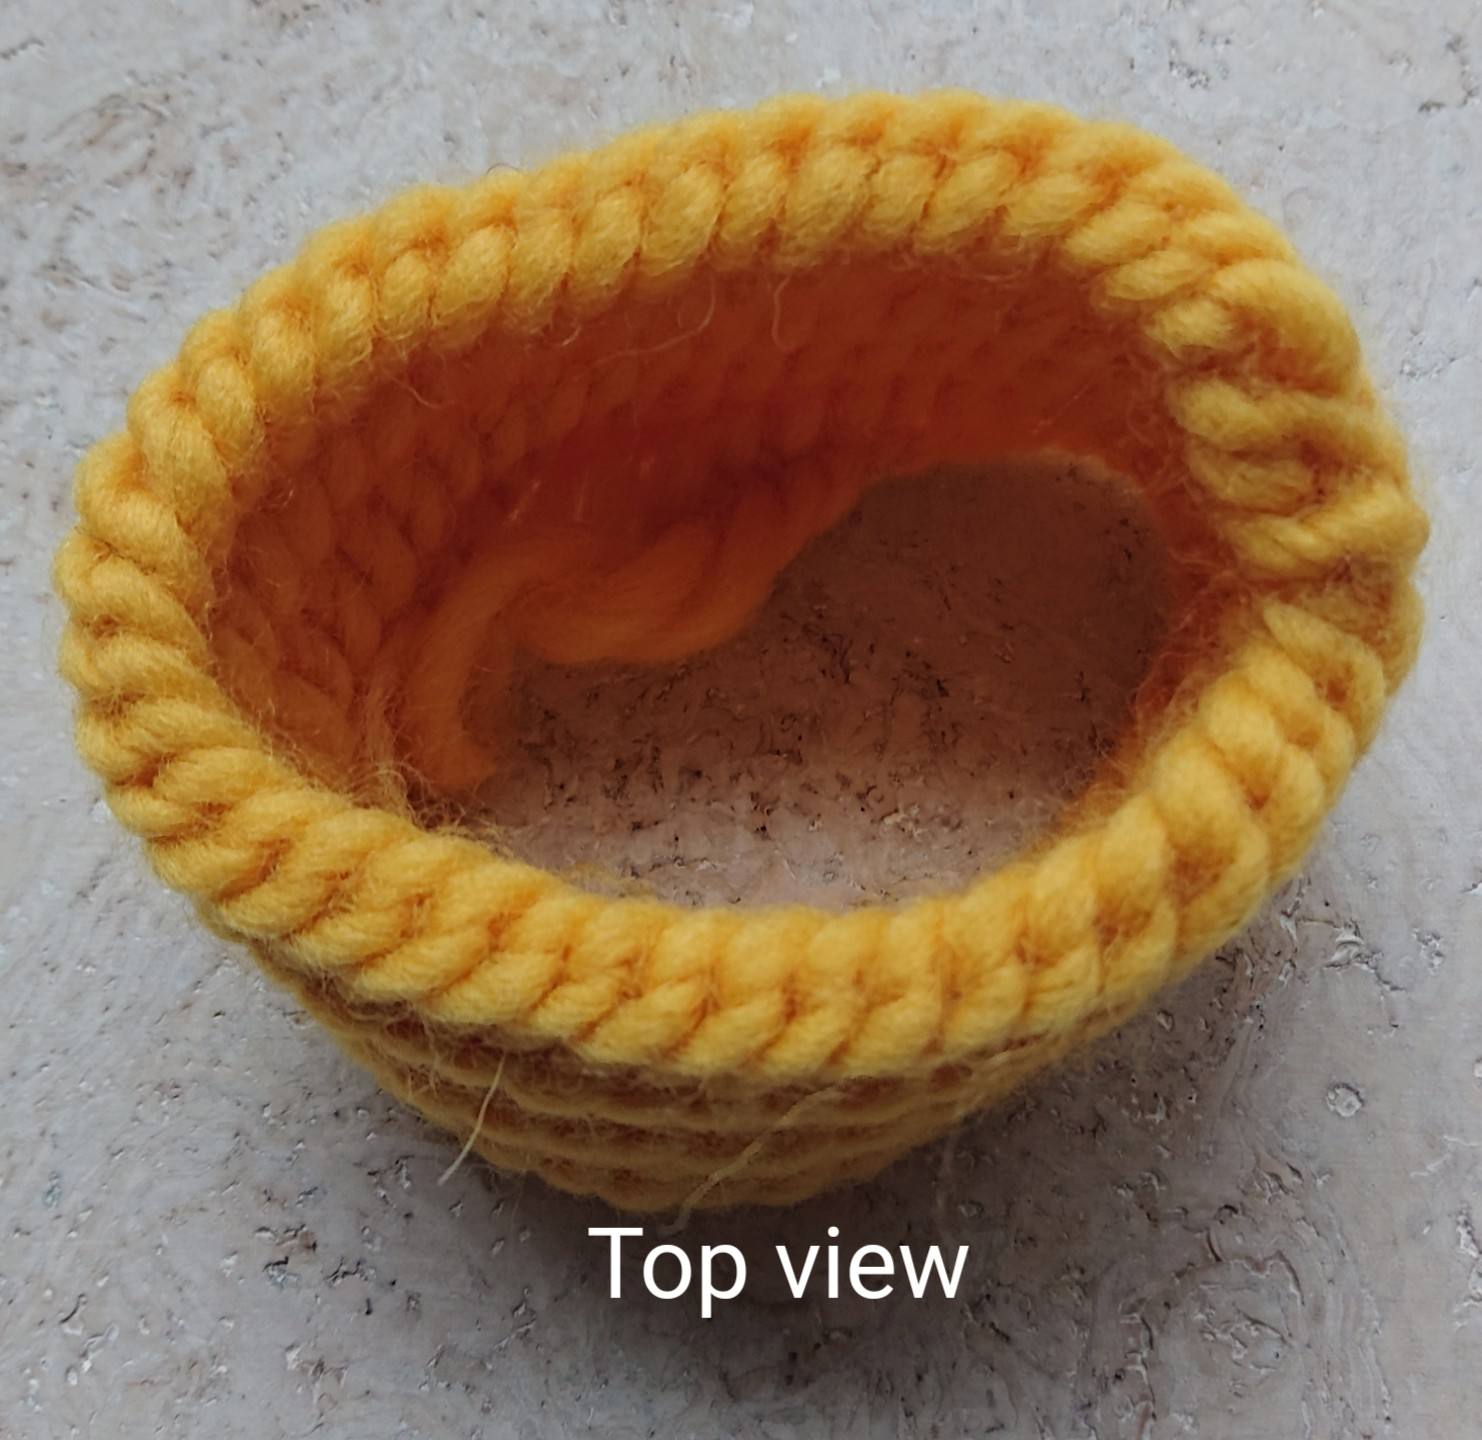
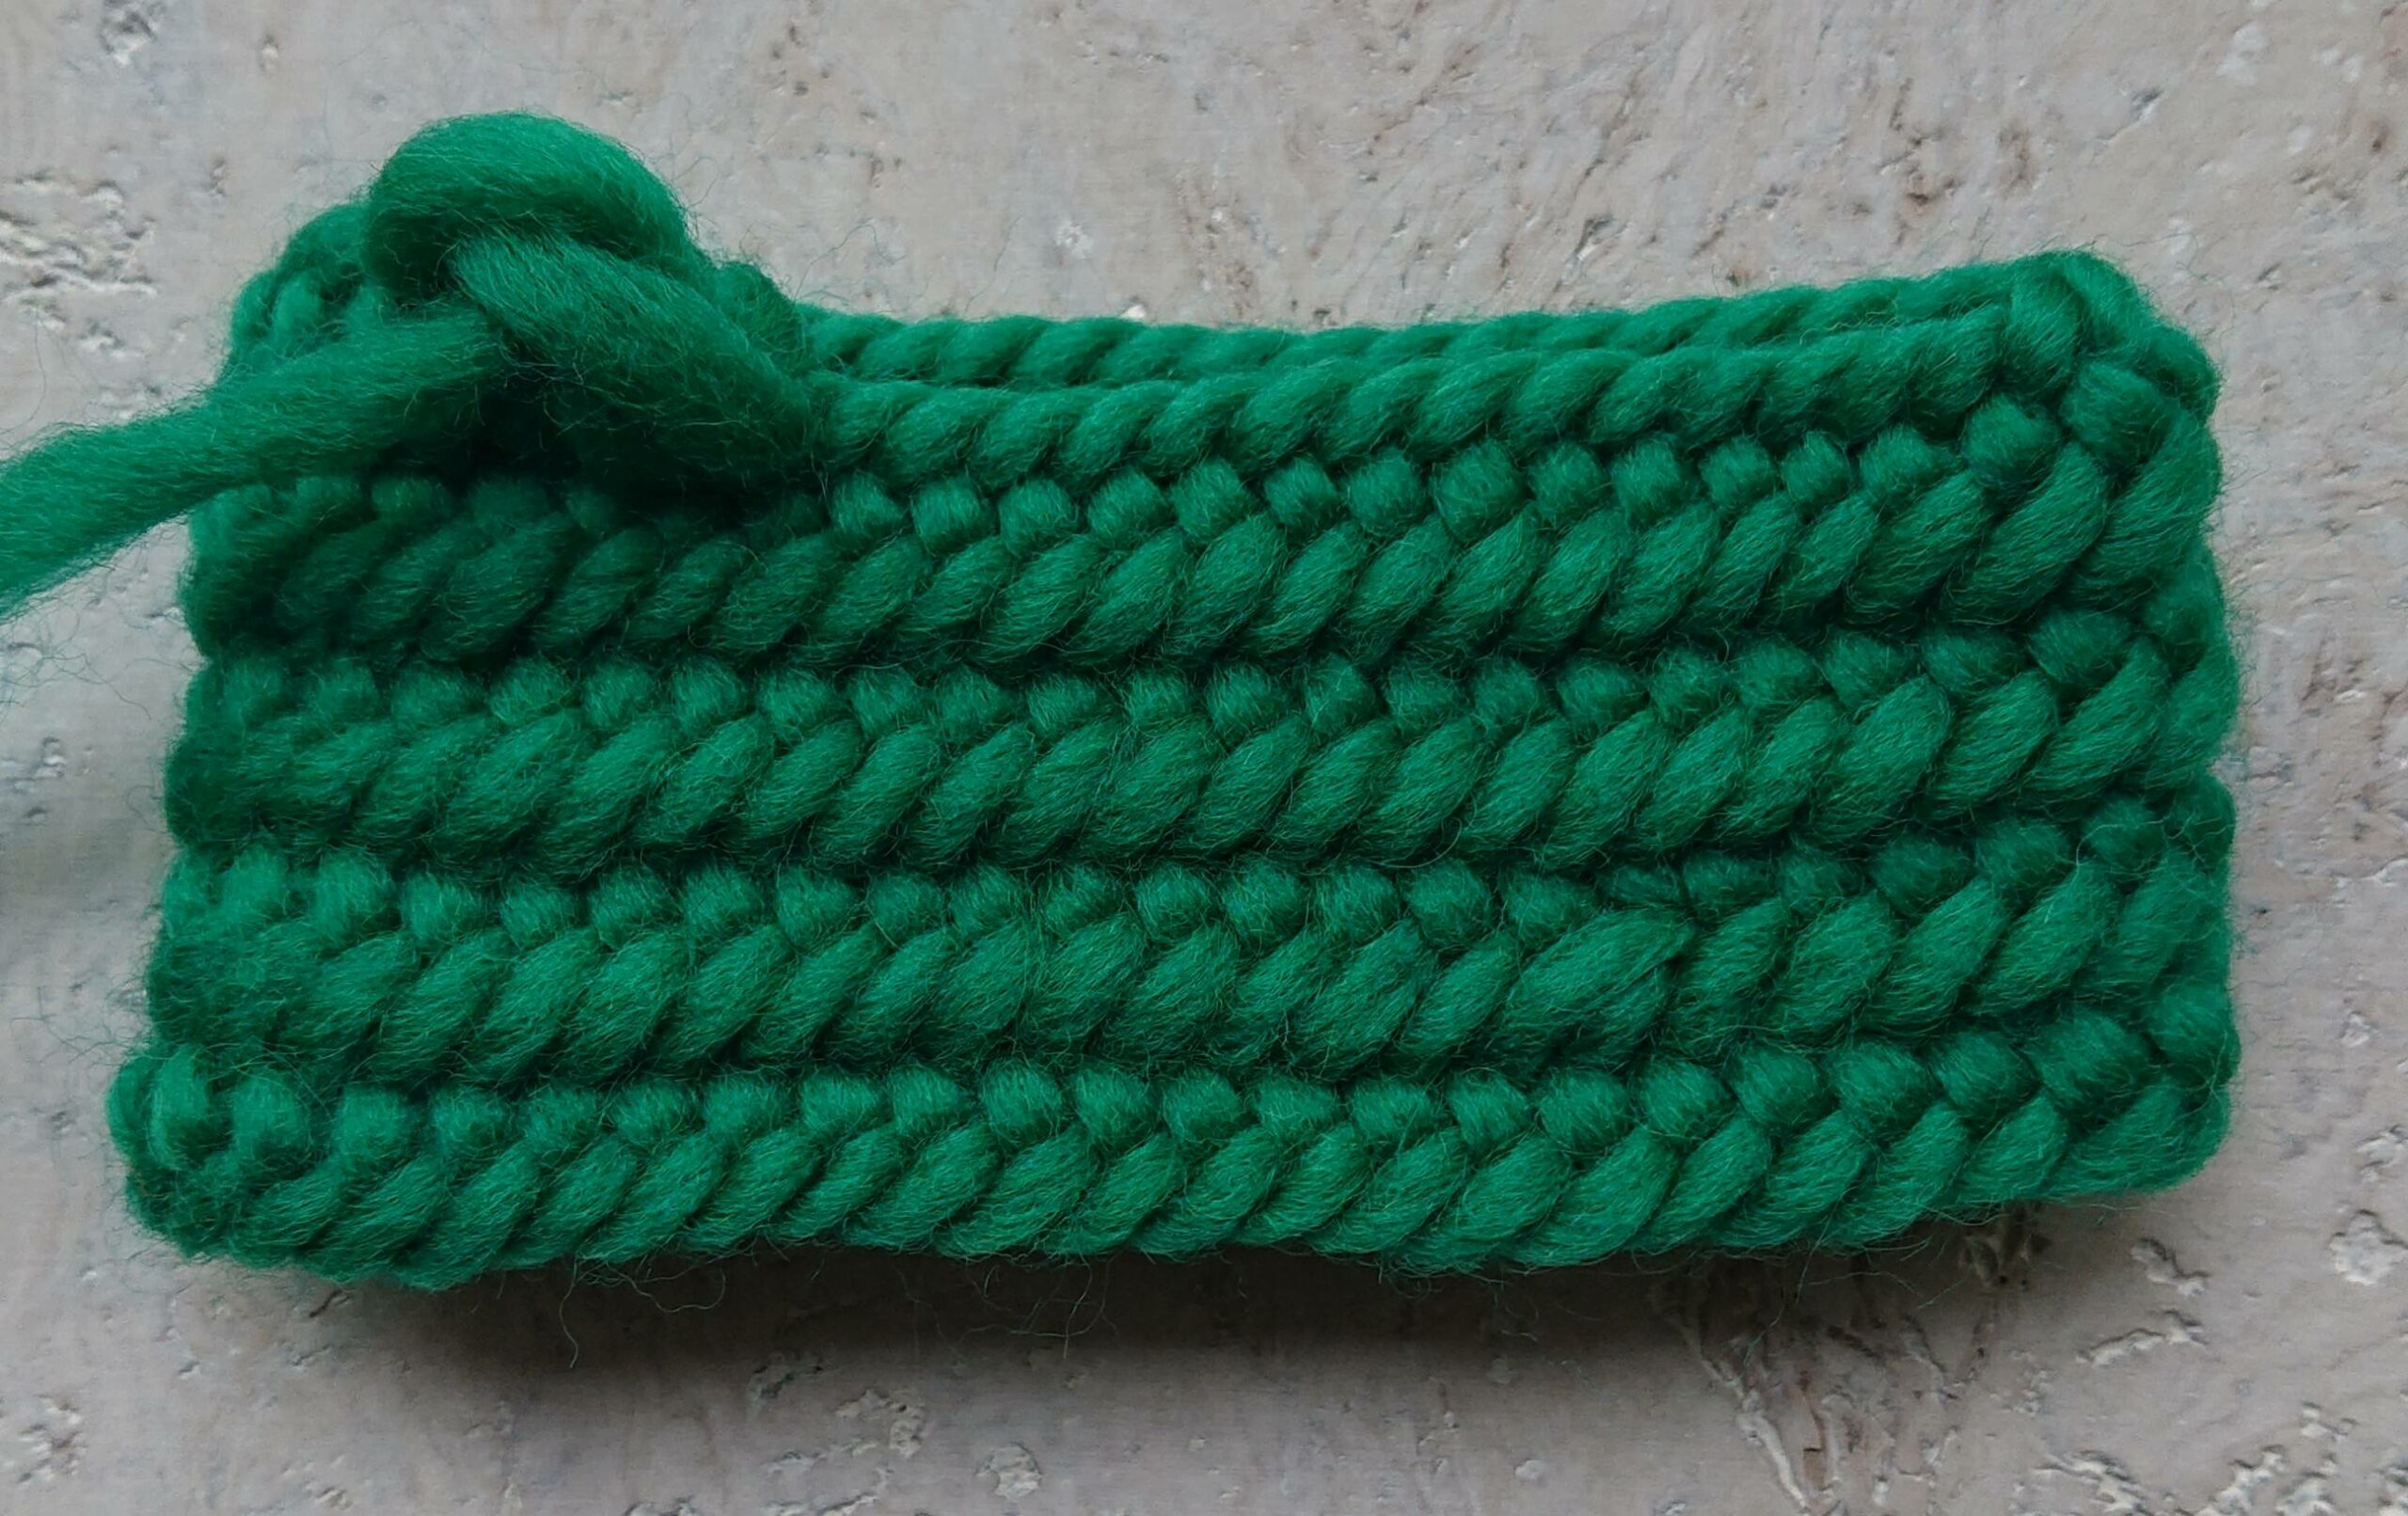
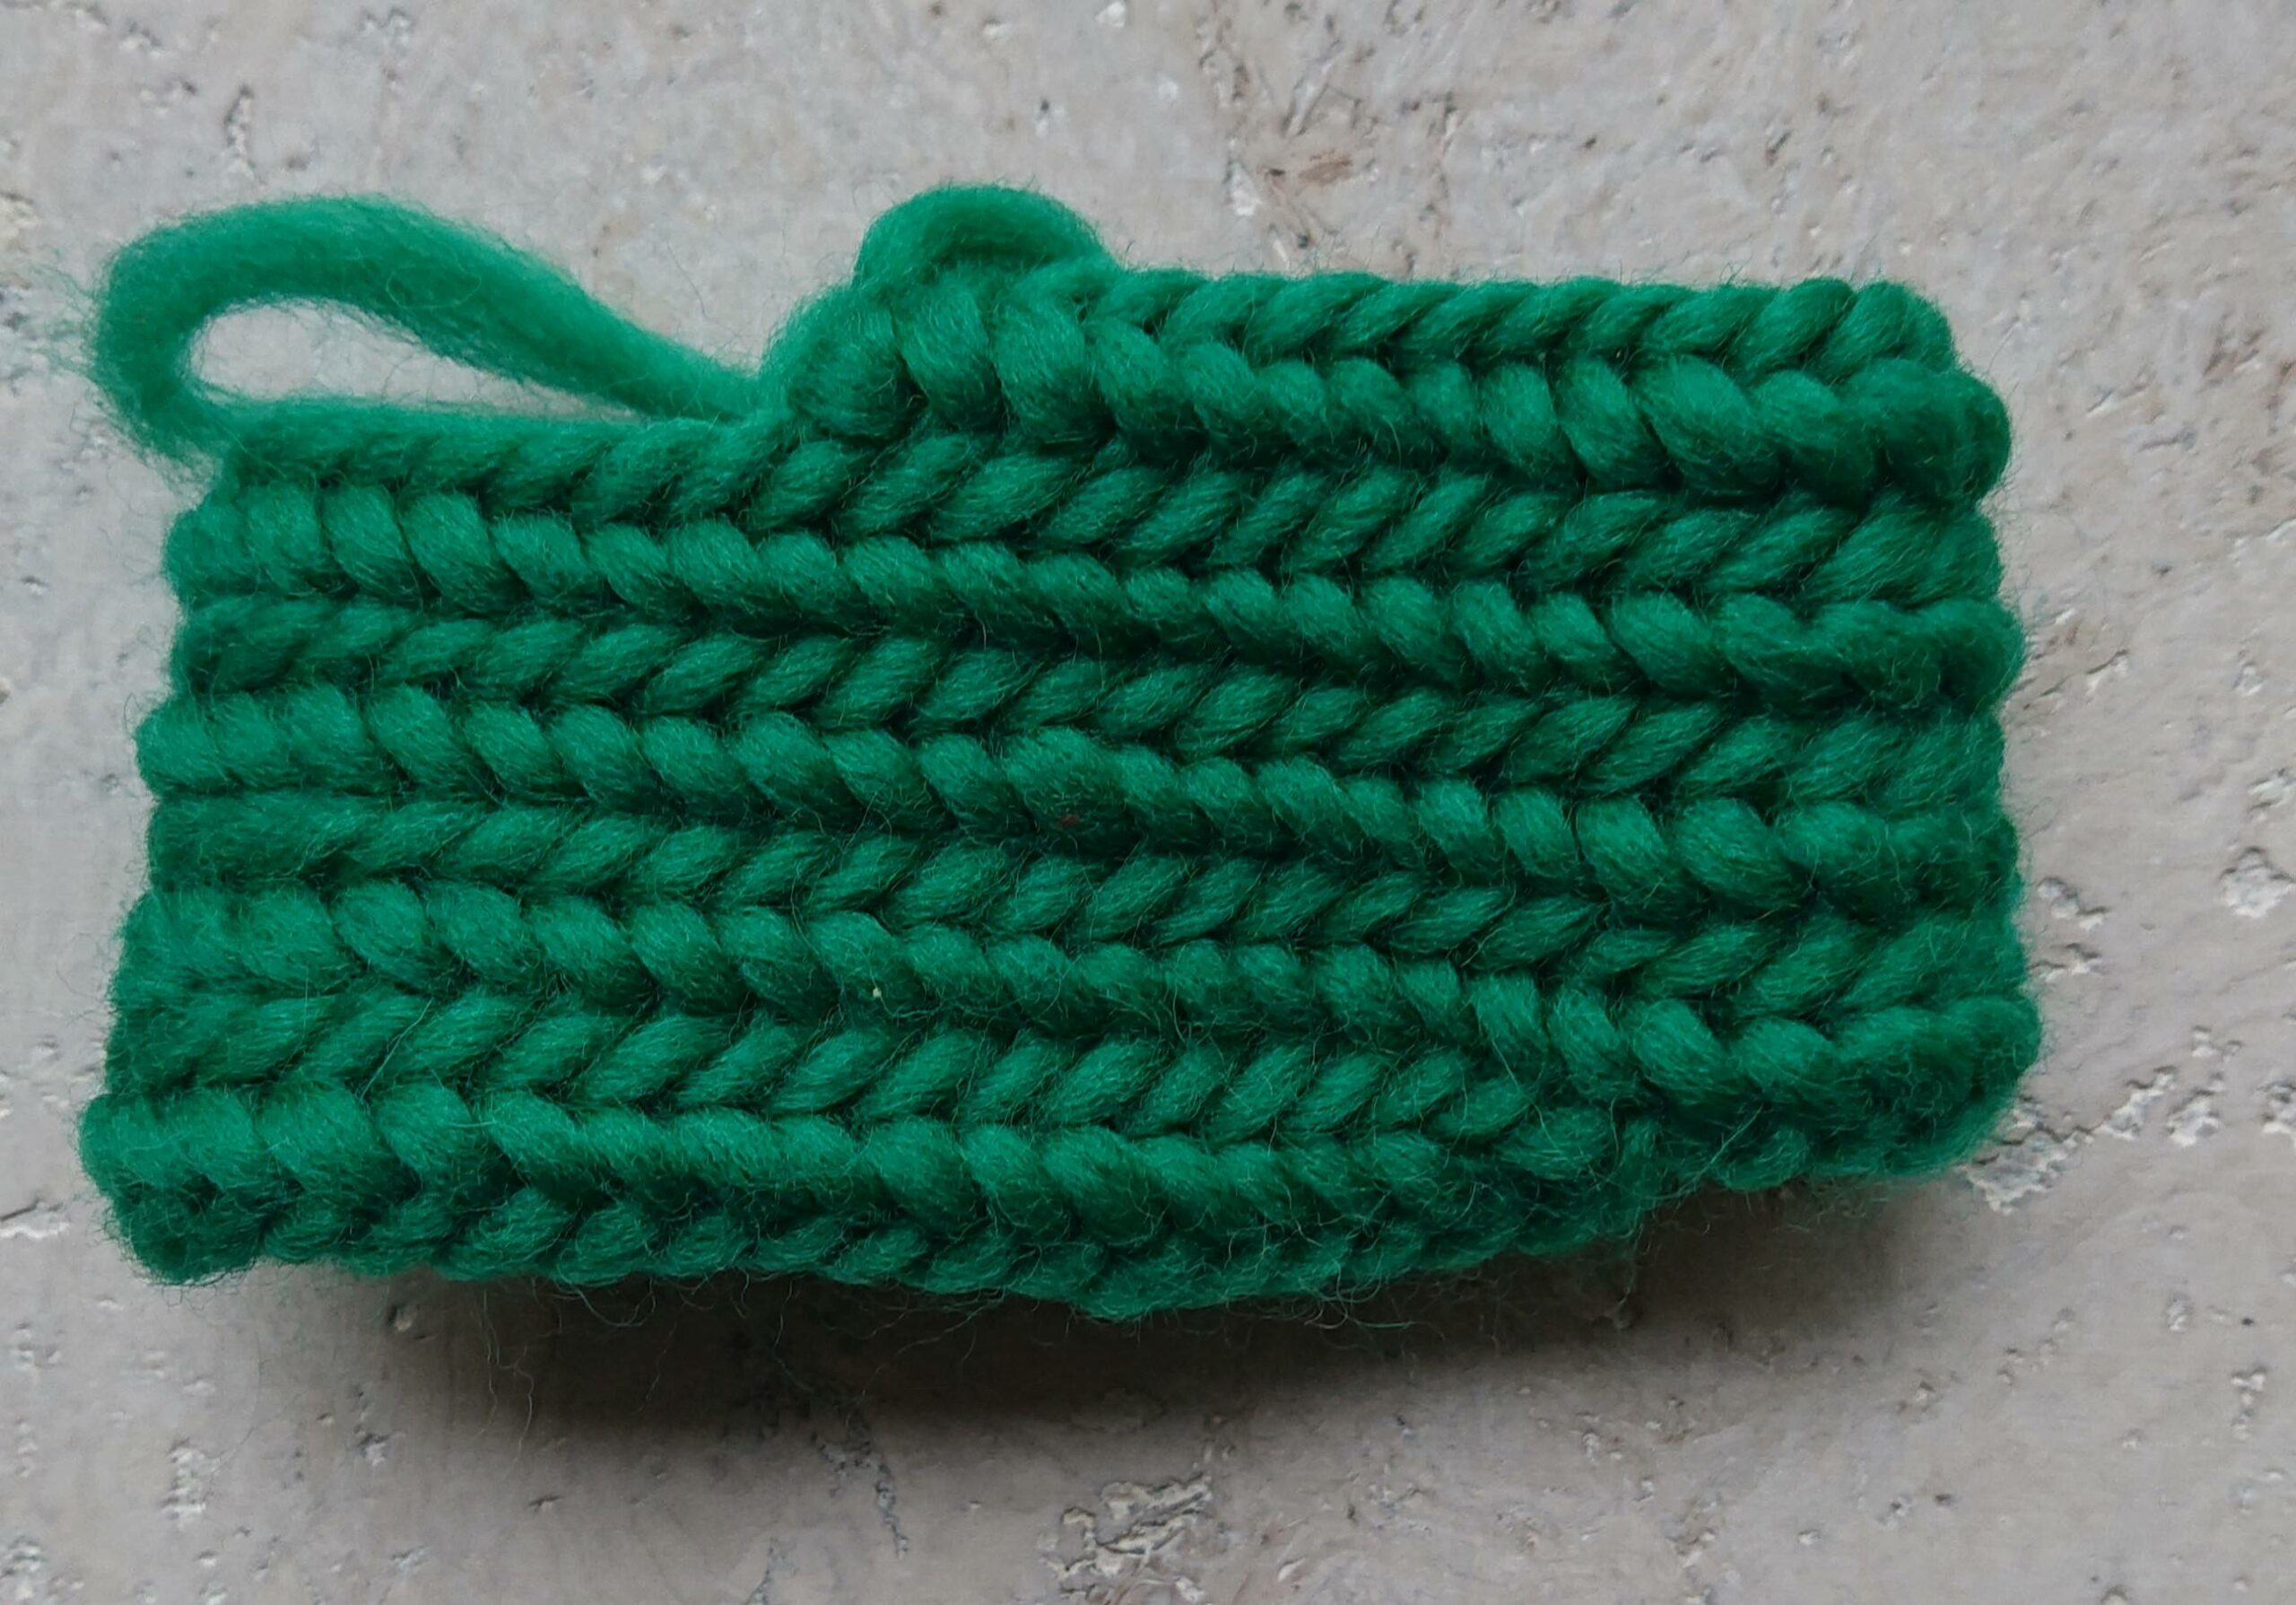
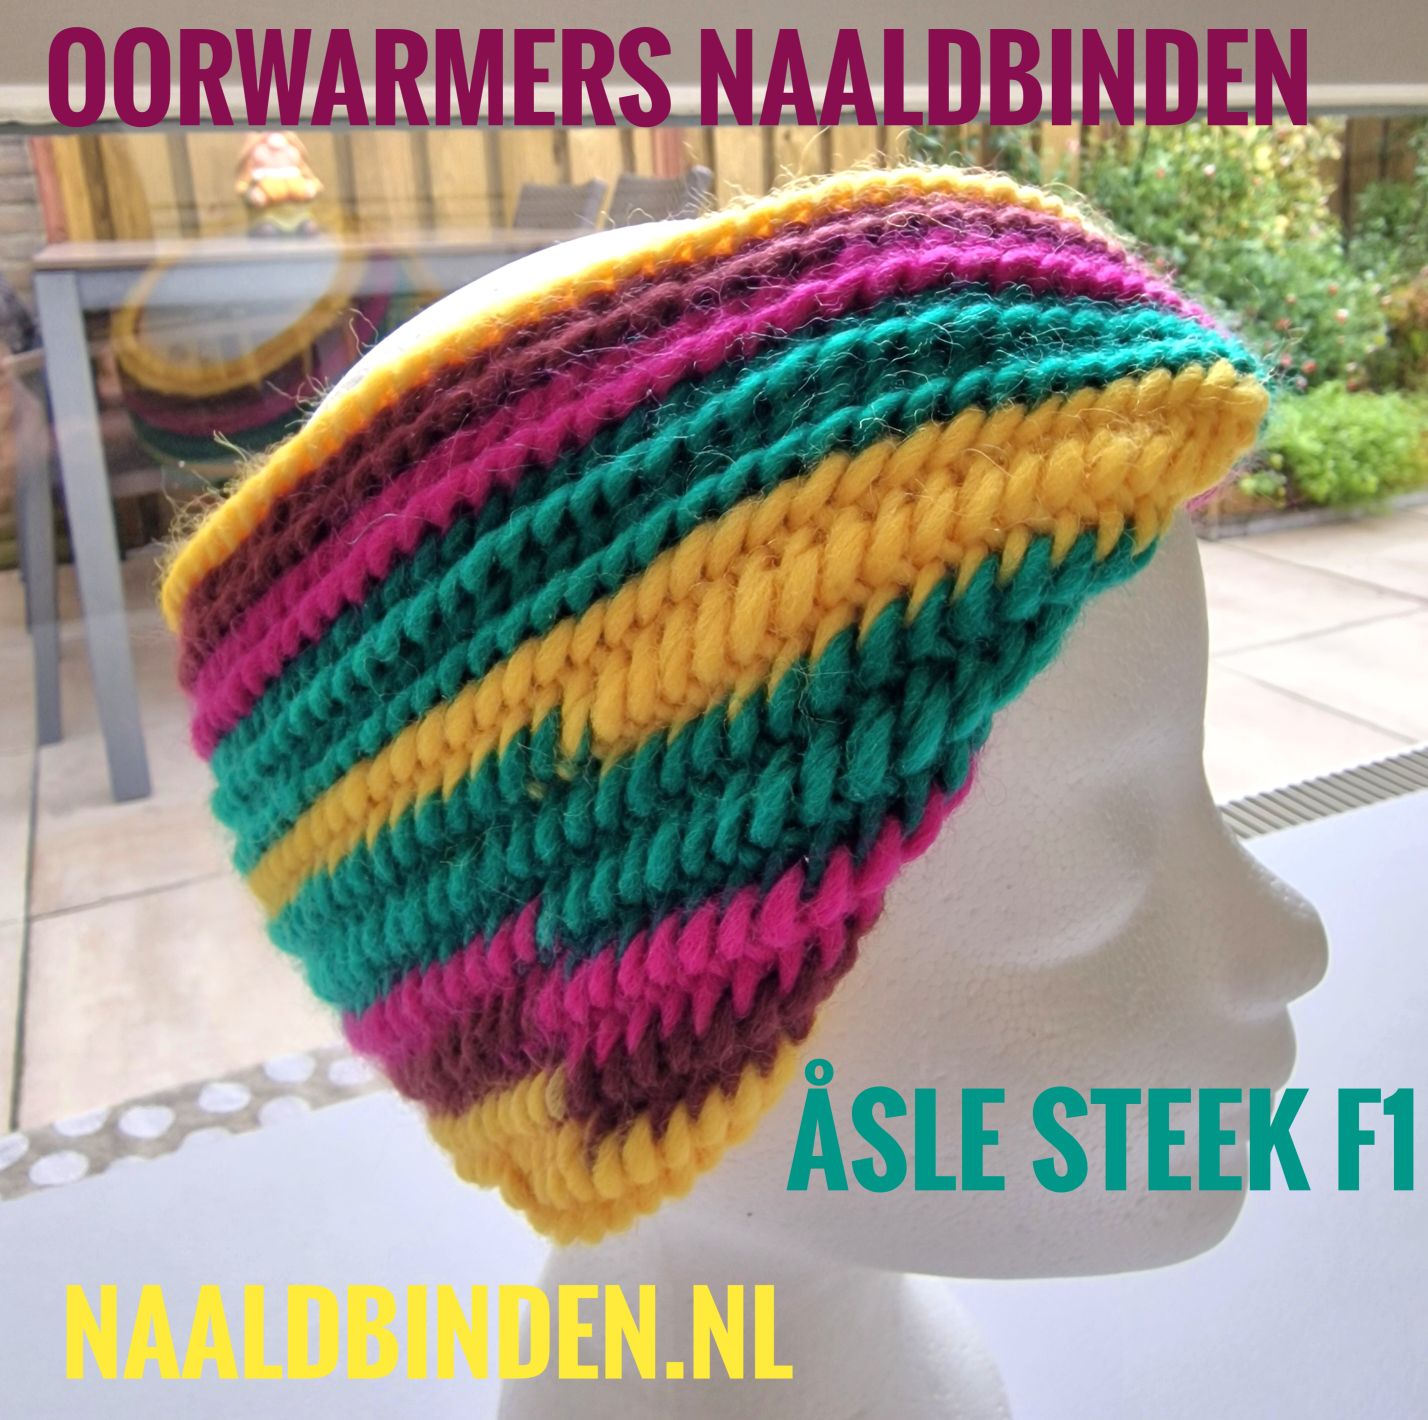
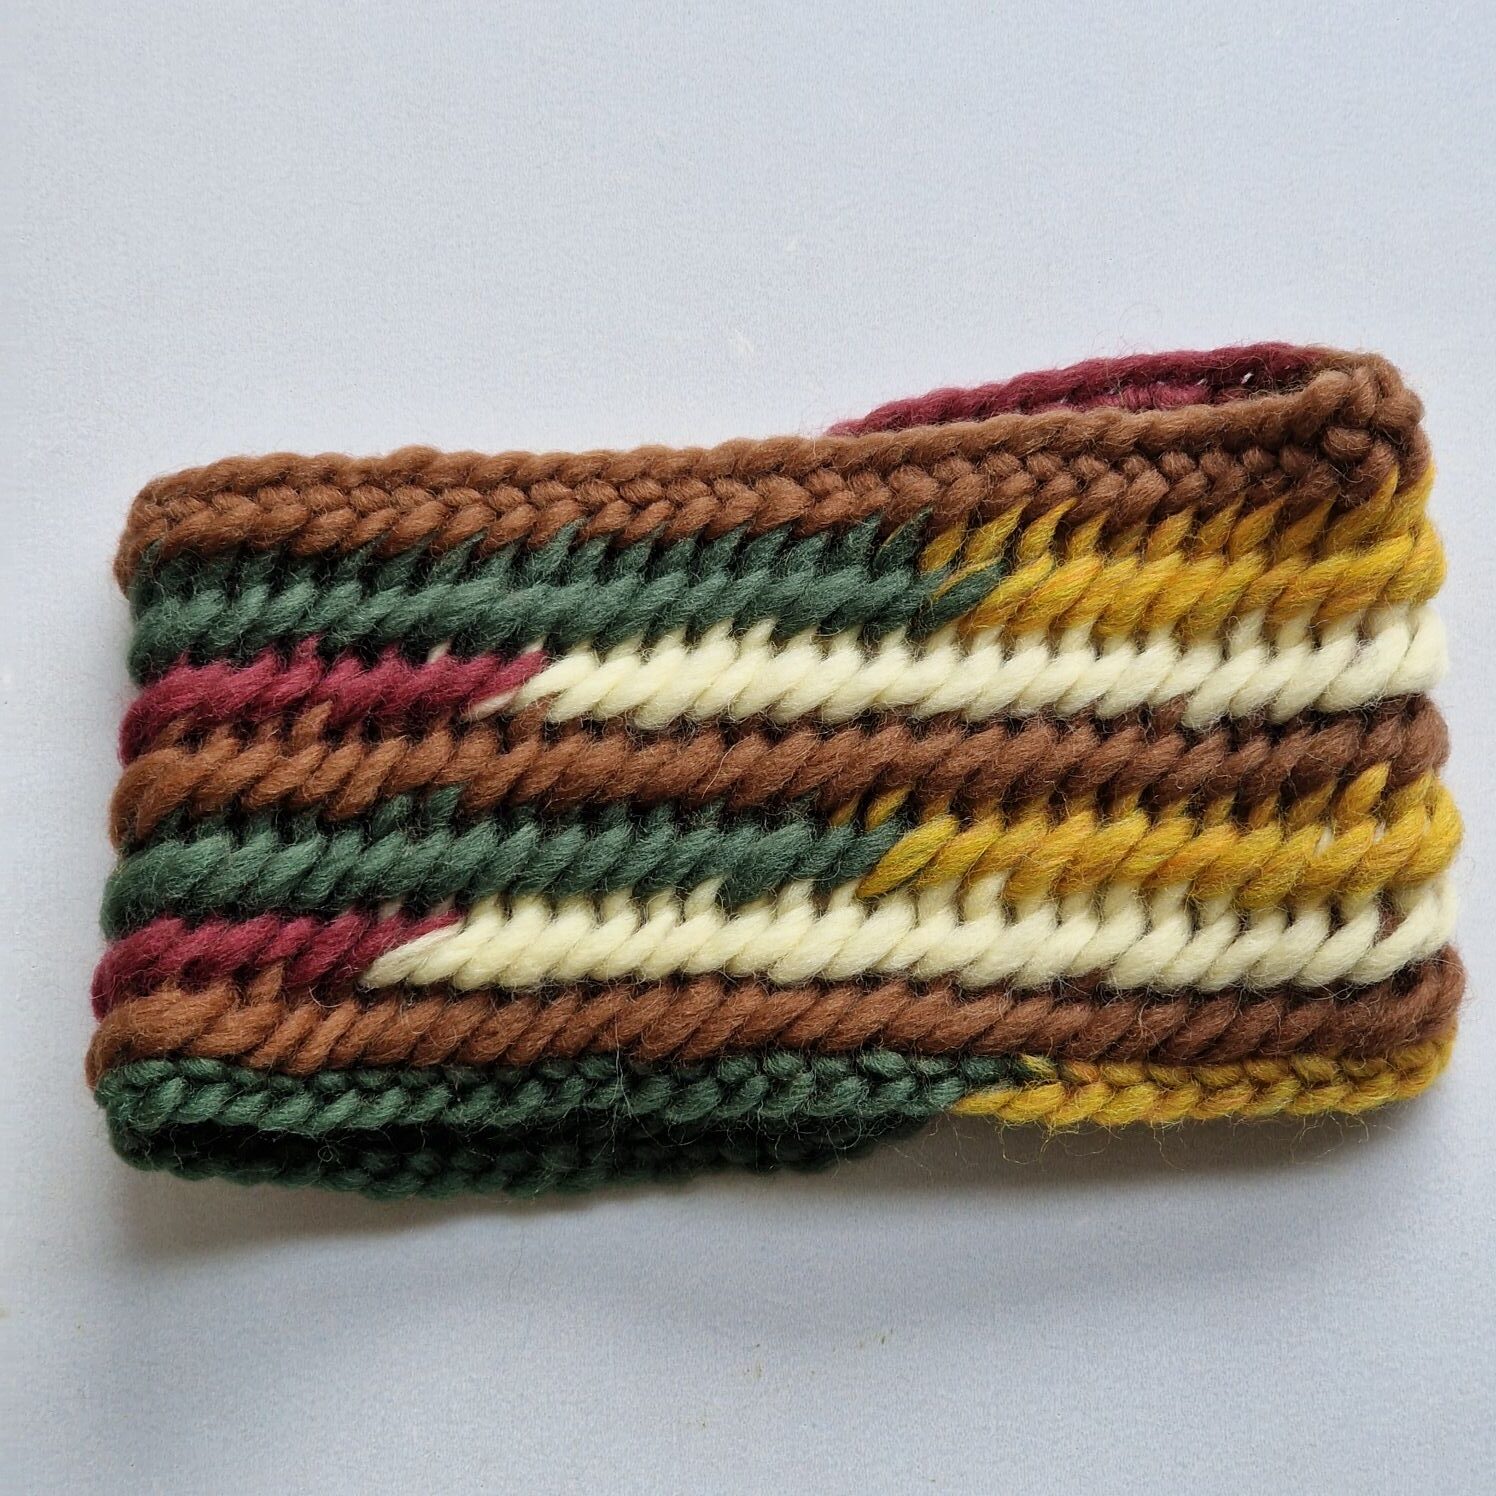
Easy Åsle variation F1.
The Åsle stitch, named for a 16 th century mitten found in Våstergötland in the southwest part of Sweden.
The stitches on this page are examples of Sanne-Mari Pihlajapiha from Finland, she is great authority of needlebinding and a very big inspiration for the needlebinding community.
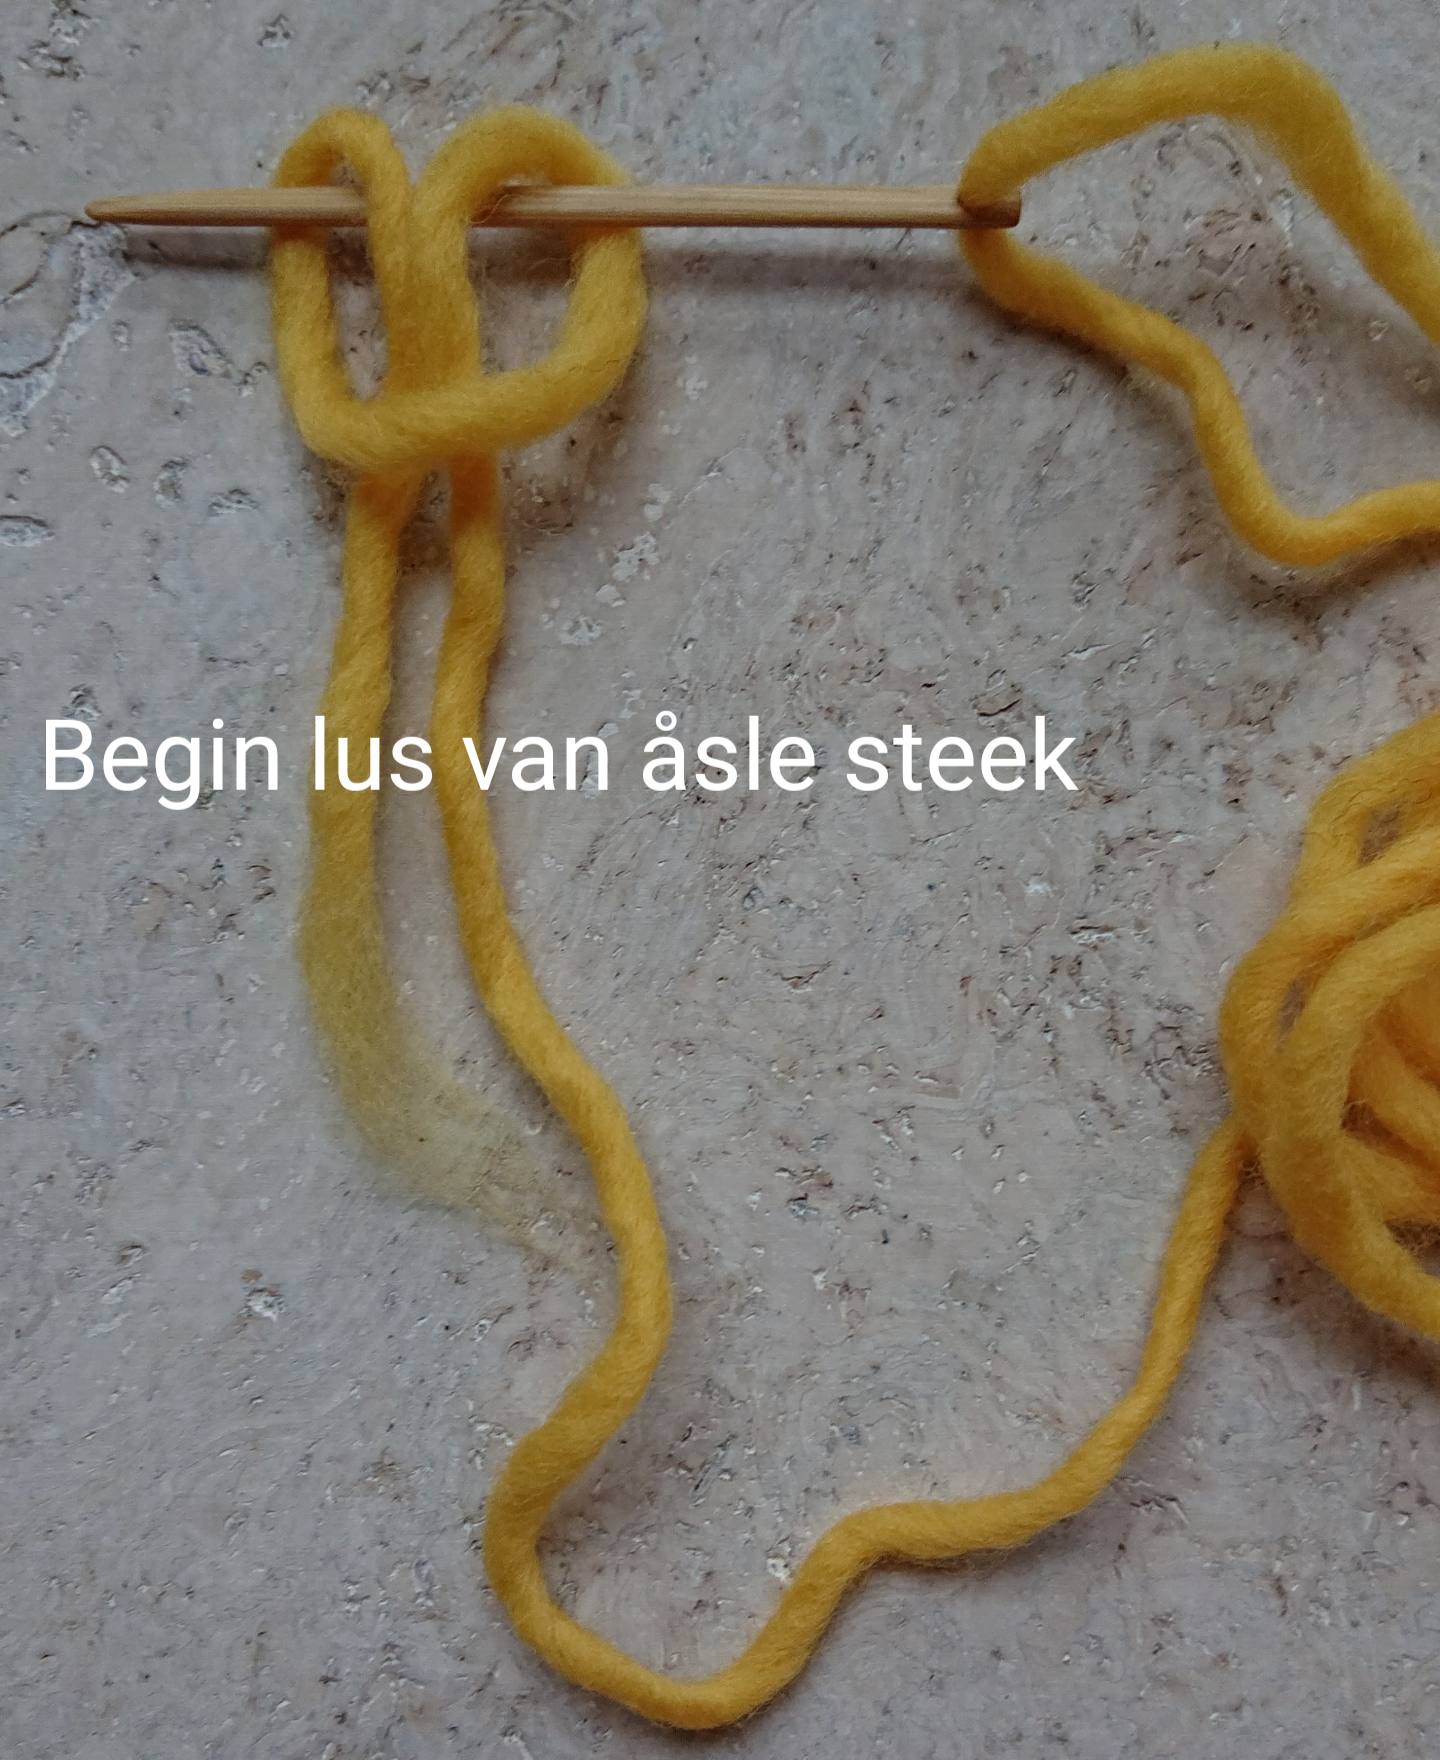
This is a new way to start needlebinding.
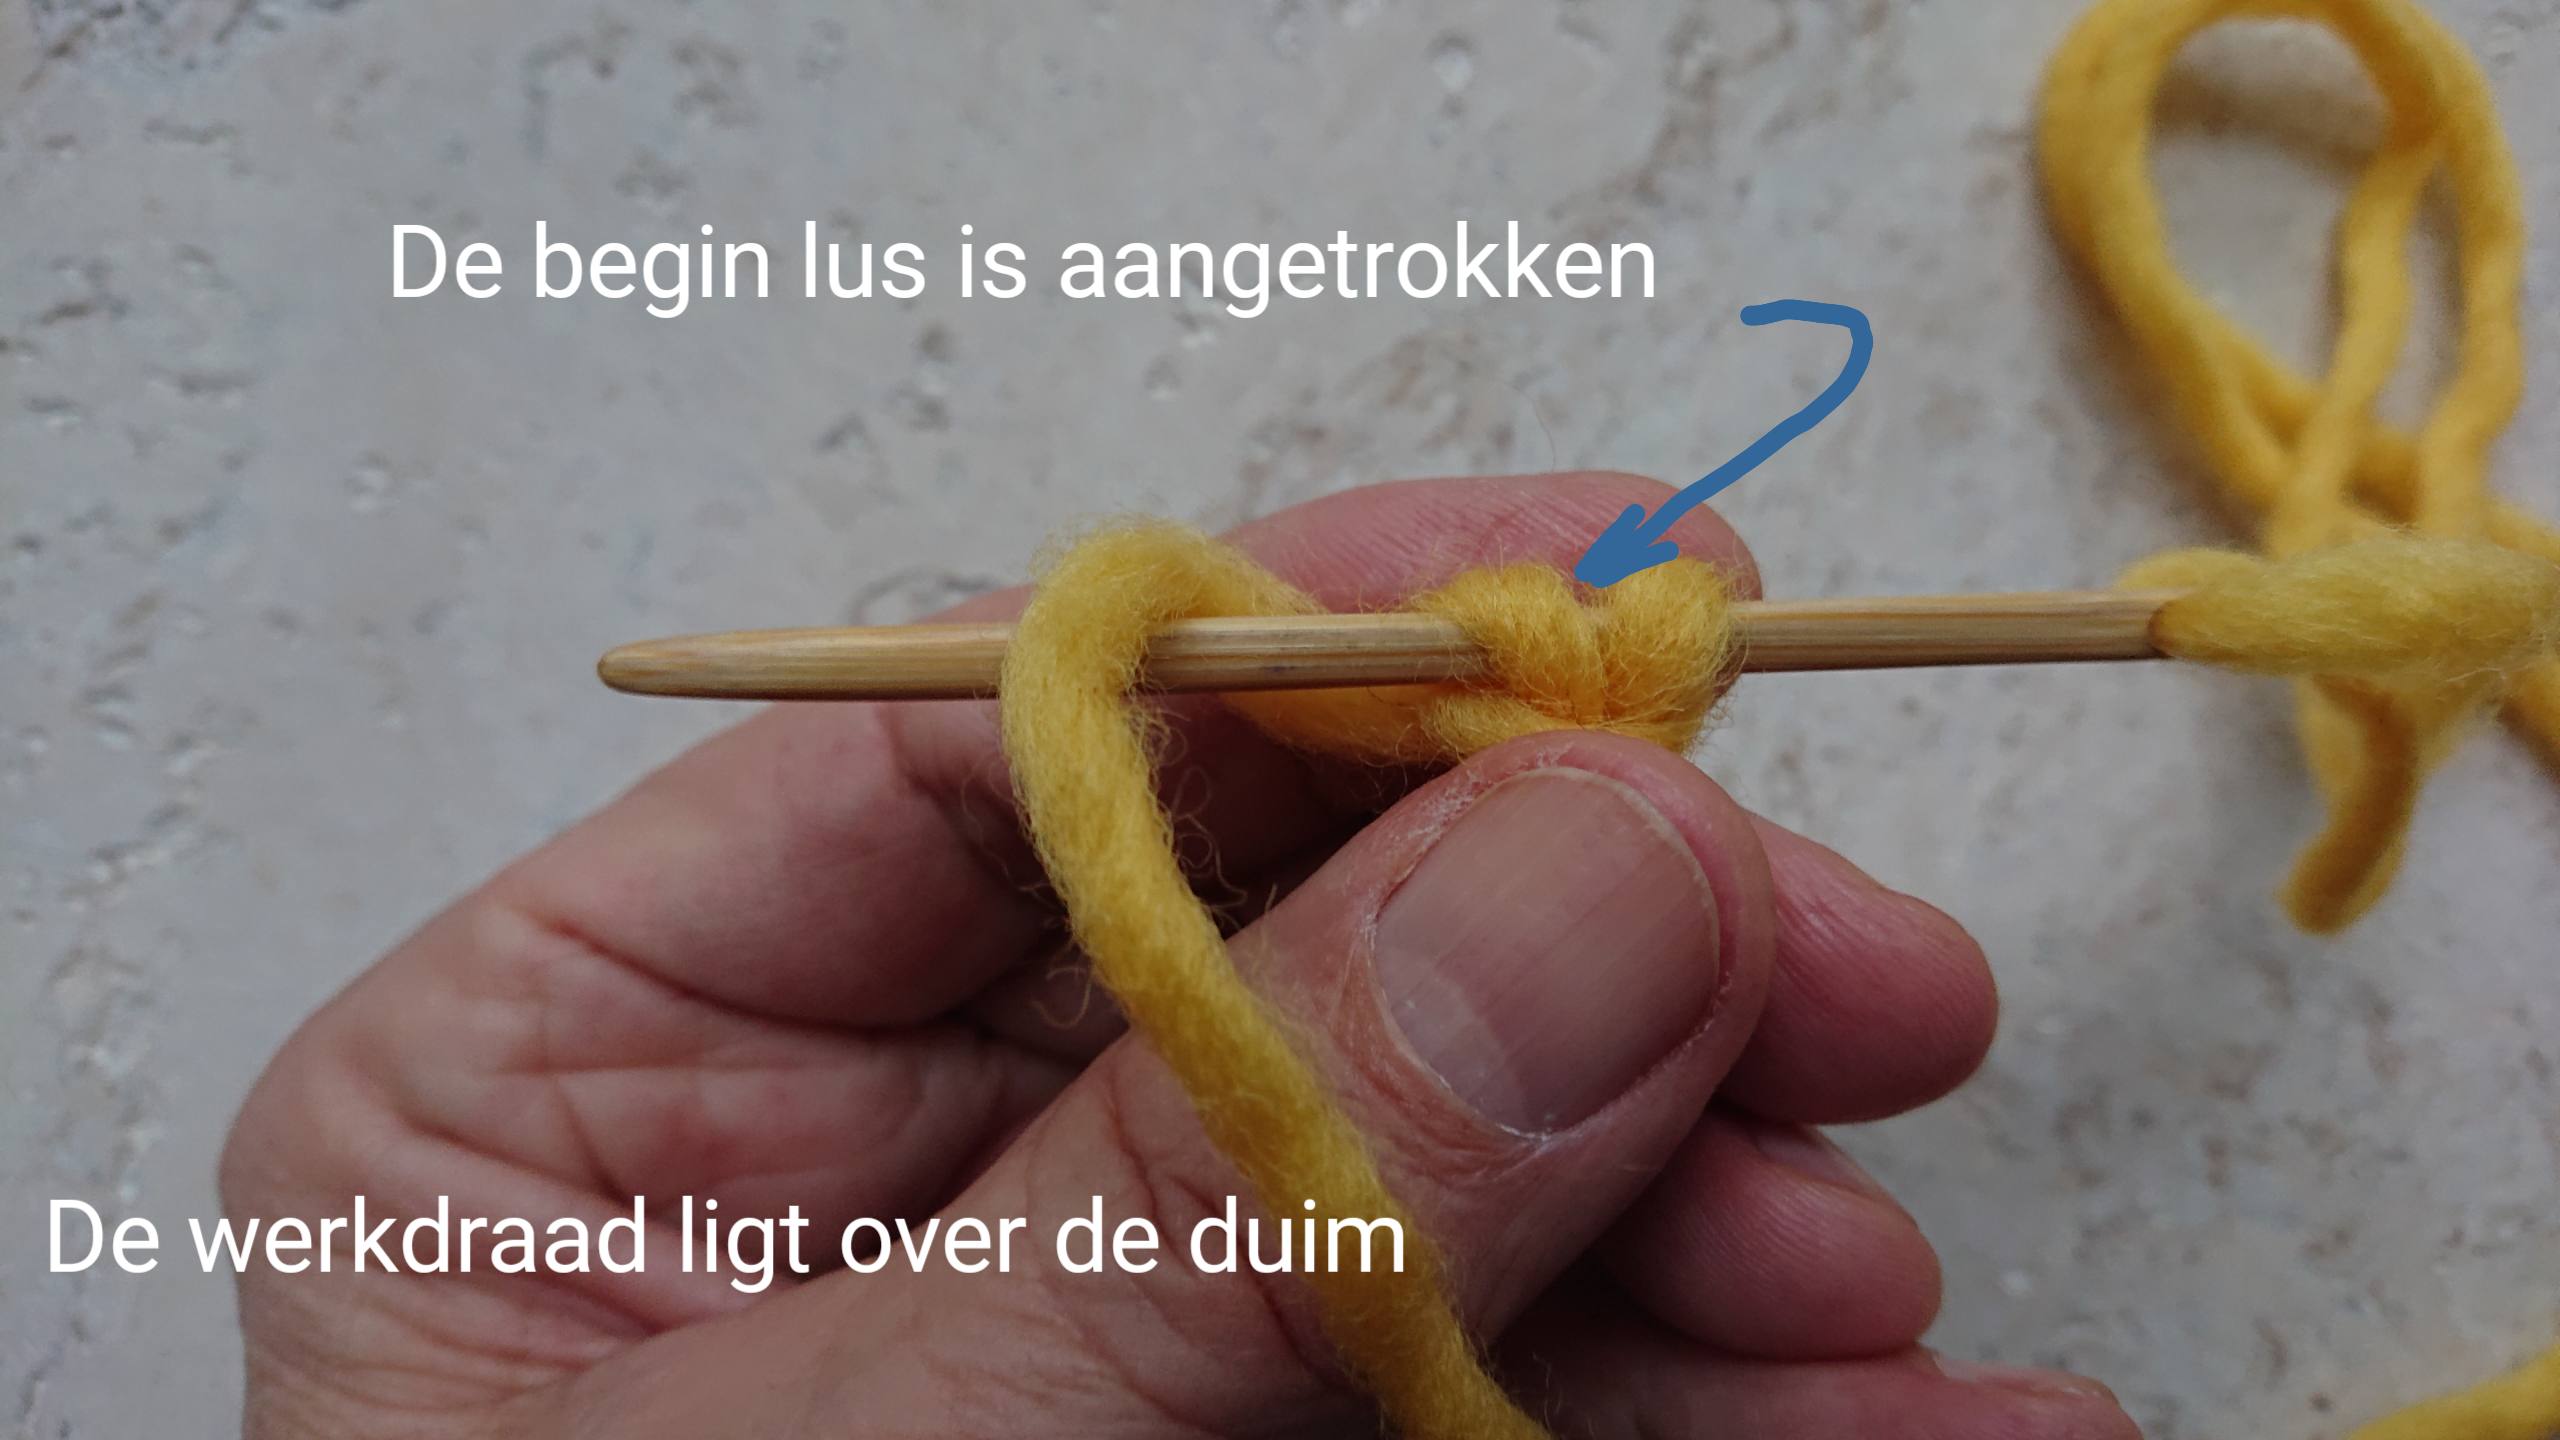
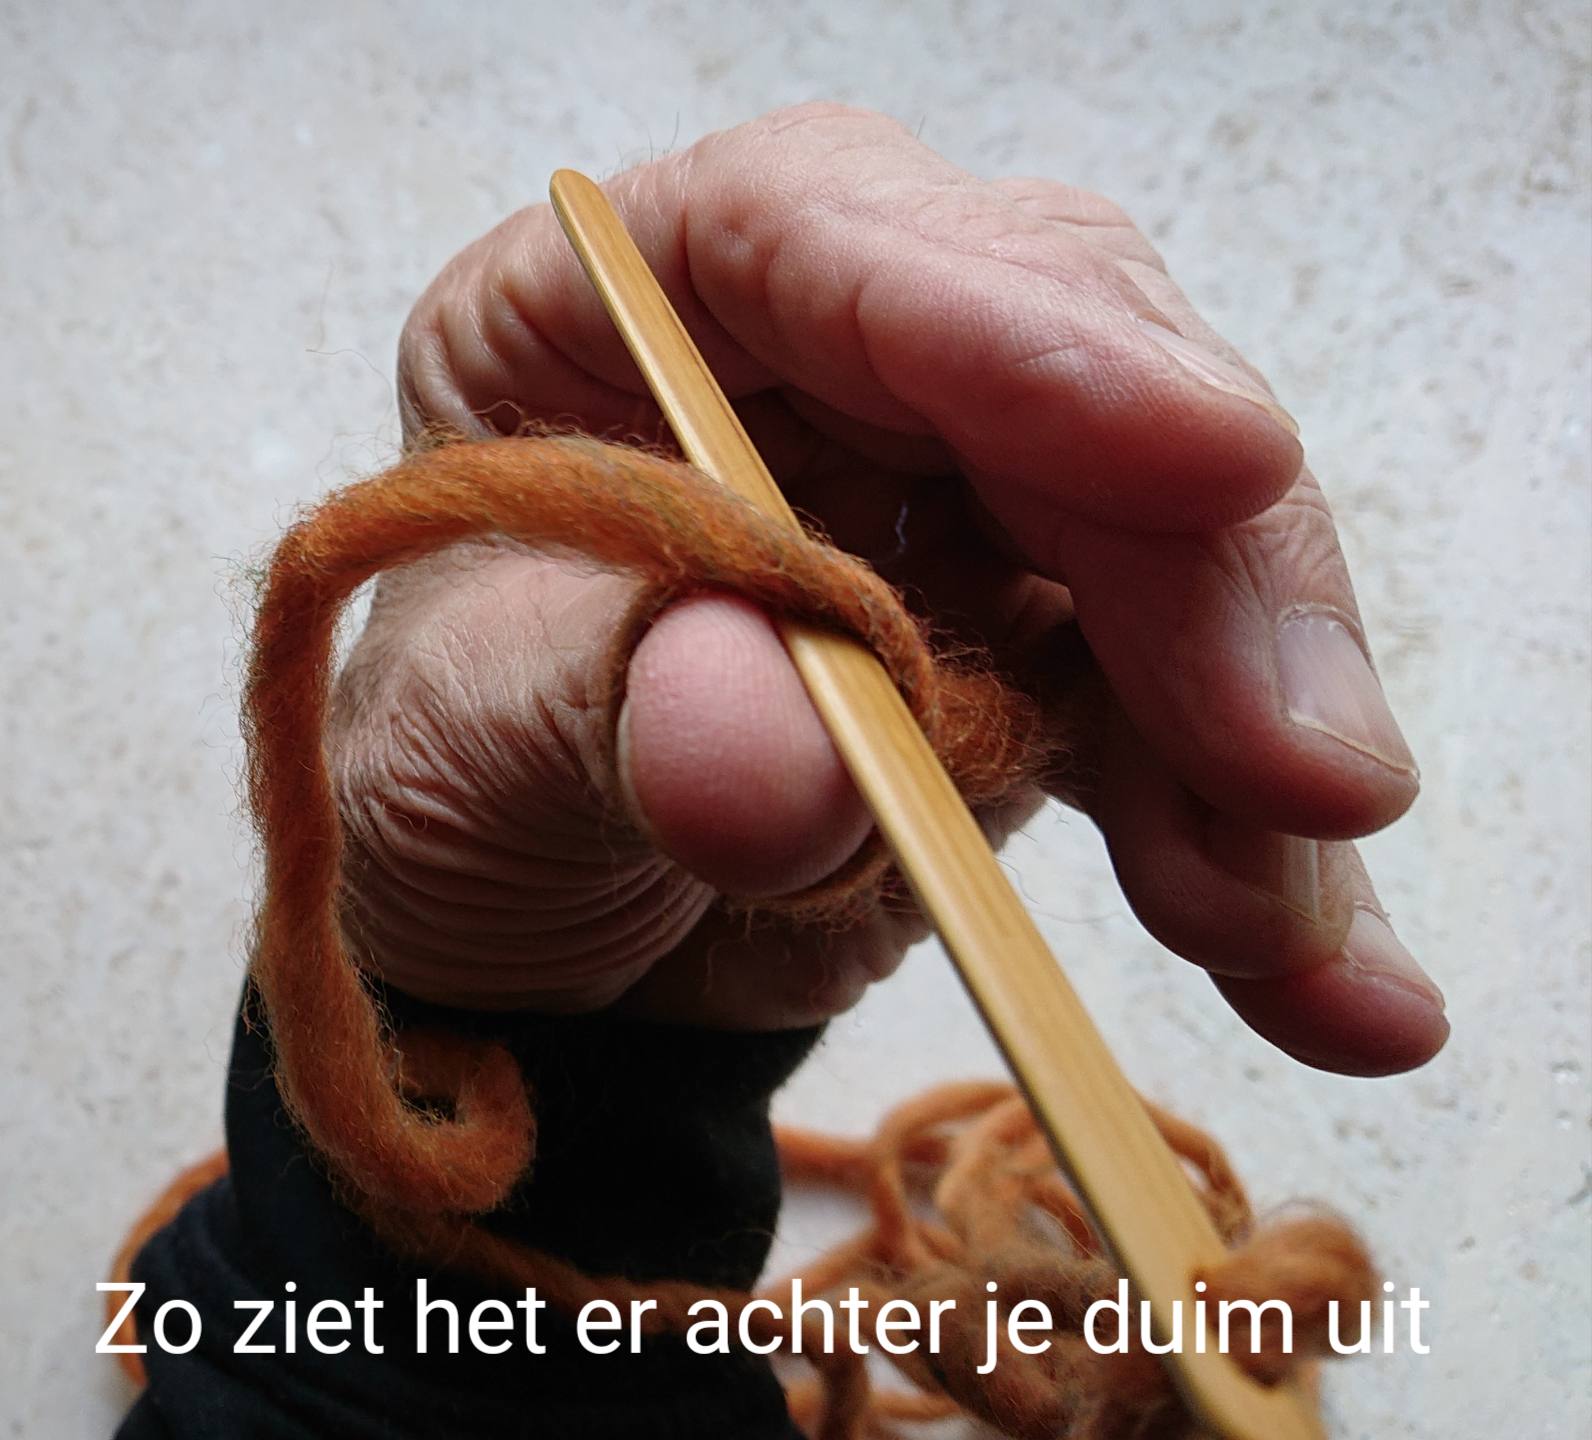
The start loop is tightened and the working thread lies over the thumb.
After the working thread has pulled, you now have one thumb loop.
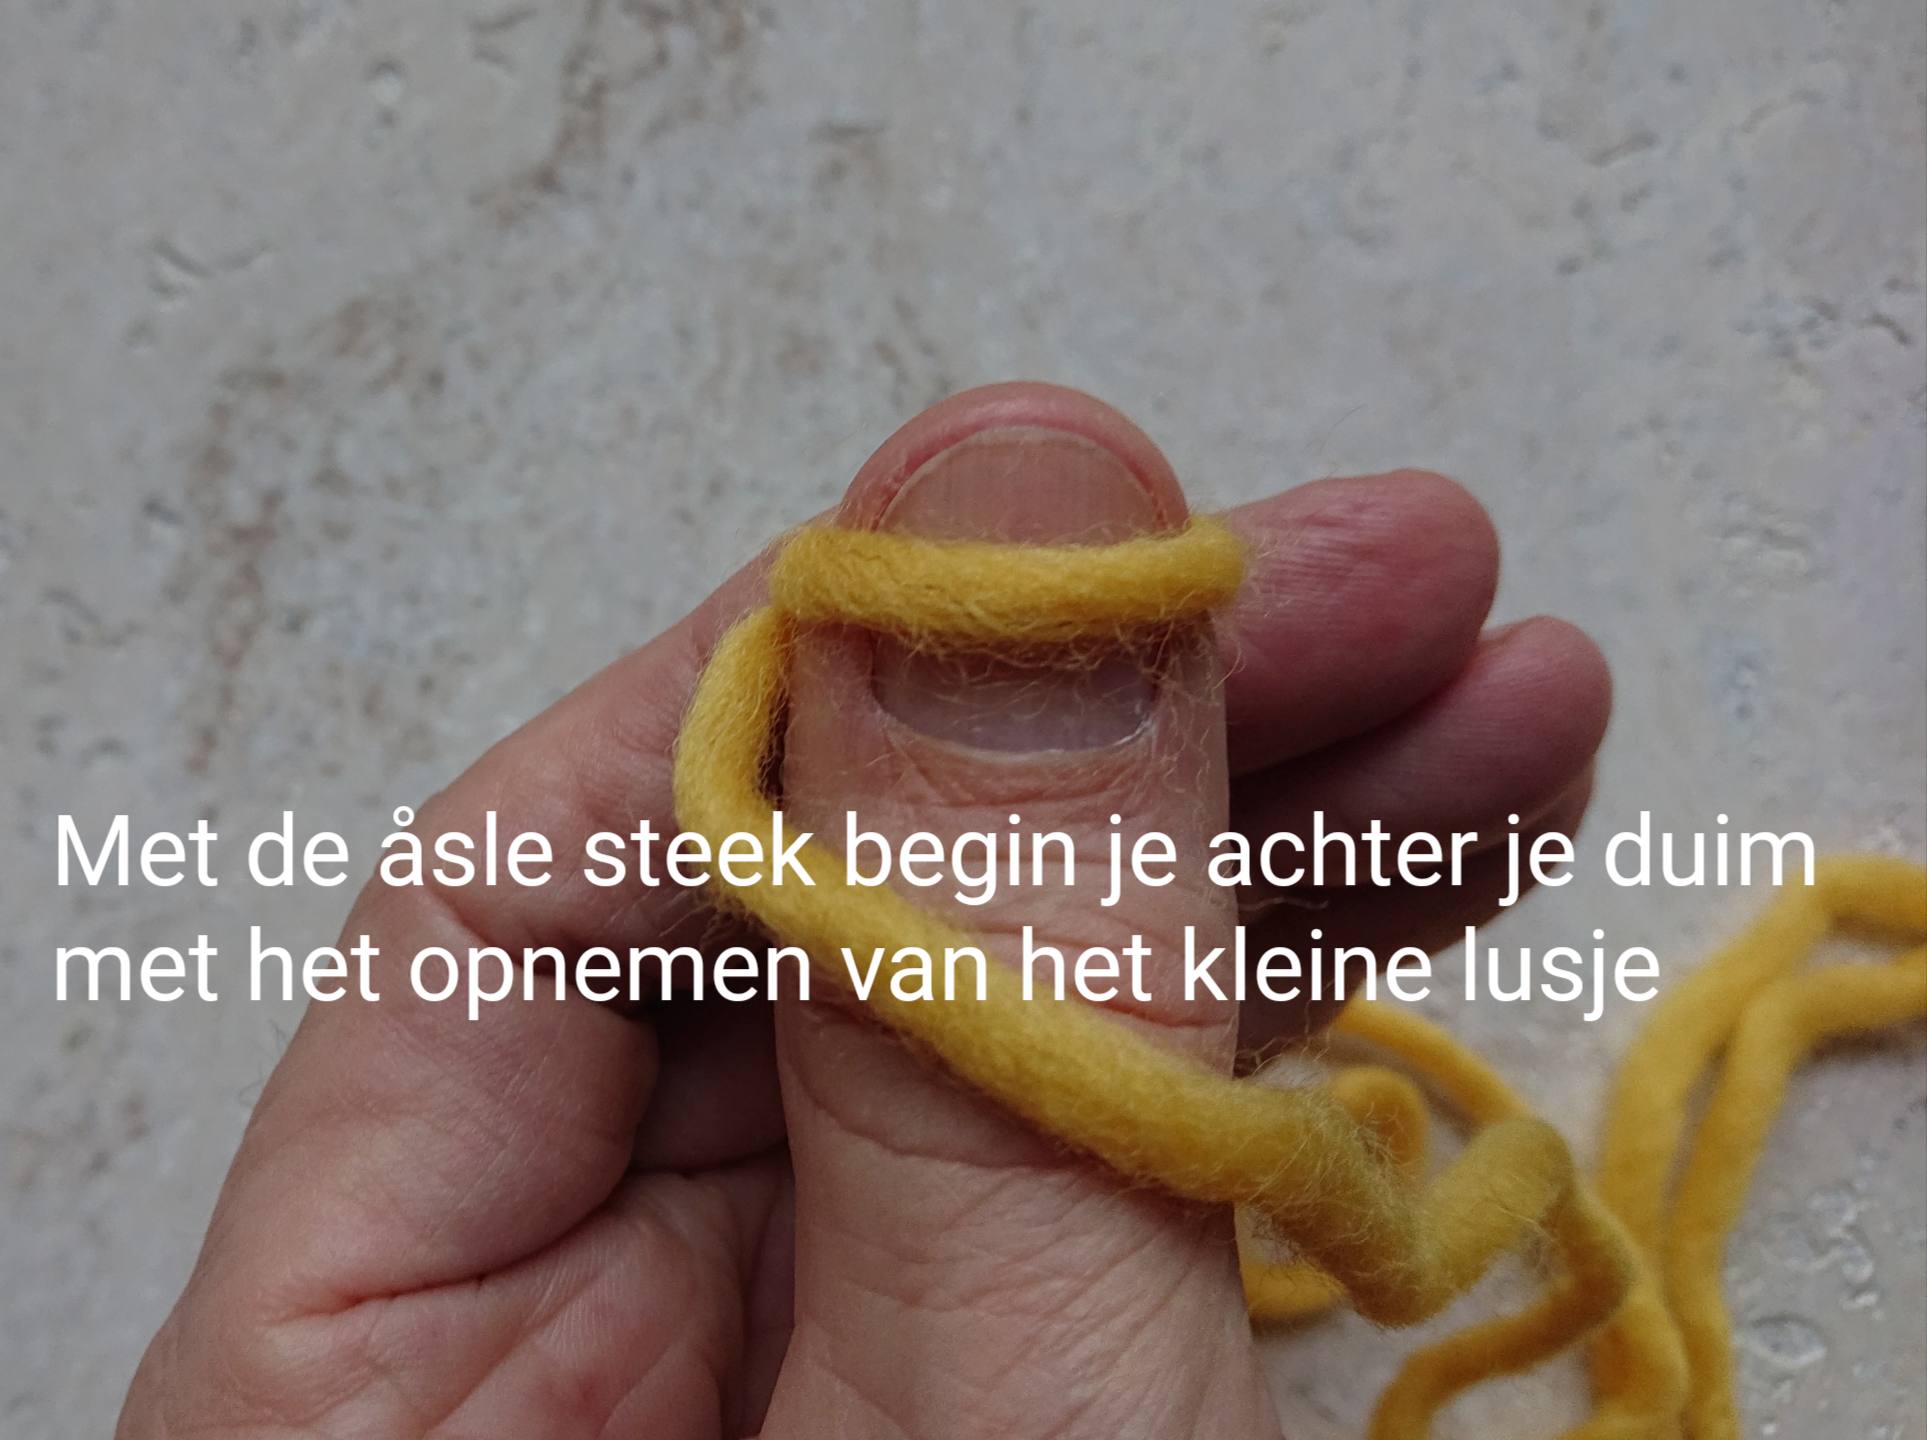
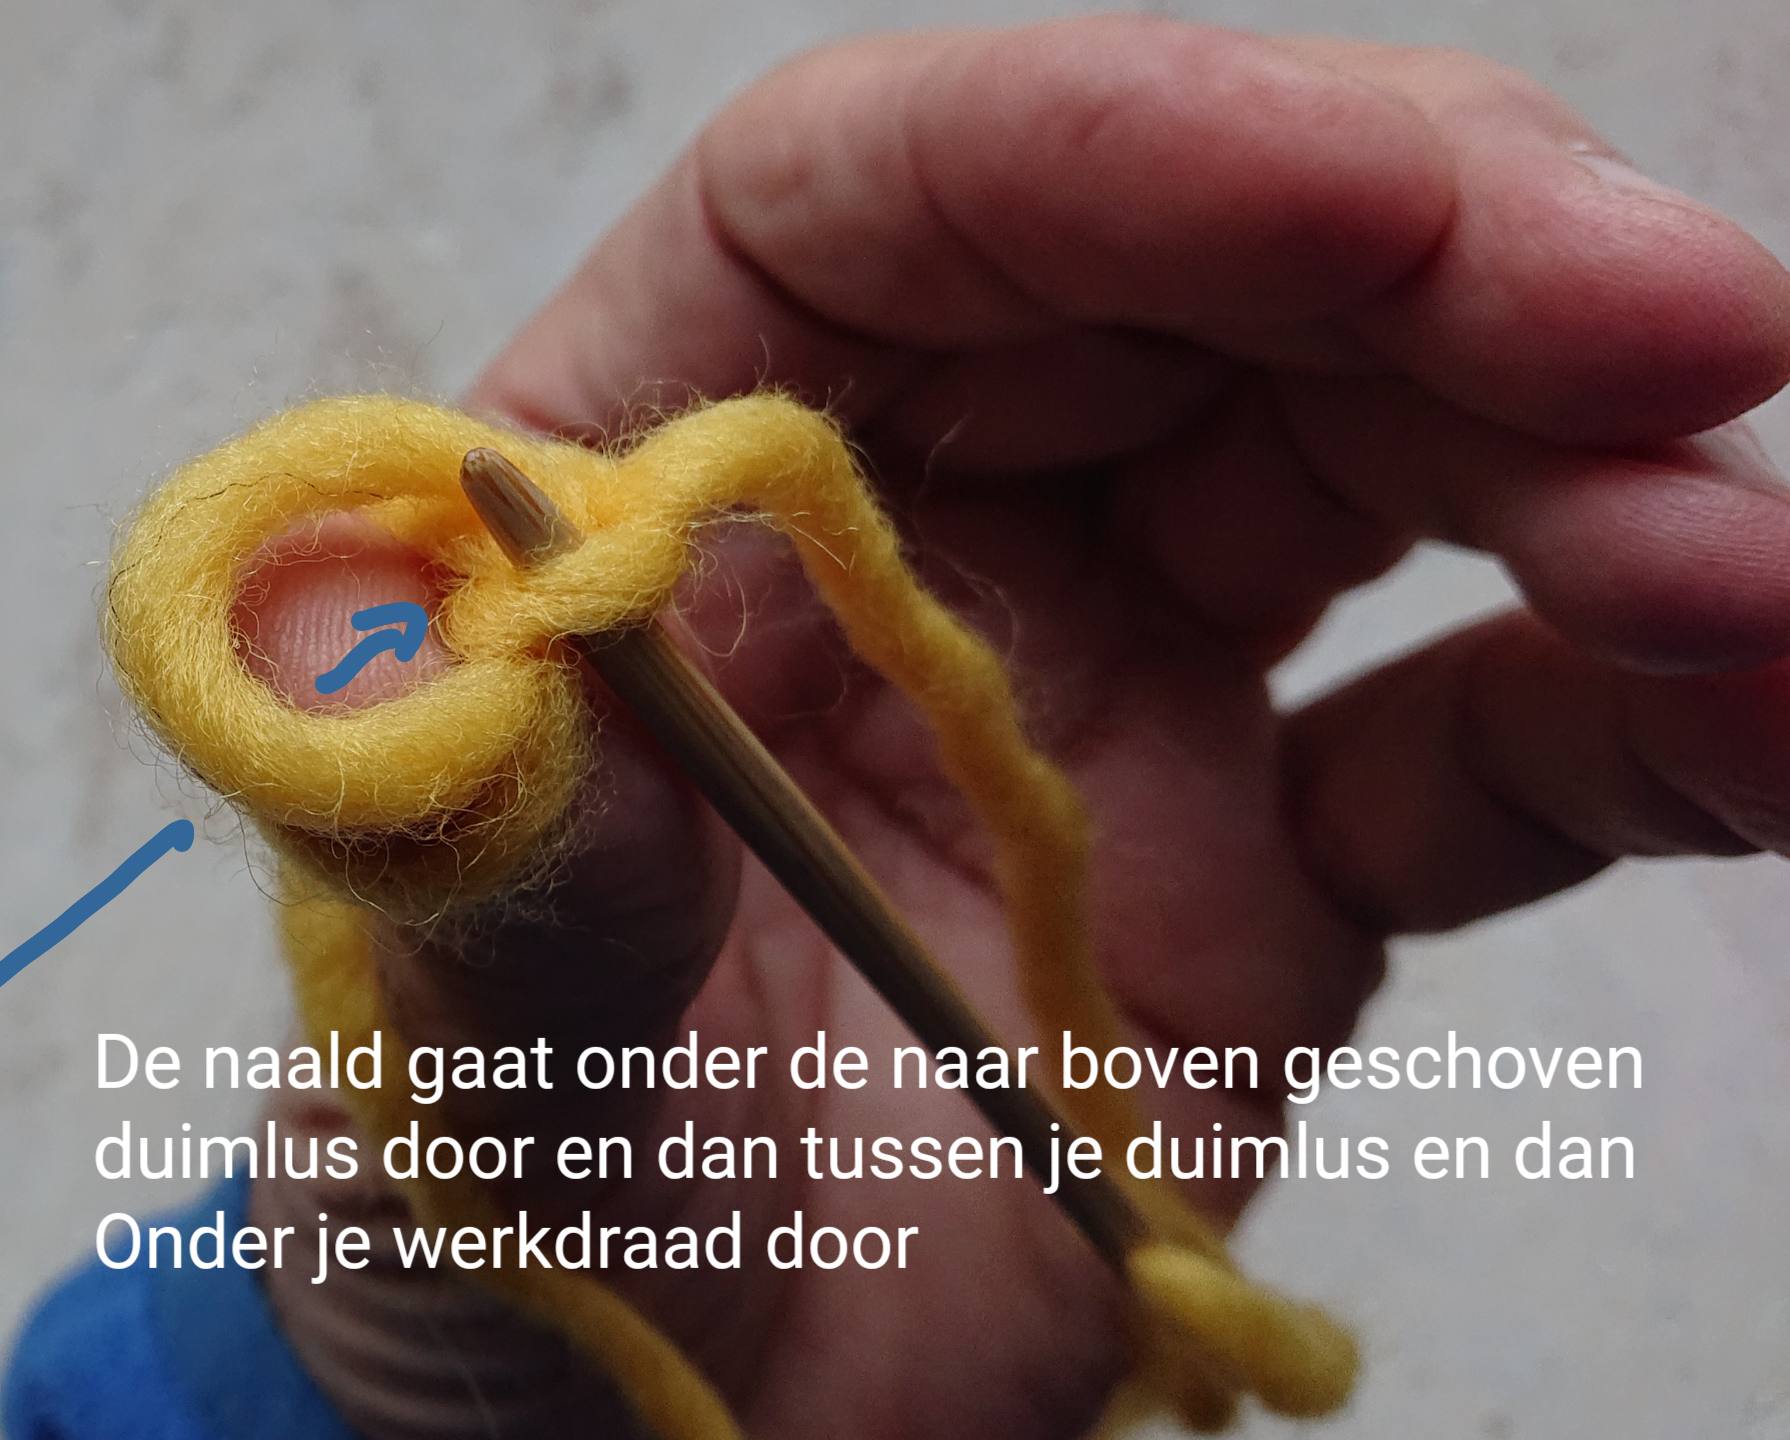
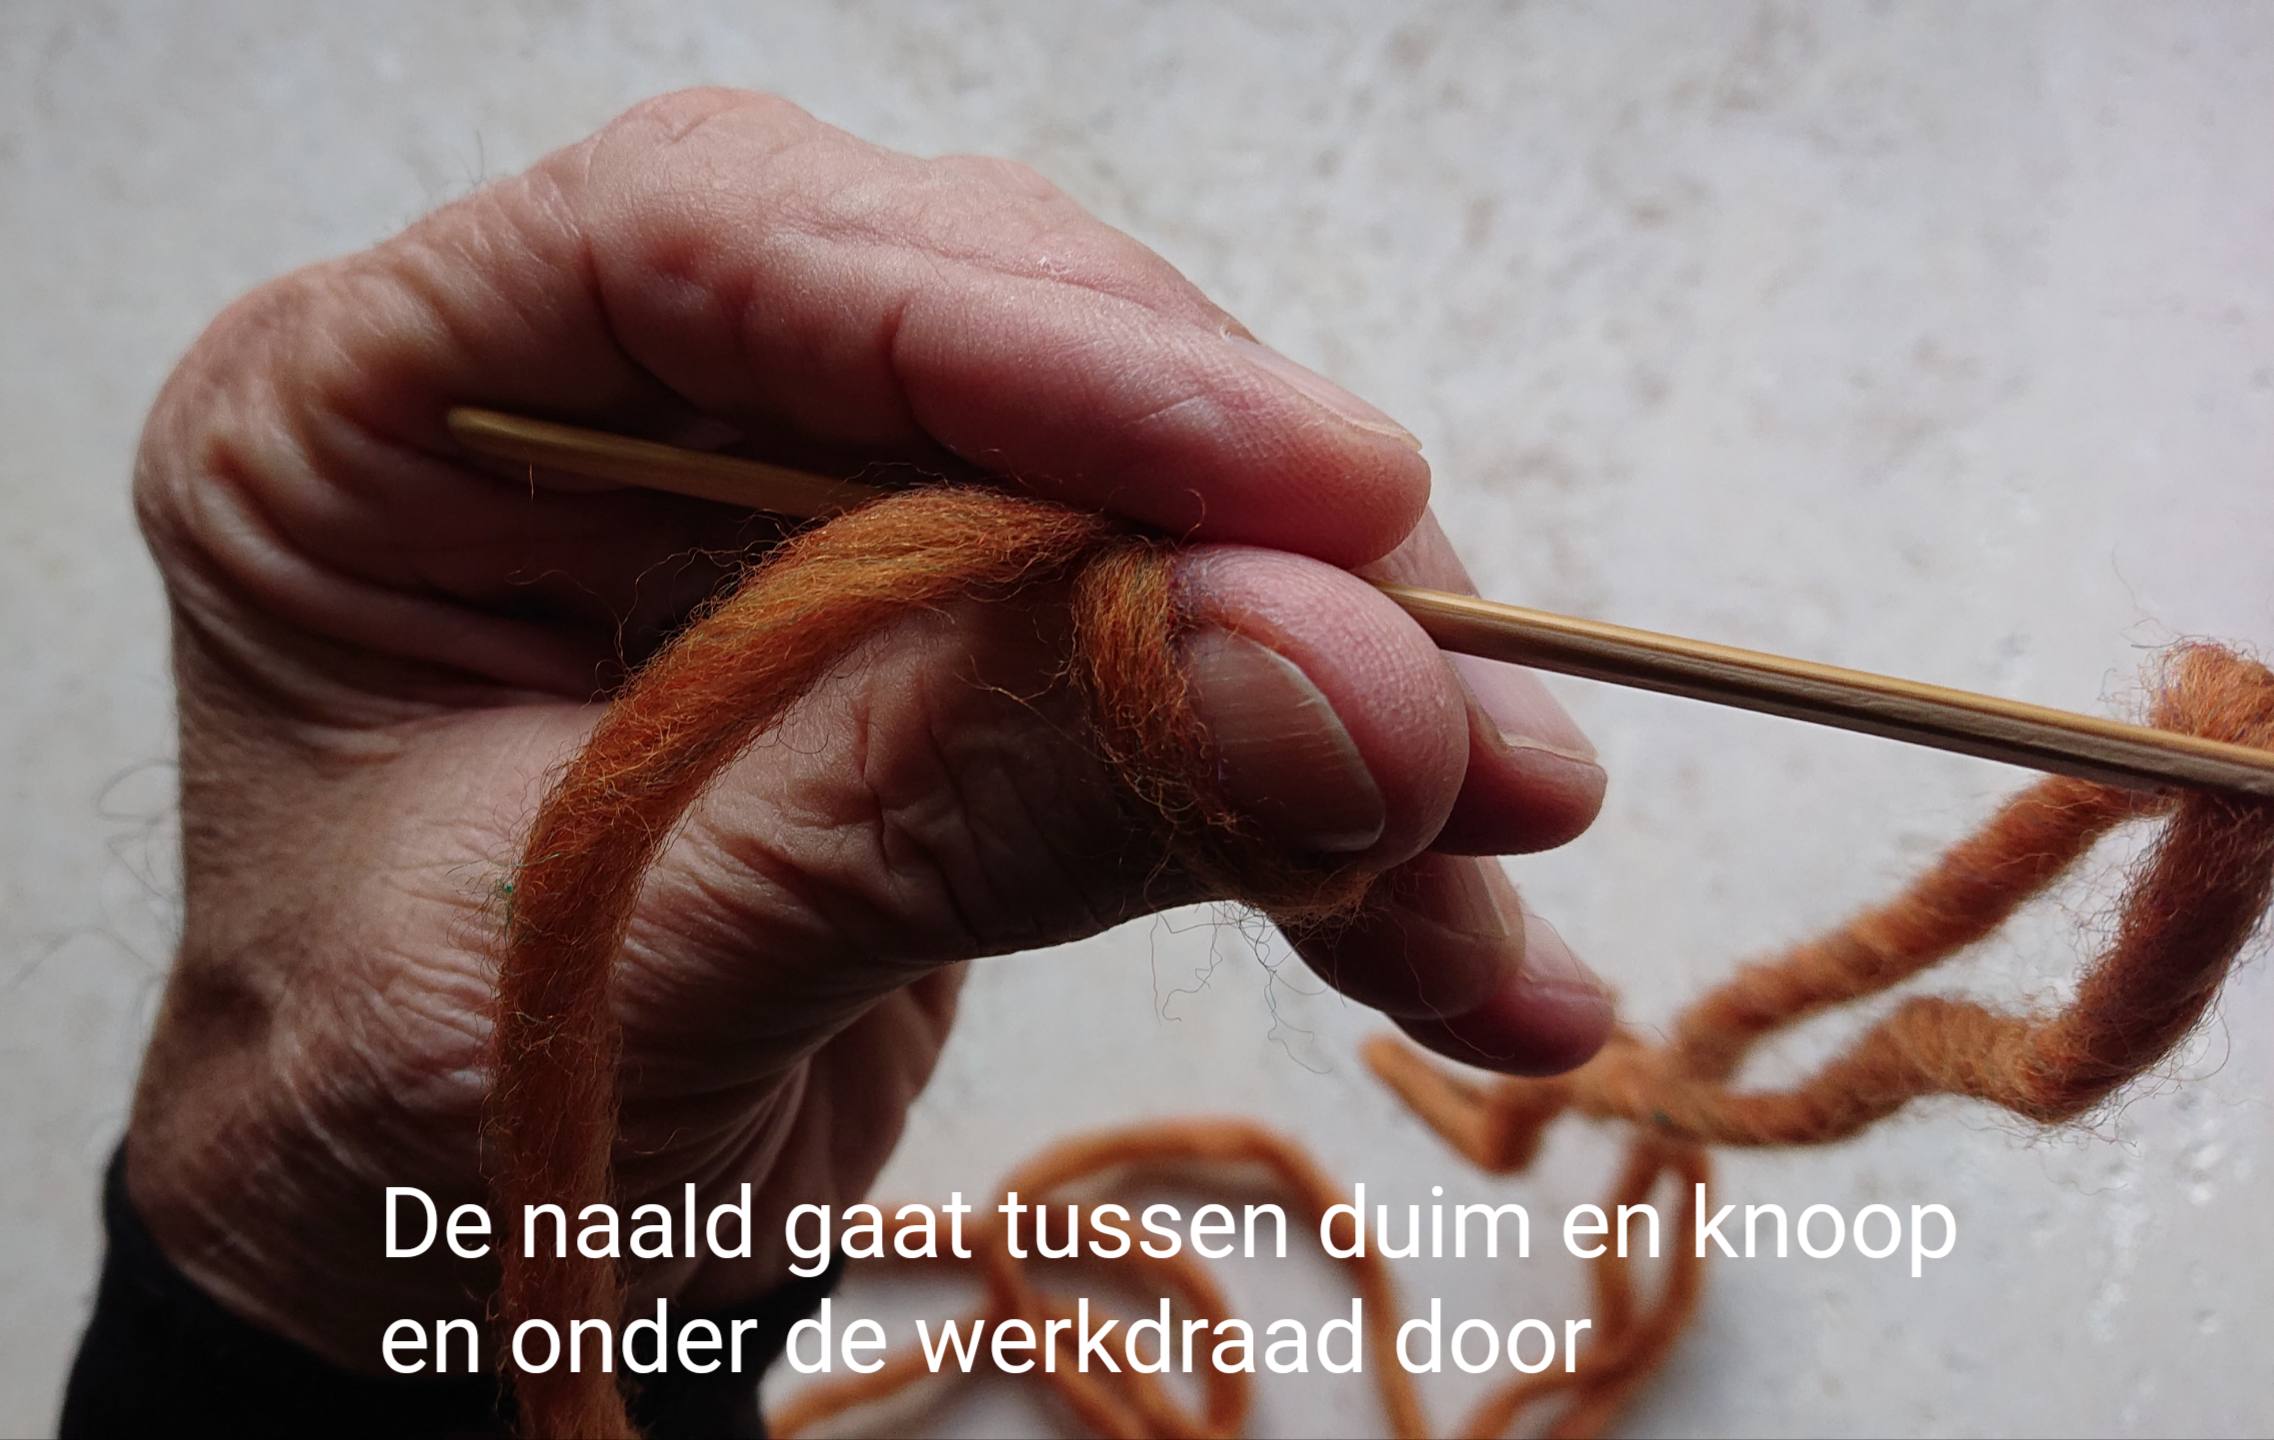
You start with the åsle stitch on the back of your thumb to insert your needle through the small loop.
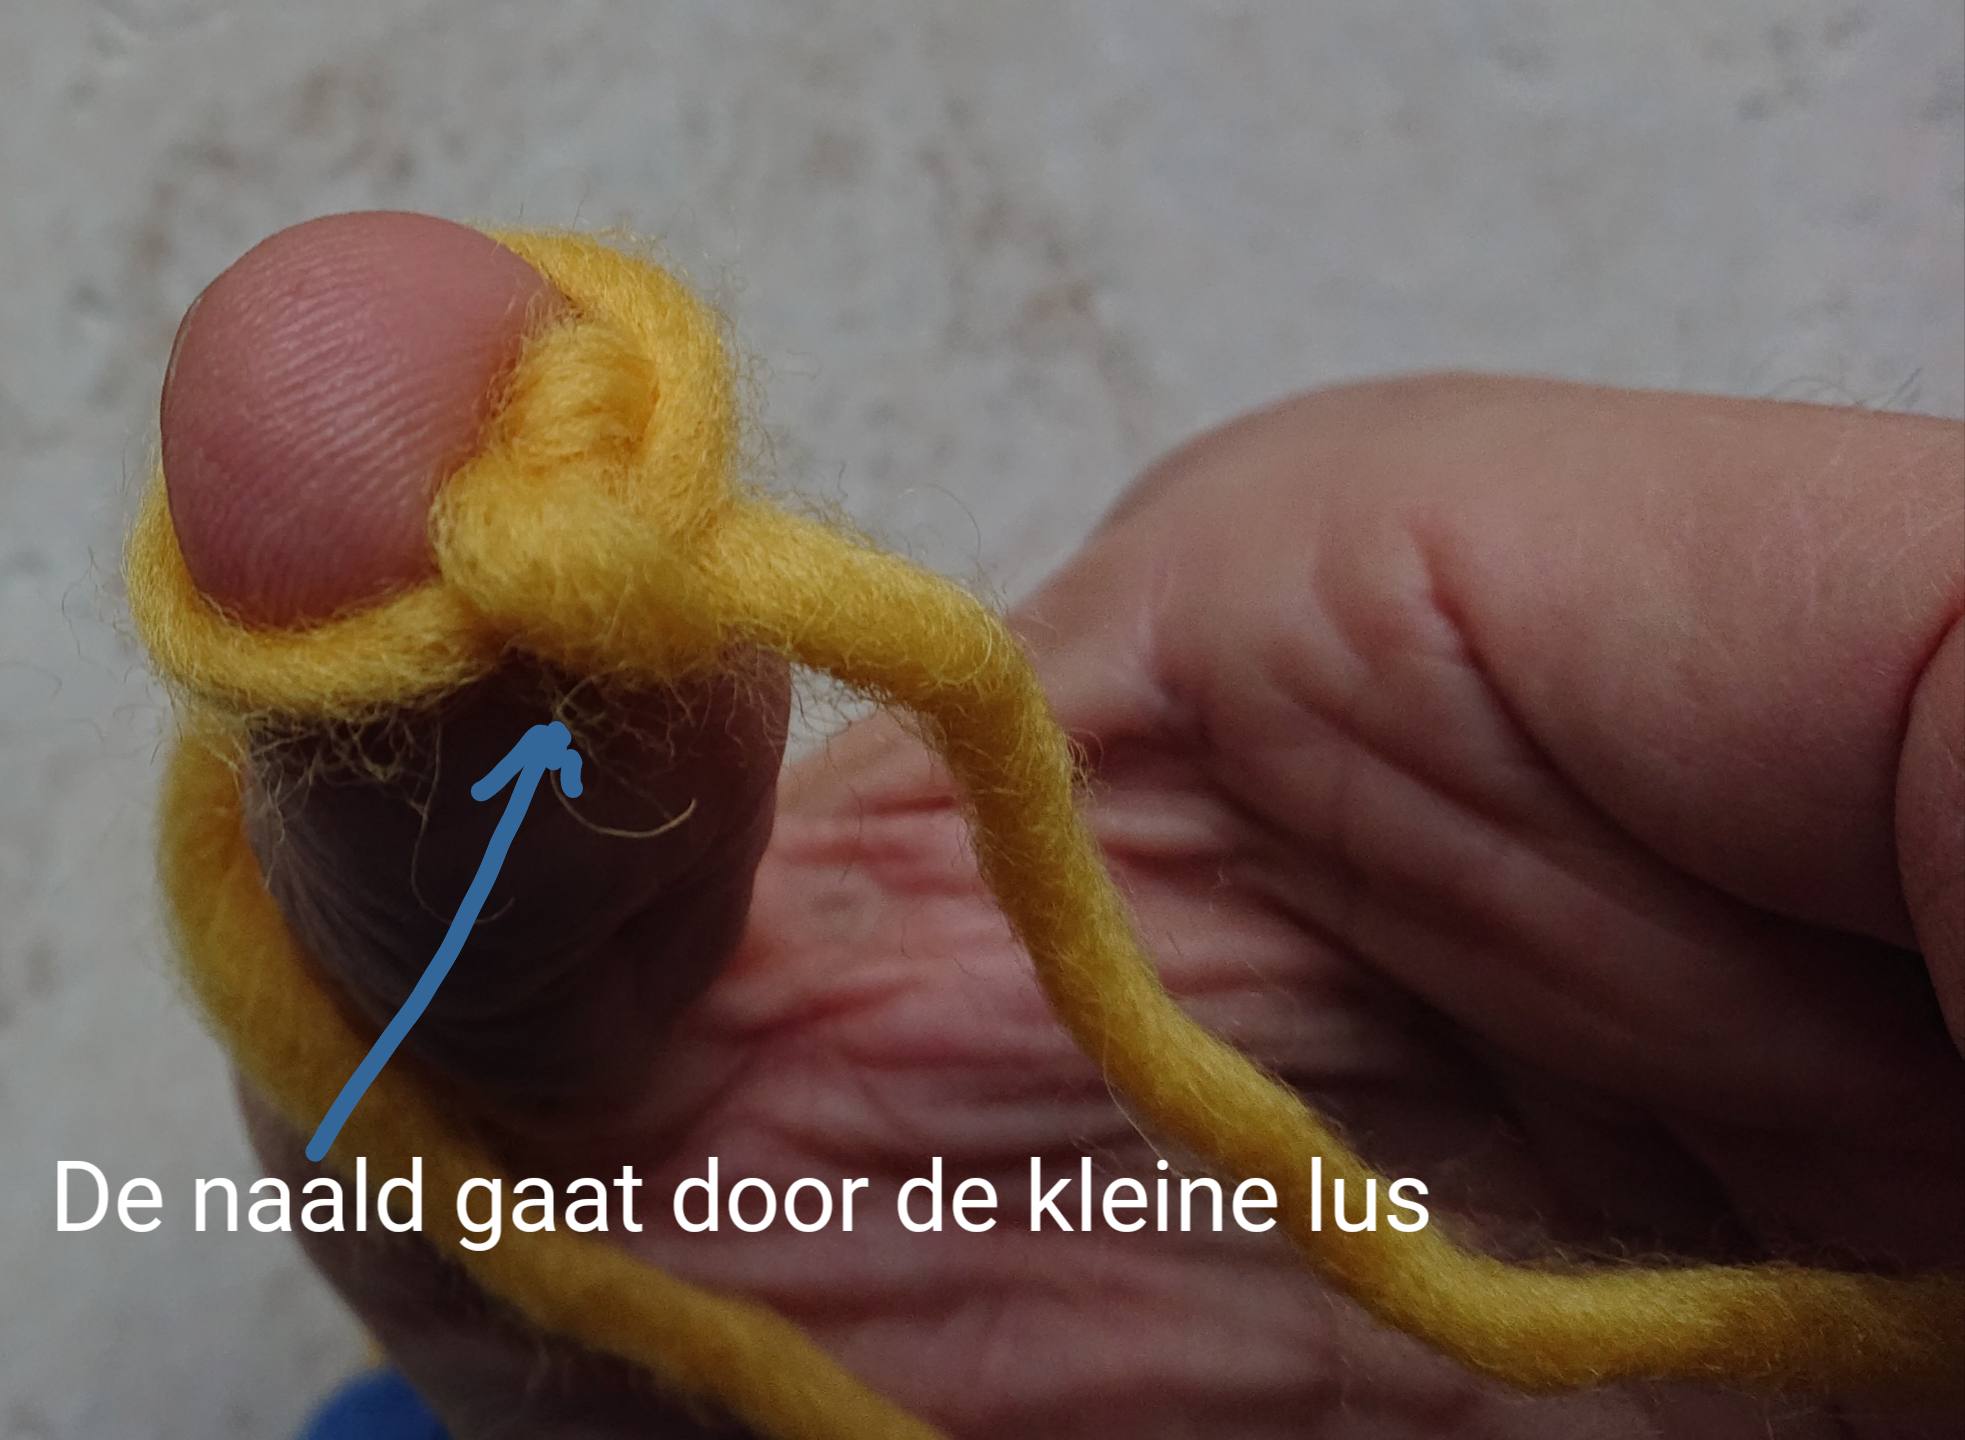
The needle goes first through the small loop.
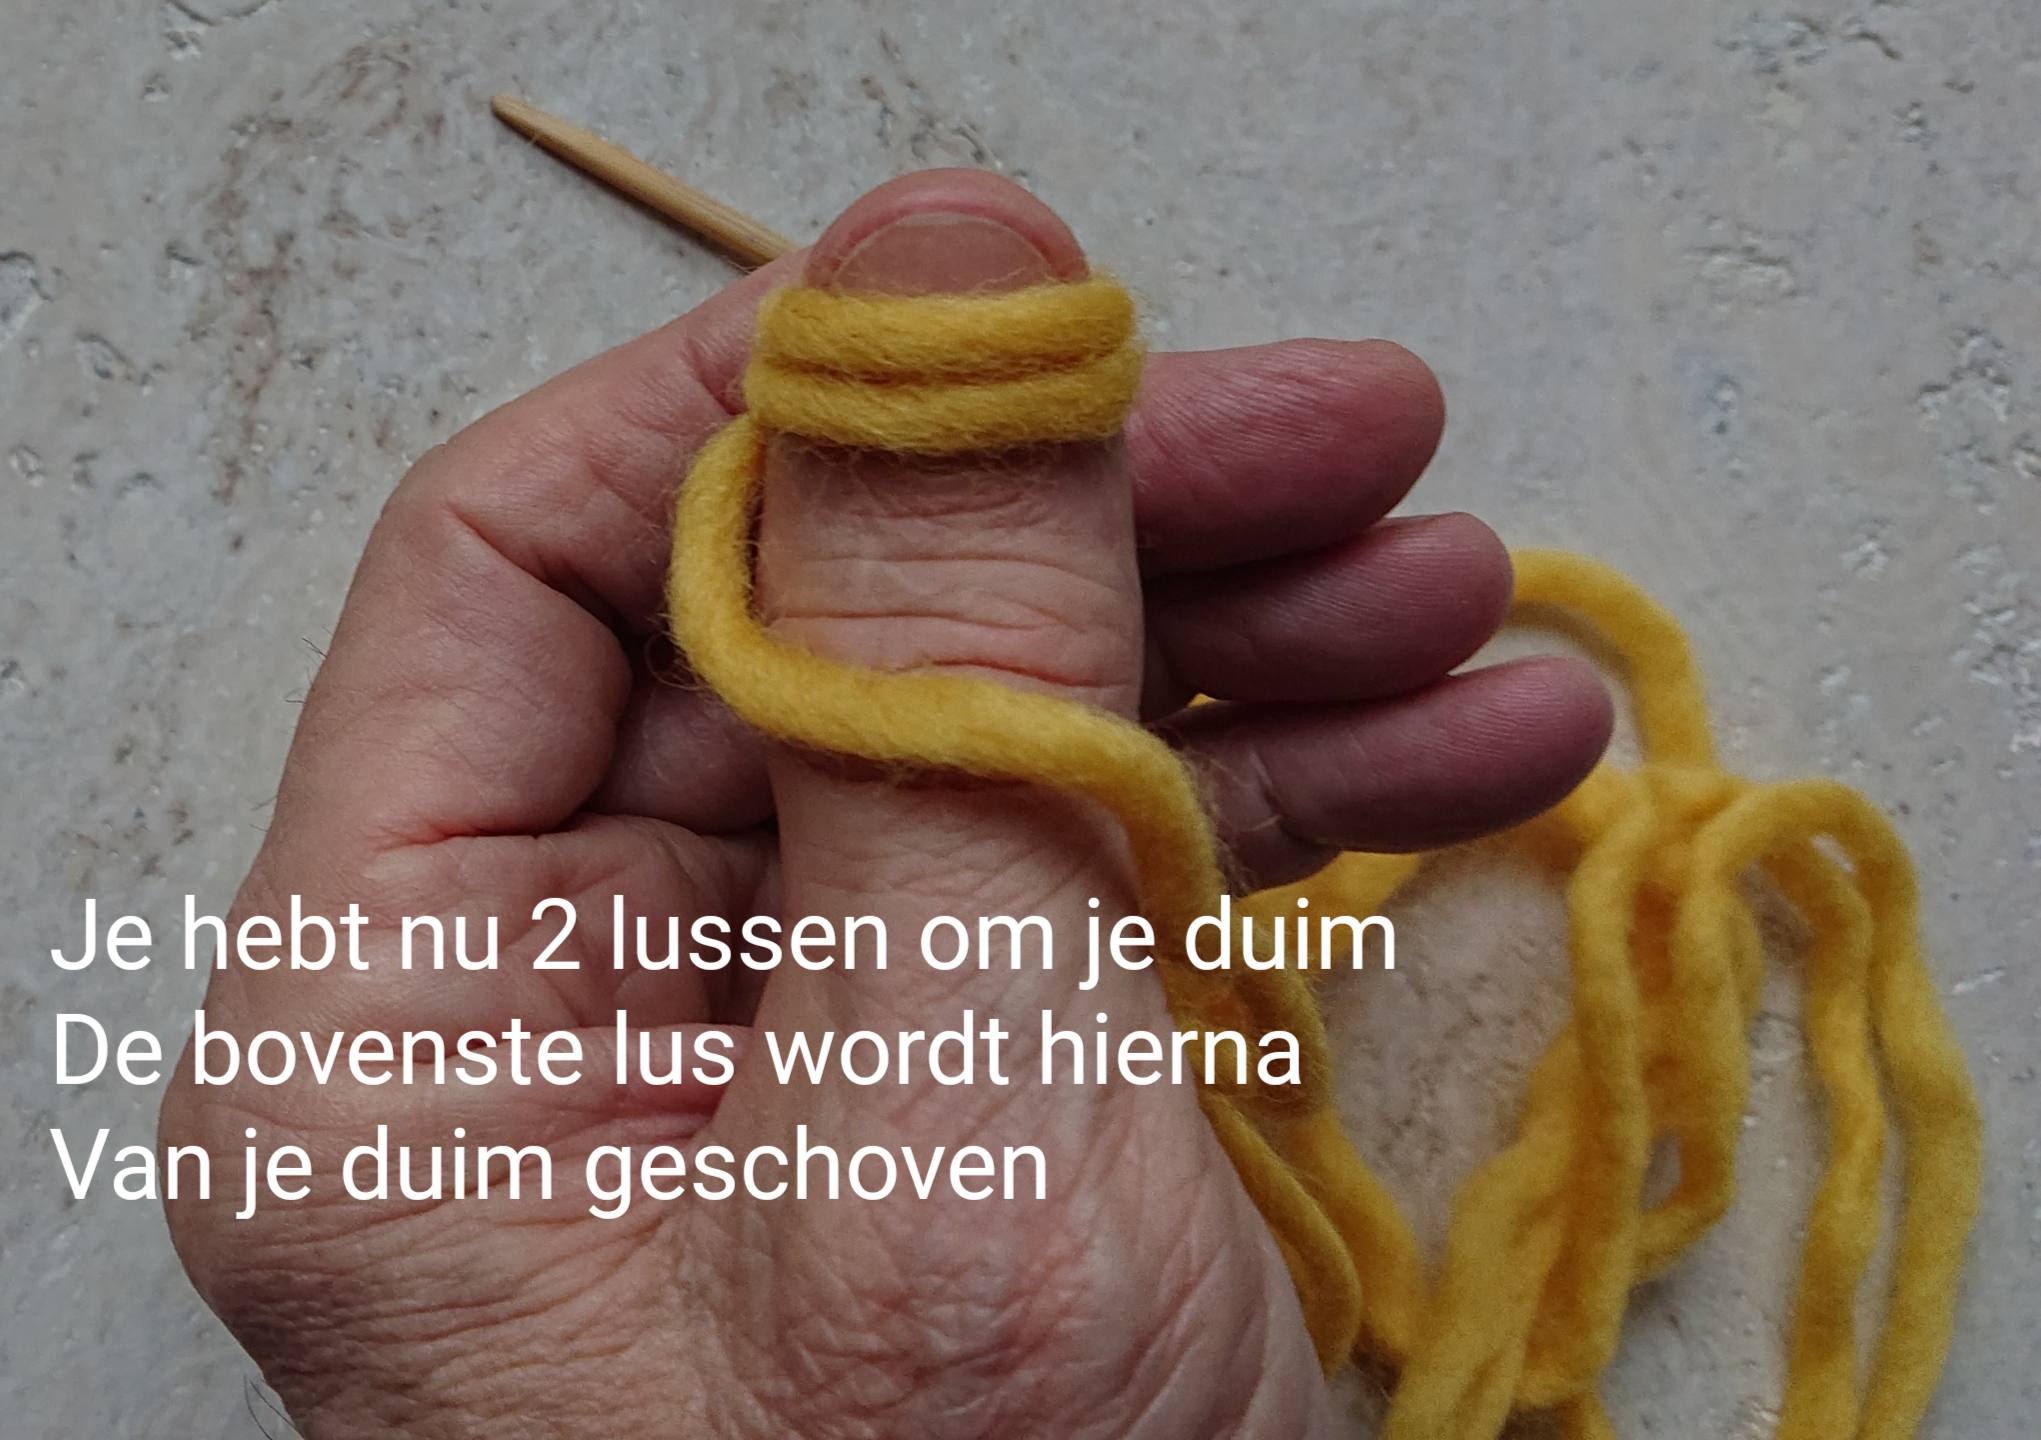
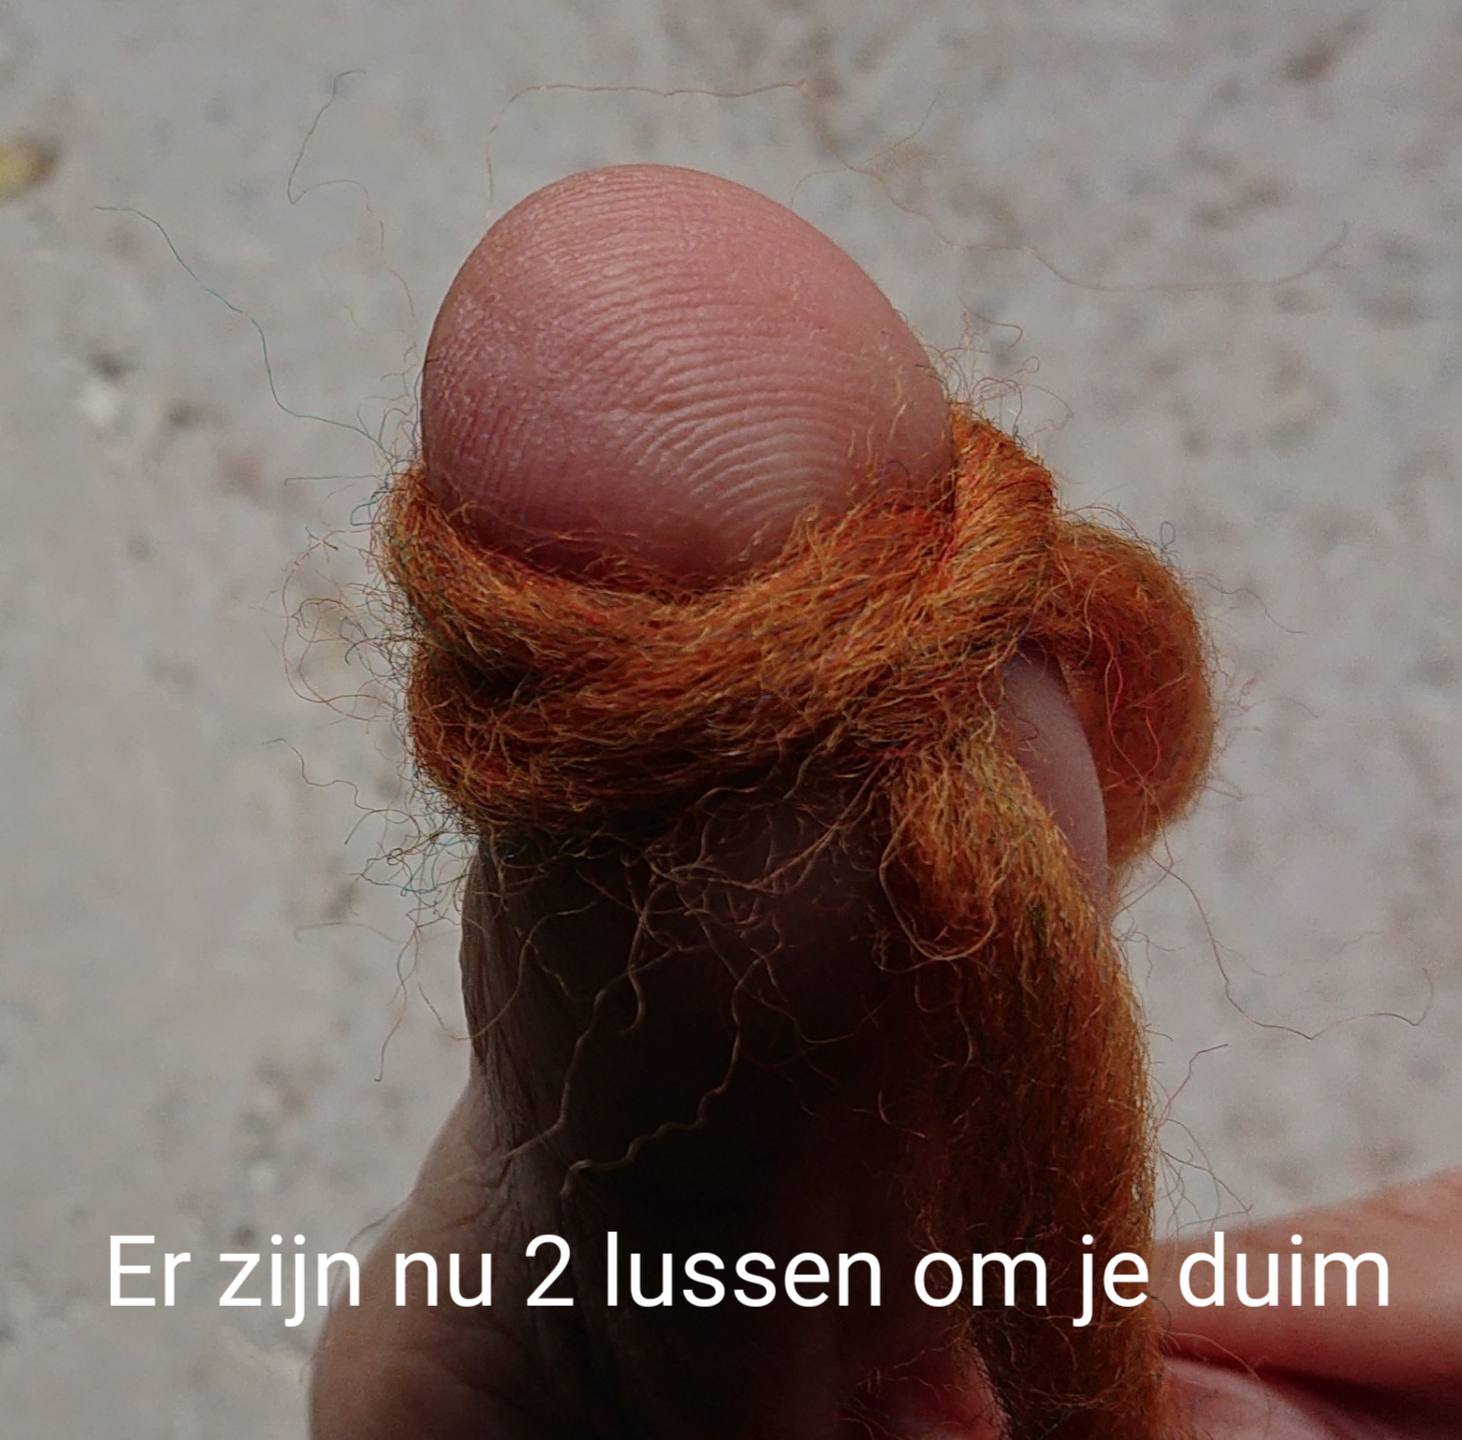
After the working thread has pulled, you have 2 thumb loops
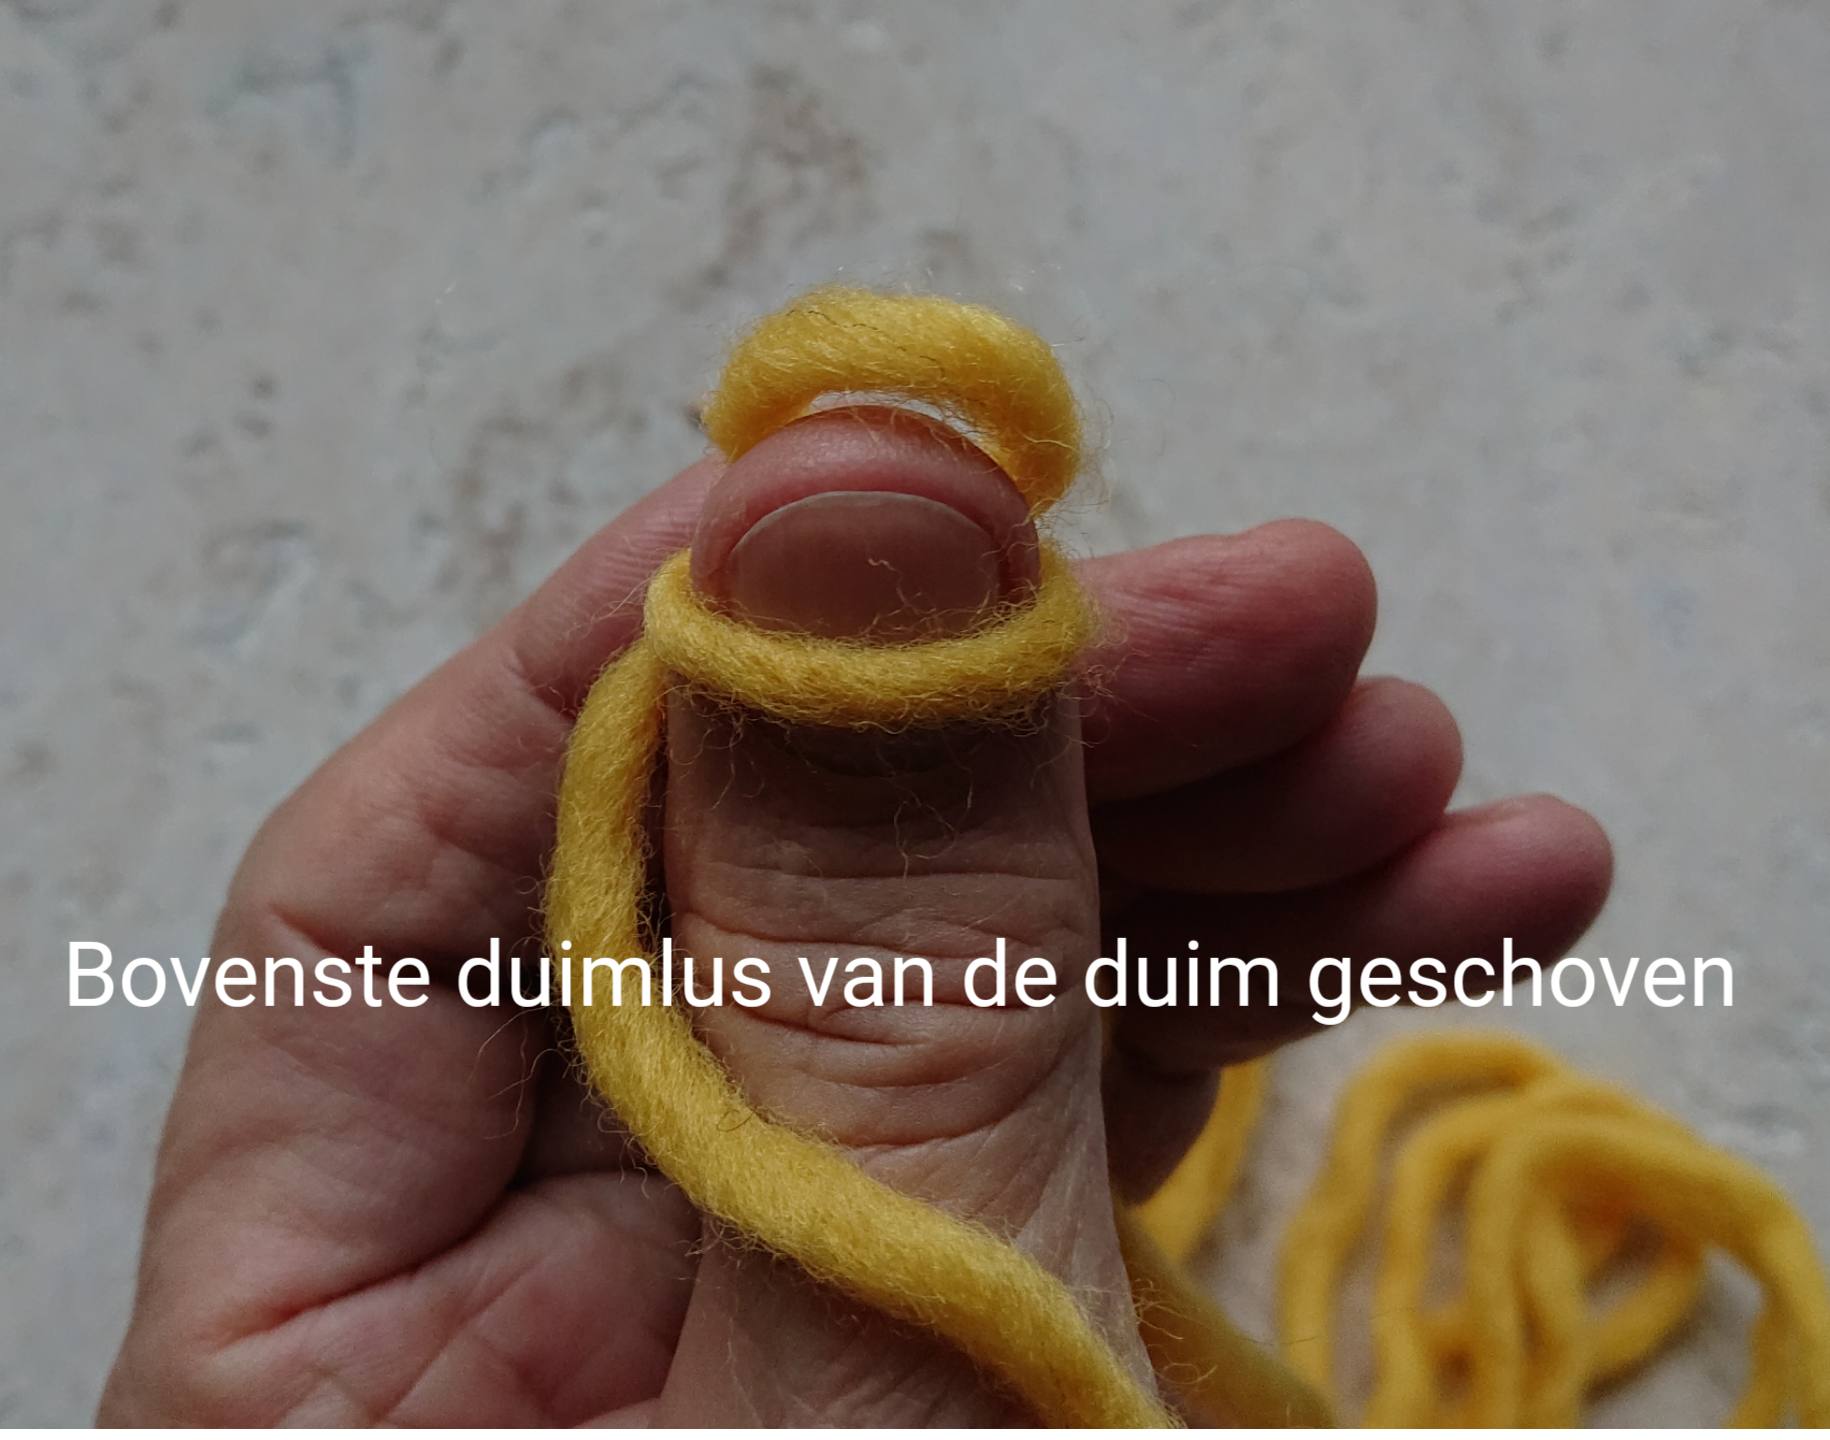
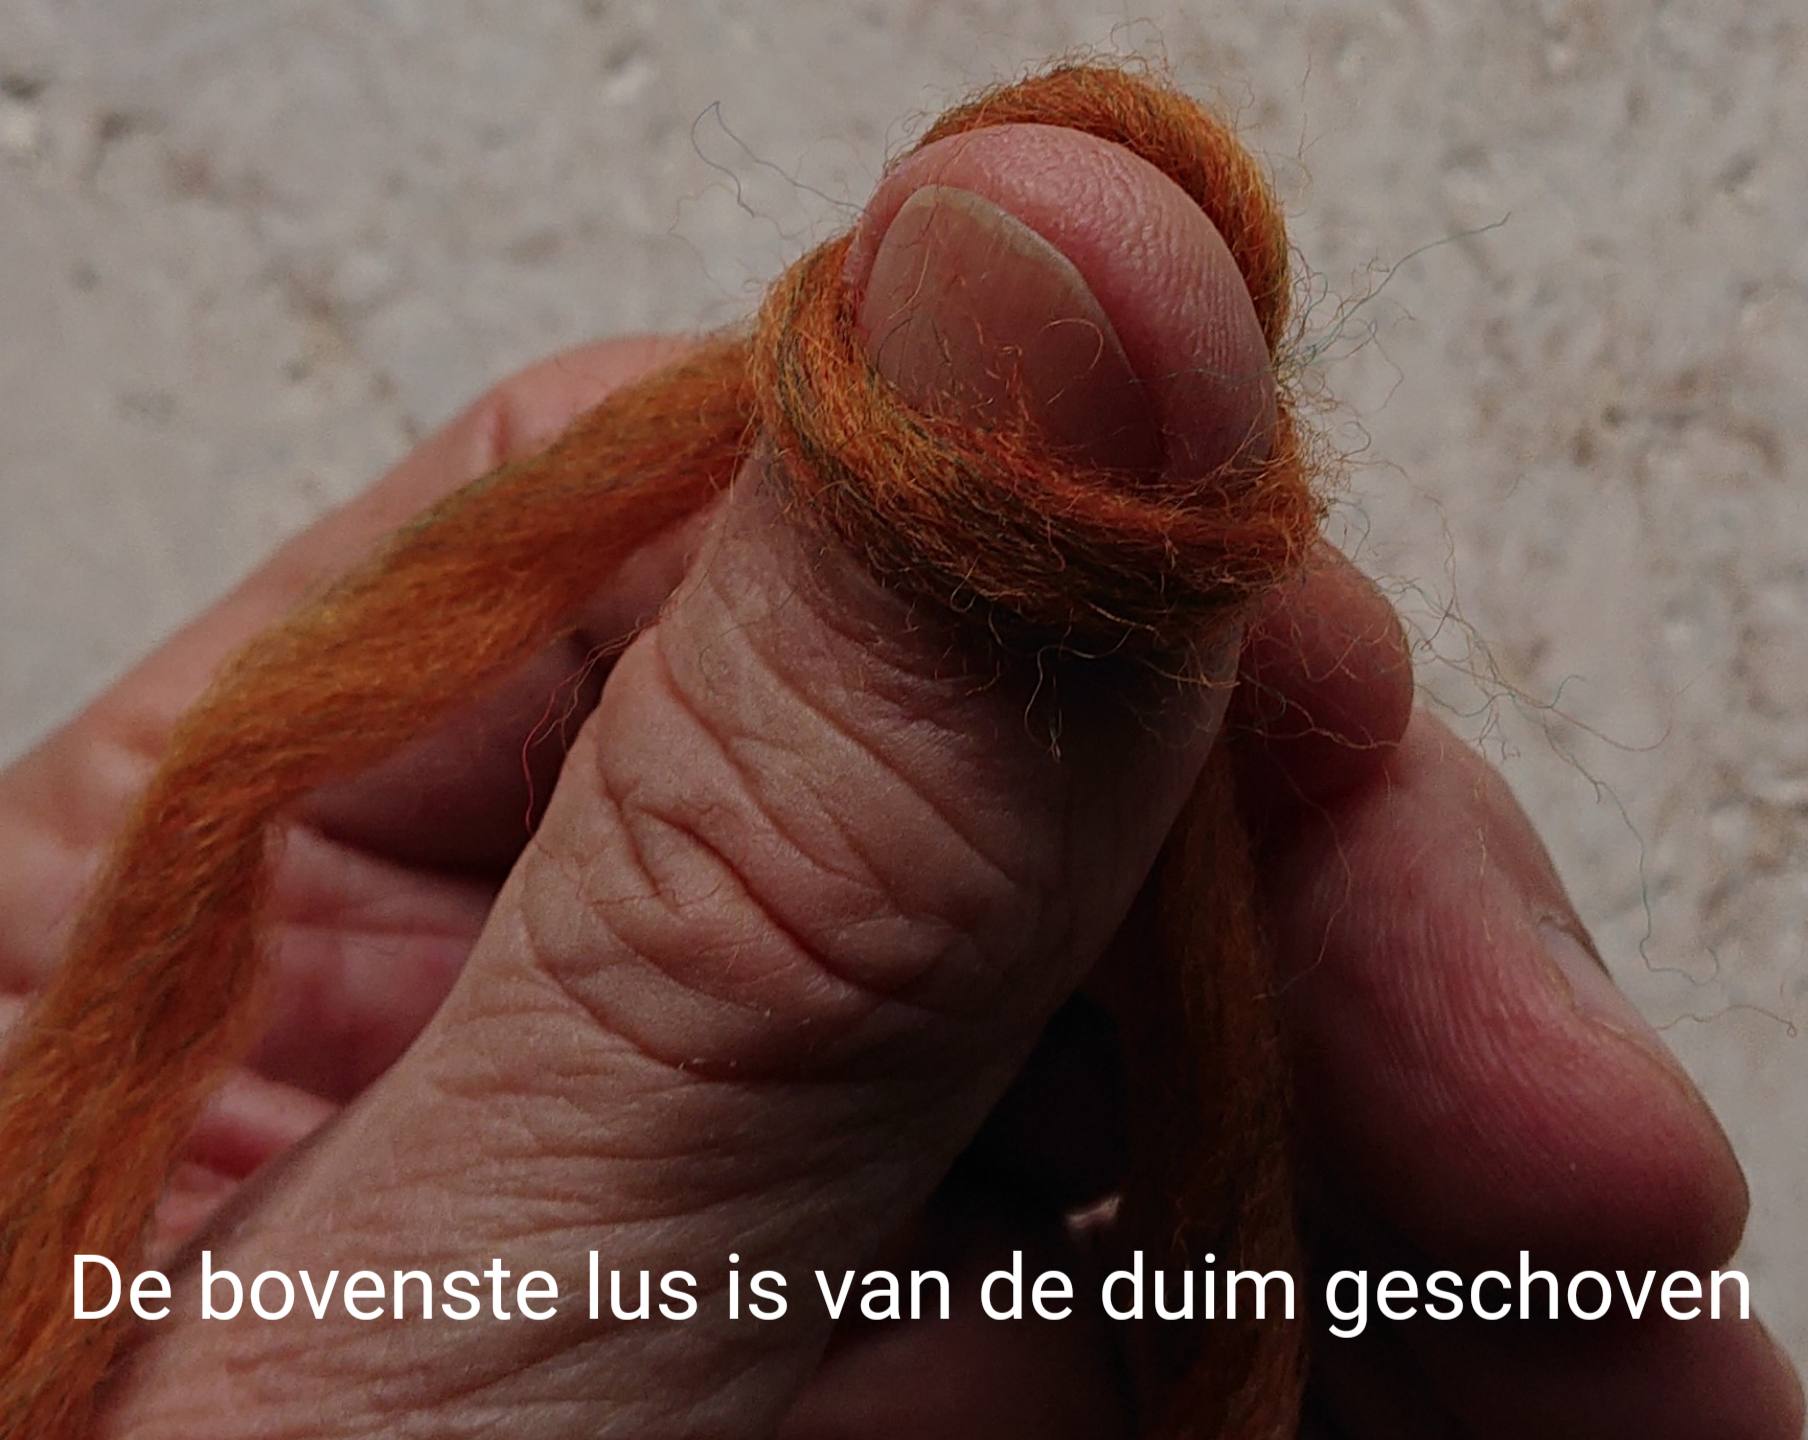
The upper loop is pushed off the thumb.
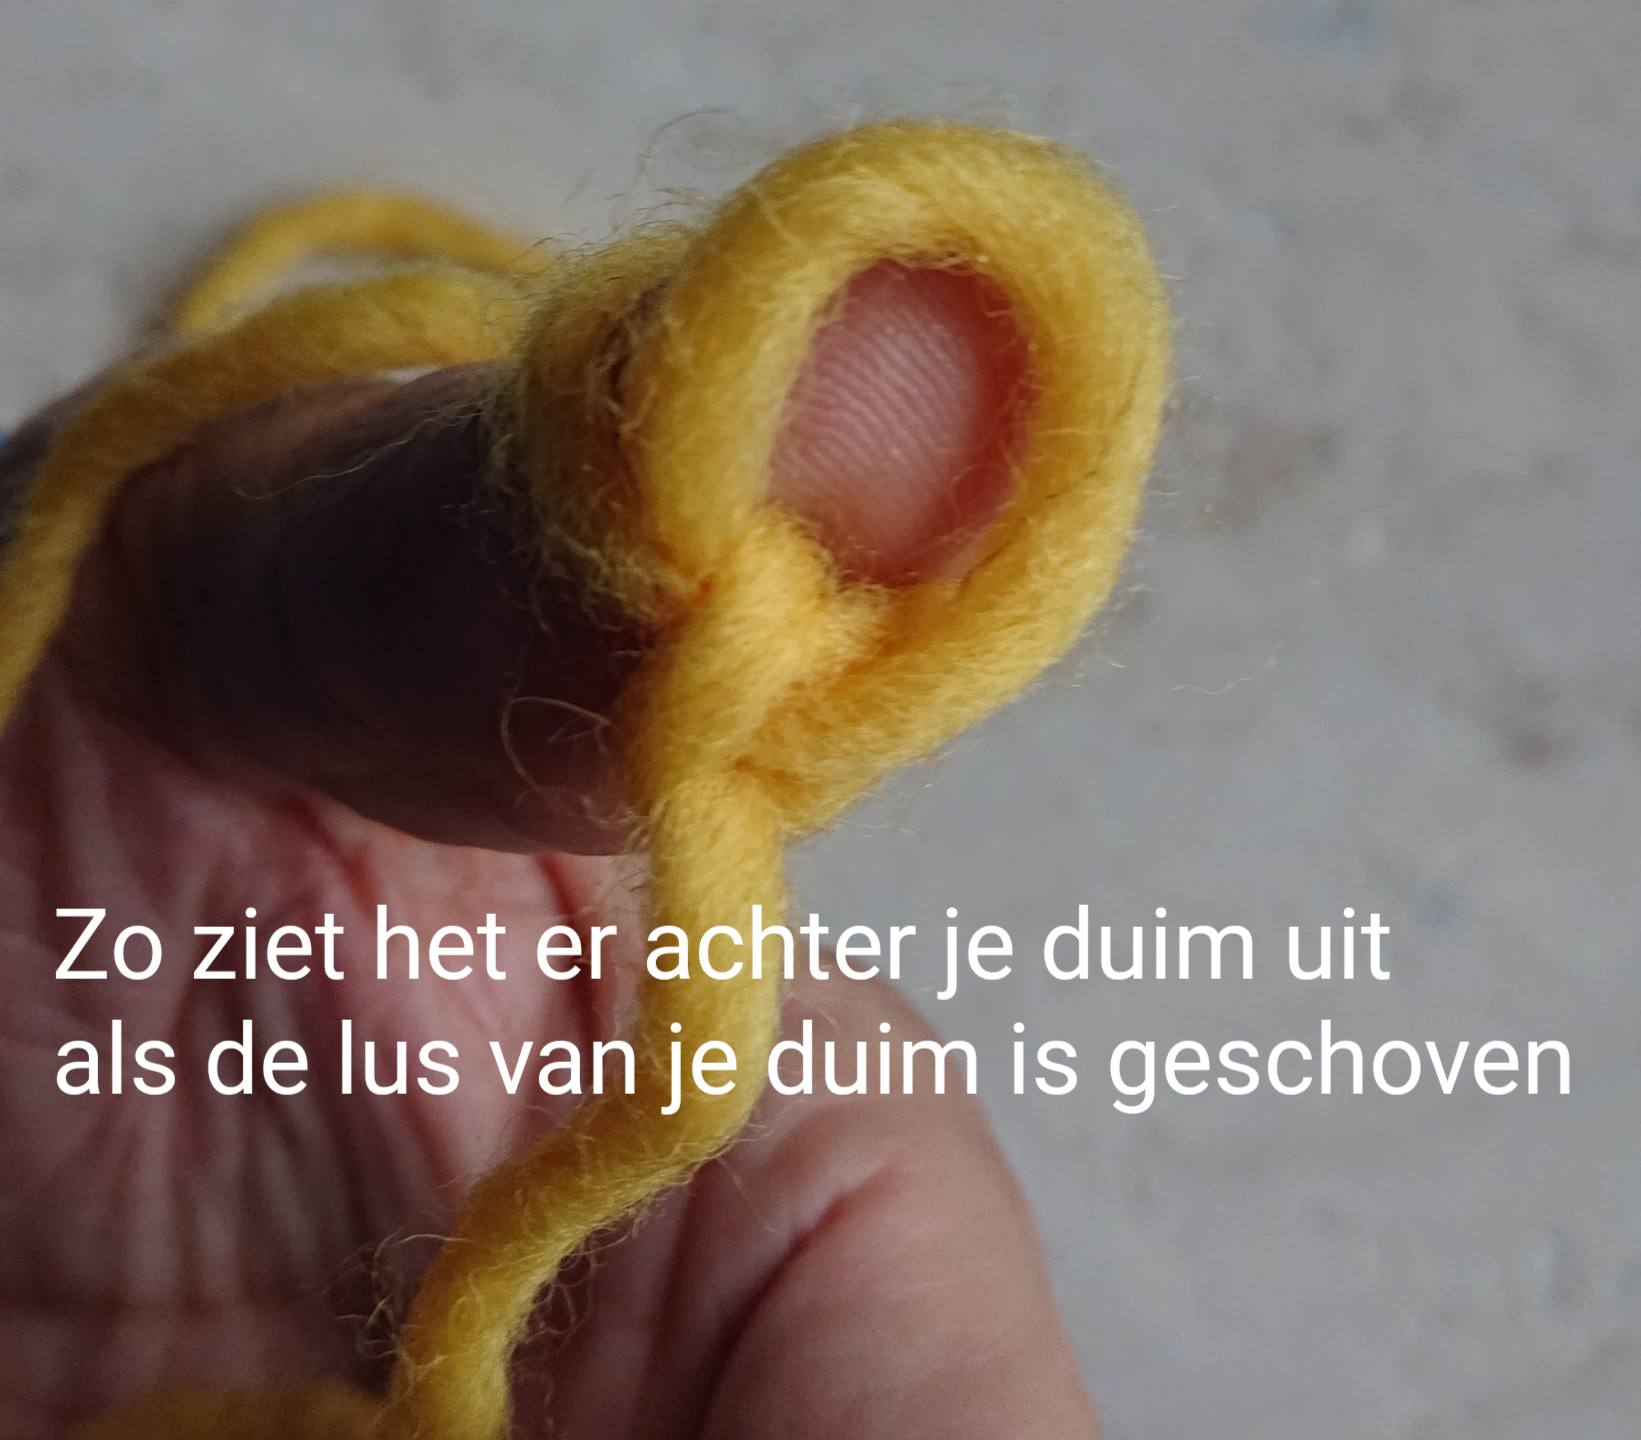
This is what it looks like behind your thumb when the loop of your thumb is slid.
The needle goes first through little loop and and pick up the big loop and rotate the needle counter clockwise. ( the åsle stitch is a turning stitch).
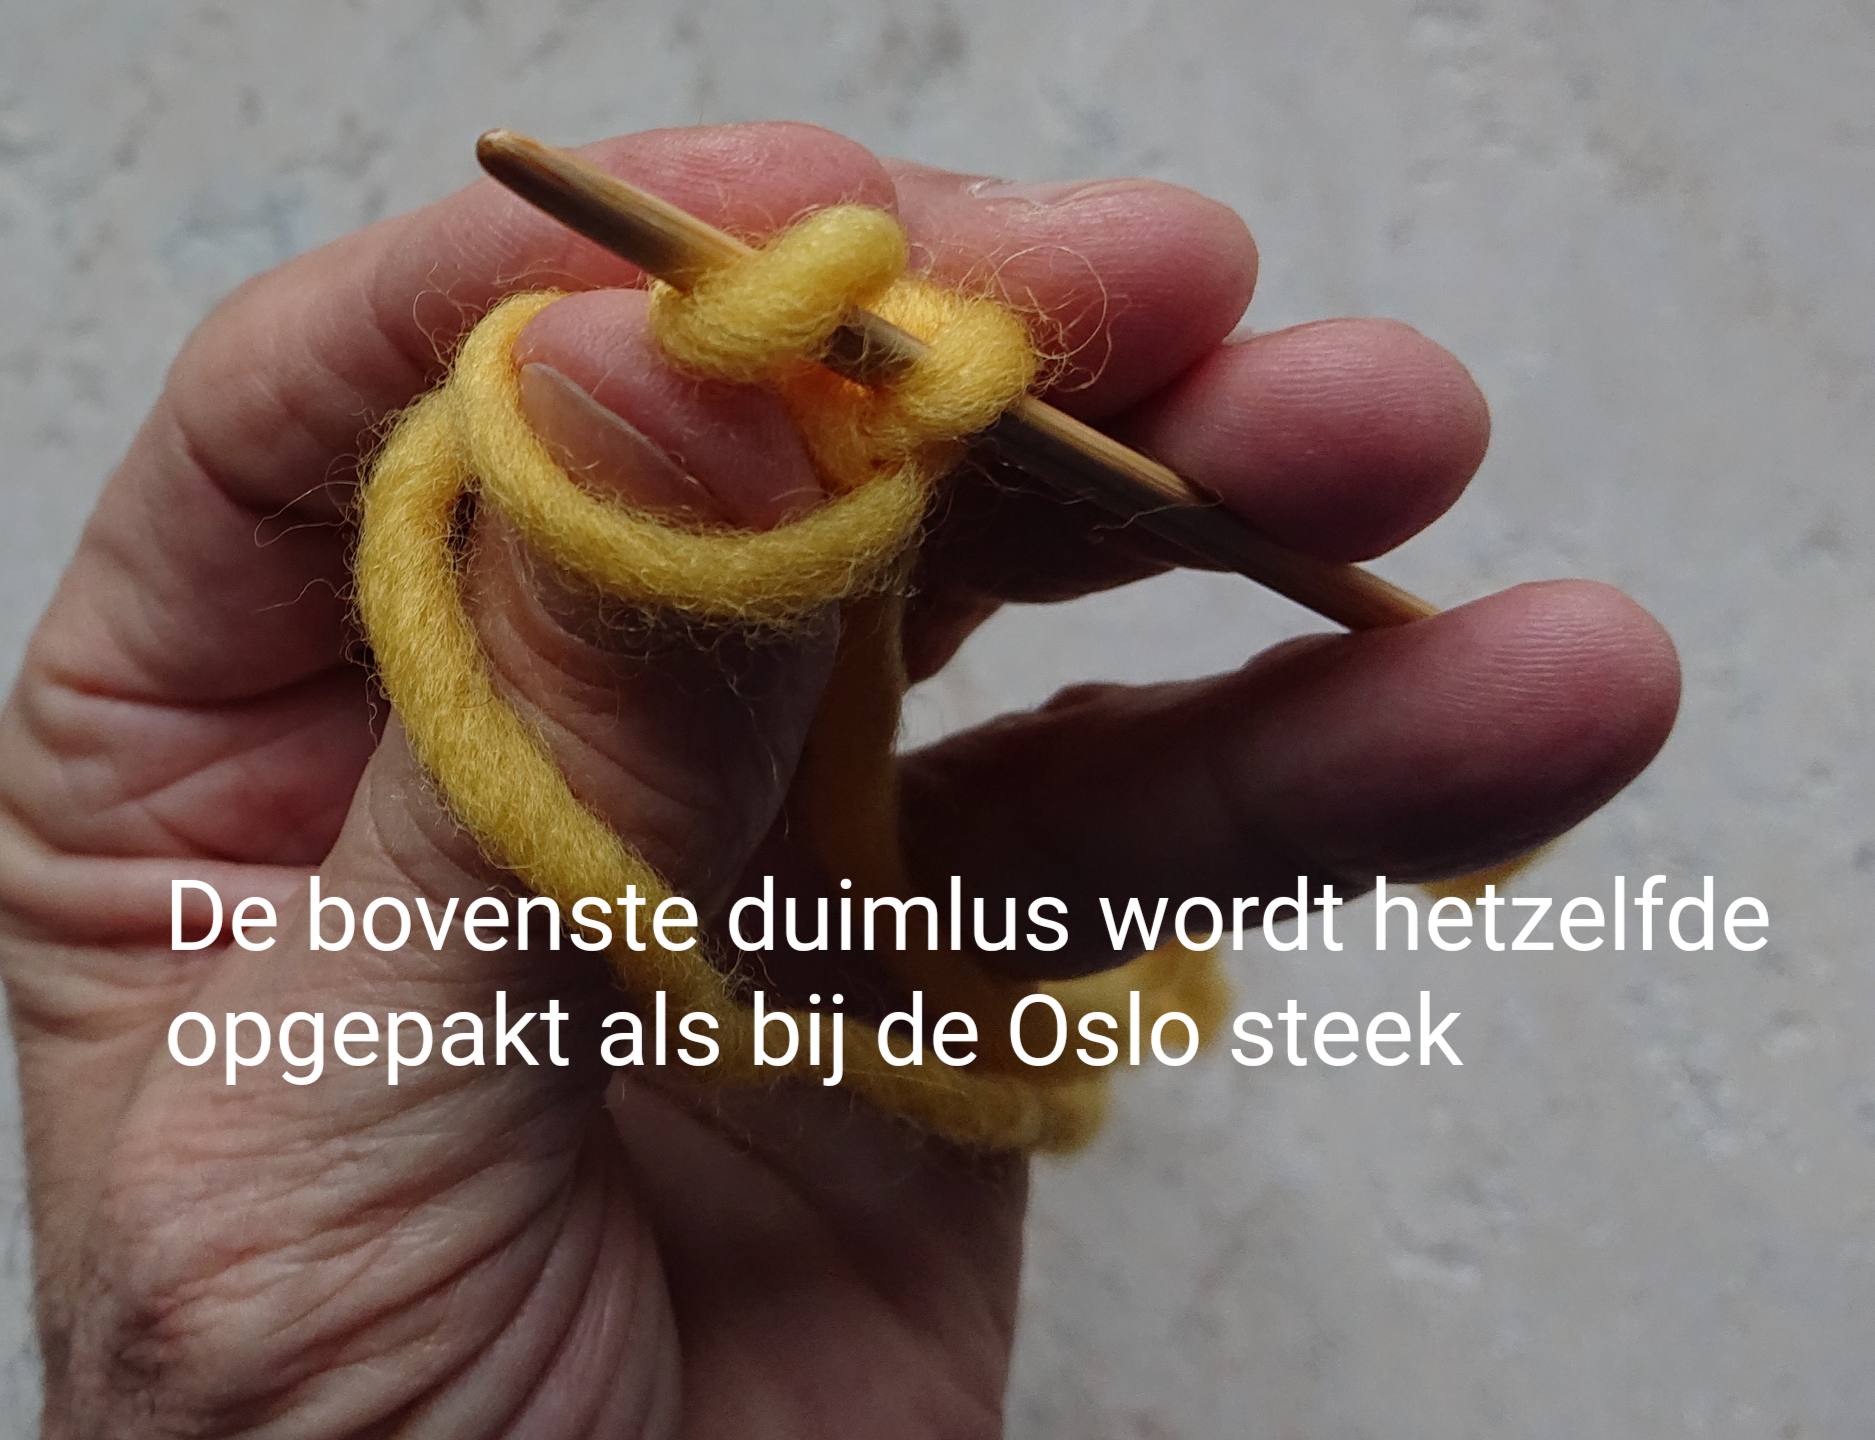
The upper thumb loop is picked up the same as with the Oslo stitch.
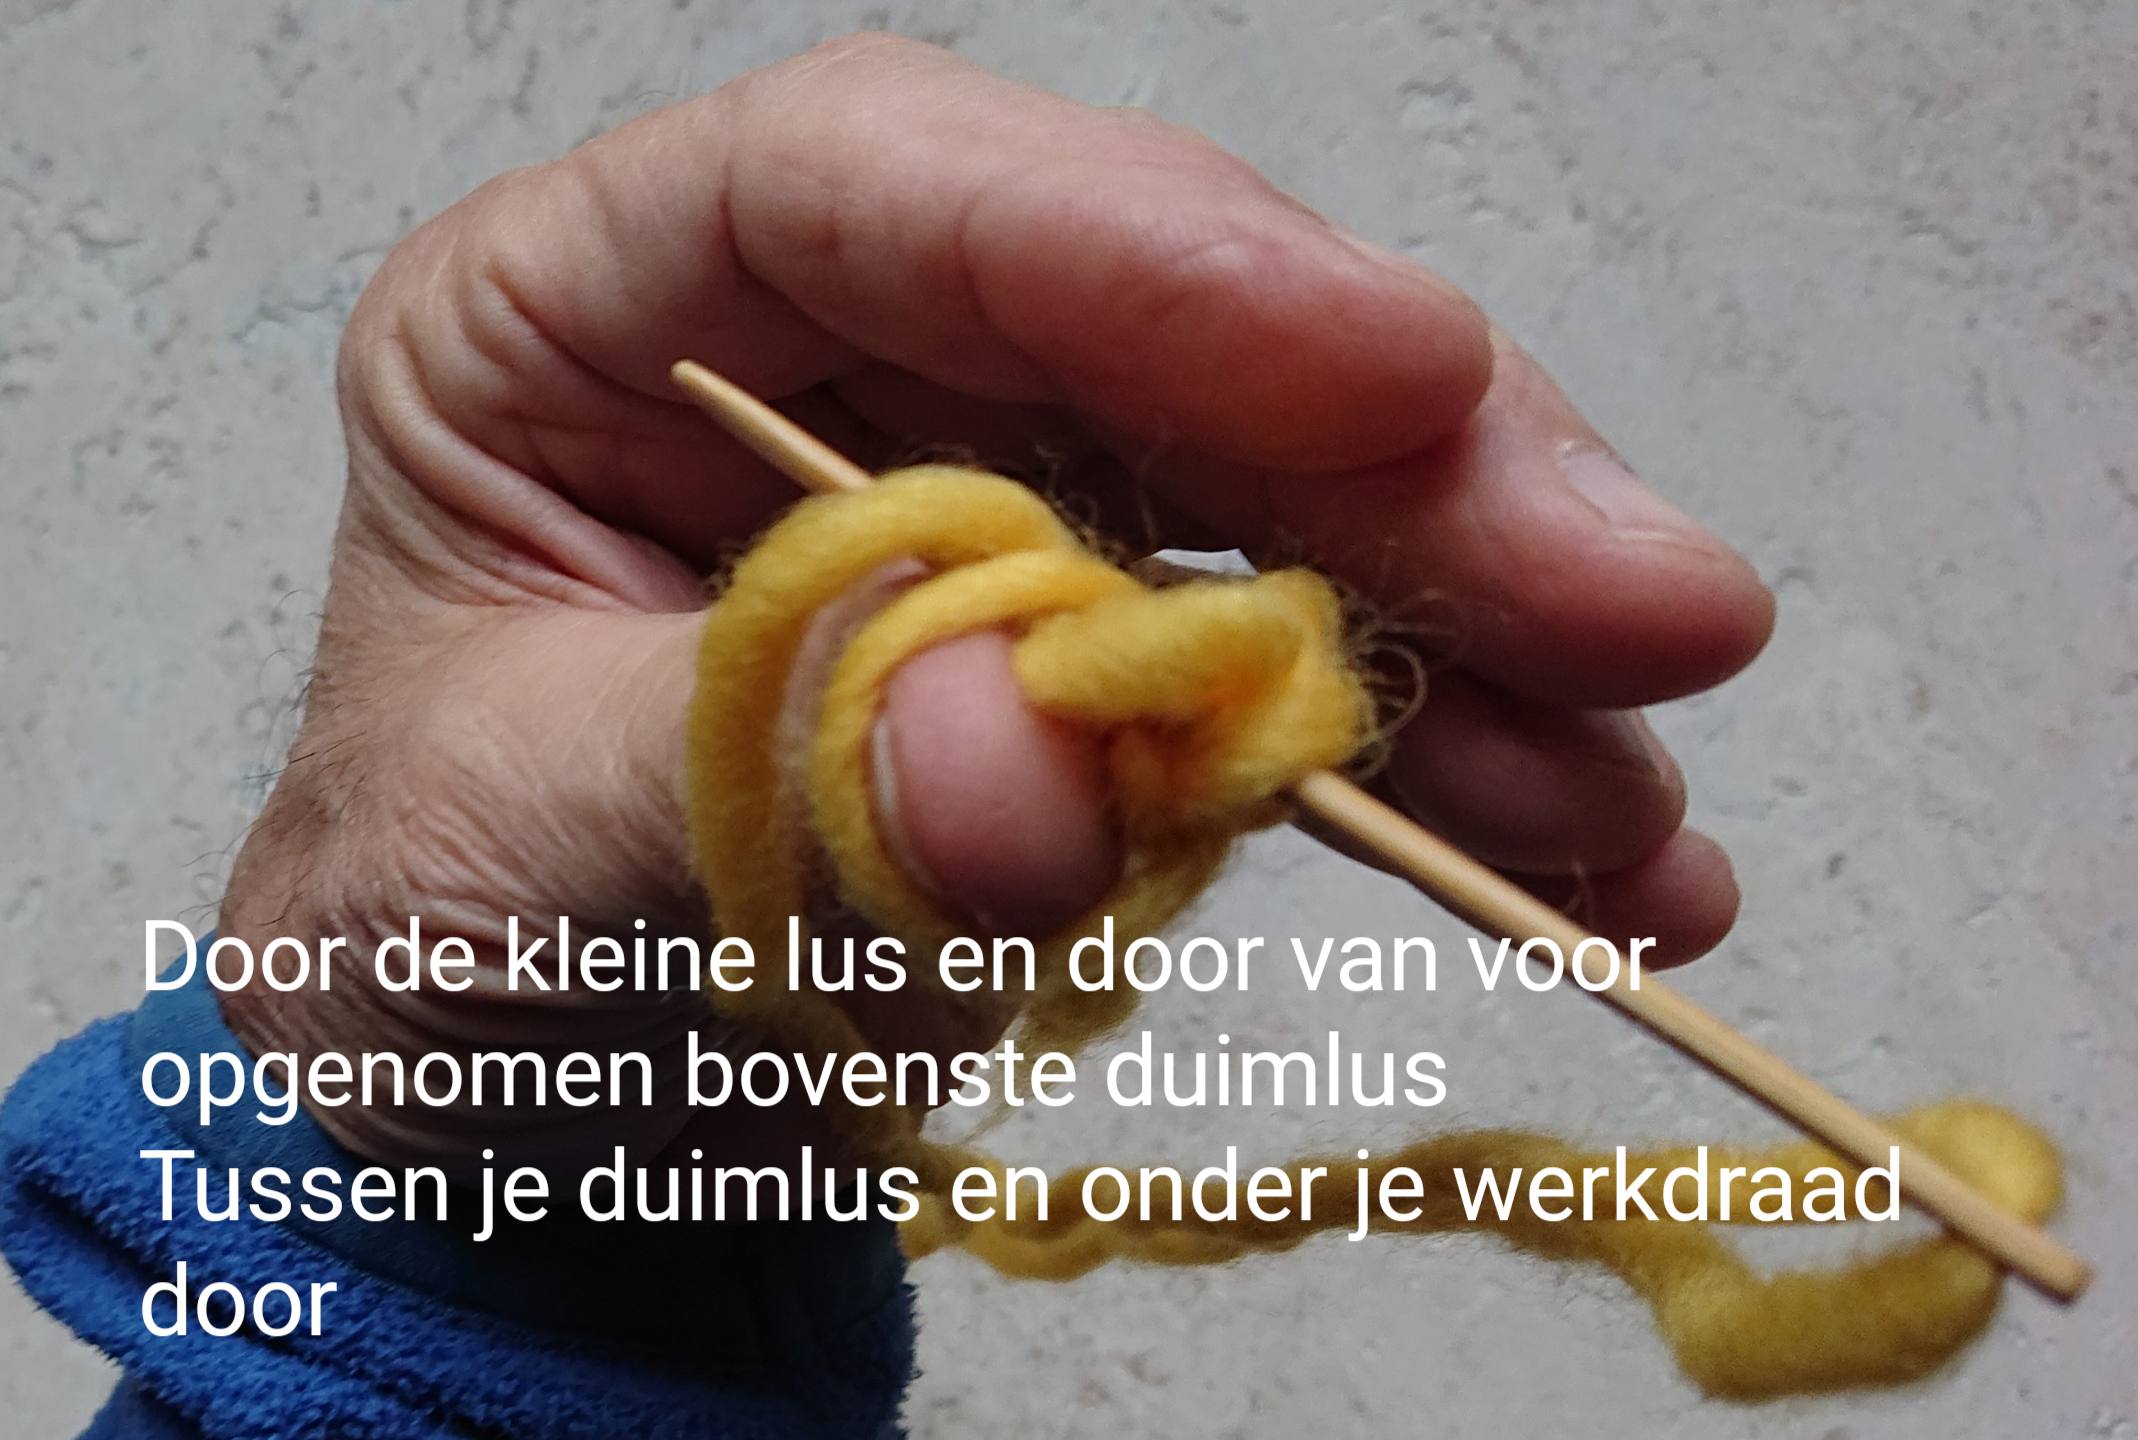
Through the small loop and throug the included upper thumb loop between your thumb loop and under the working thread.
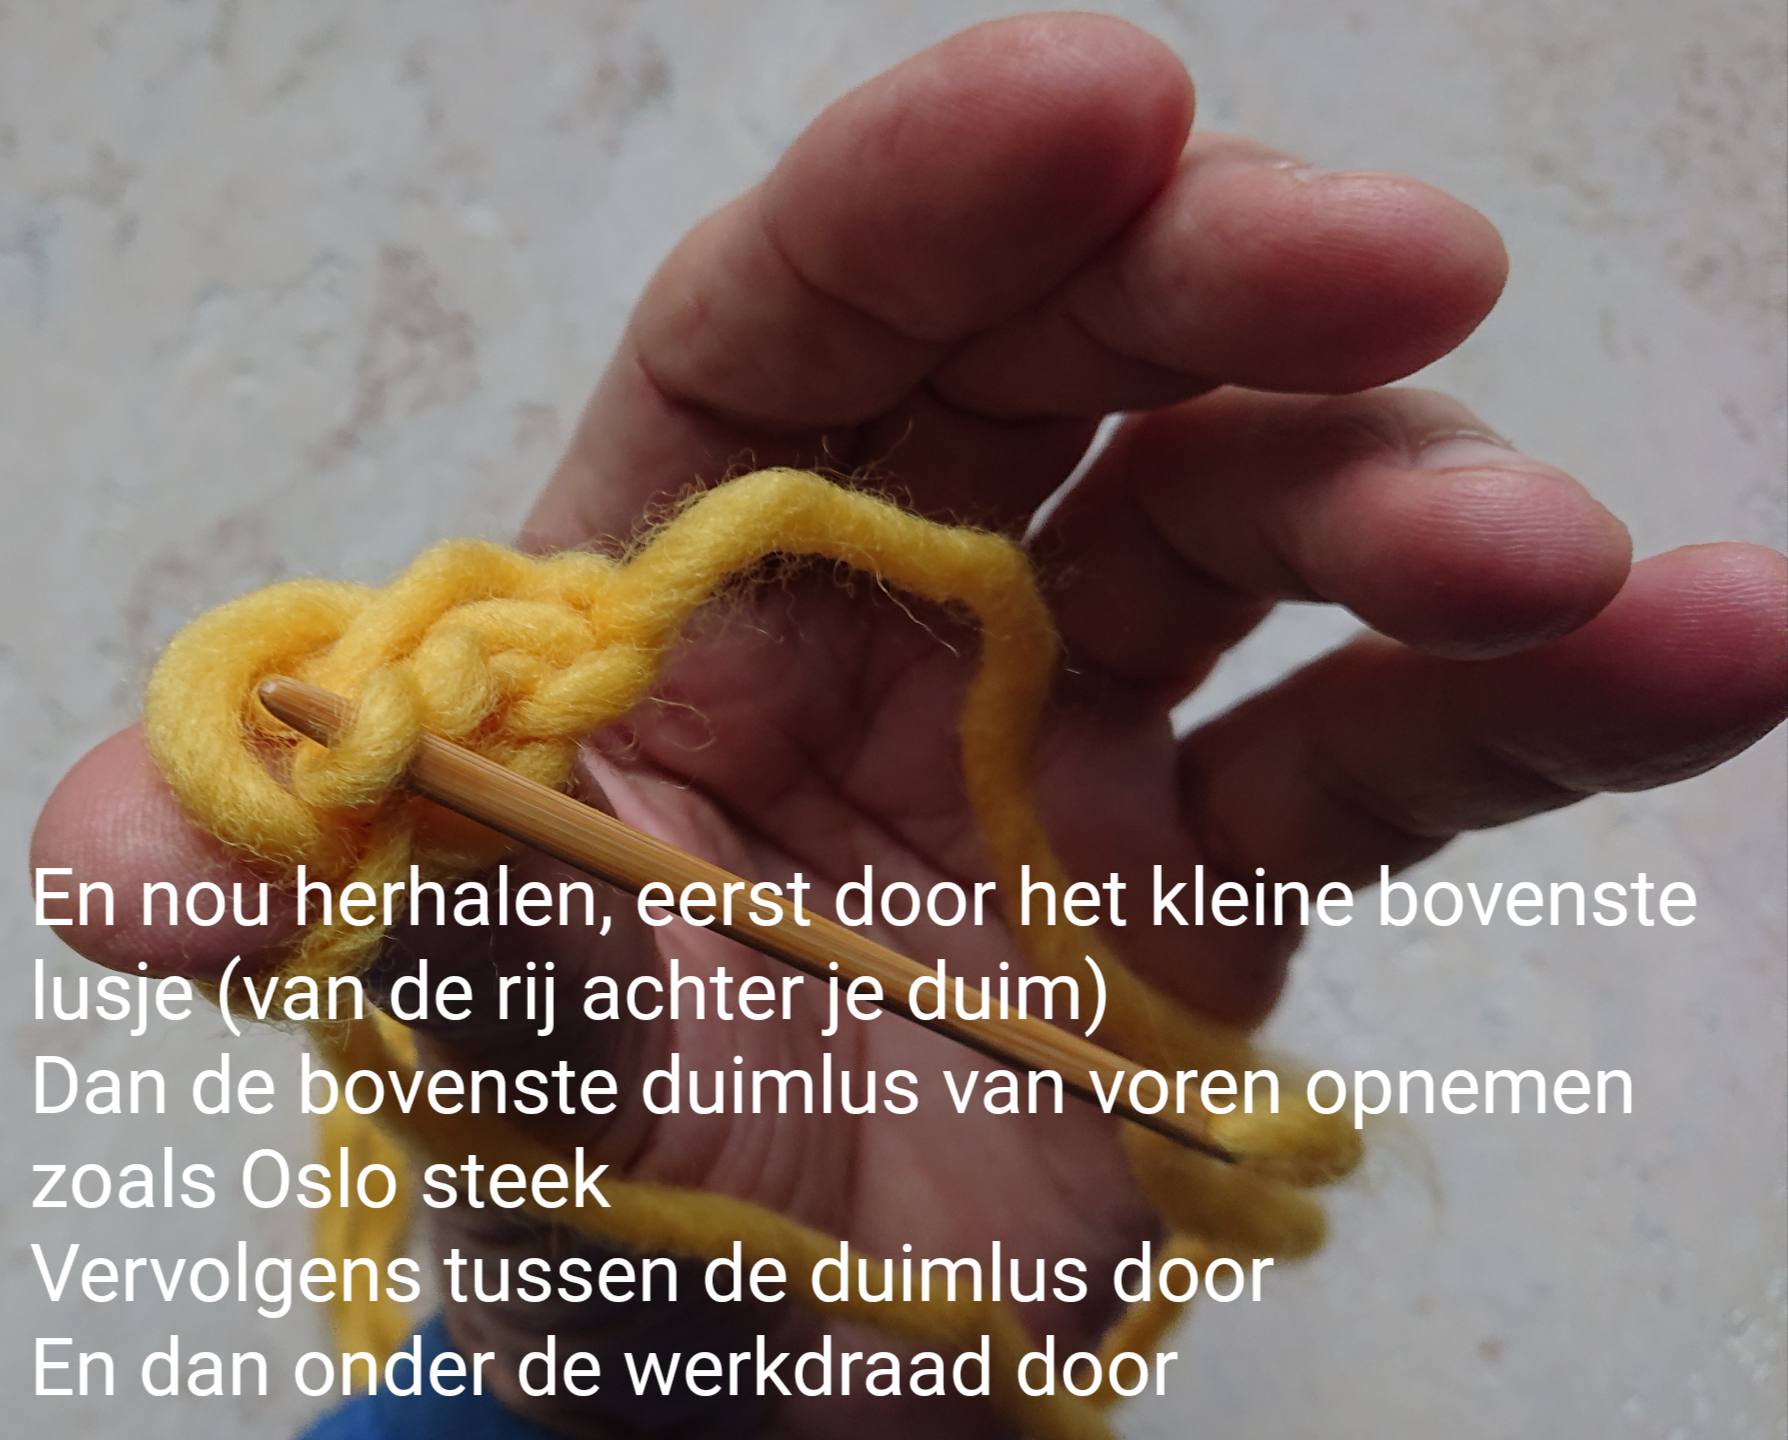
And now repeat first through the small loop (from behind your thumb), then pick up the top thumb loop from the front like the oslo stitch, then trough the thumb loop and under the working thread.
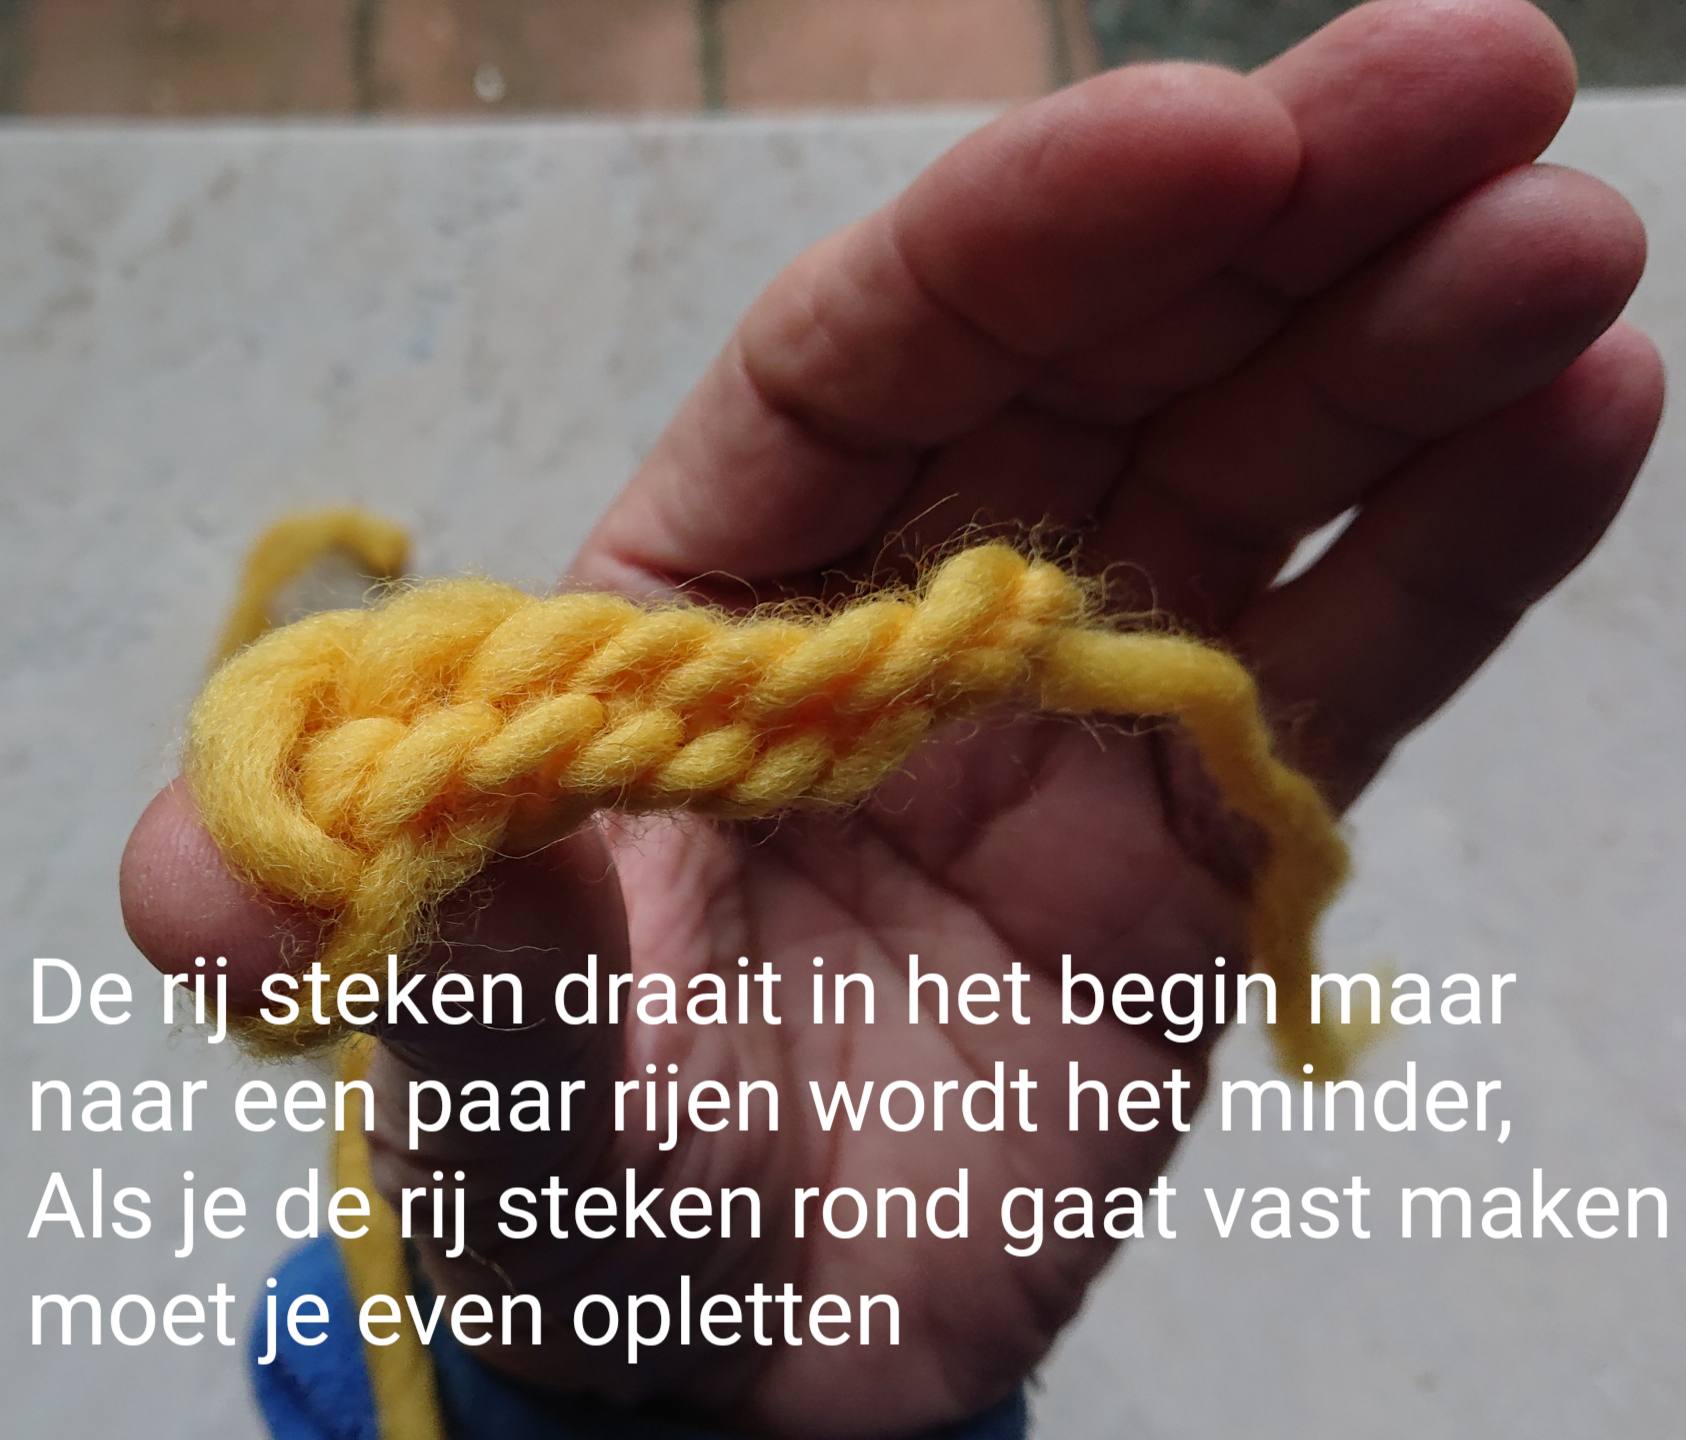
The row of stitches turns in the beginning but after a few rows it becomes less, if you are going to fasten the row of stitches around to you have to pay attention.
Today it is 13 july 2023 and i made a new YouTube video (number 30 ) called Oslo stitch and ………
I always forget to ask if you’d like to subscribe to my YouTube channel: happy needlebinding If I have a lot of subscribers, I can email magazines to write an article about this wonderful old craft so I can pass it on to the next generation.
Thank you kindly in advance. bert veugelers.
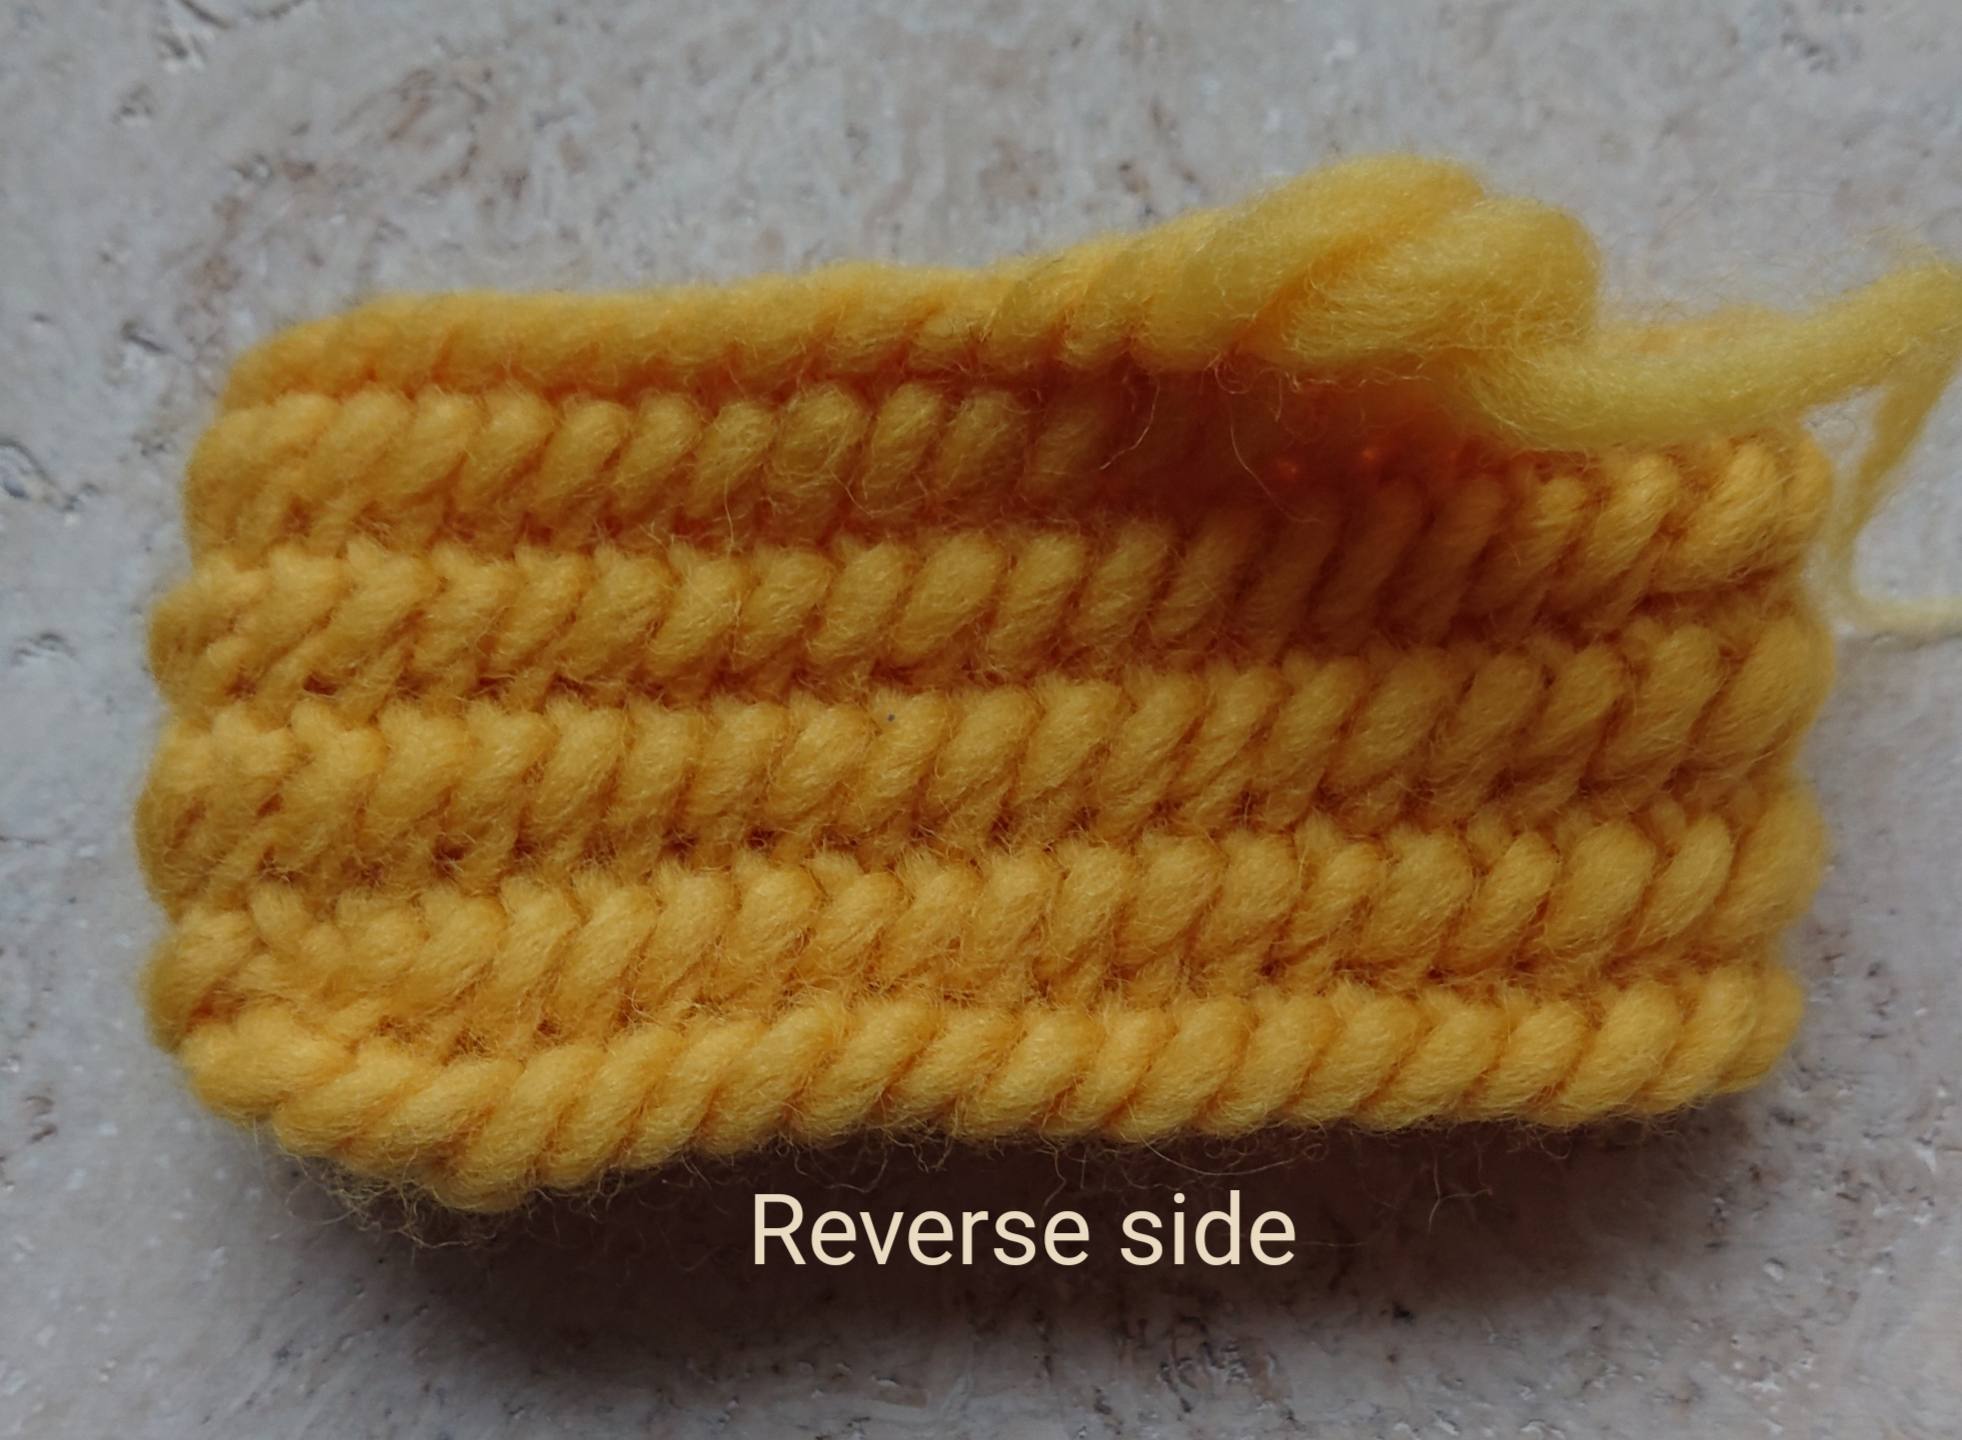
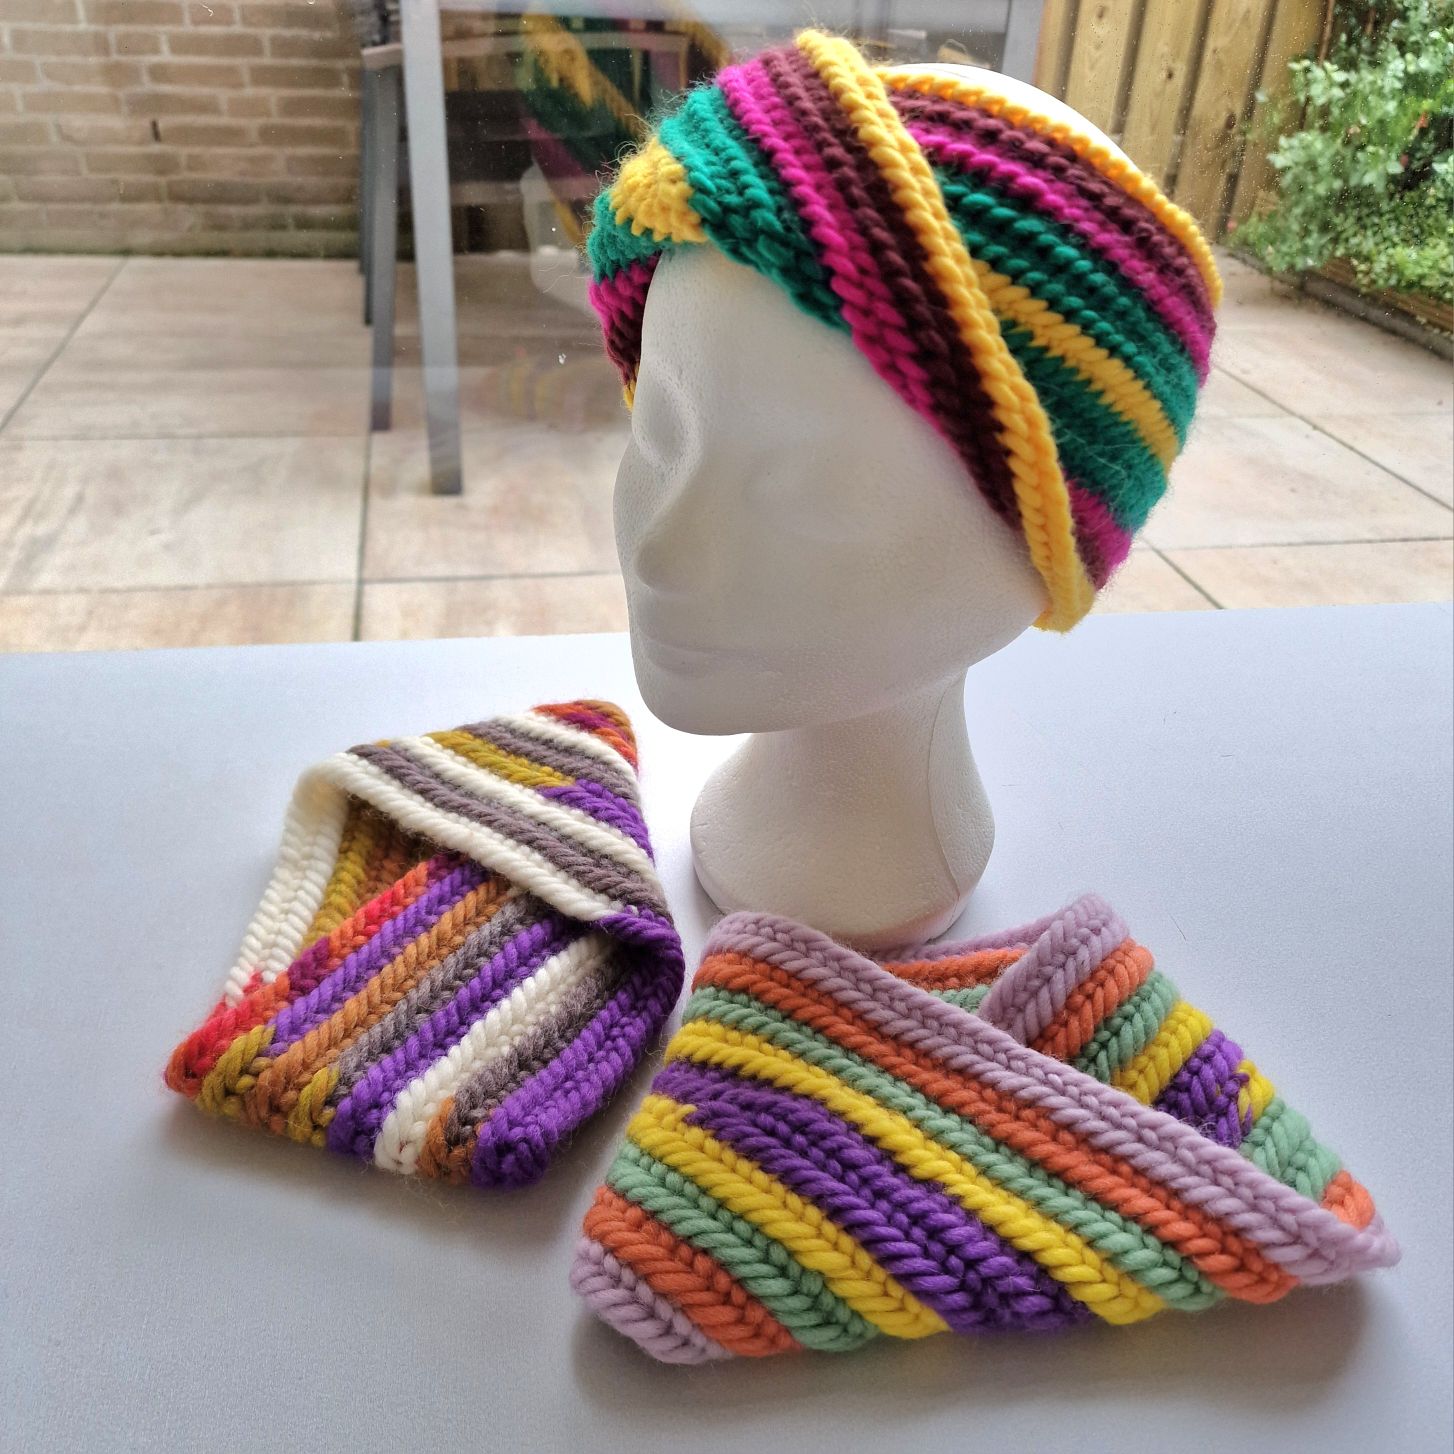
The happy colors hat is made with the easy åsle variation F1.
Arboga stitch.
reverse side.
With the arboga stitch you start just like the start of the åsle stitch.
When you have 1 loop around and 1 loop behind your thumb.
The needle goes behind your thumb pick up the small loop behind thumb turn needle clockwise and the other thumb loop in front.
Both loops on your needle goes through thumbloop and under the working yarn.
front side
The arboga stitch is a nice, dense and compact fabric looks like knitting but than of course stronger.
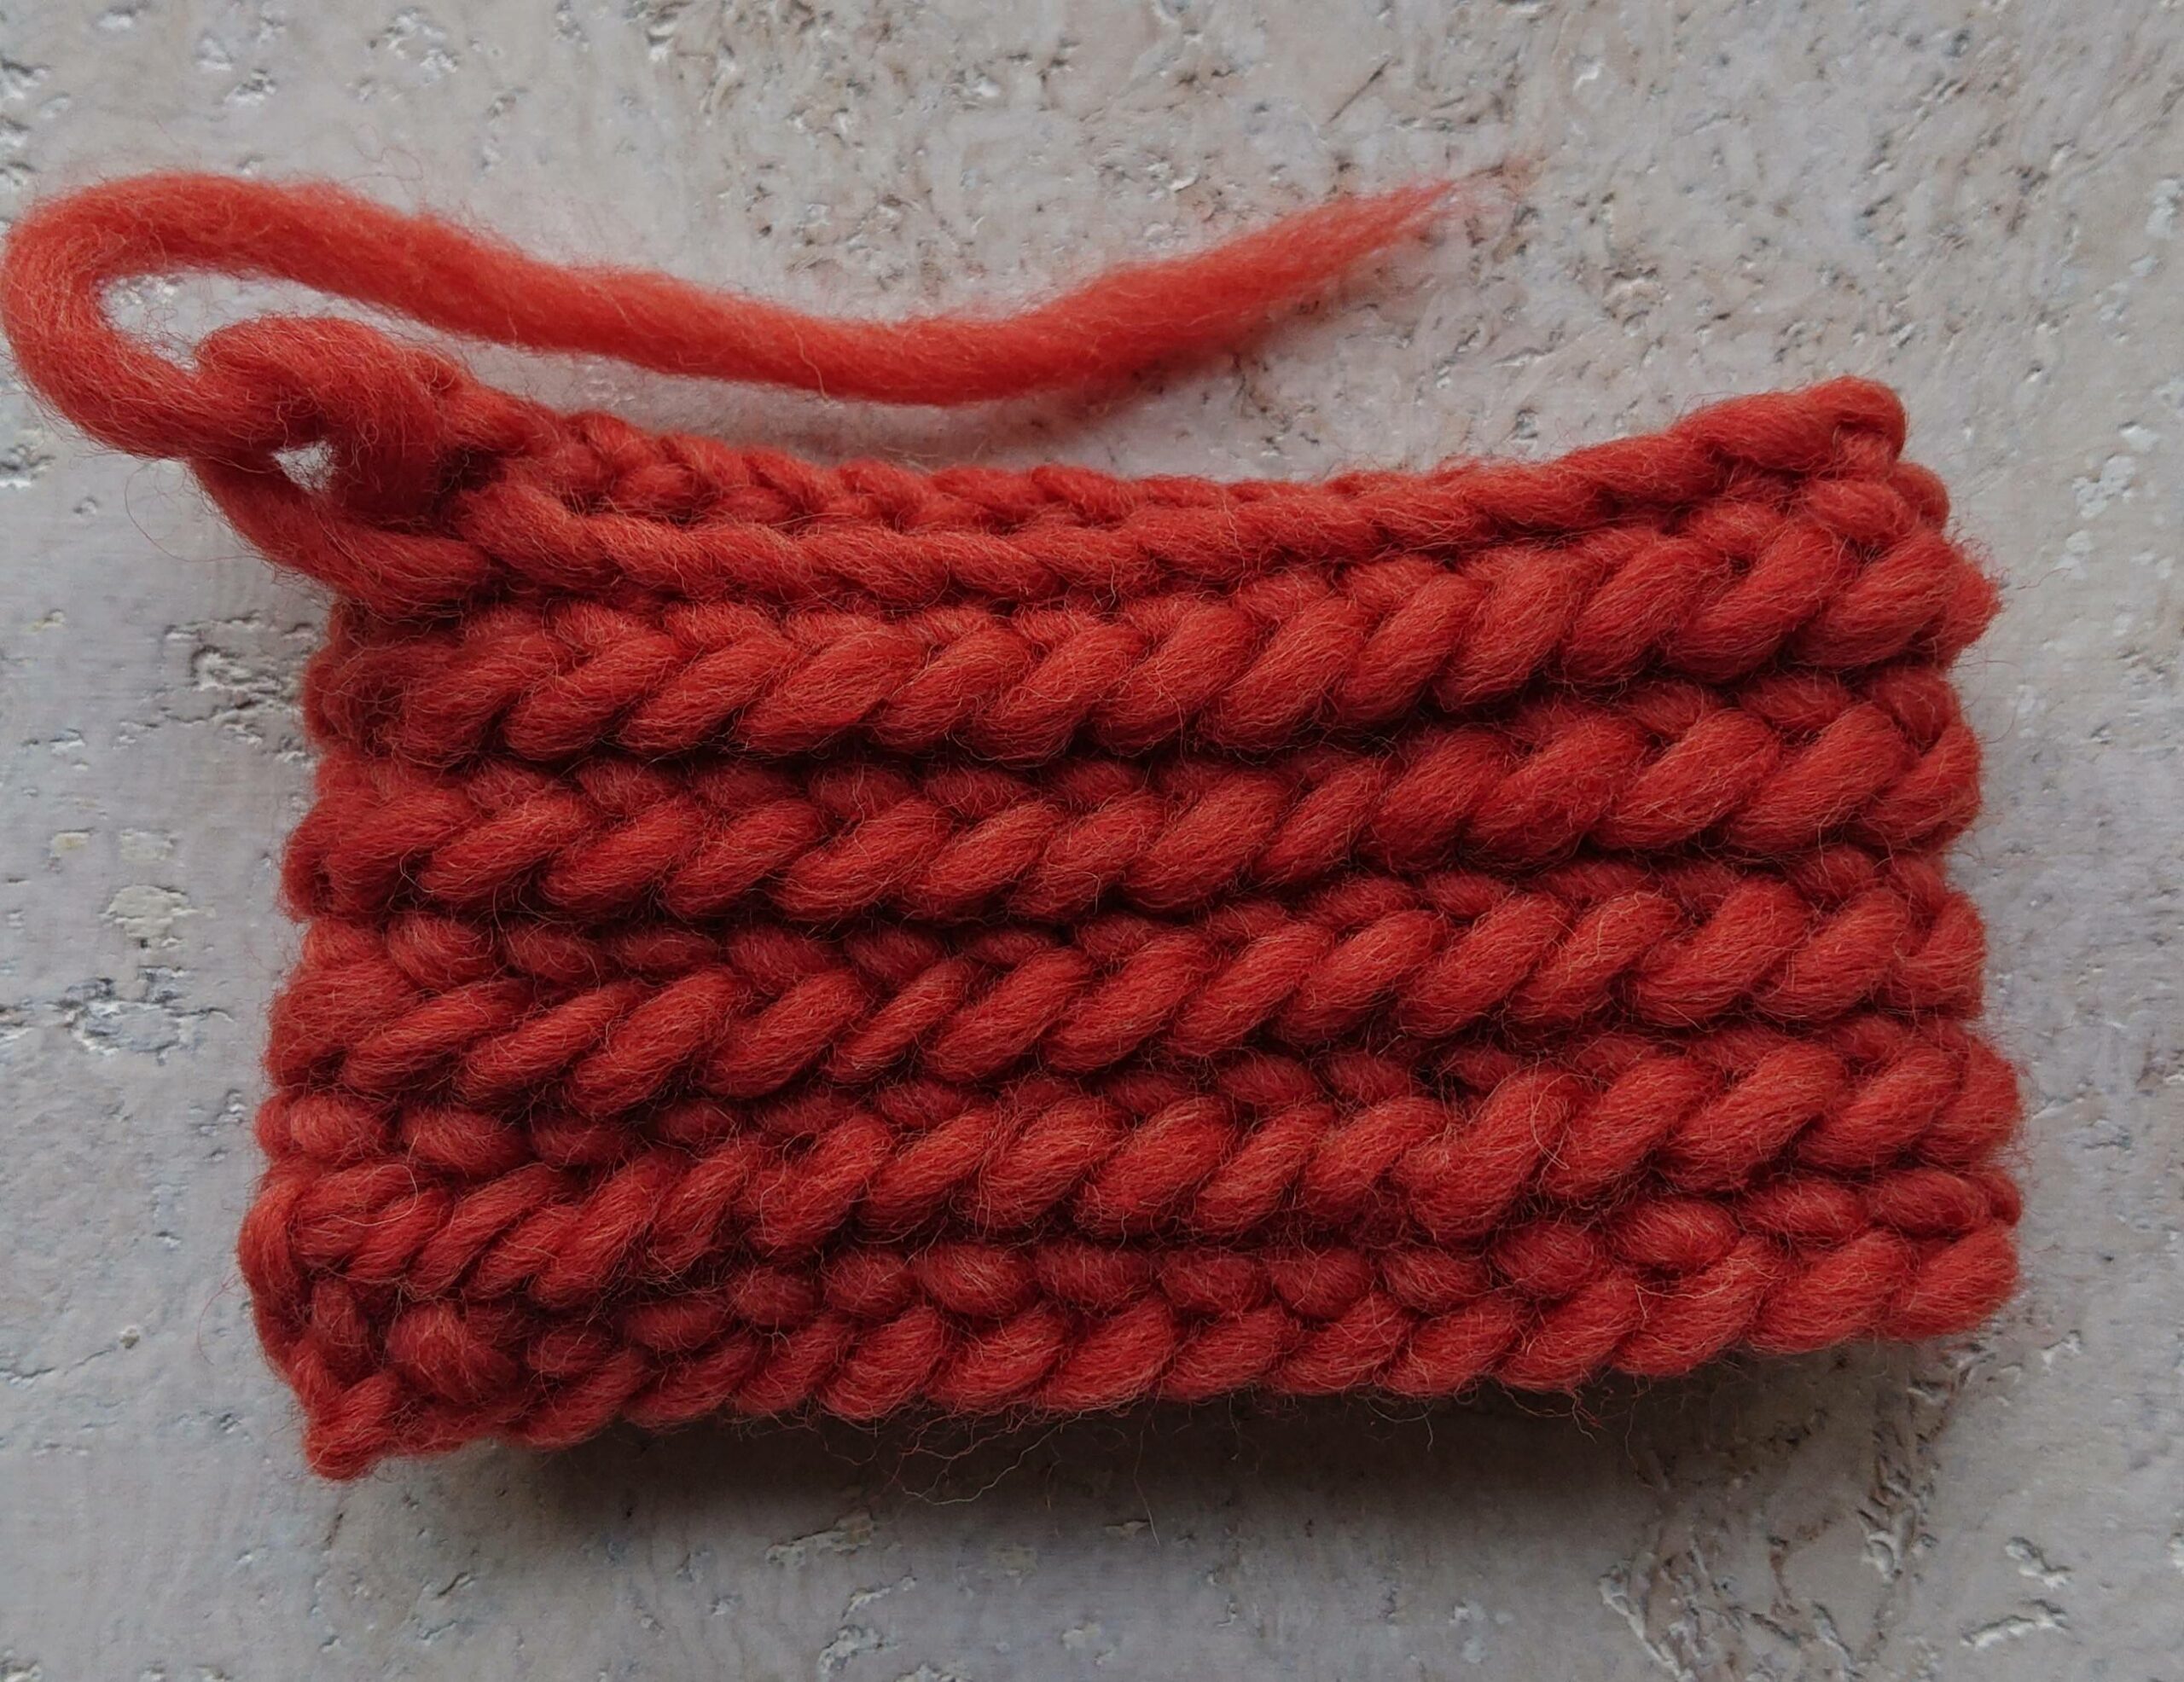
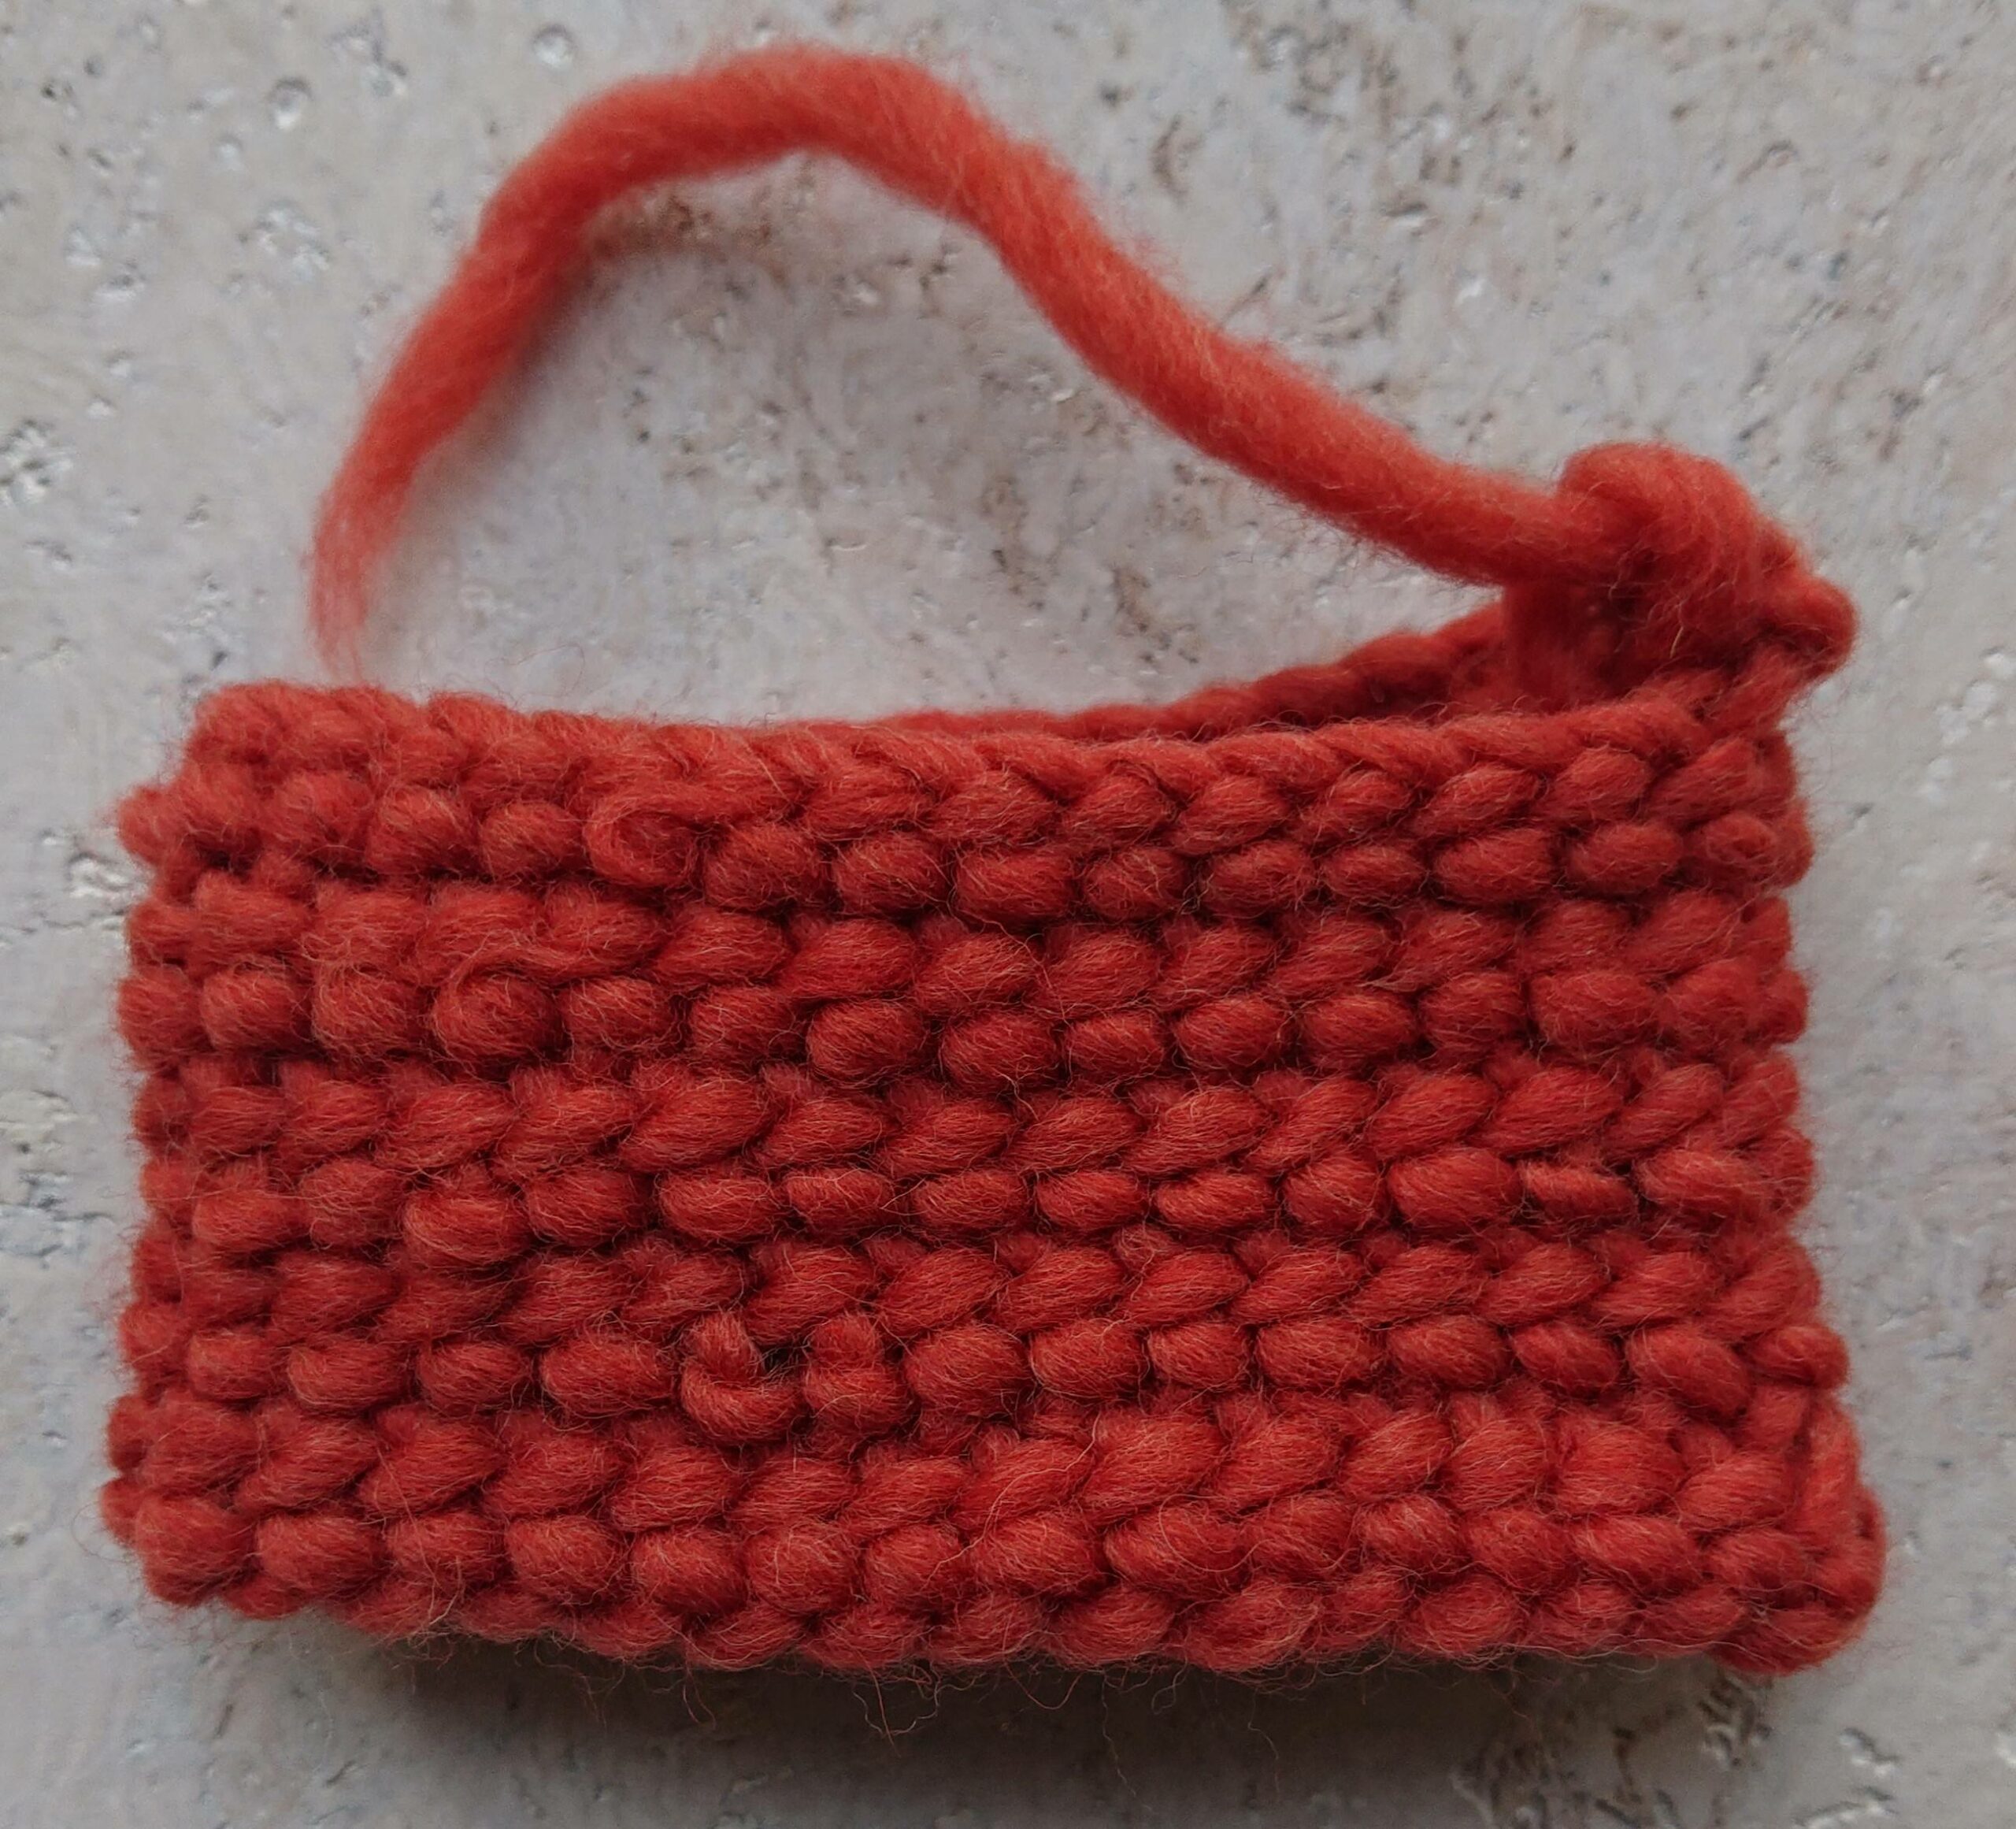
Björsbo stitch.
reverse side
The björsbo stitch is almost the same as the oslo stitch.
You start with a loop around and behind your thumb.
Instead of going Under the working yarn when you ending your stitch, you go Over the working yarn with your needle. It is a nice variation of the Oslo stich .
front side
The björsbo stitch has a loose and flexible fabric like the arboga stitch and is very fast to needlebind, no extra loop to pick up behind your thumb.
This fabric is a little denser then the oslo stitch.
ArBo stitch.
When i was discovering some stitches i thaught why not mix or combine some stitches? Needlebinding is using imagination and creativity and to discover new stitch combinations. I start with the arboga stitch and at the end of the stitch i go not Under the working thread but i go Over the working thread at the end of the stitch.
reverse side
My new invented stitch called: ArBo stitch it is an combination of the Arboga and the Björsbo stitch.
front side
The ArBo stitch is a flat almost woven fabric it is denser then the björsbo stitch and wider then the arboga stitch. I am very happy with this ”New” stitch, probably it has already invented in the past and maybe it has also a name………….
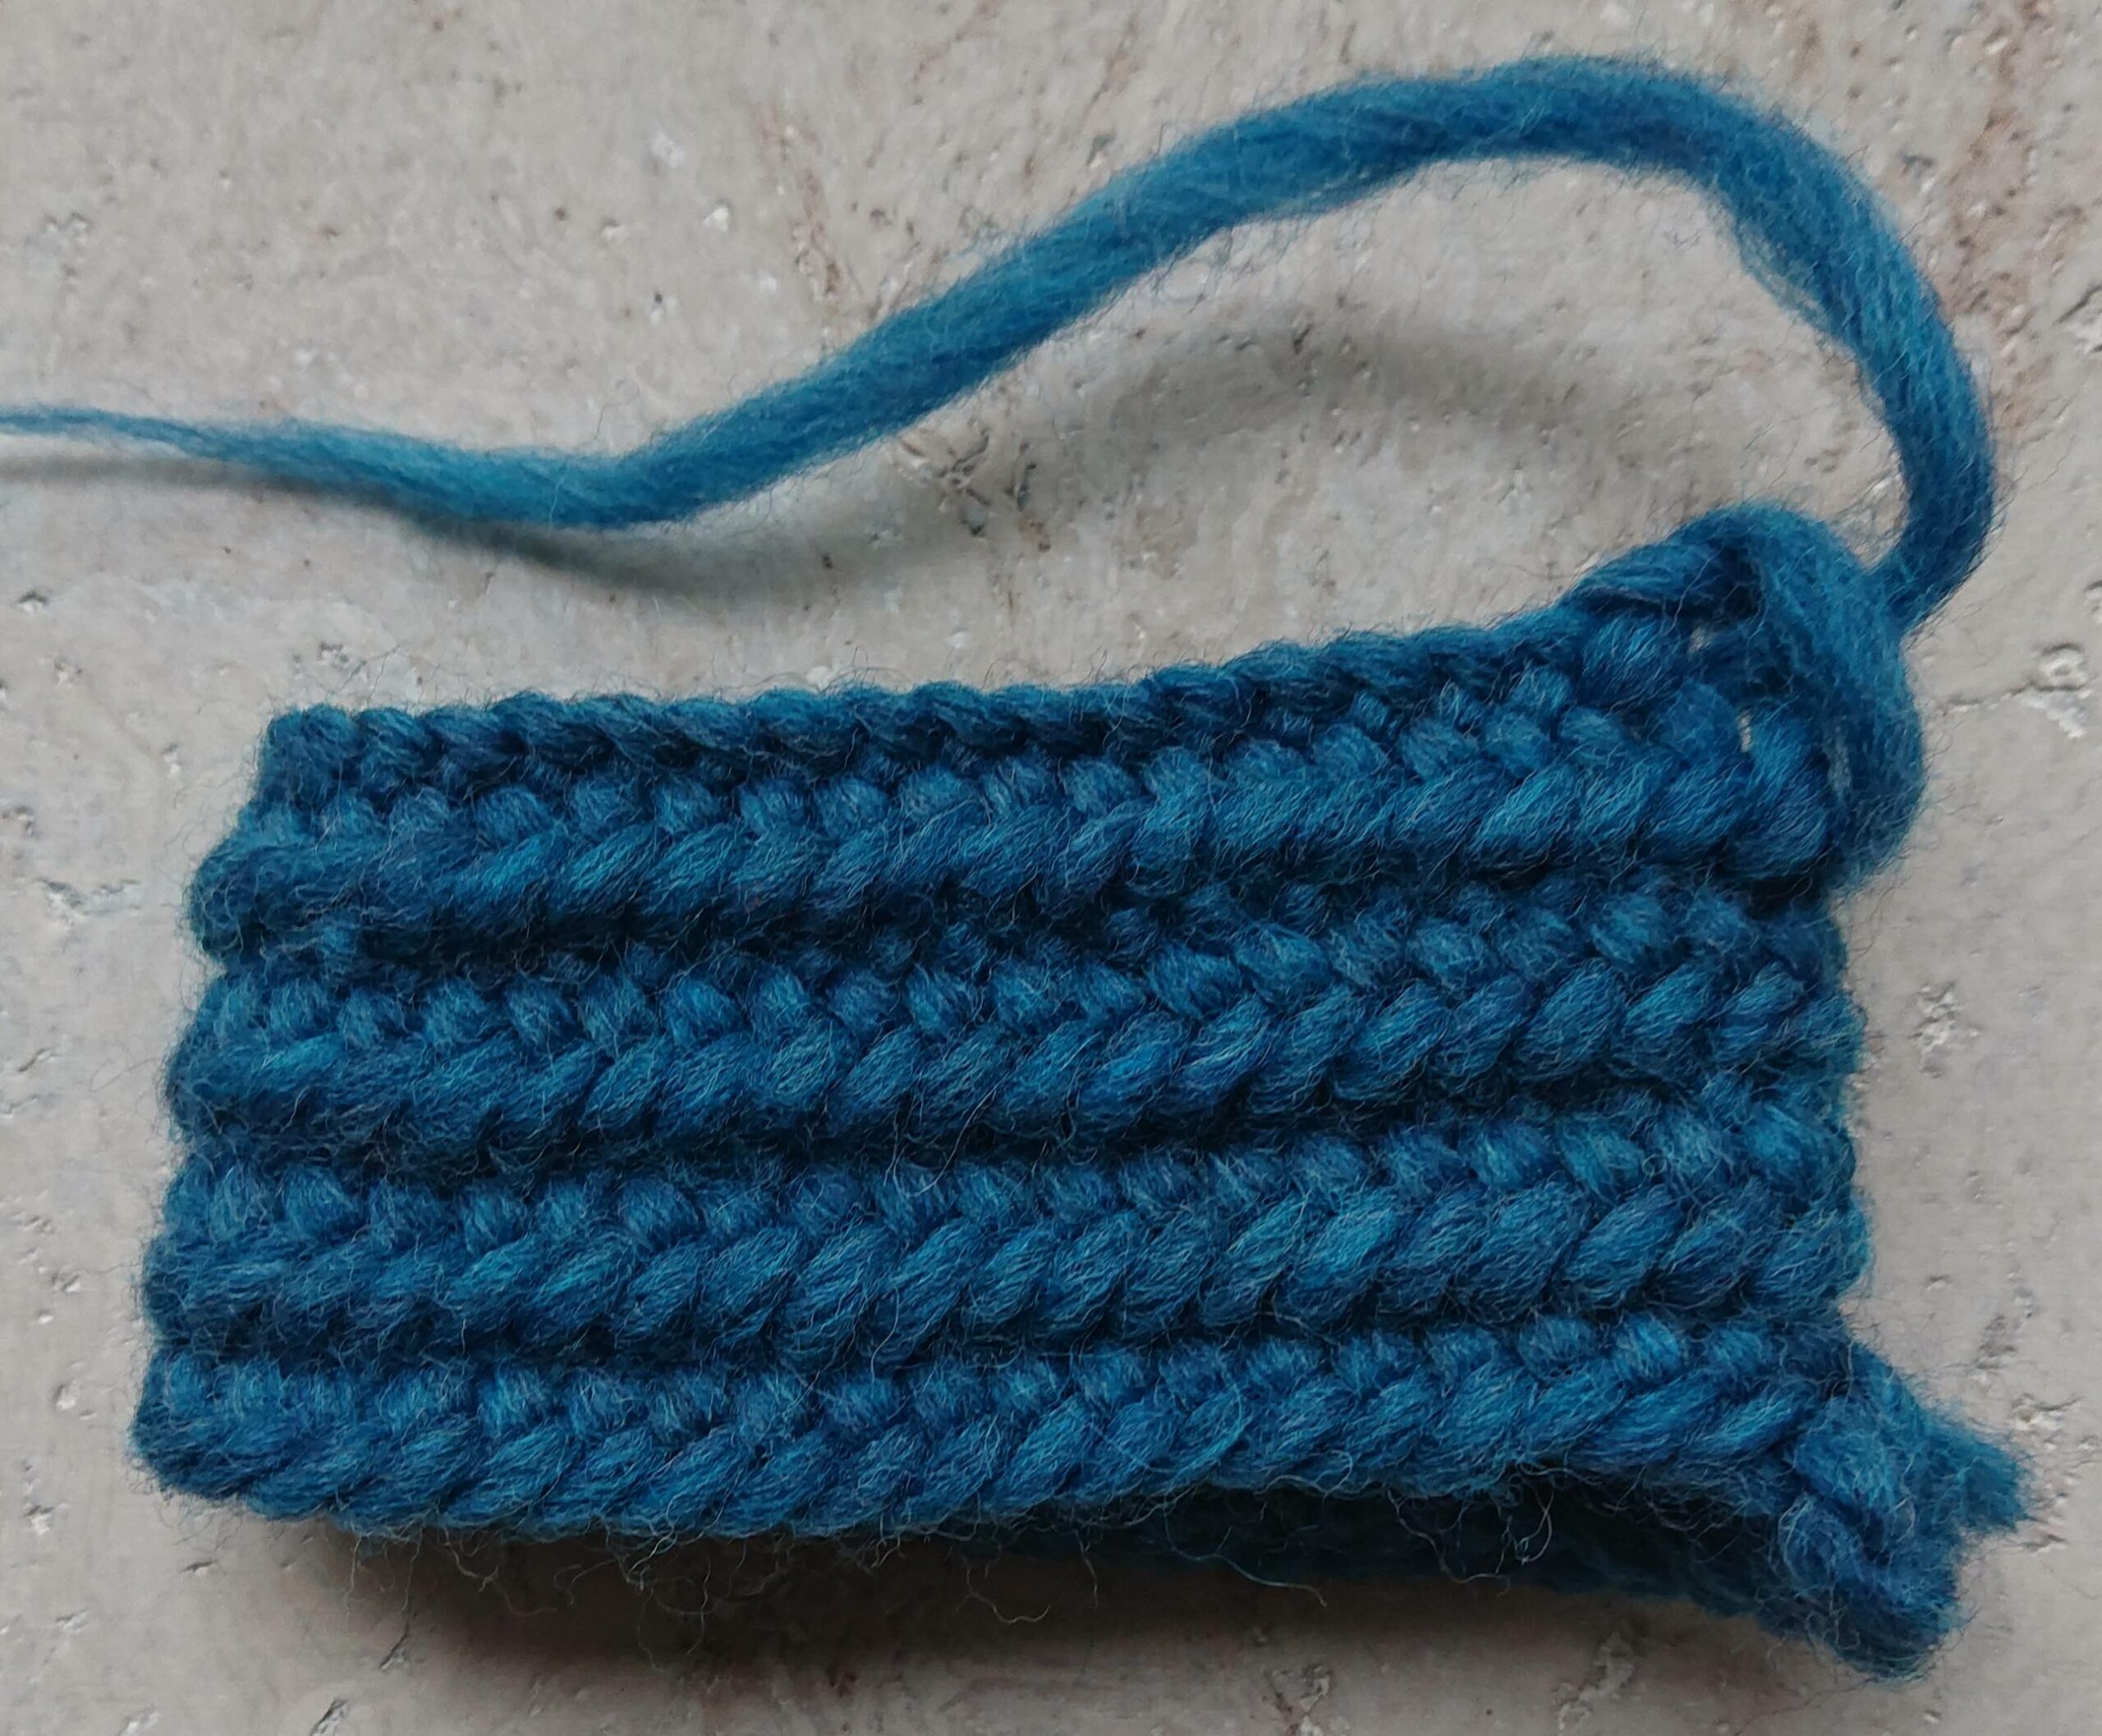
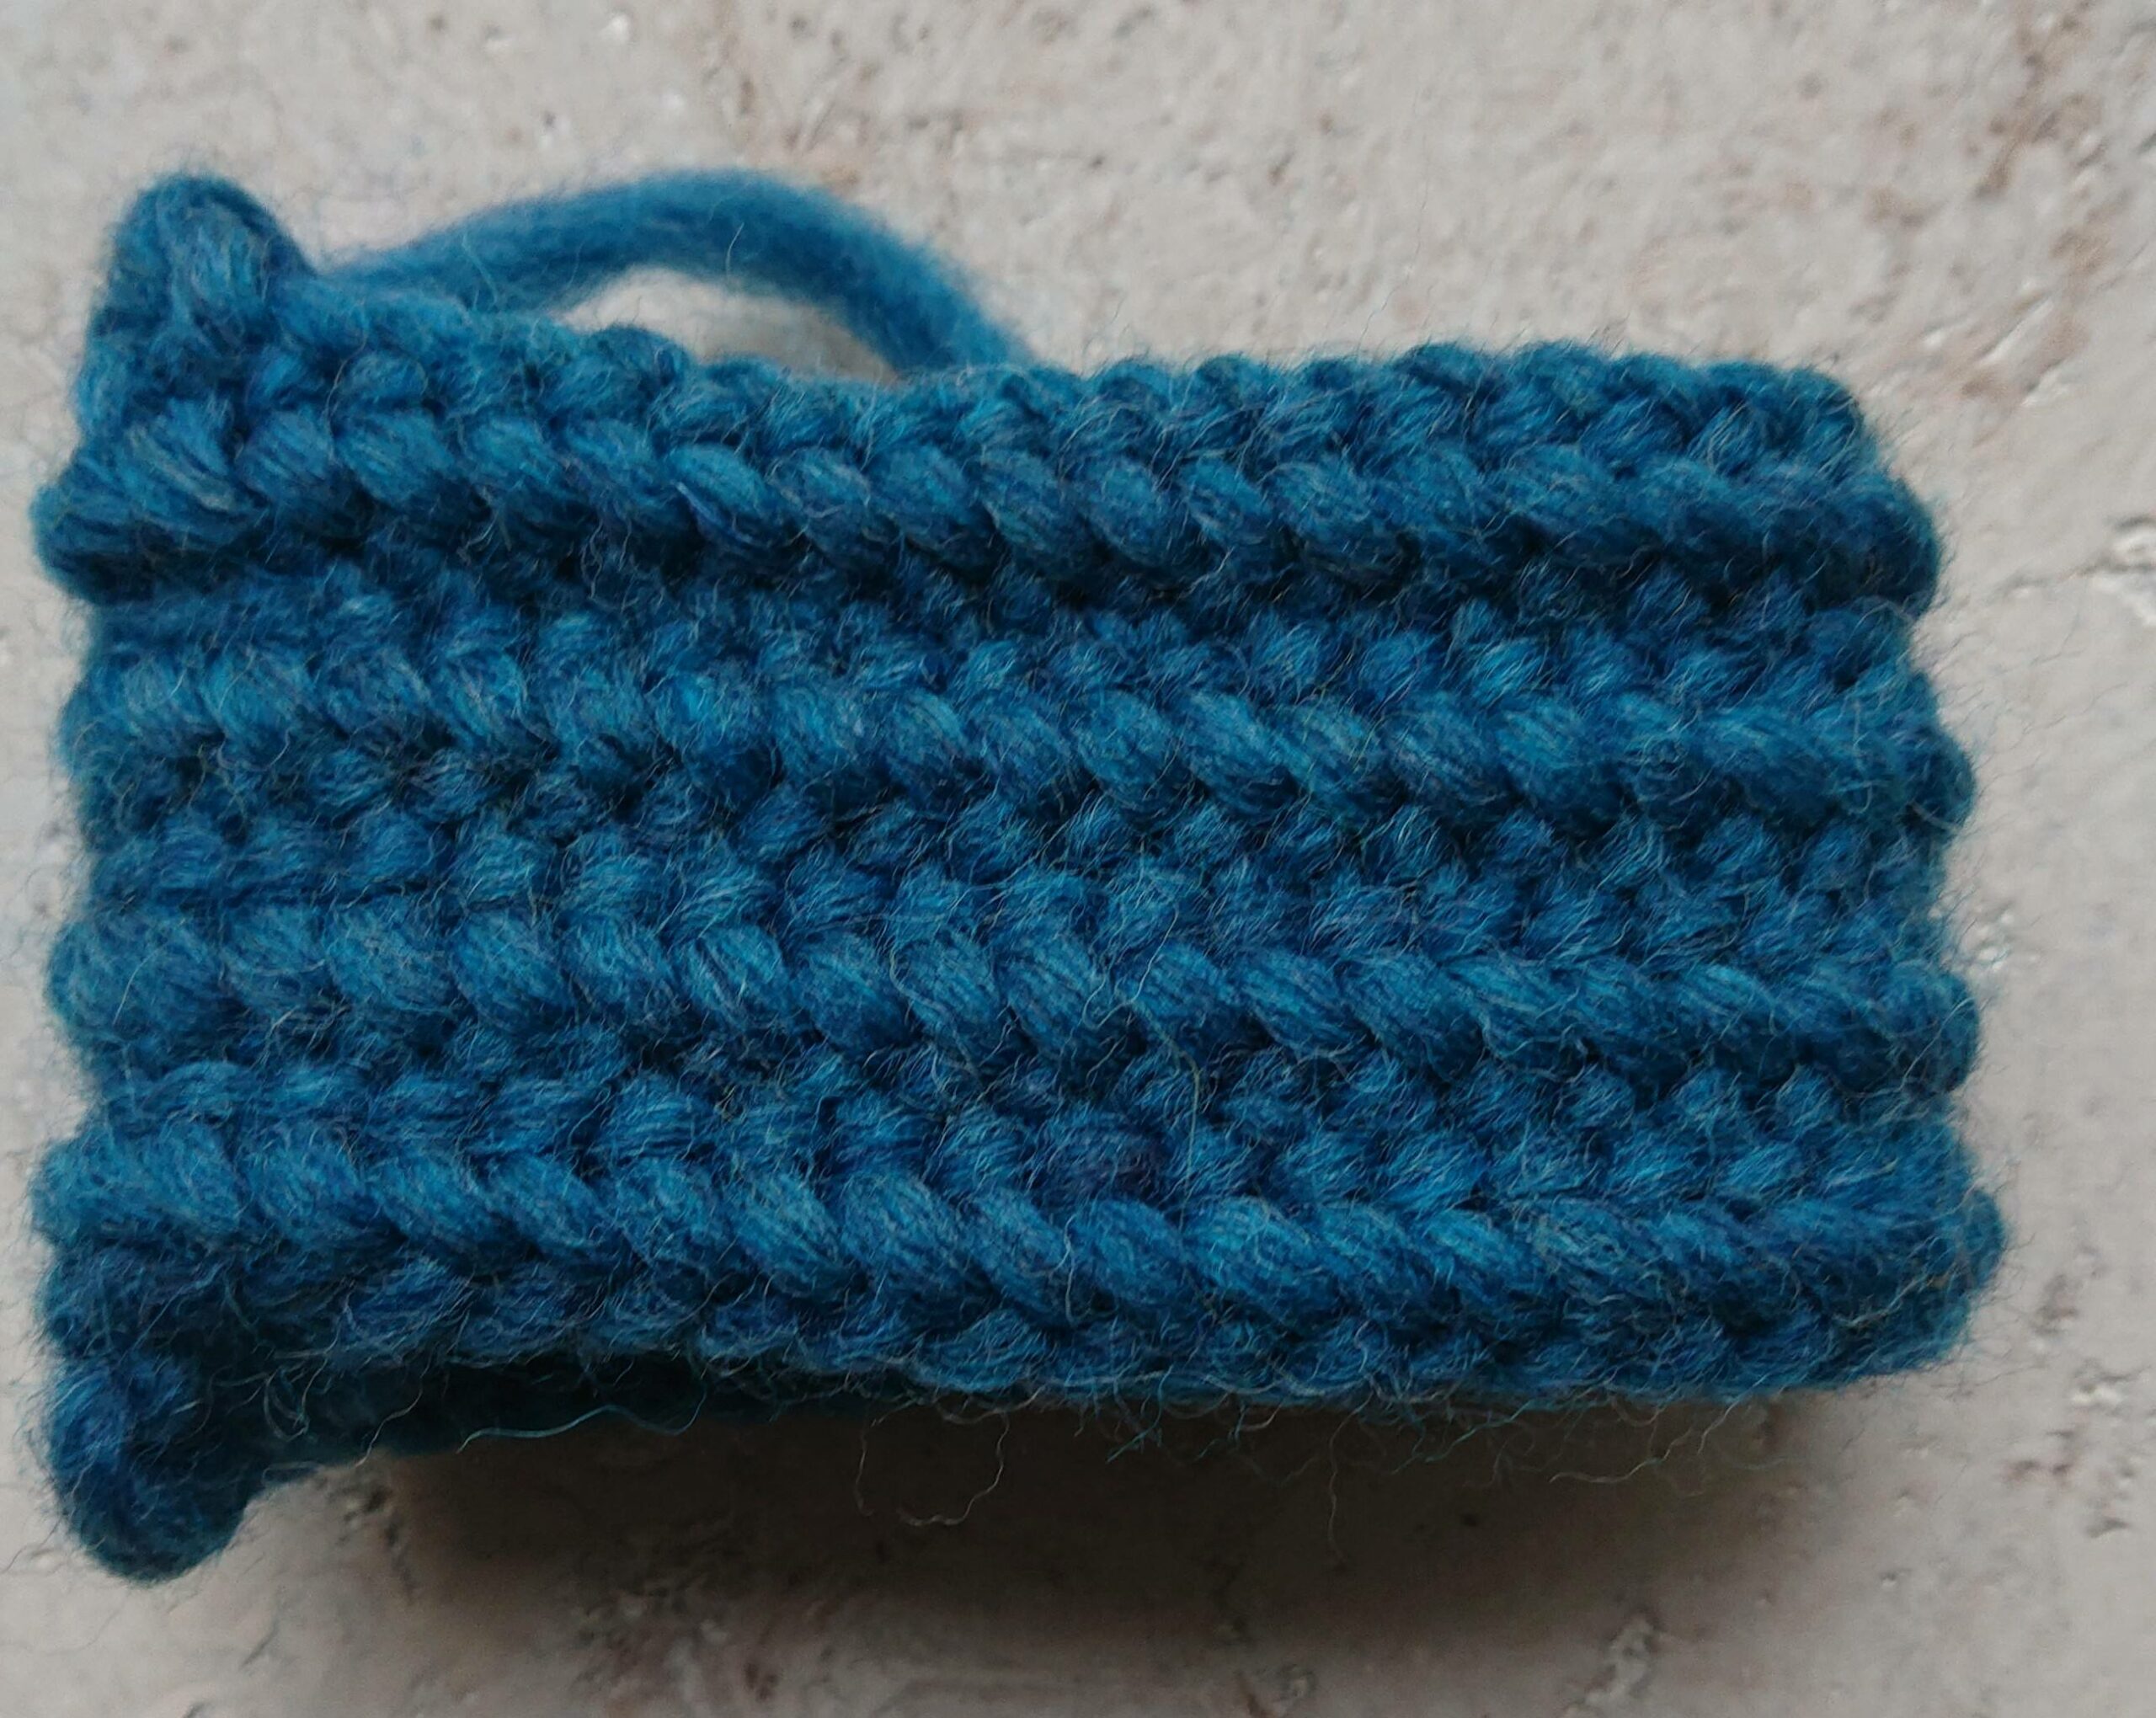
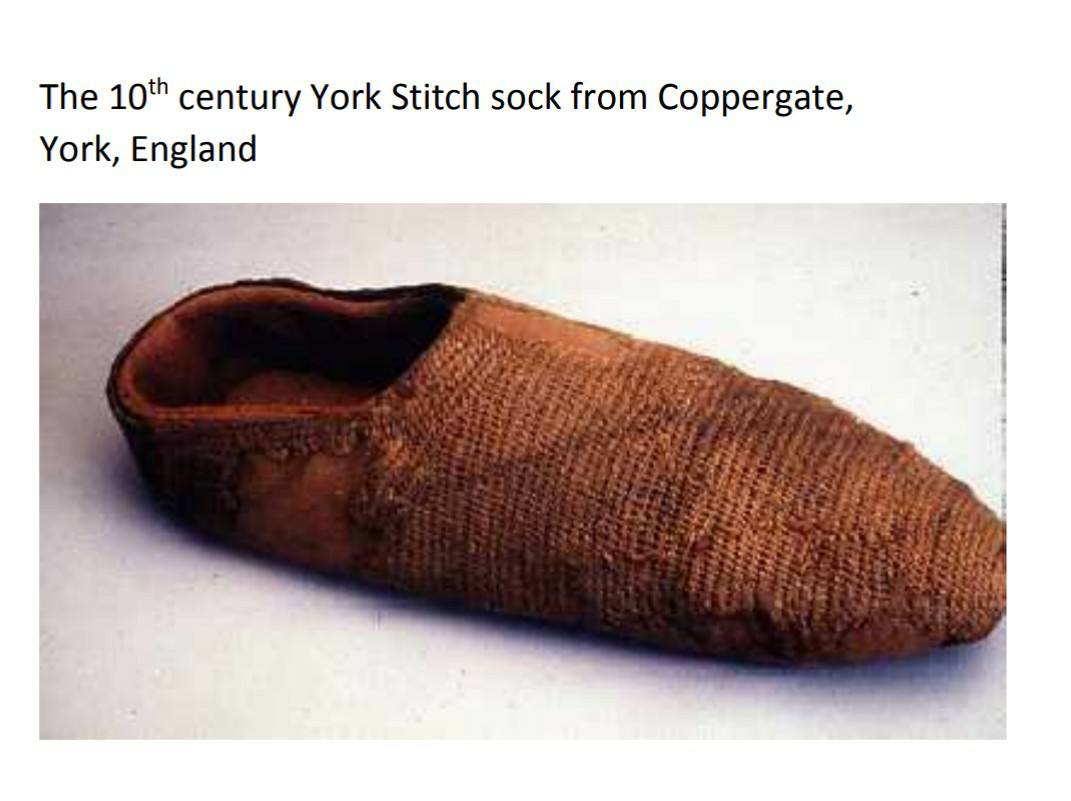
York or Coppergate stitch.
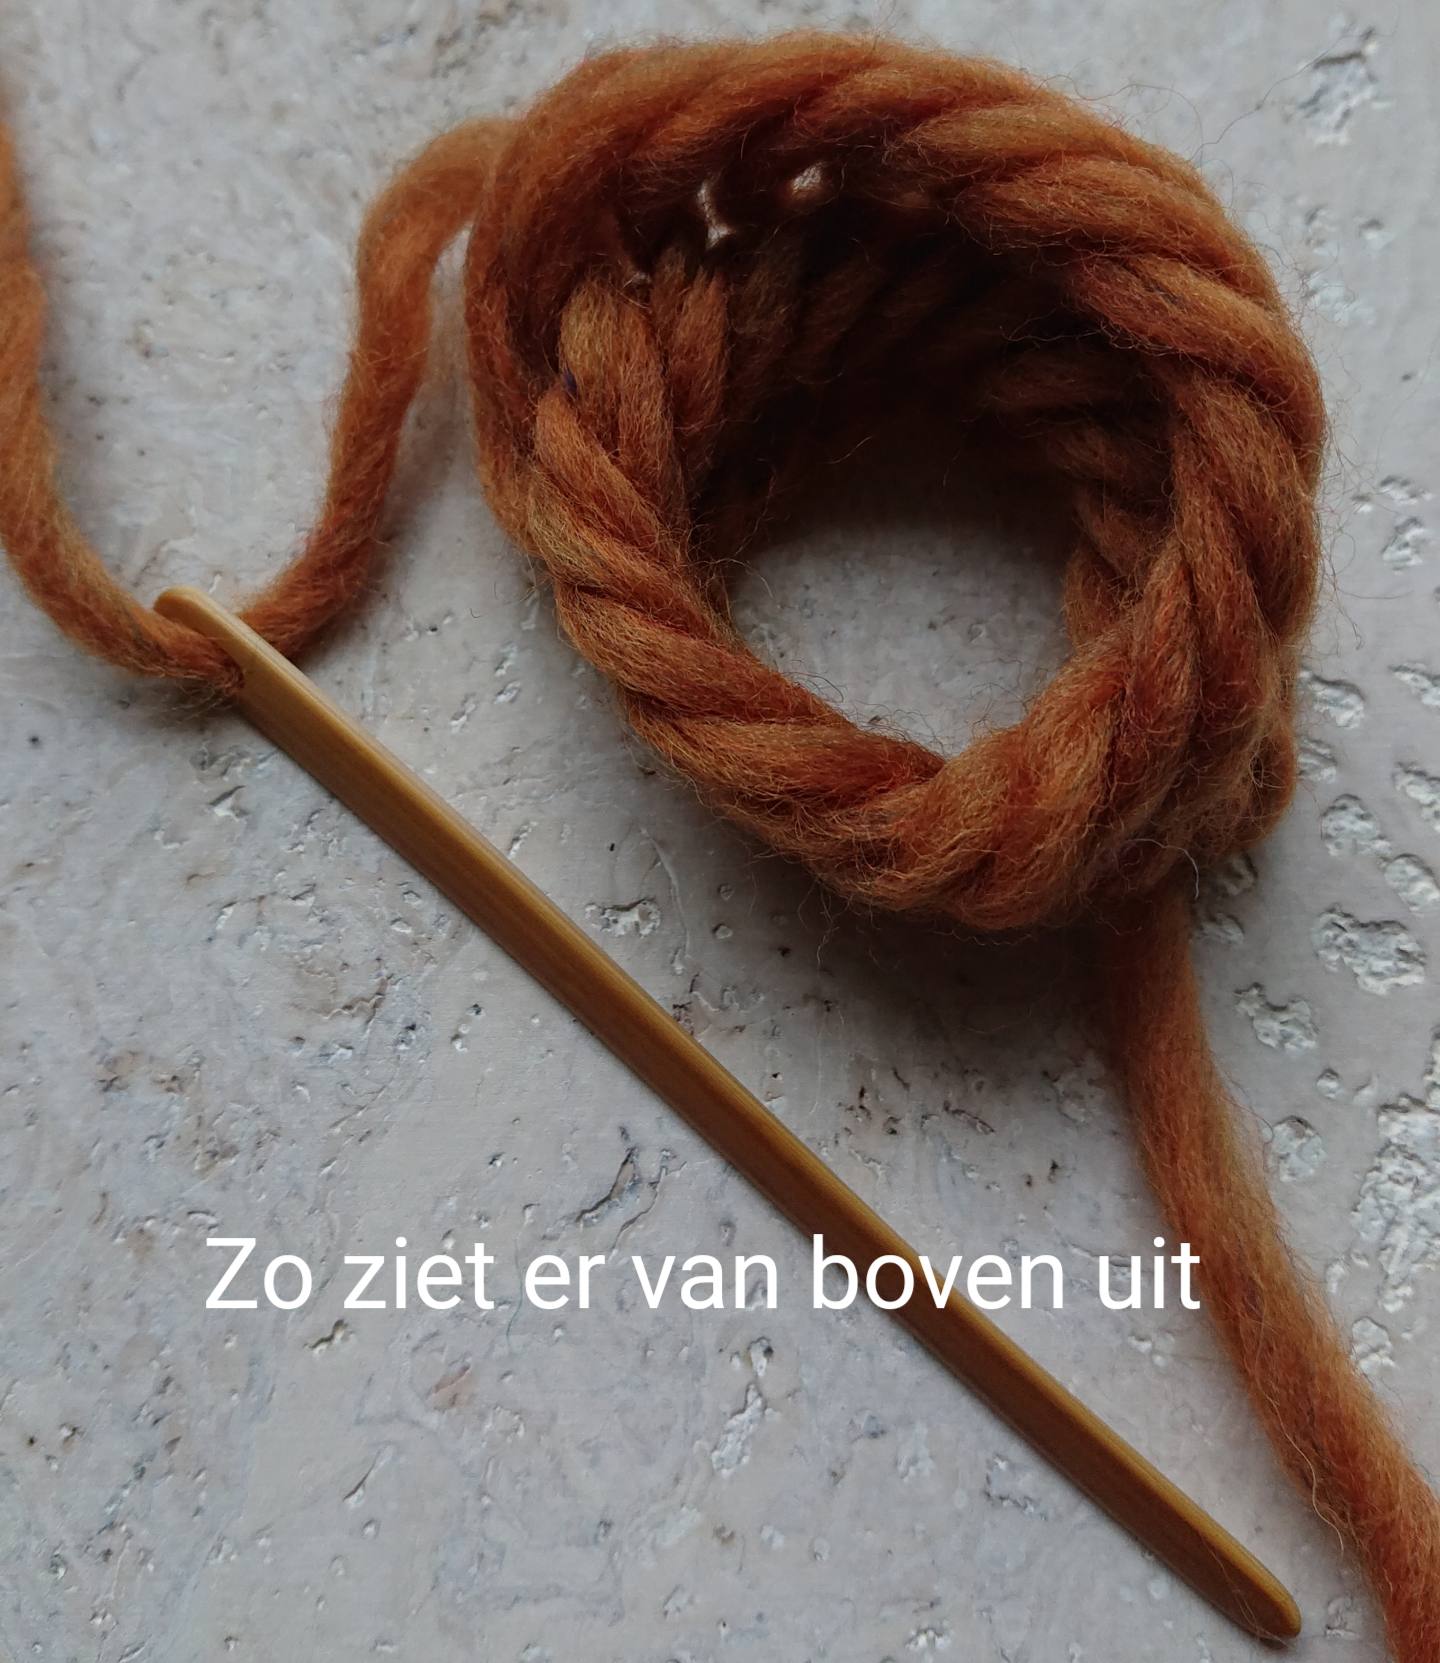
You start with a pretsel knot around the thumb and the thick part of knot behind your thumb .
The needle passes between the knot and the thumb and under the working thread.
Here you see how it looks behind your thumb.
There are now 2 loops around your thumb.
The upper loop of the thumb is gently pussed over the thumb.
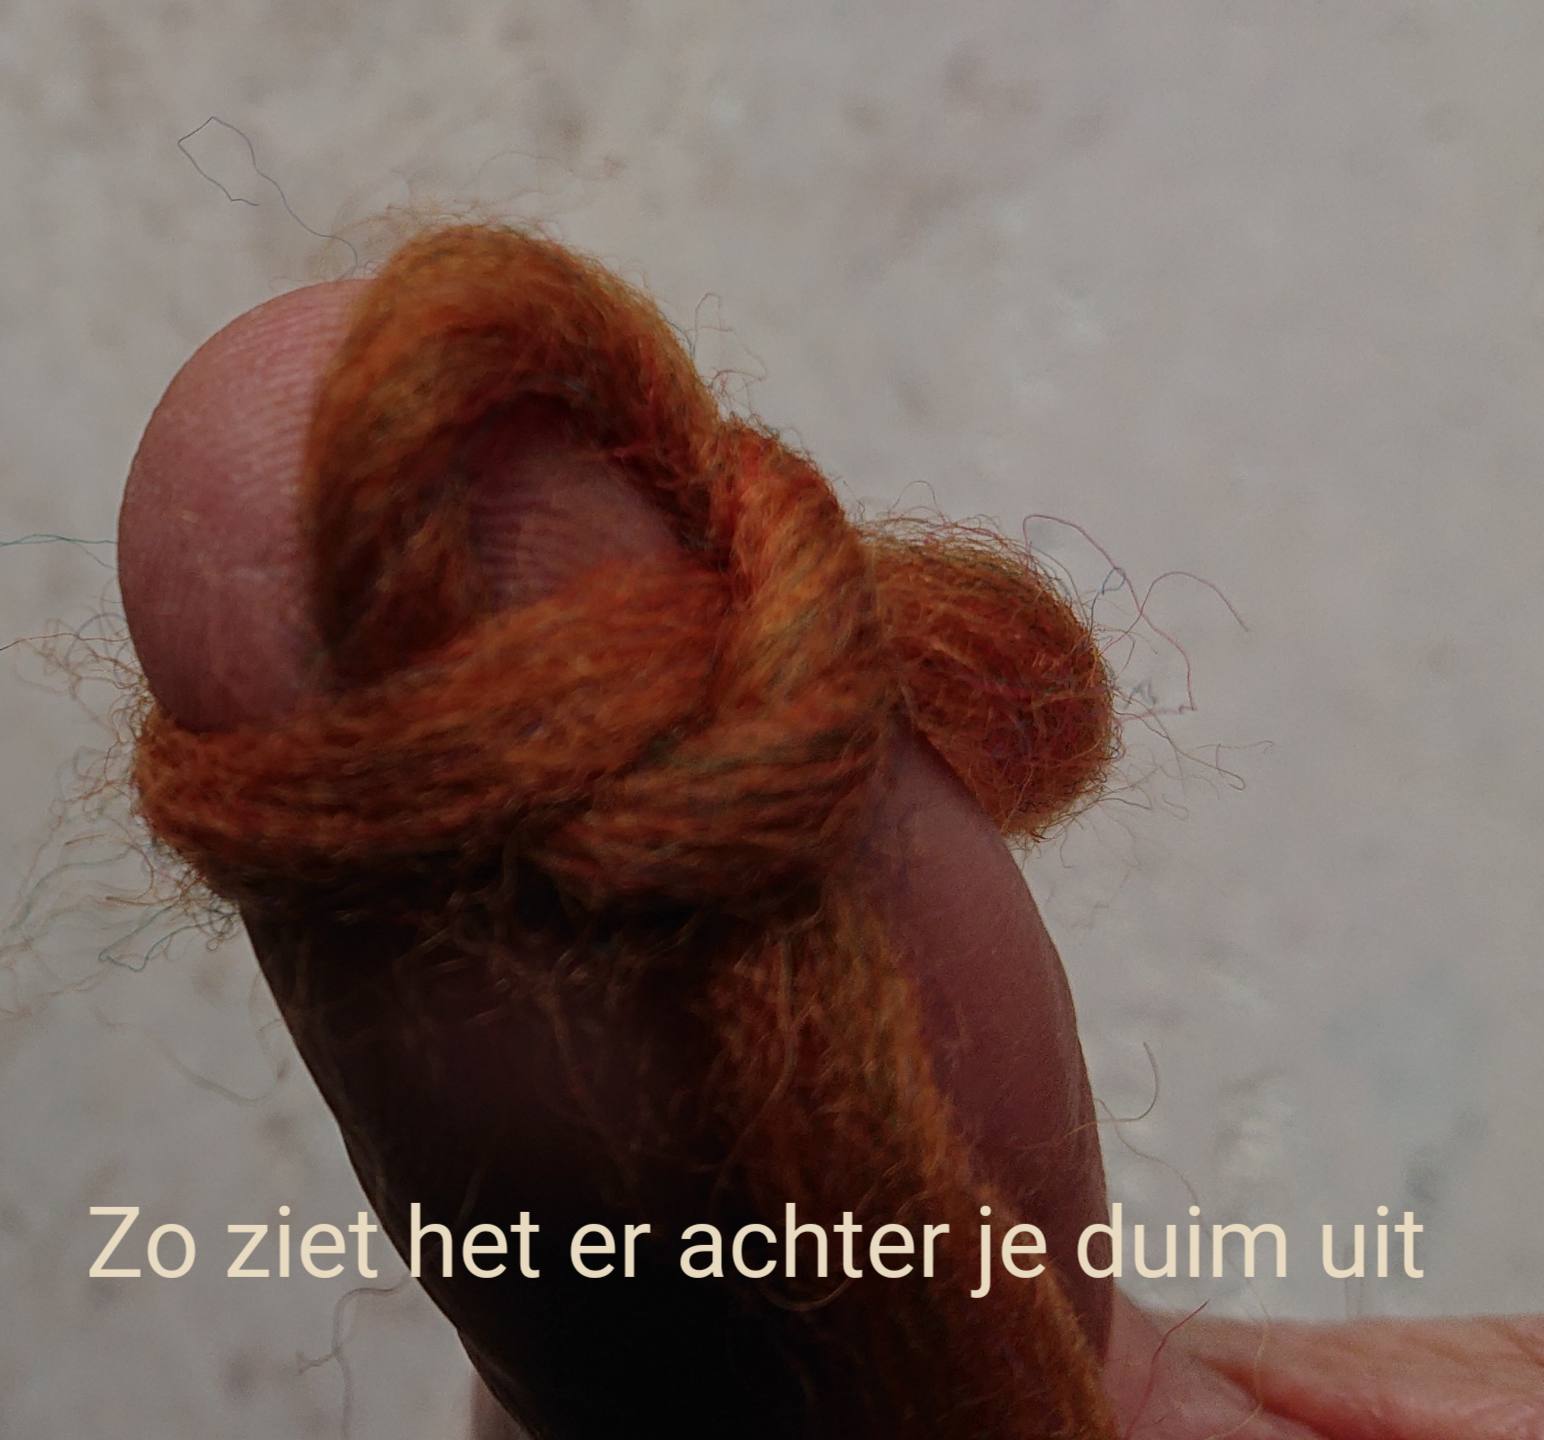
Here you see how it looks behind your thumb.
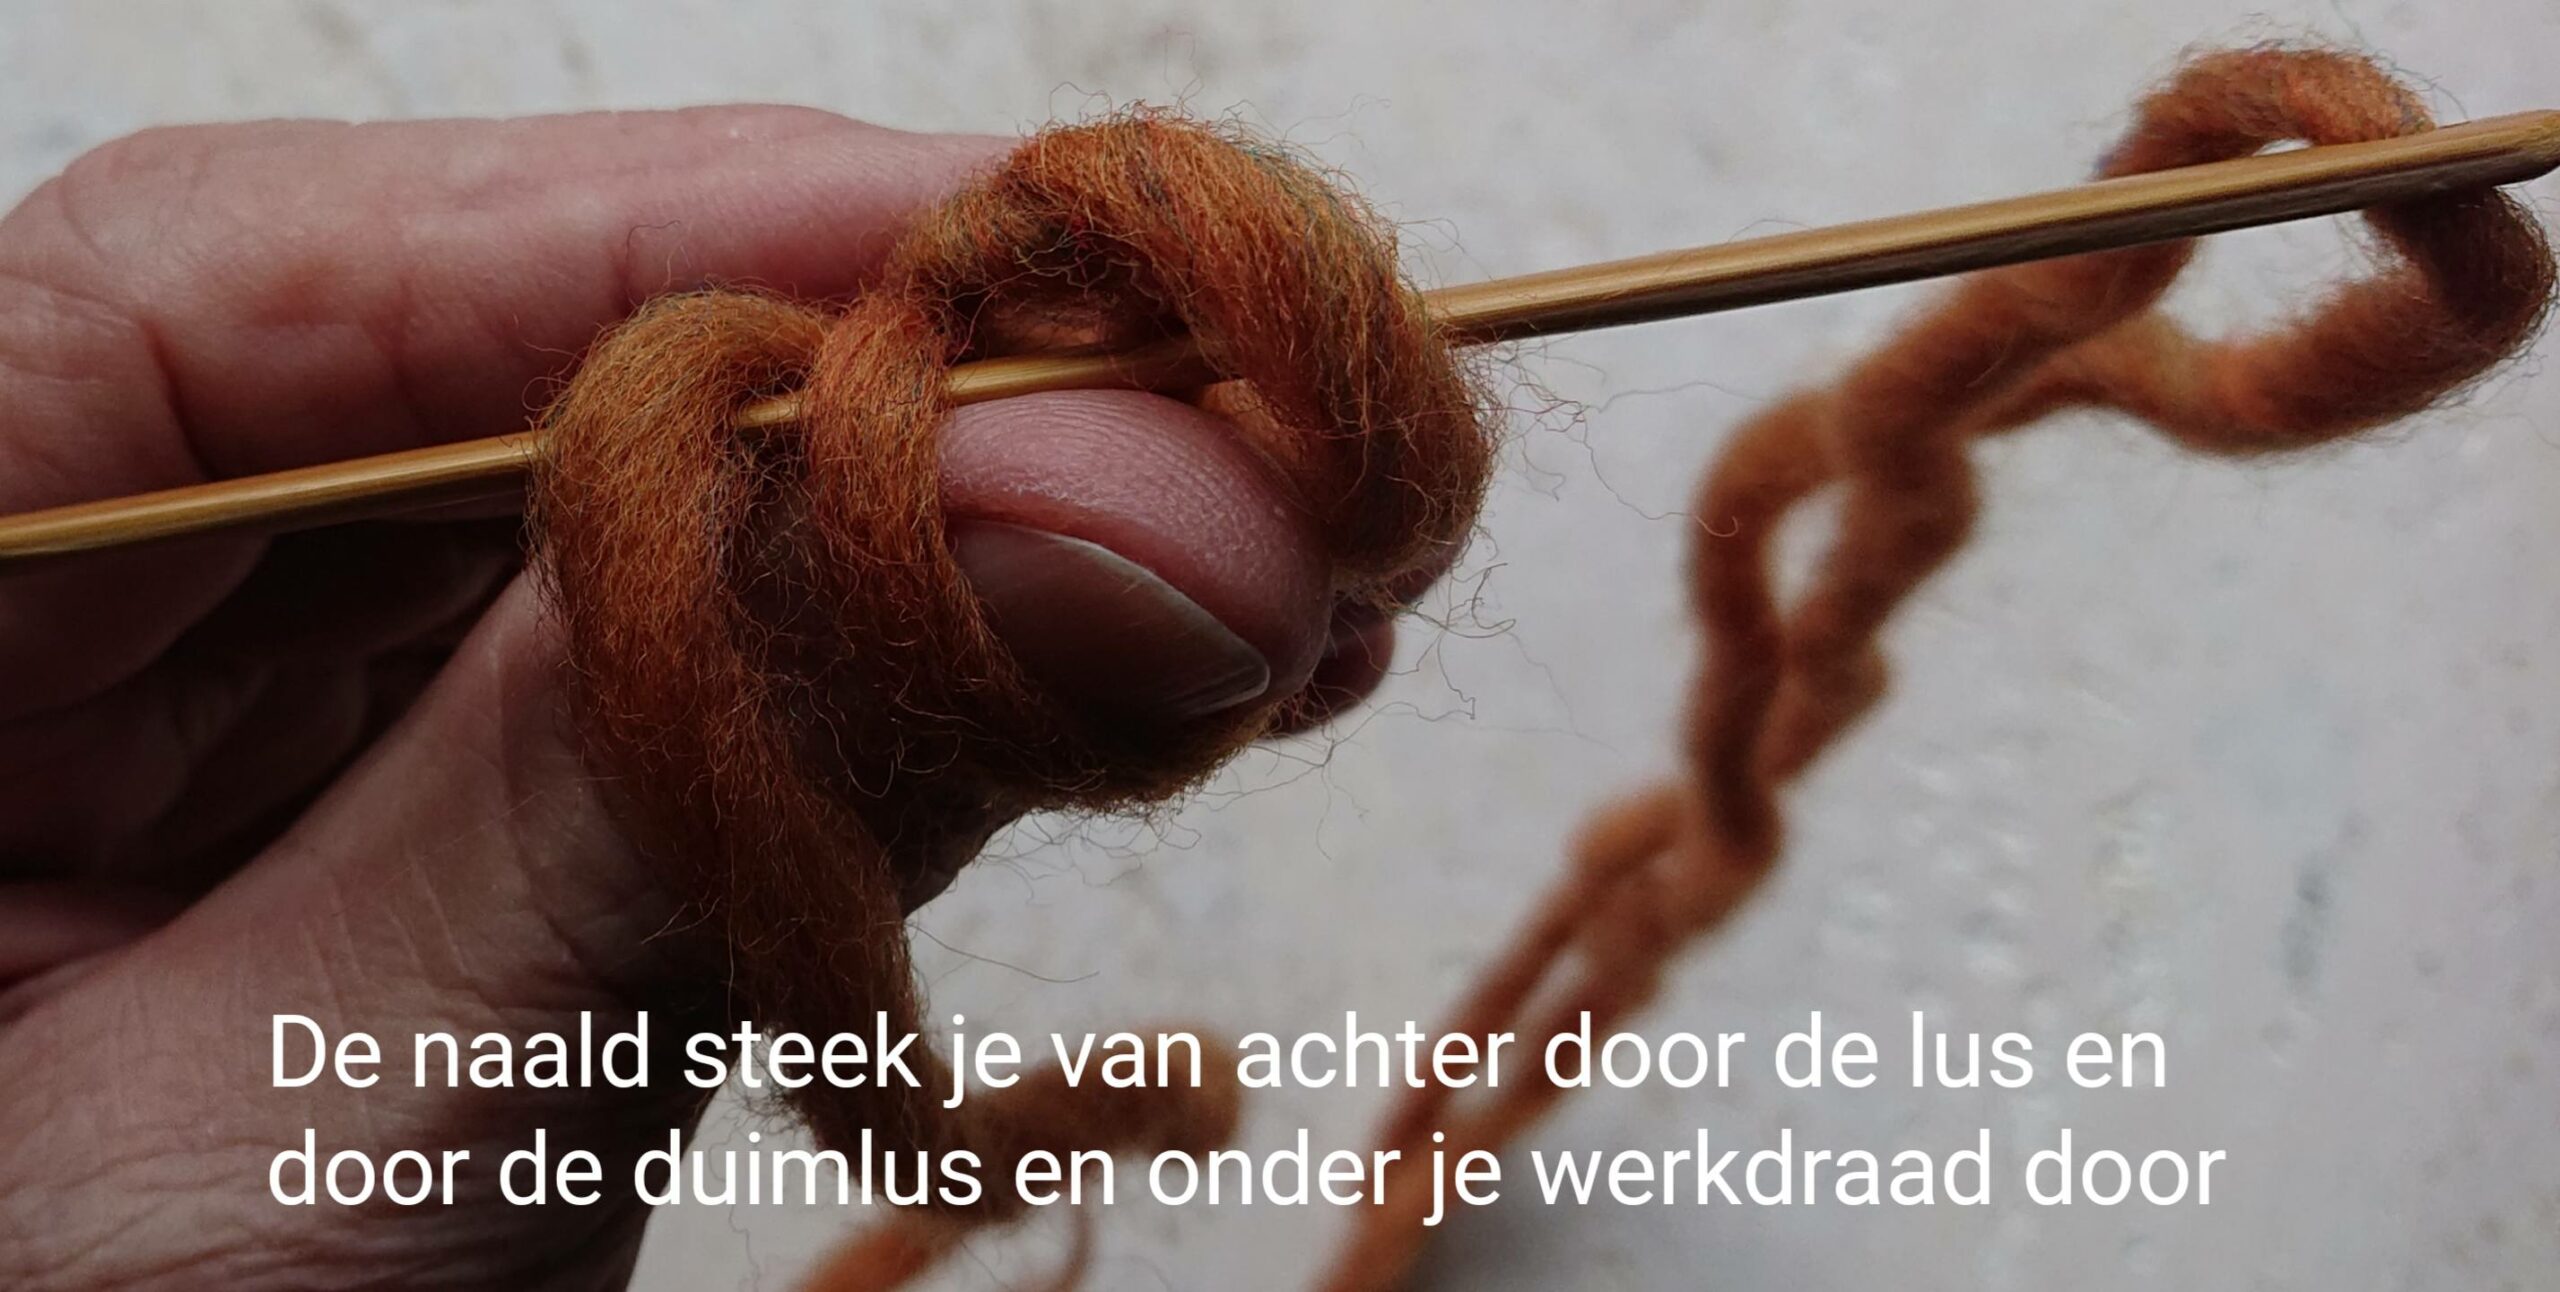
The needle goes from behind through the loop, under the thumbloop and under the working thread.
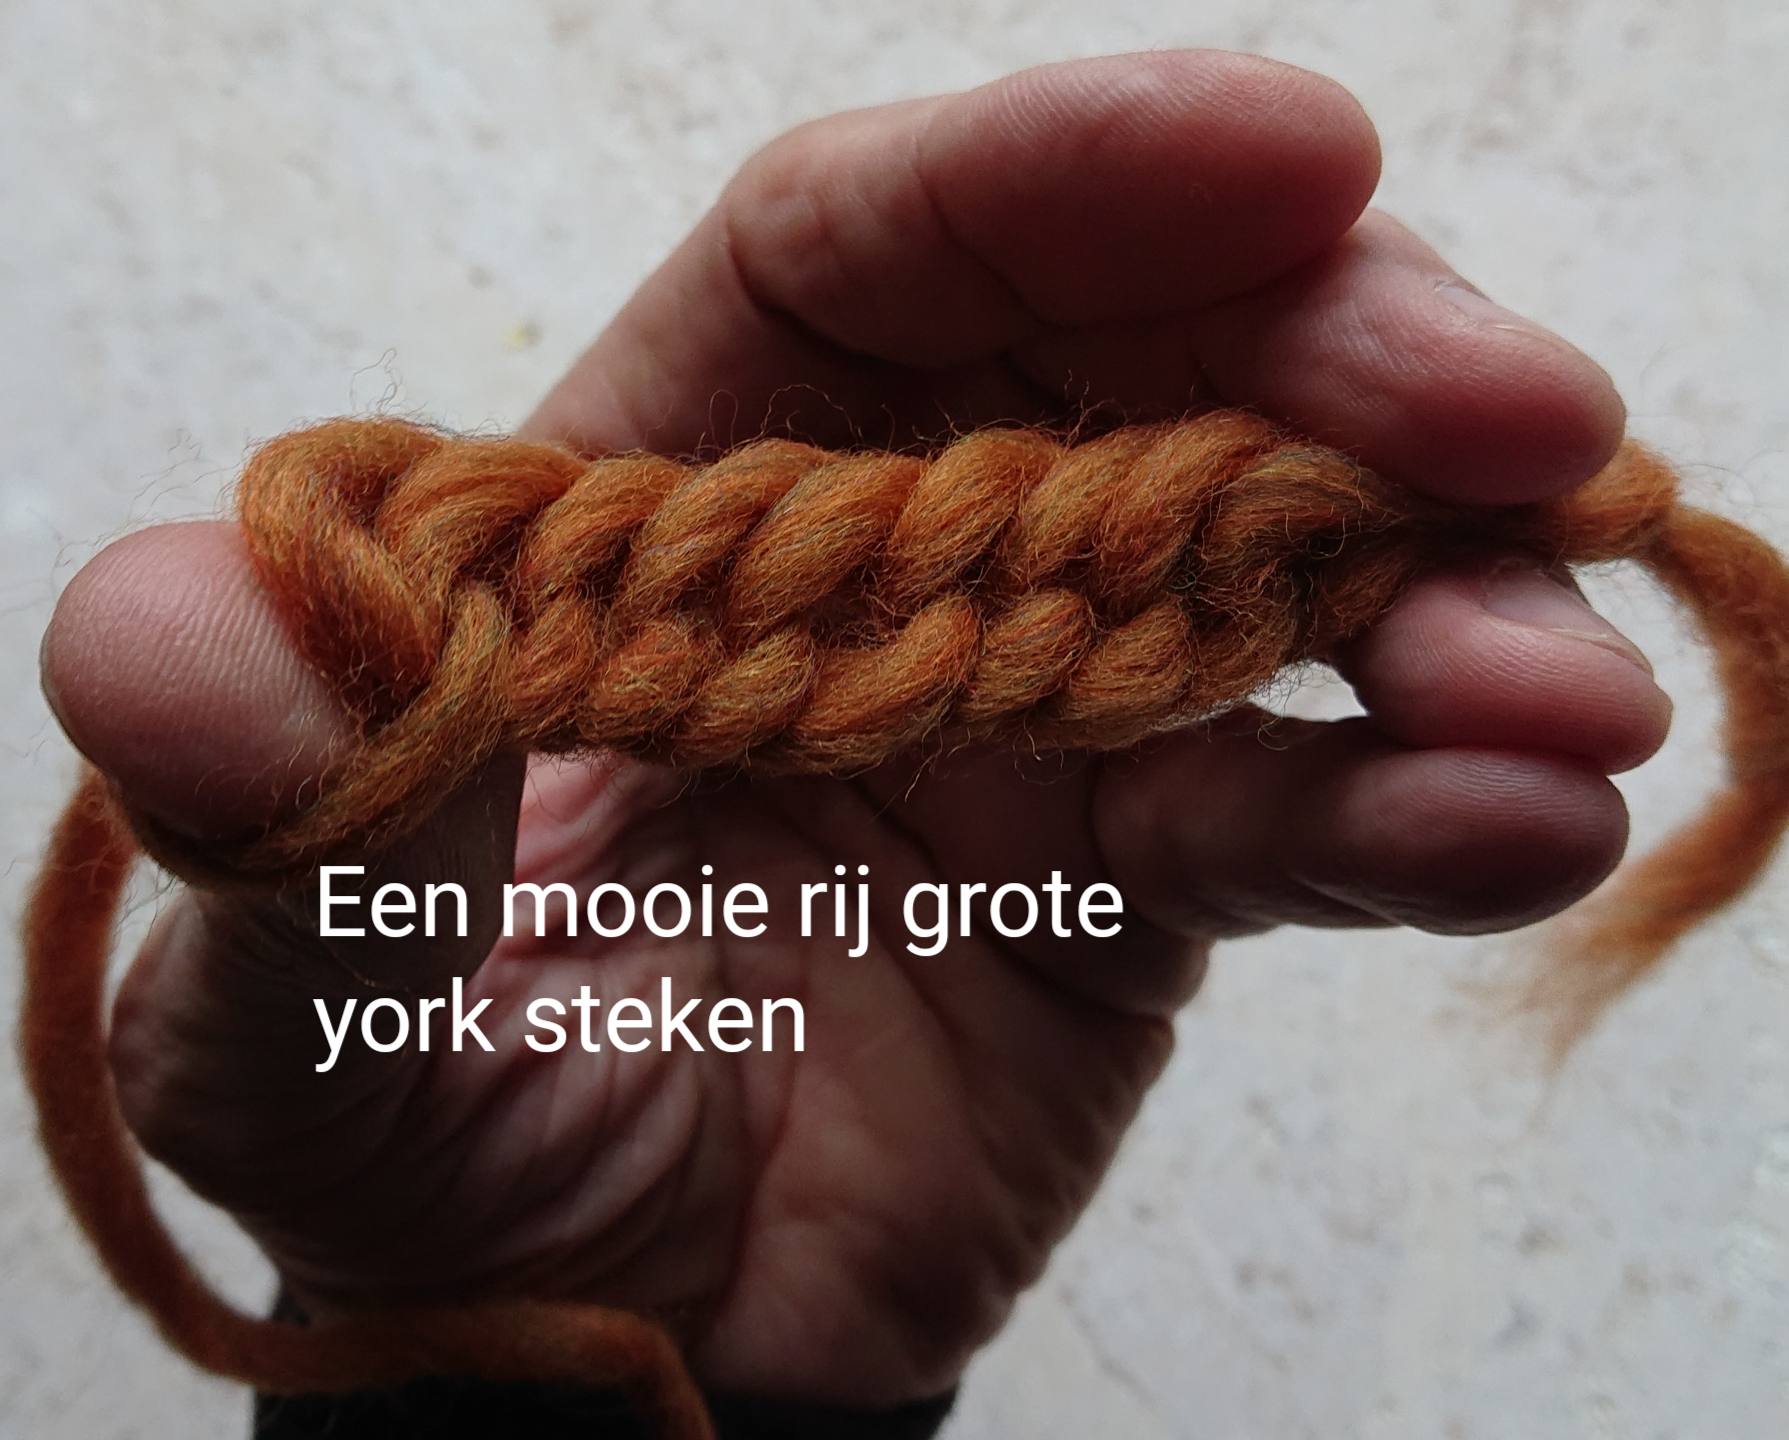
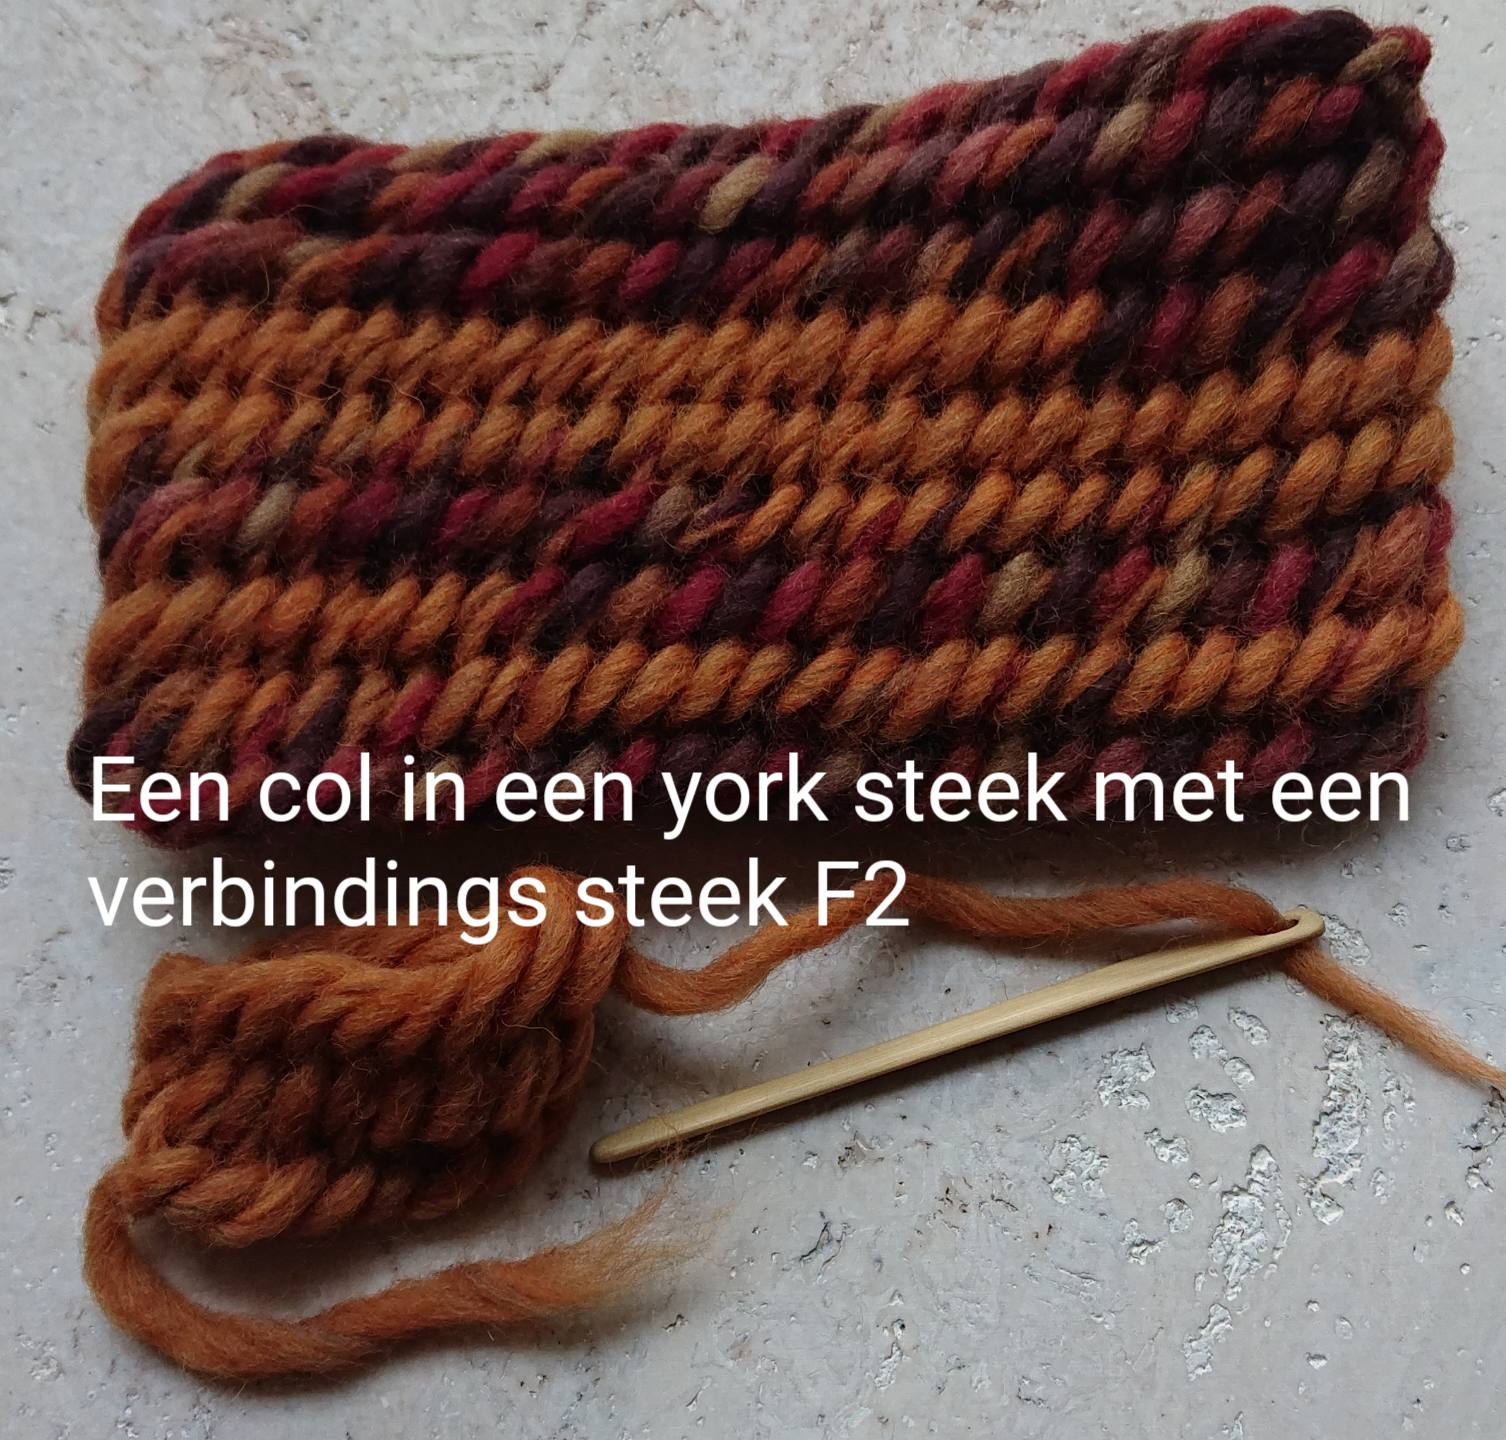
A nice row of York stitches and they are big and stretchable to.
The row of stitches turns in the beginning but after a few rows it becomes less, when you fasten the row around you have to pay attention.

To connect a circel row, insert your needle in the first 2 loops and behind the back loop thumb and through thumbloop and under the working thread.
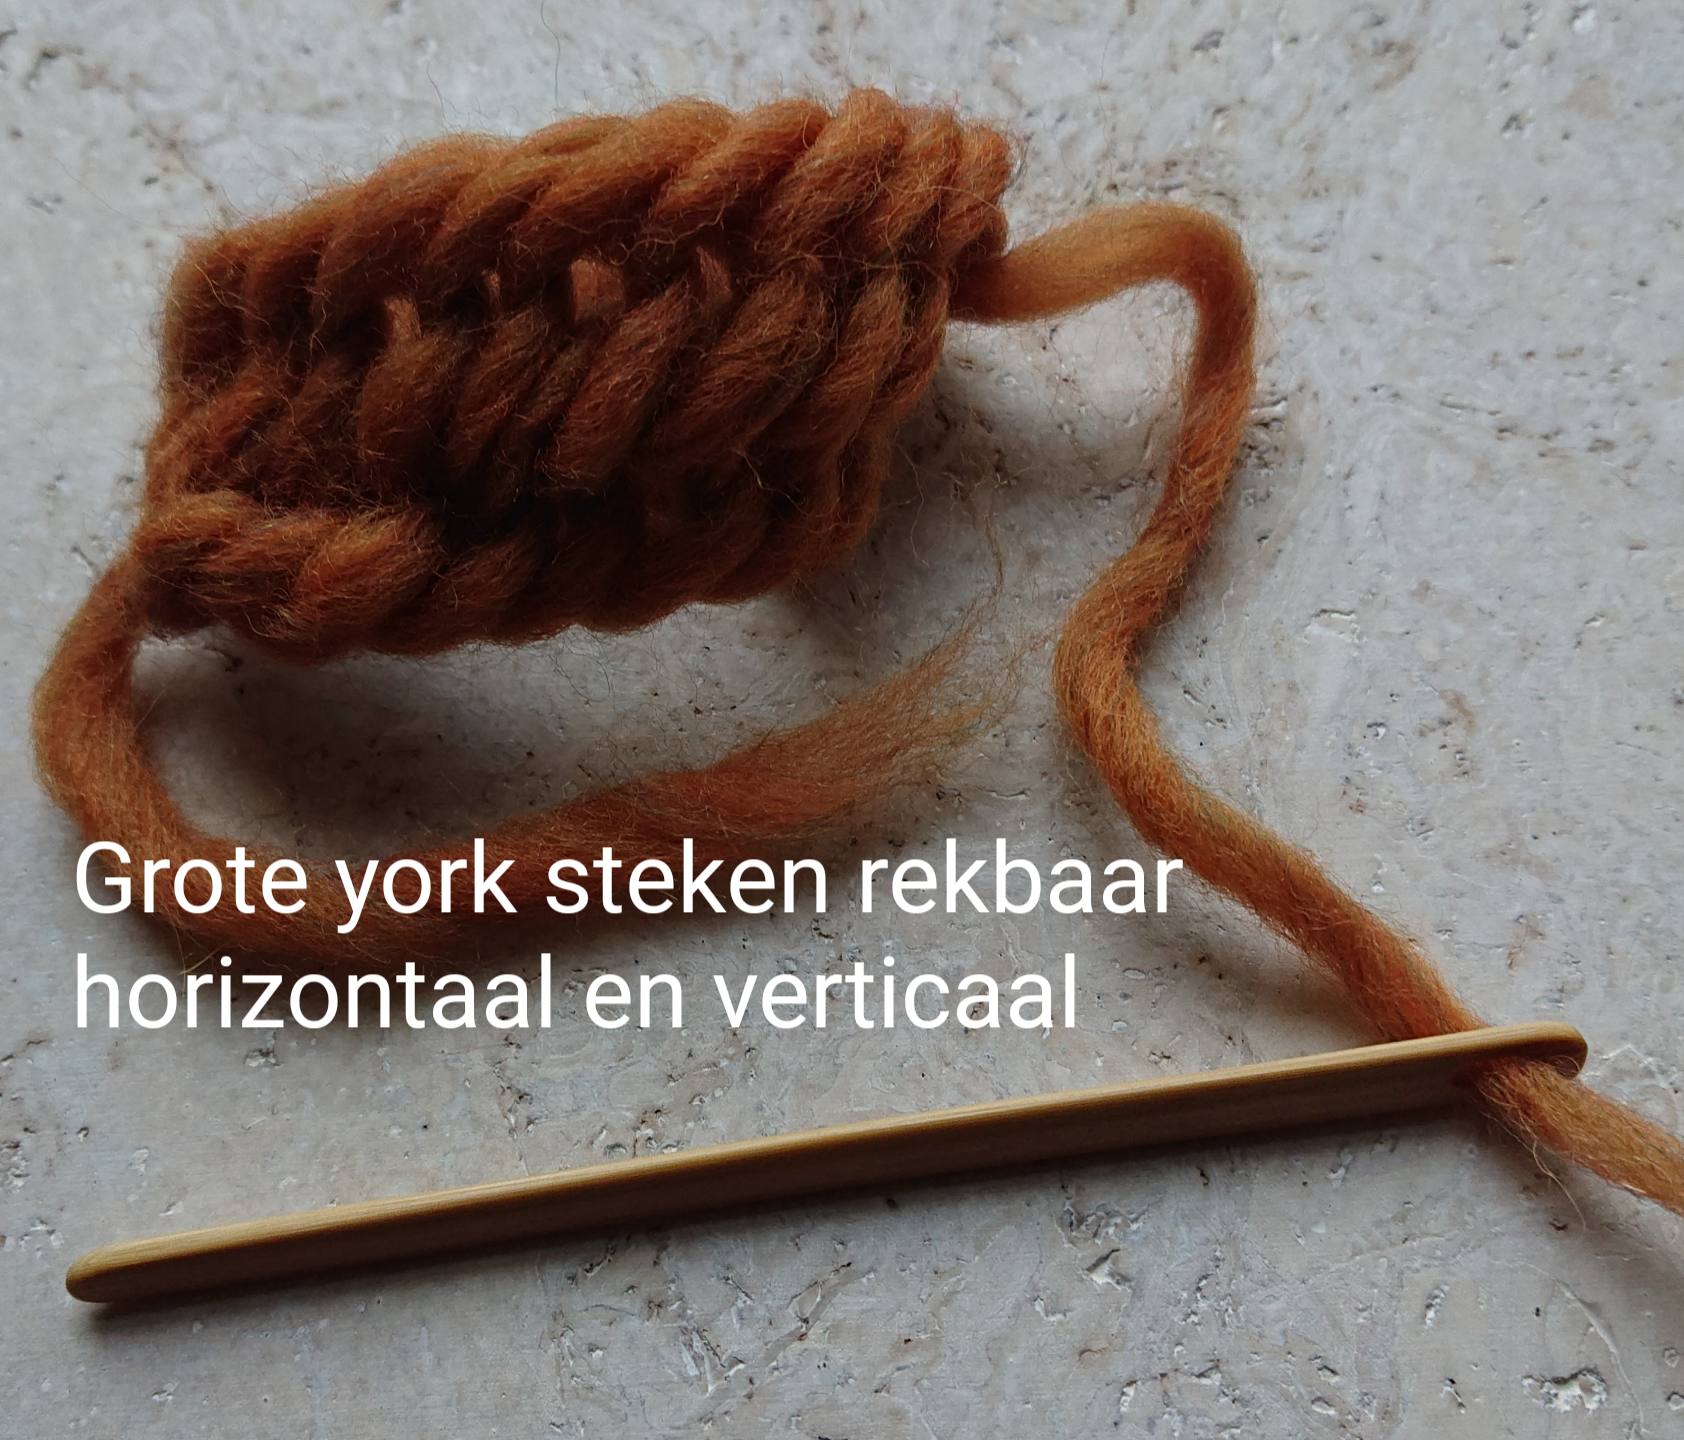
Big stitches and they are stretchable.
Above it looks like this.
This is in a Dutch language it explanes the Korgen and the Mammen stitch.
The Korgen stitch has 1 loop around your thumb and 2 loops behind your thumb and connection stitch is F1.
The Mammen stitch is the same as the korgen stitch But has a connection stitch F2 and therefore the fabric is dencer. (Mamman = 2 m = F2 to remind it easy). 🙂
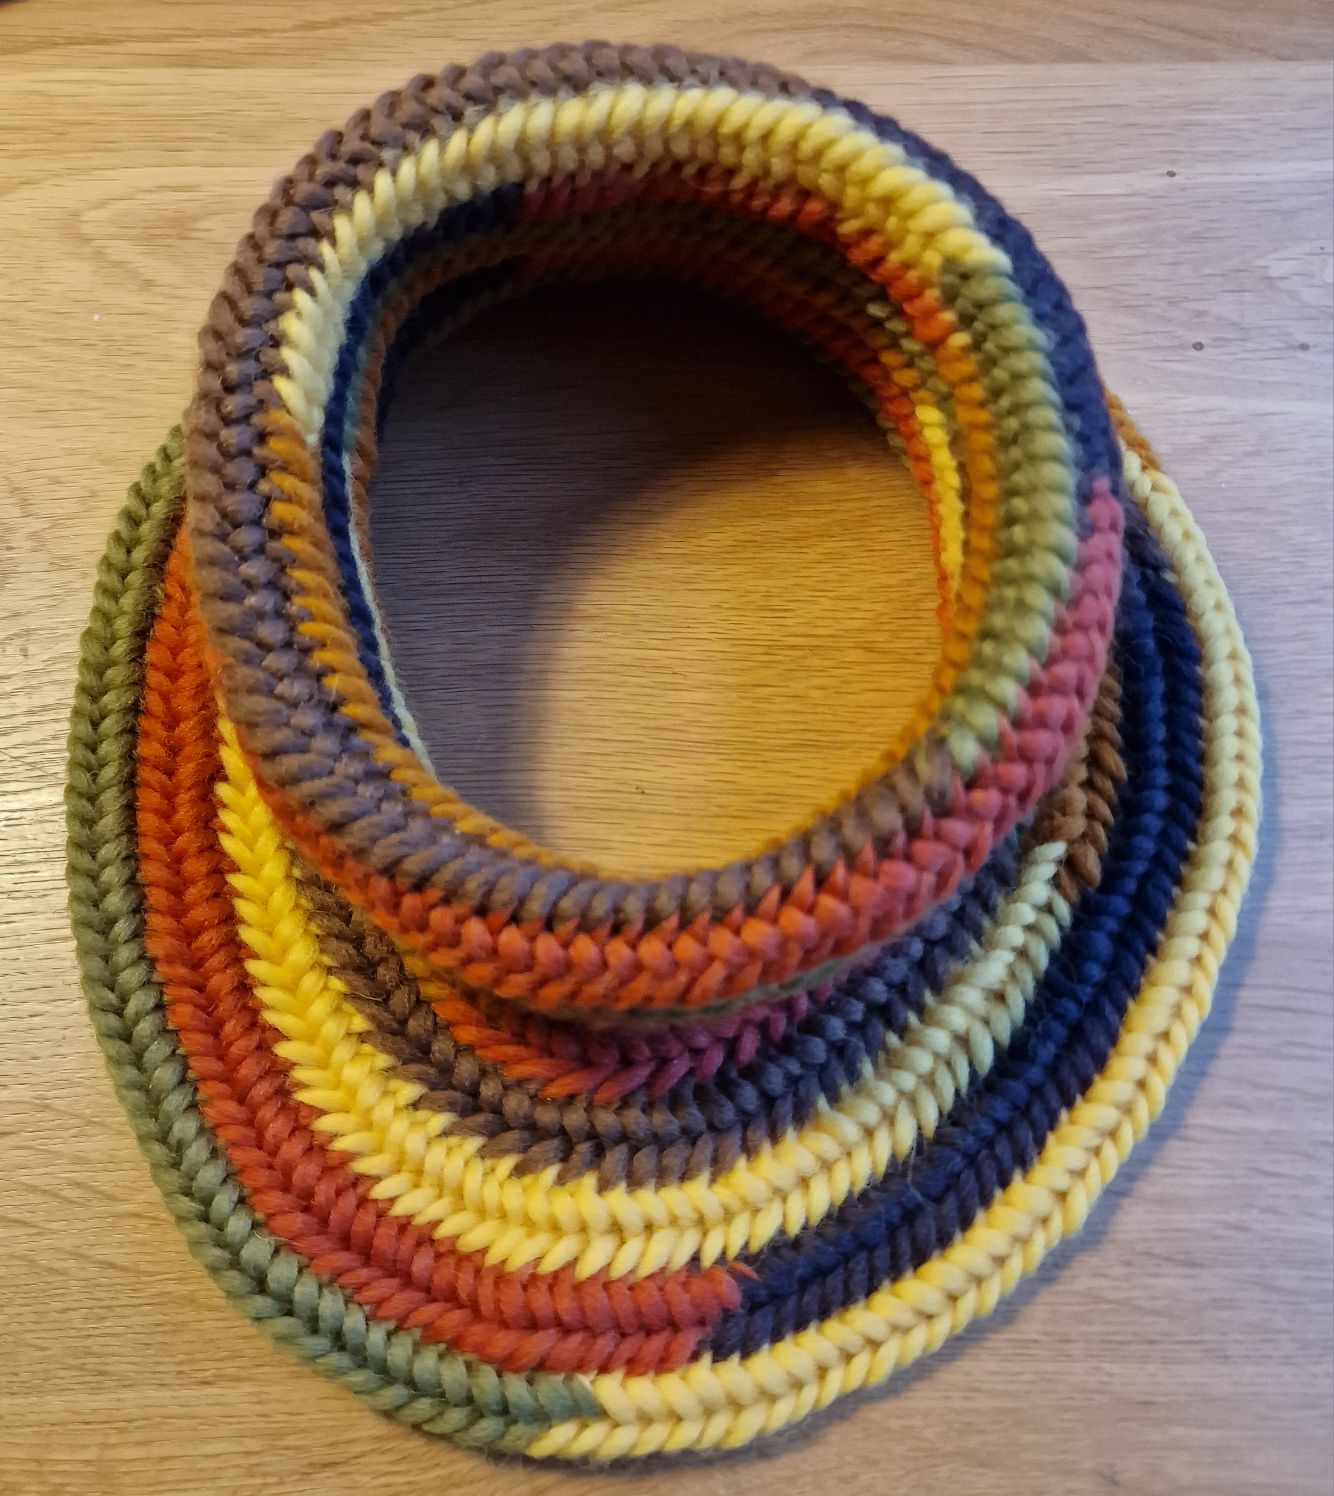
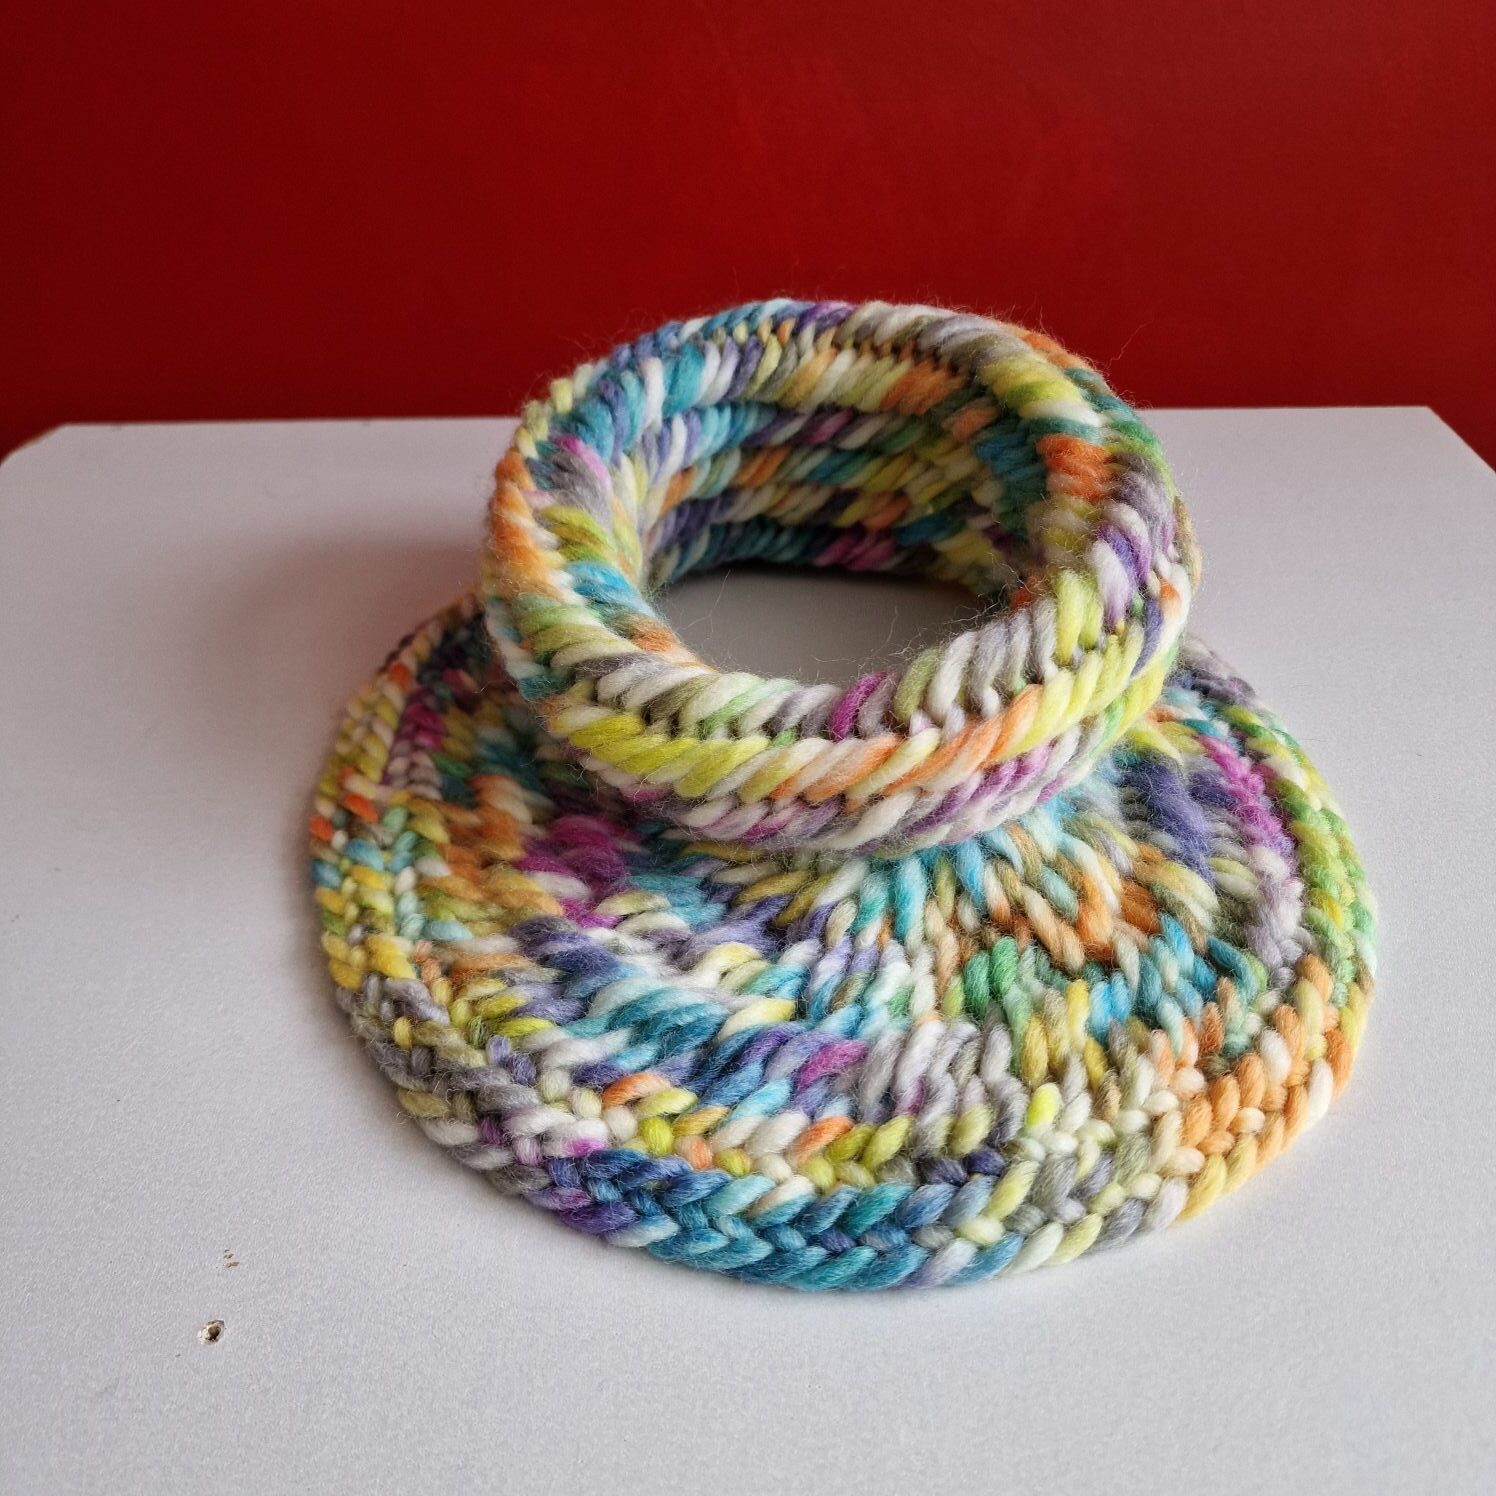
I made some more neckwarmers/col.

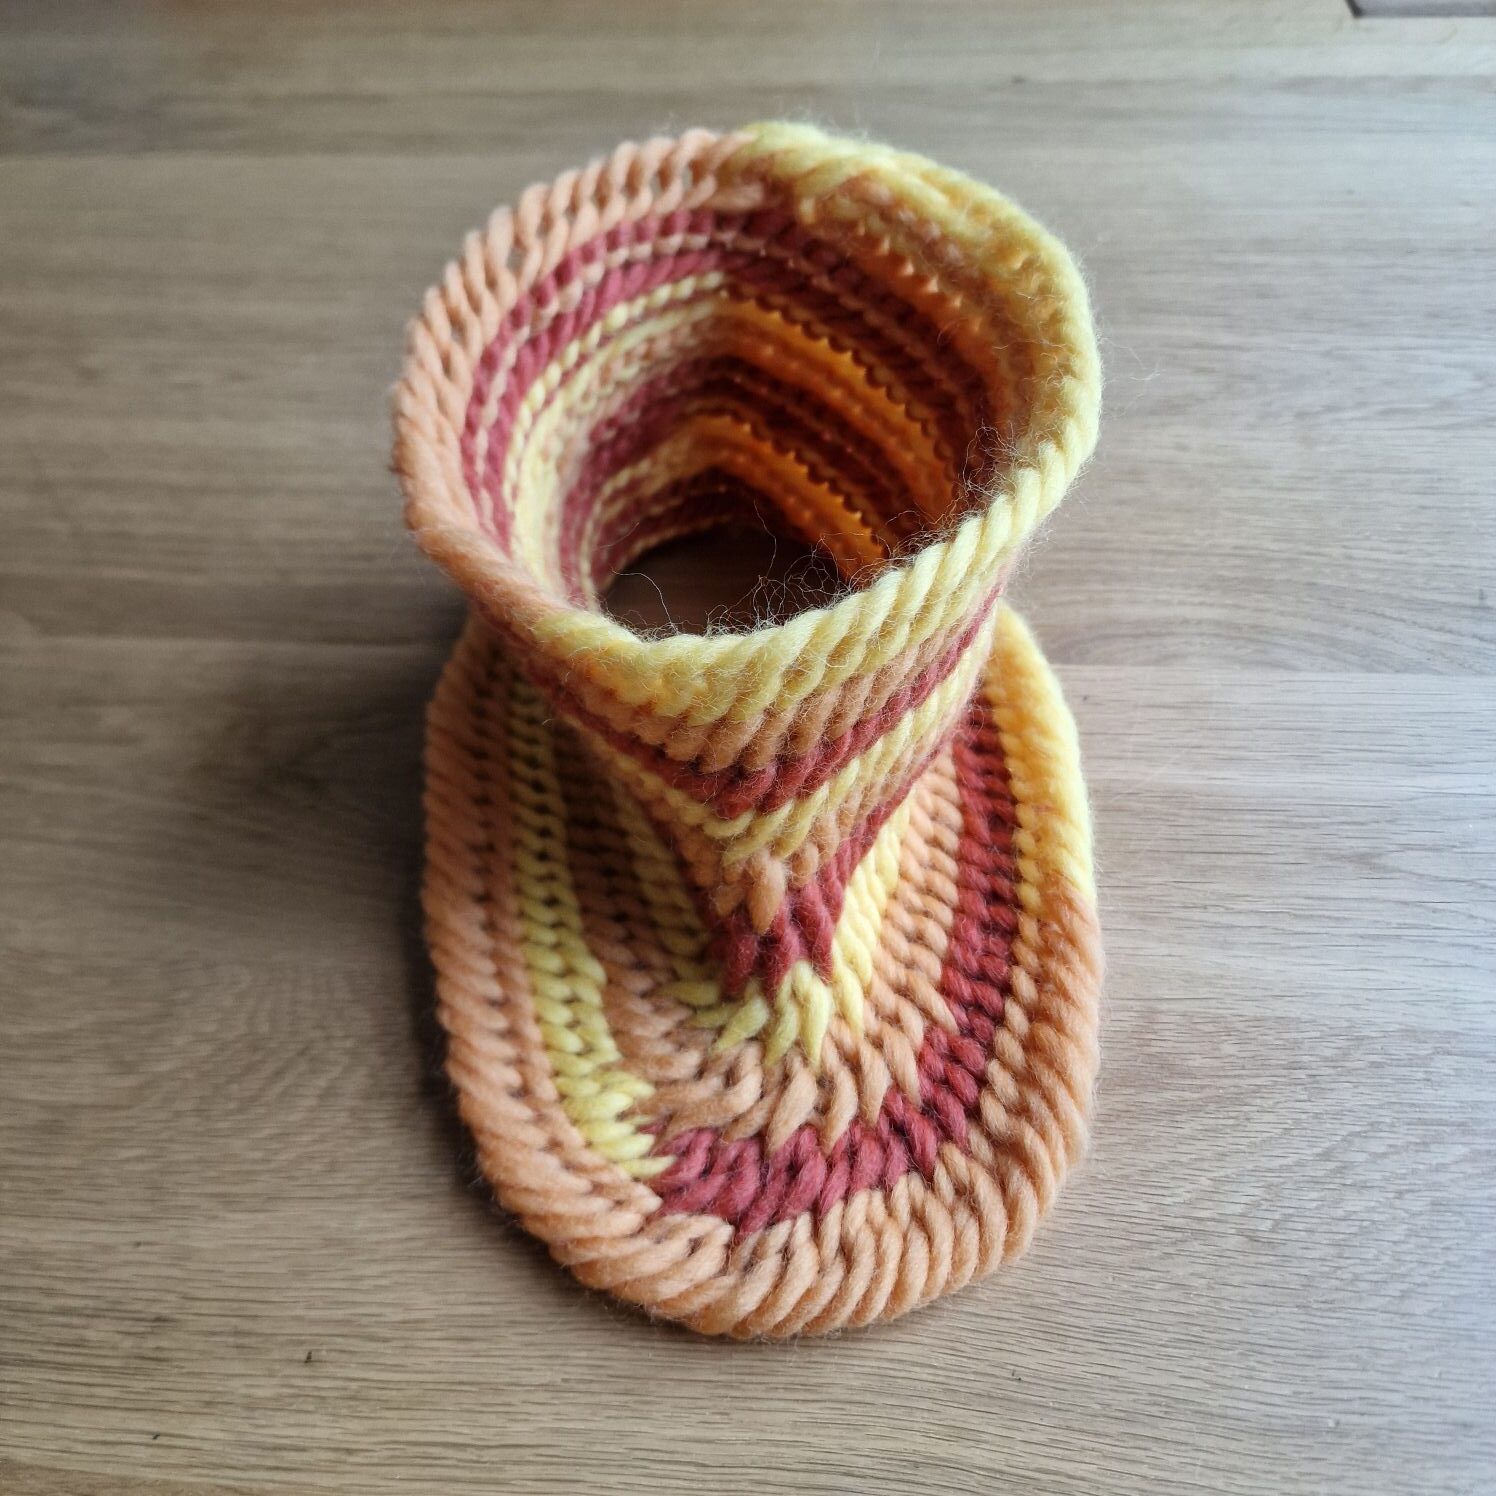
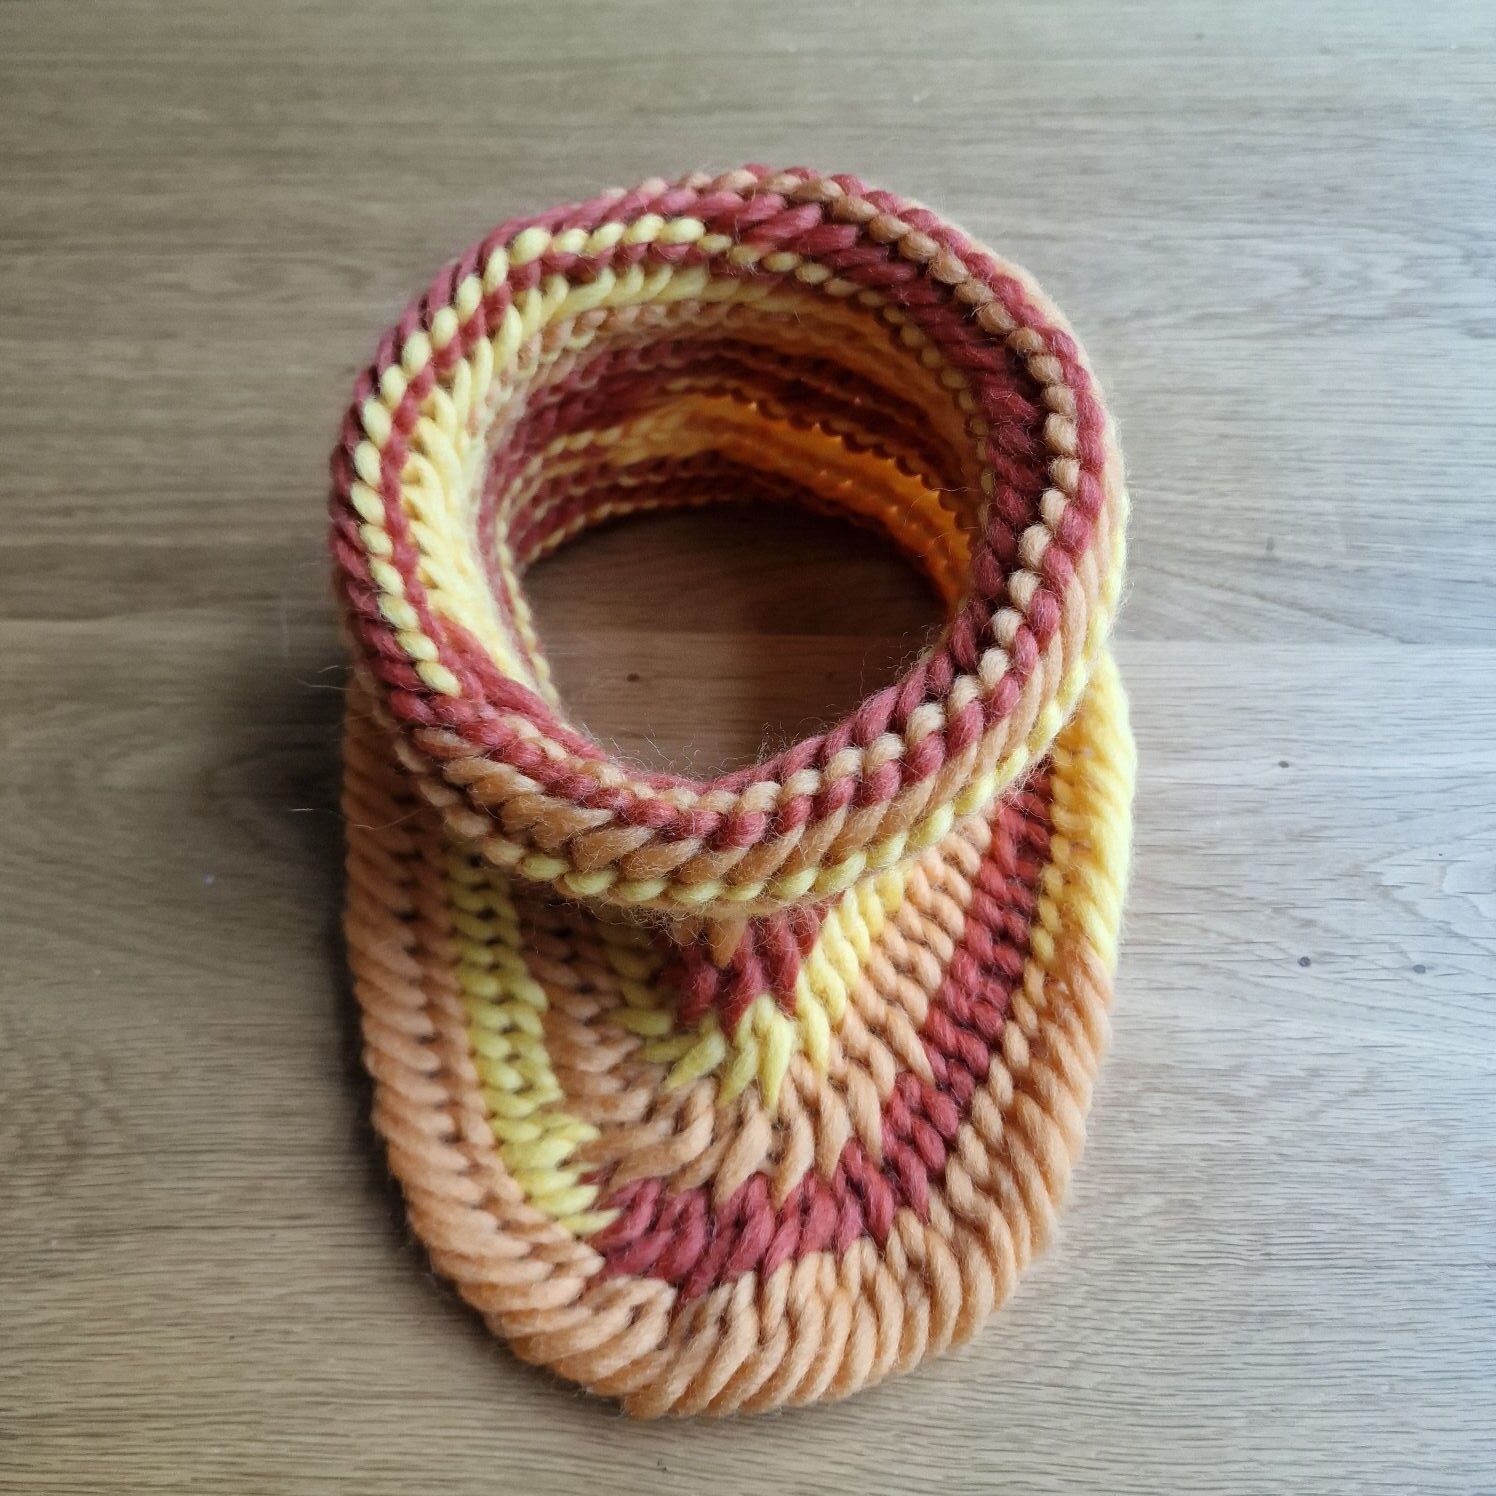
I was nalbinding a neck warmer and made de connection stitch twist and discovered the Morbius cowl.
You make the morbius cowl by simply continuing to needlebind the crossed row of stitches as you would make a neckwarmer/col.
Morbius cowl.
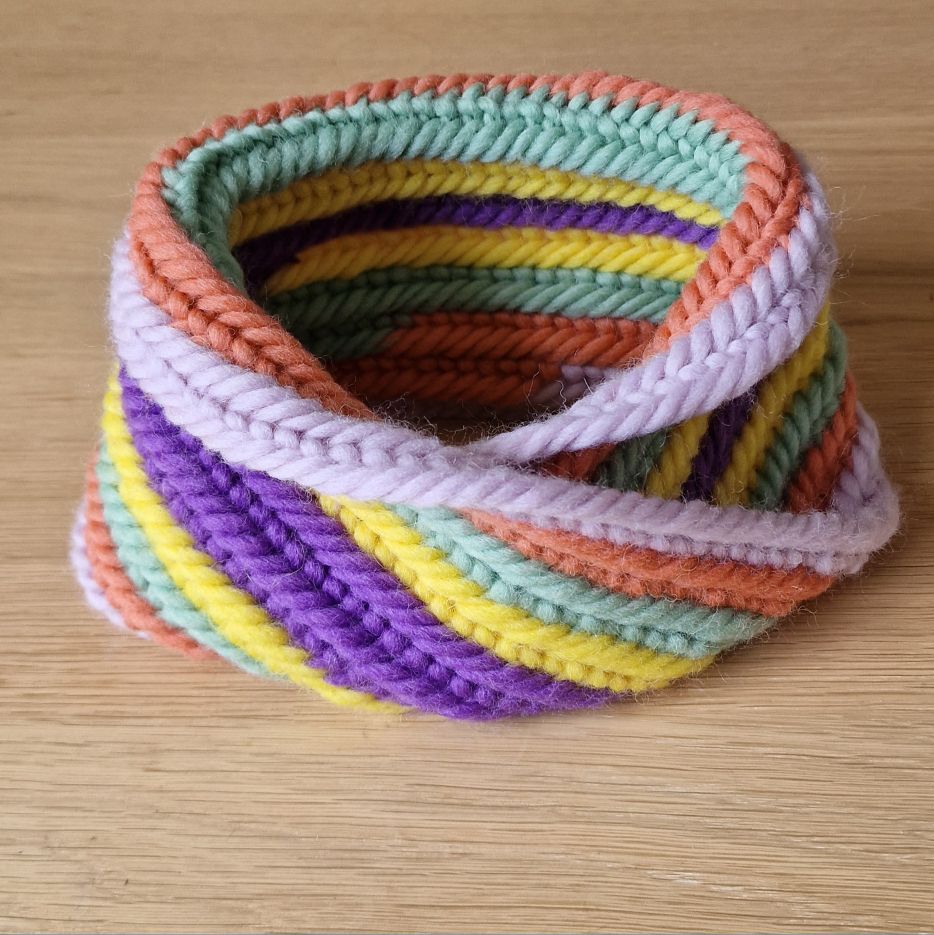
Morbius cowl.

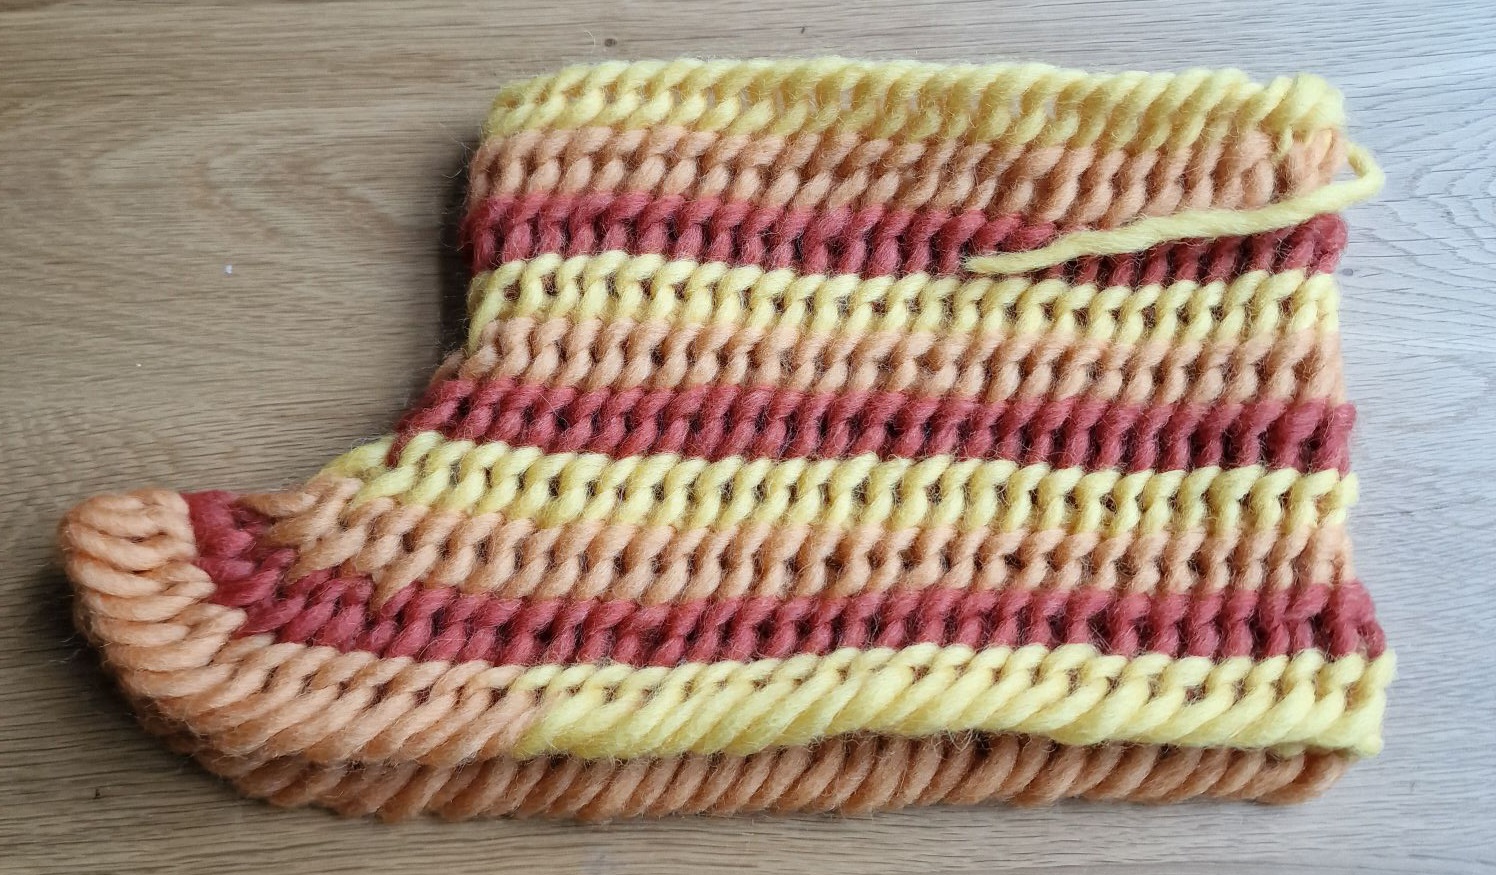
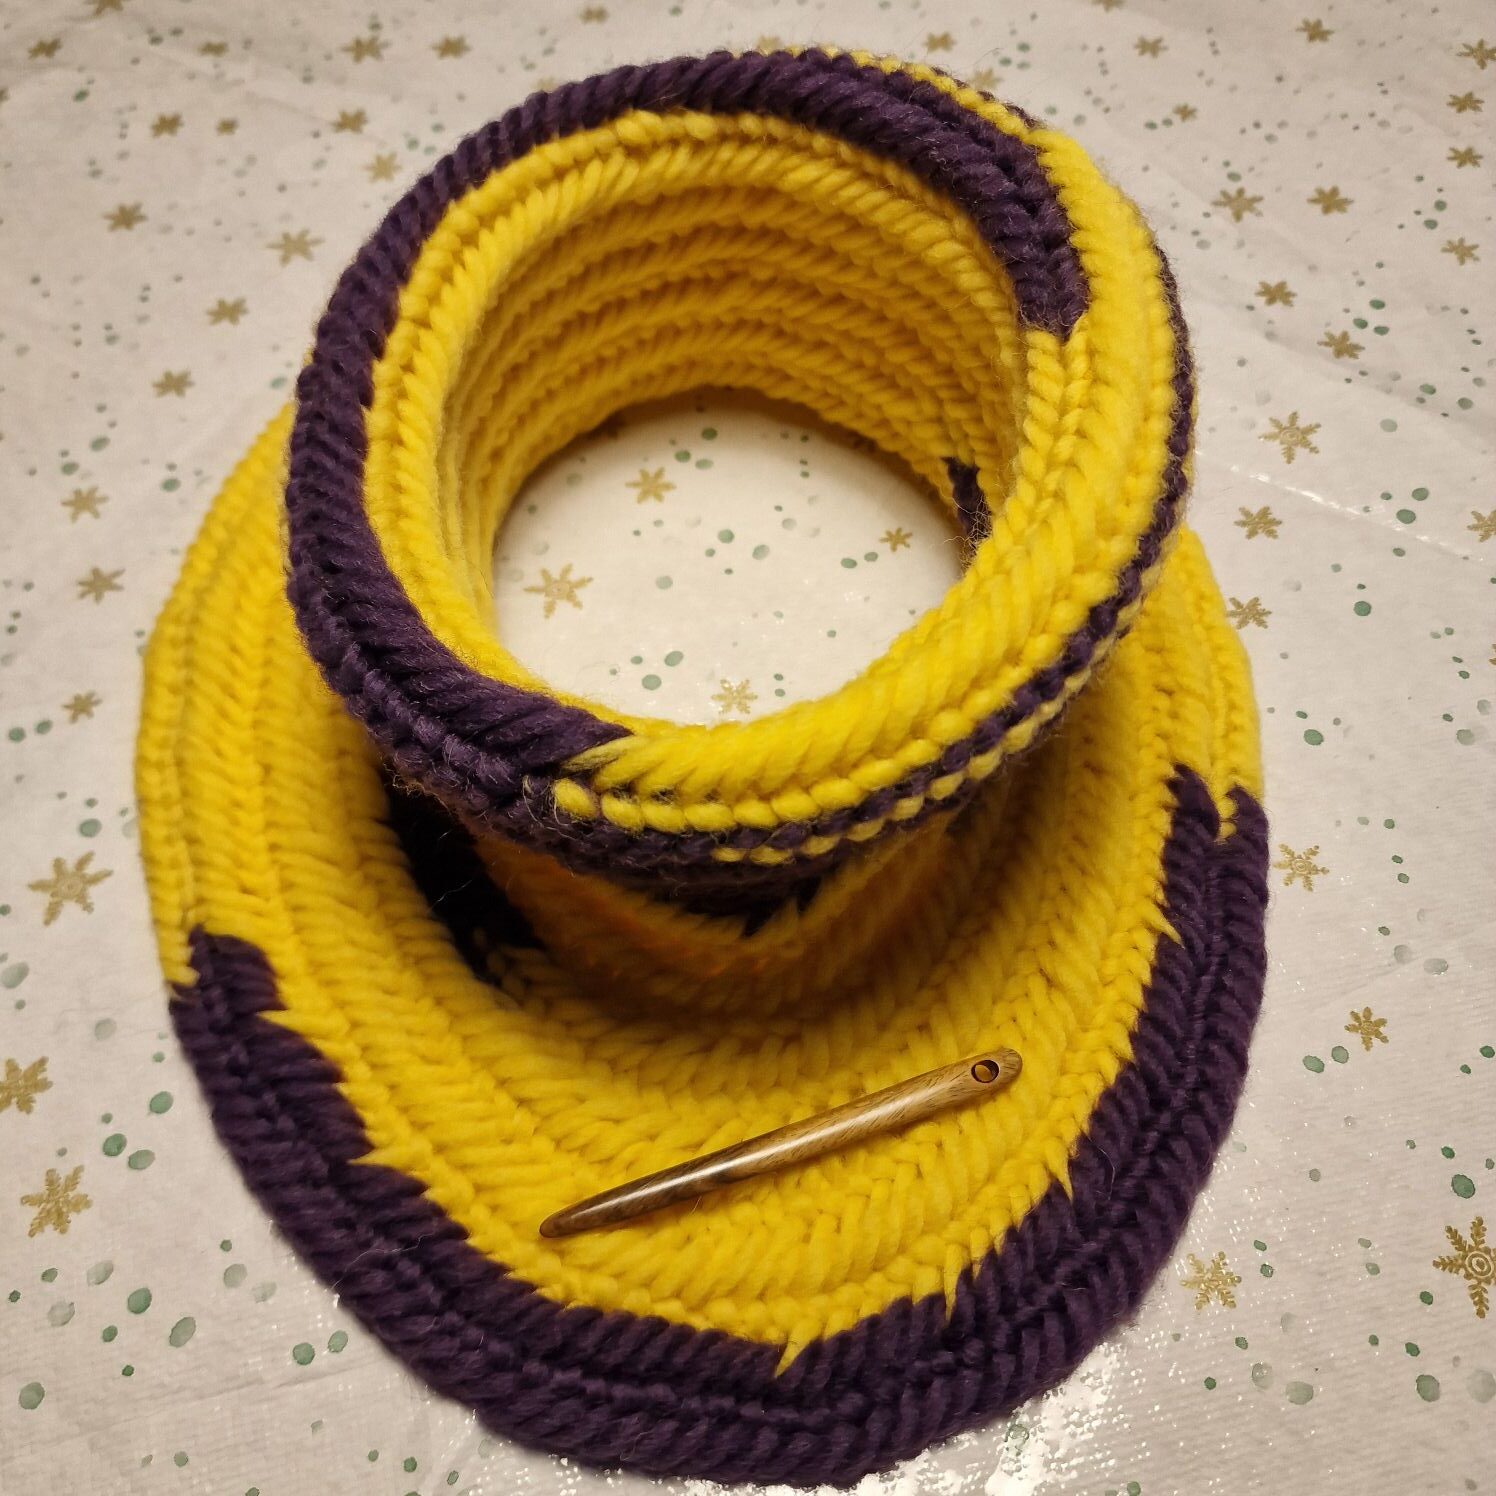
Cowl was made with the york stitch and F1 B1 connection stitch. (b1 is behind).
The first 4 row are needelbind plain.
The 5th round 1 side increase 2 stitches and place a stitchmarker.
The 6th round increase 3 stitches.
The 7th round increase 4 stitcjes.
The 8th round increase 5 stitches.
The 9th round increase 6 stitches.
The 10th round increase 7 stitches, and that was long enough.
You can make it as big as you want, to prevent the edge from waving you can make 1 stitch plain and increase the next stitch and then 1 stitch plain again, etc.
You can also wear the cowl as it is.
I folded the edge.
I’m going to make the next collars a little bigger with another stitch.
Cowl with the Arboga stitch and F1 connection stitch. ( same patern as above ).
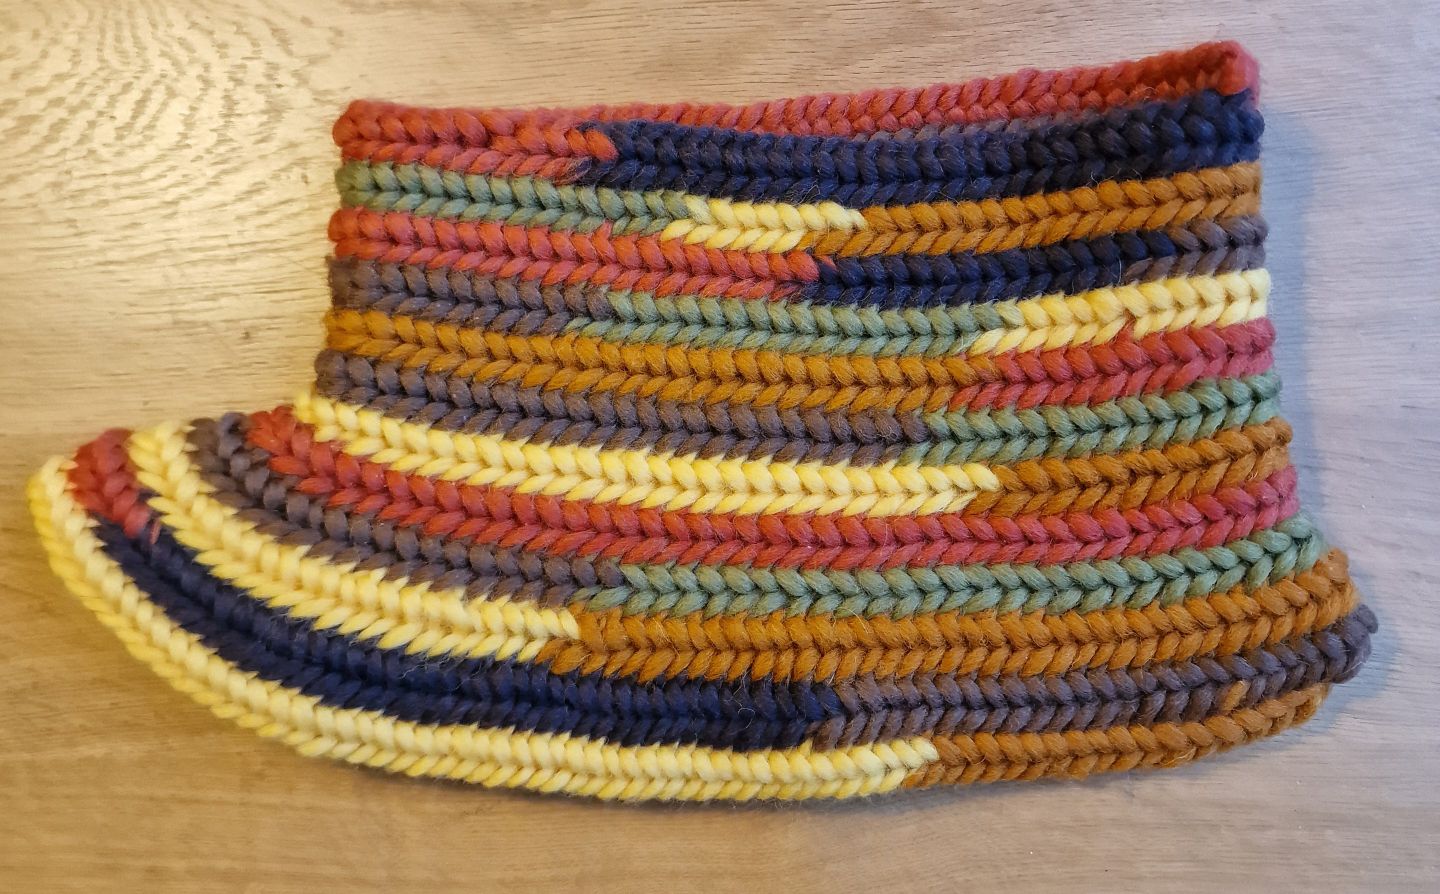
The easy Arboga stitch is one of my favorite stitches ( very beautiful ).
This Arboga F1 fabric was a lot denser than the York F1 B1 and that was my intention.
Today it is 22 december 2023 and i made my 34 th video at my YouTube channel happy needlebinding.
The video shows how i make a Cowl/Col.
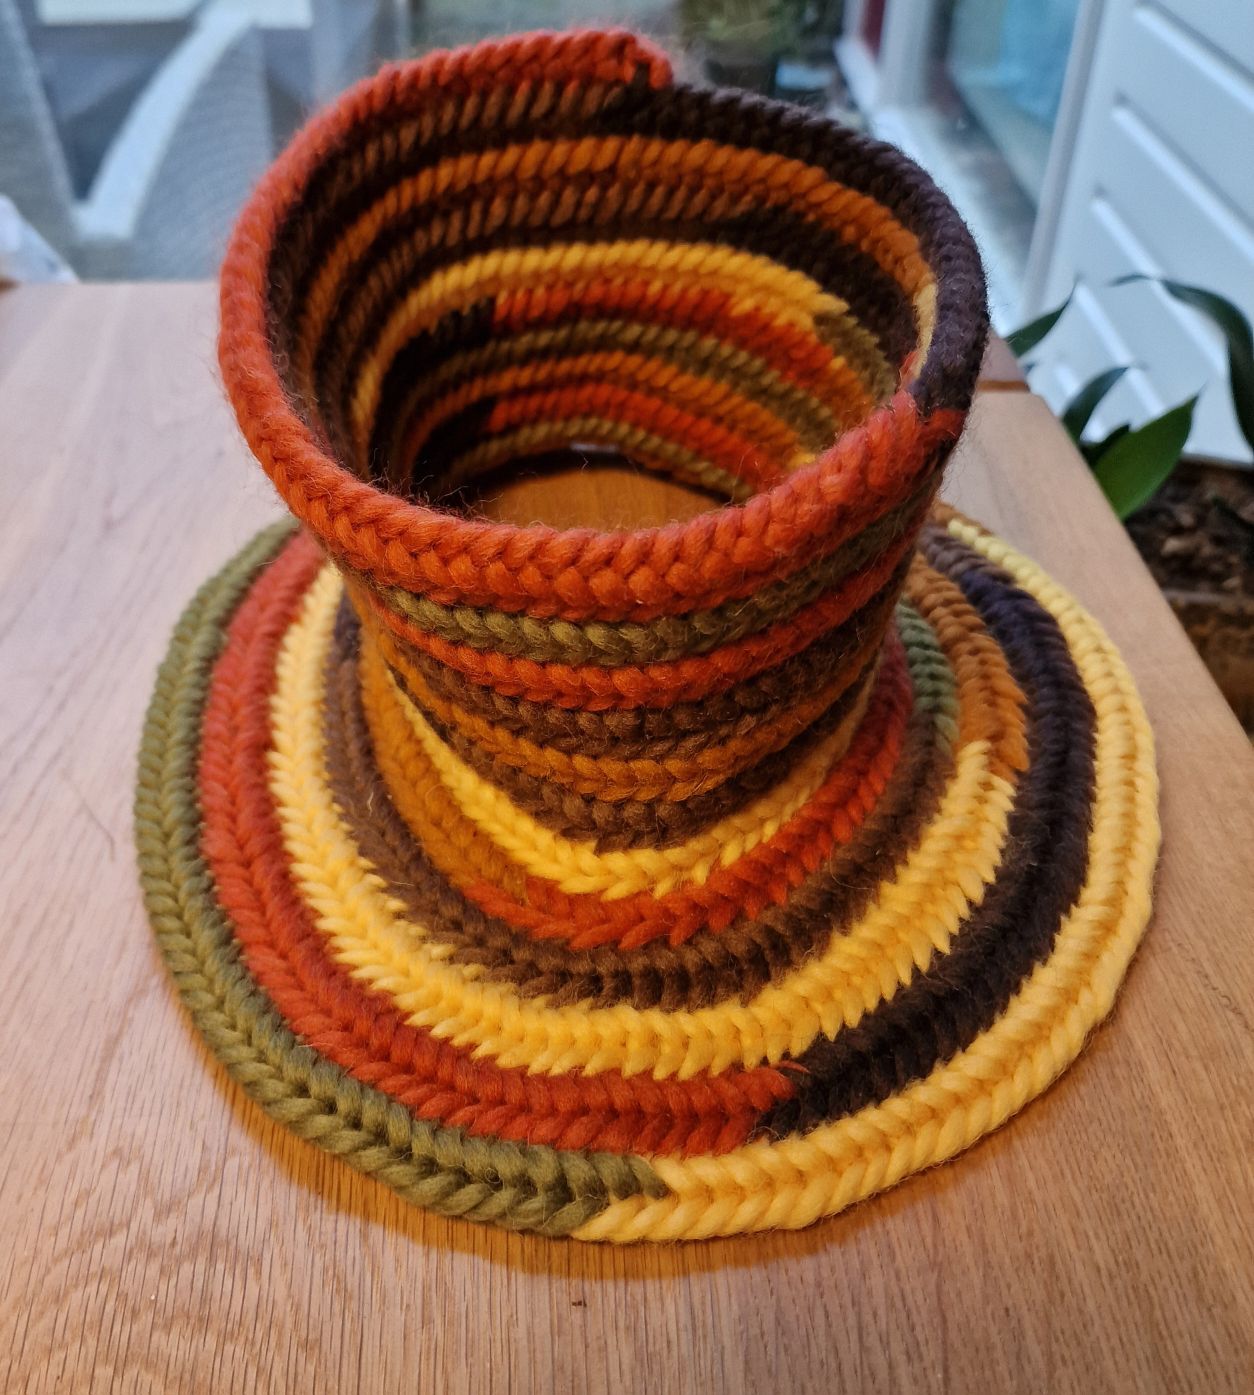
Another Cowl with the Faberg stitch with the edge with connection stitch F1 B1 and continue the next rounds with connection stitch F1.
The first 6 rounds are needlebinding with plain stitches.
The next round 3 stitches plain and the 4th stitch increase.
The next round 4 stitches plain and the 5th stitch increase.
The next round 5 stitches plain and the 6th stitch increase.
This cowl is slightly larger than the previous one.
The needle is made of Pock wood, very hard and beautiful wood for nalbinding.
This cowl is made with the York stitch and the edge is made with the Oslo stitch and the connection stitch is F1.
When you nalbind your mobius neckwarmer a bit larger it is going to be a hairband, so your ear get warm in the winter.
The asle stitch is a very dense stitch and you get a very warm ear mobius warmer.
The next simple neckwarmer is nalbind with the York stitch F1 and the edge is nalbind with the Oslo stitch also F1.
The edge of the York stitch is very loose, with an edge nalbind with the Oslo stitch you get a nice sturdy edge.