A tutorial in the Dutch language, the English language, the German language, the French language and the Spanish language.
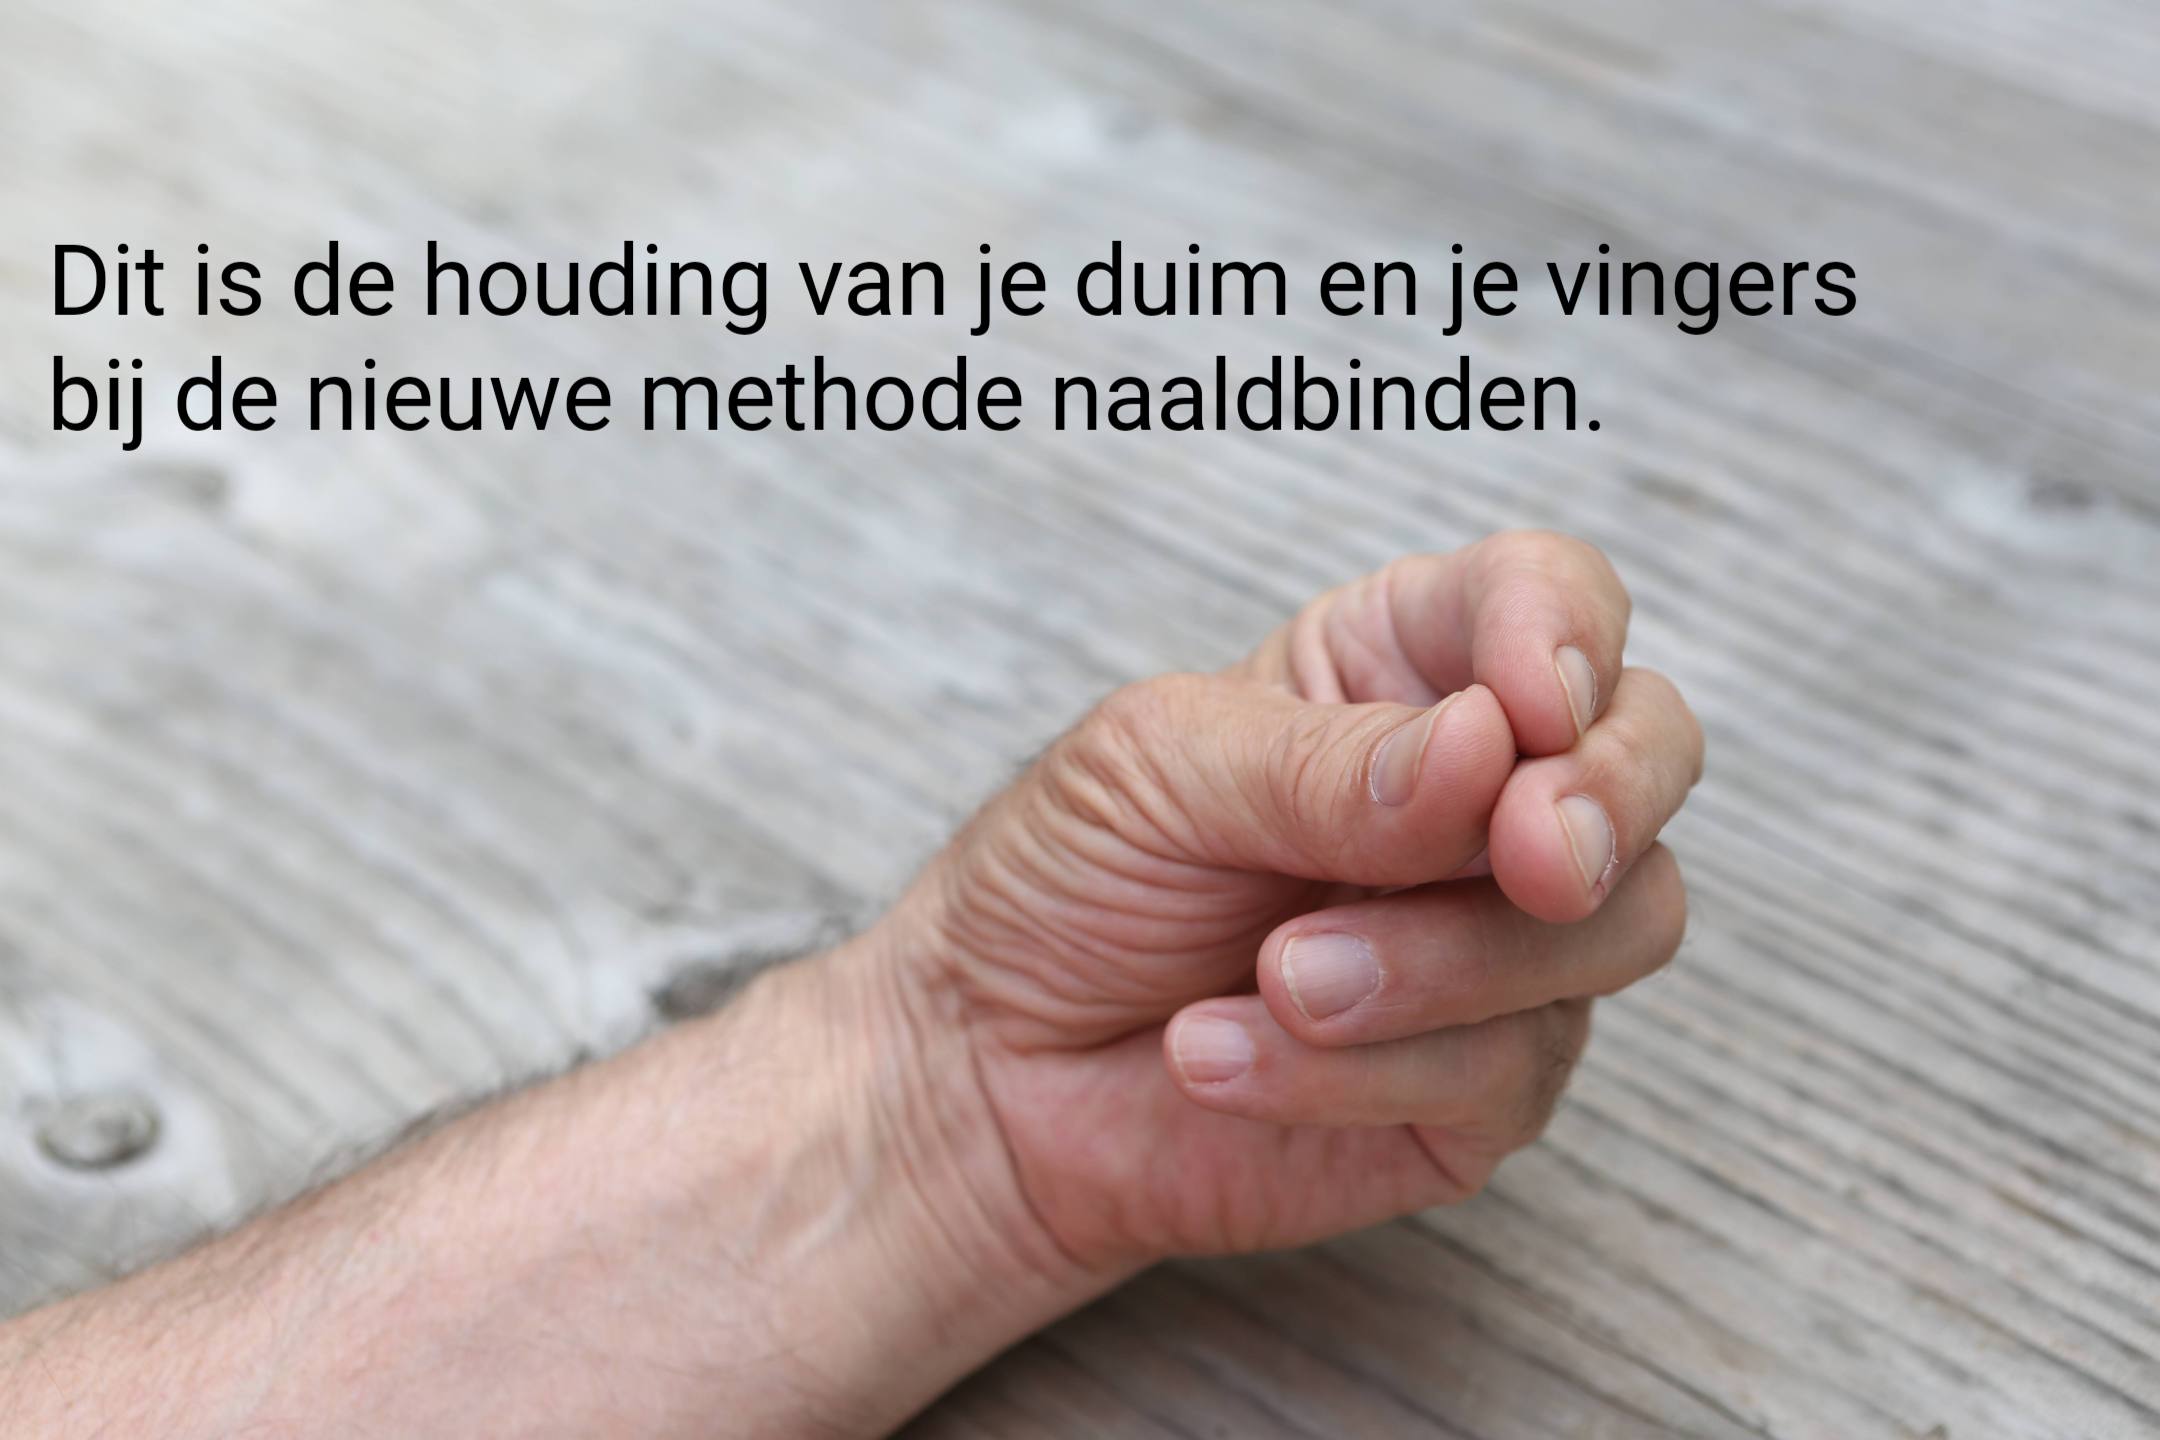
This is the position of your thumbs and fingers in the new method of needle binding.
Dies ist die Position Ihrer Daumen und Finger bei der neuen Methode der Nadelbindung.
Voici la position de vos pouces et de vos doigts dans la nouvelle méthode de reliure à l’aiguille.
Esta es la posición de los pulgares y los dedos en el nuevo método de unión con aguja.
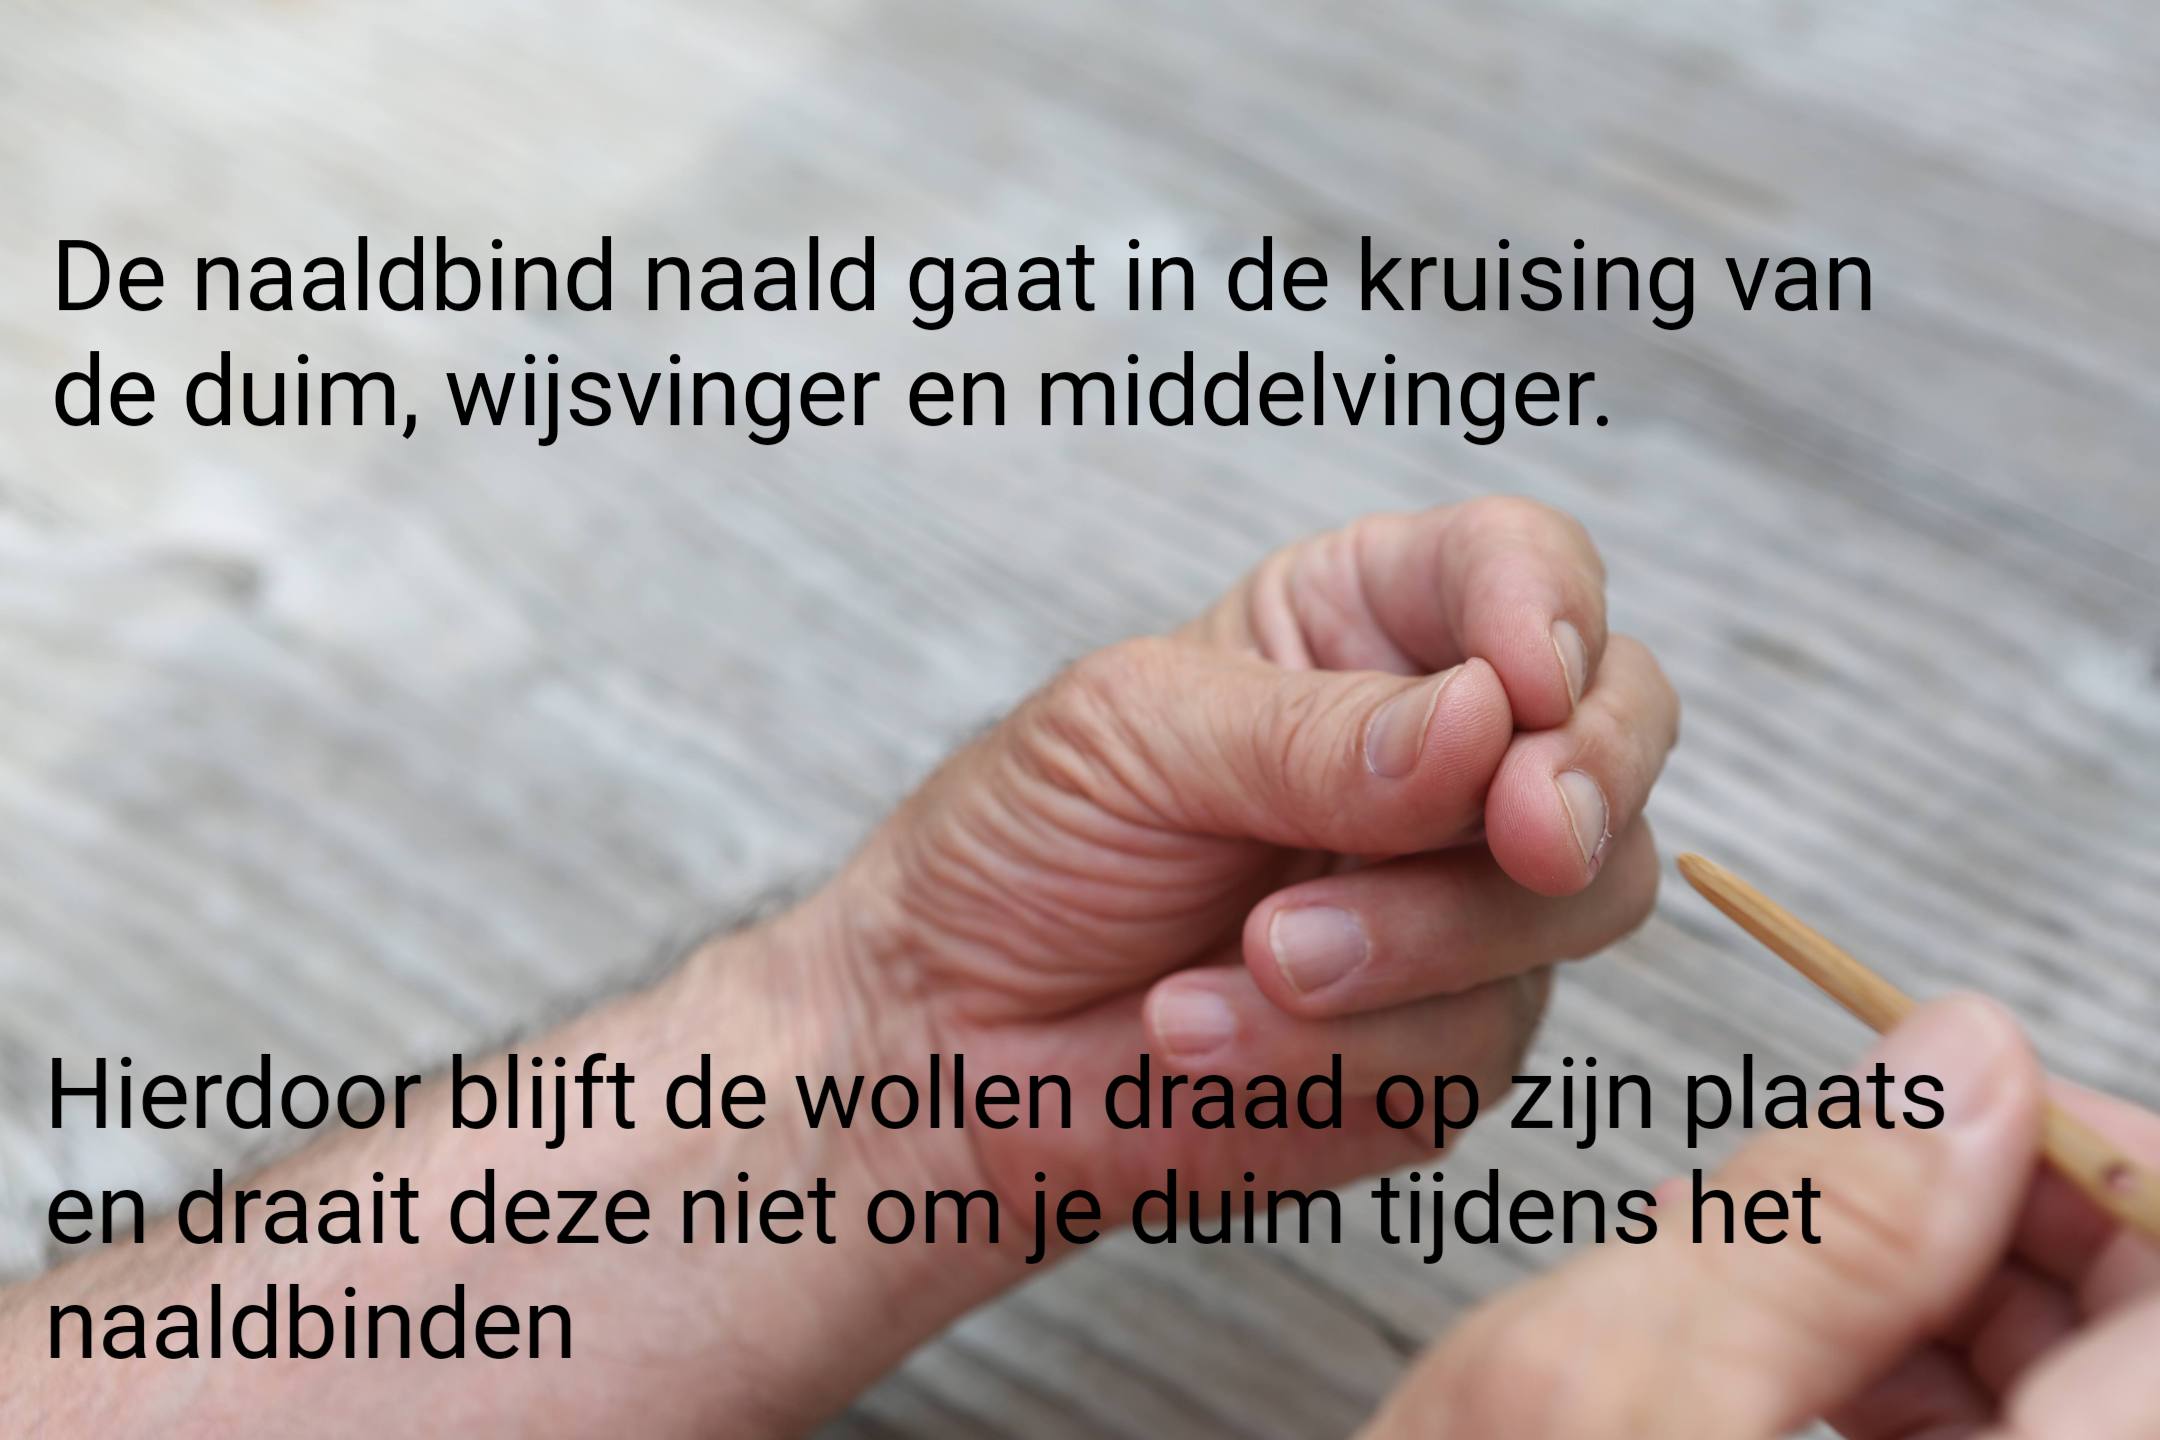
The needle-binding needle goes where your thumb, index finger, and middle finger meet. This keeps the wool thread in place and prevents it from twisting around your thumb while needle-binding.
Die Nadelbindenadel wird dort eingesetzt, wo Daumen, Zeigefinger und Mittelfinger zusammentreffen. Dadurch bleibt der Wollfaden an Ort und Stelle und kann sich beim Nadelbinden nicht um den Daumen wickeln.
L’aiguille à reliure se place à l’intersection du pouce, de l’index et du majeur. Elle maintient le fil de laine en place et l’empêche de s’enrouler autour du pouce pendant la reliure.
La aguja para encuadernar se coloca en la unión del pulgar, el índice y el dedo medio. Esto mantiene el hilo de lana en su lugar y evita que se enrede alrededor del pulgar mientras se encuaderna.
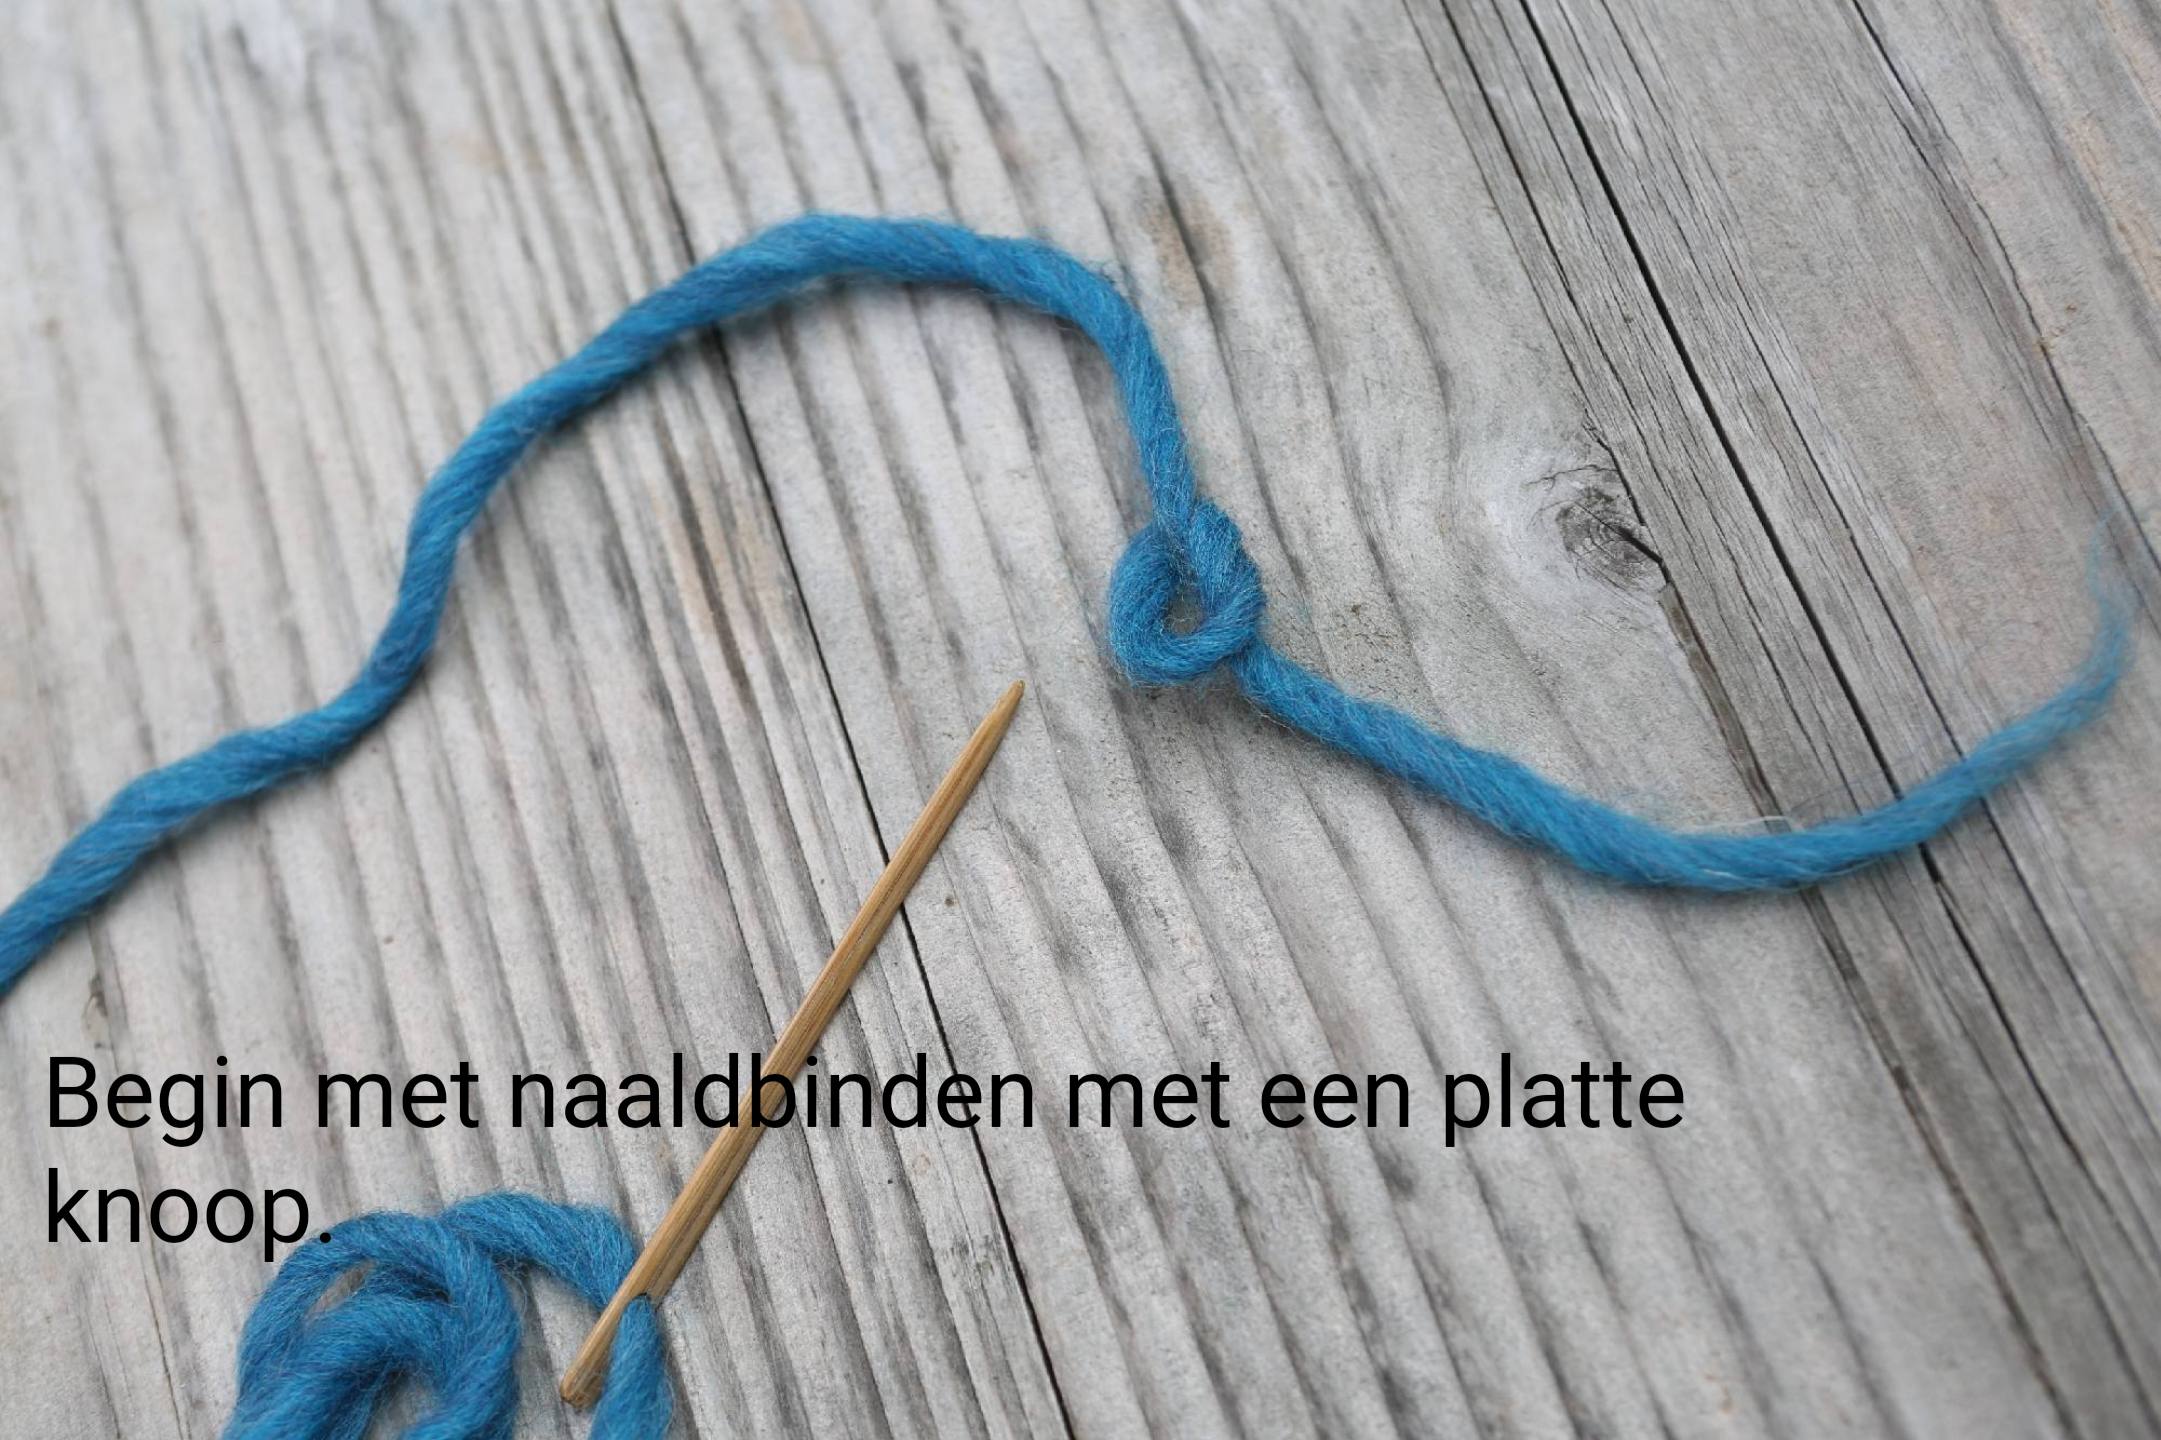
Begin needle binding with a flat knot.
Beginnen Sie das Nadelbinden mit einem flachen Knoten.
Commencez la reliure à l’aiguille avec un nœud plat.
Comience a atar con aguja con un nudo plano.
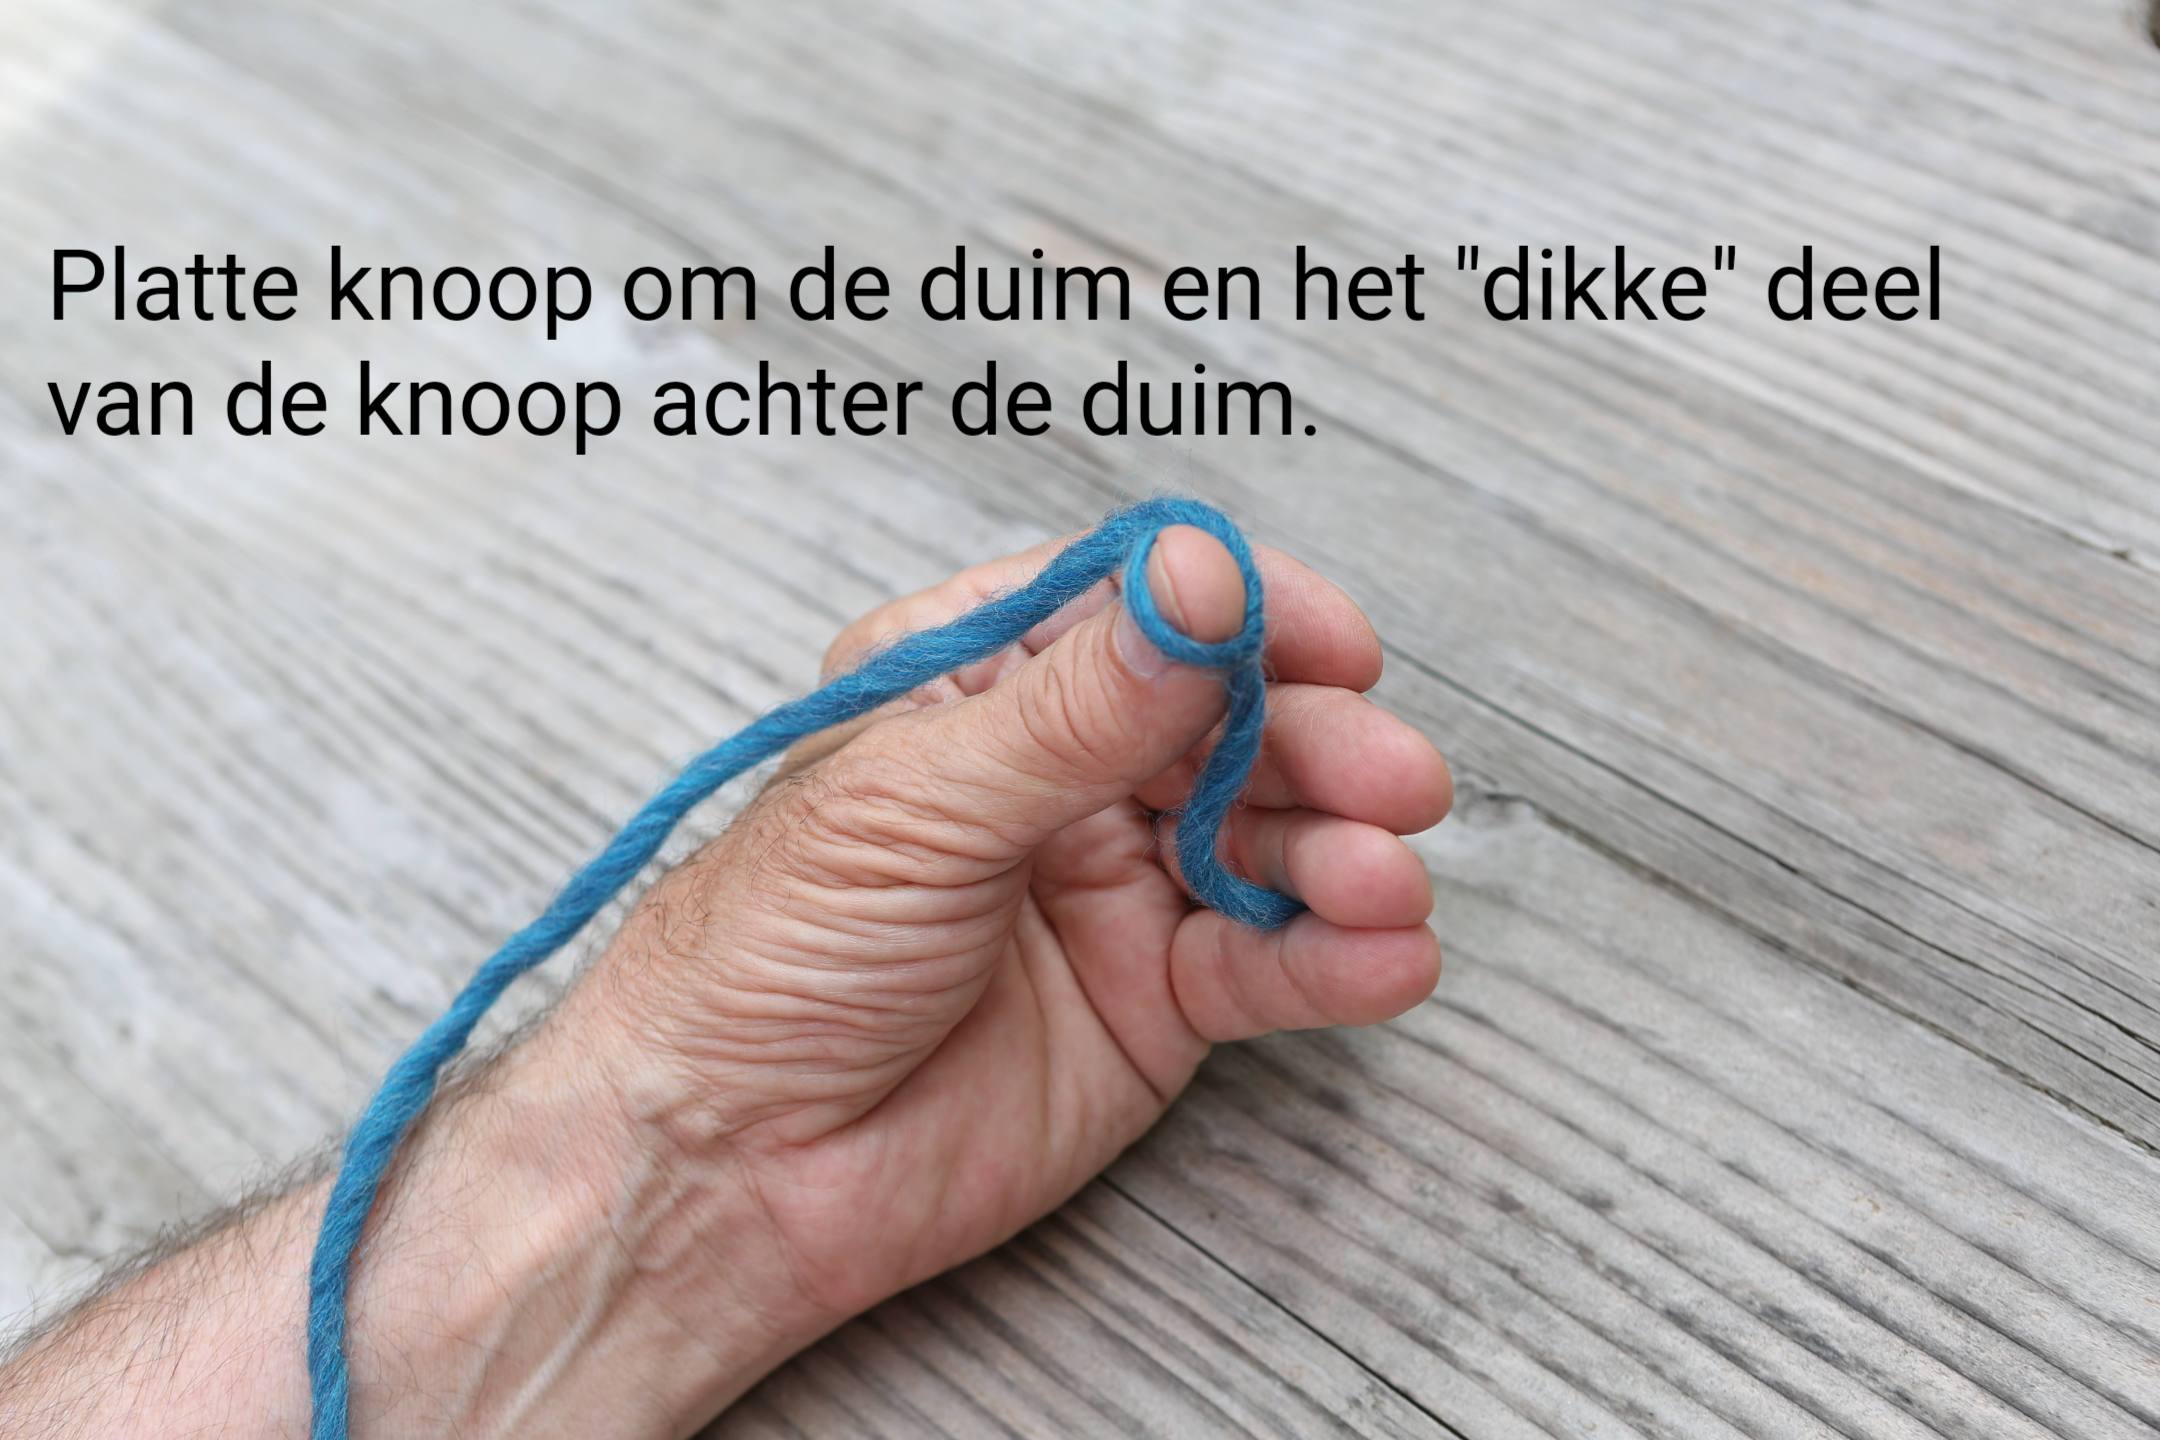
Flat knot around the thumb and the “thick” part of the knot behind your thumb.
Flacher Knoten um den Daumen und der „dicke“ Teil des Knotens hinter dem Daumen
Nœud plat autour du pouce et la partie « épaisse » du nœud derrière votre pouce.
Nudo plano alrededor del pulgar y la parte “gruesa” del nudo detrás del pulgar
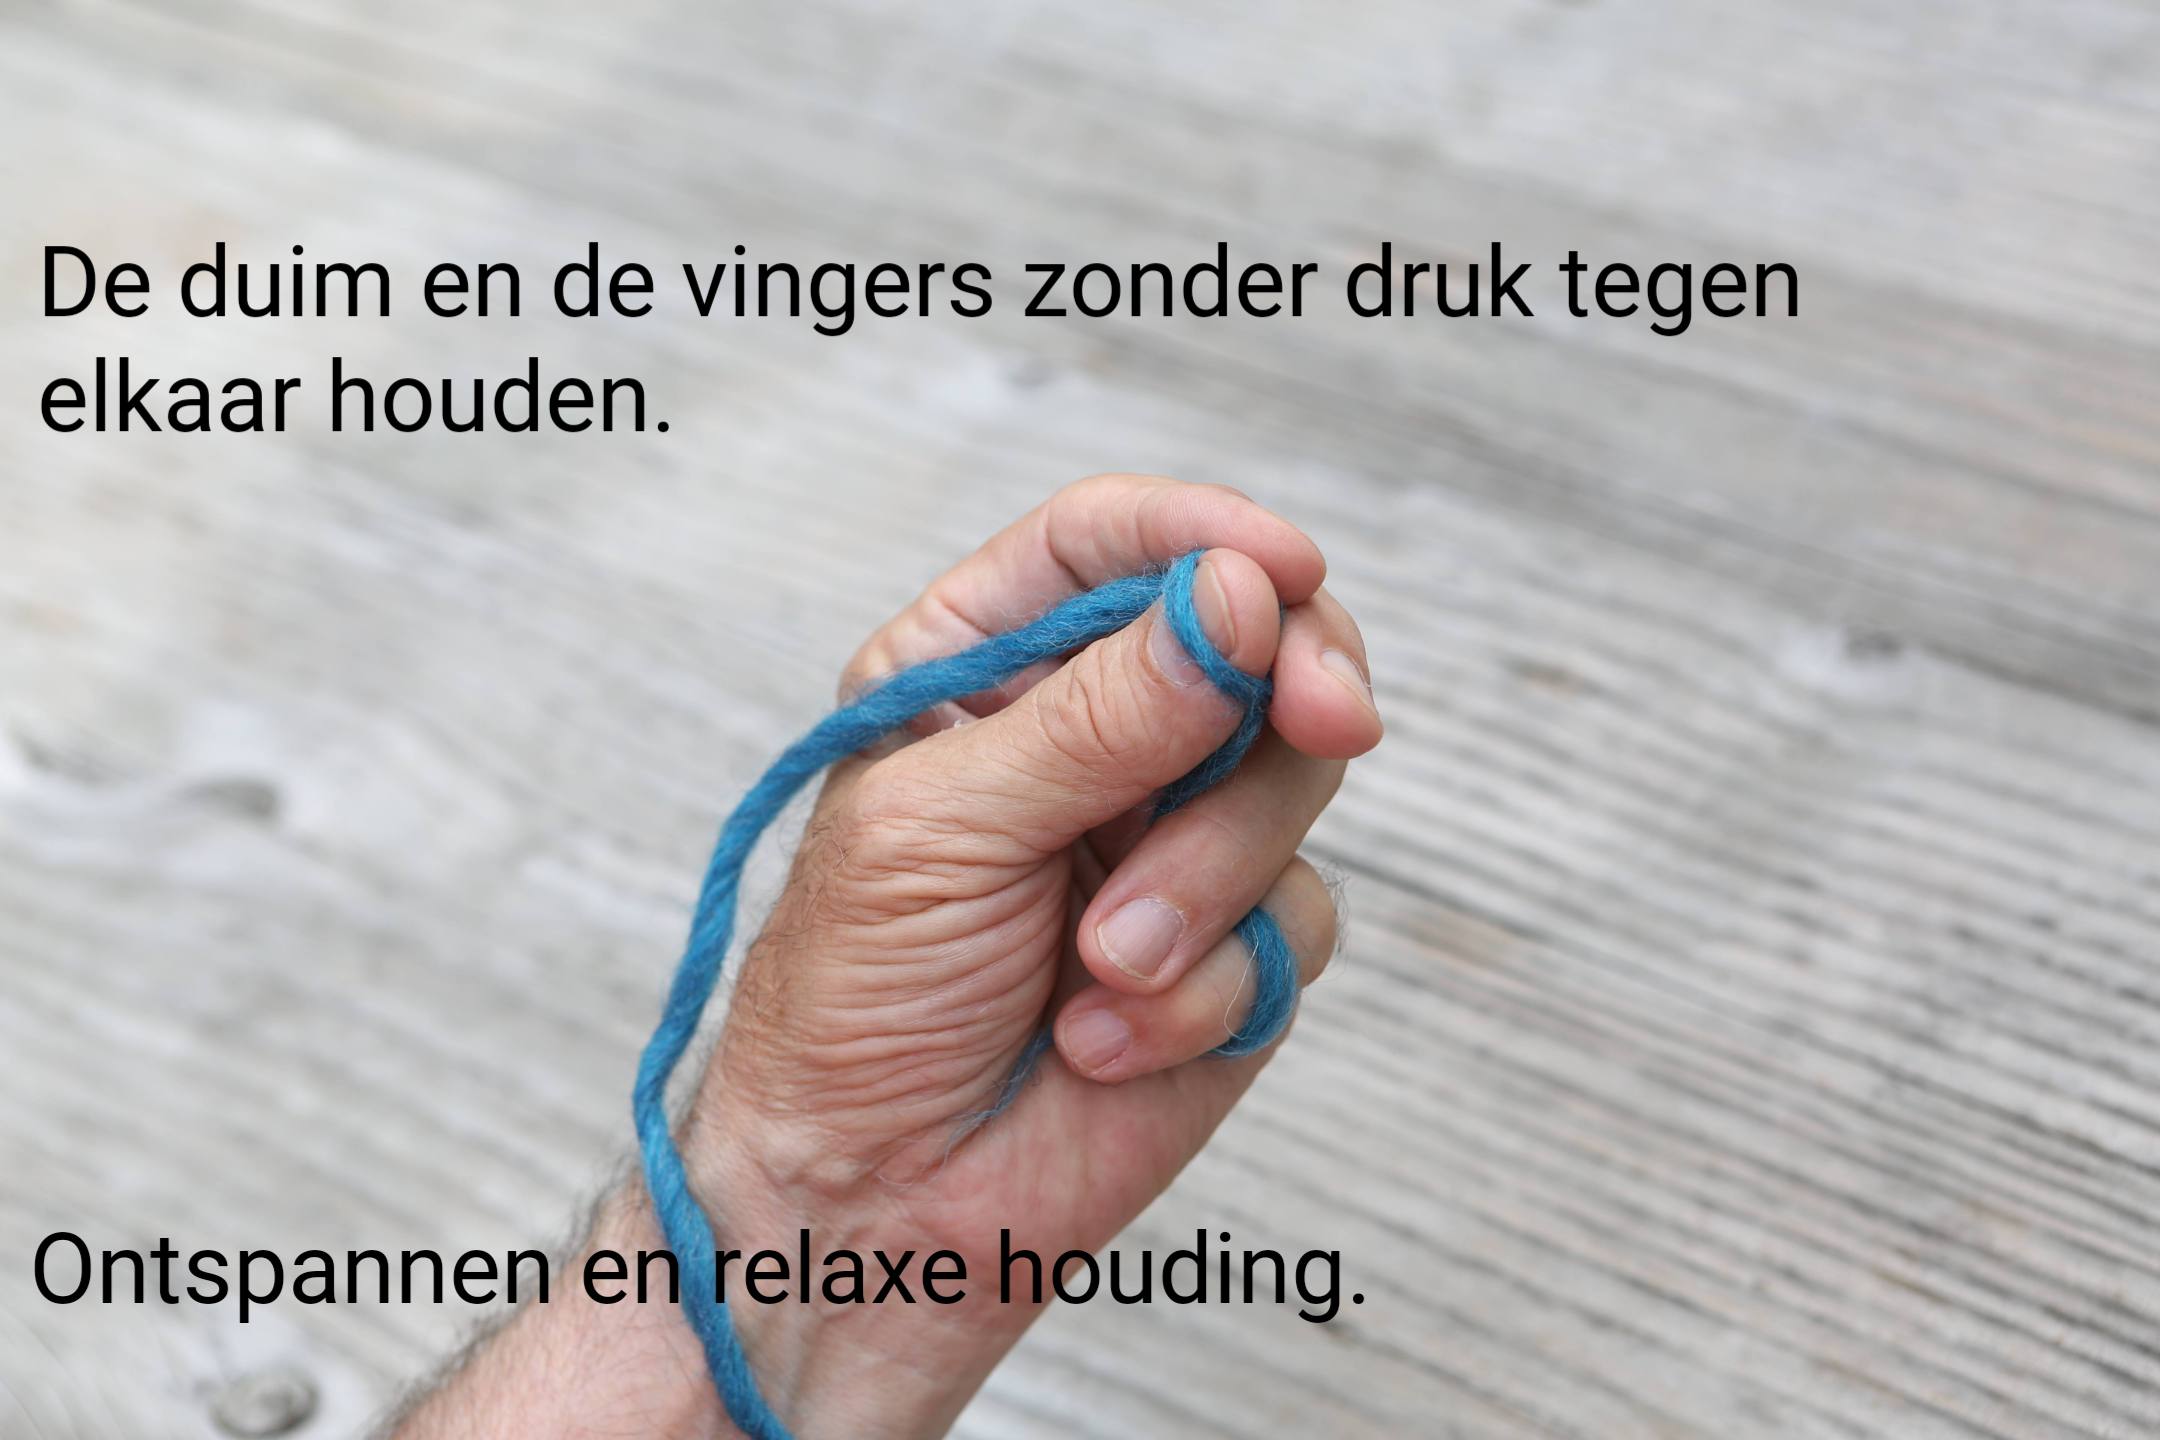
Hold the thumb and fingers against each other without pressure in a relaxed position.
Halten Sie Daumen und Finger in entspannter Position ohne Druck aneinander.
Maintenez le pouce et les doigts l’un contre l’autre sans pression dans une position détendue.
Mantenga el pulgar y los dedos uno contra el otro sin presión en una posición relajada.
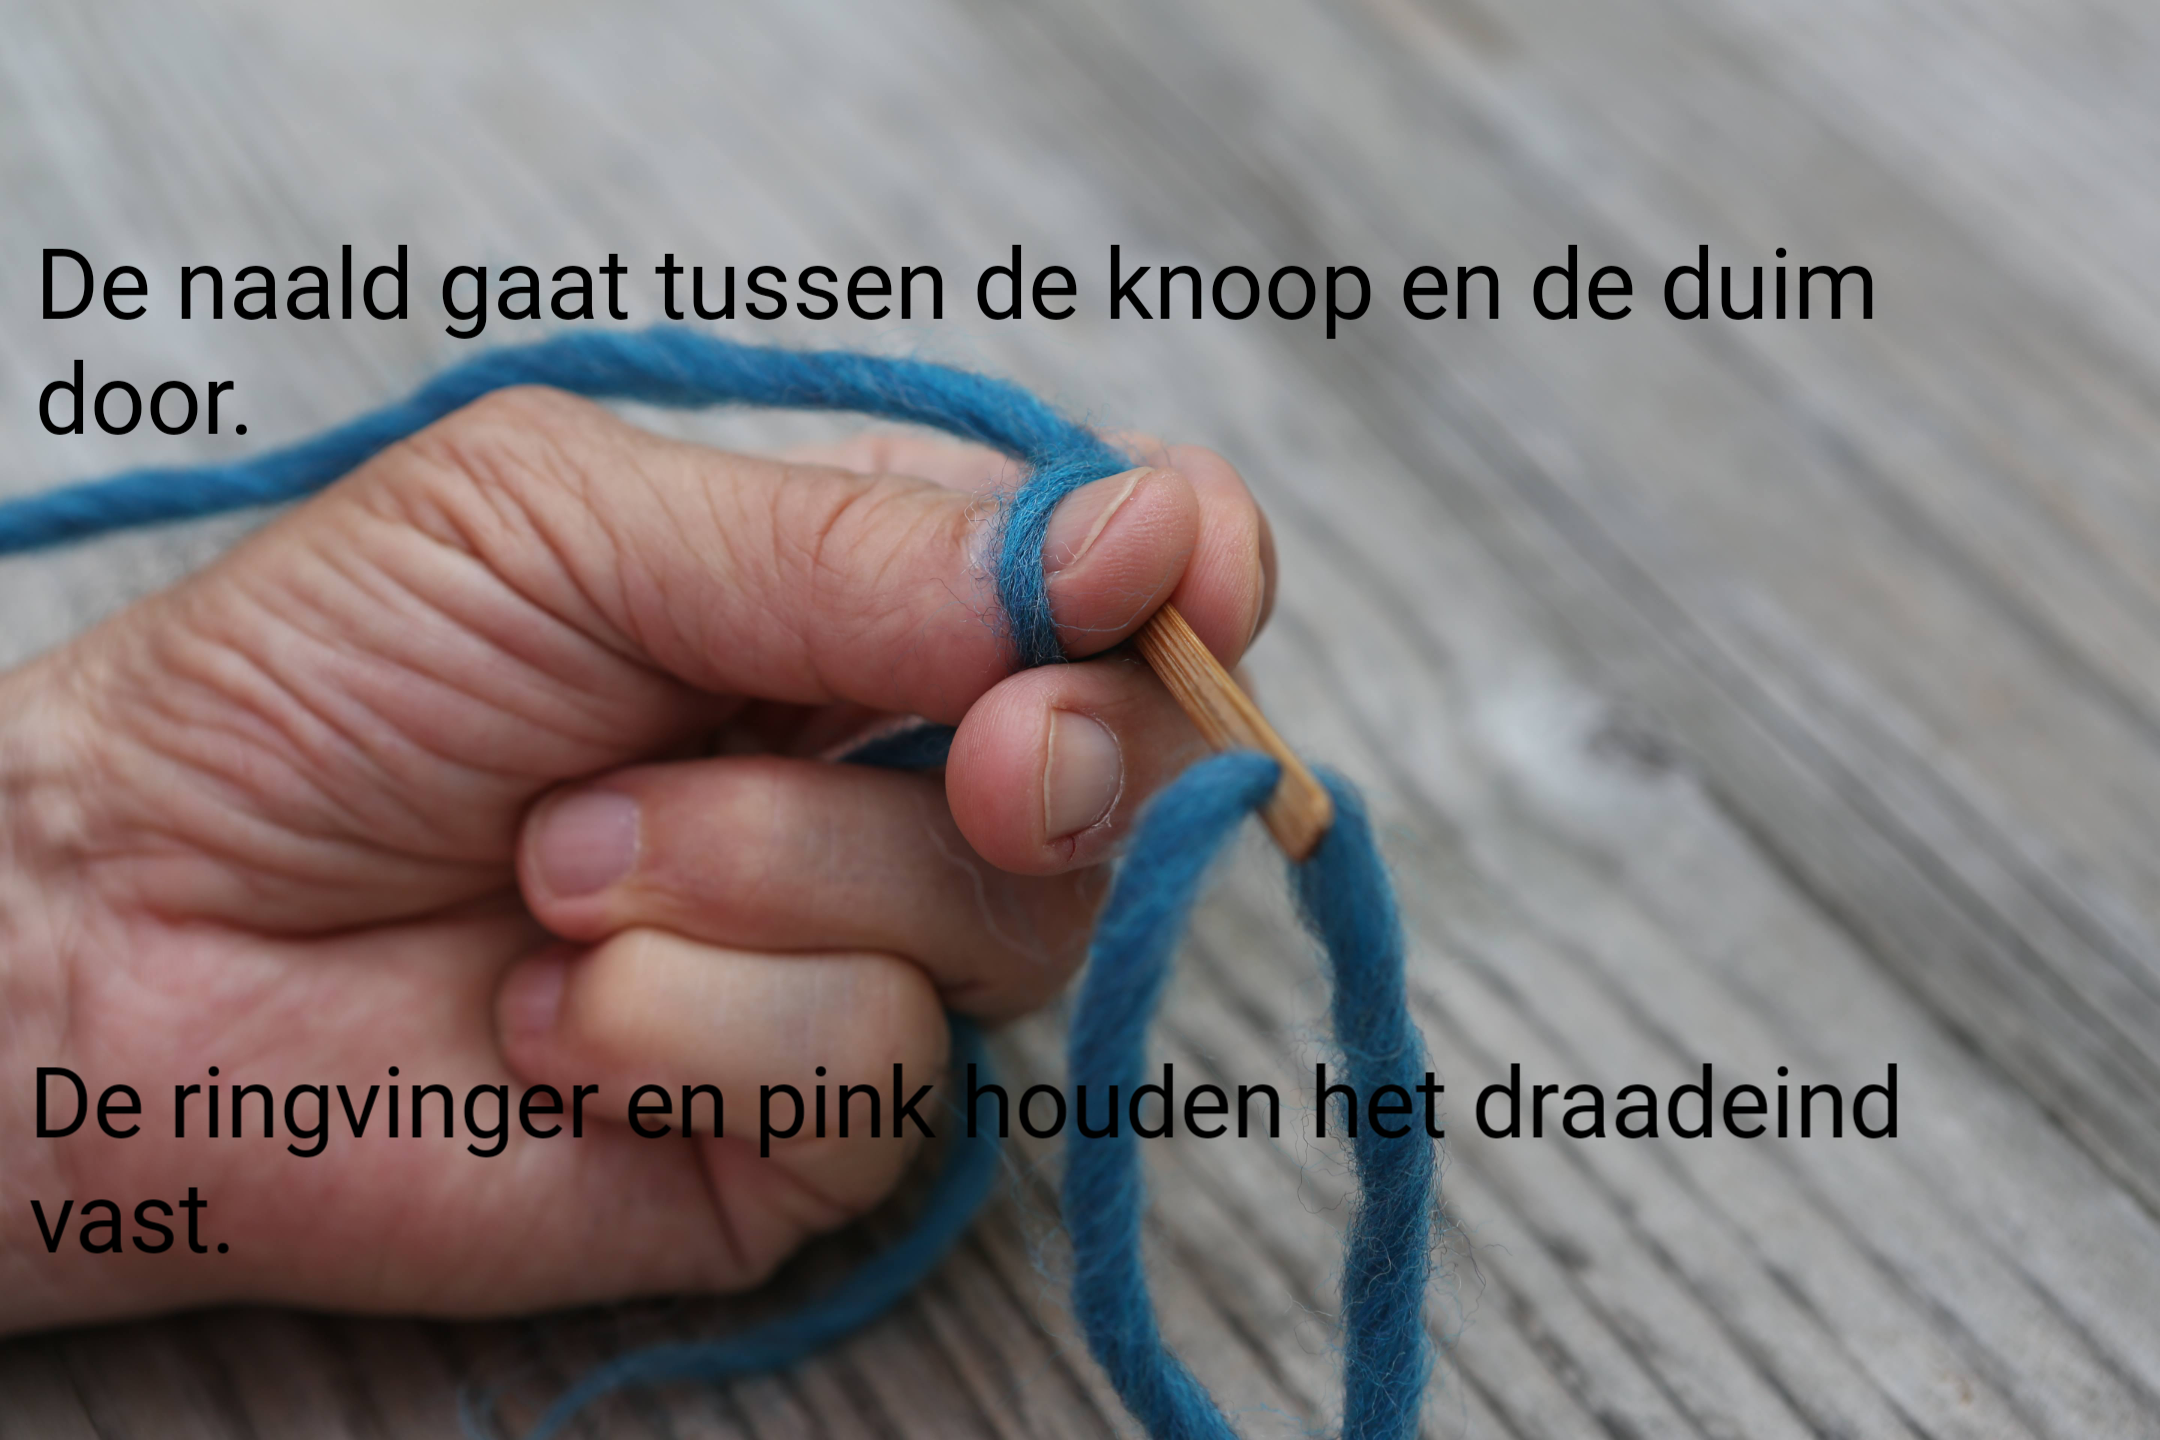
The needle passes between the button and the thumb. The ring and little fingers hold the thread end.
Die Nadel wird zwischen Knopf und Daumen geführt. Ringfinger und kleiner Finger halten das Fadenende.
L’aiguille passe entre le bouton et le pouce. L’annulaire et l’auriculaire tiennent l’extrémité du fil.
La aguja pasa entre el botón y el pulgar. Los dedos anular y meñique sujetan el extremo del hilo.
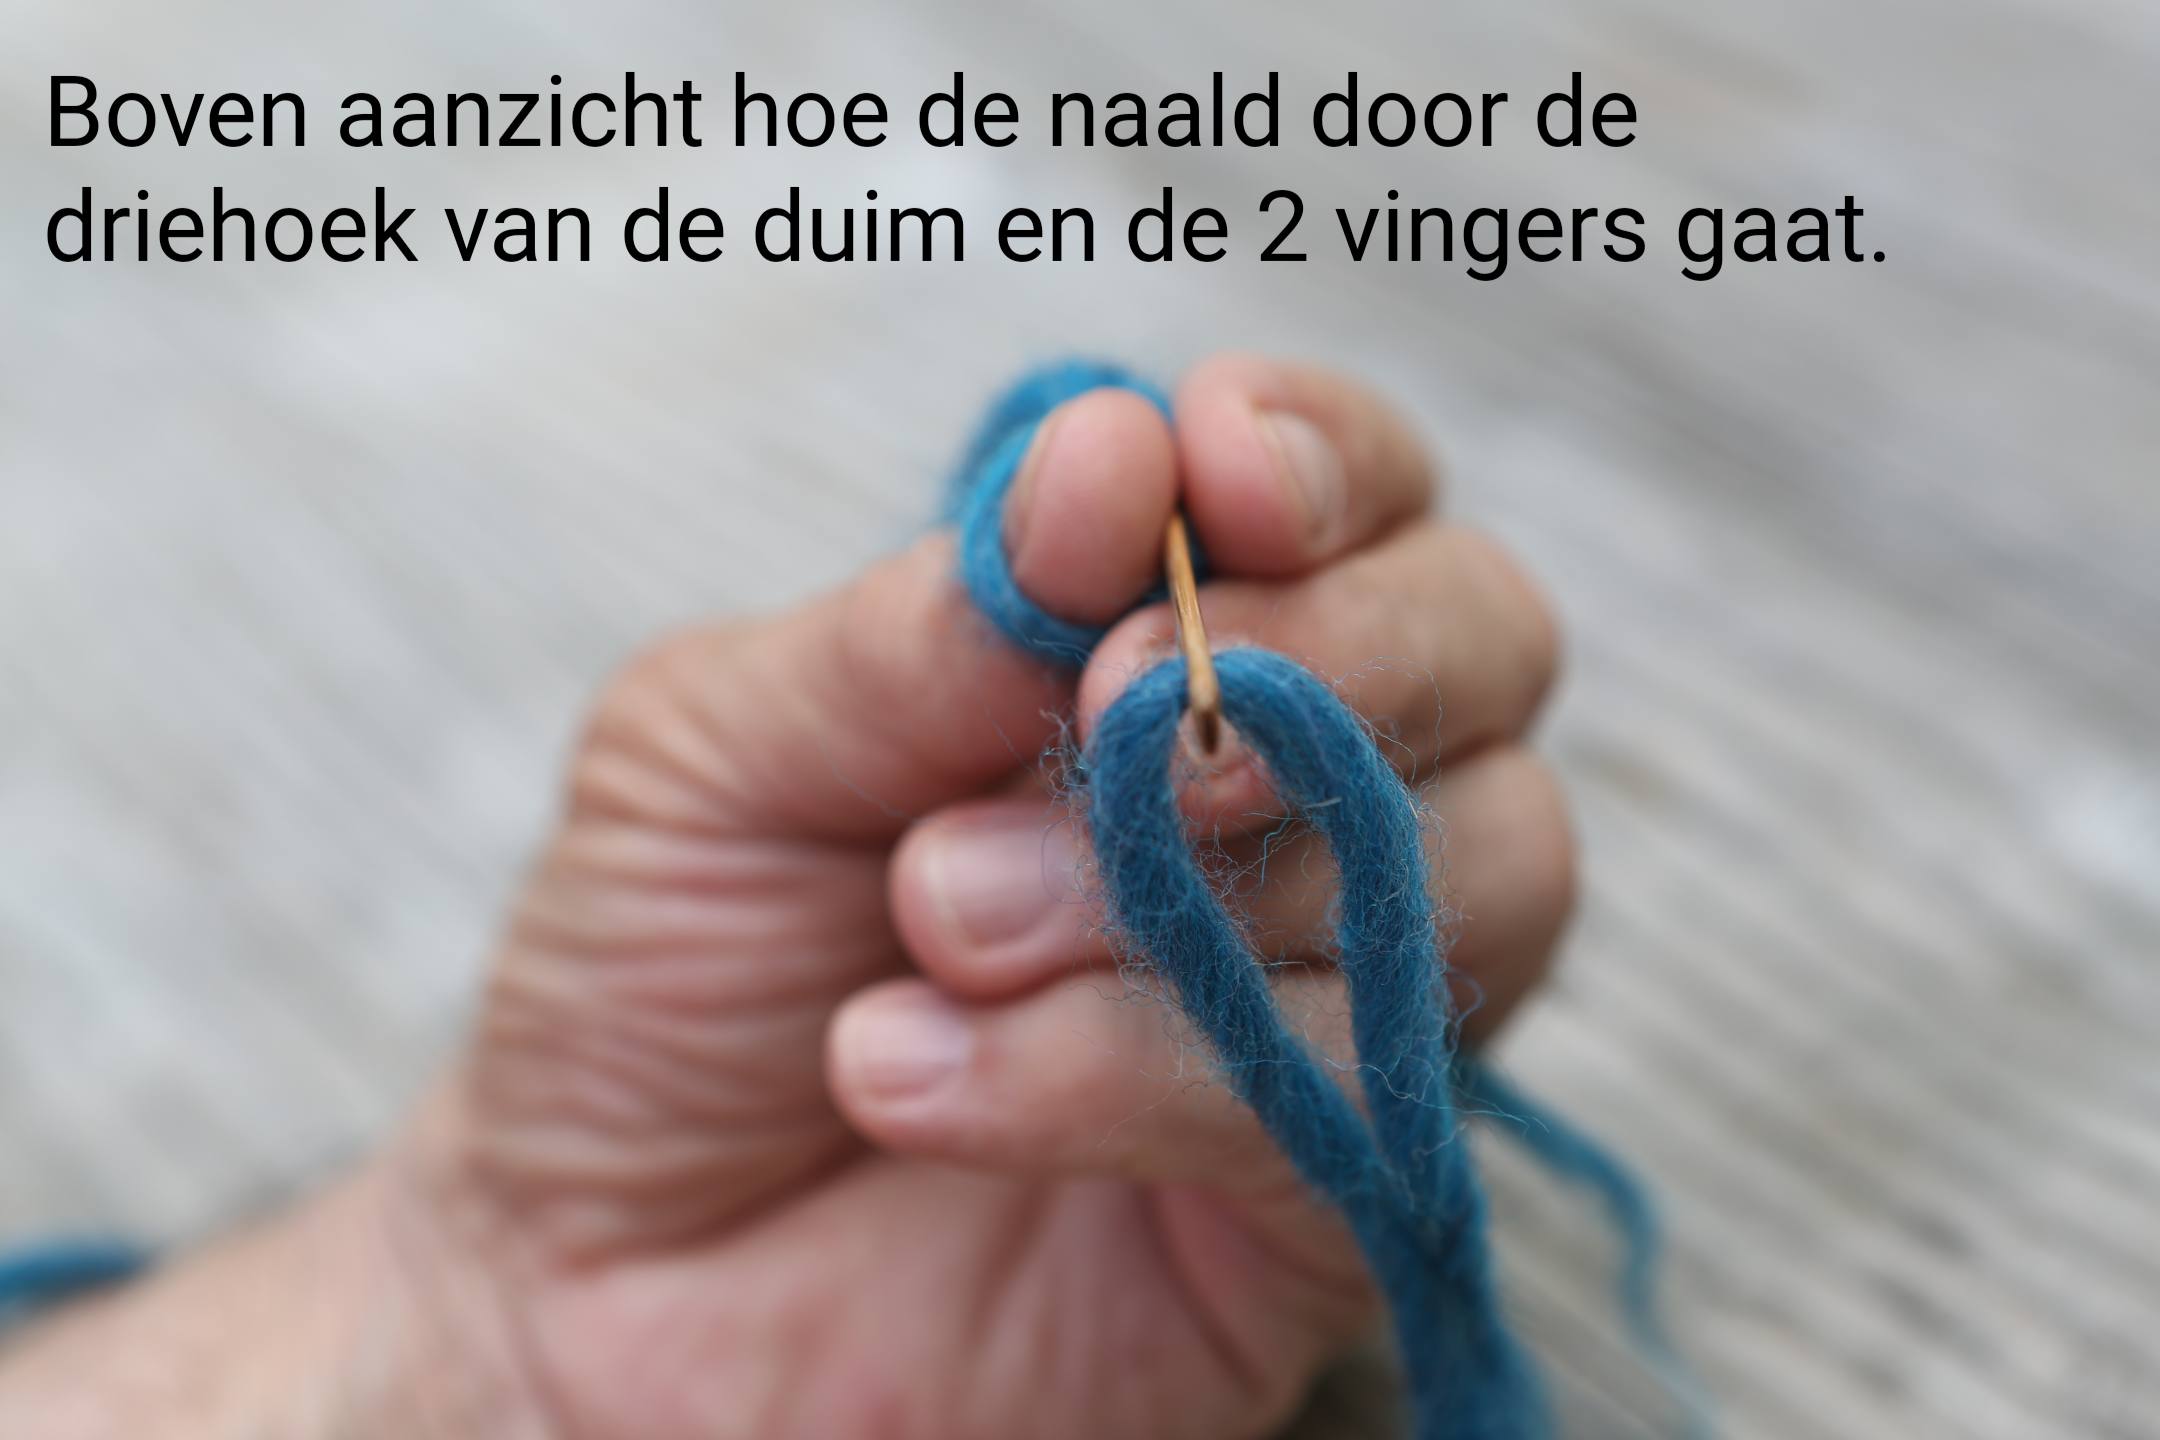
Top view of how the needle goes through the triangle of the thumb and the 2 fingers.
Draufsicht, wie die Nadel durch das Dreieck aus Daumen und den beiden Fingern geht.
Vue de dessus de la façon dont l’aiguille traverse le triangle du pouce et des 2 doigts.
Vista superior de cómo la aguja pasa por el triángulo del pulgar y los 2 dedos.
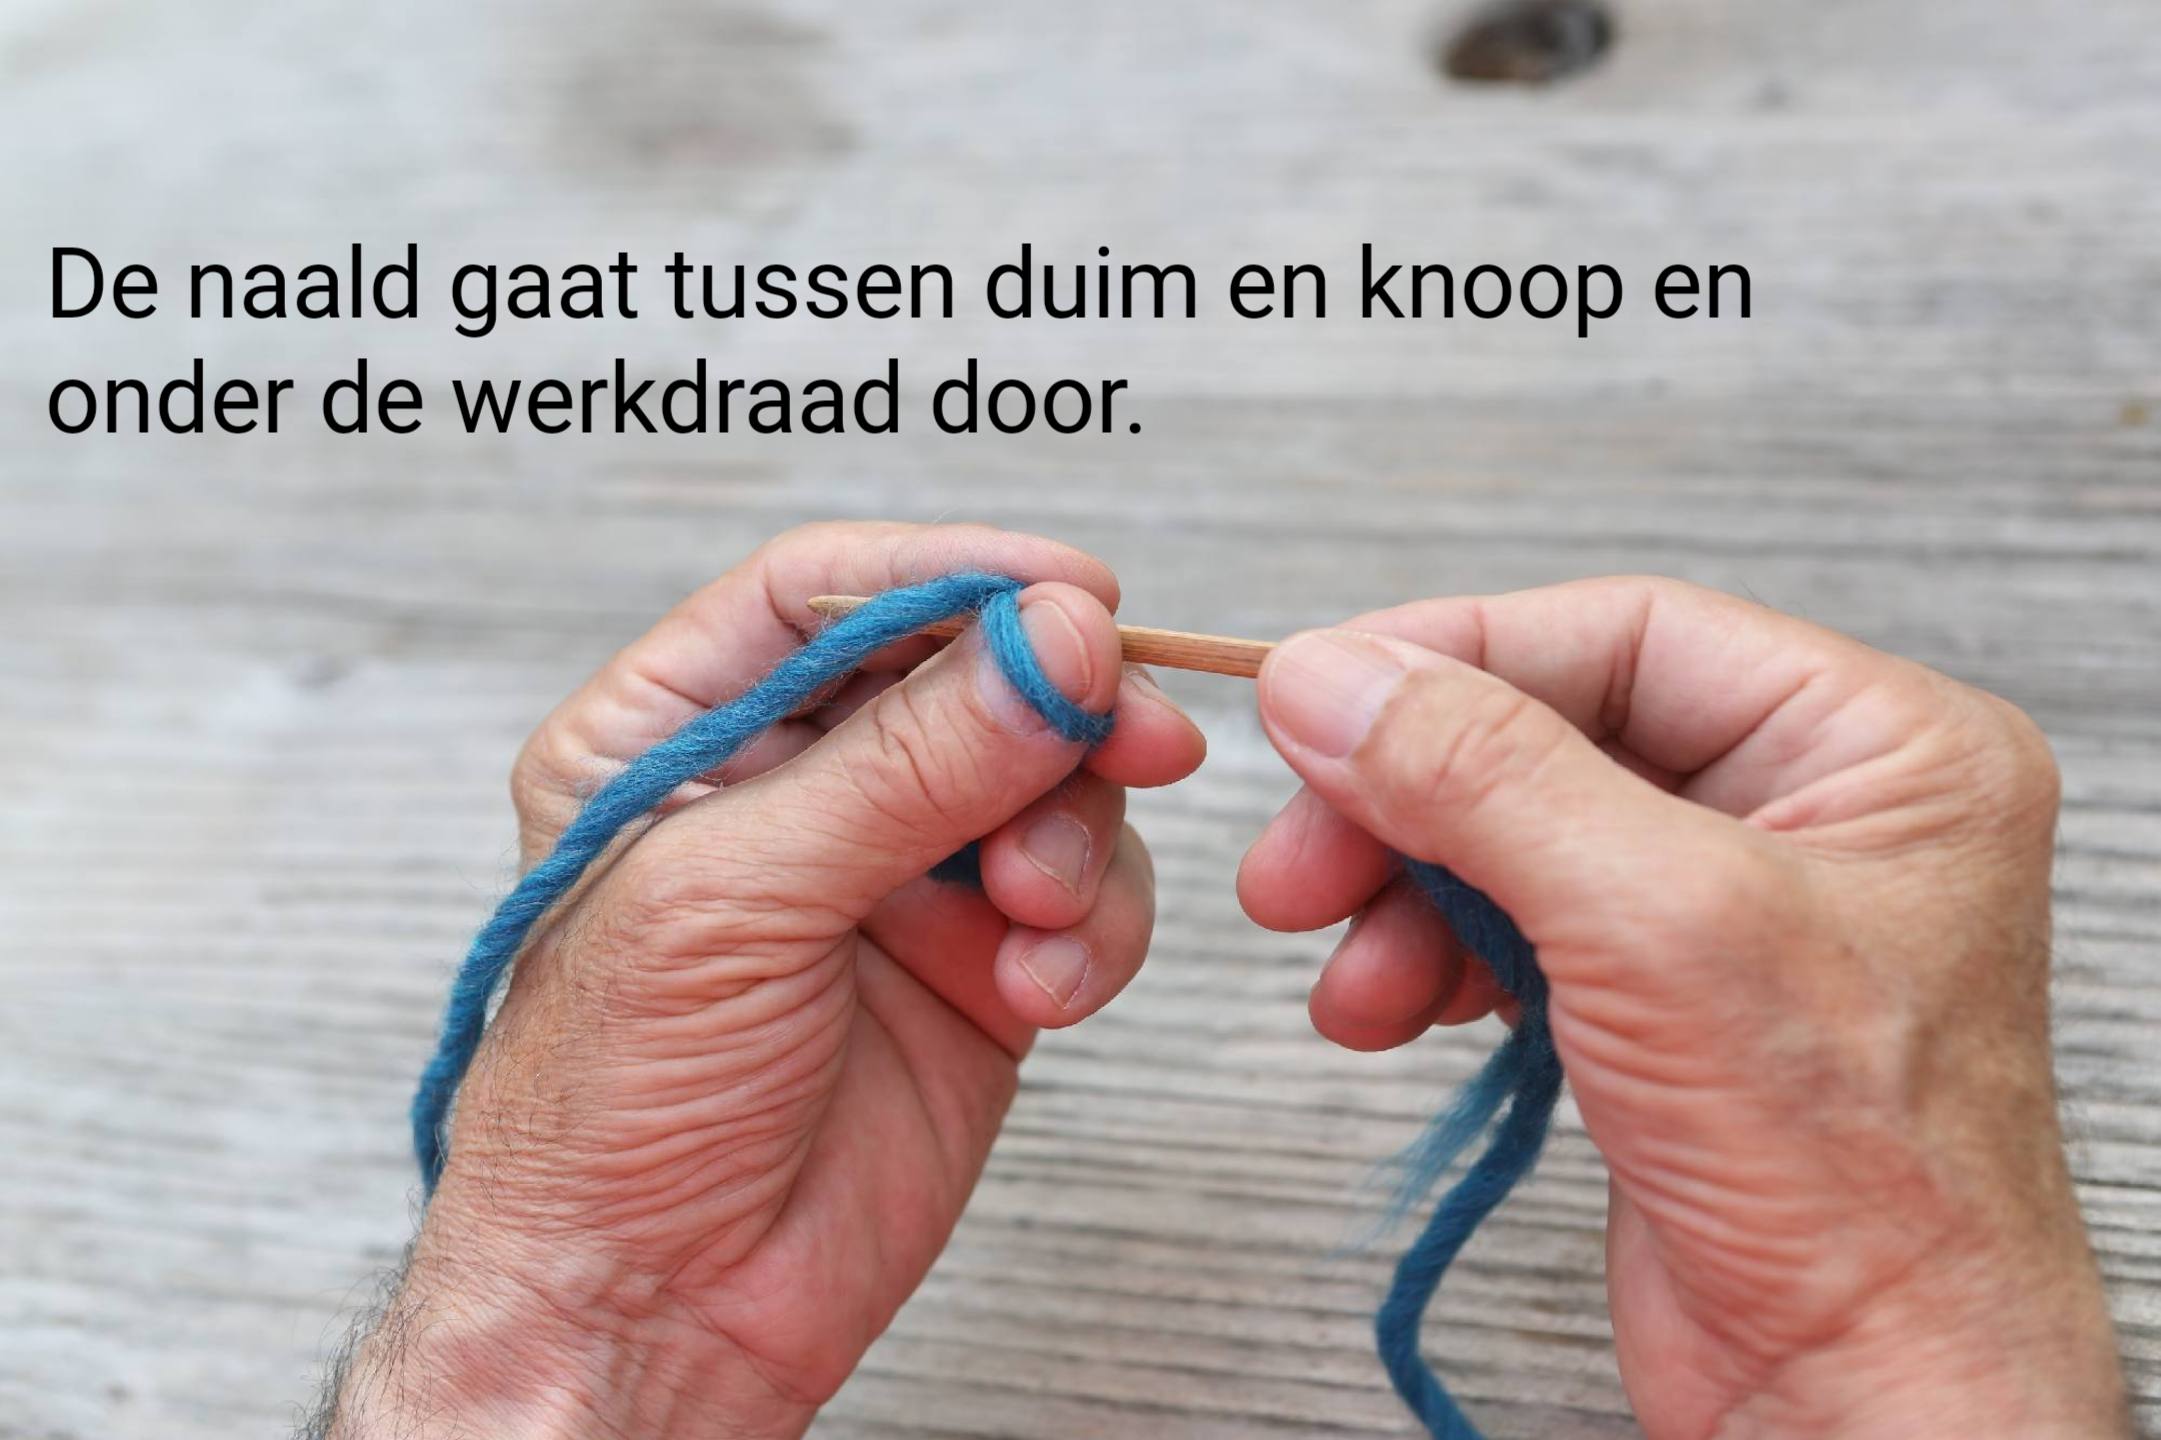
The needle goes between your thumb and the button and under the working thread.
Die Nadel wird zwischen Daumen und Knopf und unter den Arbeitsfaden geführt.
L’aiguille passe entre votre pouce et le bouton et sous le fil de travail.
La aguja pasa entre el pulgar y el botón y debajo del hilo de trabajo.
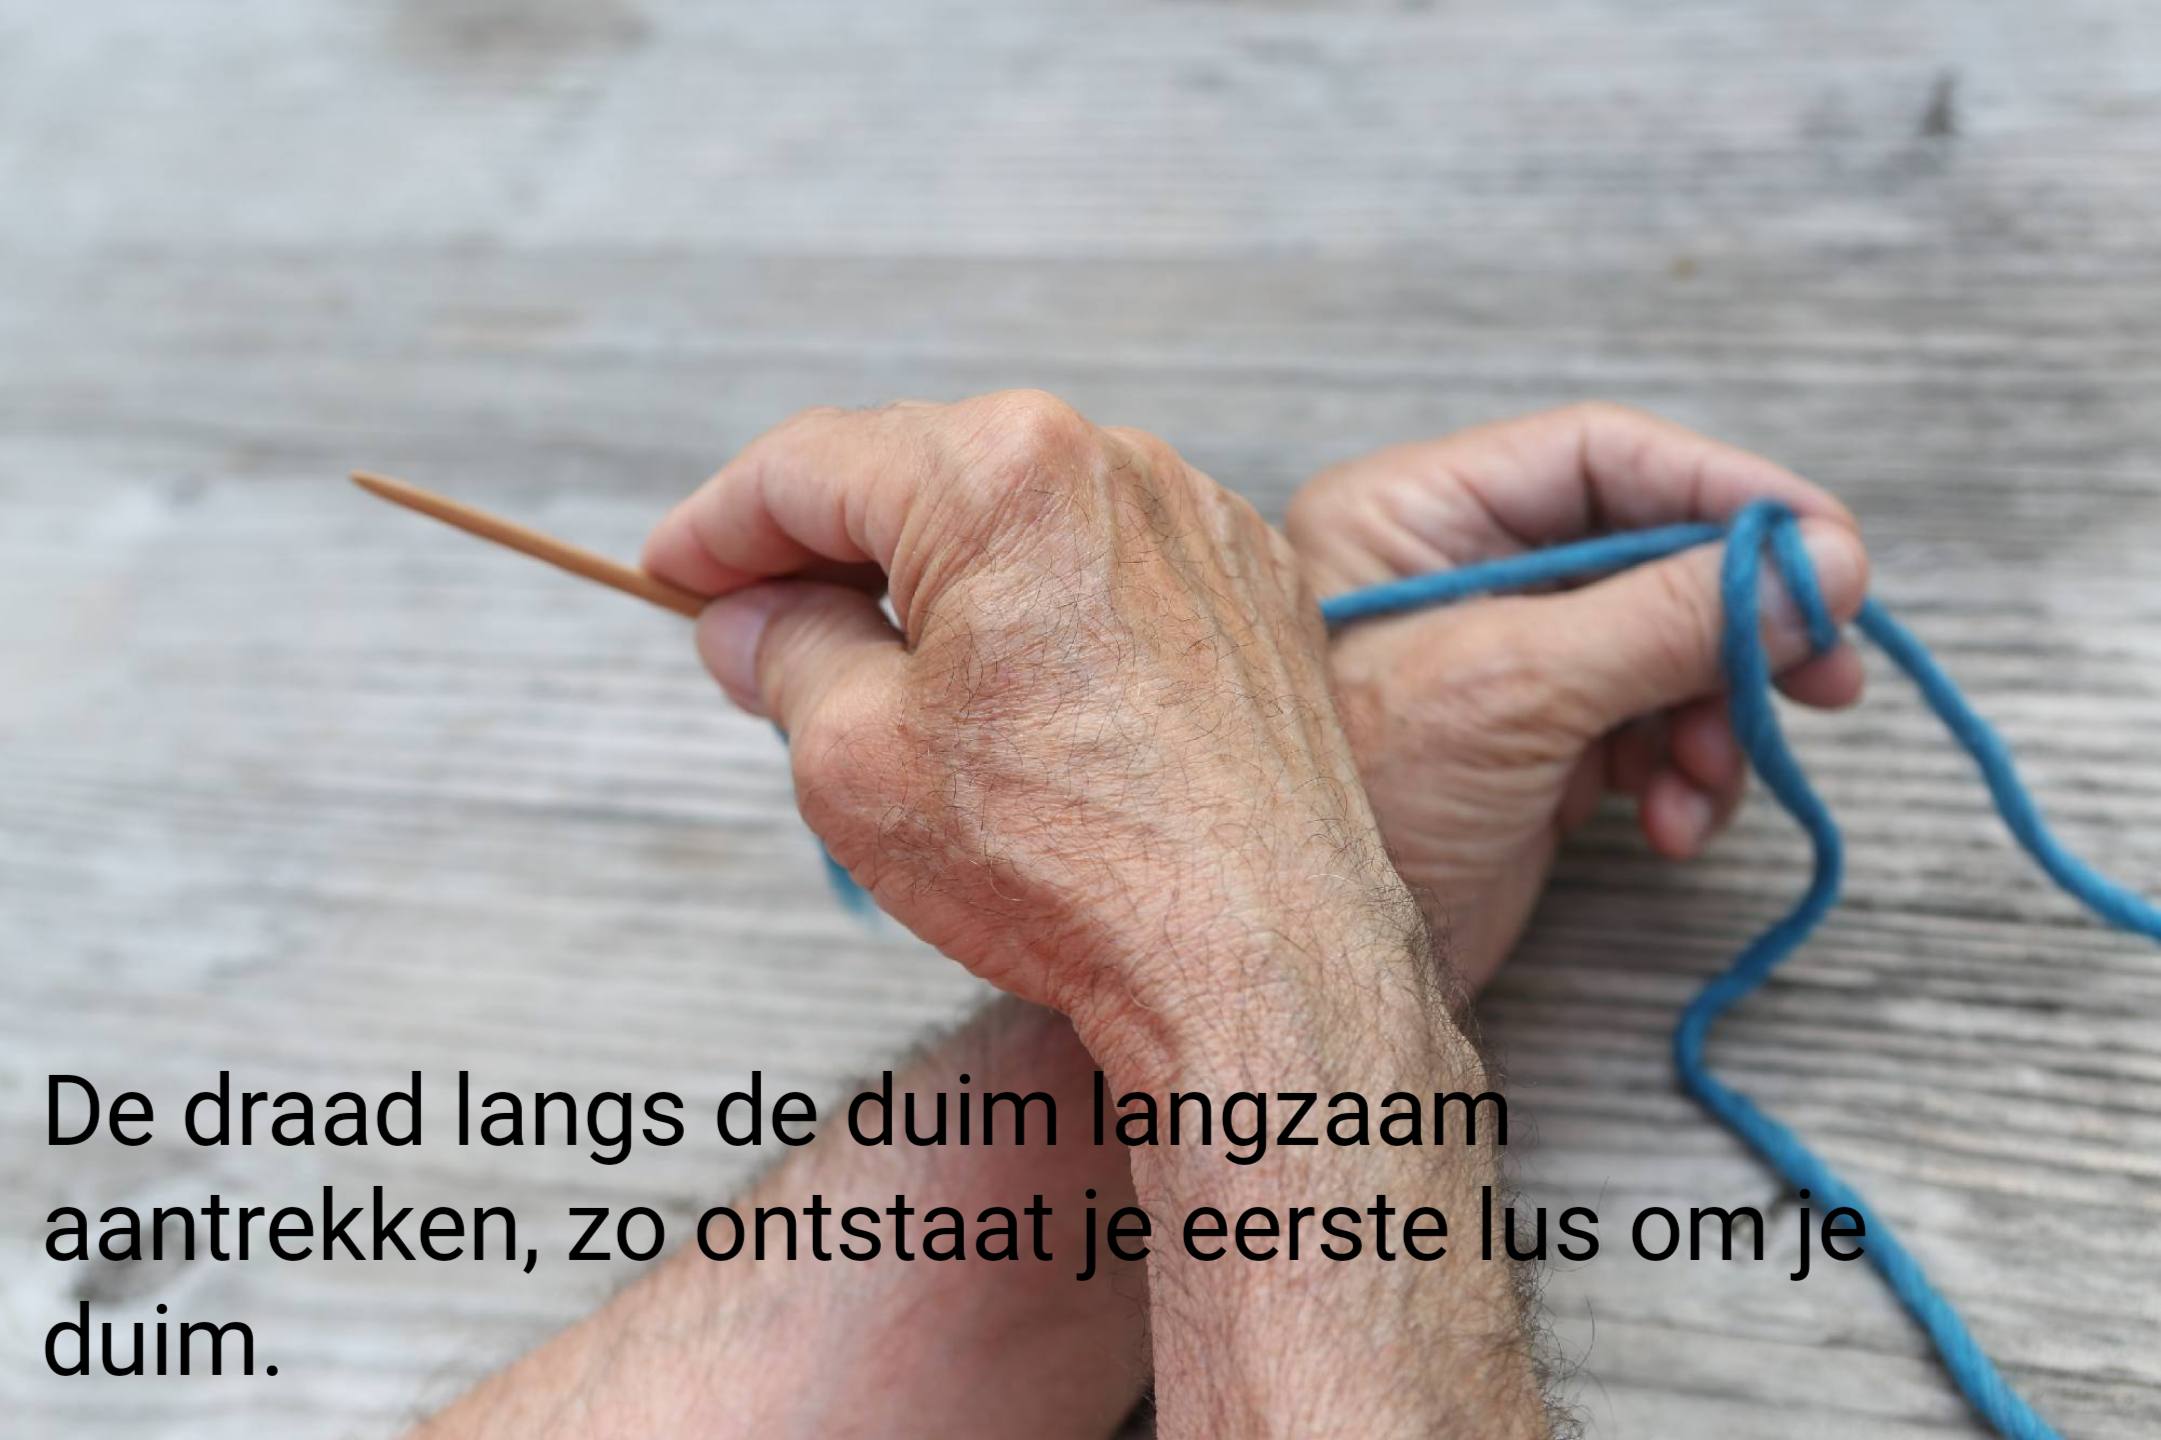
Slowly pull the thread along your thumb, creating your first loop around your thumb.
Ziehen Sie den Faden langsam an Ihrem Daumen entlang, sodass die erste Schlaufe um Ihren Daumen entsteht.
Tirez lentement le fil le long de votre pouce, créant ainsi votre première boucle autour de votre pouce.
Tire lentamente del hilo a lo largo de su pulgar, creando su primer bucle alrededor de su pulgar.
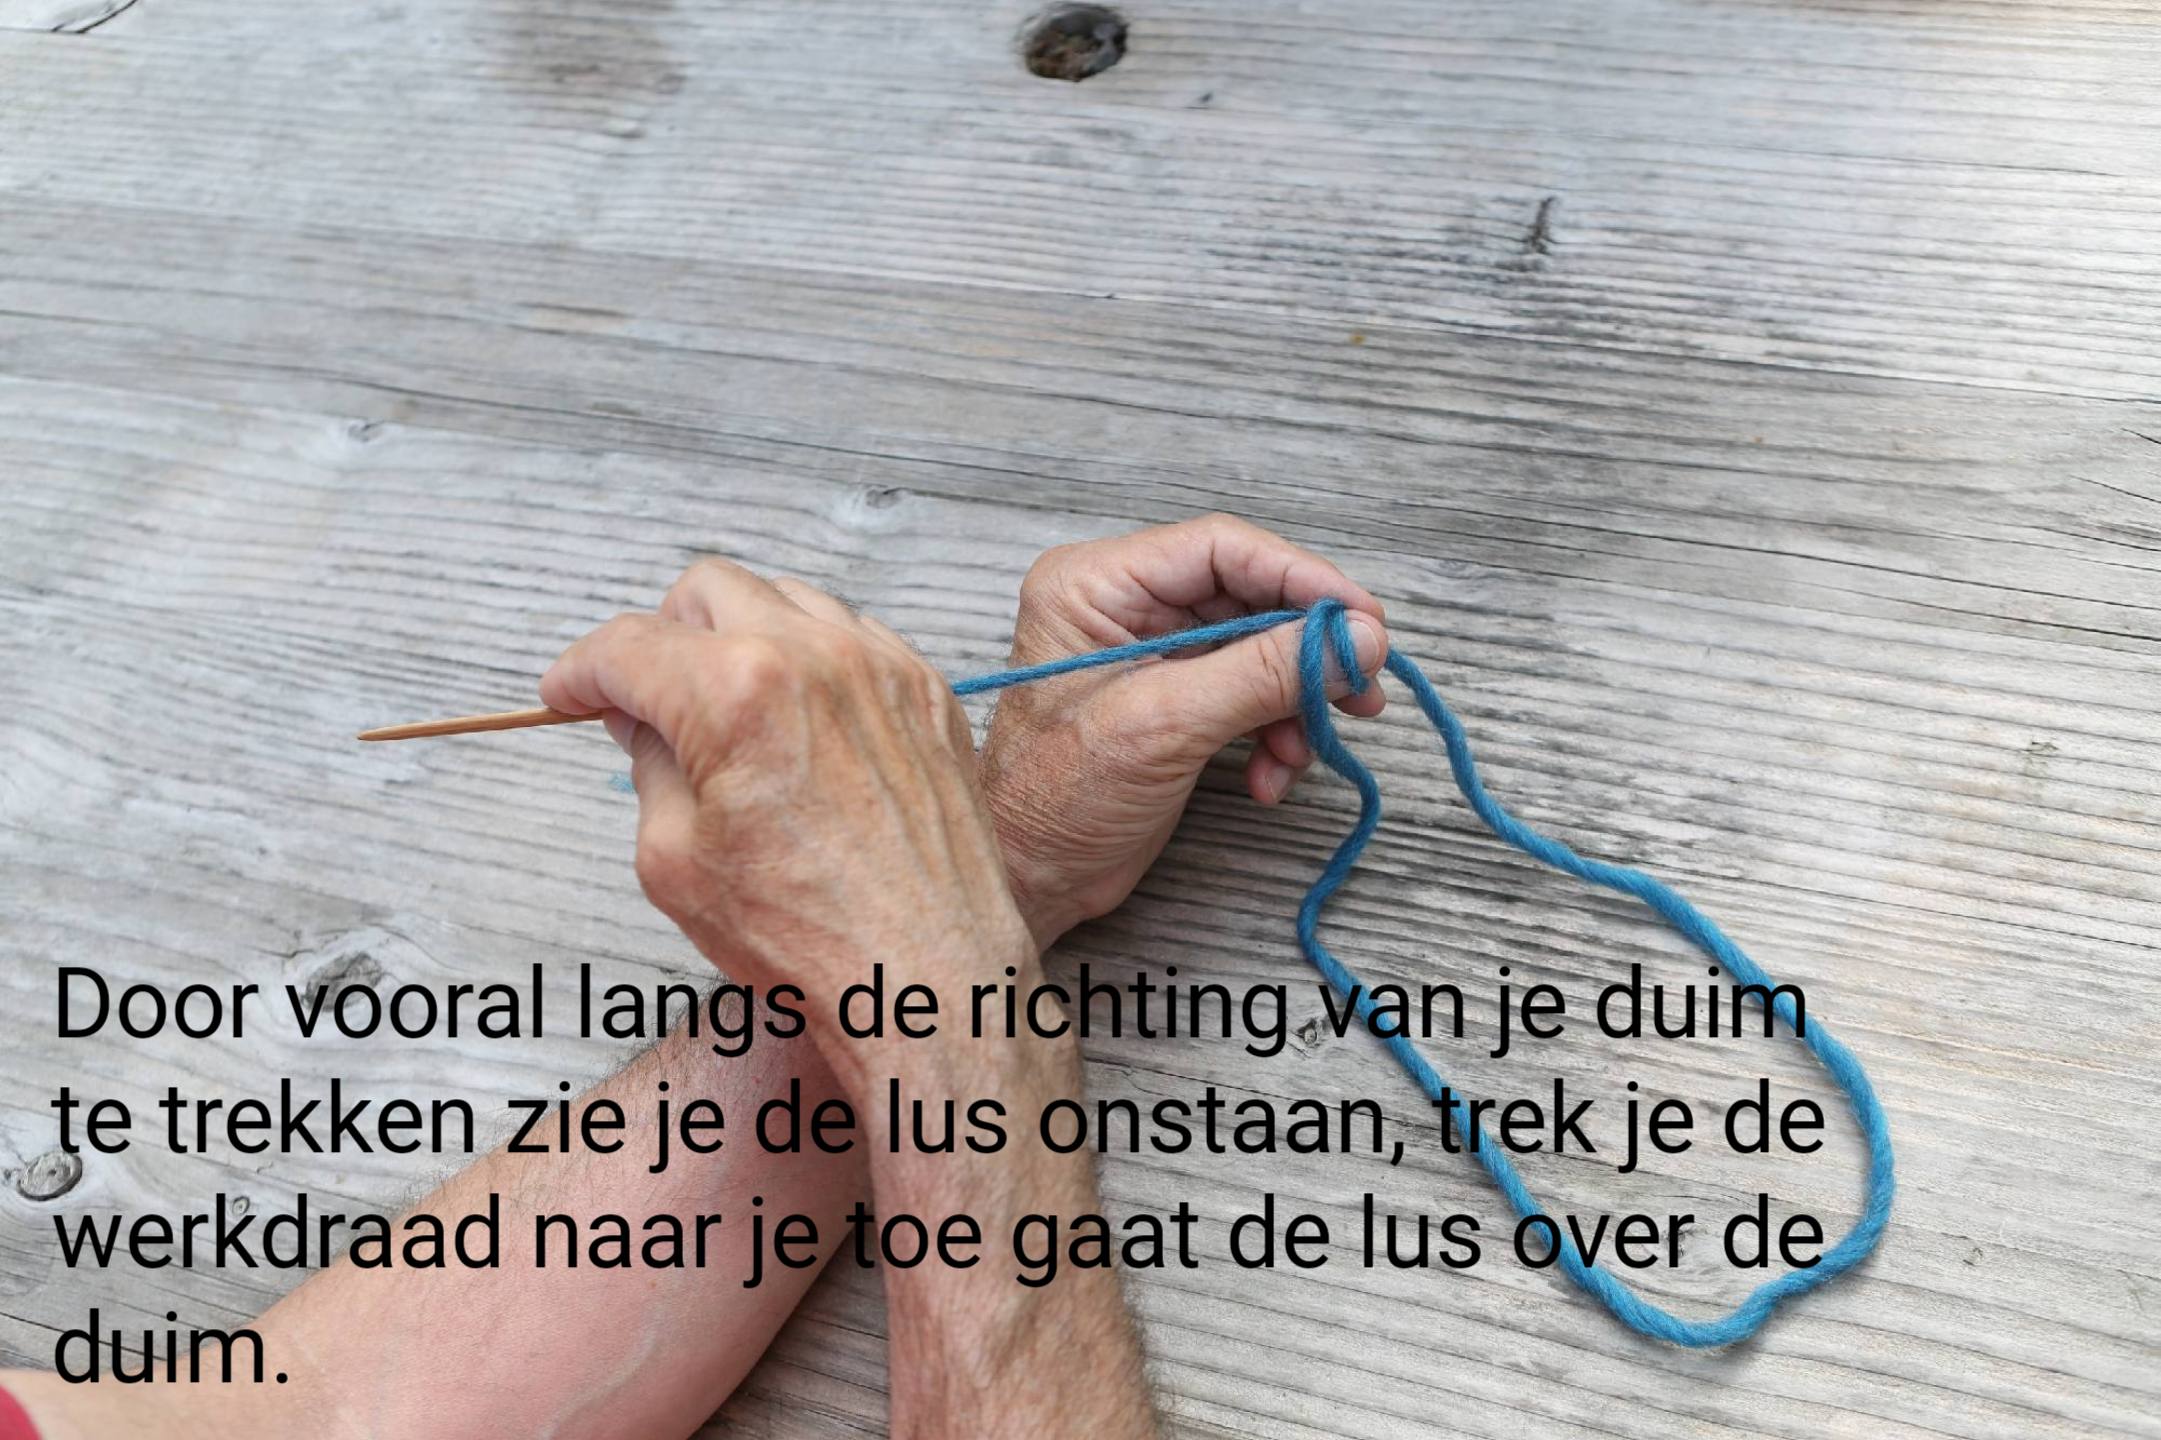
By pulling mainly in the direction of your thumb you will see the loop form; if you pull the working yarn towards you the loop will go over your thumb.
Wenn Sie hauptsächlich in Richtung Ihres Daumens ziehen, sehen Sie, wie sich die Schlaufe bildet. Wenn Sie das Arbeitsgarn zu sich ziehen, geht die Schlaufe über Ihren Daumen.
En tirant principalement dans la direction de votre pouce, vous verrez la boucle se former ; si vous tirez le fil de travail vers vous, la boucle passera par-dessus votre pouce.
Tirando principalmente en la dirección de tu pulgar verás cómo se forma el bucle; si tiras del hilo de trabajo hacia ti, el bucle pasará por encima de tu pulgar.
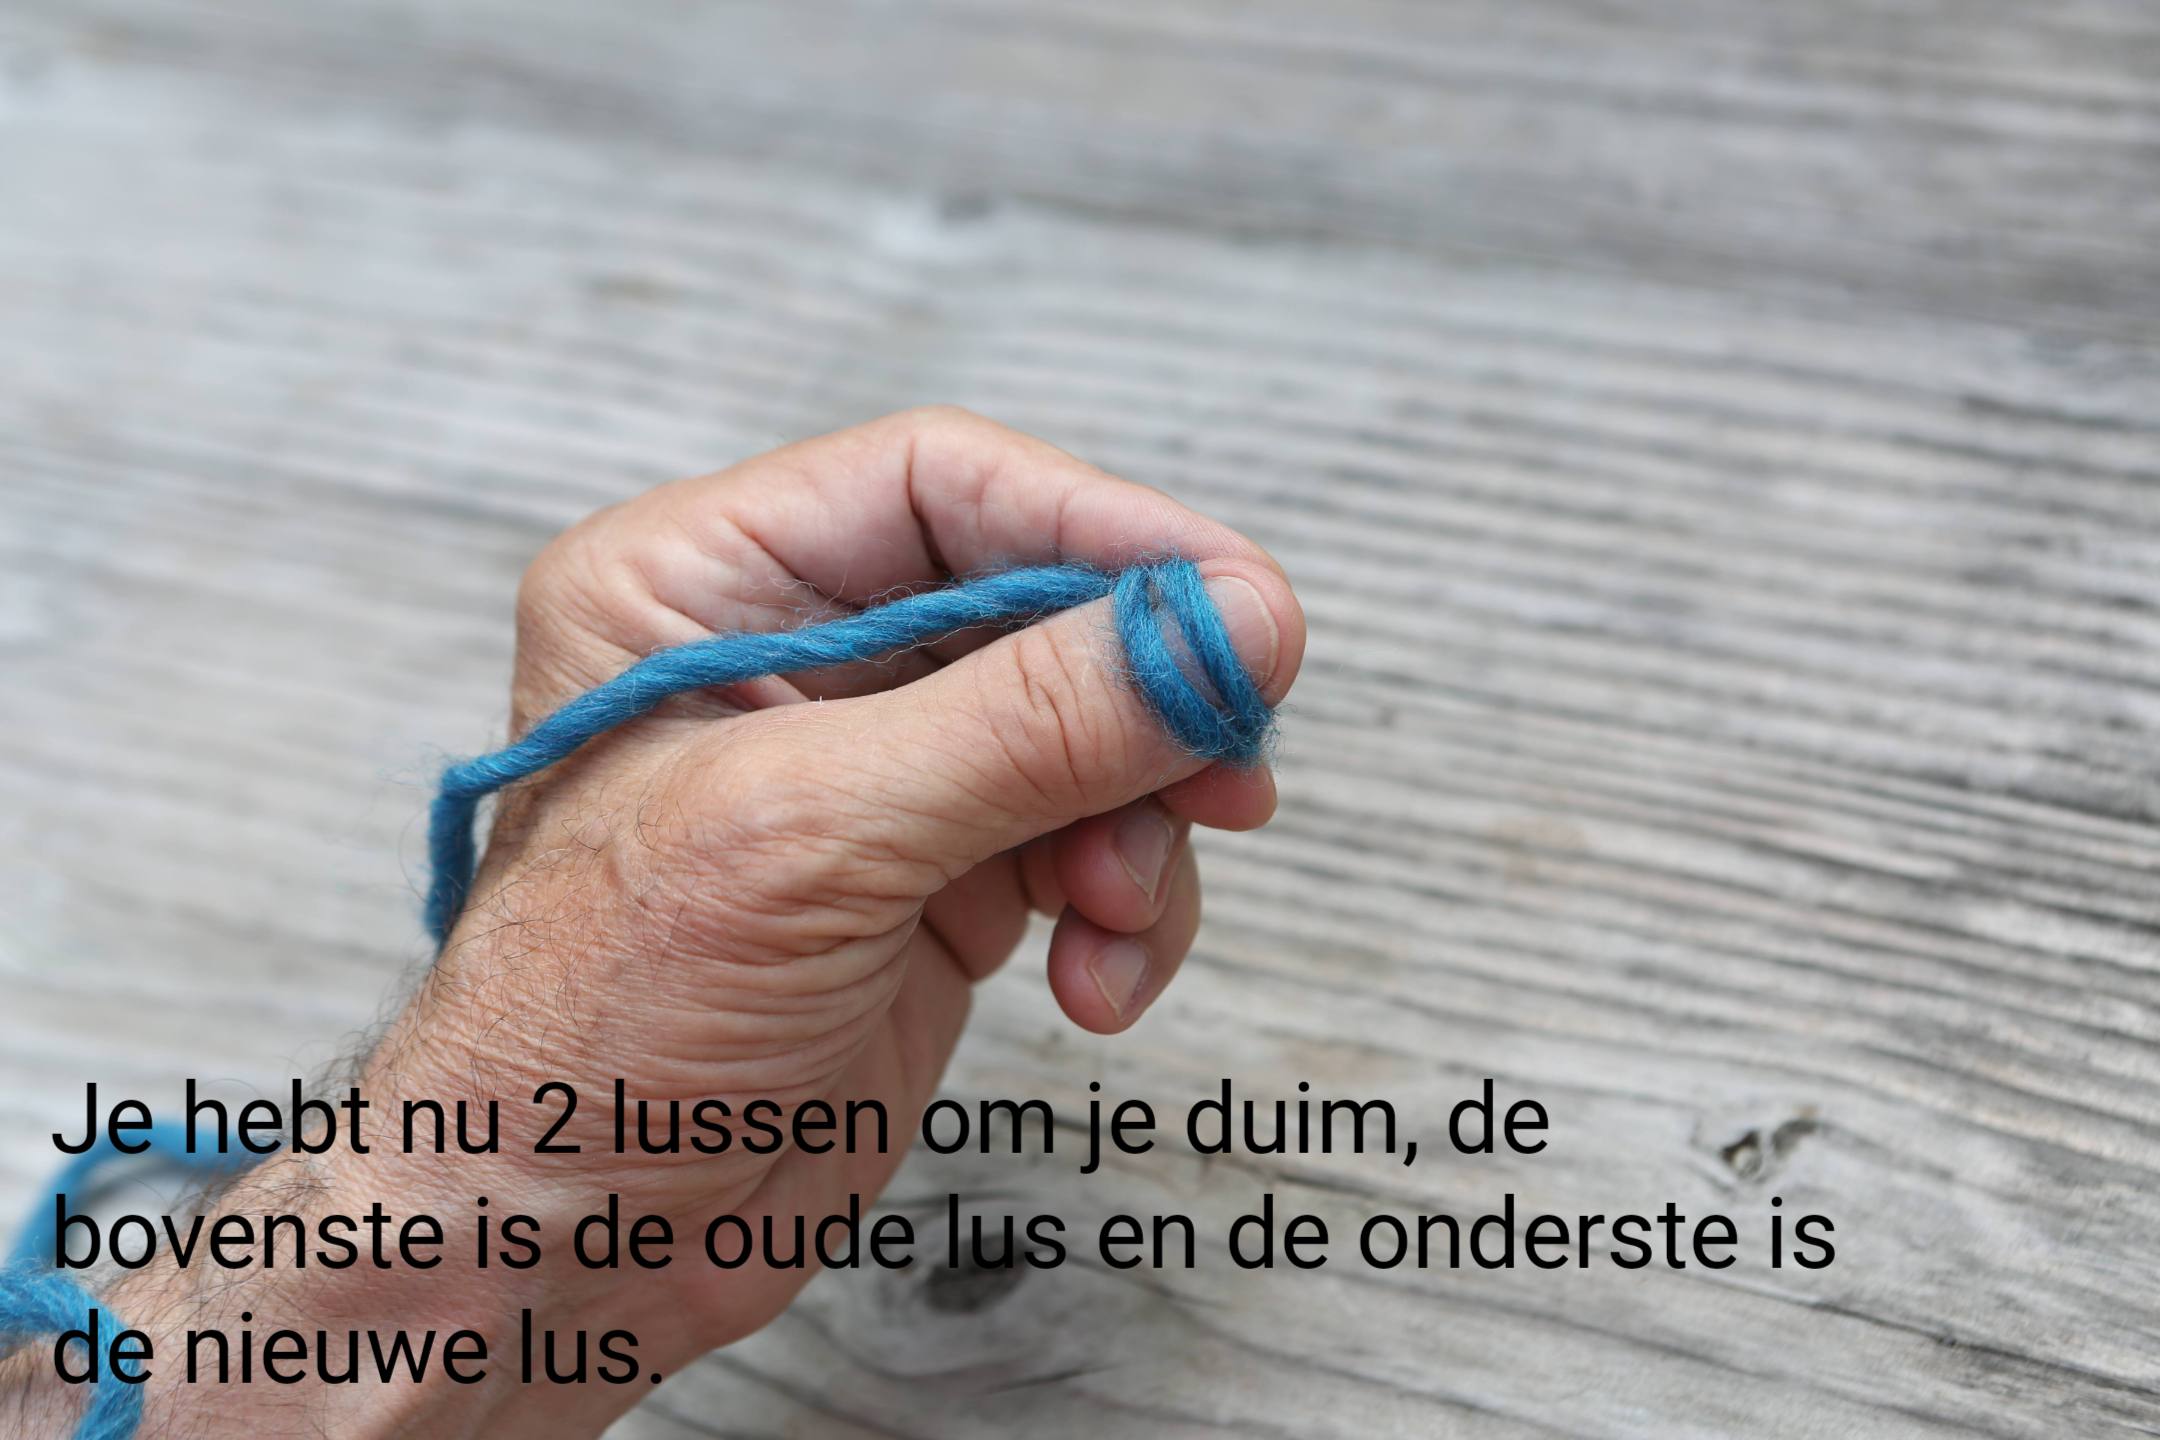
You now have 2 loops around your thumb, the top one is the old loop and the bottom one is the new loop.
Sie haben jetzt 2 Schlaufen um Ihren Daumen, die obere ist die alte Schlaufe und die untere ist die neue Schlaufe.
Vous avez maintenant 2 boucles autour de votre pouce, celle du haut est l’ancienne boucle et celle du bas est la nouvelle boucle.
Ahora tienes 2 bucles alrededor de tu pulgar, el superior es el bucle antiguo y el inferior es el bucle nuevo.
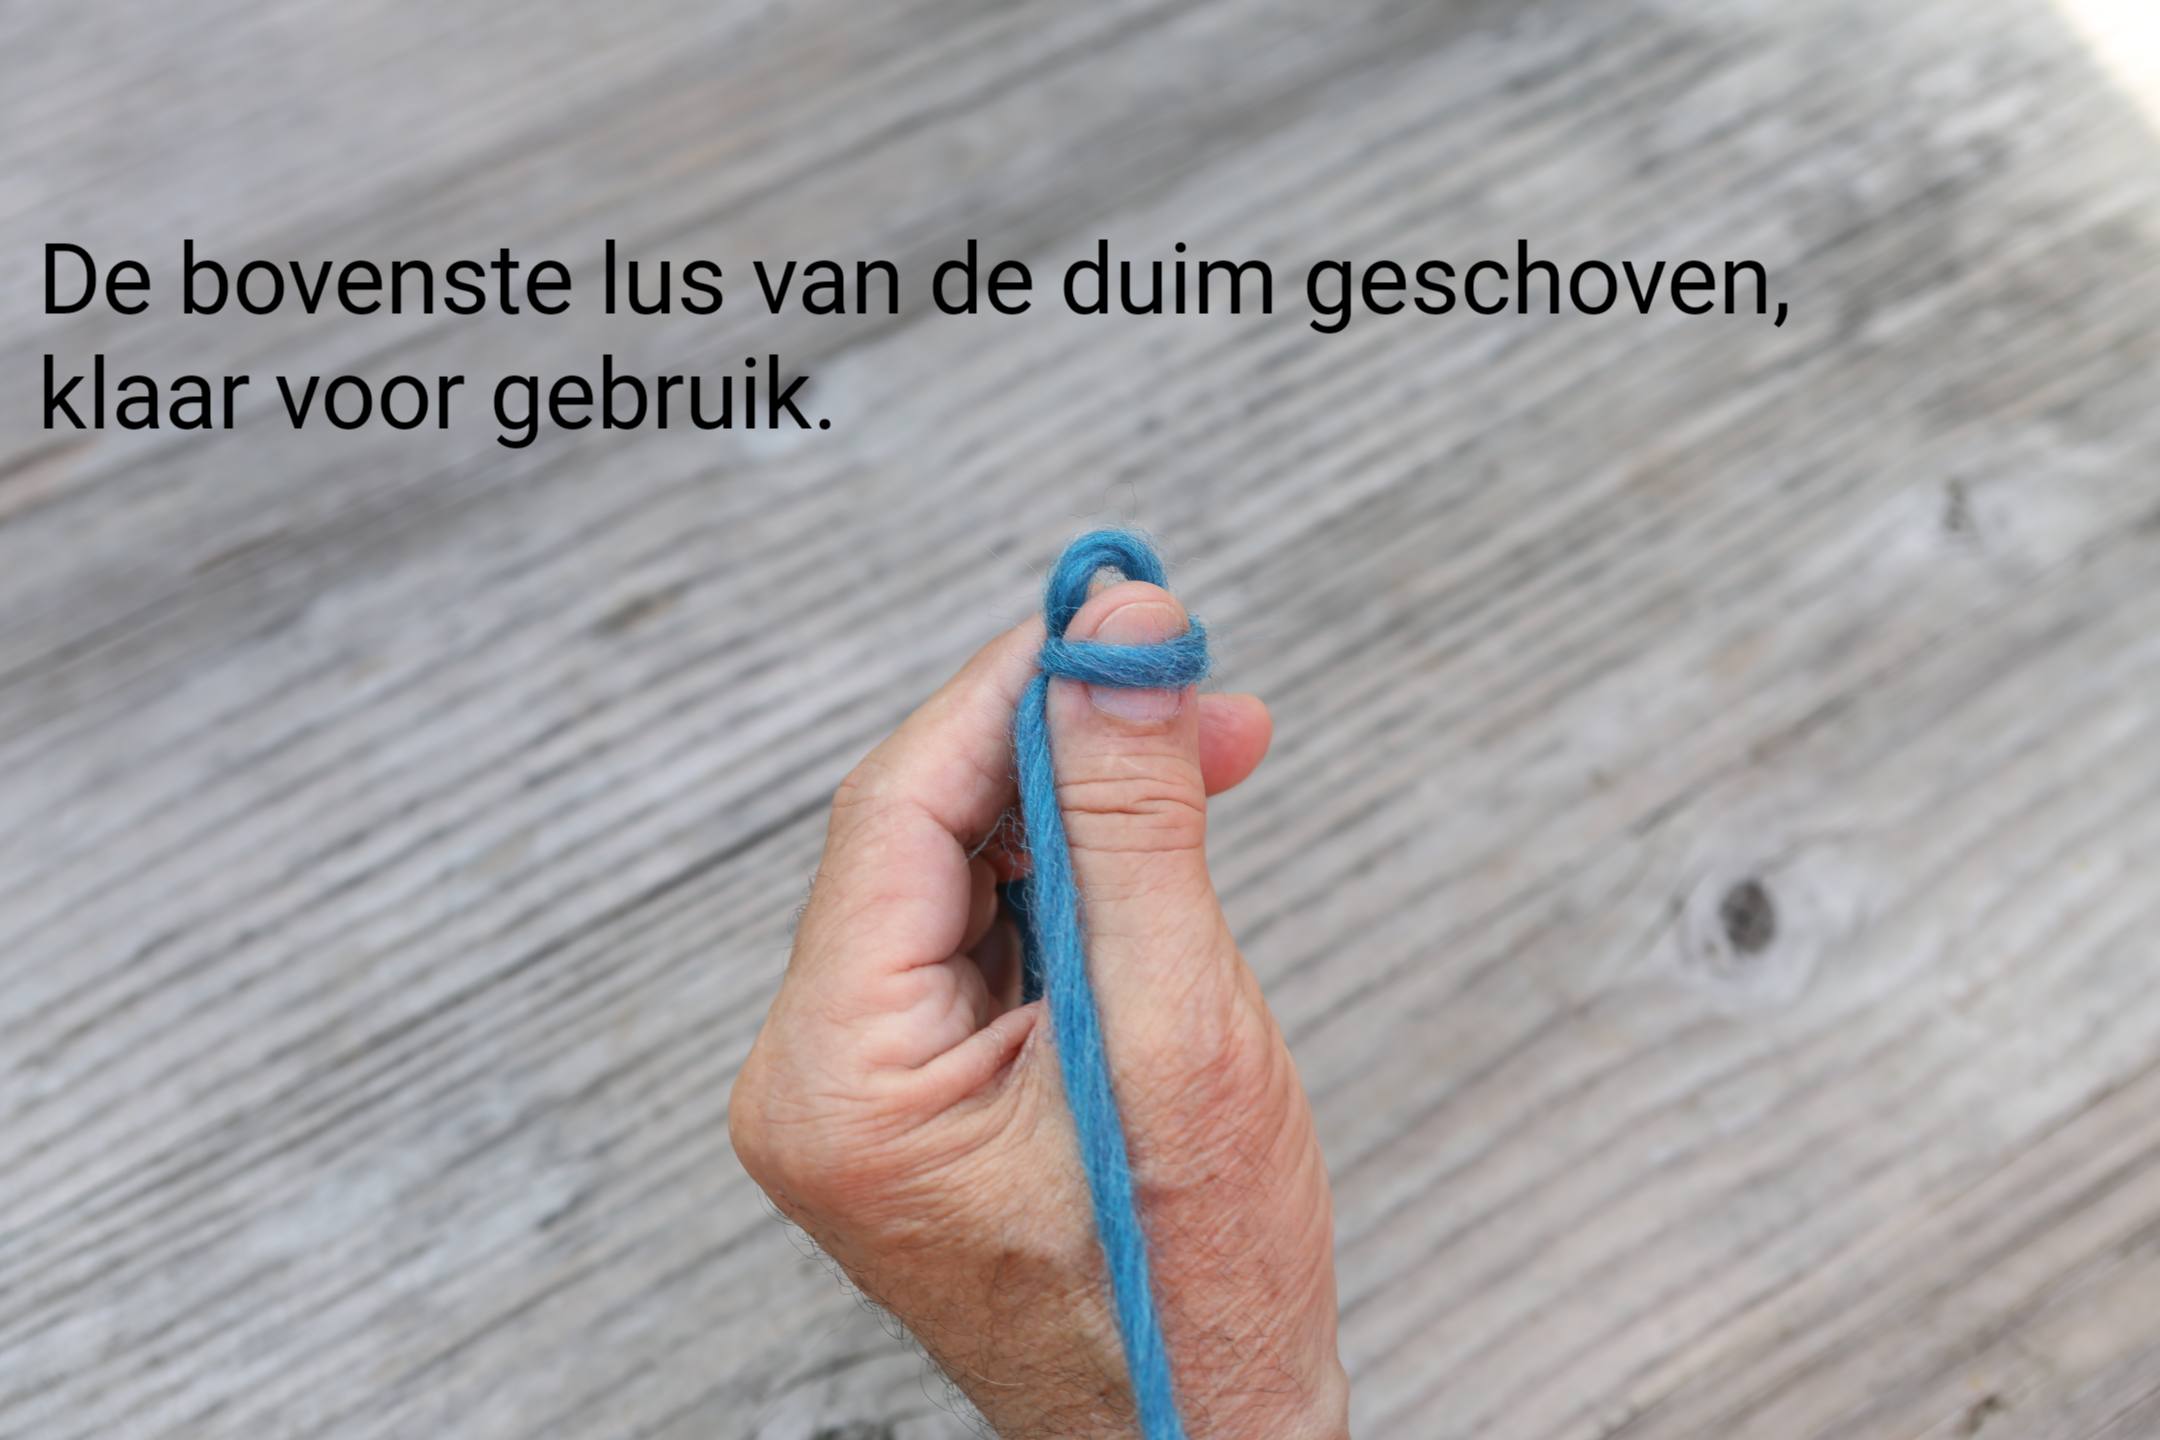
The top loop of the thumb slid off, ready for use.
Die obere Schlaufe des Daumens ließ sich abziehen und war einsatzbereit.
La boucle supérieure du pouce a glissé, prête à être utilisée.
El lazo superior del pulgar se deslizó y quedó listo para usarse.
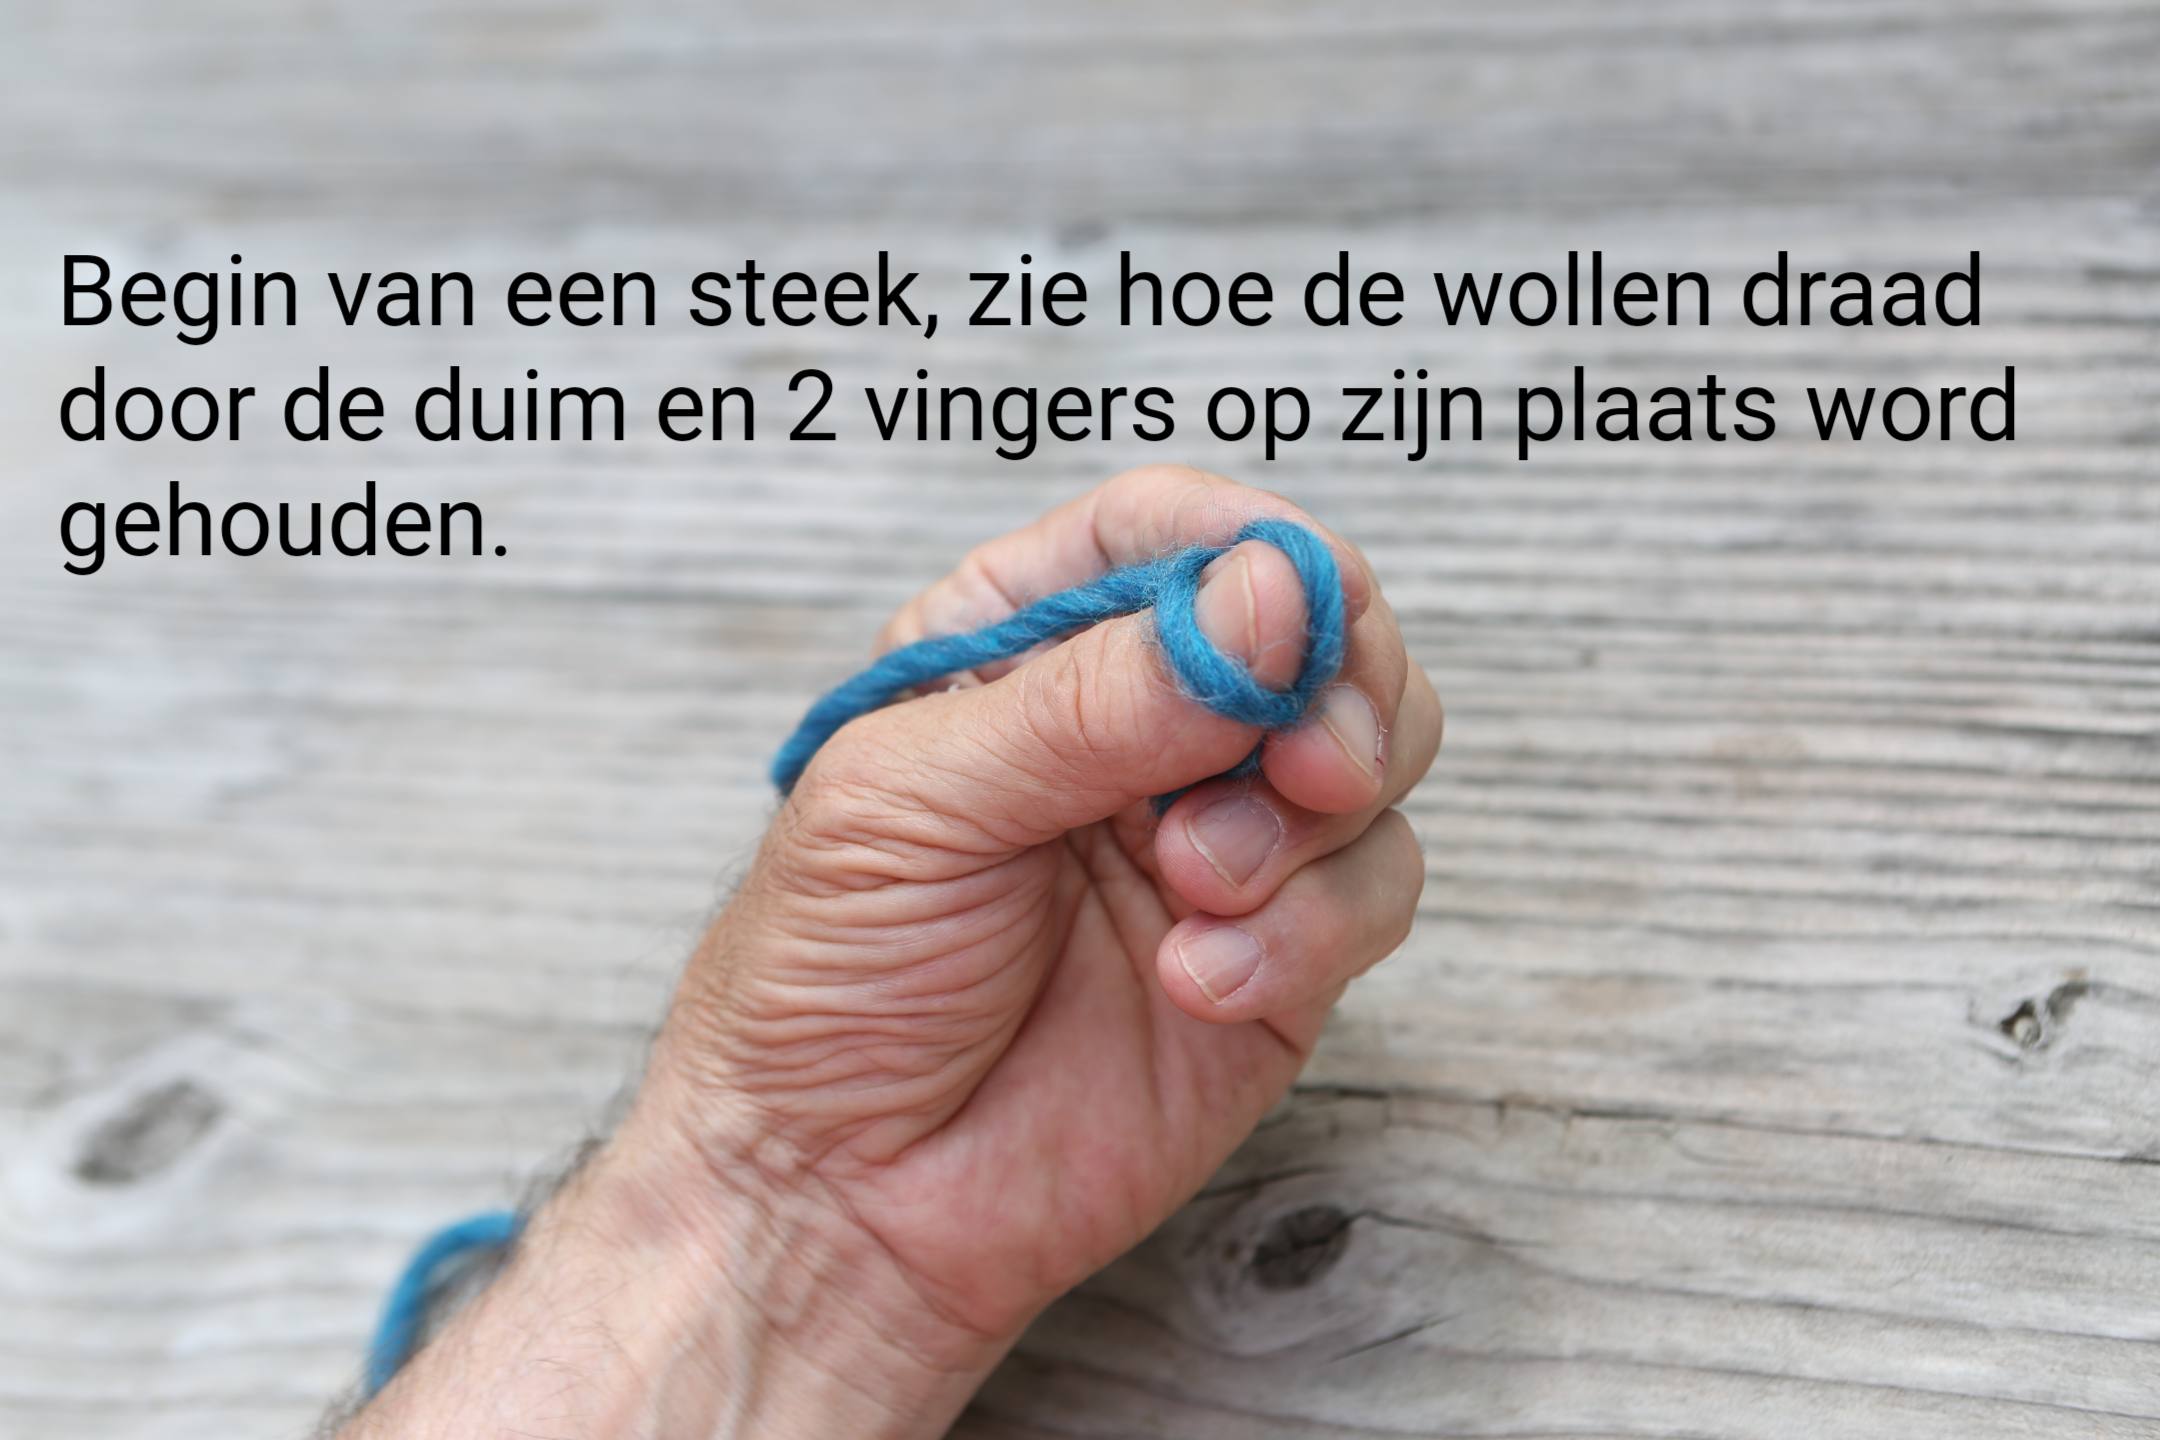
Beginning of a stitch, see how the woolen thread is held in place by your thumb and two fingers.
Achten Sie am Anfang einer Masche darauf, wie der Wollfaden von Ihrem Daumen und zwei Fingern festgehalten wird.
Au début d’un point, voyez comment le fil de laine est maintenu en place par votre pouce et deux doigts.
Al comenzar una puntada, observa cómo el hilo de lana se mantiene en su lugar gracias al pulgar y dos dedos.
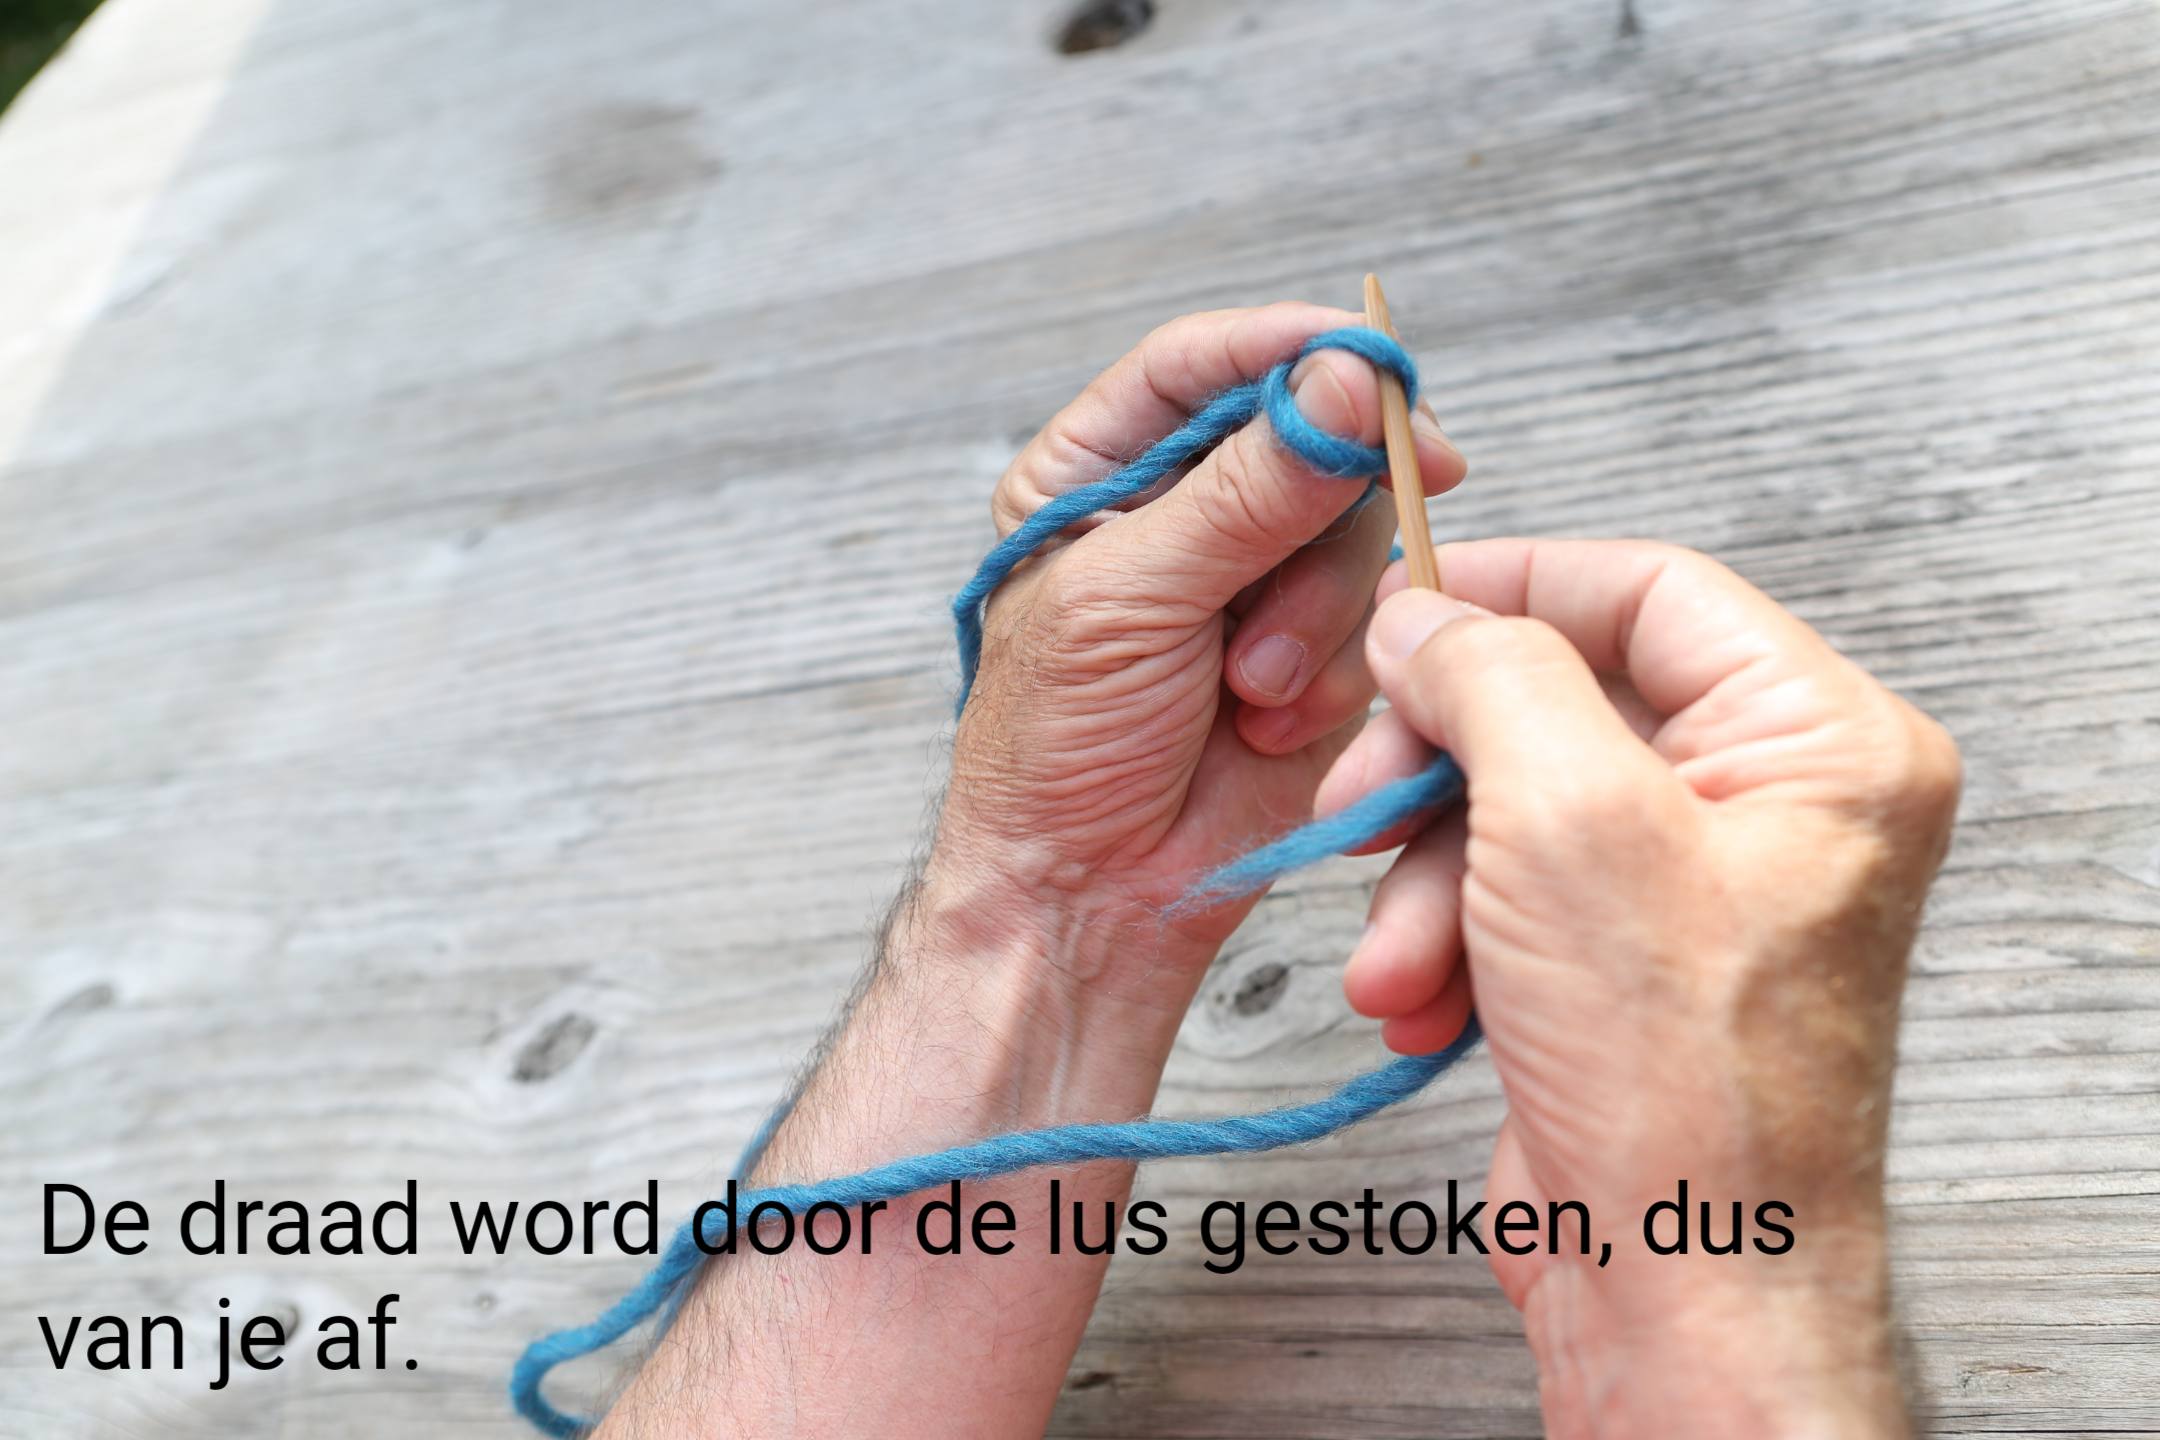
The thread is put through the loop, away from you.
Der Faden wird durch die Schlaufe geführt, von Ihnen weg.
Le fil est passé dans la boucle, loin de vous.
El hilo se pasa a través del bucle, lejos de usted.
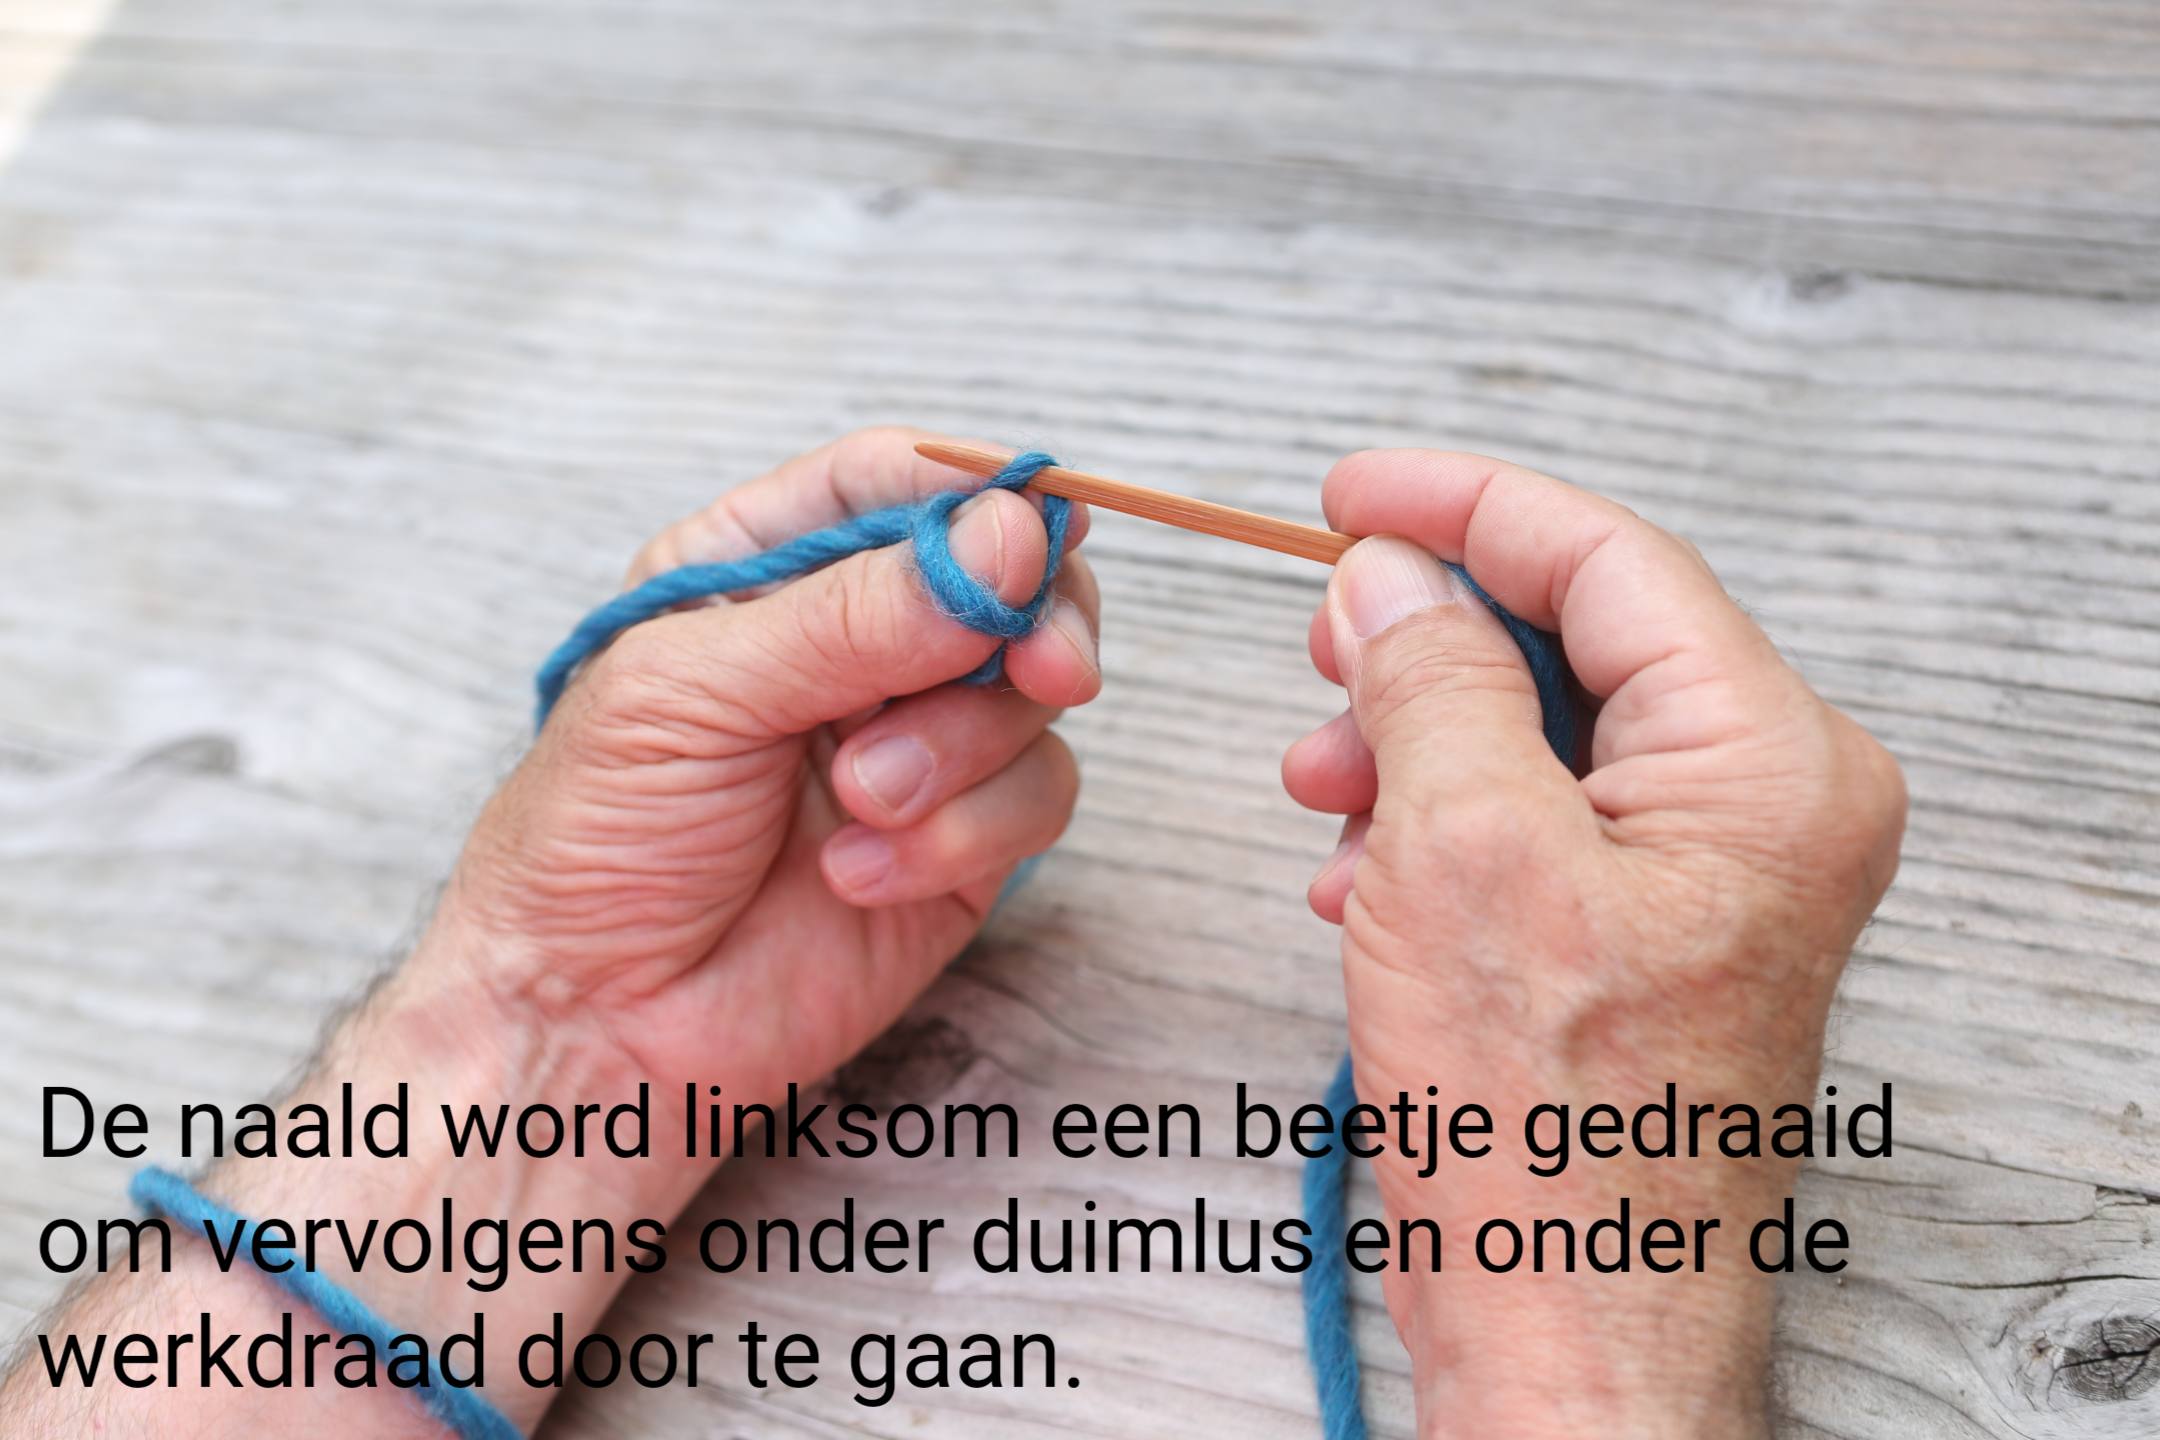
The needle is turned slightly to the left and then passes under the thumb loop and under the working thread.
Dabei wird die Nadel leicht nach links gedreht und führt dann unter der Daumenschlaufe hindurch und unter dem Arbeitsfaden hindurch.
L’aiguille est légèrement tournée vers la gauche puis passe sous la boucle du pouce et sous le fil de travail.
La aguja se gira ligeramente hacia la izquierda y luego pasa por debajo del lazo del pulgar y por debajo del hilo de trabajo.
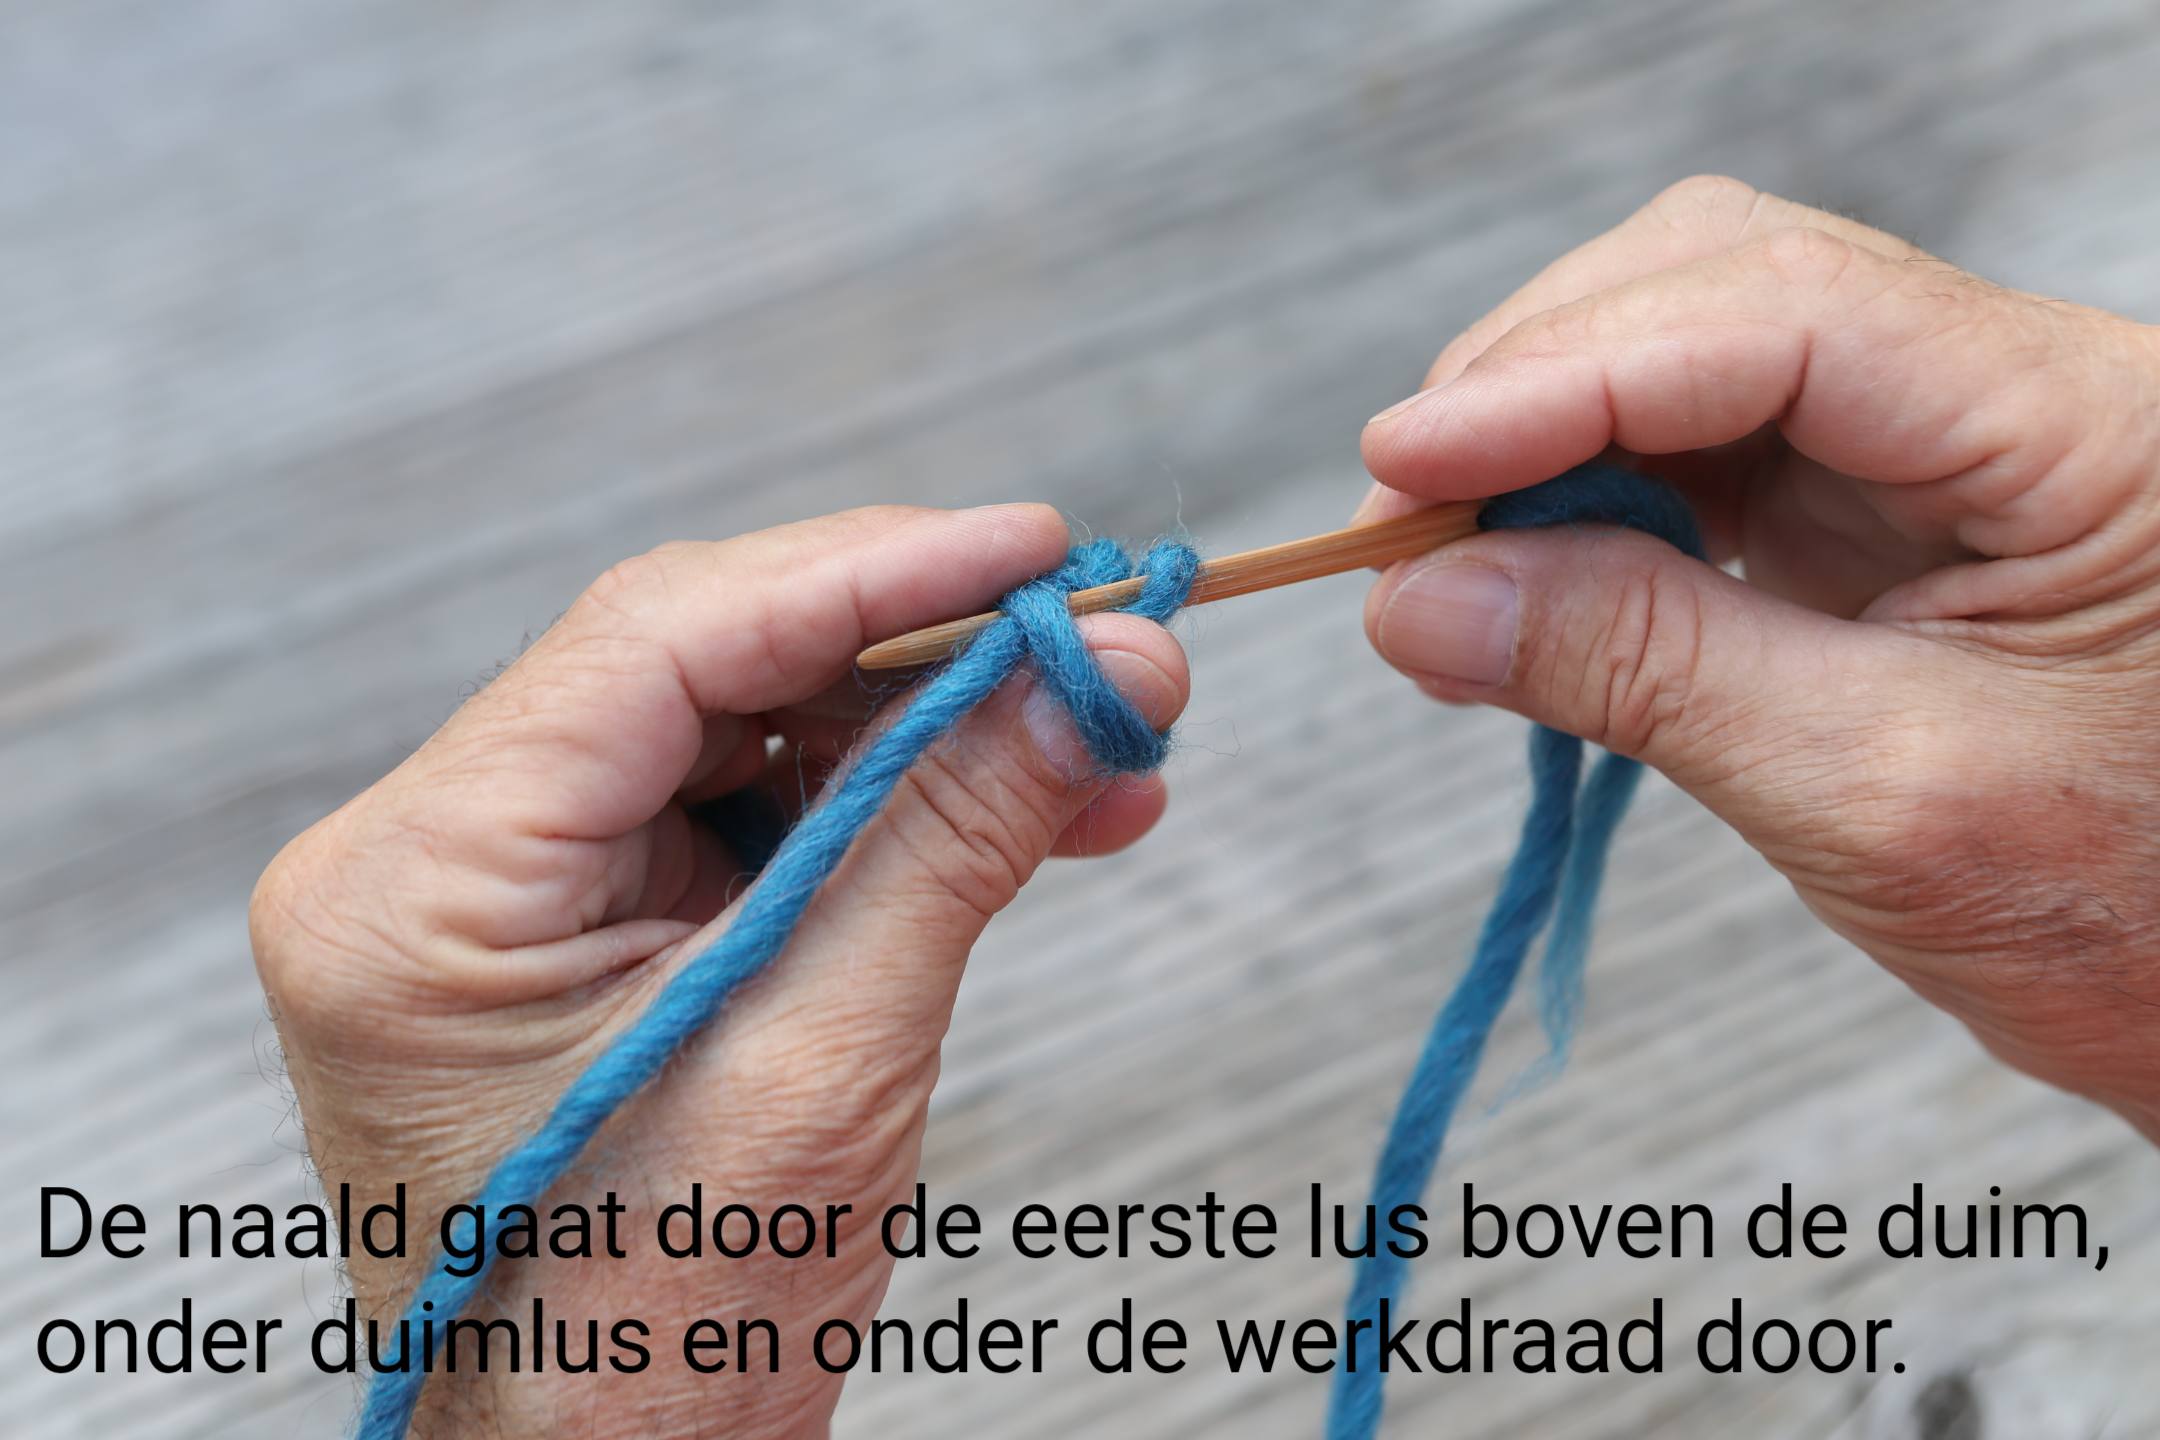
The needle goes through the first loop above the thumb, under the thumb loop and under the working yarn.
Die Nadel geht durch die erste Schlaufe über dem Daumen, unter der Daumenschlaufe und unter dem Arbeitsgarn hindurch.
L’aiguille passe dans la première boucle au-dessus du pouce, sous la boucle du pouce et sous le fil de travail.
La aguja pasa a través del primer bucle por encima del pulgar, por debajo del bucle del pulgar y por debajo del hilo de trabajo.

Here you can clearly see how a stitch is created.
Hier sieht man deutlich, wie ein Stich entsteht.
Ici, vous pouvez clairement voir comment un point est créé.
Aquí puedes ver claramente cómo se crea una puntada.
Pull the thread along your thumb, creating your first loop around your thumb.
Ziehen Sie den Faden entlang Ihres Daumens und bilden Sie die erste Schlaufe um Ihren Daumen.
Tirez le fil le long de votre pouce, créant ainsi votre première boucle autour de votre pouce.
Pase el hilo a lo largo de su pulgar, creando su primer bucle alrededor de su pulgar
By pulling mainly in the direction of your thumb you will see the loop form; if you pull the working yarn towards you the loop will go over your thumb.
Wenn Sie hauptsächlich in Richtung Ihres Daumens ziehen, sehen Sie, wie sich die Schlaufe bildet. Wenn Sie das Arbeitsgarn zu sich ziehen, geht die Schlaufe über Ihren Daumen.
En tirant principalement dans la direction de votre pouce, vous verrez la boucle se former ; si vous tirez le fil de travail vers vous, la boucle passera par-dessus votre pouce.
Tirando principalmente en la dirección de tu pulgar verás cómo se forma el bucle; si tiras del hilo de trabajo hacia ti, el bucle pasará por encima de tu pulgar.
You now have 2 loops around your thumb, the top one is the old loop and the bottom one is the new loop.
Sie haben jetzt 2 Schlaufen um Ihren Daumen, die obere ist die alte Schlaufe und die untere ist die neue Schlaufe.
Vous avez maintenant 2 boucles autour de votre pouce, celle du haut est l’ancienne boucle et celle du bas est la nouvelle boucle.
Ahora tienes 2 bucles alrededor de tu pulgar, el superior es el bucle antiguo y el inferior es el bucle
The top loop of the thumb slid off, ready for use.
Die obere Schlaufe des Daumens ließ sich abziehen und war einsatzbereit.
La boucle supérieure du pouce a glissé, prête à être utilisée.
El lazo superior del pulgar se deslizó y quedó listo para usarse.

Gently pull the end thread so that the loops you make are the same size.
Ziehen Sie vorsichtig am Endfaden, sodass die Schlaufen, die Sie machen, die gleiche Größe haben.
Tirez doucement sur le fil d’extrémité afin que les boucles que vous réalisez soient de la même taille.
Tire suavemente del hilo final para que los bucles que haga sean del mismo tamaño.
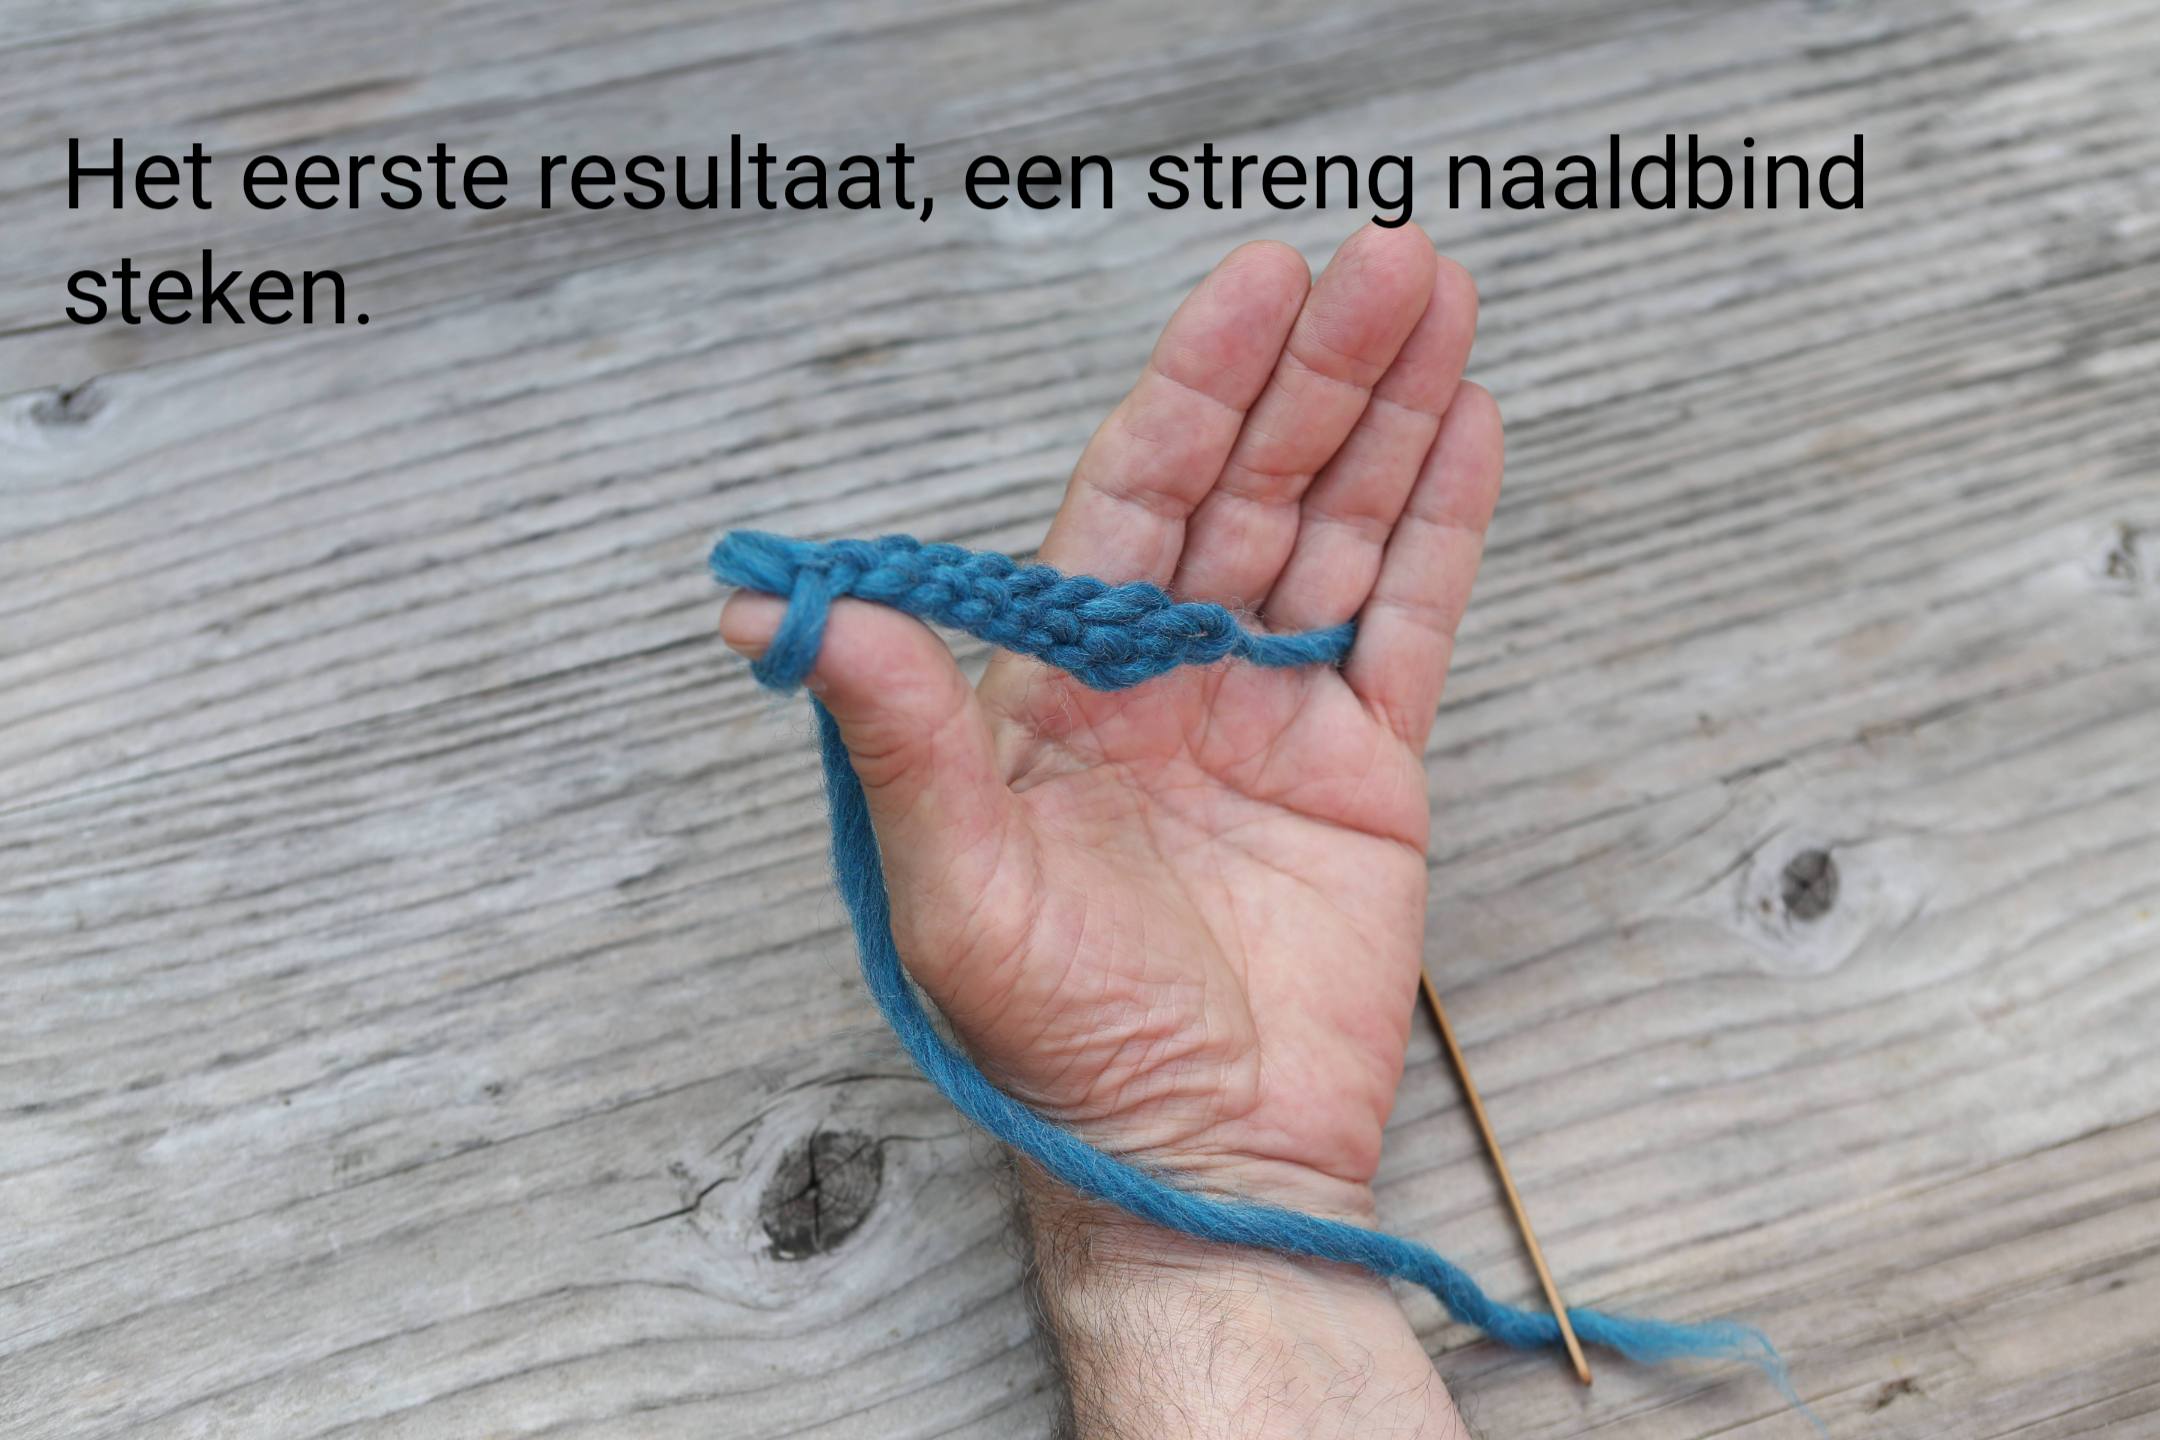
The first result, a strand of needle binding stitches.
Das erste Ergebnis, ein Strang Nadelbindestiche.
Le premier résultat, un brin de points de reliure à l’aiguille.
El primer resultado, una hebra de puntadas de unión con aguja.
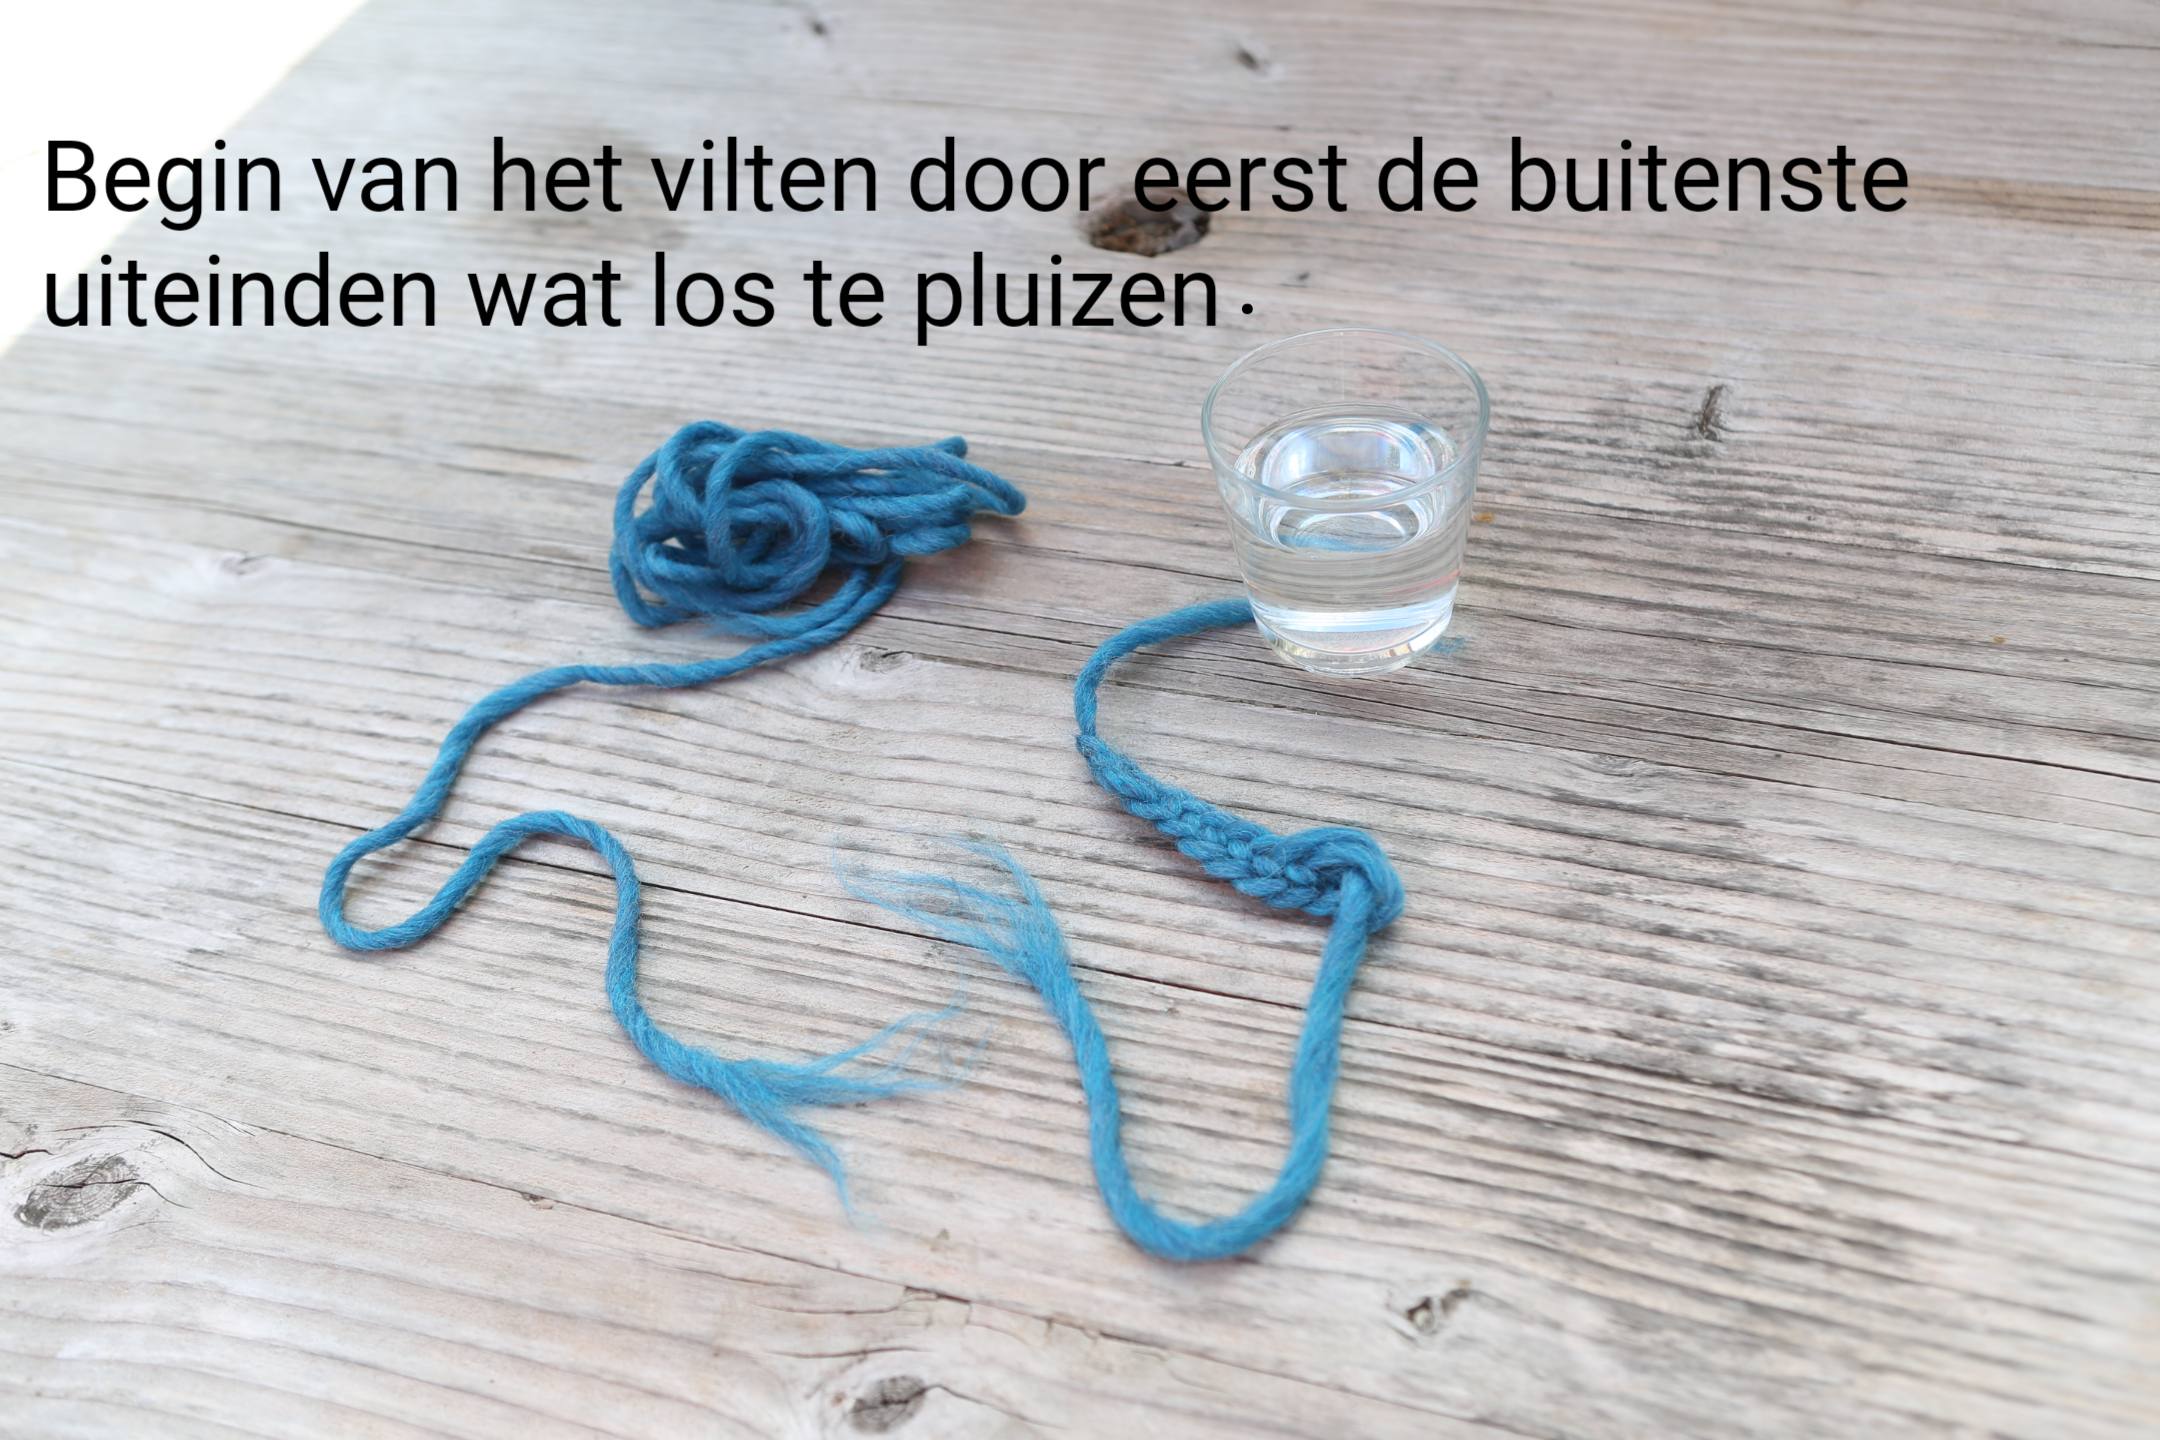
Begin the felting by first fluffing the outer ends a little.
Beginnen Sie mit dem Filzen, indem Sie zunächst die äußeren Enden etwas aufplustern.
Commencez le feutrage en gonflant d’abord légèrement les extrémités extérieures.
Comience el fieltrado esponjando primero un poco los extremos exteriores.
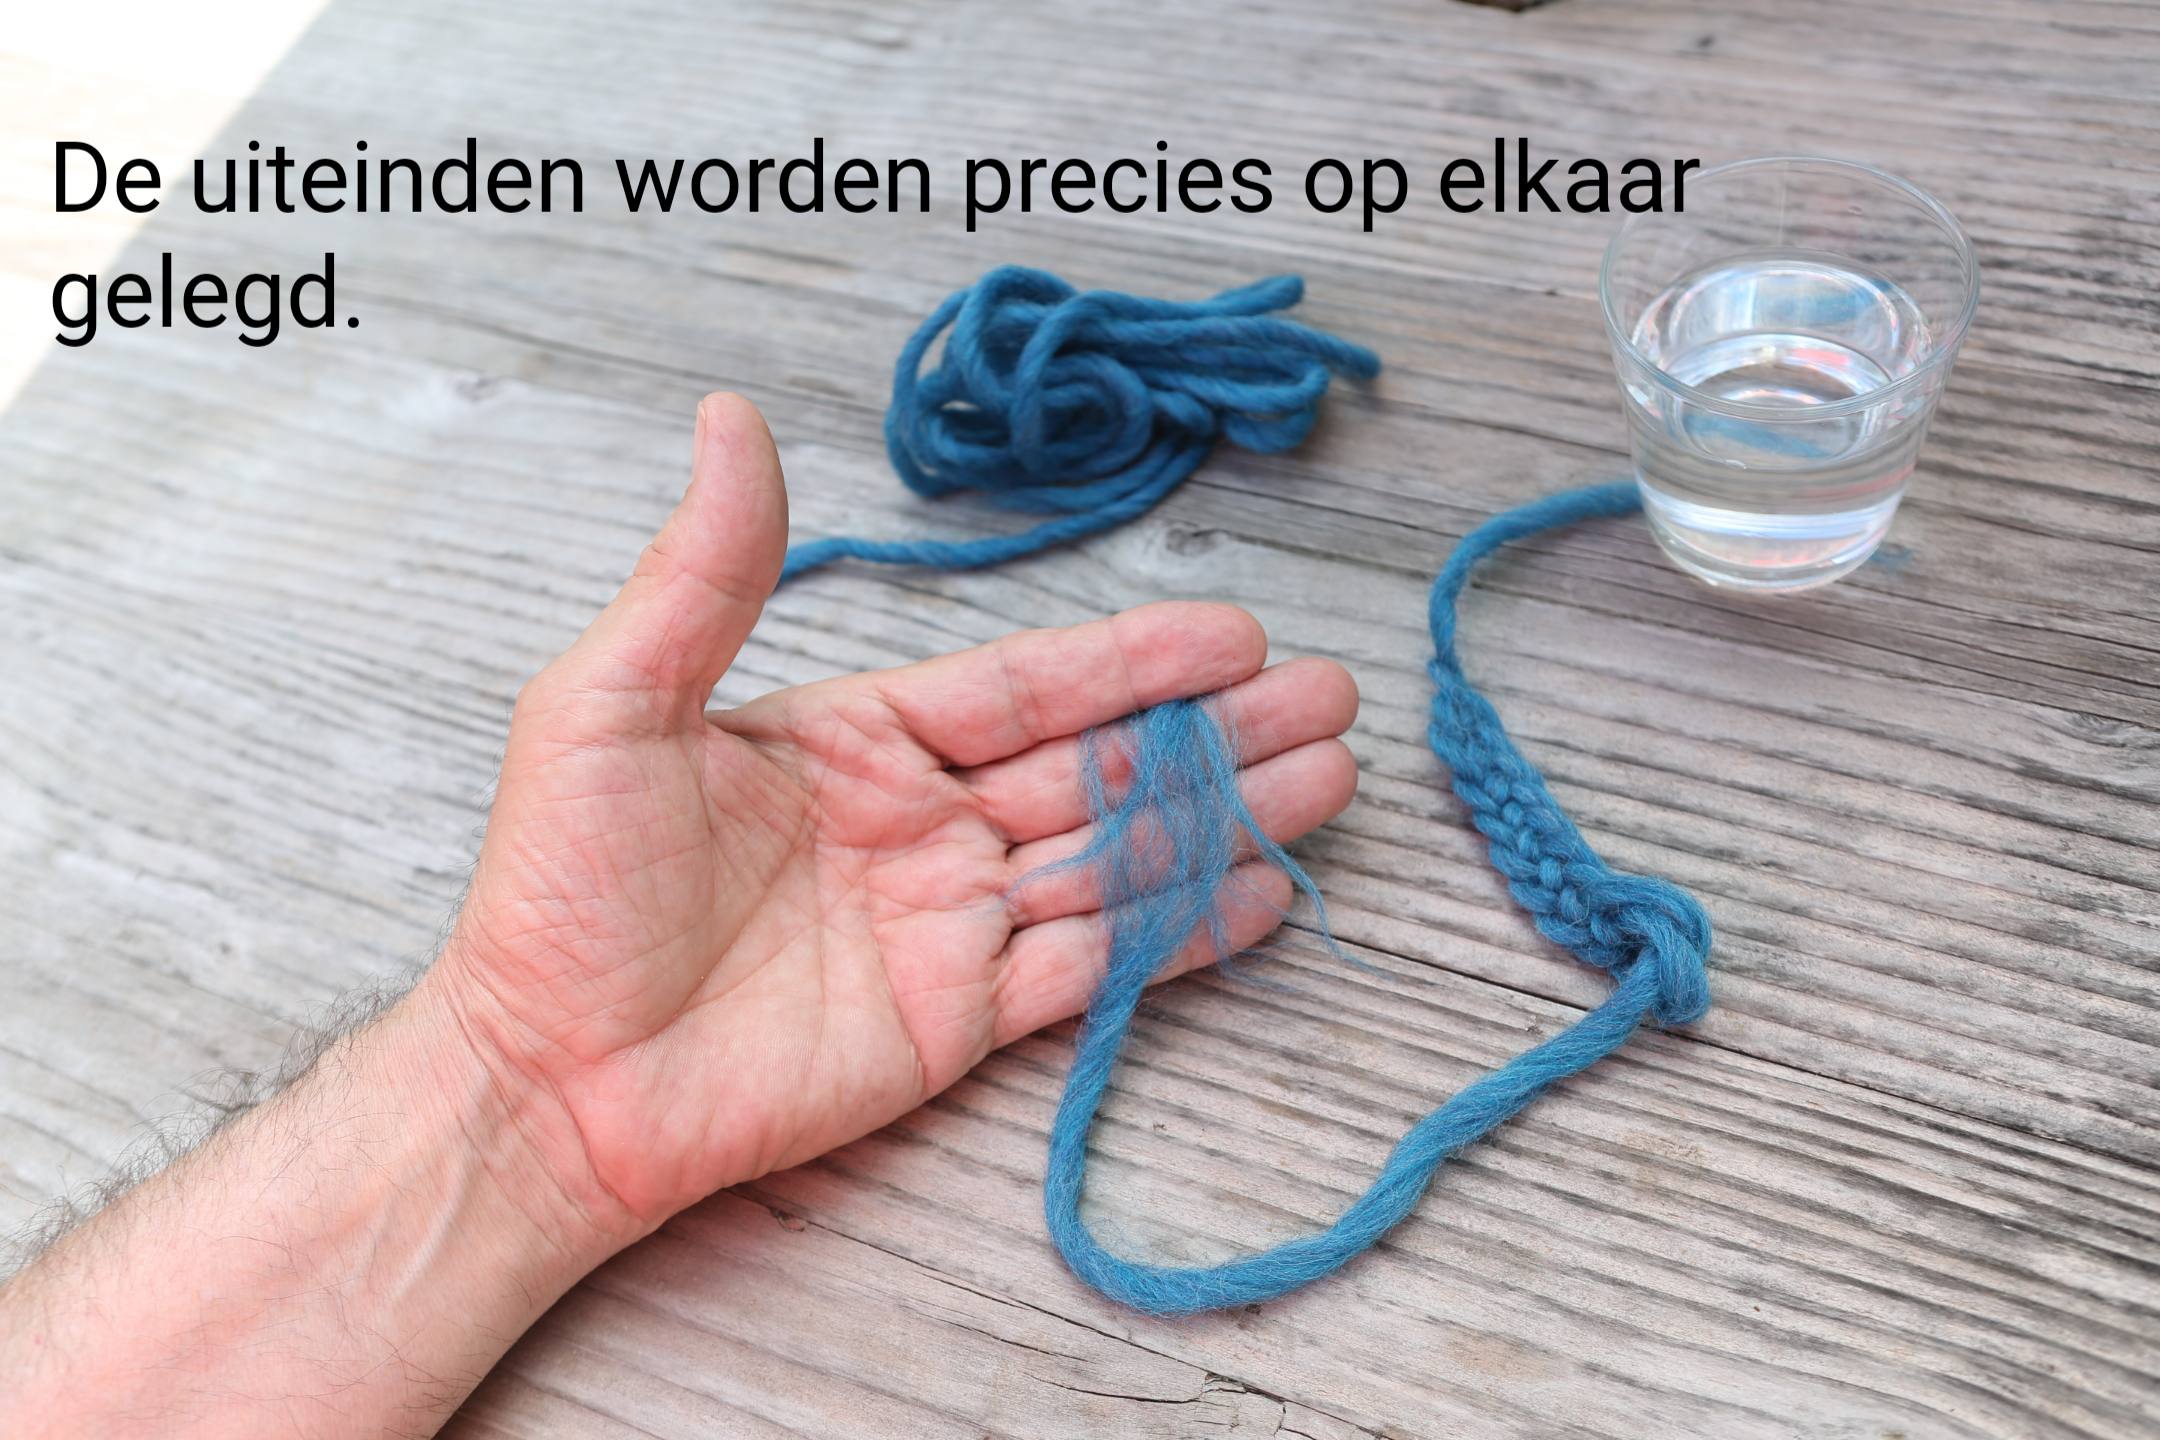
The ends are placed exactly on top of each other.
Die Enden werden exakt übereinander gelegt.
Les extrémités sont placées exactement l’une sur l’autre.
Los extremos se colocan exactamente uno encima del otro.
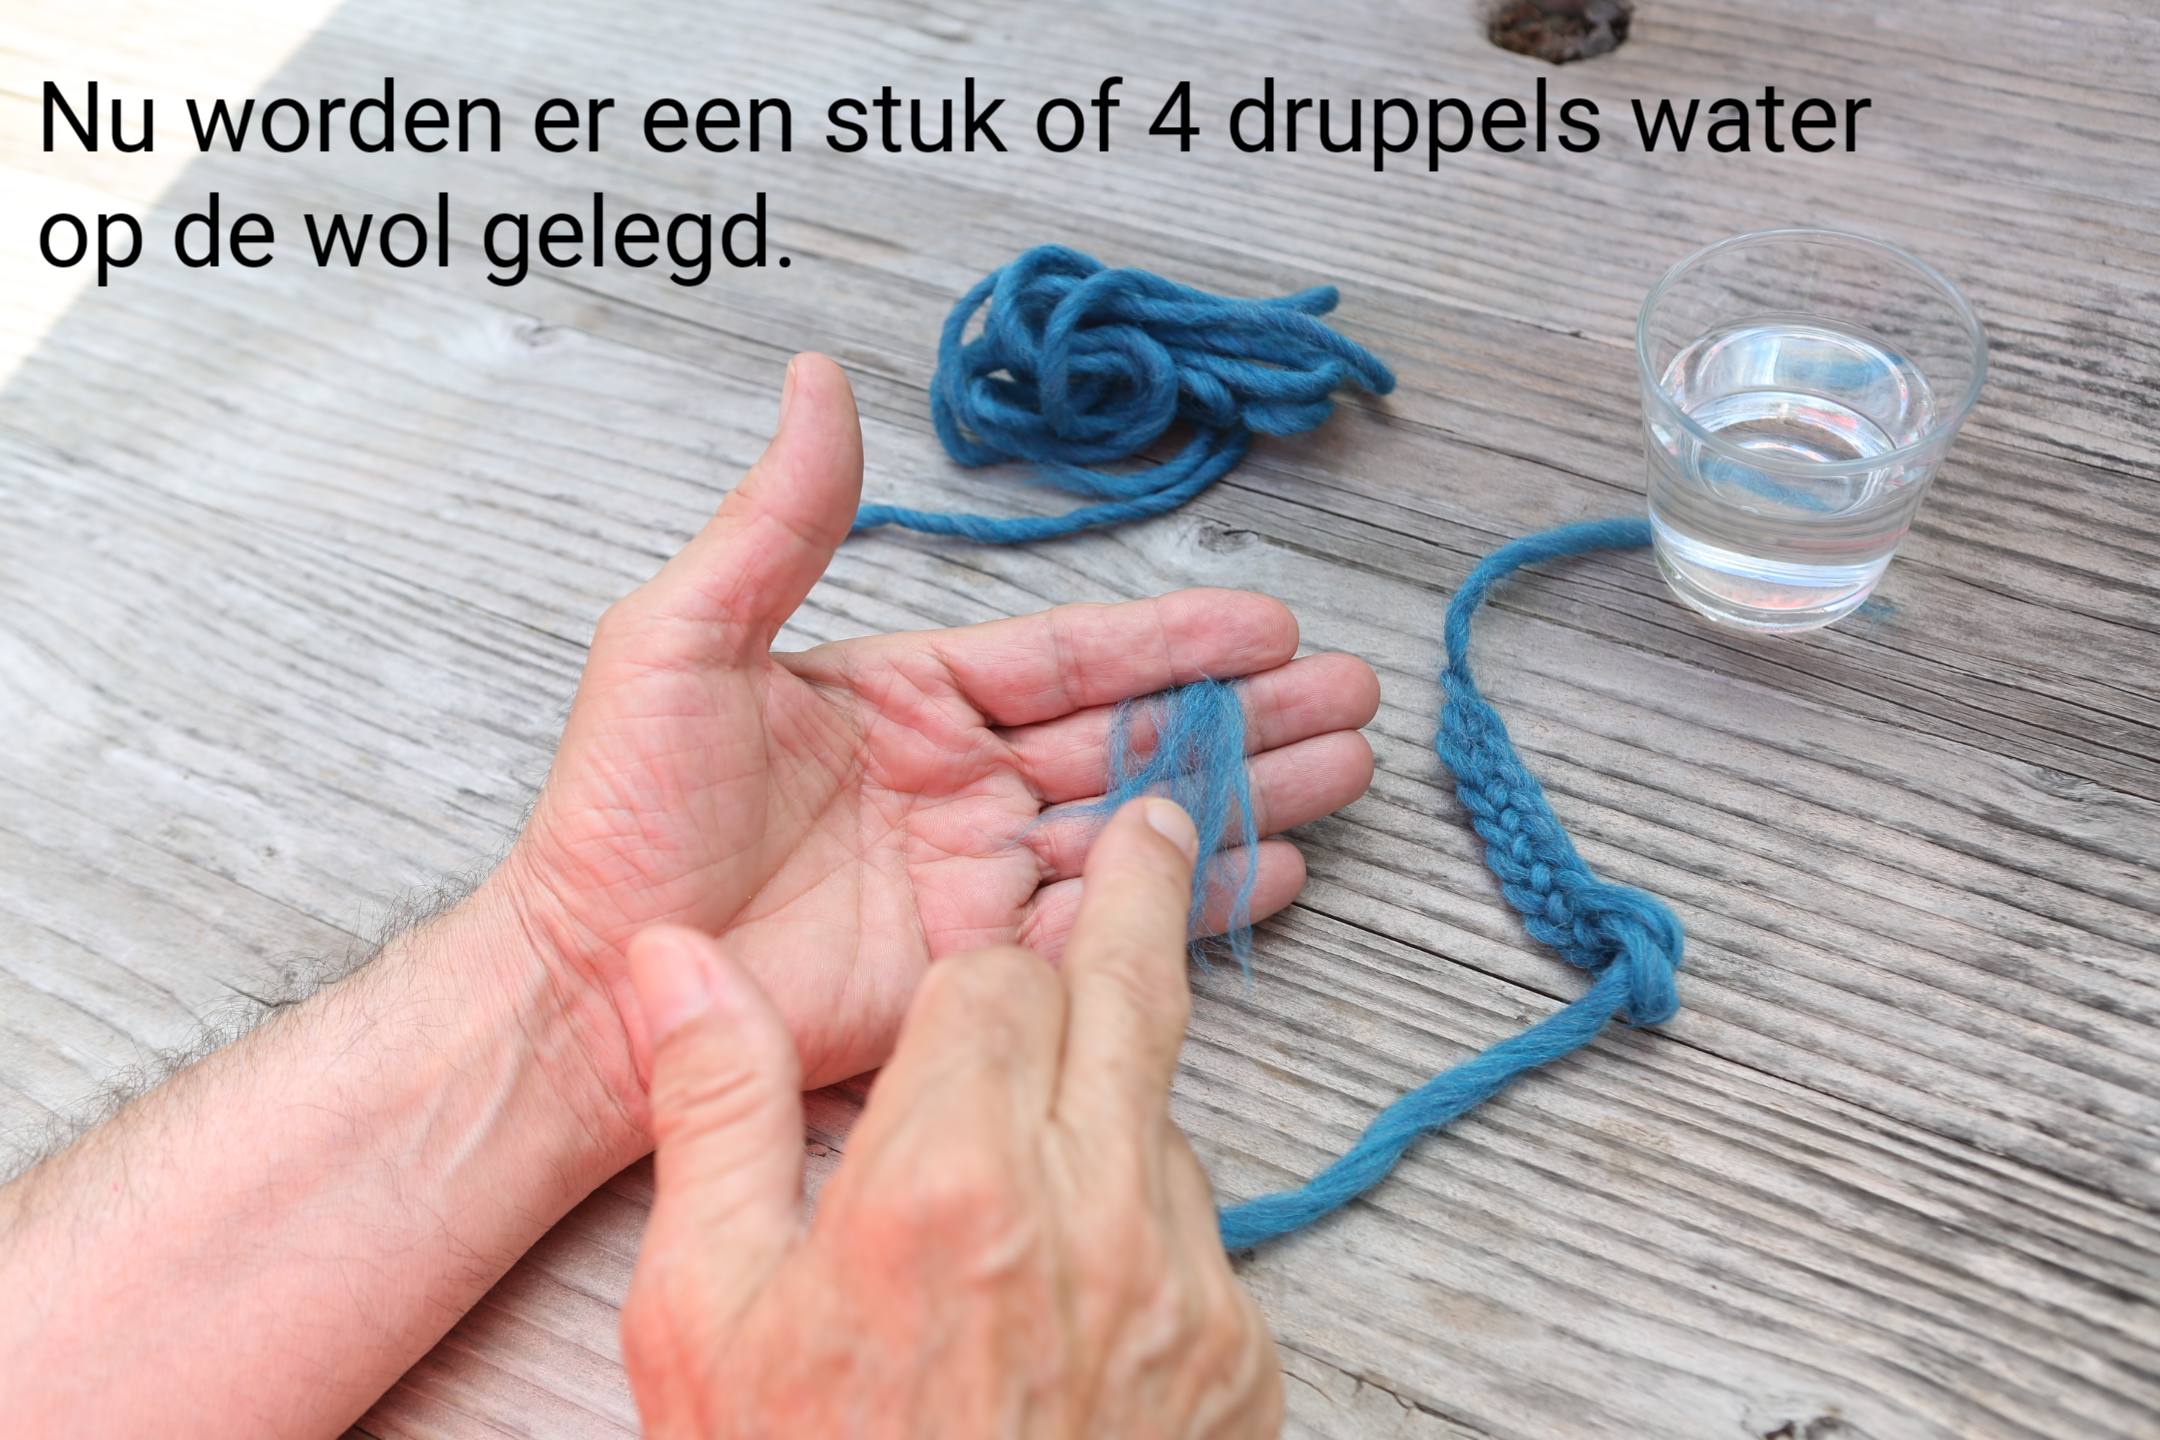
Now about four drops of water are placed on the wool.
Nun werden etwa vier Tropfen Wasser auf die Wolle gegeben.
Maintenant, environ quatre gouttes d’eau sont placées sur la laine.
Ahora se colocan unas cuatro gotas de agua sobre la lana.
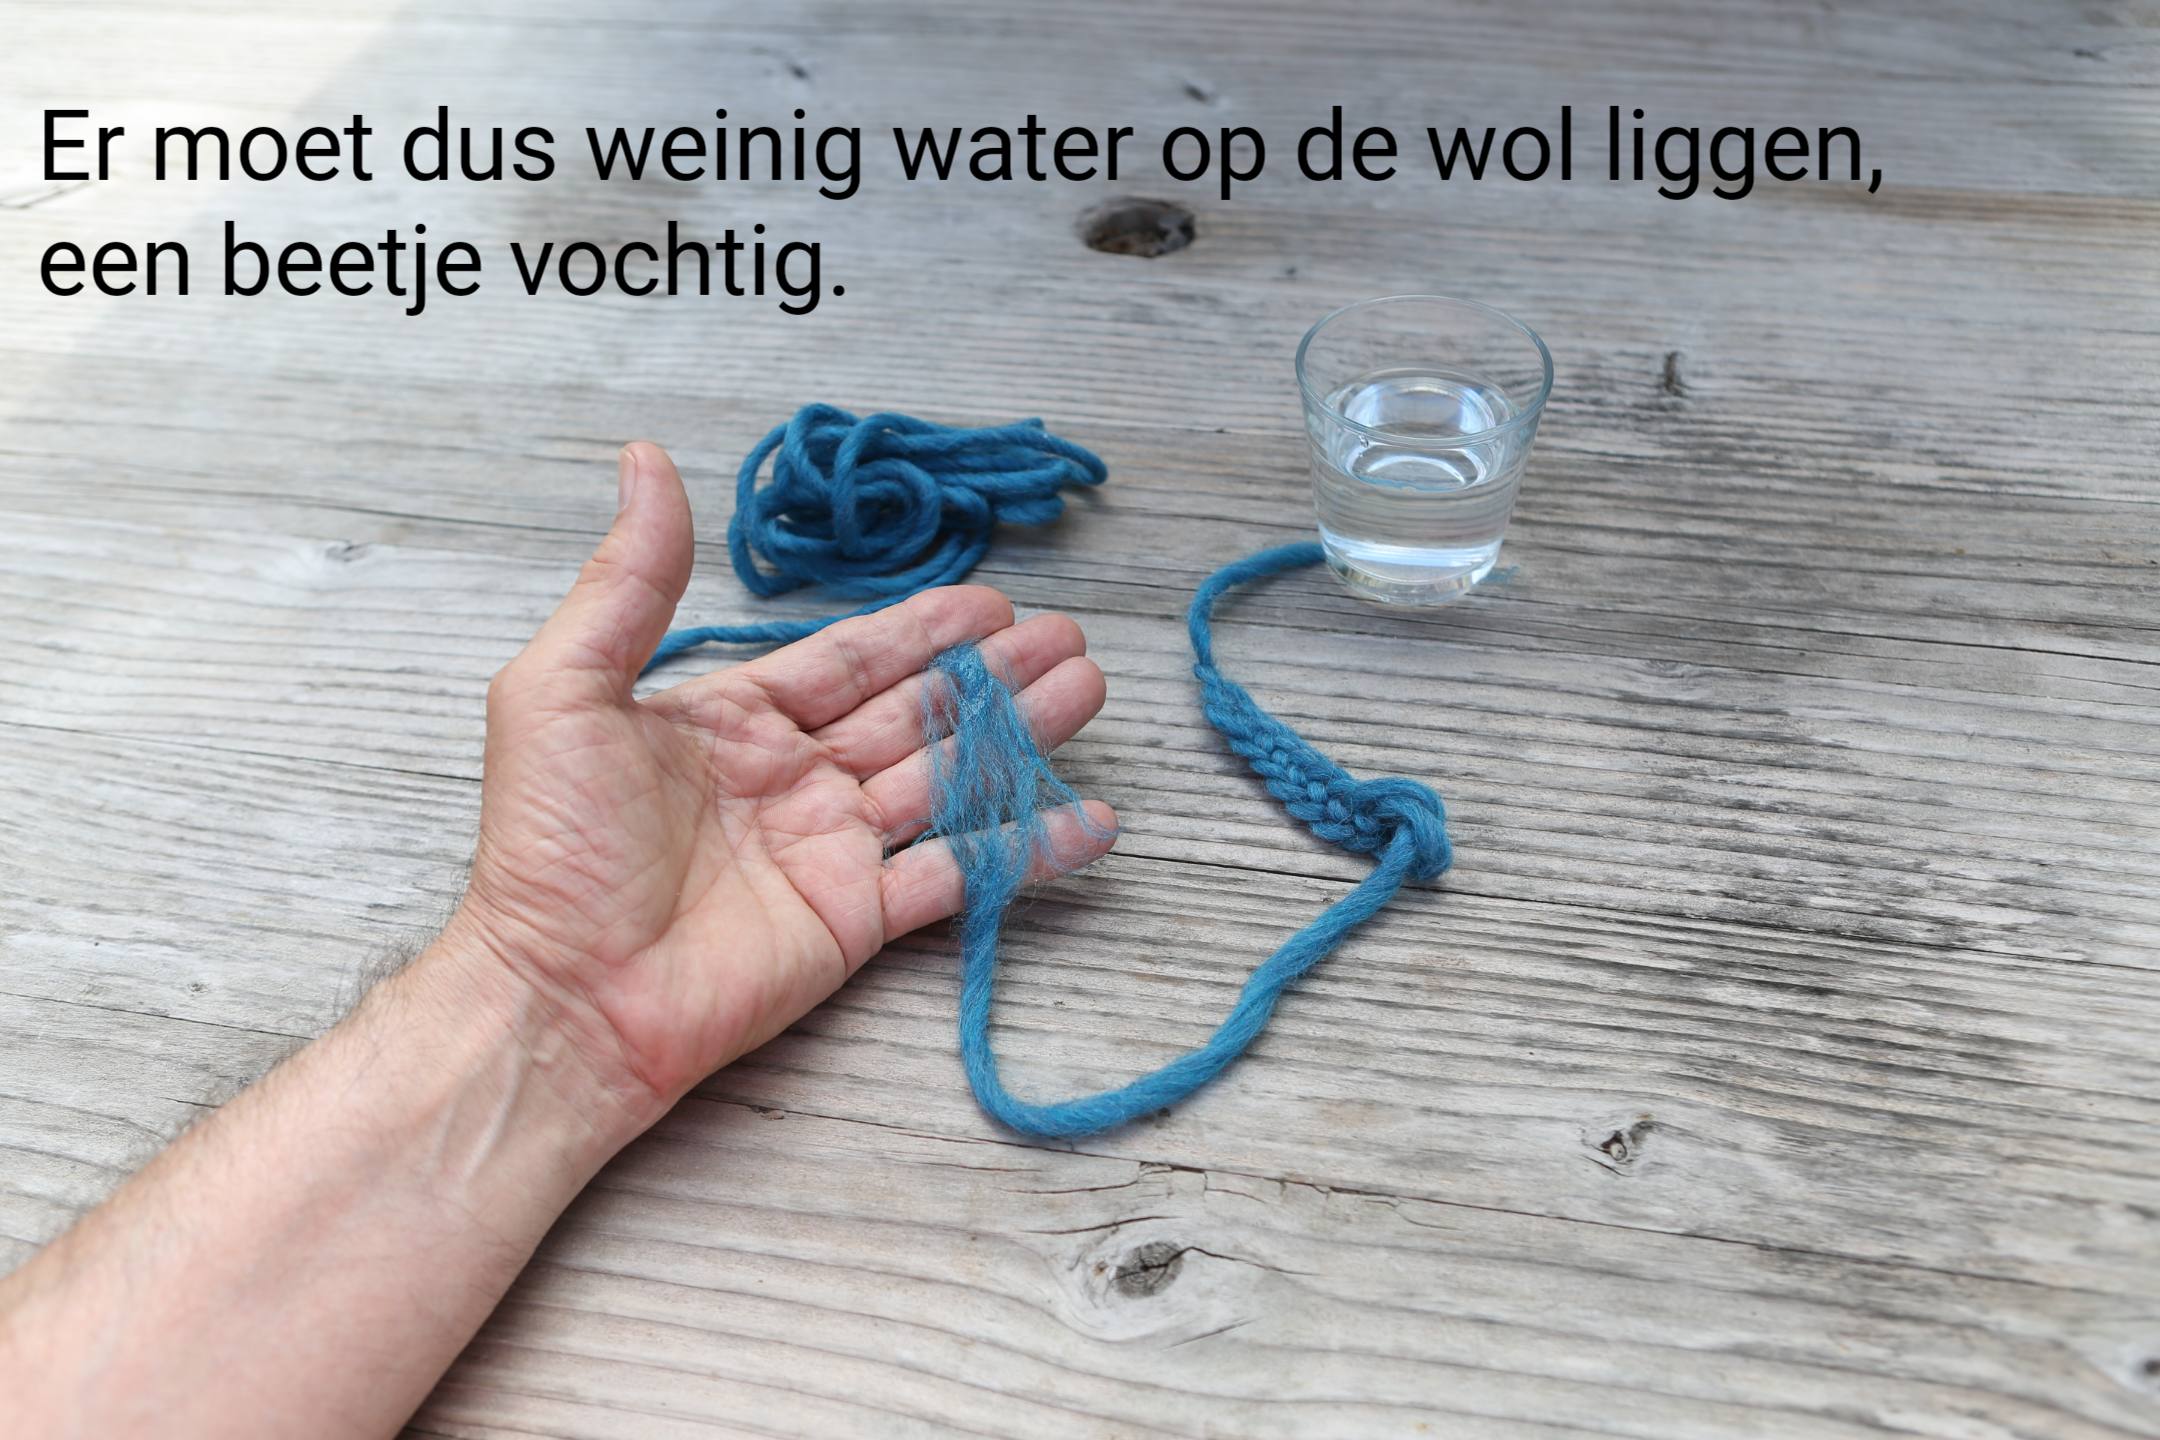
So there should be little water on the wool, slightly damp.
Es sollte also wenig Wasser auf der Wolle sein, leicht feucht.
Il devrait donc y avoir un peu d’eau sur la laine, légèrement humide.
Entonces debe haber poca agua sobre la lana, ligeramente húmeda.

Roll the wool between your hands, do not rub too hard.
Rollen Sie die Wolle zwischen Ihren Händen, reiben Sie nicht zu stark.
Roulez la laine entre vos mains, ne frottez pas trop fort.
Enrolle la lana entre sus manos, no frote demasiado fuerte.
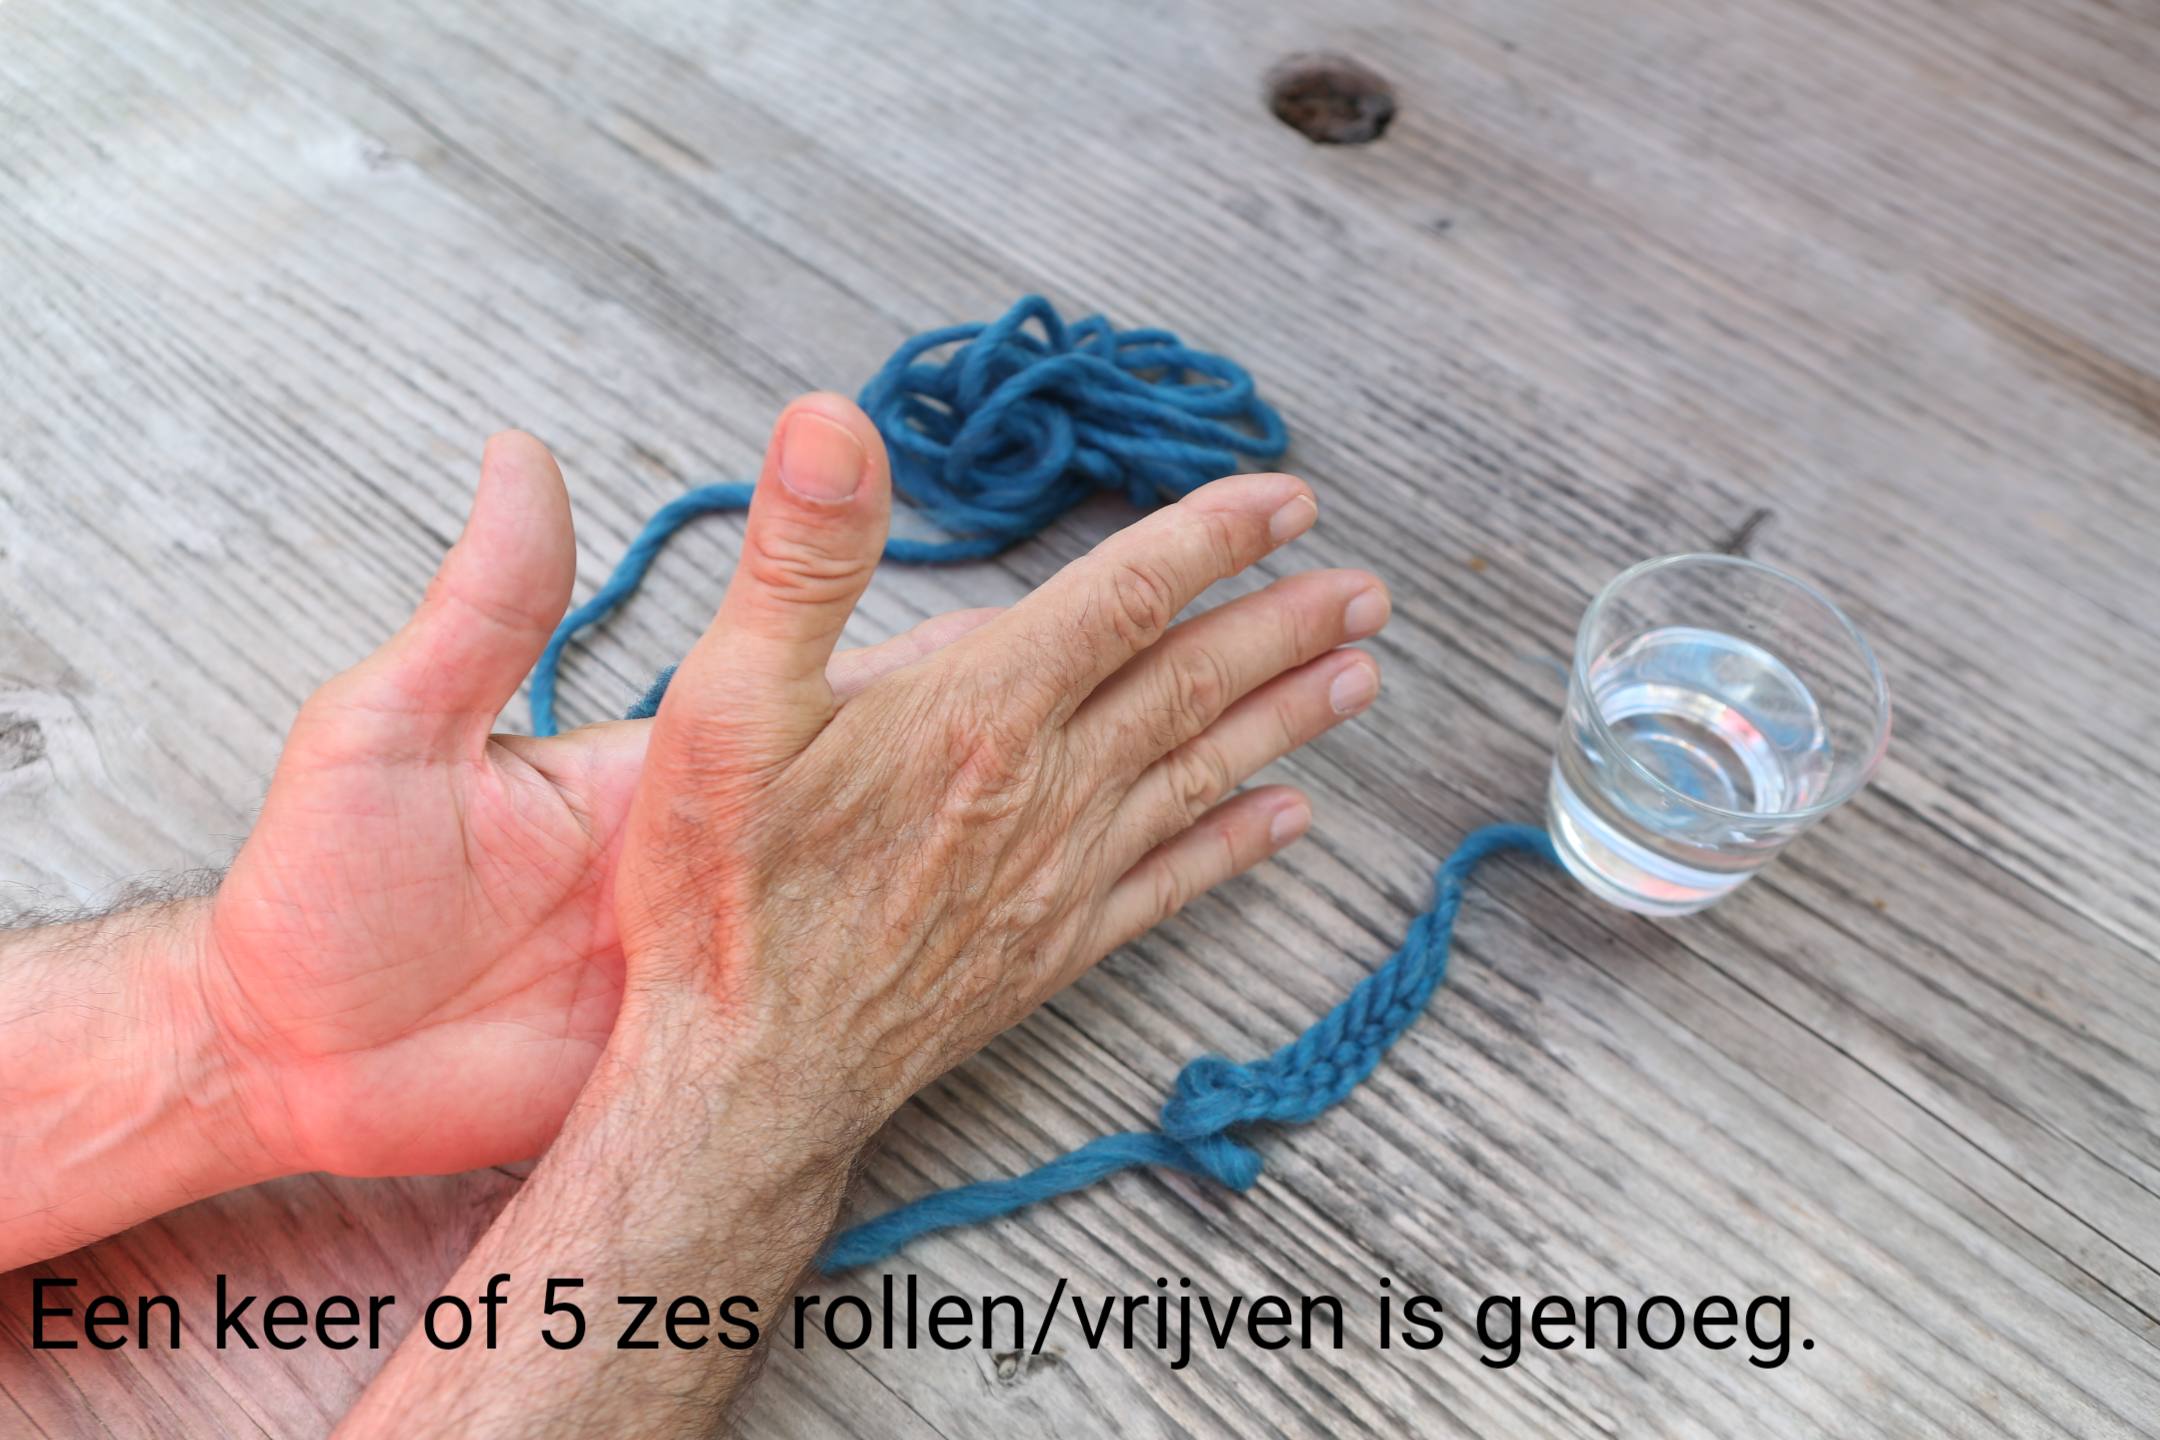
Roll 5 or 6 times, rubbing is enough.
5 bis 6 Mal rollen, Reiben genügt.
Rouler 5 ou 6 fois, frotter suffit.
Da 5 o 6 vueltas, frotando es suficiente.

The felt method gives you a nice result.
Mit der Filzmethode erzielen Sie ein schönes Ergebnis.
La méthode du feutre vous donne un joli résultat
El método del fieltro te dará un bonito resultado.
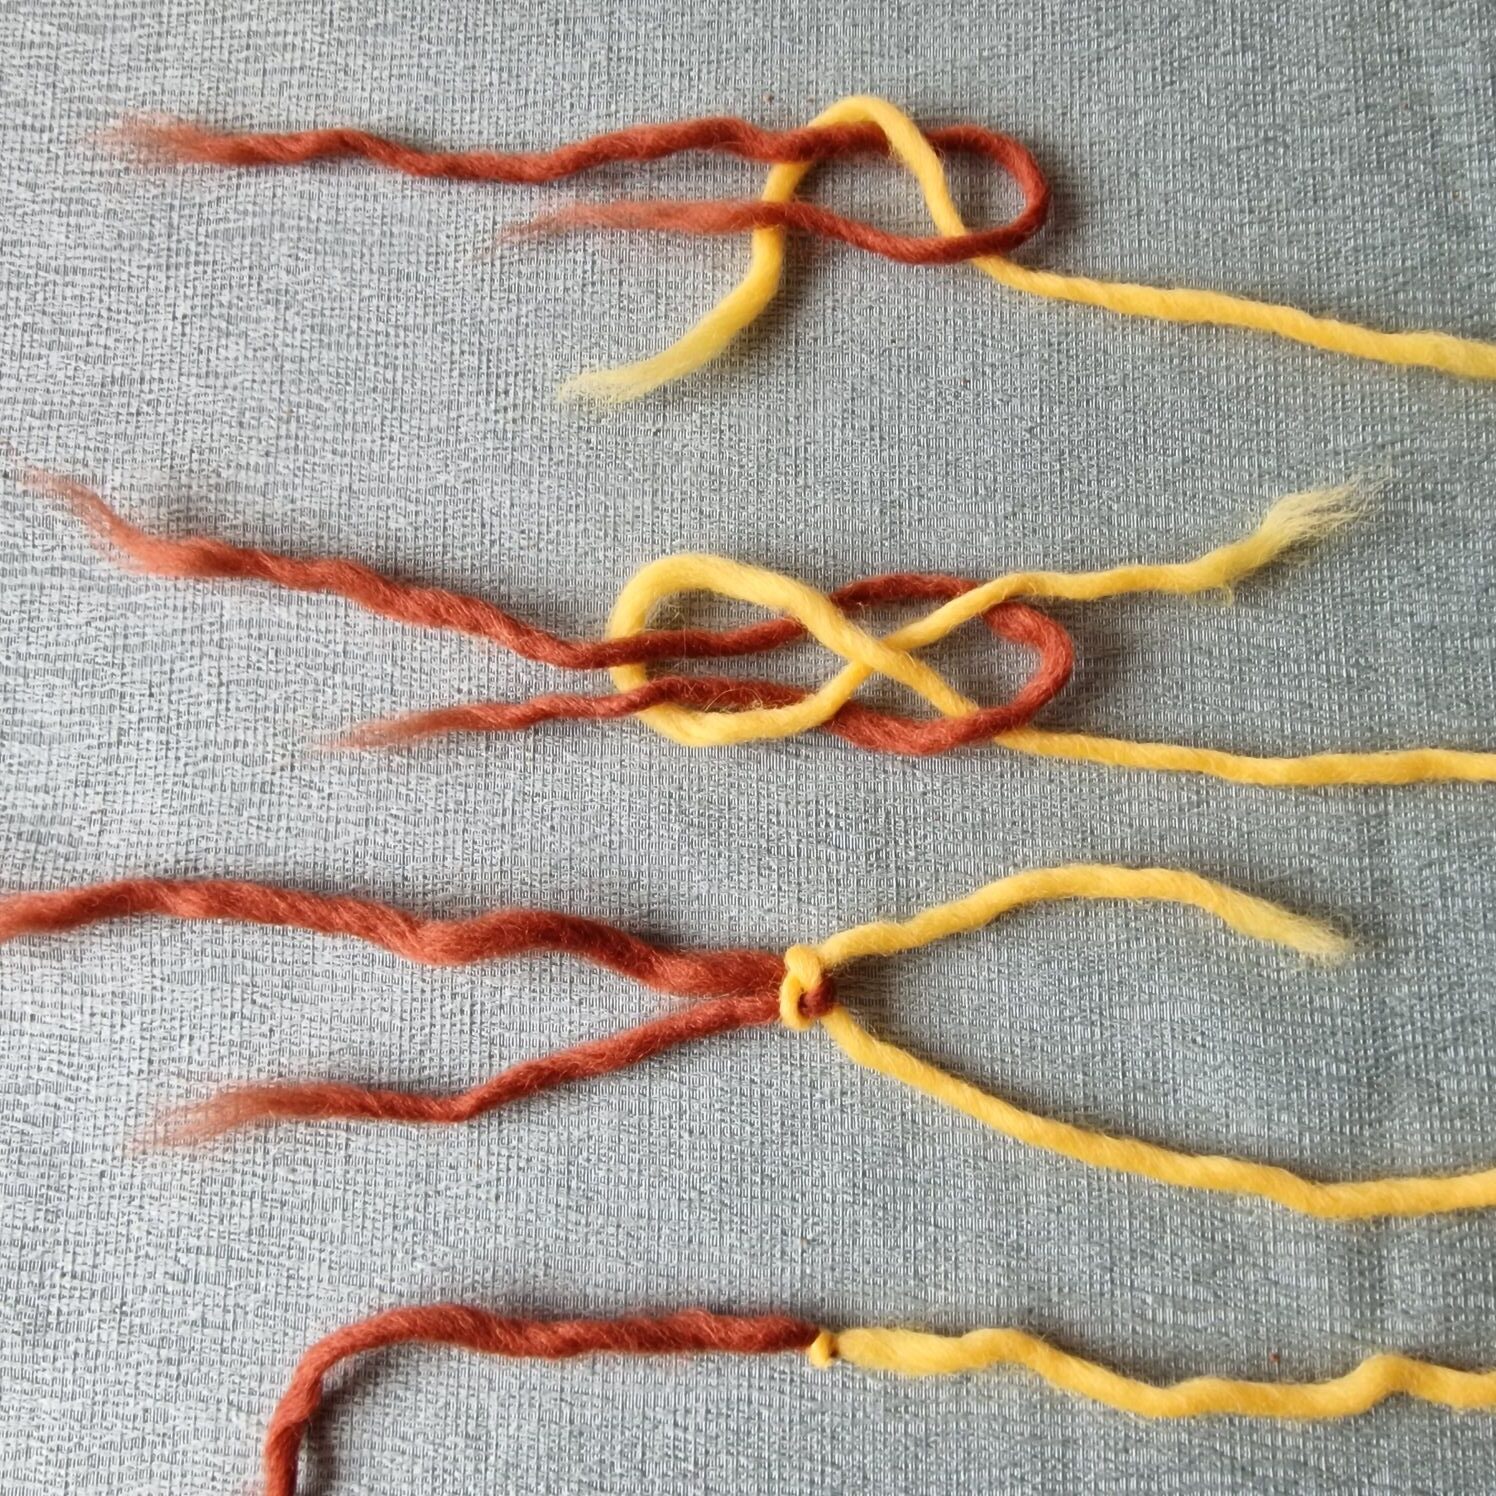
Als je ander garen wilt gebruiken wat je niet kunt vilten, kun je de schootsteek gebruiken om een nieuw stuk garen aan elkaar te knopen.
If you want to use a different yarn that you can’t felt, you can use the sheet stitch to join a new piece of yarn.
Wenn Sie ein anderes Garn verwenden möchten, das Sie nicht filzen können, können Sie mit dem Sheetstich ein neues Garnstück annähen.
Si vous souhaitez utiliser un fil différent que vous ne pouvez pas feutrer, vous pouvez utiliser le point de feuille pour joindre un nouveau morceau de fil.
Si deseas utilizar un hilo diferente que no puedas fieltrar, puedes utilizar la puntada de sábana para unir un nuevo trozo de hilo
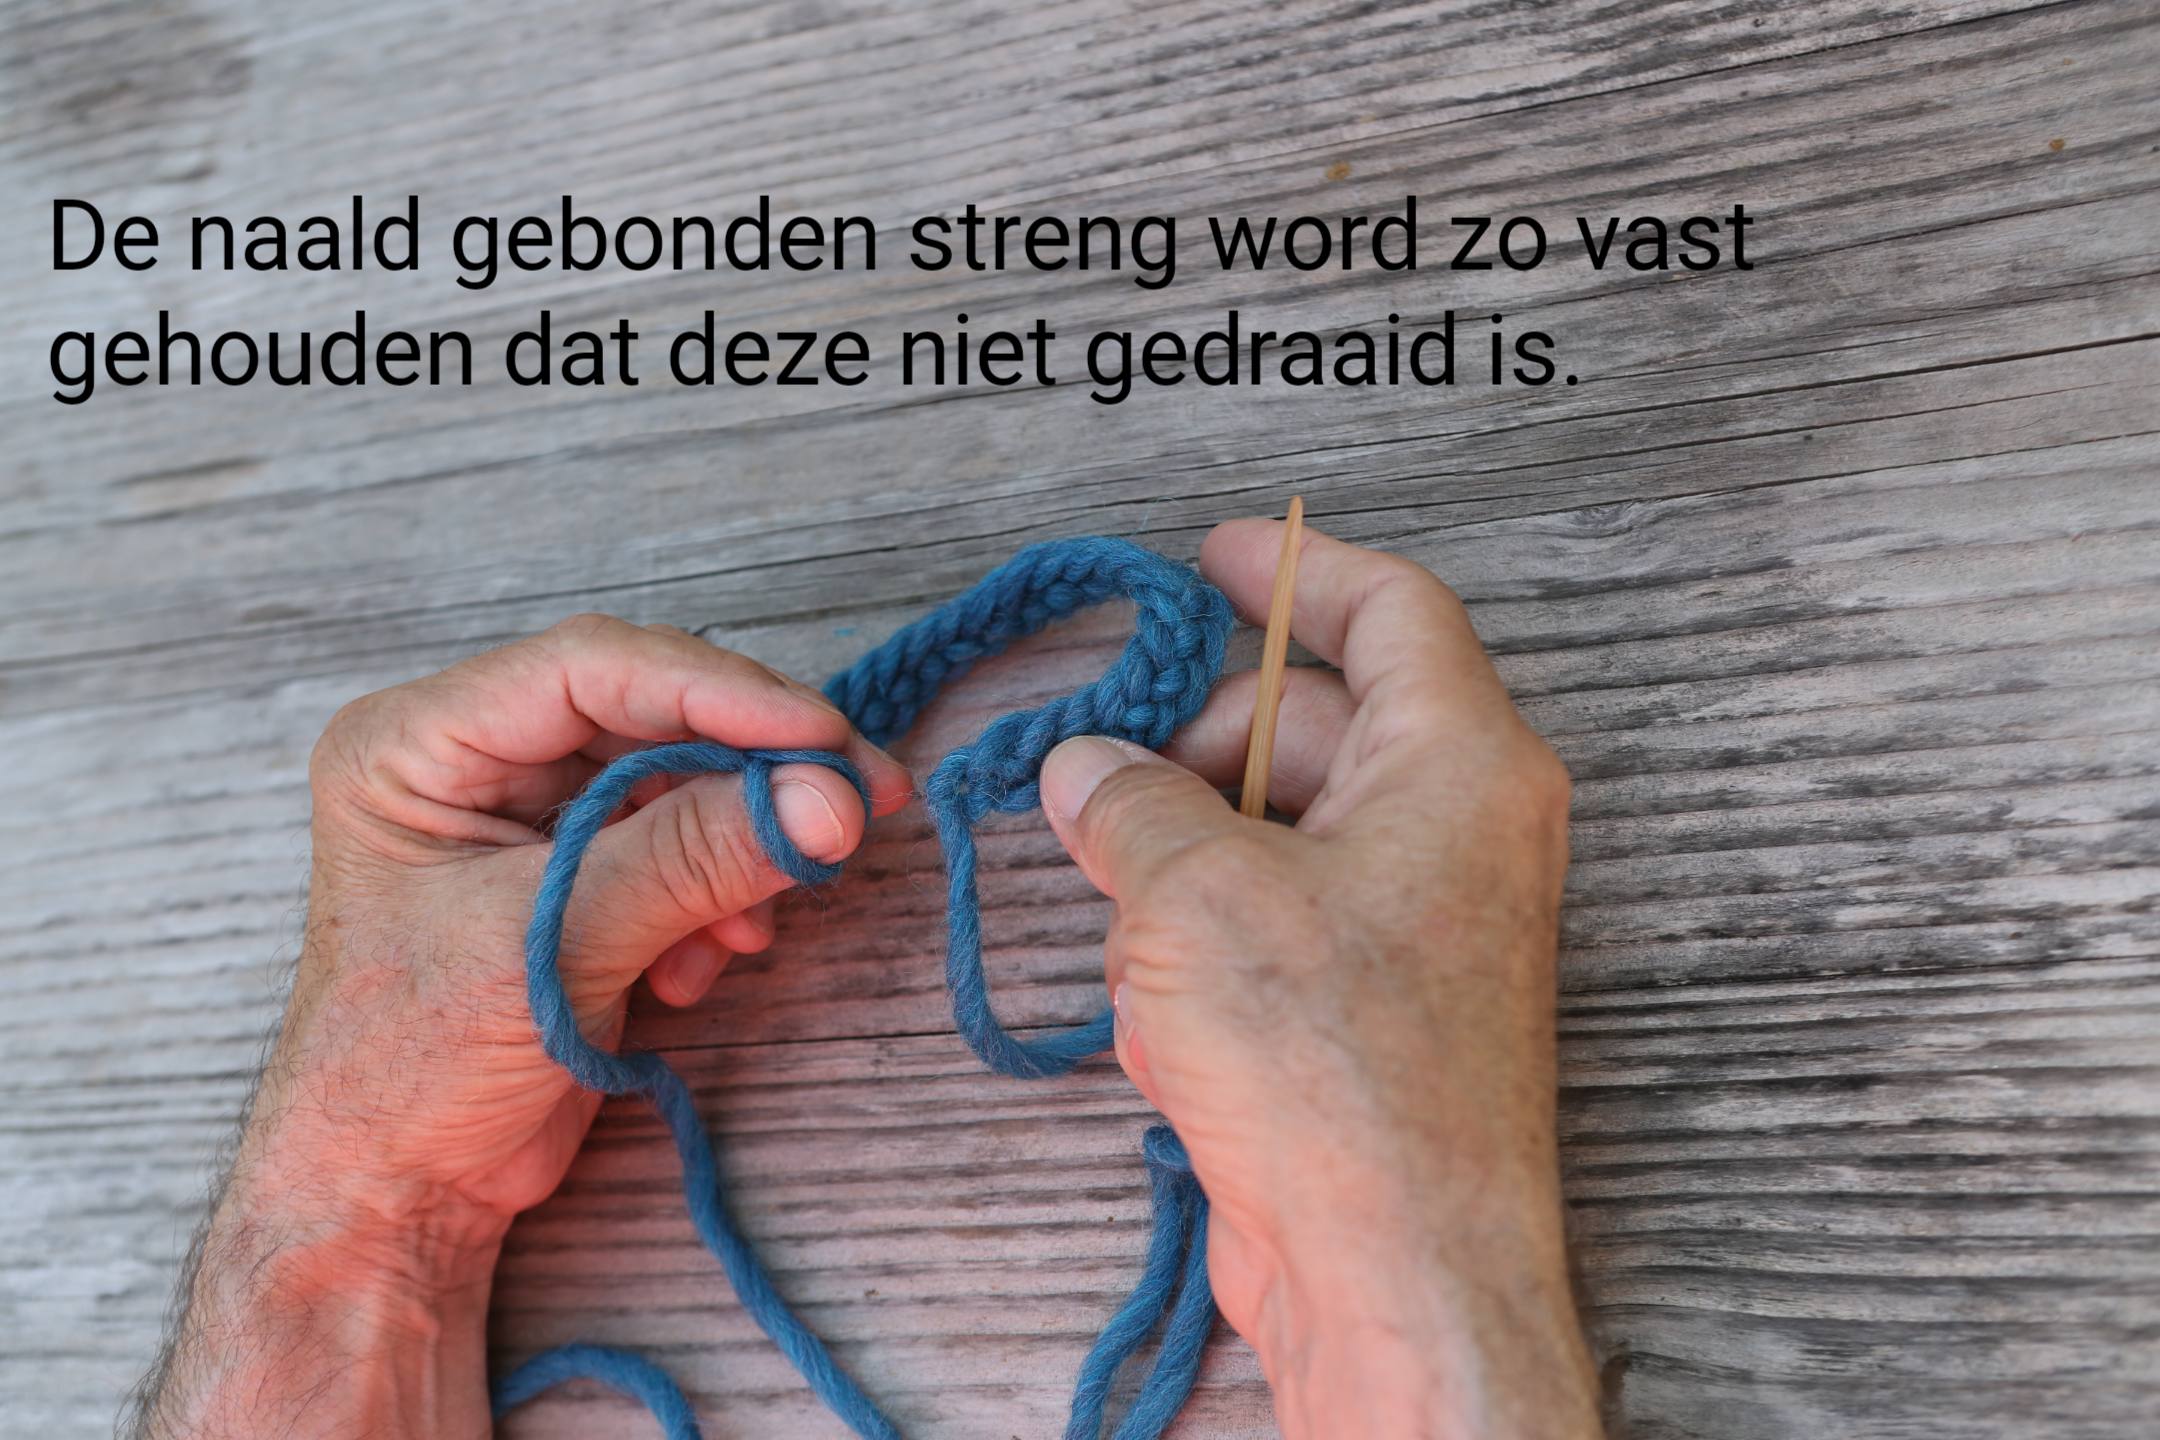
The needle bound strand is held in such a way that it is not twisted.
Der nadelgebundene Strang wird so gehalten, dass er sich nicht verdreht.
Le fil aiguilleté est maintenu de manière à ne pas être tordu.
La hebra unida con la aguja se mantiene de tal manera que no se retuerza.
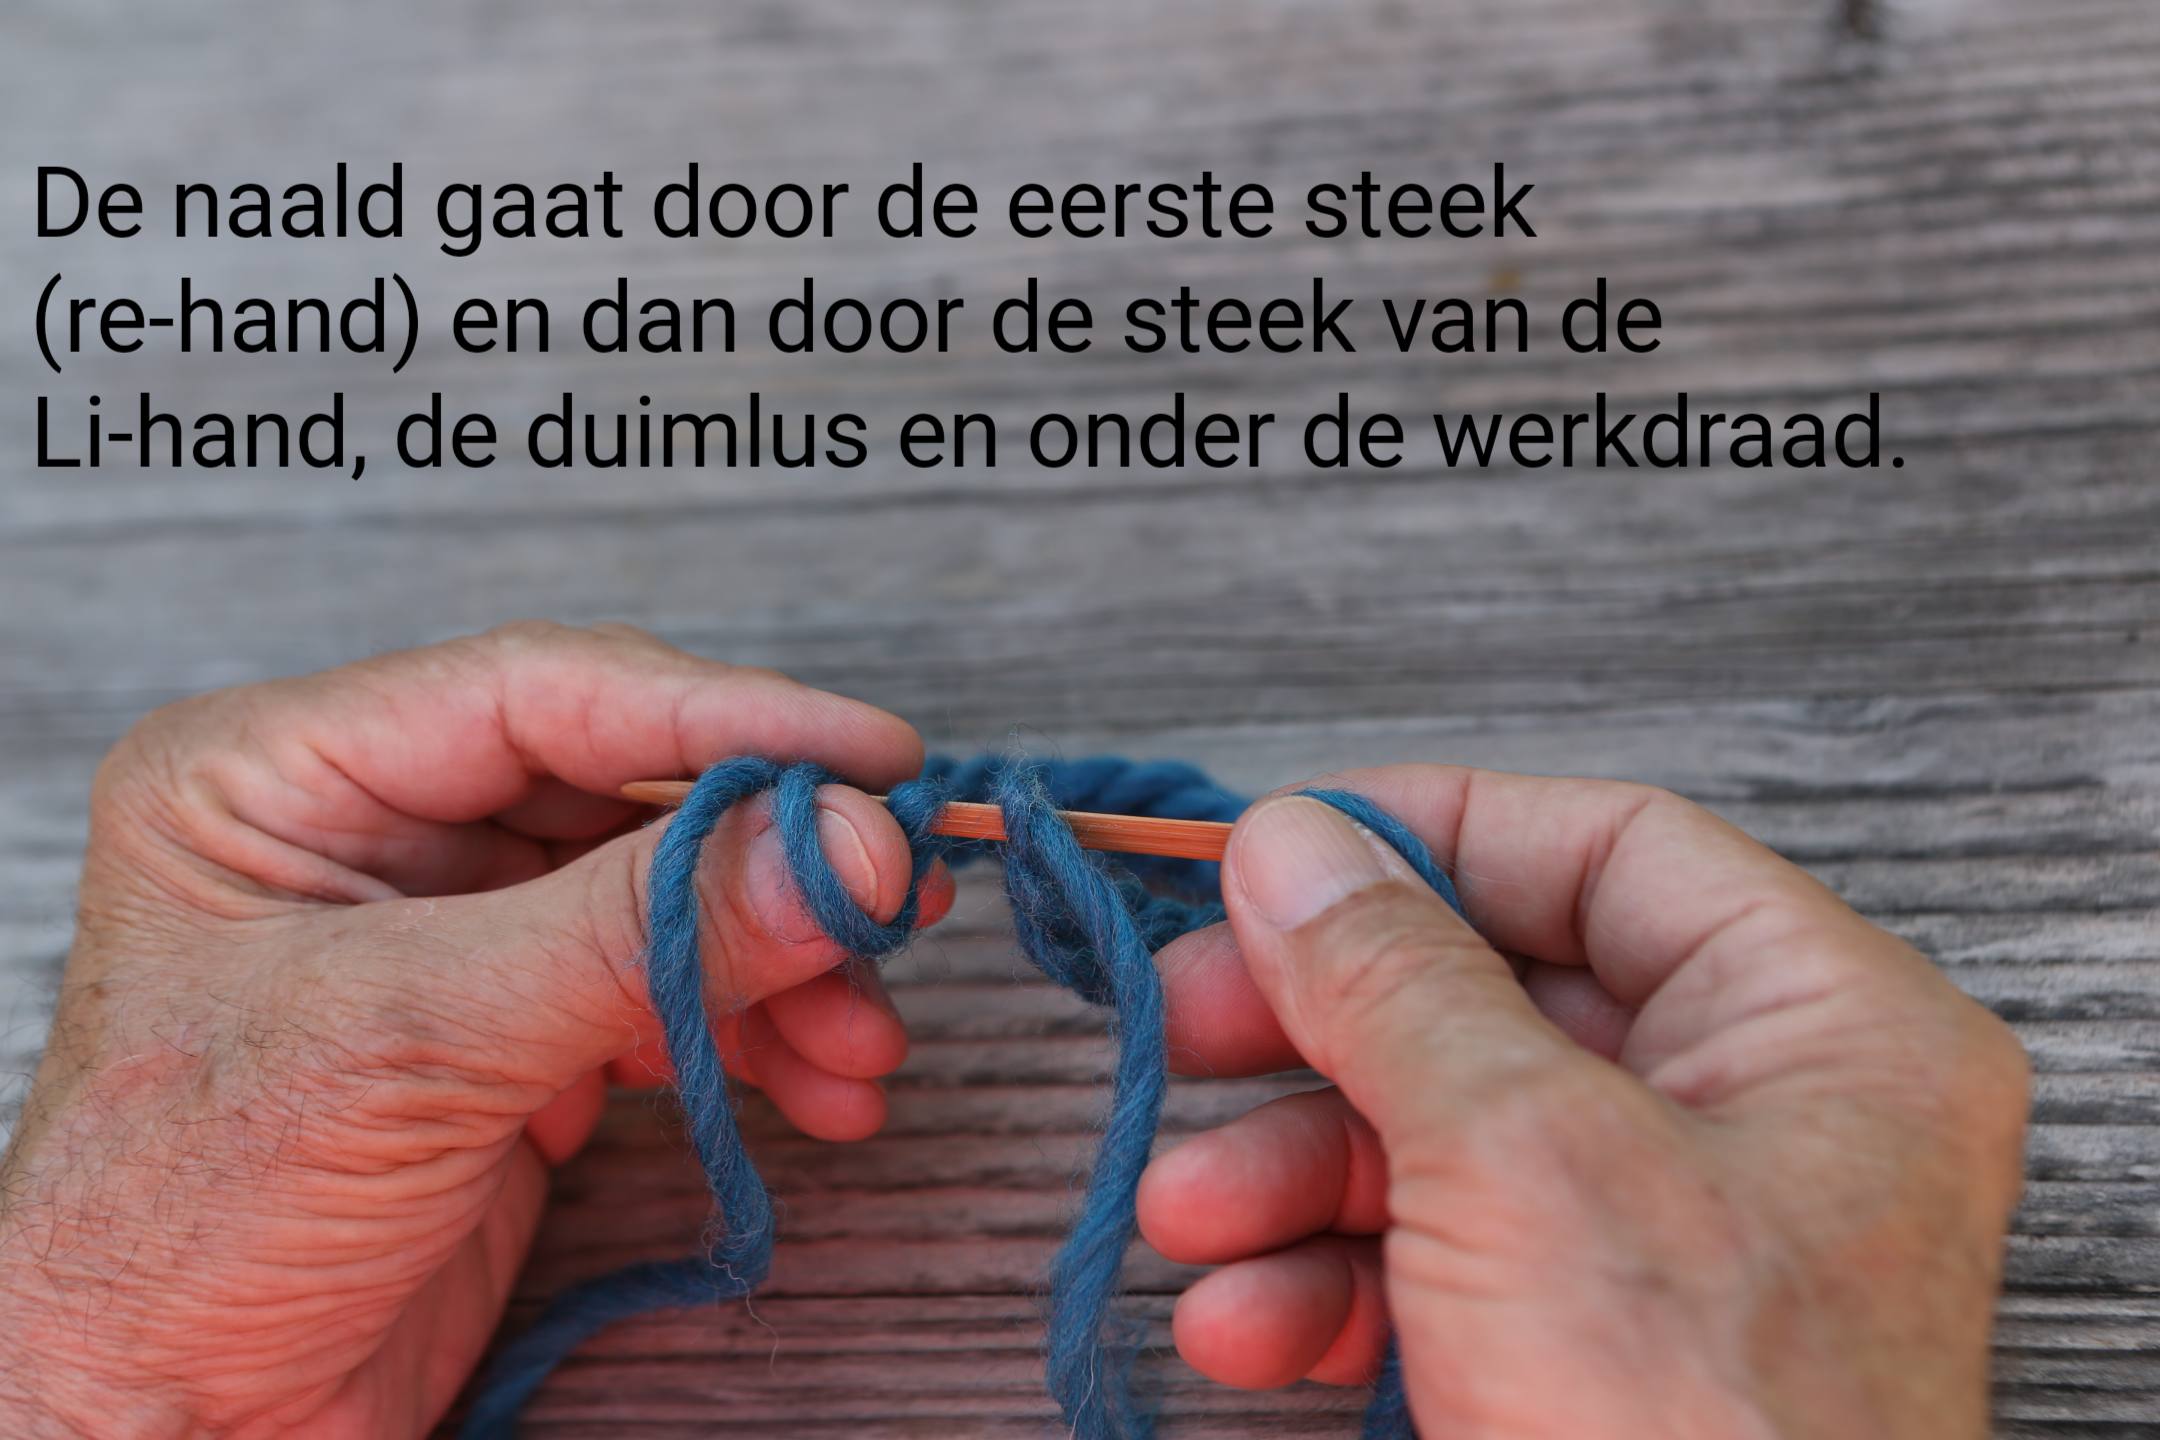
The needle goes through the first stitch (right hand), then through the stitch of the right hand (left hand), the thumb loop and under the working yarn.
Die Nadel geht durch die erste Masche (rechte Hand), dann durch die Masche der rechten Hand (linke Hand), die Daumenschlaufe und unter dem Arbeitsgarn hindurch.
L’aiguille passe dans la première maille (main droite), puis dans la maille de la main droite (main gauche), dans la boucle du pouce et sous le fil de travail.
La aguja pasa por el primer punto (mano derecha), luego por el punto de la mano derecha (mano izquierda), por el lazo del pulgar y por debajo del hilo de trabajo.
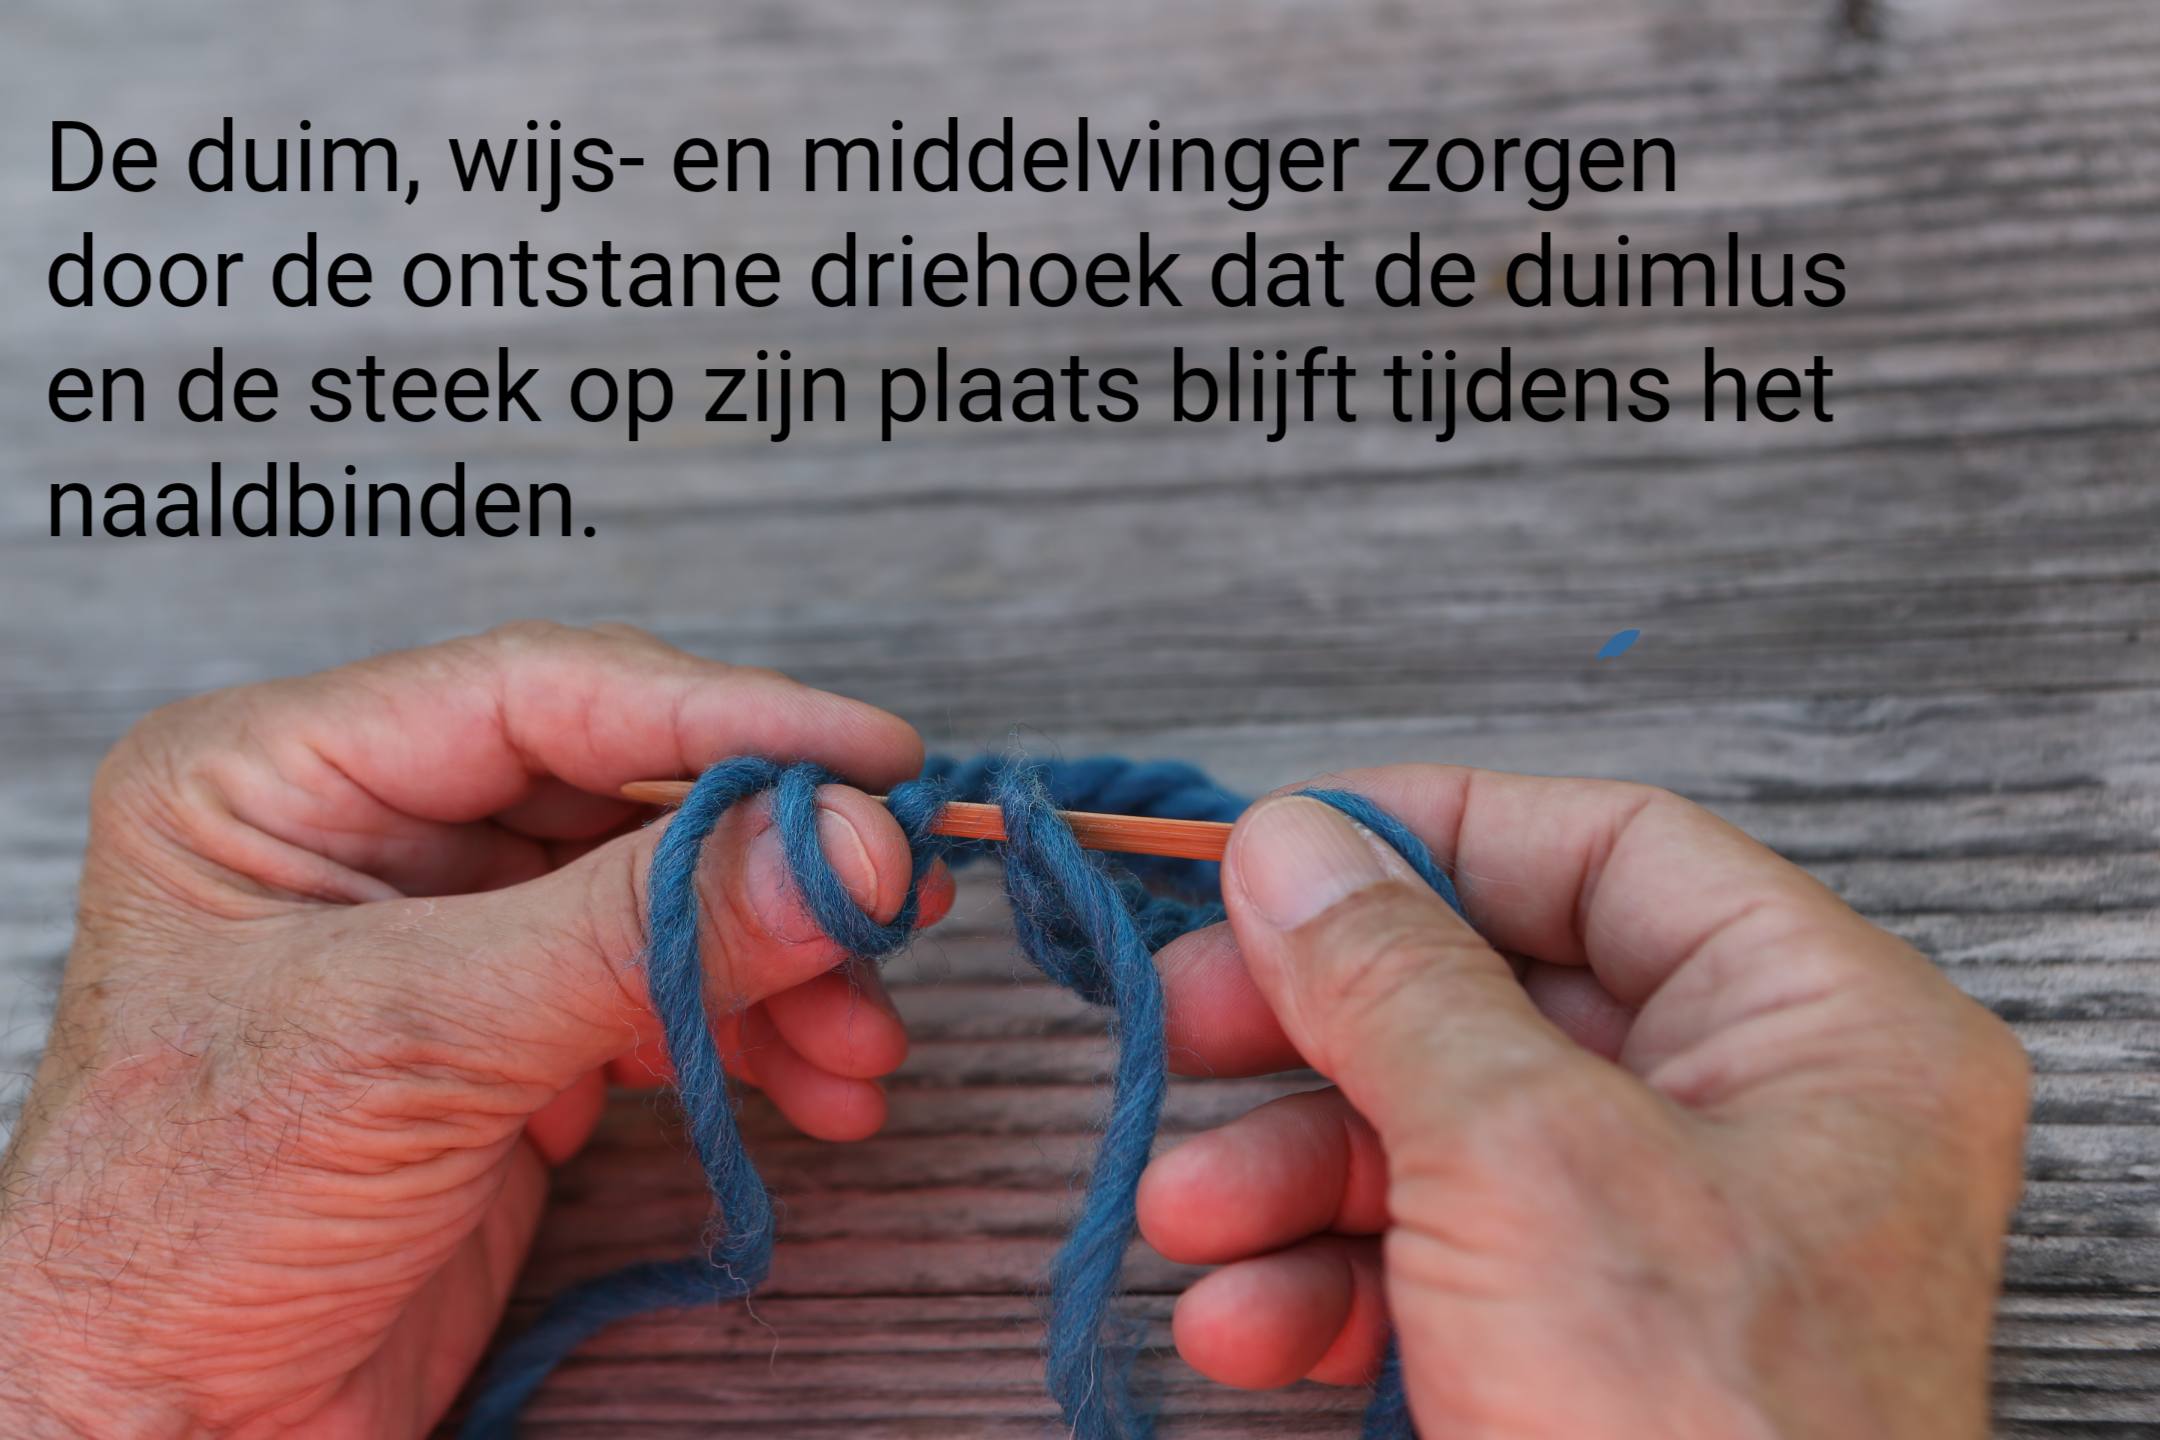
The thumb, index finger and middle finger form the triangle that keeps the thumb loop and stitch in place during needle binding.
Daumen, Zeigefinger und Mittelfinger bilden das Dreieck, das die Daumenschlaufe und die Masche beim Nadelbinden an Ort und Stelle hält.
Le pouce, l’index et le majeur forment le triangle qui maintient la boucle du pouce et le point en place pendant la reliure à l’aiguille.
El pulgar, el índice y el dedo medio forman el triángulo que mantiene el lazo del pulgar y la puntada en su lugar durante la unión con aguja.
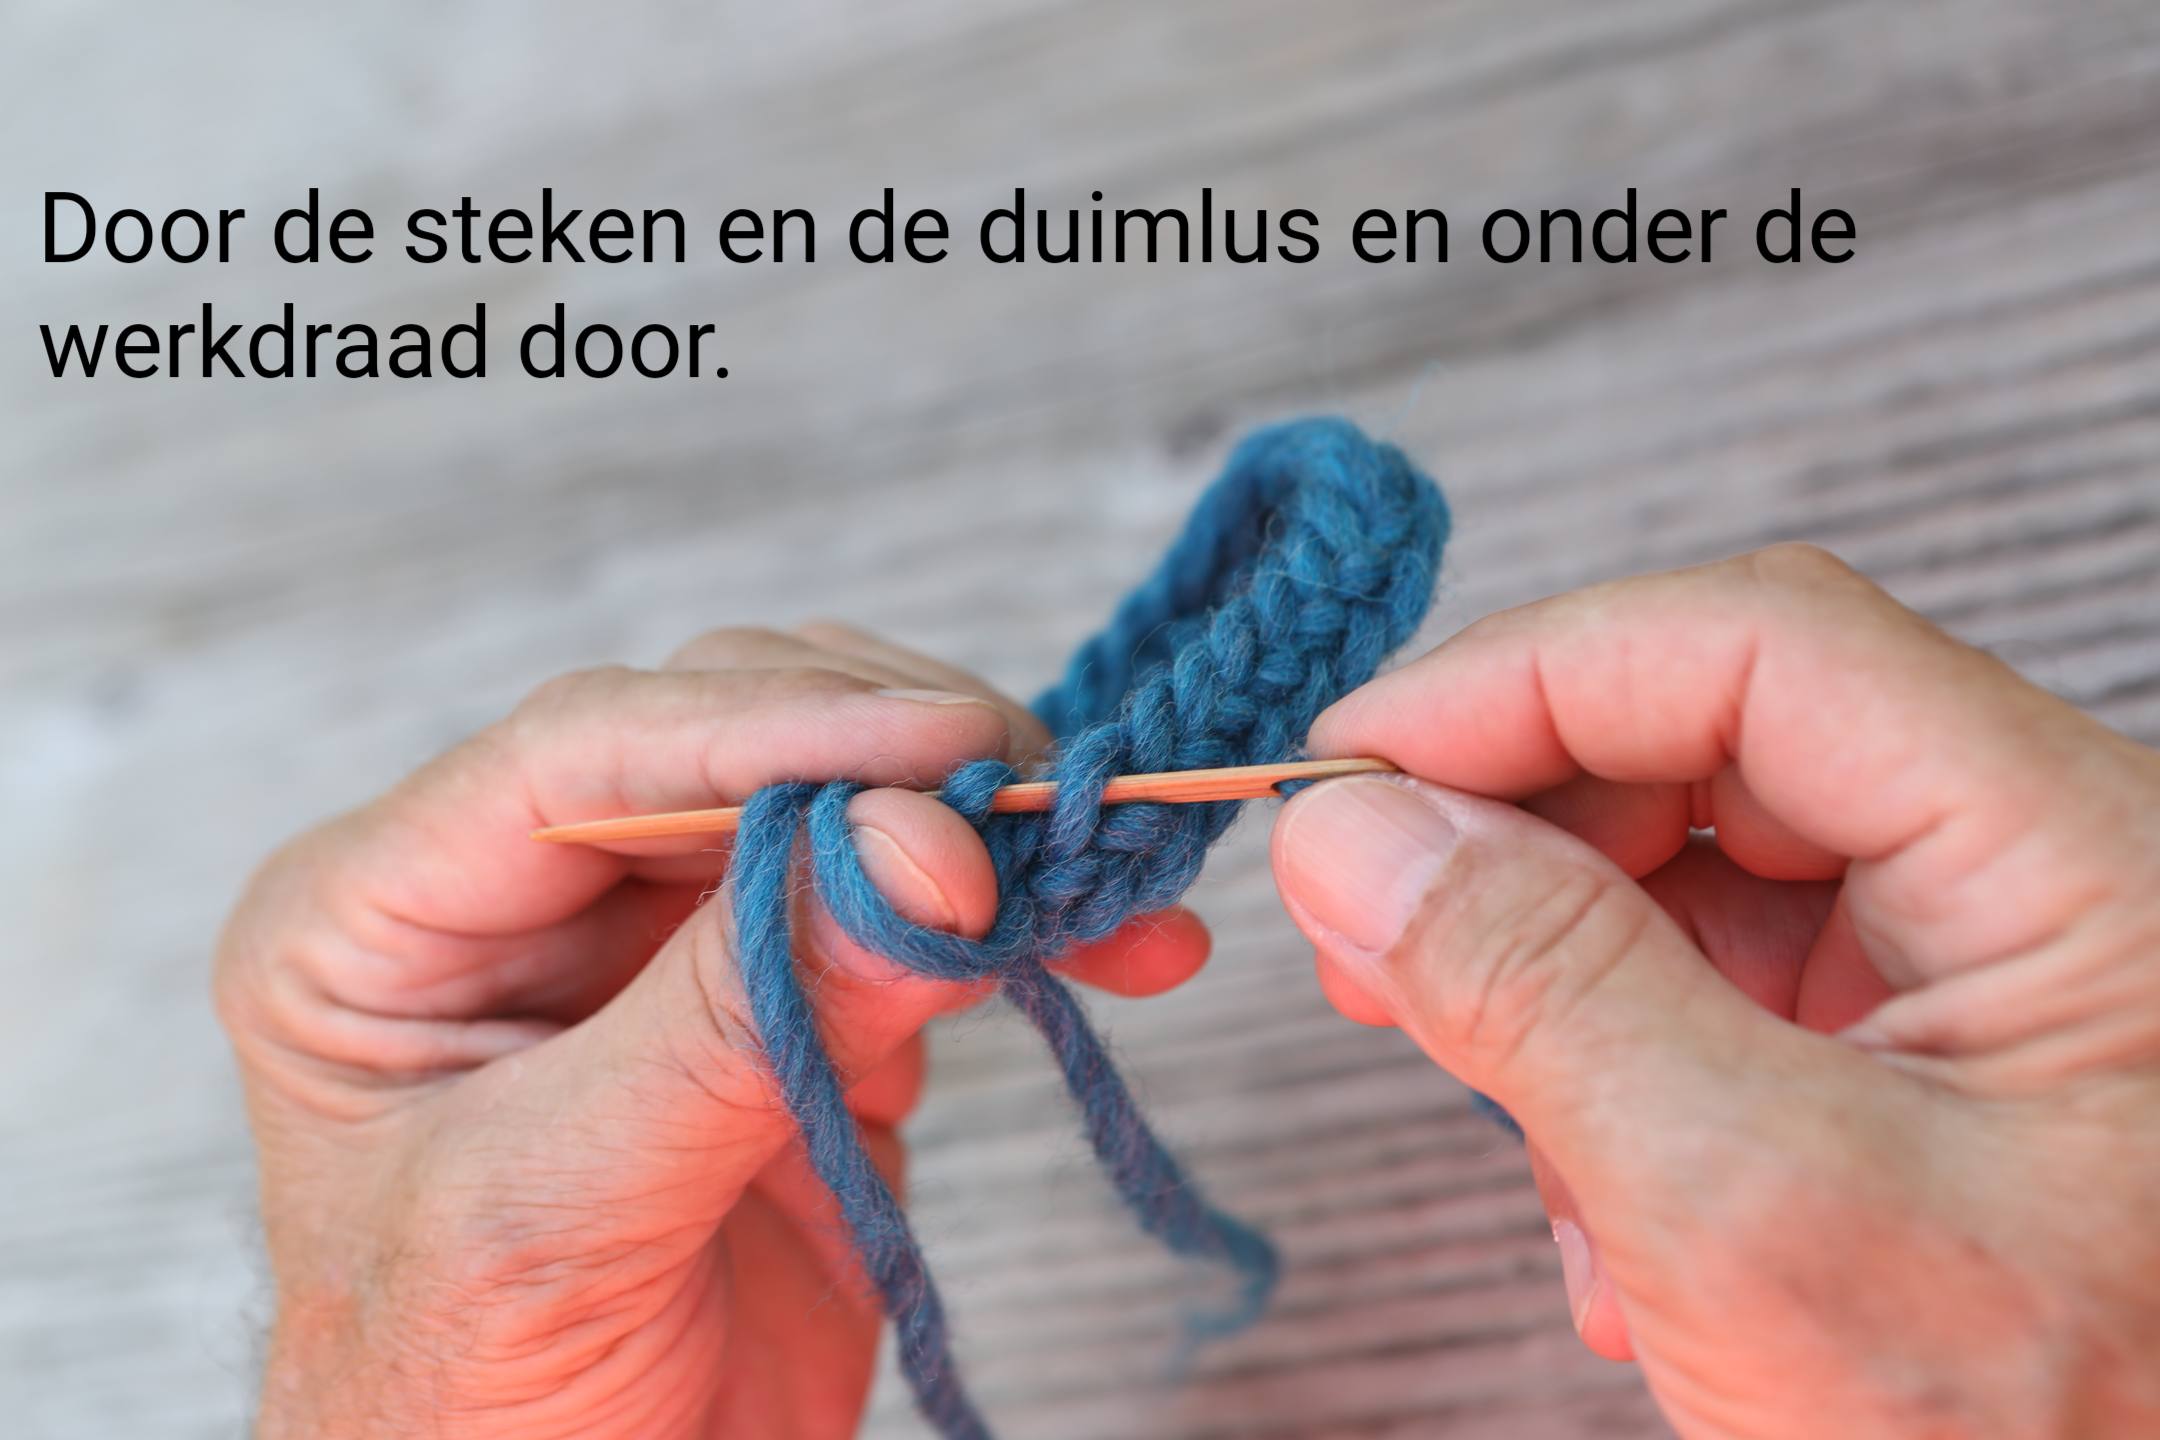
Through the stitches and the thumb loop and under the working yarn.
Durch die Maschen und die Daumenschlaufe und unter dem Arbeitsfaden hindurch.
À travers les mailles et la boucle du pouce et sous le fil de travail.
A través de los puntos y el lazo del pulgar y debajo del hilo de trabajo.
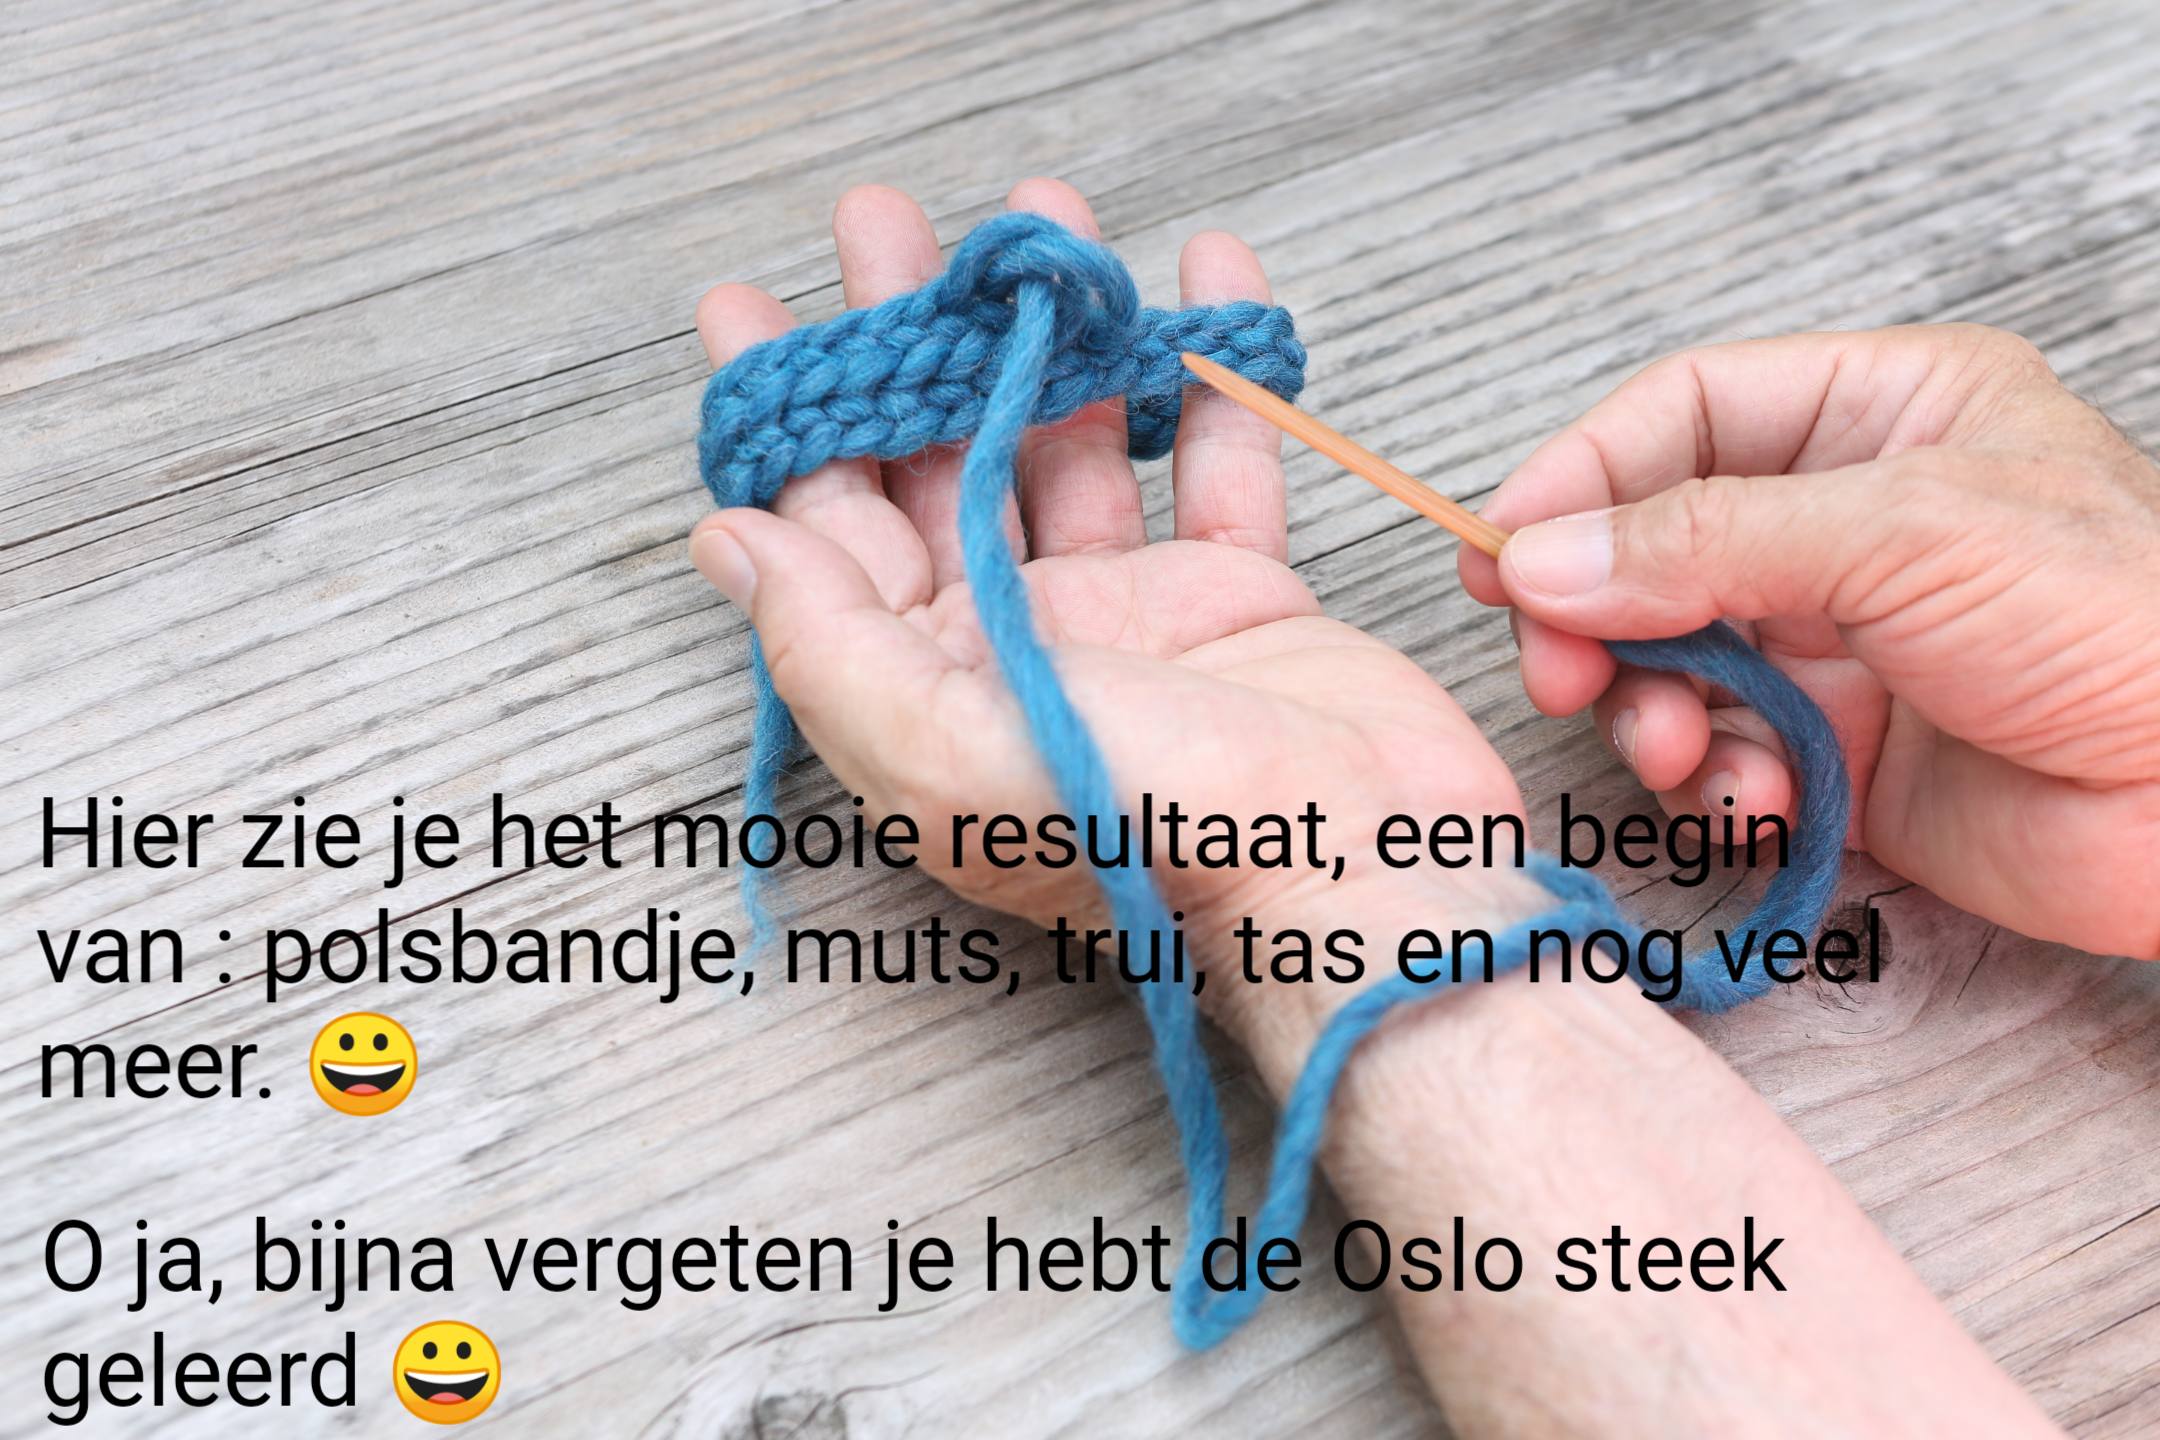
Here you see the beautiful result, a start of: wristband, hat, sweater, bag and much more. Oh yes, I almost forgot, you learned the Oslo stitch, the basic stitch of needle binding.
Hier seht ihr das schöne Ergebnis, einen Anfang bestehend aus: Armband, Mütze, Pullover, Tasche und vielem mehr. Ach ja, fast hätte ich es vergessen, Sie haben den Oslostich gelernt, den Grundstich der Nadelbindung.
Voici le beau résultat, un début de : bracelet, chapeau, pull, sac et bien plus encore. Ah oui, j’ai presque oublié, tu as appris le point d’Oslo, le point de base de la reliure à l’aiguille.
Aquí veis el bonito resultado, un comienzo de: pulsera, gorro, jersey, bolso y mucho más. Ah, sí, casi lo olvido, aprendiste la puntada Oslo, la puntada básica para encuadernar con aguja
My first YouTube video in Dutch, the images are so clear that you can follow it very well.
Happy nalbinding what is happening hehind your thumb.
Lefthand nalbinding video.
My first YouTube video in the German language.
I create videos on YouTube to learn people how to needlebind with two fingers and your thumb. Needlebinding helps people to relax, relieve stress and make beautiful objects at the same time. I’m passionate about needlebinding. I love to learn people this almost forgotten craftmanship.
If you want to support my work you can buy me a coffee at : https://ko-fi.com/happy needlebinding.
Very helpful!