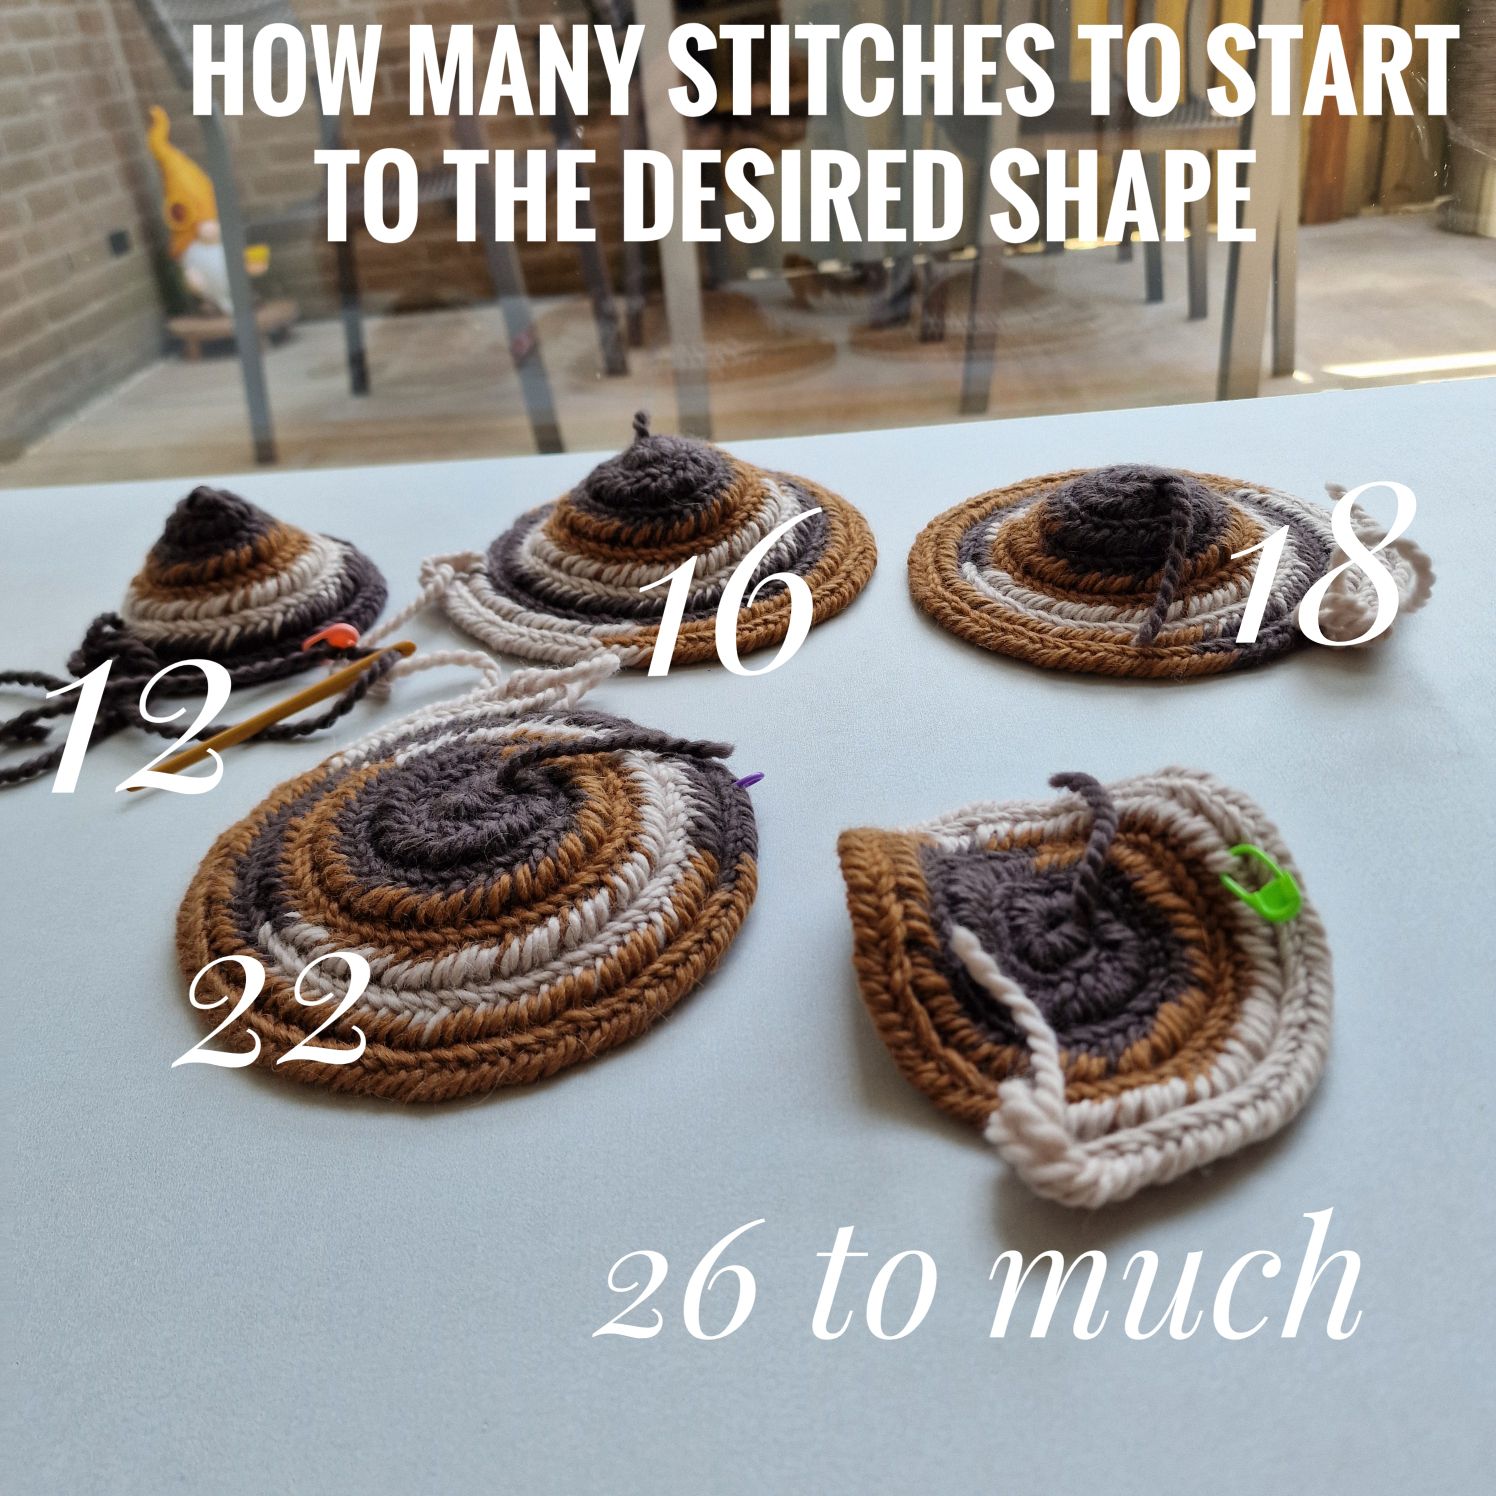
Many projects that you can make with needlebinding are started with a circle : bags, a sweater or hats.
Knitting socks is done with cicelcular needles, or with 3 or 4 needles, the great thing about needlebinding is that you only need One Needle.
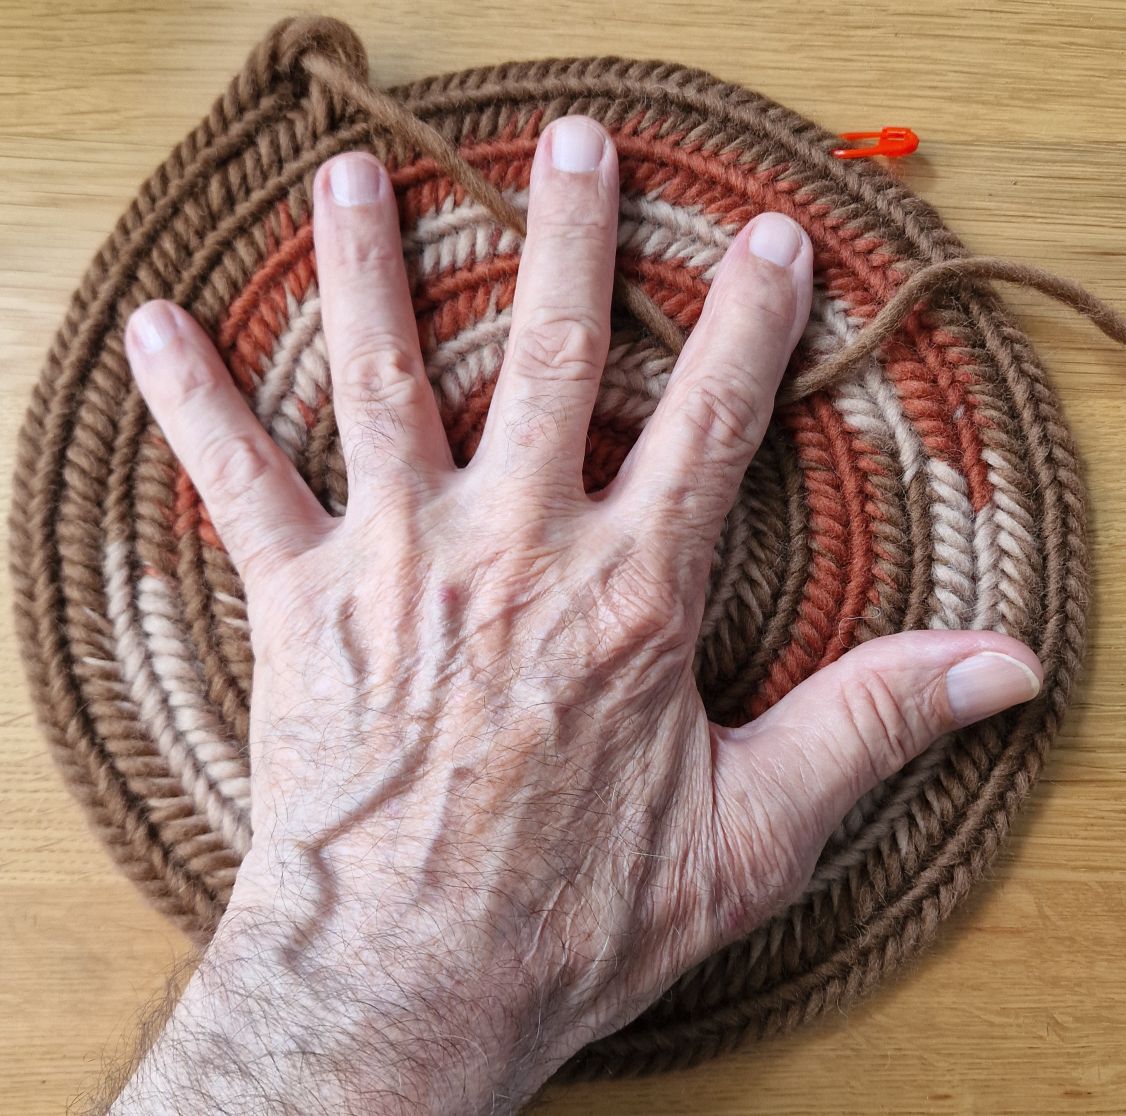
When you start a project you can choise a stitch you like, every stitch is different in size and thickness and tight or very loose.
Your thumb size and whether you nalbind loose or tight and the stitch and connection stitch choice determines how the fabric will look.
I made some swatches with 30 stitches in a row and 5 rows long.
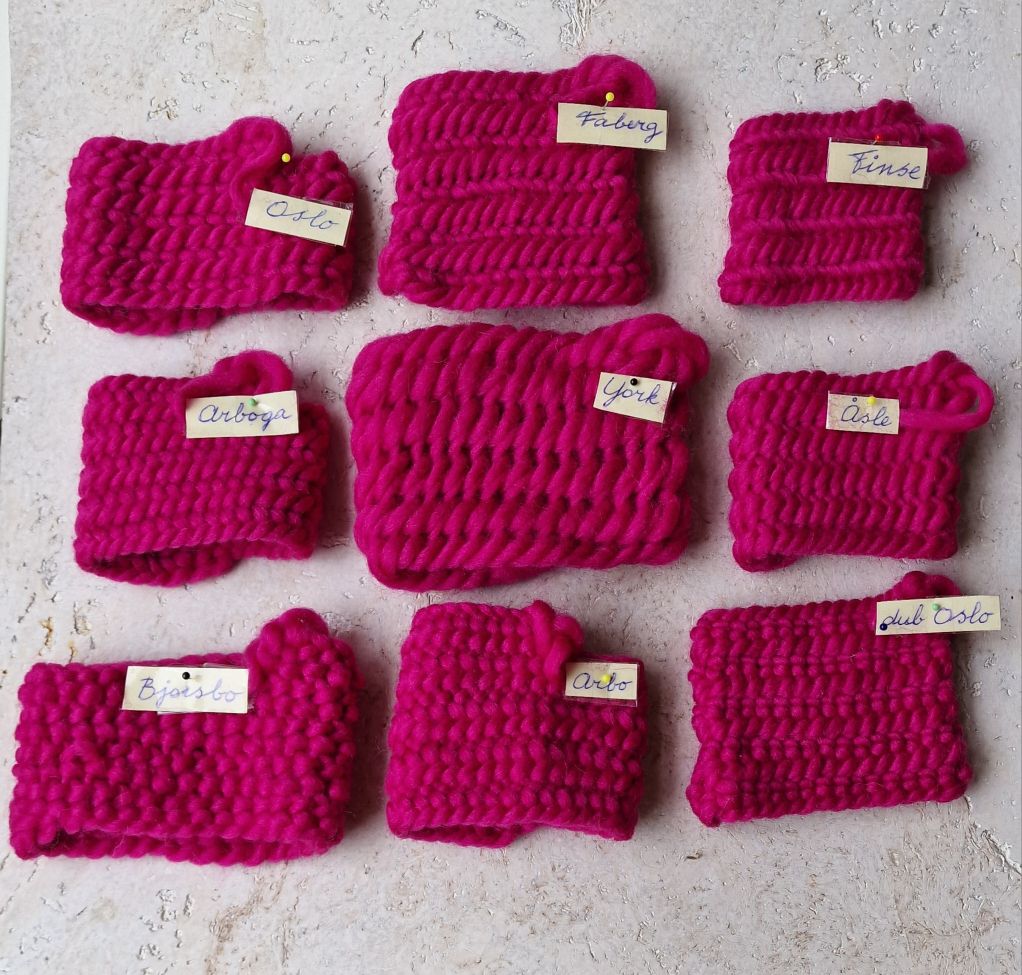
All the swatches are made with the connection stitch F2, (you pick your old loop and your next loop on your needle and make your stitch).
The Oslo stitch was used in the next project.
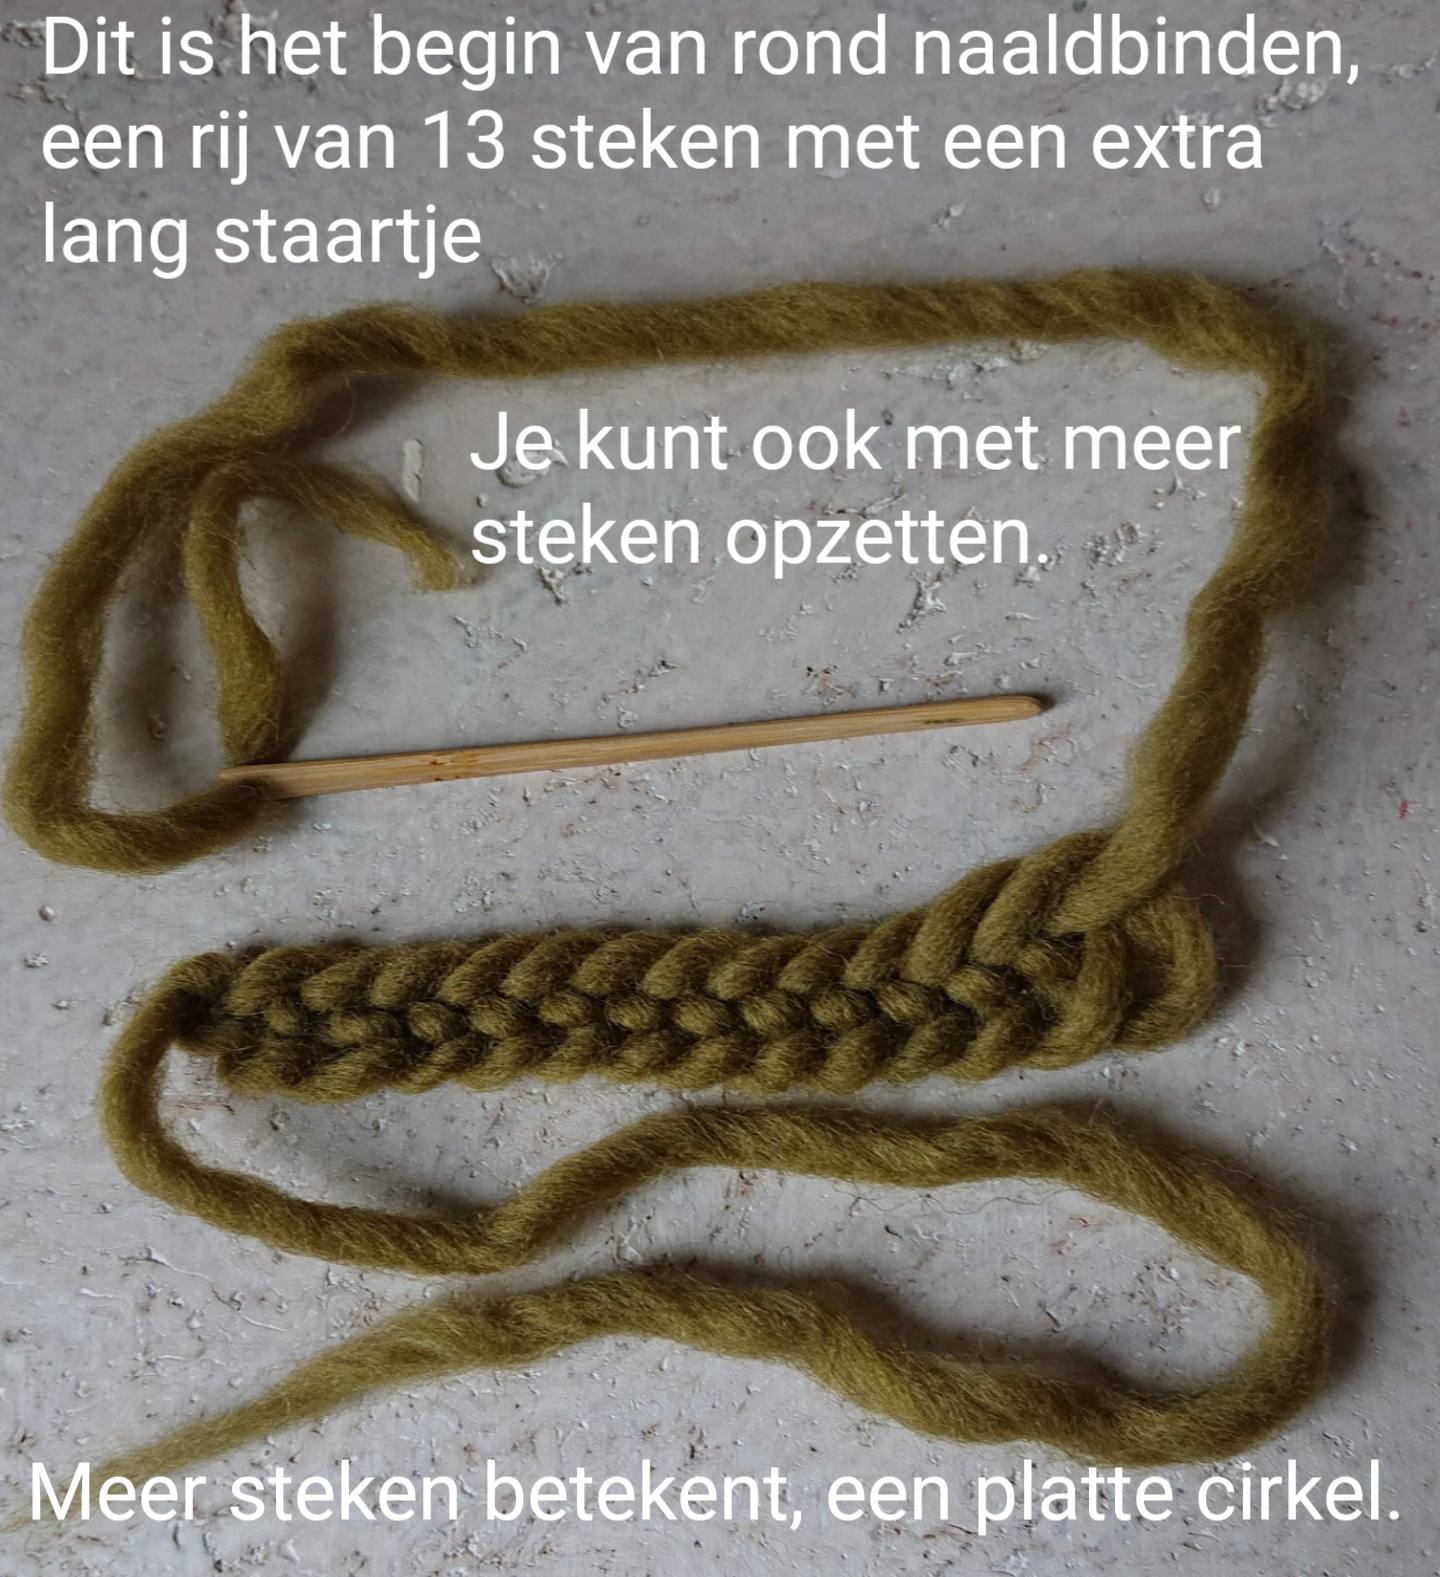
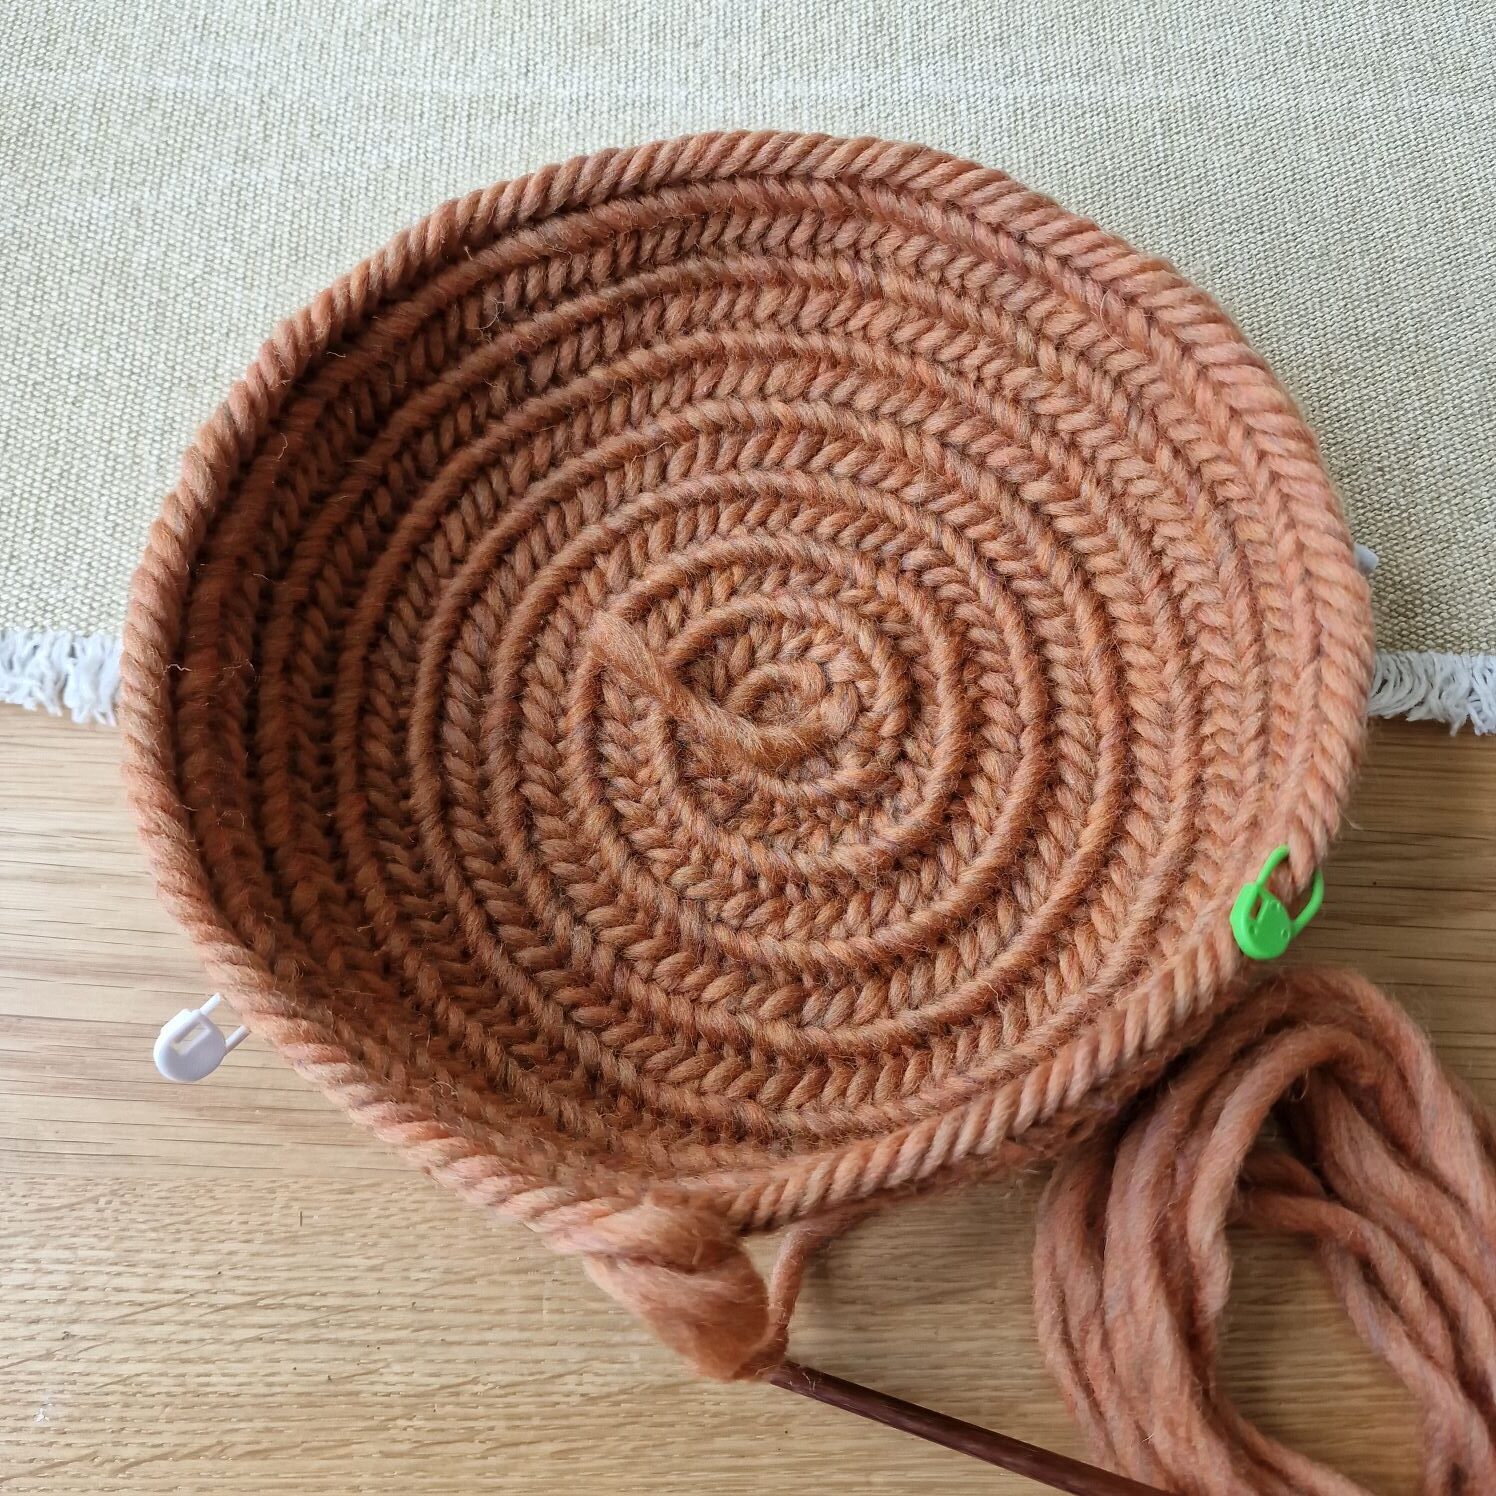
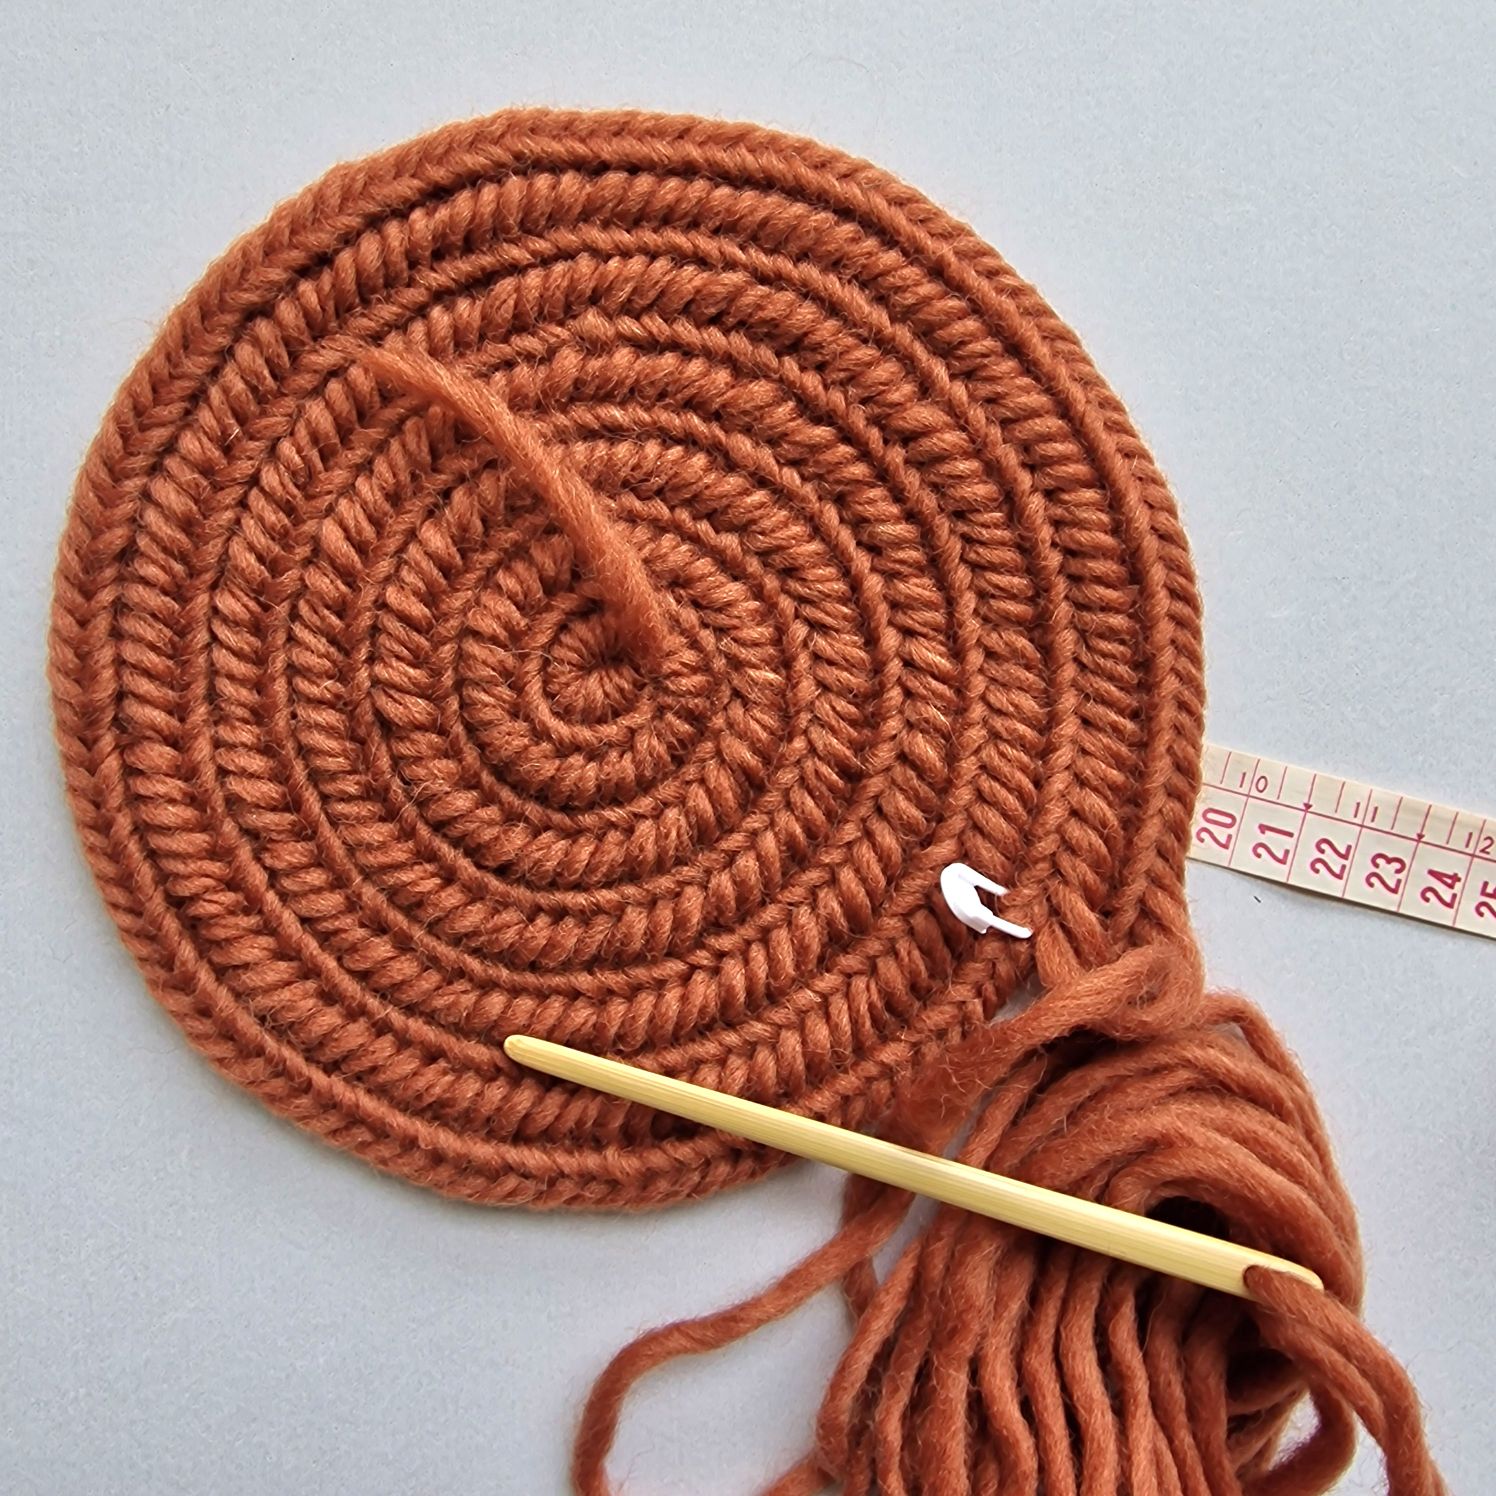
This is the start of needlebinding of a row of 13 stitches with the Oslo stitch and extra long tail. You can also set up with more stitches, the hat is going to be bigger.
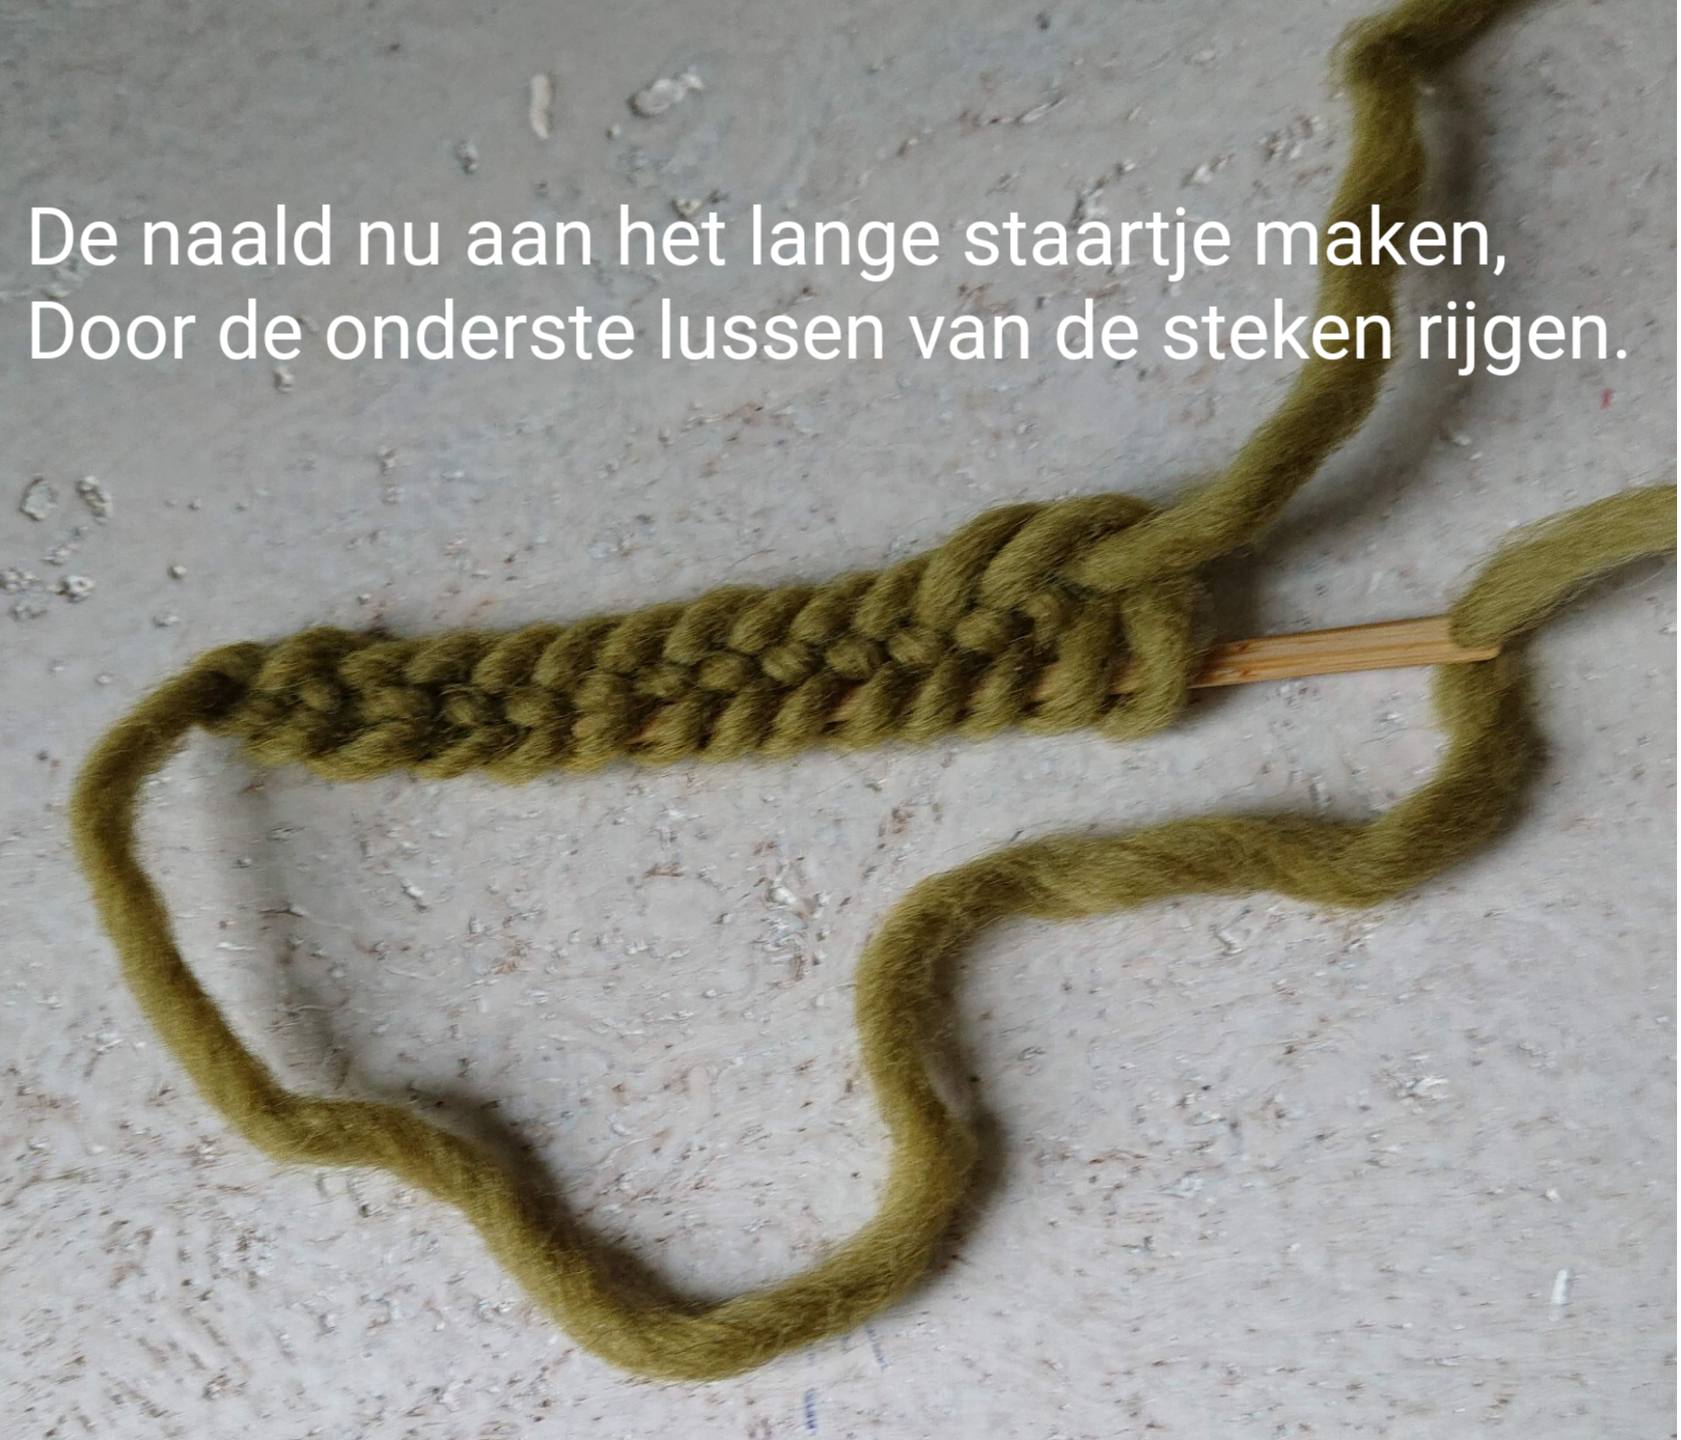
Make the needle on the long tail thread through the lower loops of the stitches.
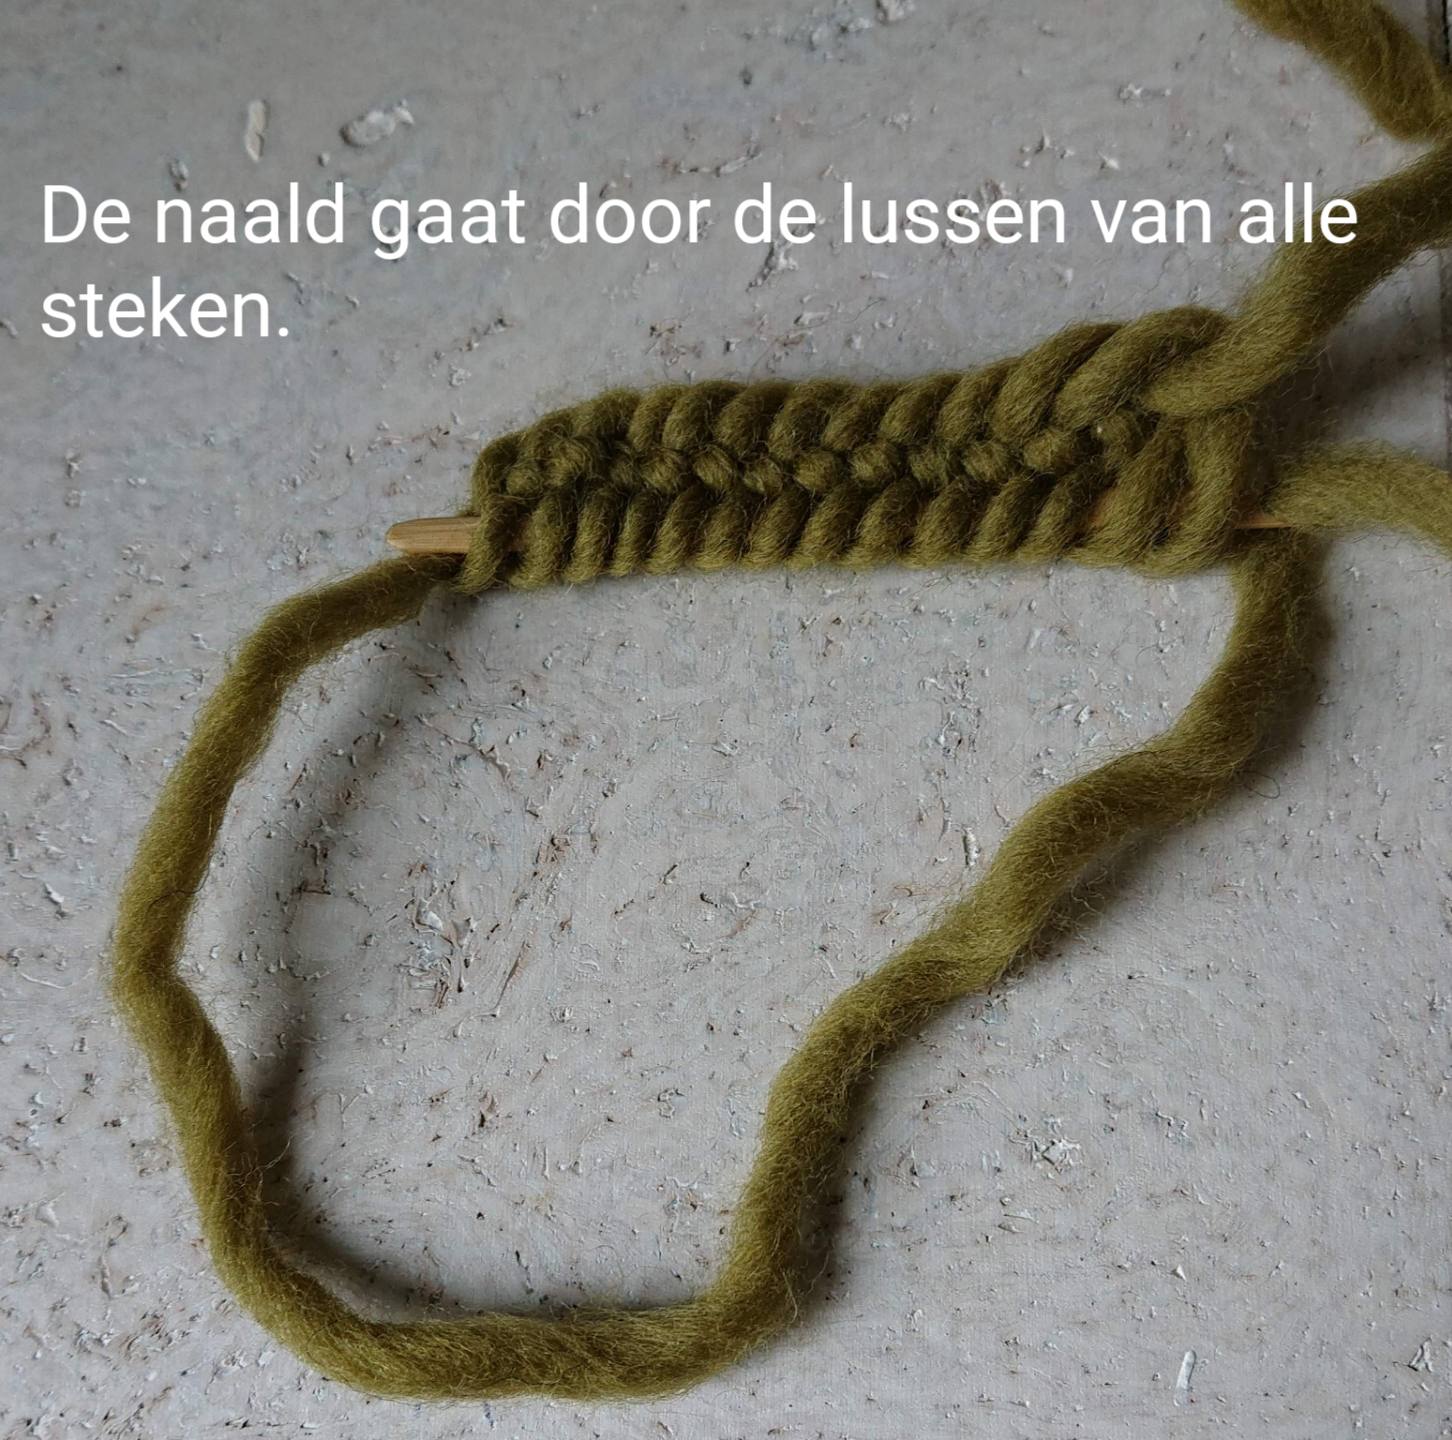
The needle goes through the loops of all stitches.
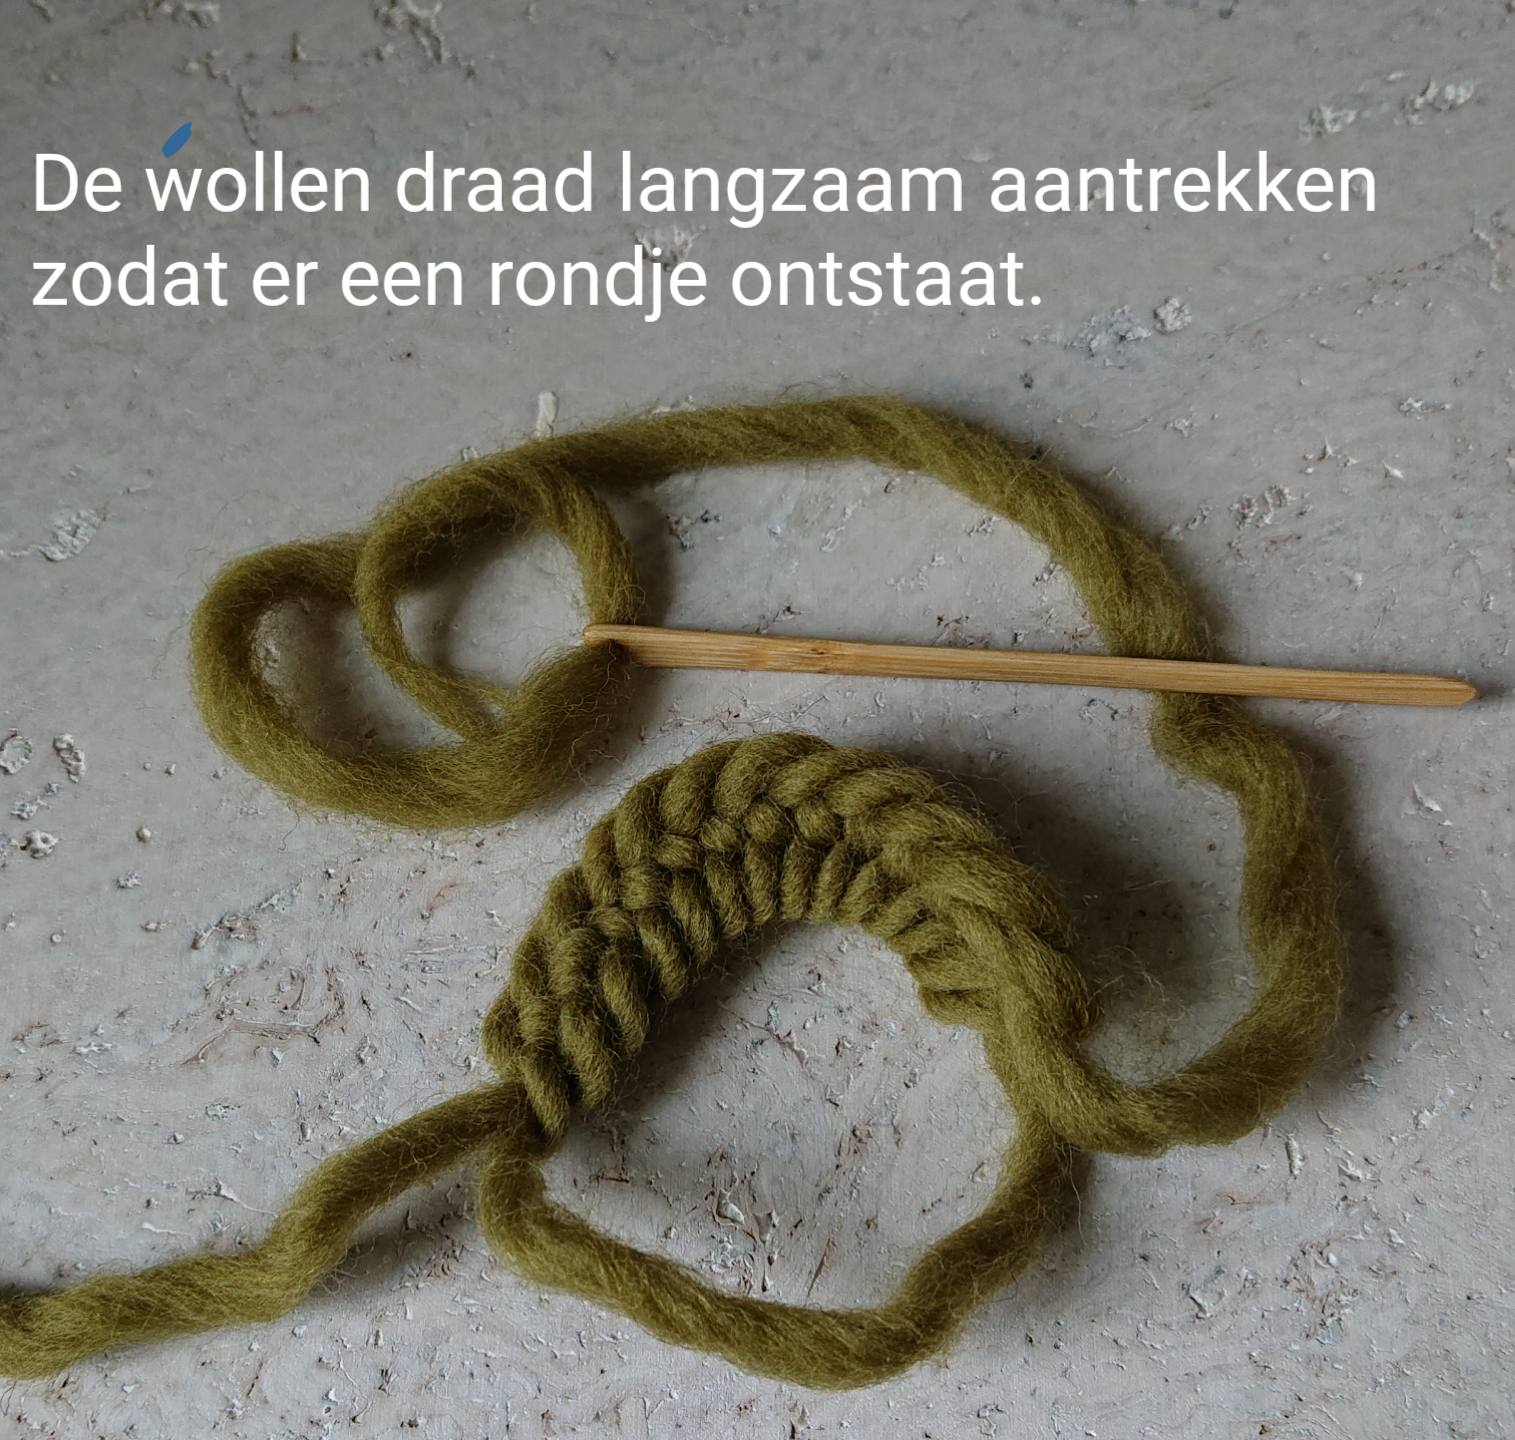
Slowly tighten the woolen thread to create a circle.
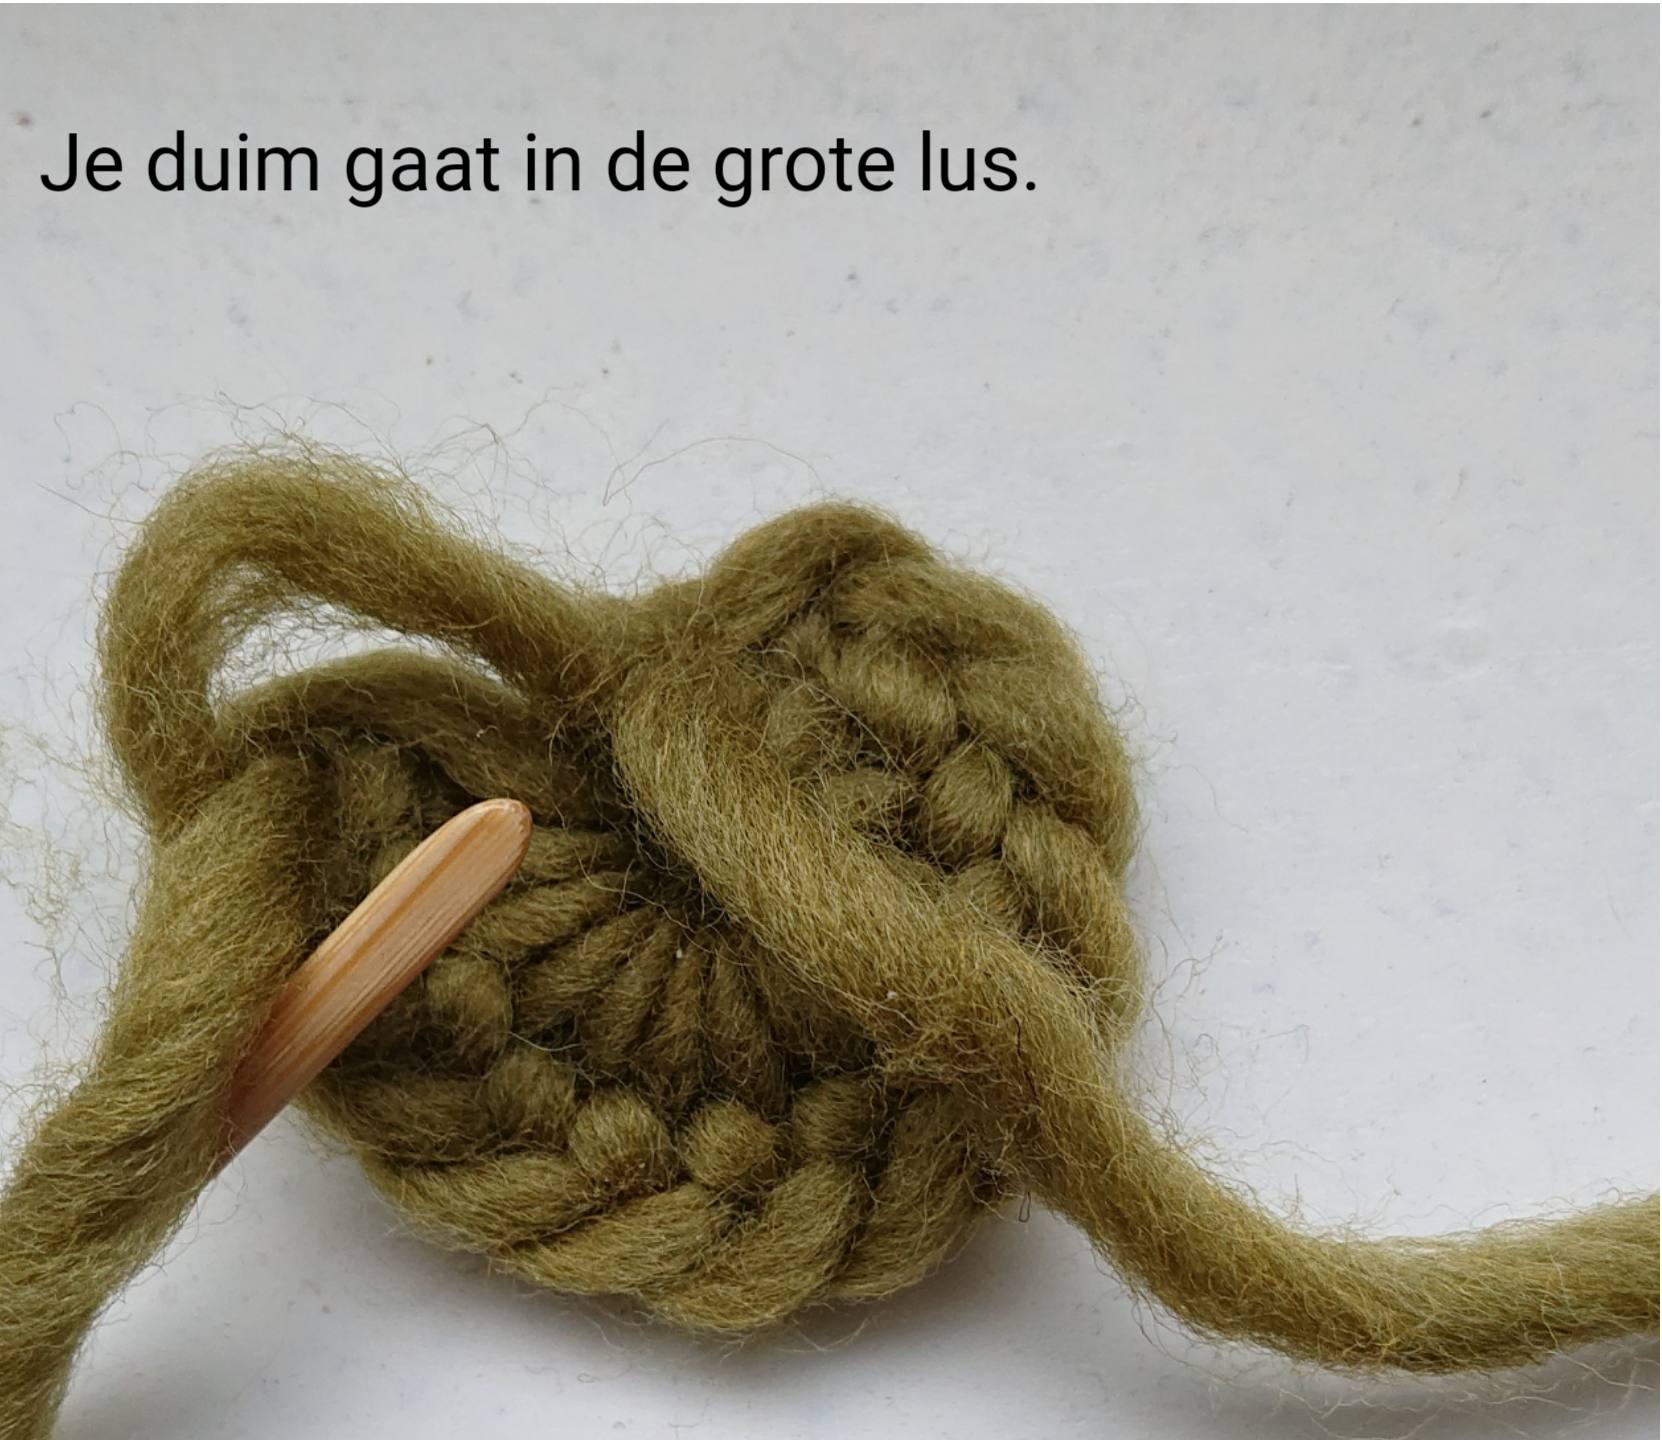
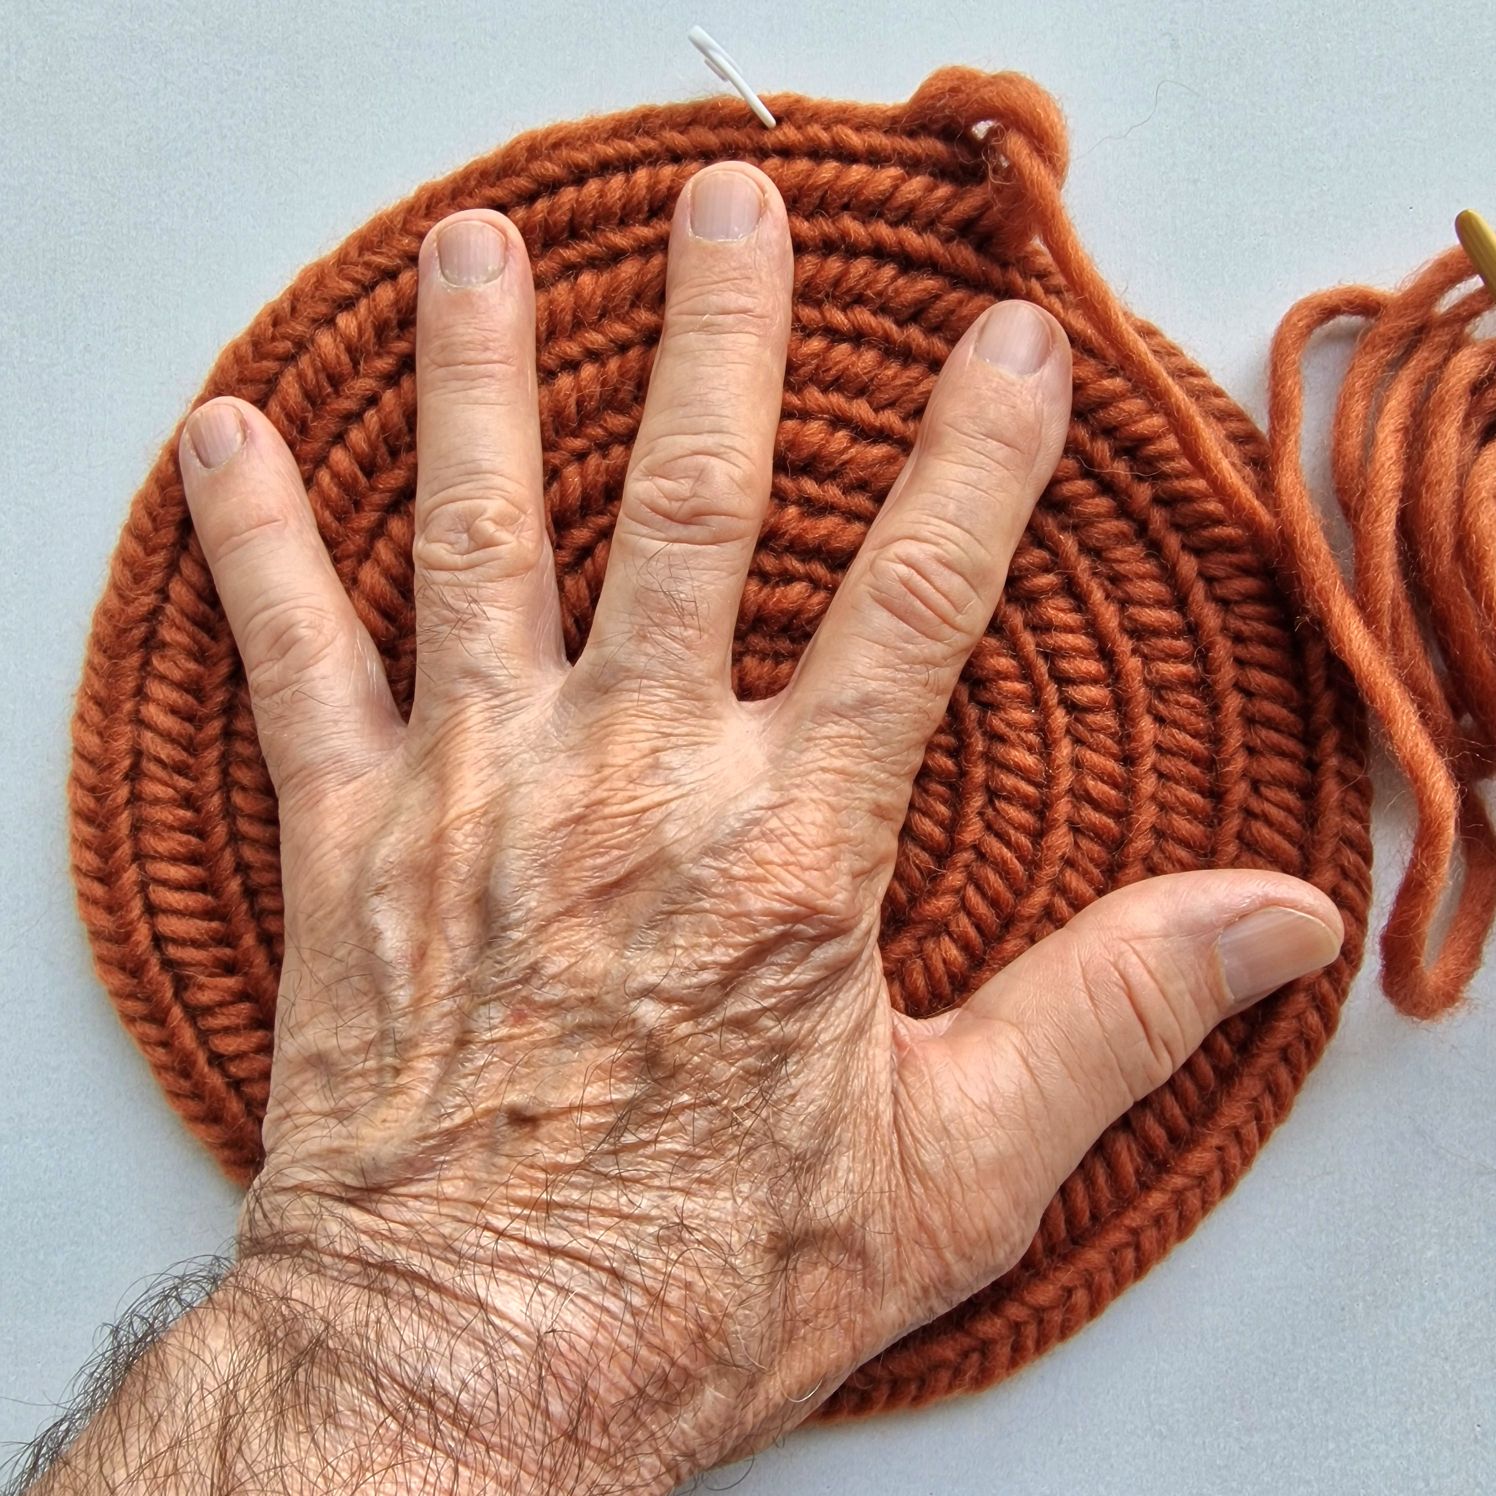
Your thumb goes into the big loop.
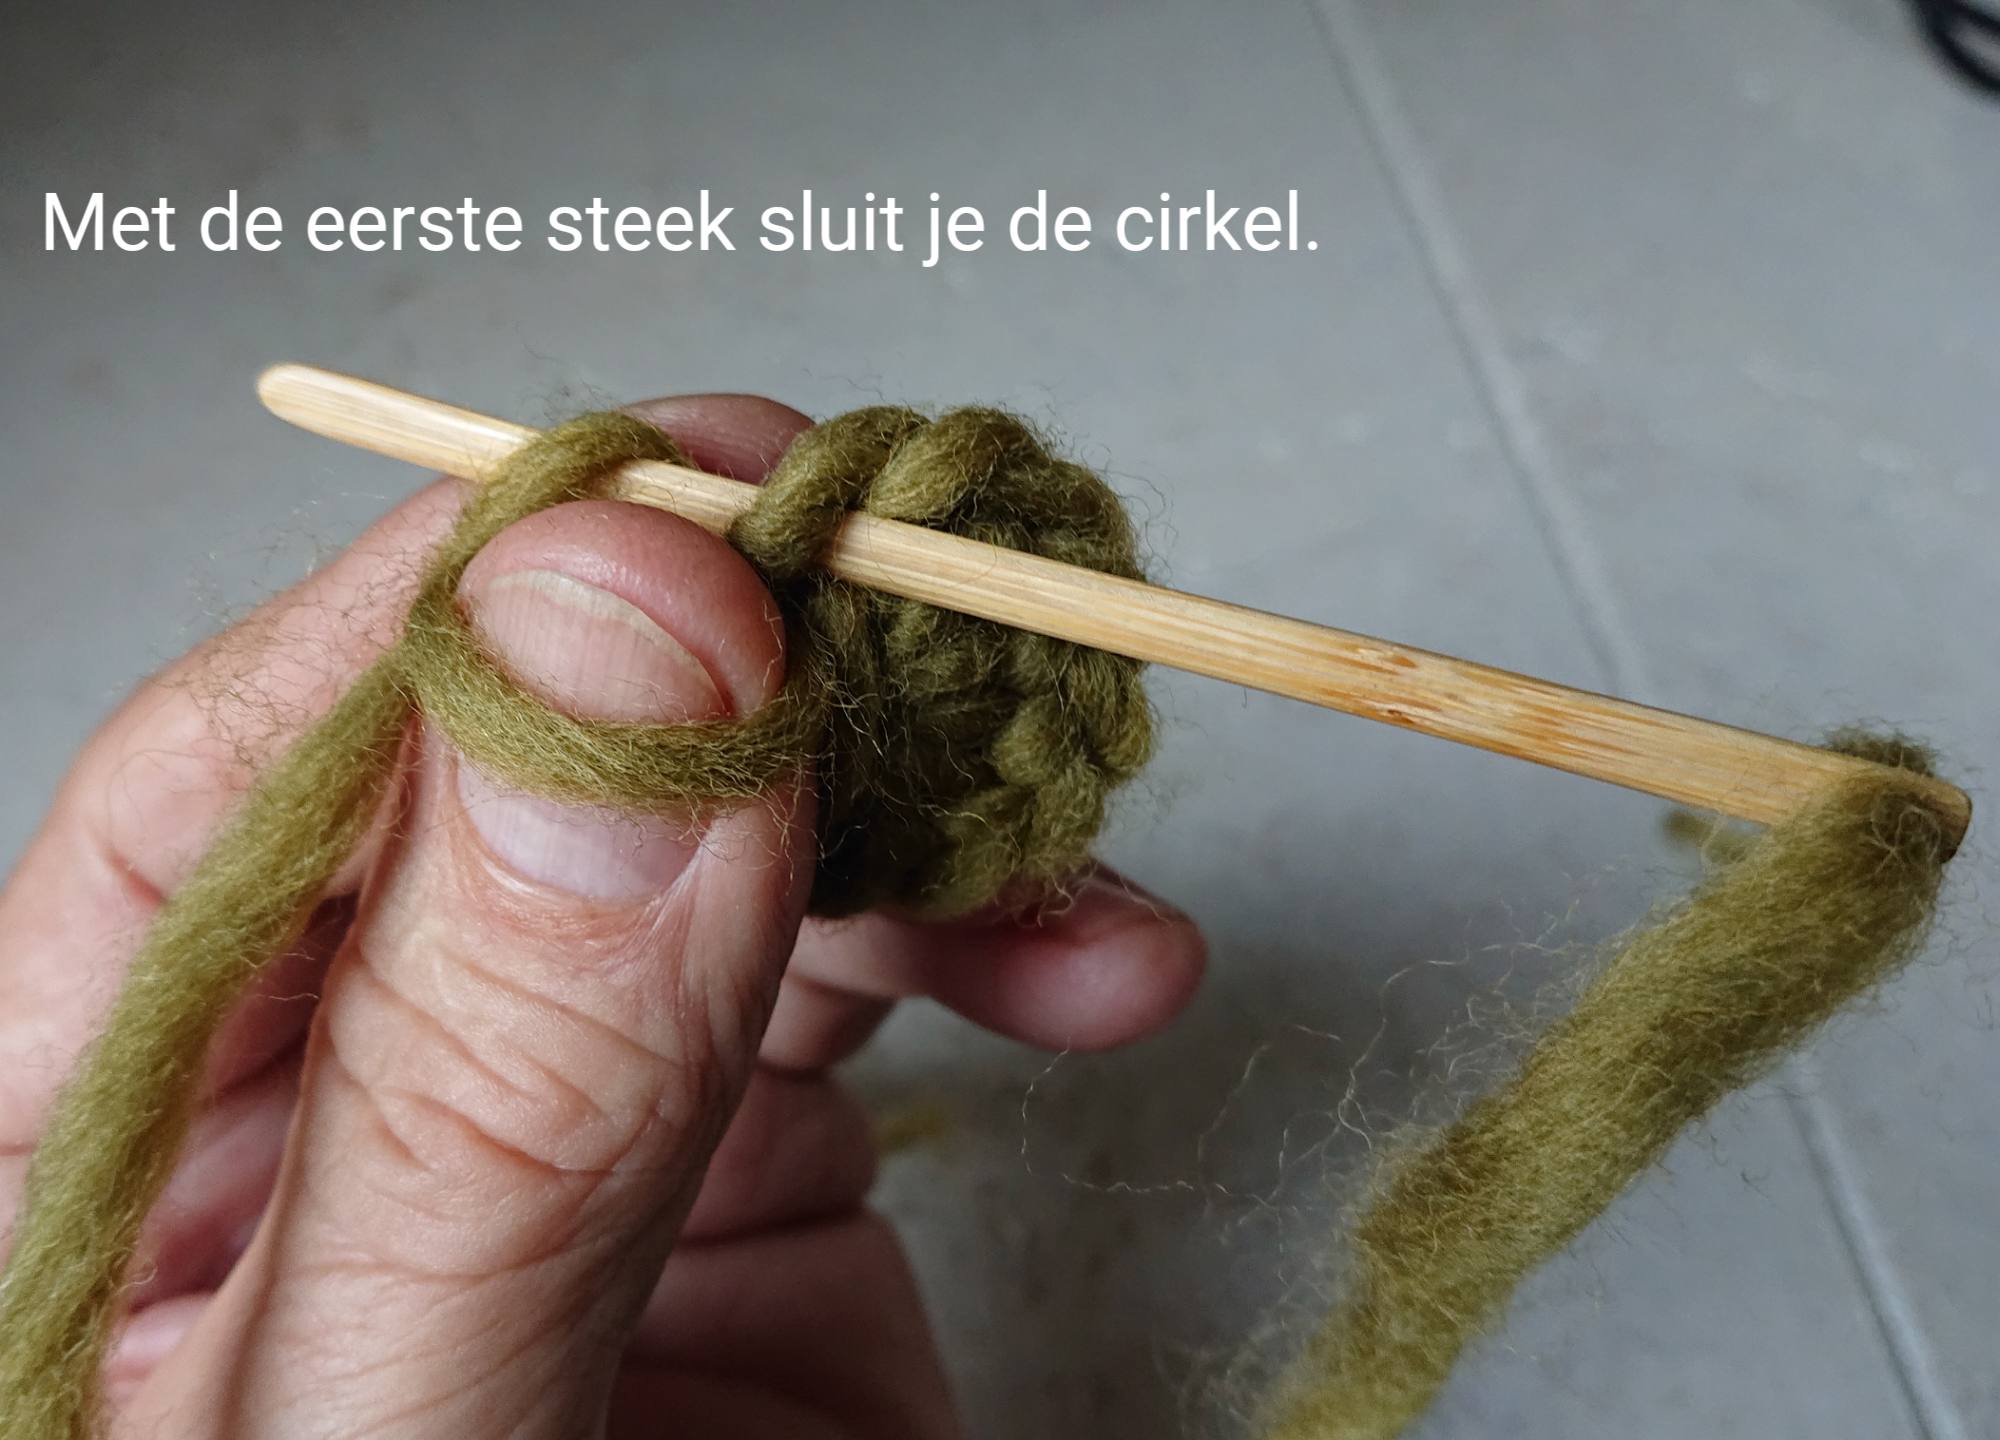
Close the circle with the first stitch.
I always forget to ask if you’d like to subscribe to my YouTube channel: happy needlebinding If I have a lot of subscribers, I can email magazines to write an article about this wonderful old craft so I can pass it on to the next generation.
Thank you kindly in advance. bert veugelers.
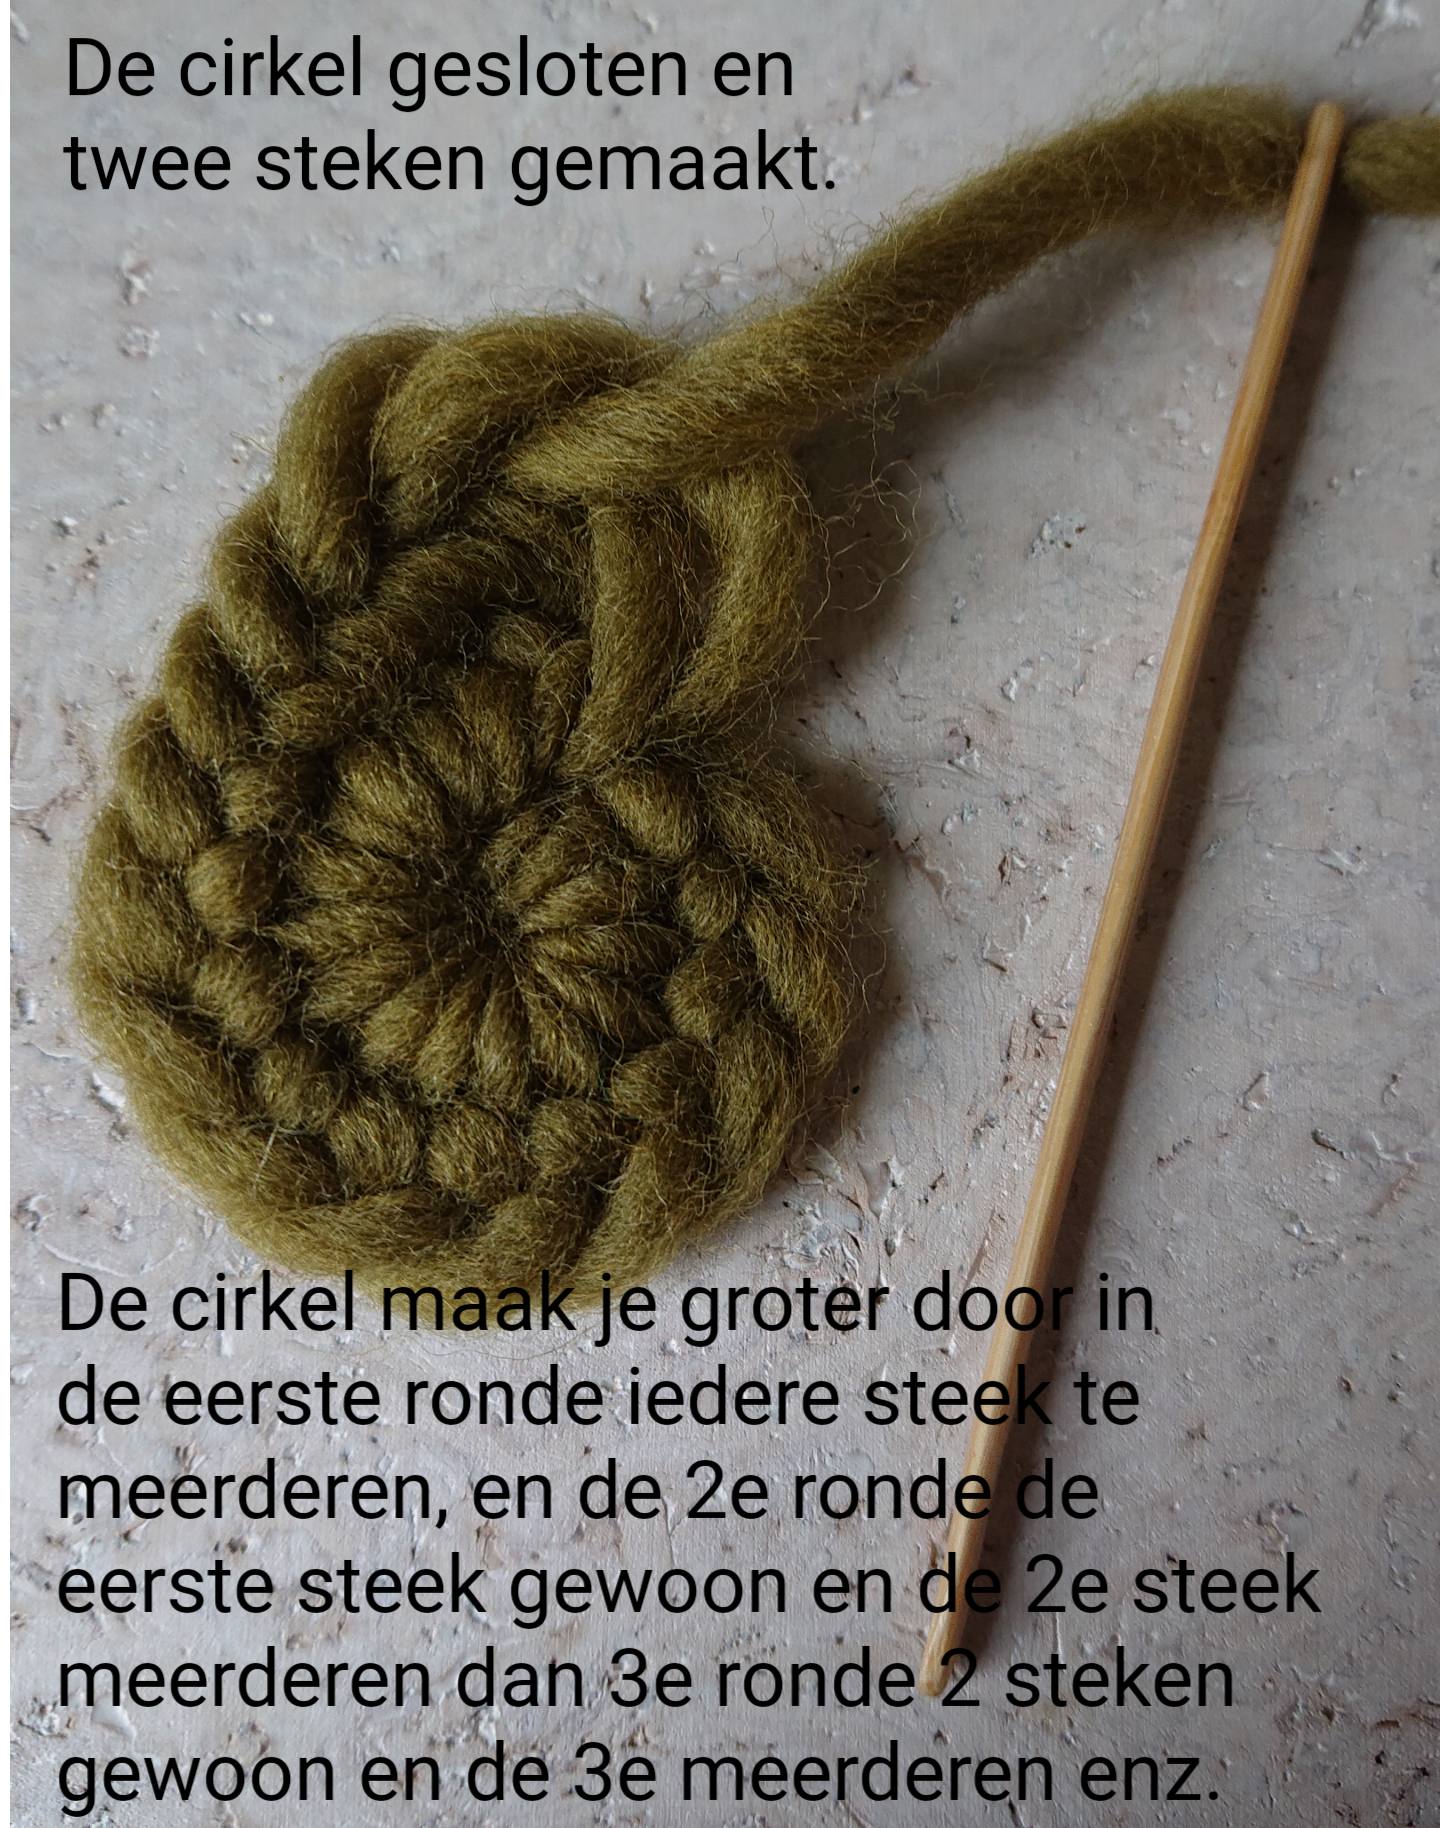
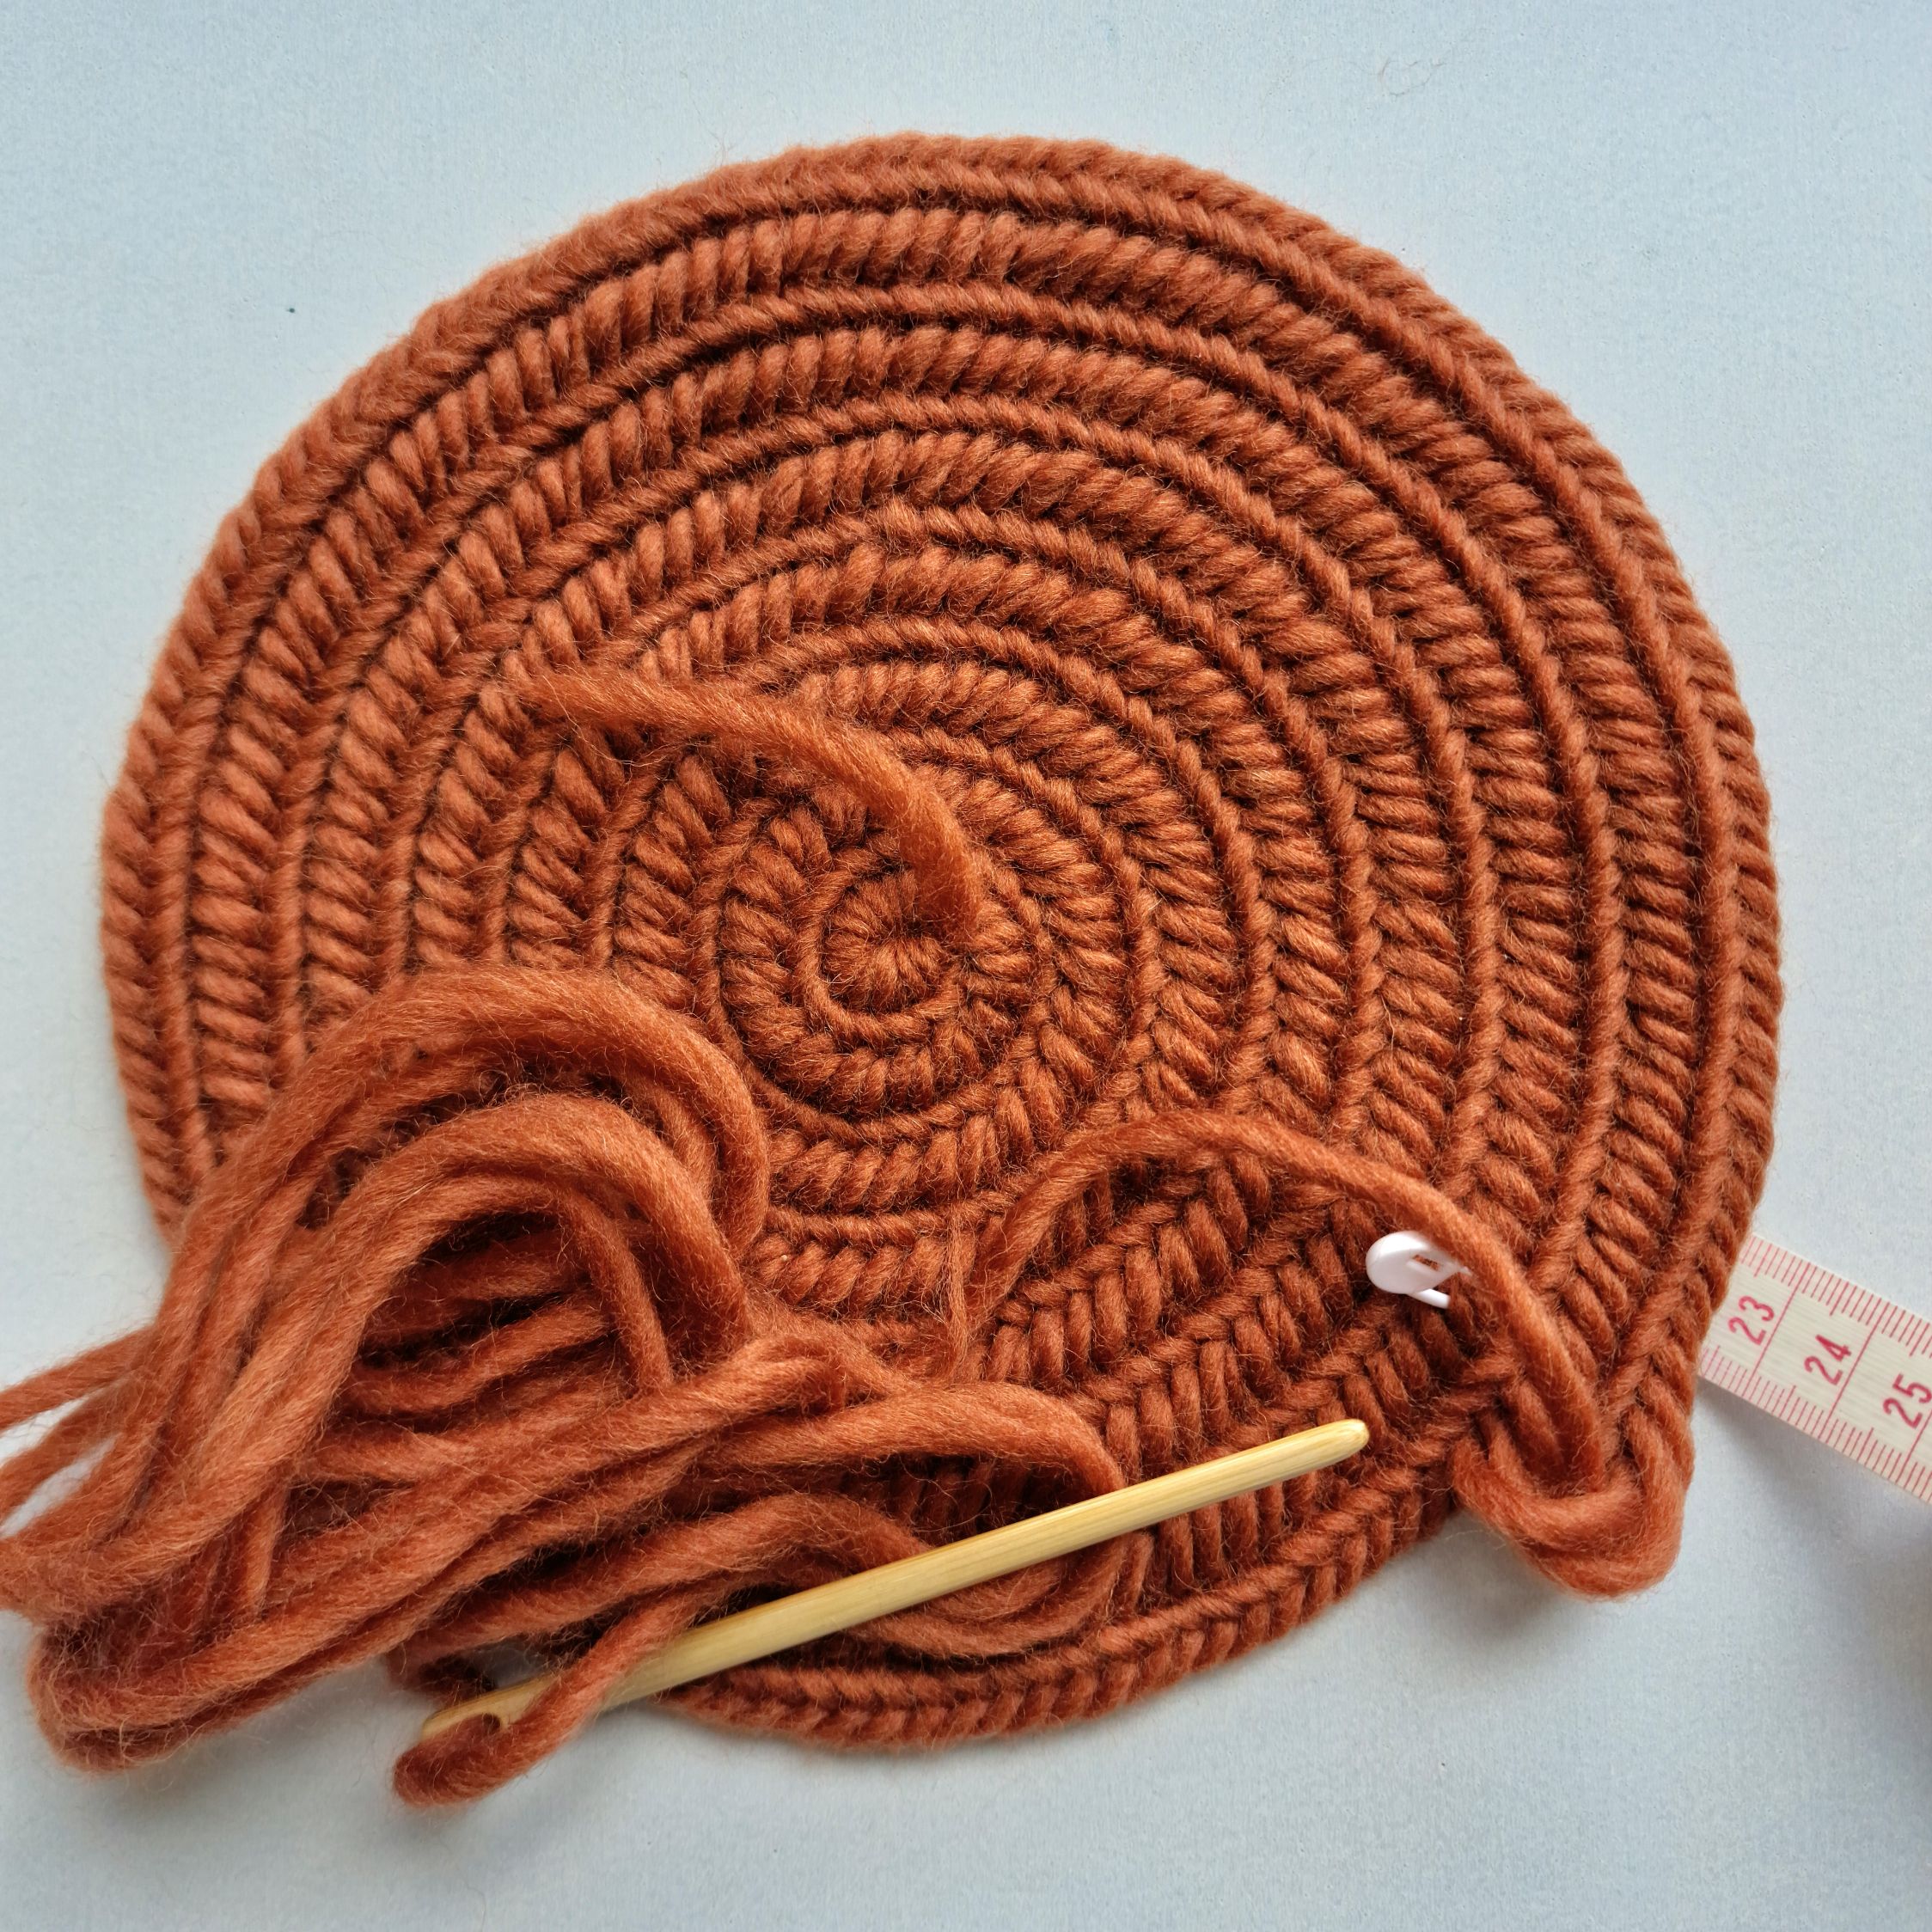
Closed the circle and made two stiches.
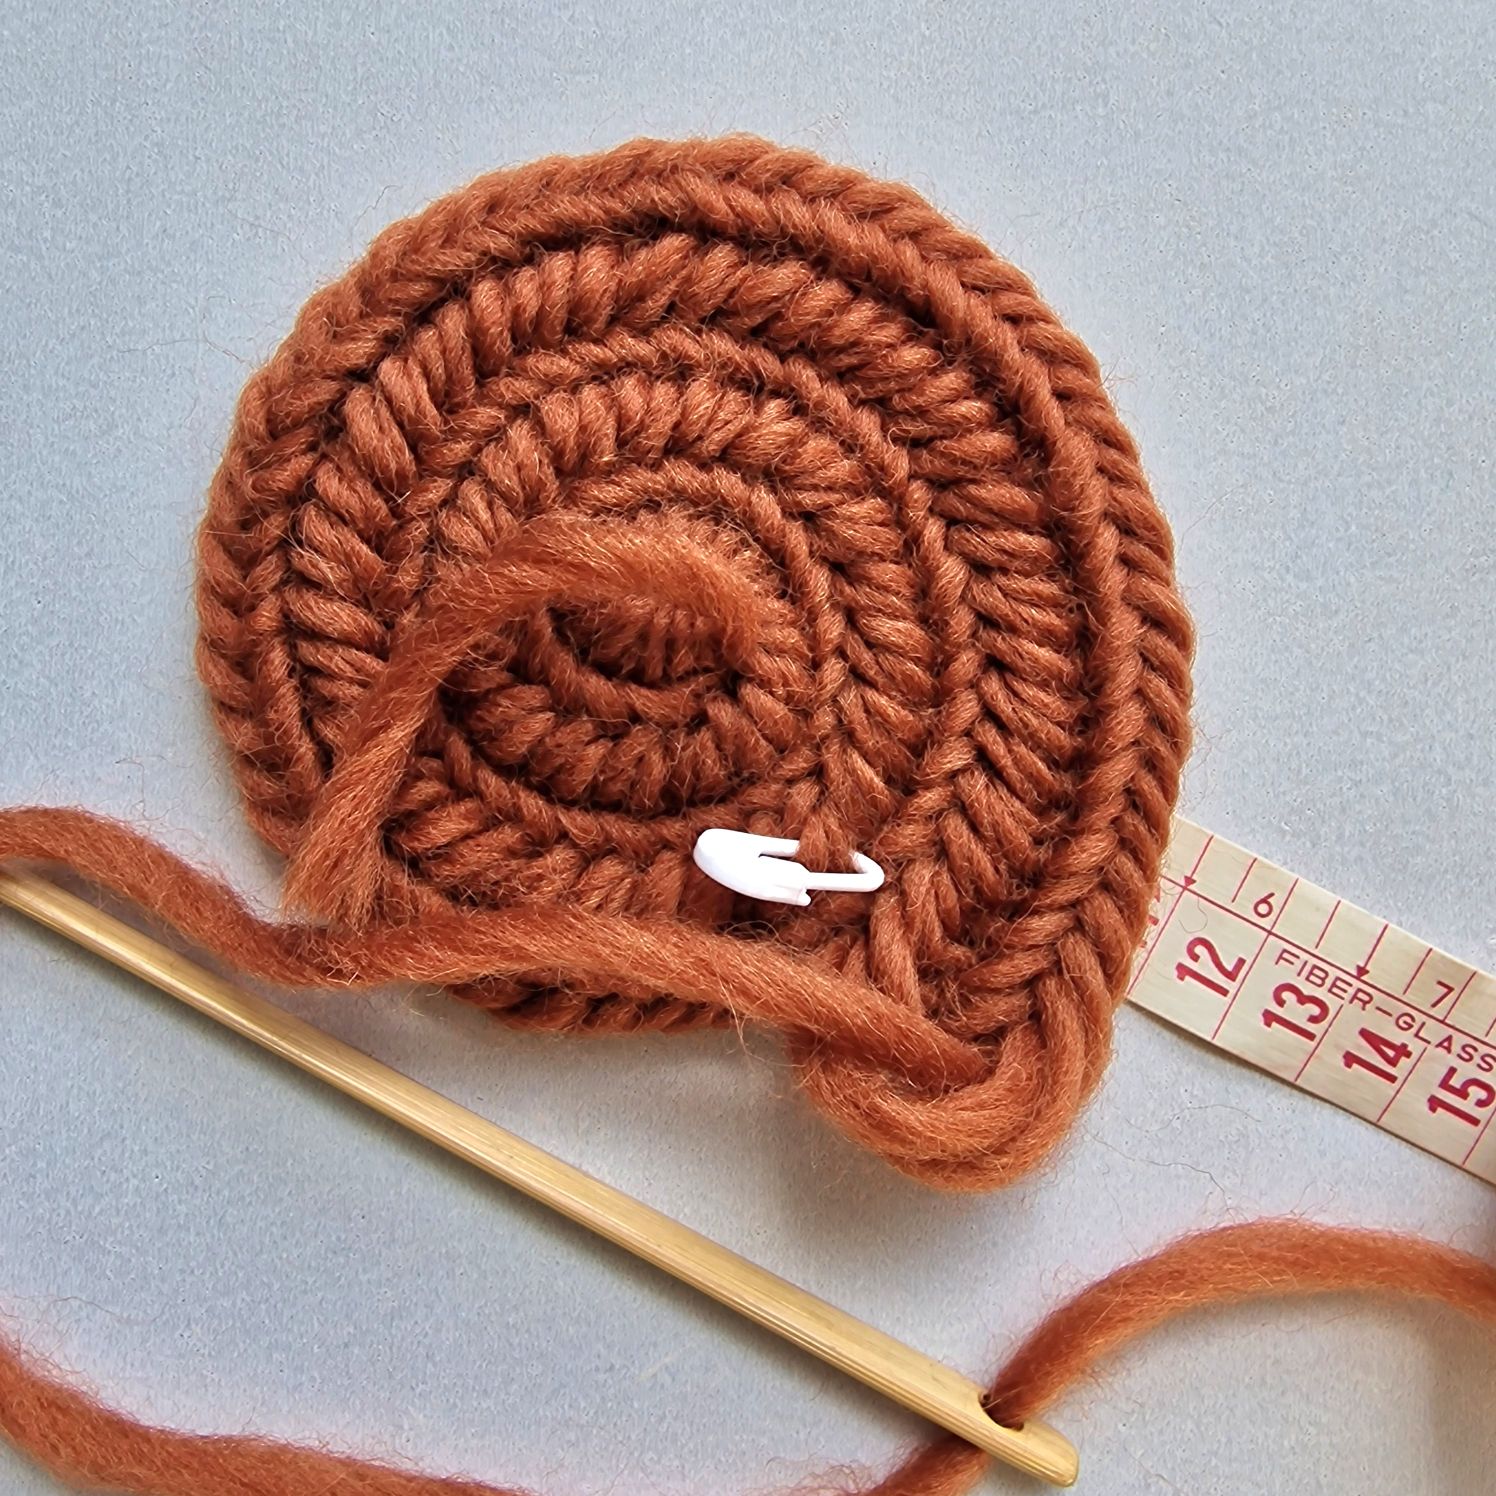
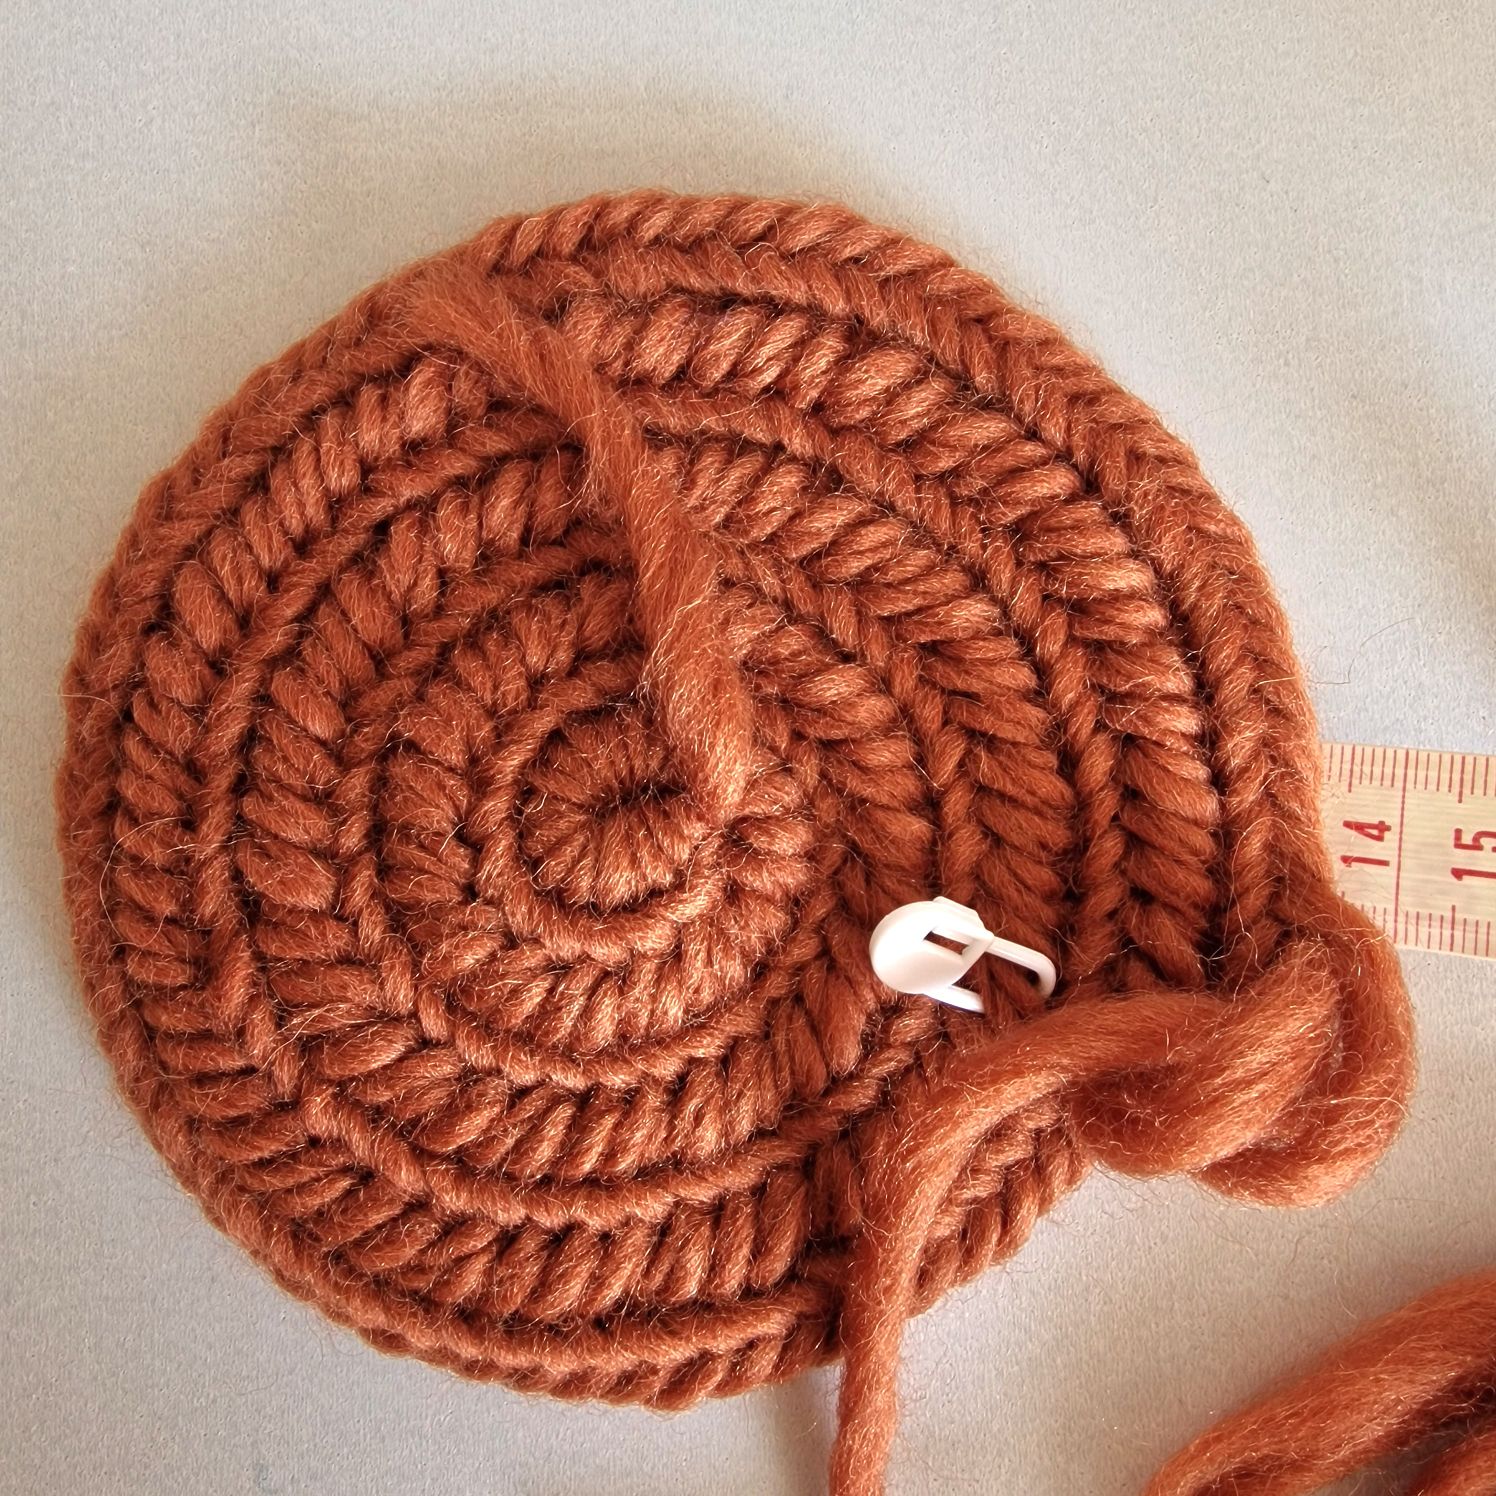
The first round make the circle larger by increasing every stitch.
After the first round you attach a stitch marker so that you know when a round starts and ends. The 2nd round, one stitch normal and the 2nd stitch increase.
The 3nd round, two stitches normal and the 3nd stitch increase.
The 4nd round three stitches normal and the 4nd increase.
The 5nd round four stitches normal and the 5nd increase.
The 6nd round five stitches normal and the 6nd increase.
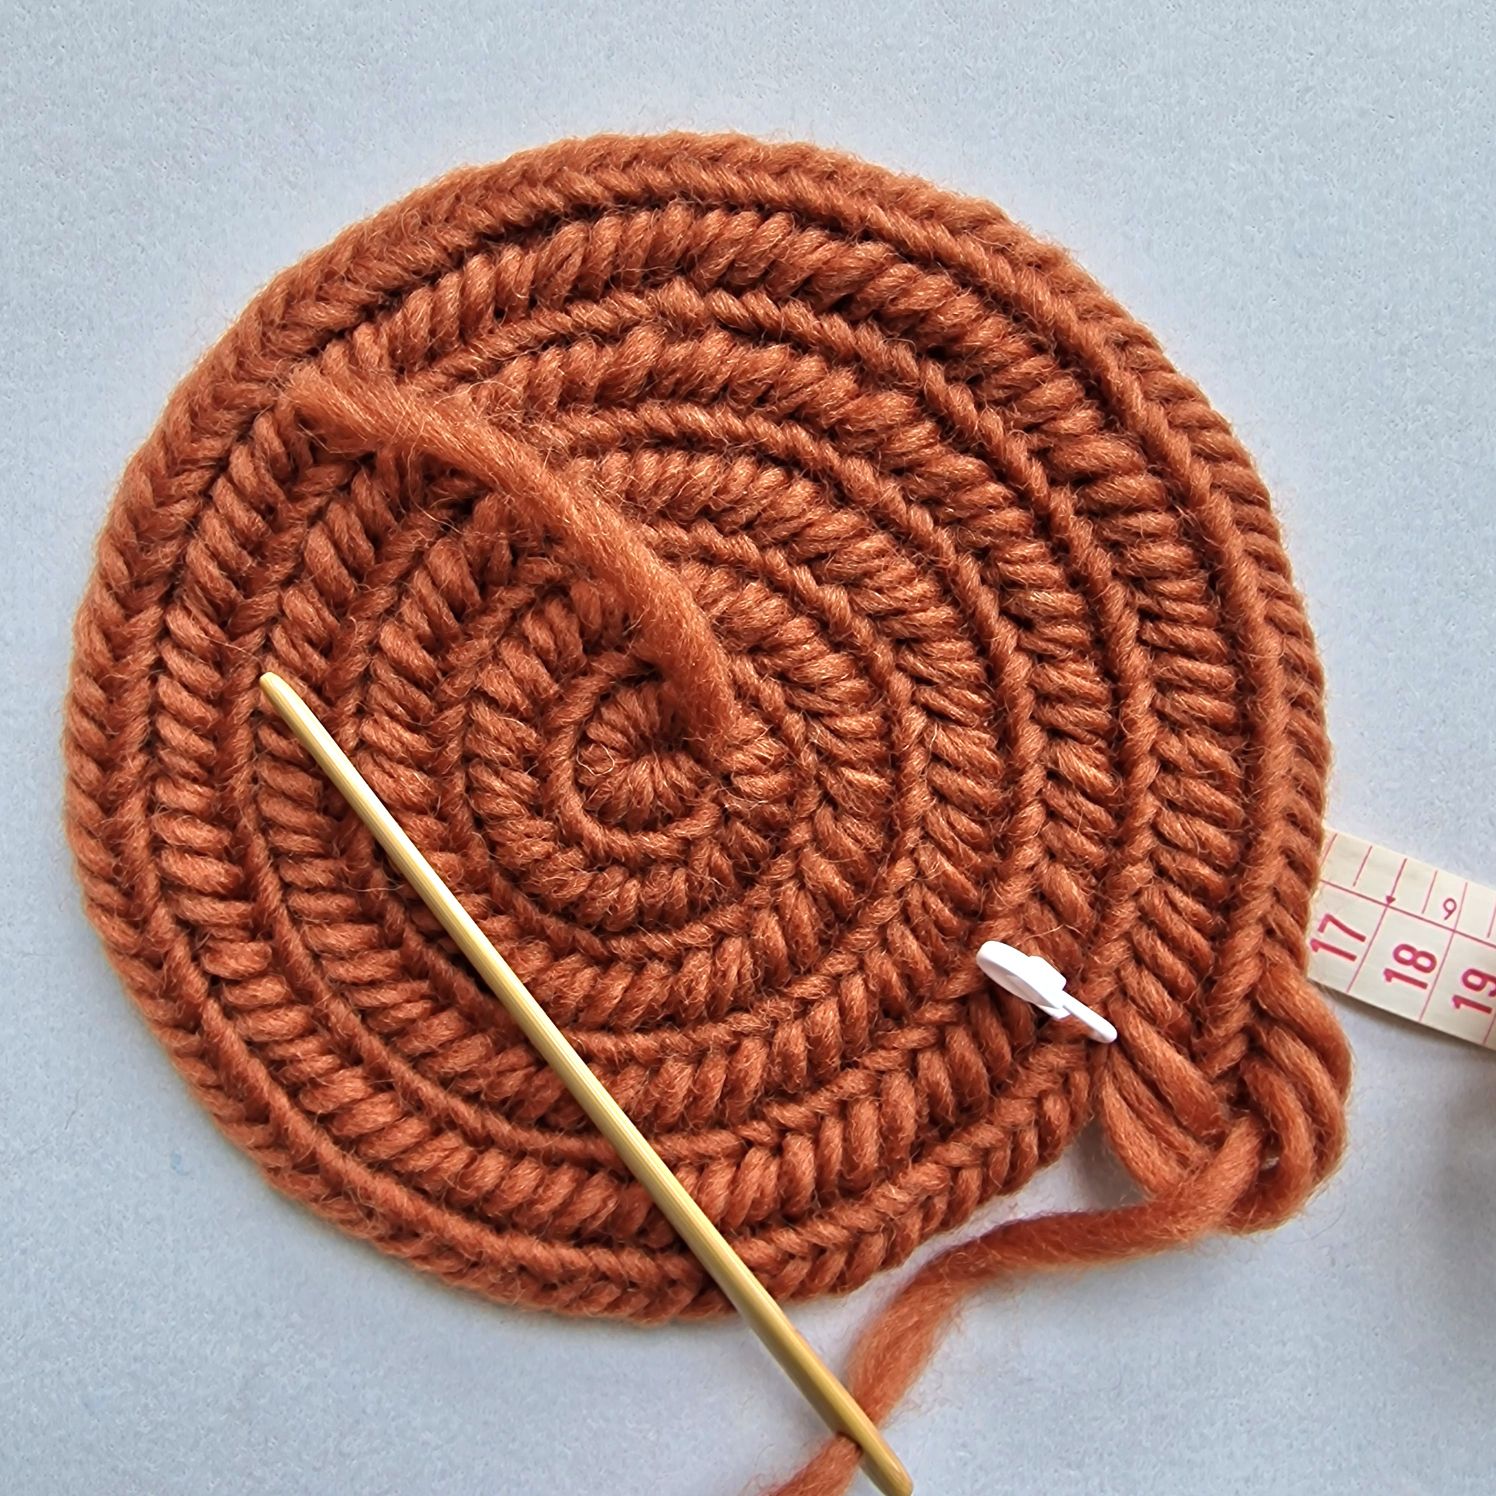
Now just measure the diameter, is it 21 cm (for my head the circumference is 56.5 cm than : The 7nd round just needlebinding don’t increase or decrease.
After this round you are going decrease stitches.
The 8nd round five stitches normal and the 6nd decrease.
The 9nd round four stitches normal and the 5nd decrease.
The 10nd round three stitches normal and the 4nd decrease and measure and finish the edge. How to finish the hat see picture chapter increase and decrease.

If you want to make a bigger hat start with a longer row stitches in the beginning when you make the circel (magic loop they called it with crochet).
So different stitches also different sizes.
The photo below shows examples of needlebinding with the Finnish stitch and with the connection stitch F2.
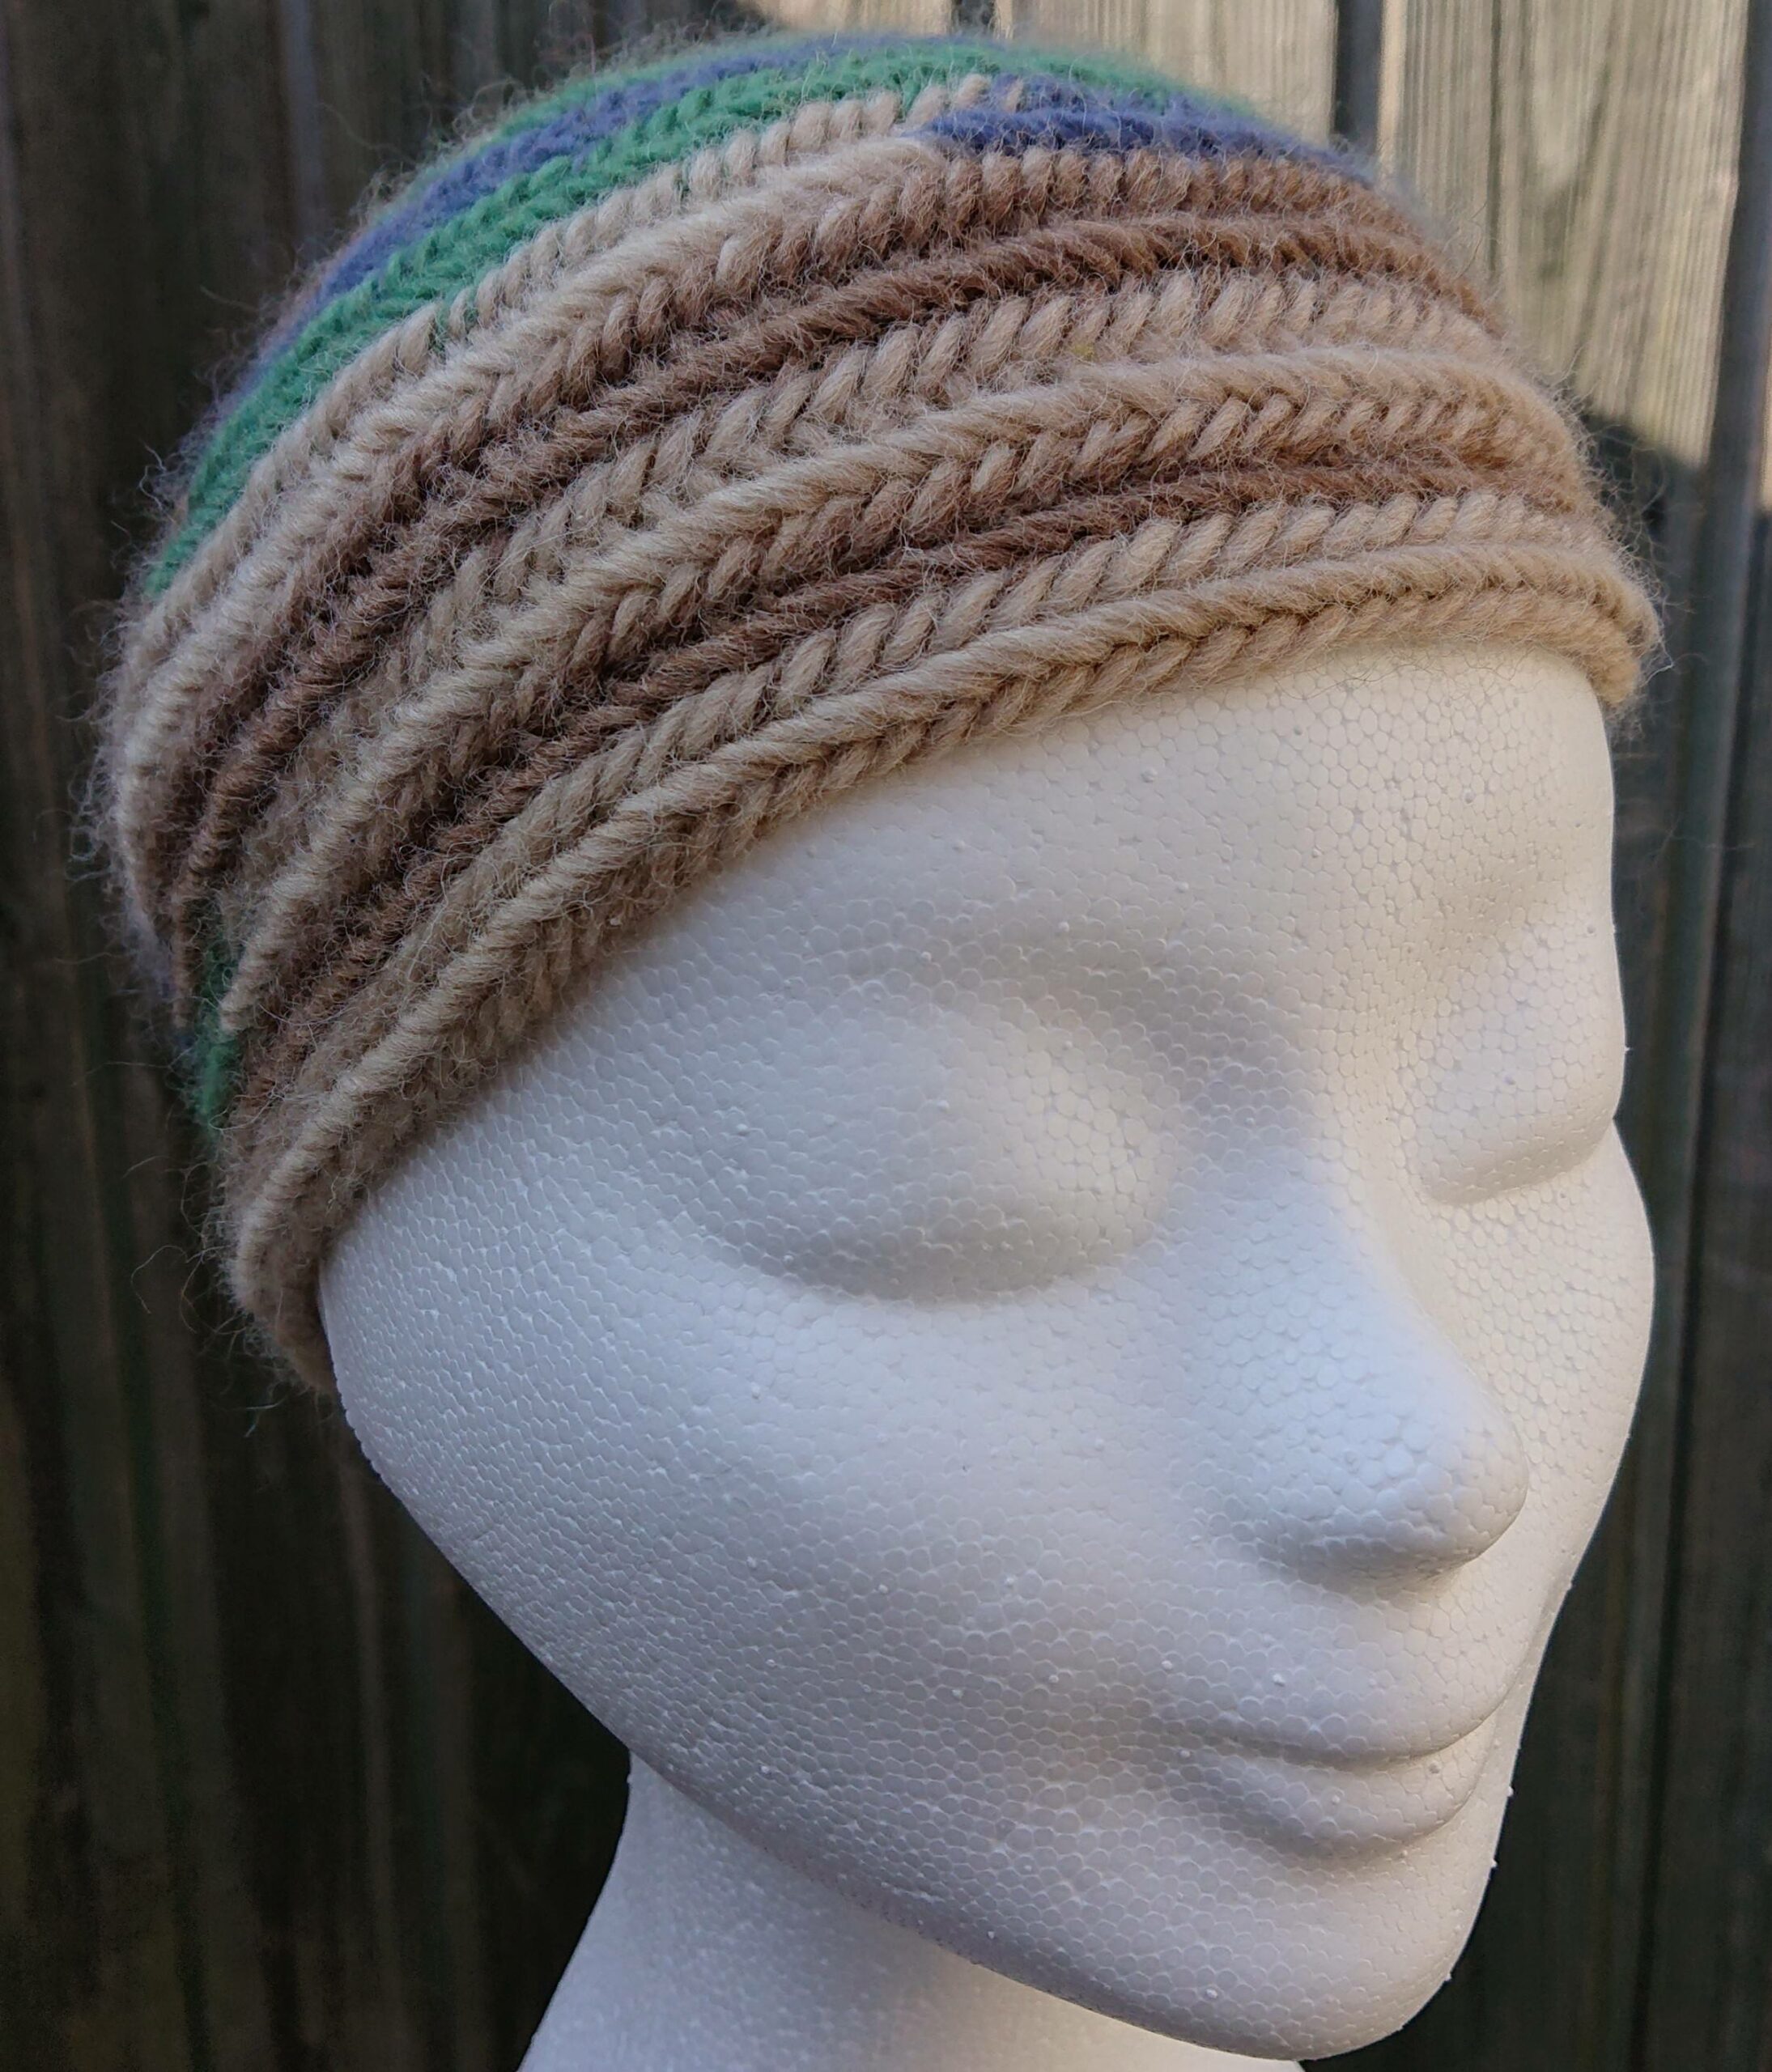
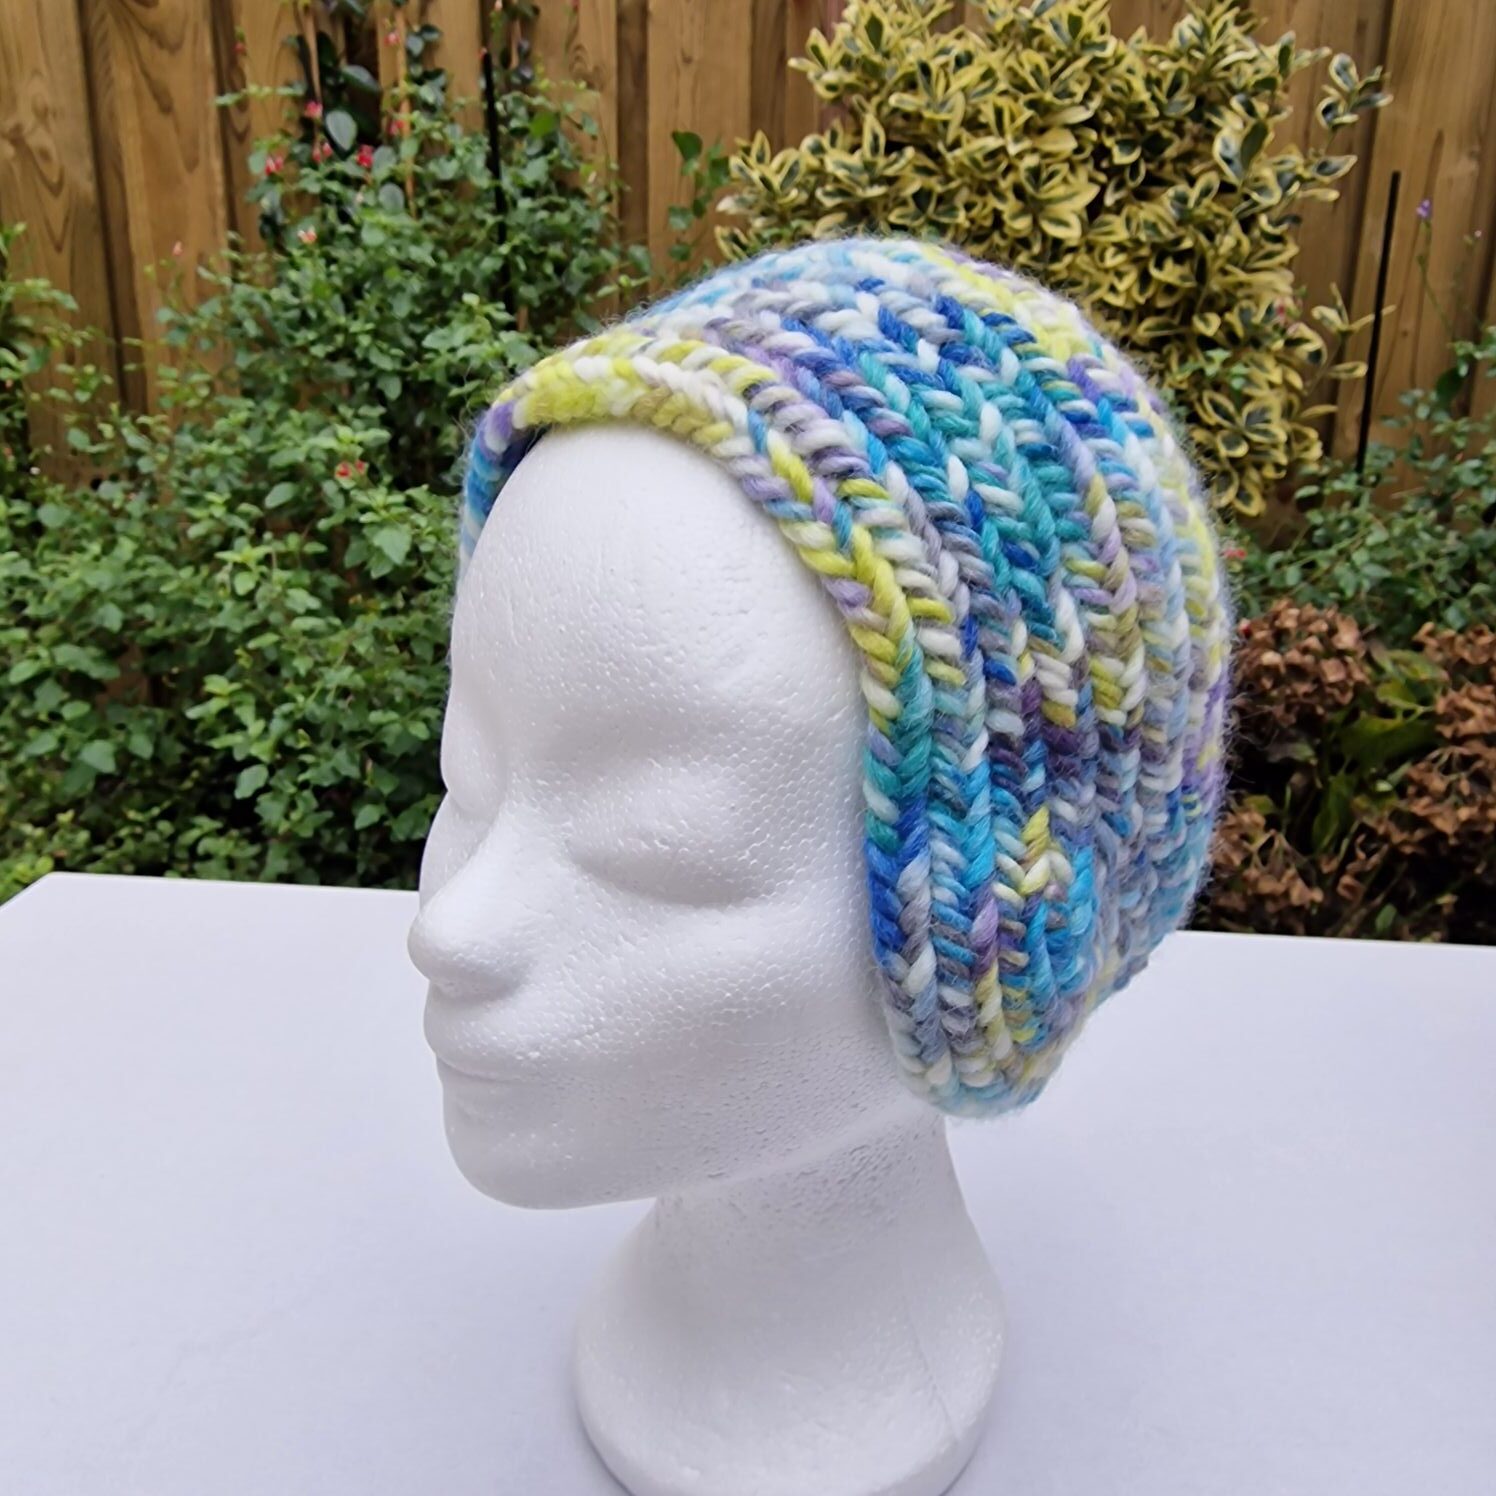
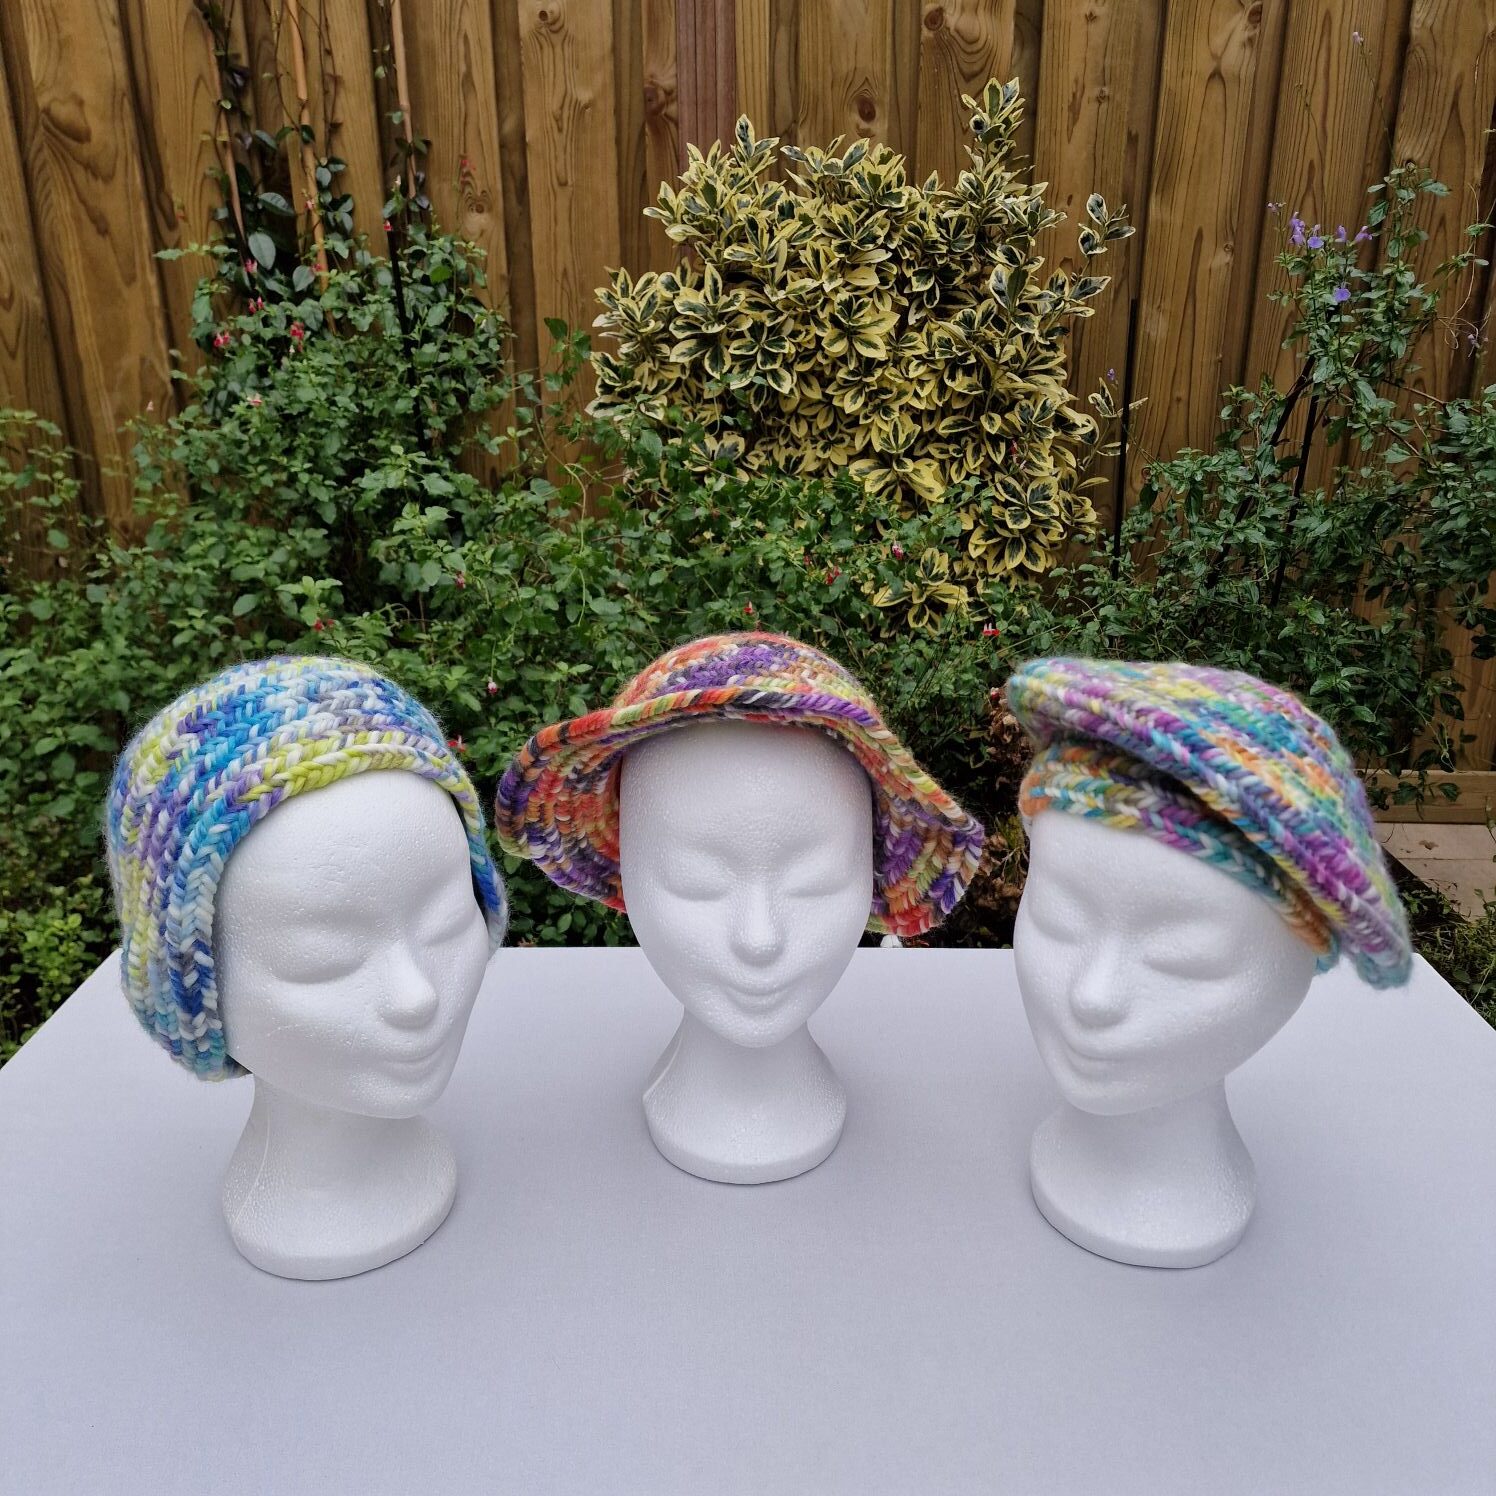
More hats.
This hat is needlebound in a Finnish stitch 2+2 F2.
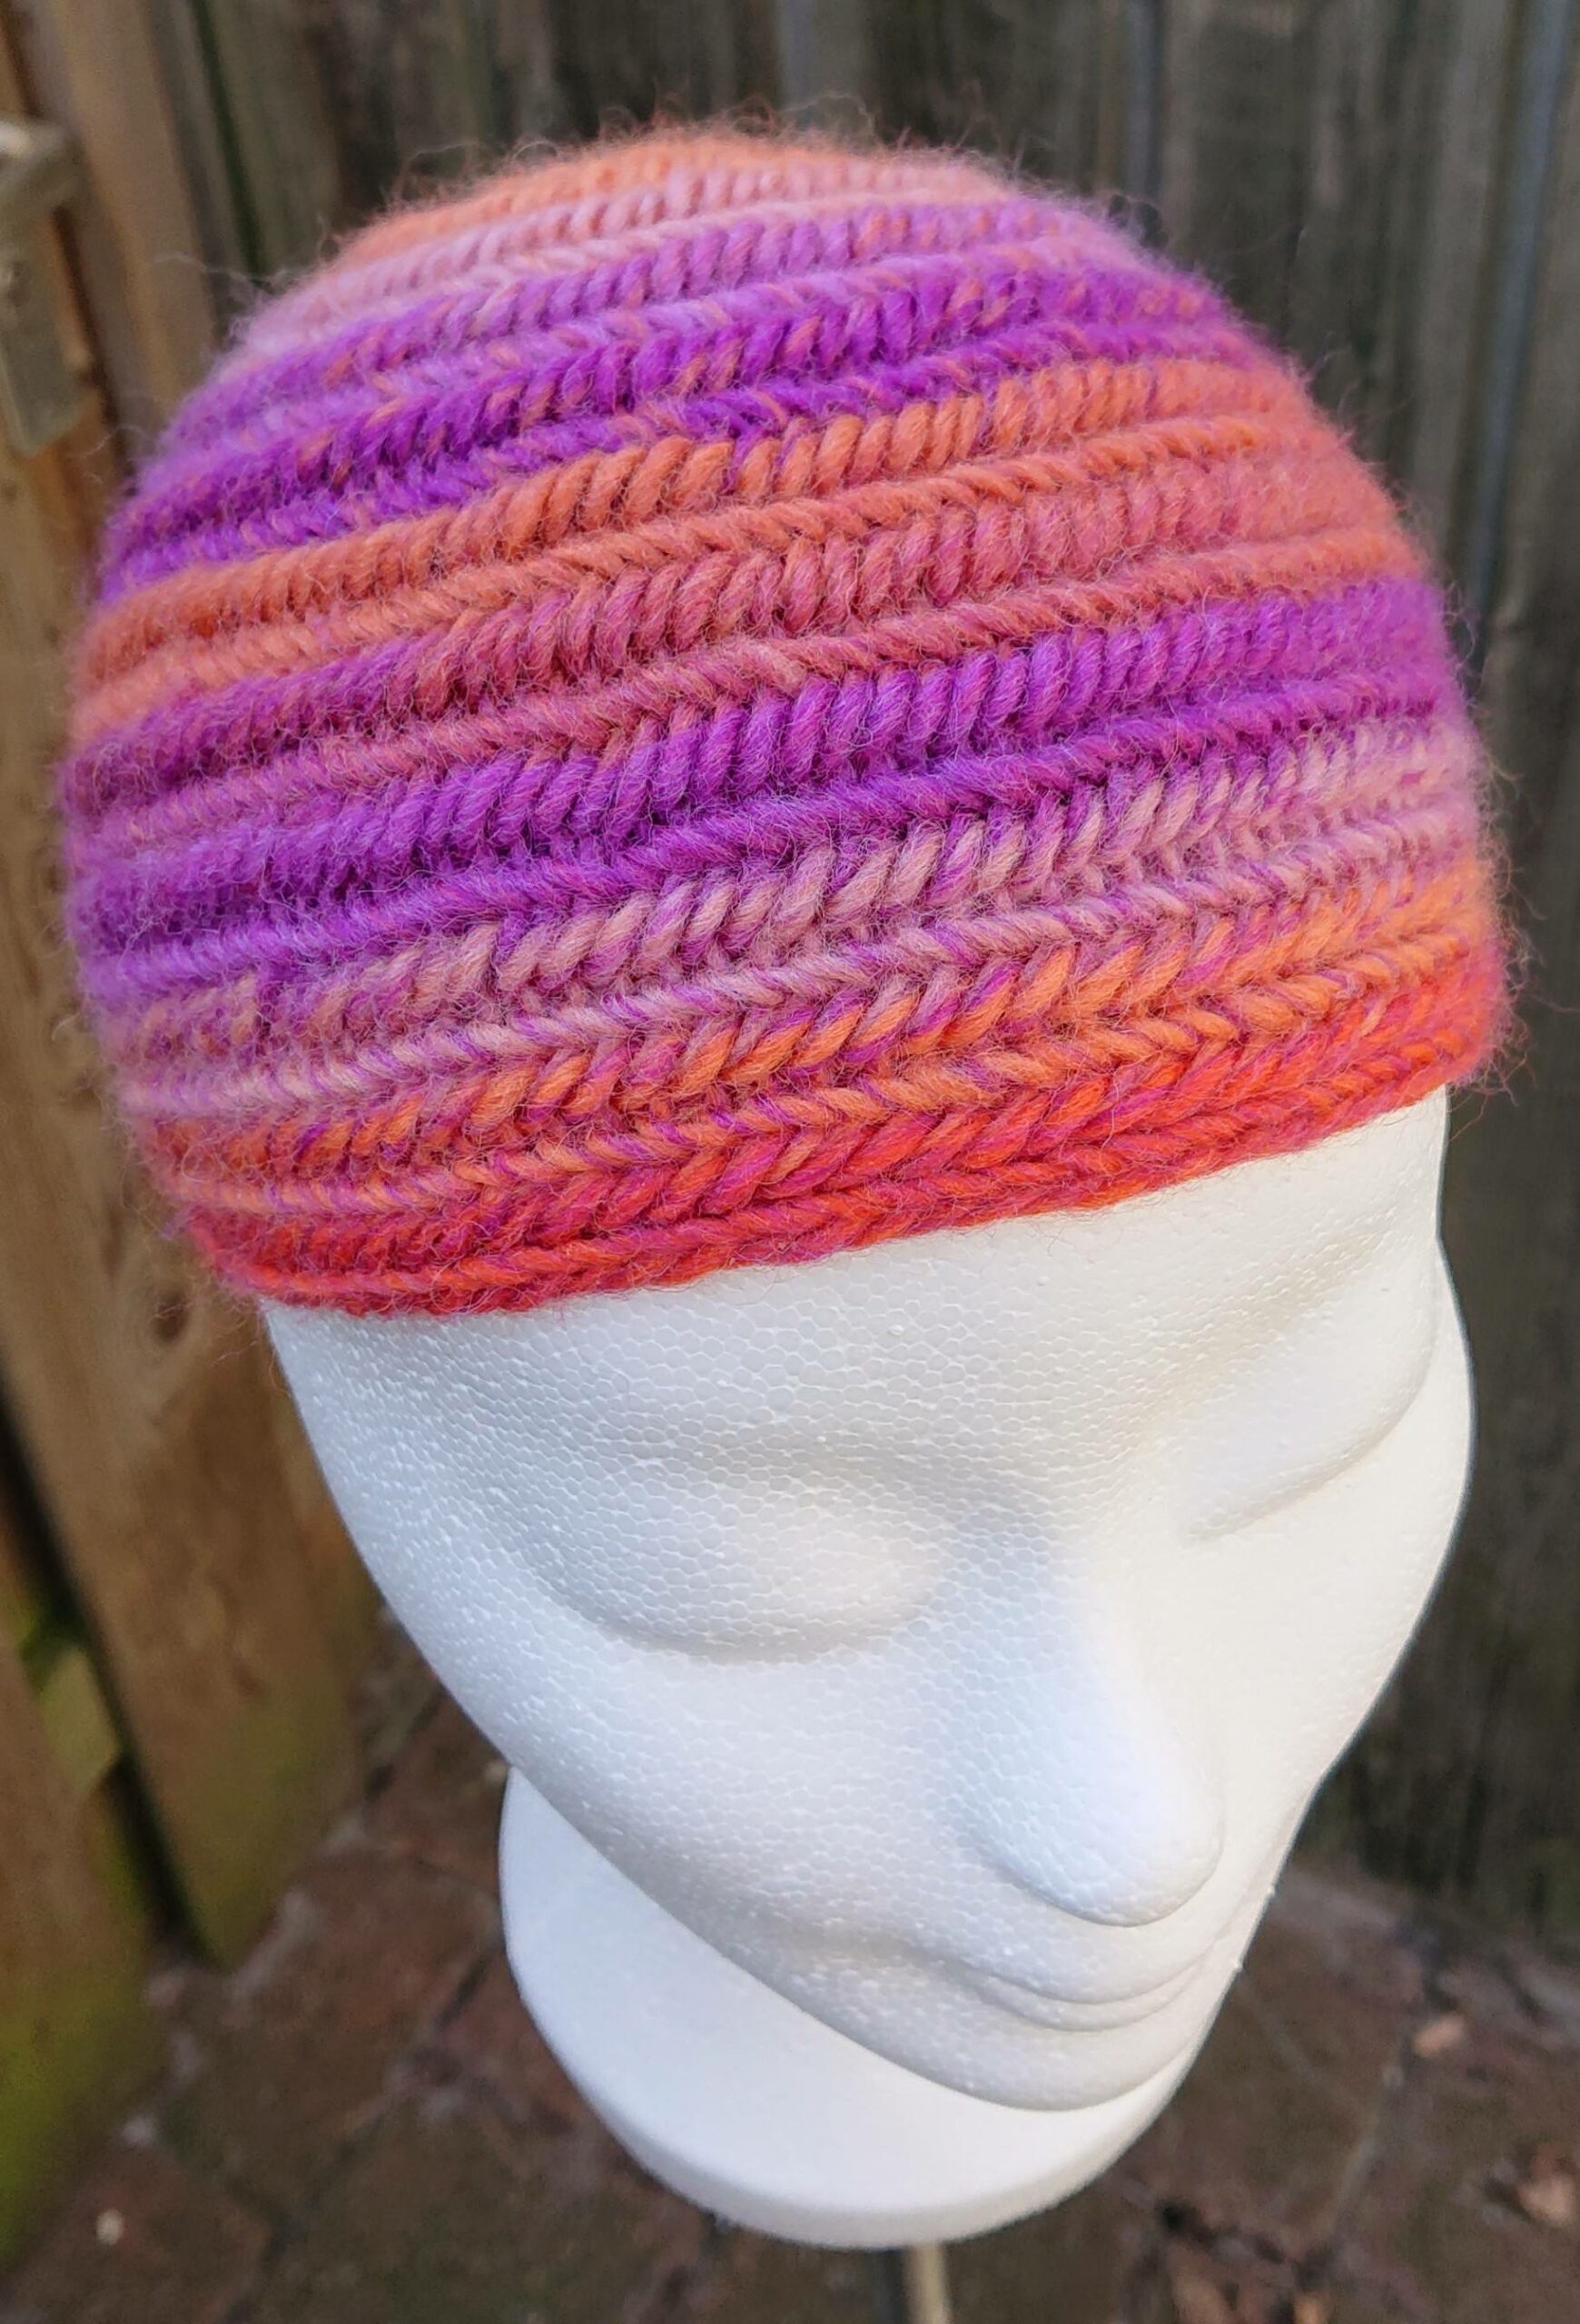
This hat is needlebound in a Finnish stitch 2+2 F2.
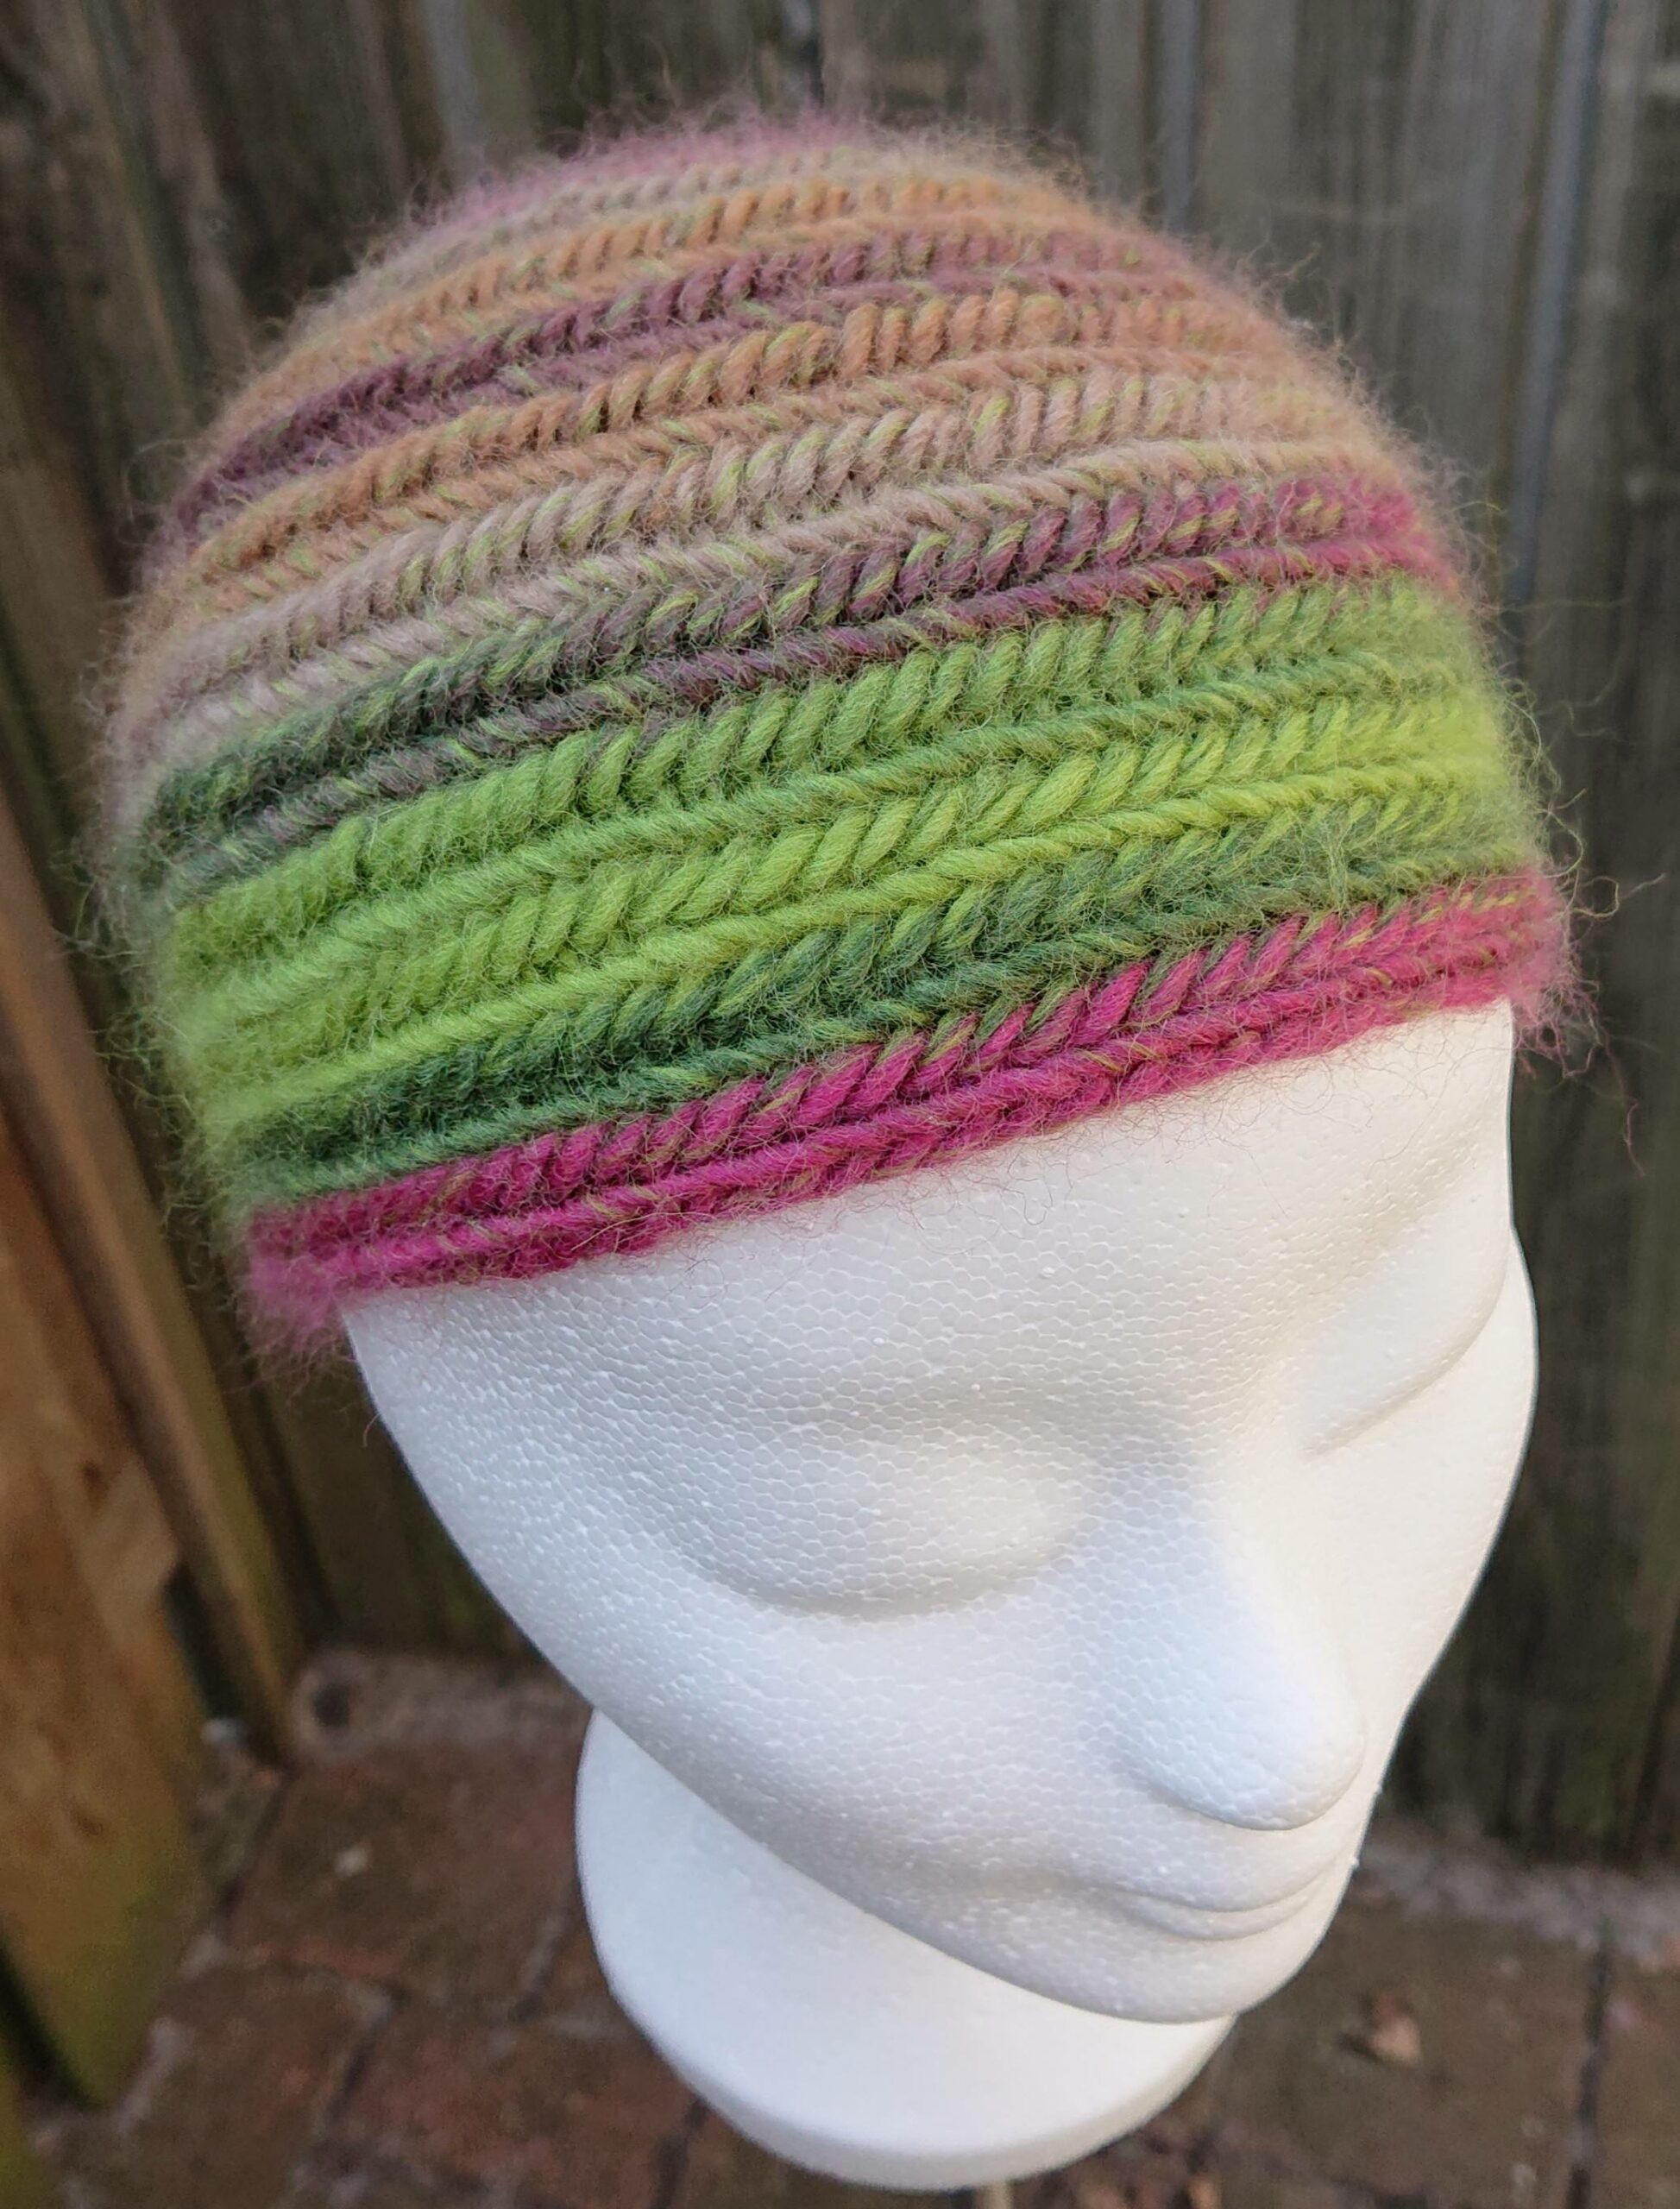
This hat is needlebind in a Finnish stitch 2+2 F2.
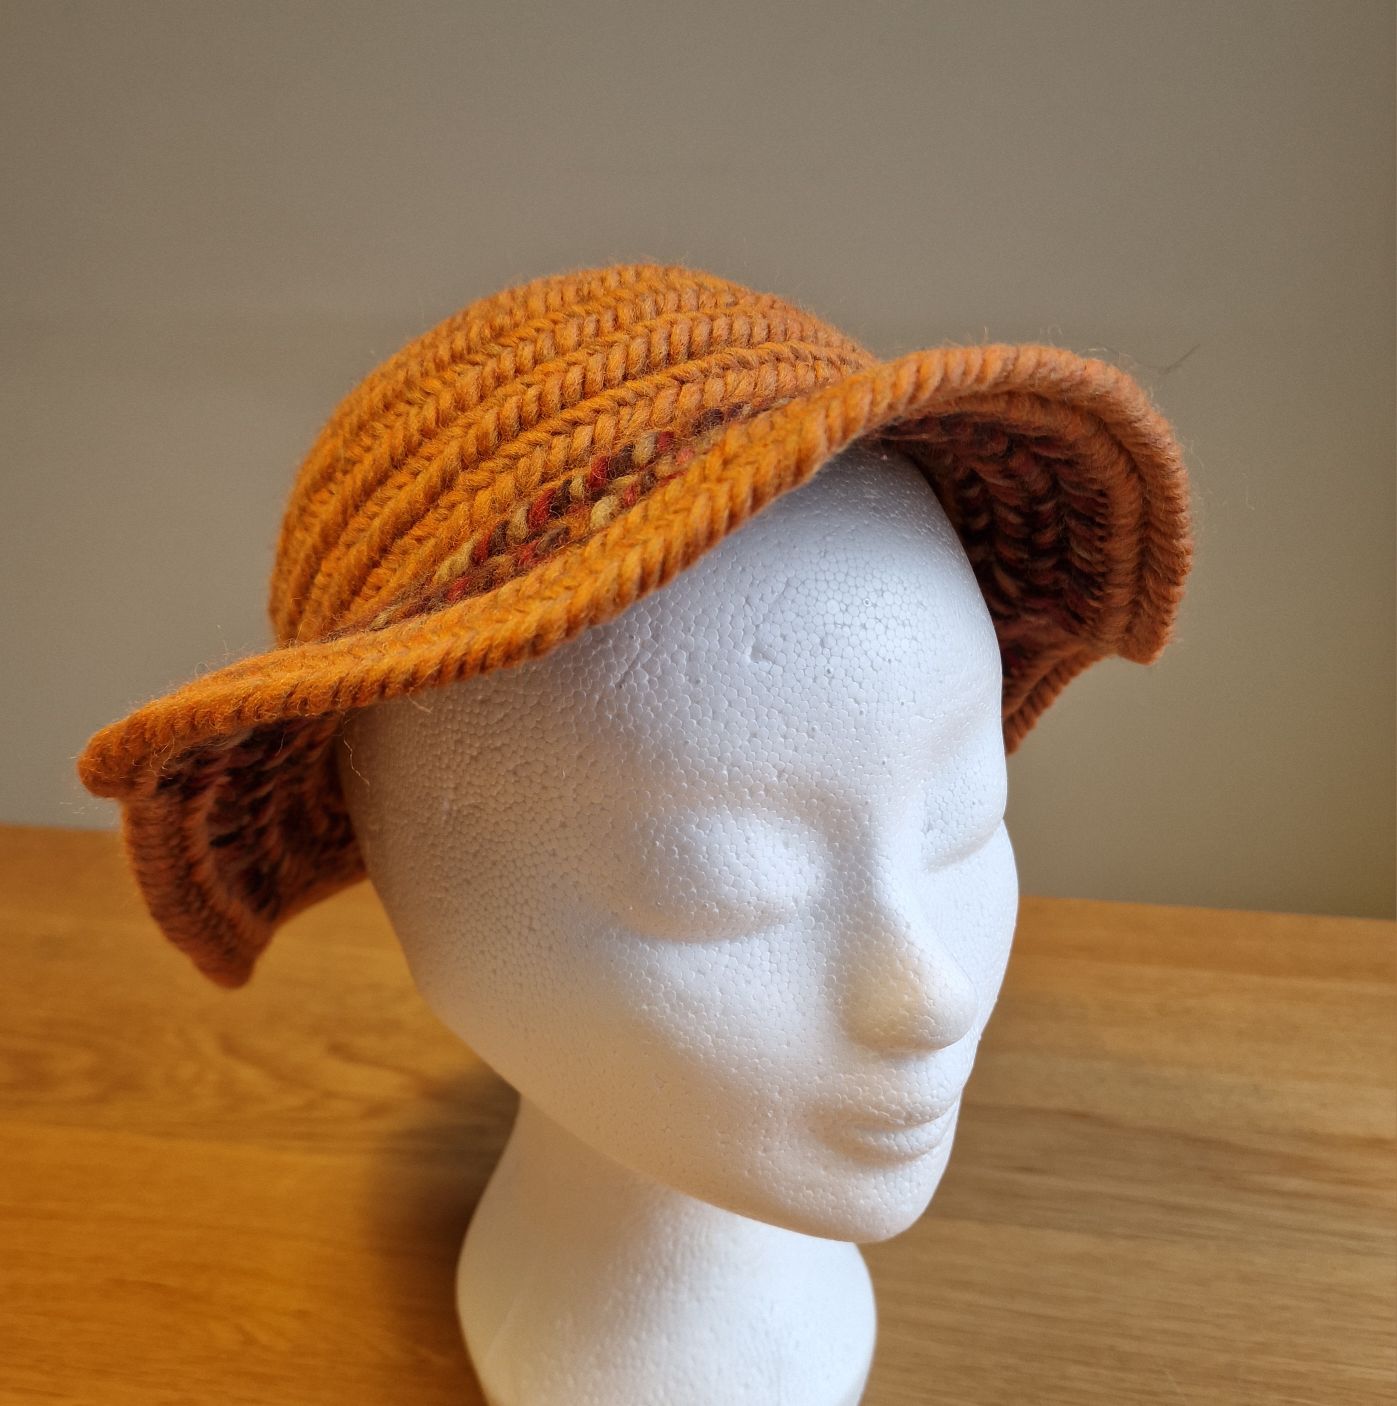
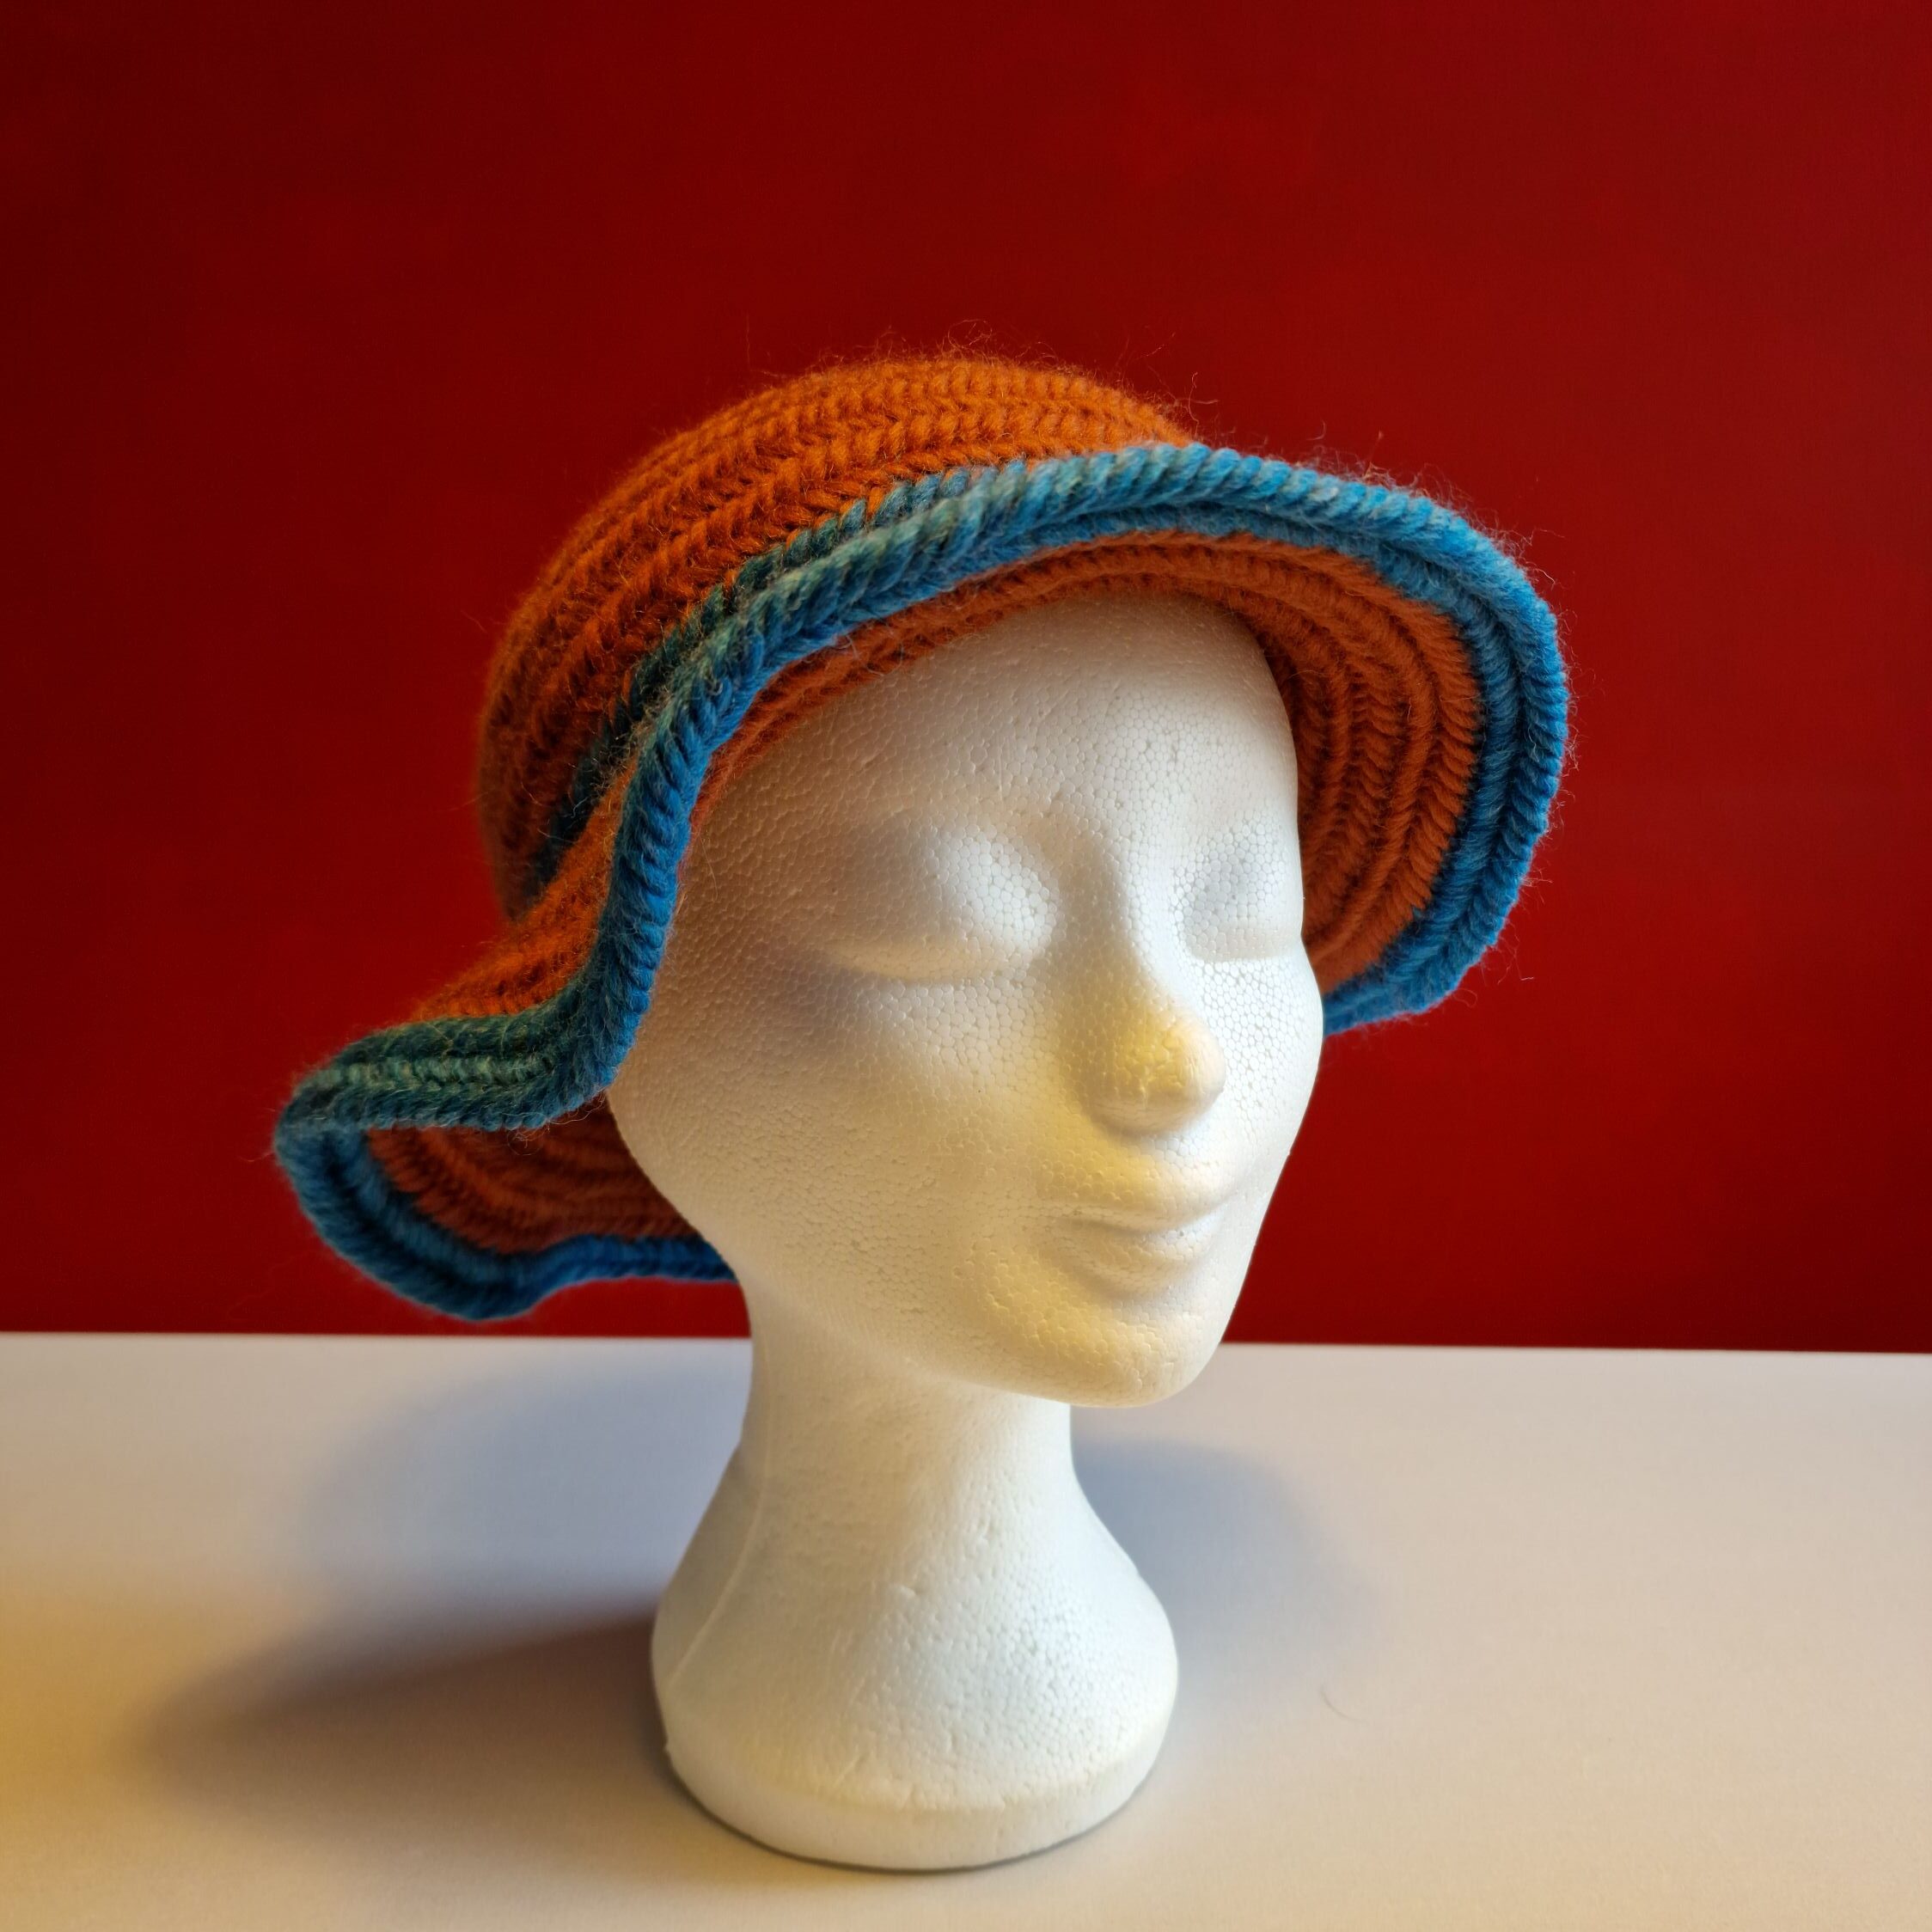
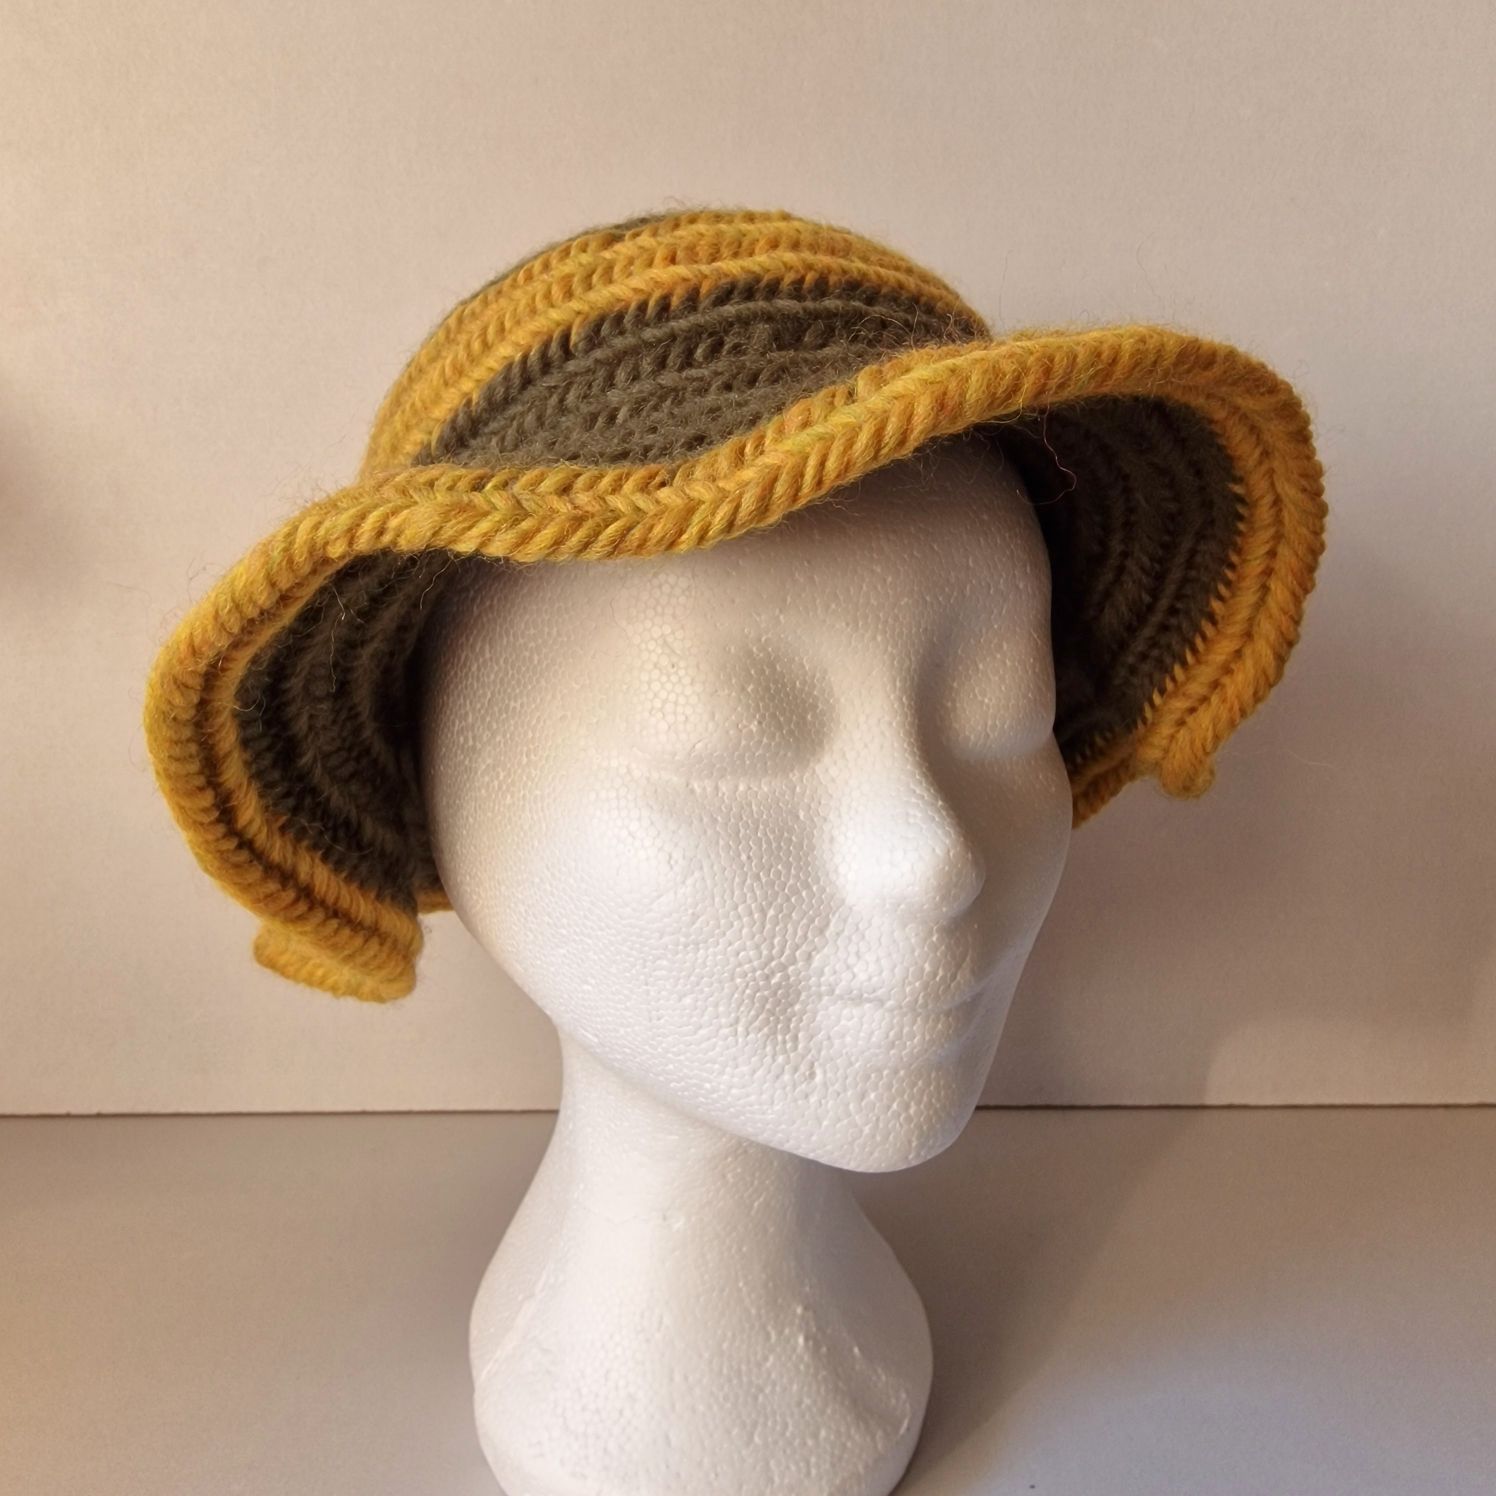
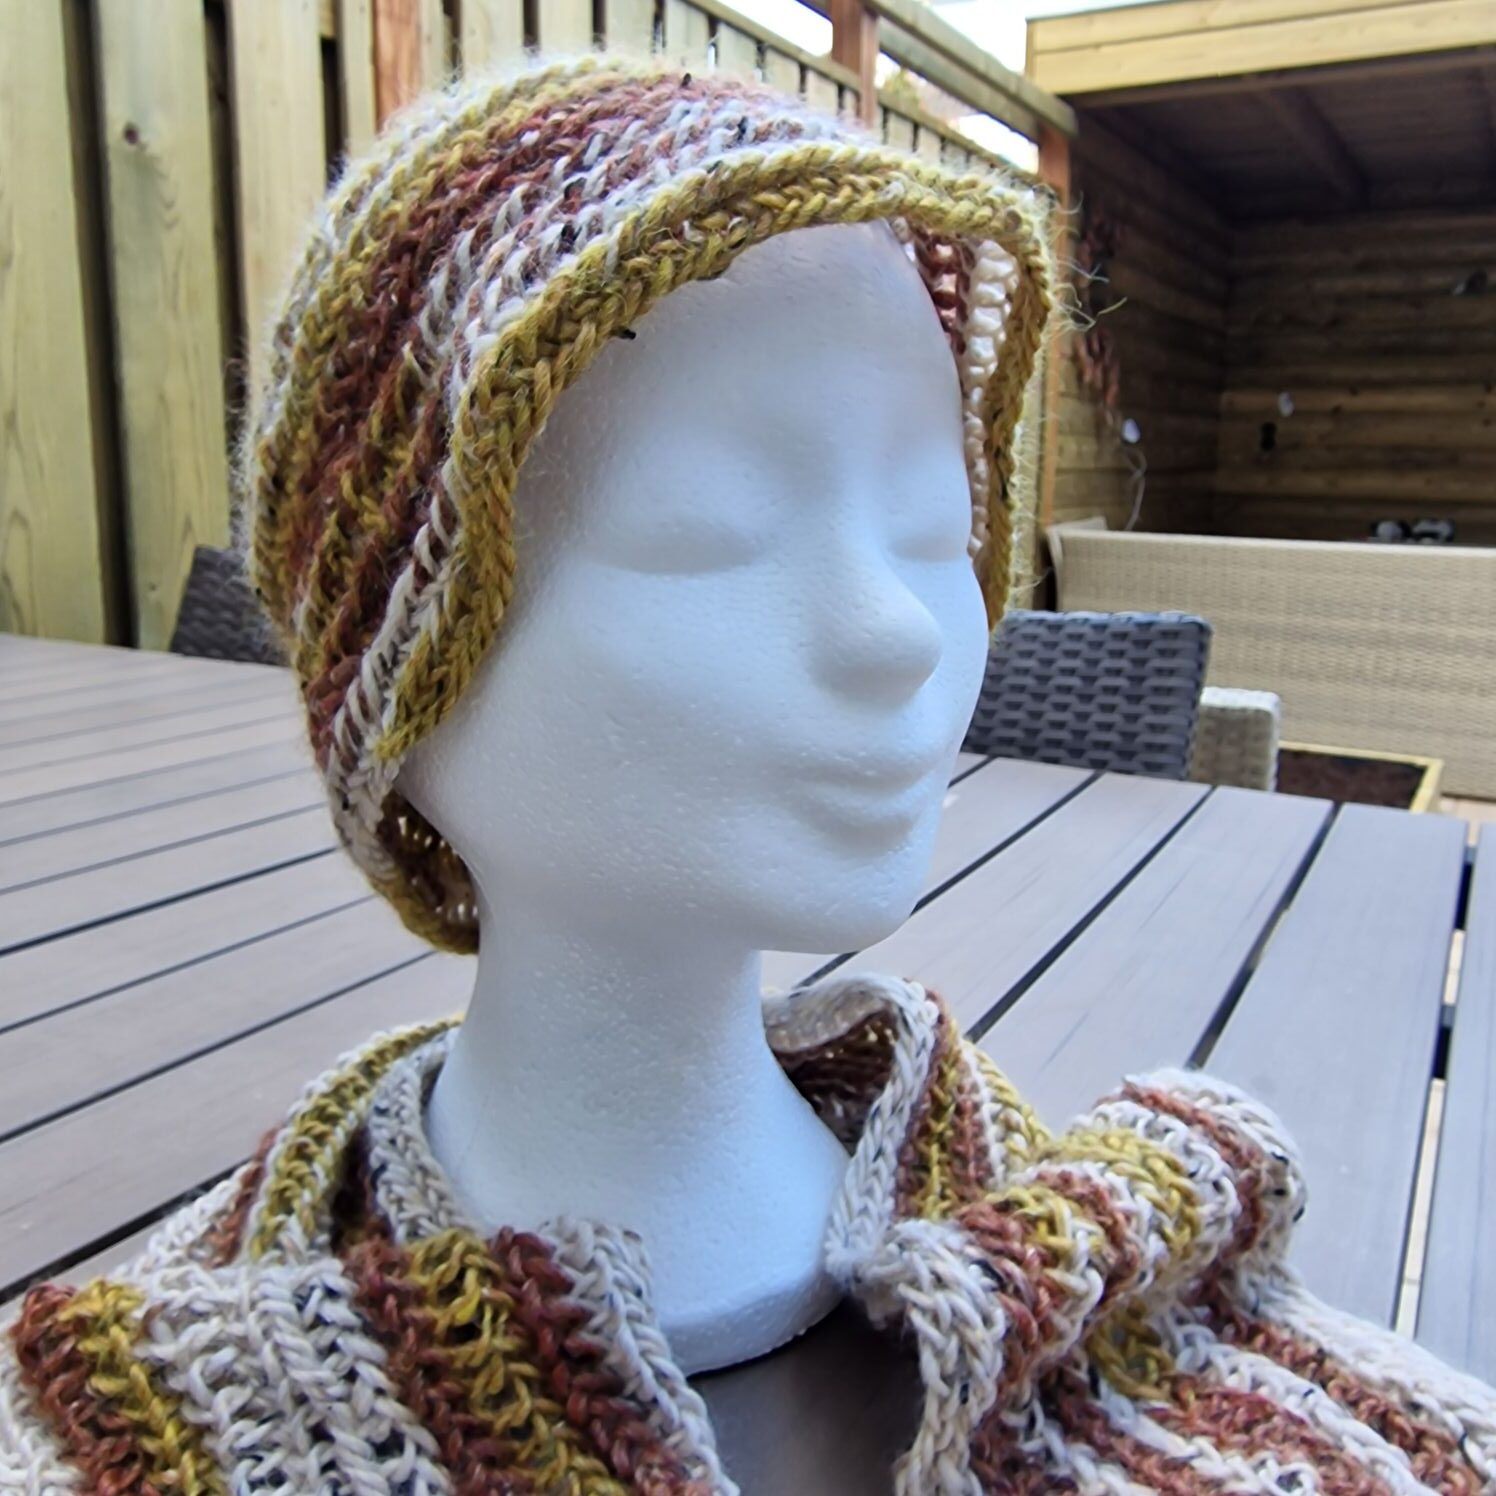
A hat with a brim.
I made this hat with a Finnish stitch 2+2 and F2 as a connecting stitch.
I started with 18 stitches with a round start.
After the circle has been closed and you have attached a stitch marker, you will increase all stitches in the 1st round.
During the 2nd round you will increase every other stitch.
The 3rd round 2 stitches normal and the 3rd increase.
The 4th round 3 stitches normal and the 4th stitch increase.
The 5th round 4 stitches normal and the 5th stitch increase.
The 6th round 5 stitches normally and the 6th stitch increases and then you put your hand on a circle and that is approximately the size of your head. (photo is of a different hat).
The 7 round just plain nalbinding.
After this you will decrease the next round
The 8th round 5 stitches normal and the 6th decrease.
The 9th round 4 stitches normally and the 5th stitch decrease and try on your hat.
Once your hat fits you will make the brim of your hat.
You will make the brim of your hat by increasing, first I increased all the stitches and that resulted in a very wavy edge, this was way too much, so cut it off and start again.
Then I chose to simply increase 2 stitches and the 3rd stitch, which was better.
The next round 3 stitches normally and the 4th increase, this 2 round I used a mixed color.

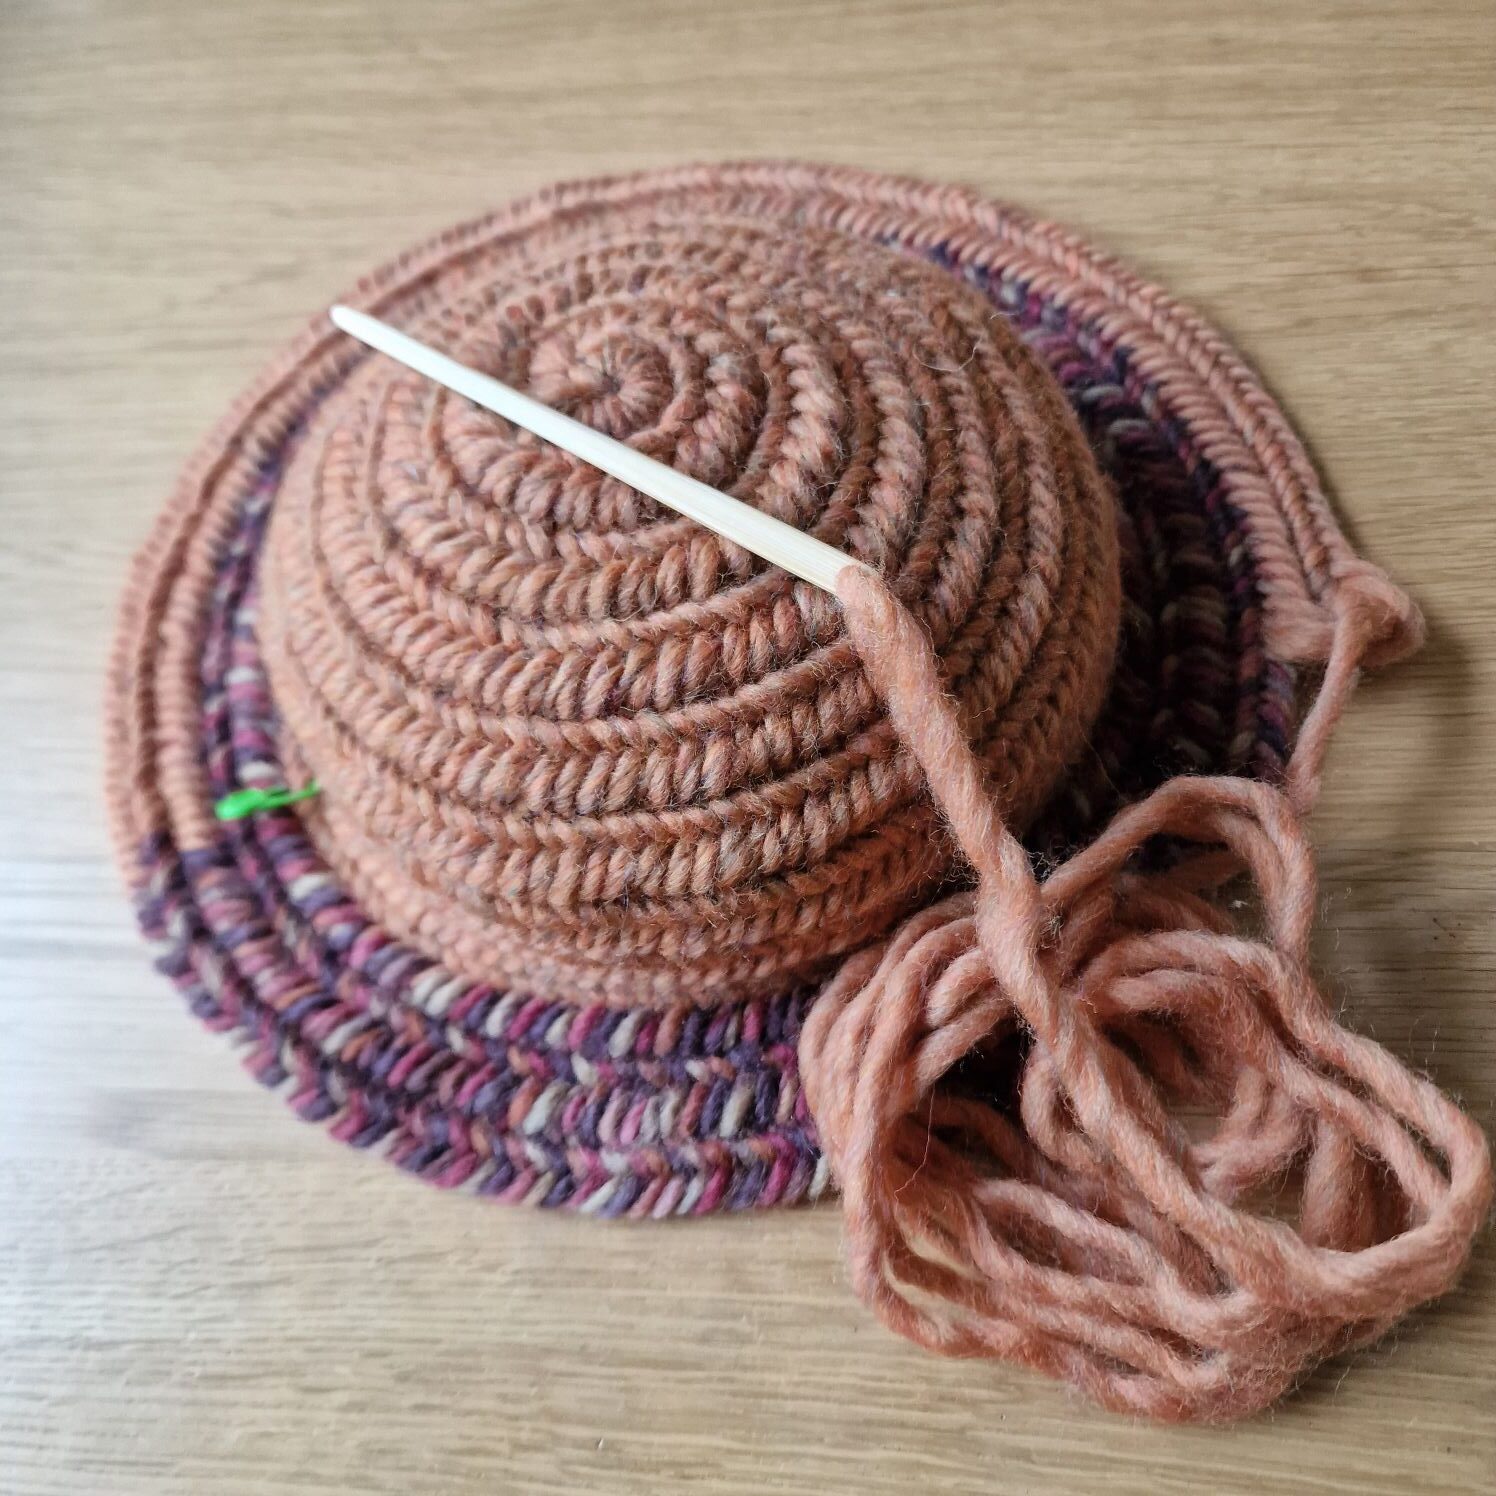
The last round I used the camel color again and because the edge became a little more wavy again, I used 10 stitches normally and the 11 increases with needle binding.
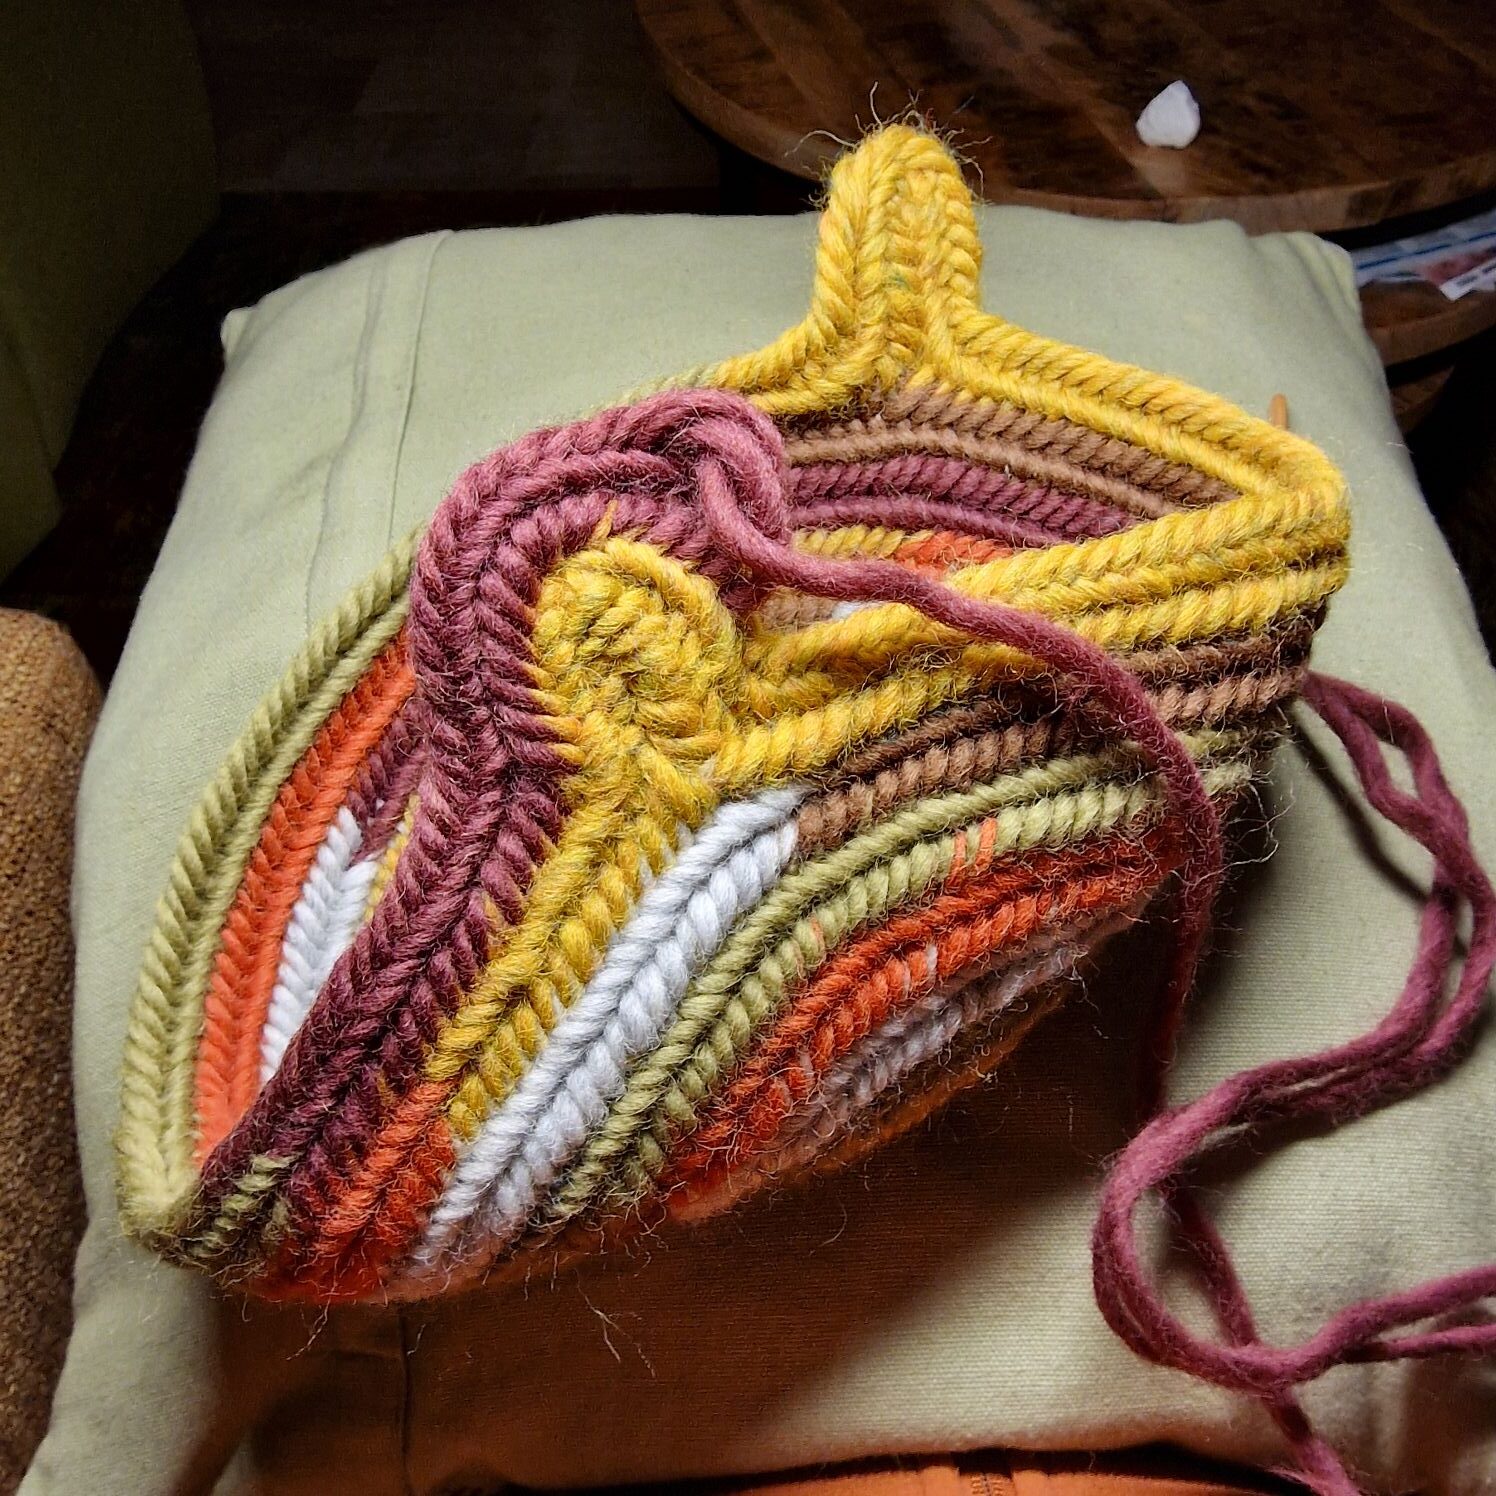
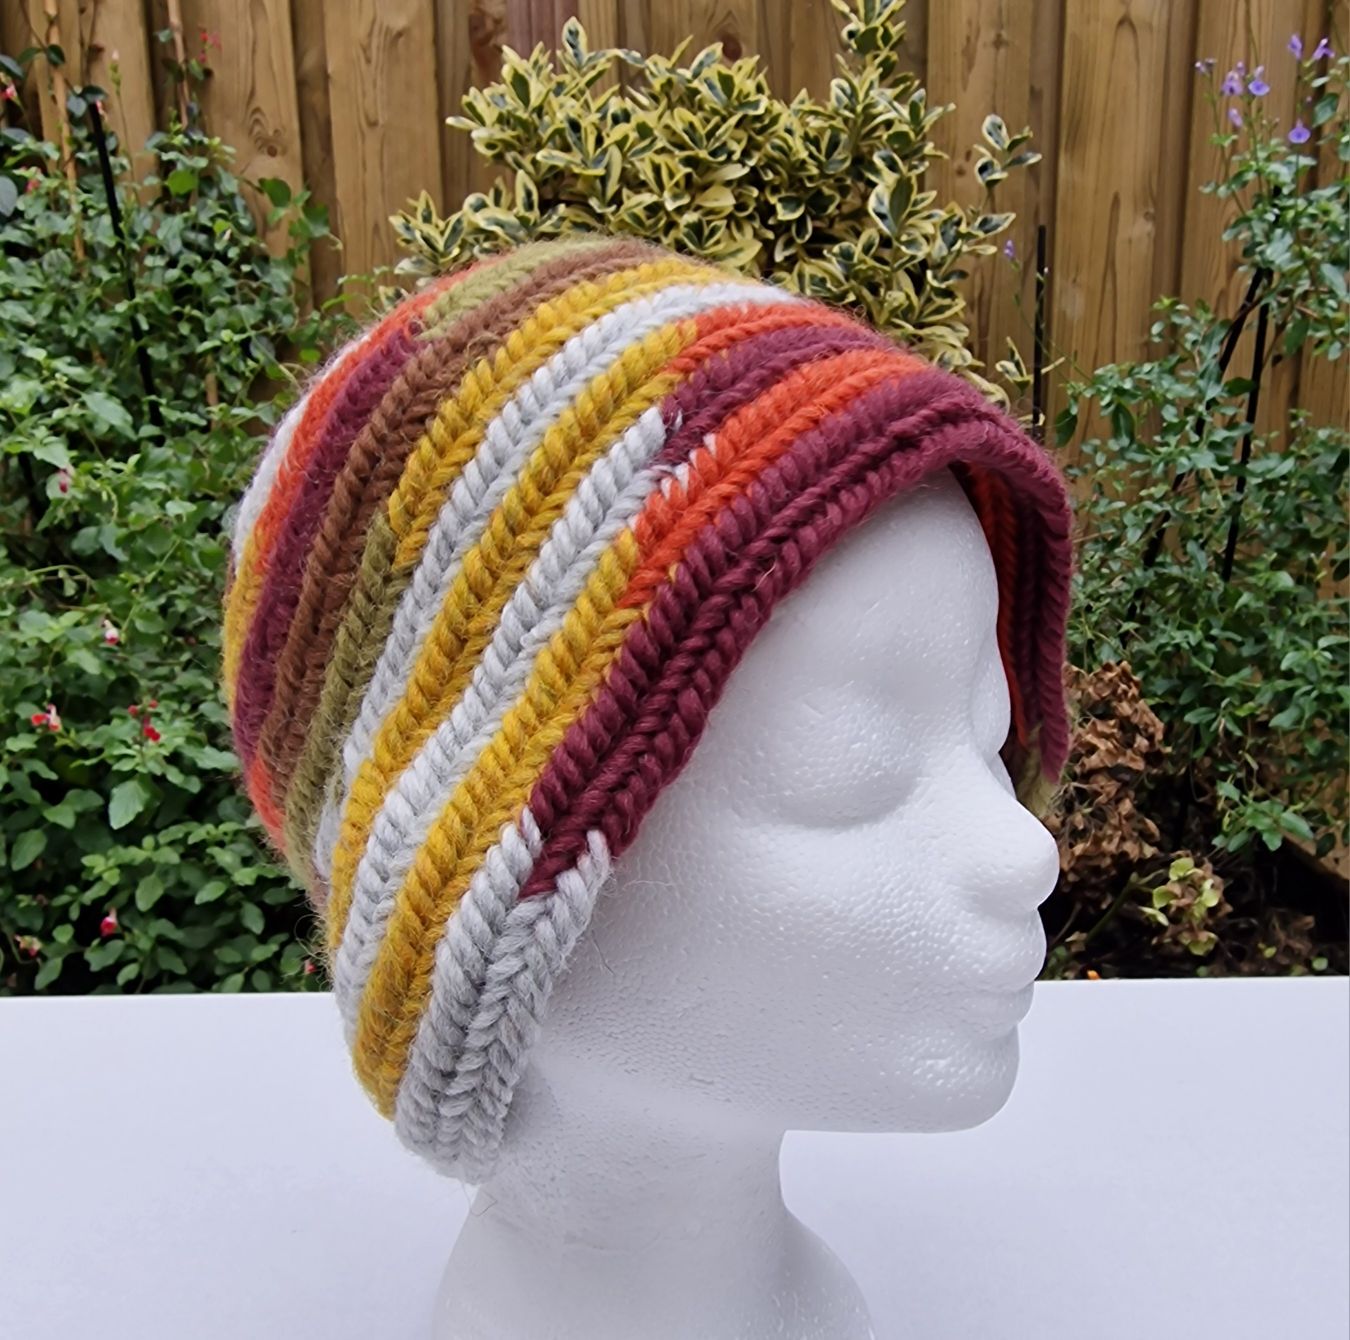
This is my first cheerful hat with a brim with thicker wool for Autumn/winter and I have learned a lot again and (taken out/cut)
I am going to make many more hats with a brim from all kinds of wool, thin, thick 1-2- 3 ply wool or combinations of wool and acrylic but NOT superwash wool because you cannot felt it.
Today 15 december 2023 i made a new video called: needlebinding nalbinding a hat.
Have fun with my patterns and also take a look at my YouTube Channel: happy needlebinding for even more needlebinding videos in (Dutch, English and German).
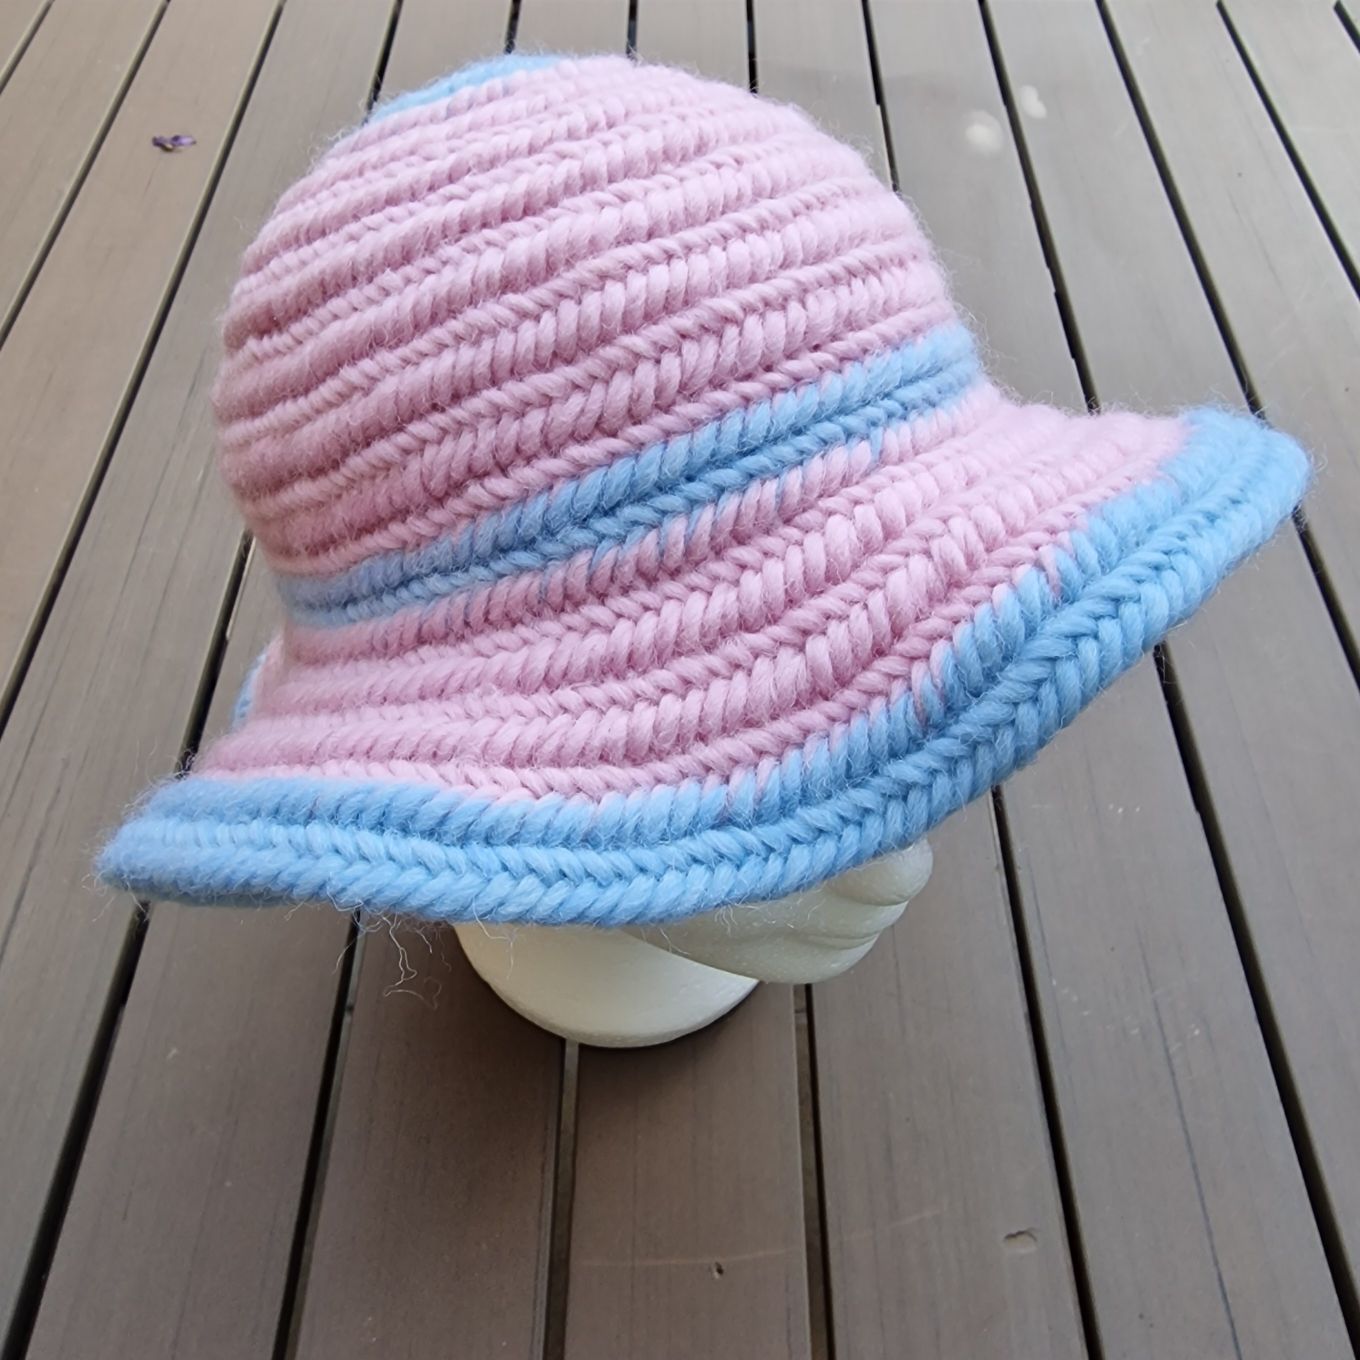
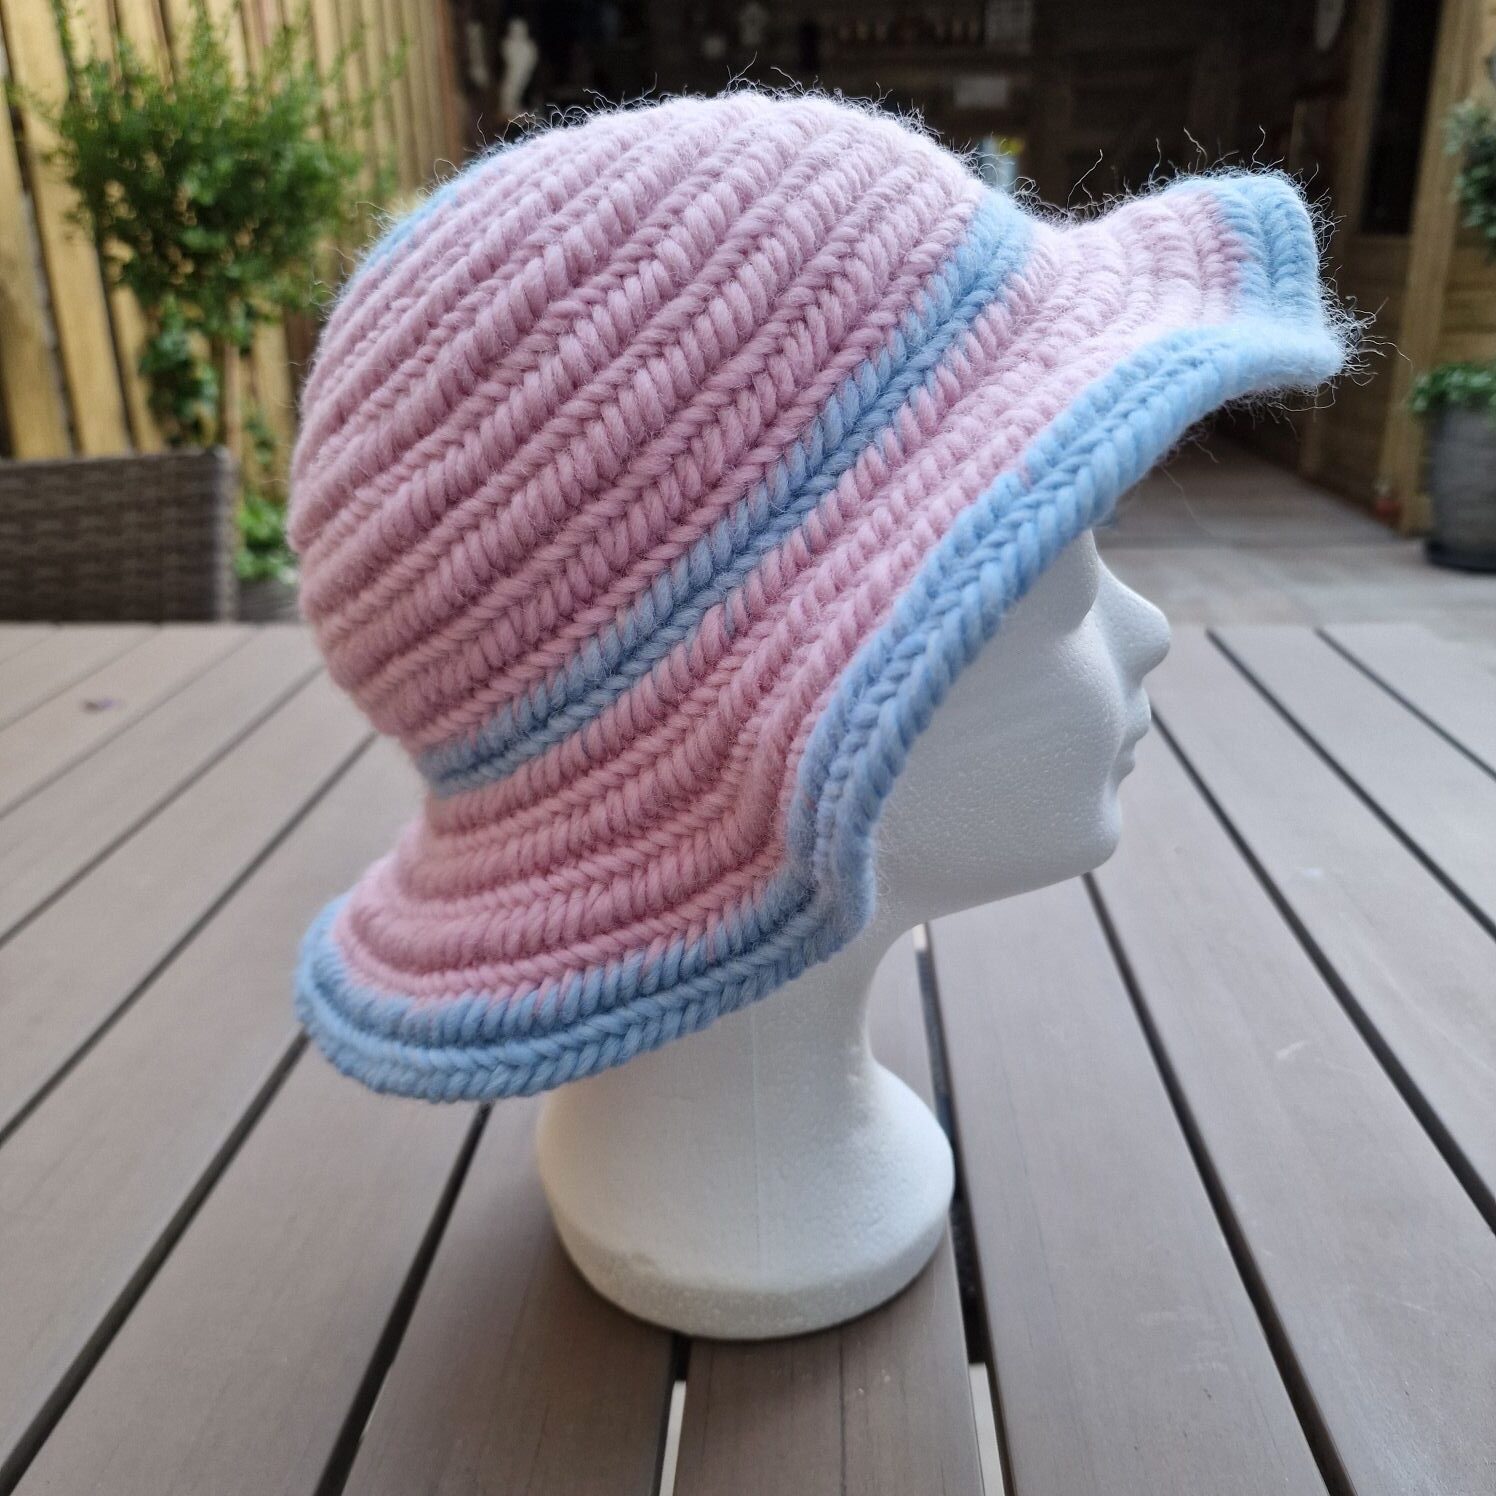
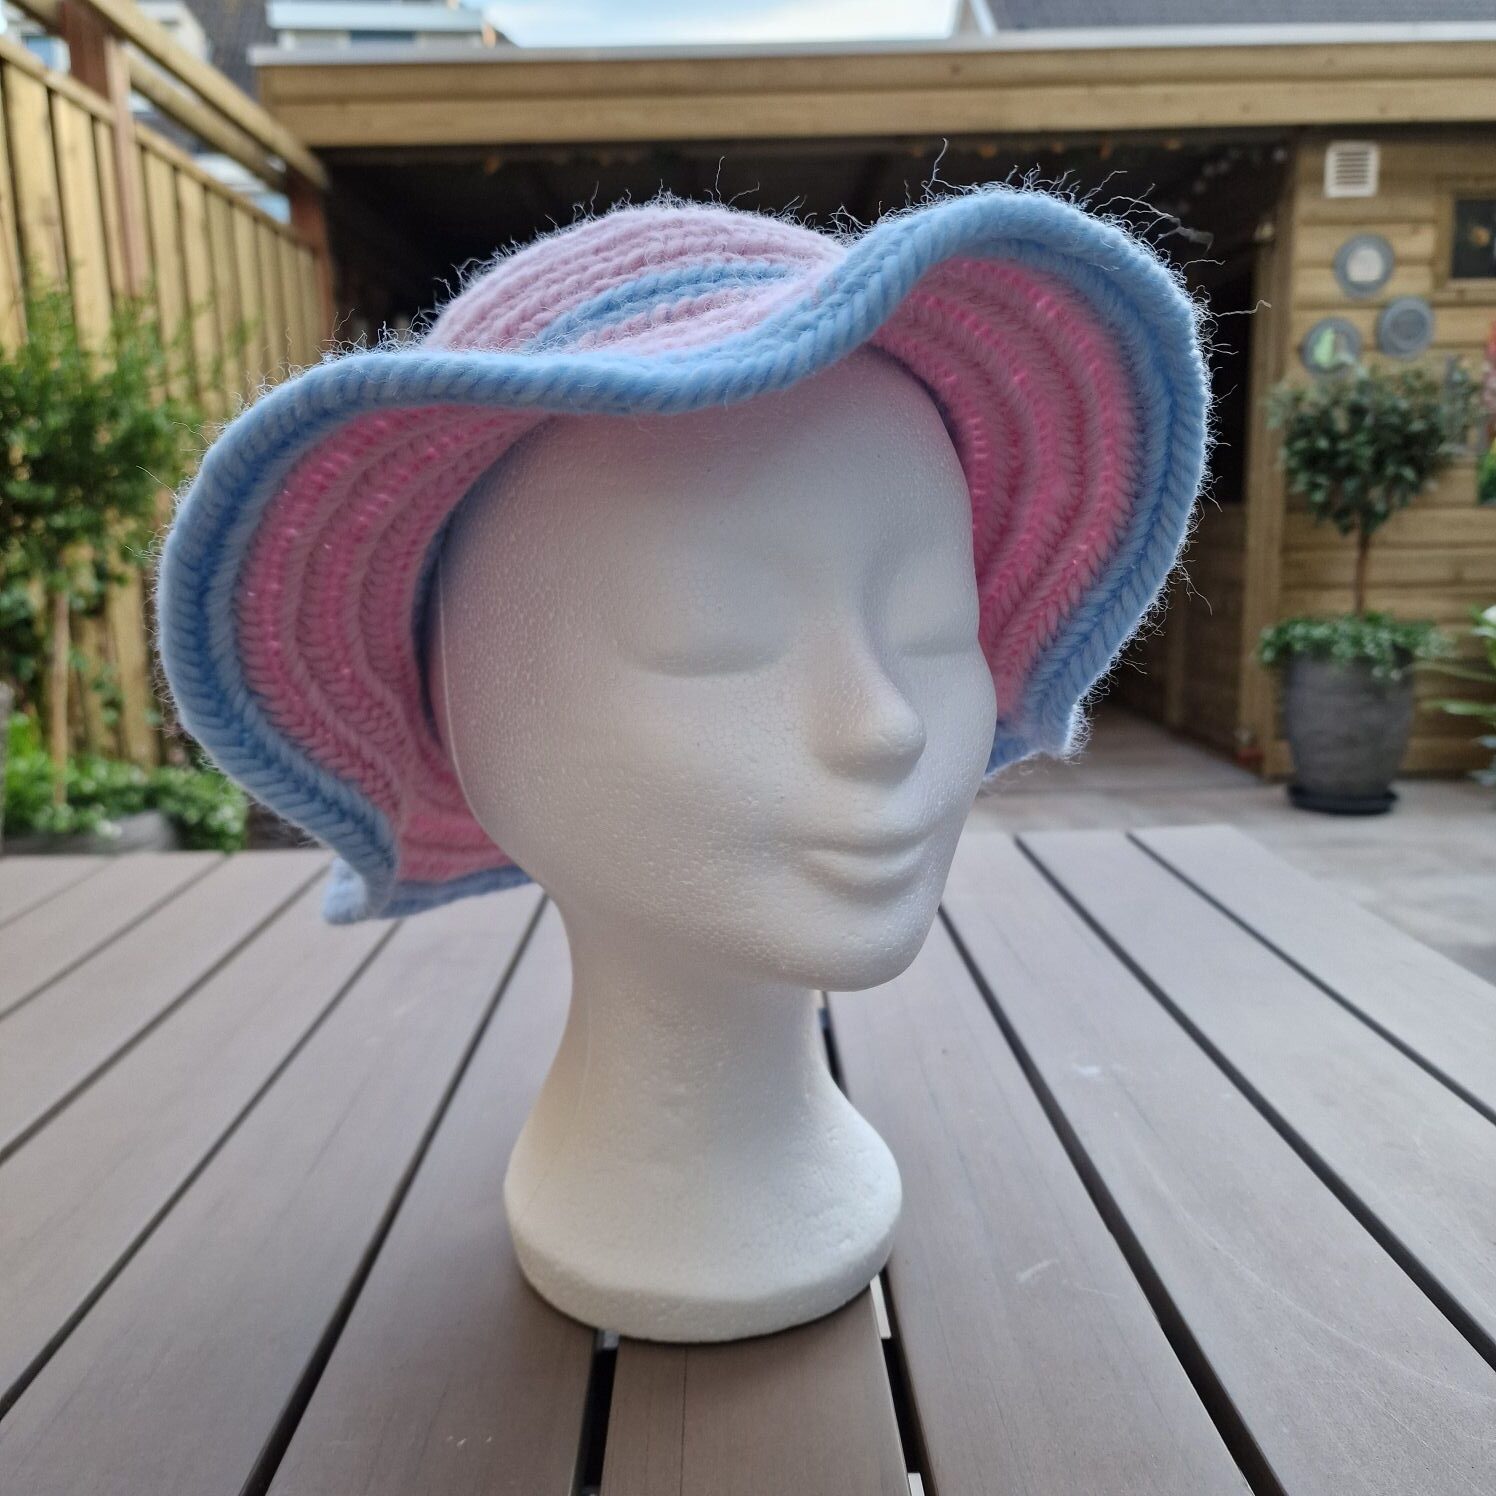
My second Hat with a brim
I needlebind my 2nd hat with the Finnish stitch 2 + 2 and with F2 as a connecting stitch.
I started with 18 stitches with a round start.
After the circle has been closed and you have attached a stitch marker, you will increase all stitches in the 1st round.
The diameter is 7.5 cm

During the 2nd round you will increase every other stitch. The diameter is 11.5 cm.
The 3rd round 2 stitches normally and the 3rd stitch increases. The diameter is 13 cm.
The 4th round 3 stitches normally and the 4th stitch increases. The diameter is 16 cm.
The 5th round 4 stitches normal and the 5th stitch increase. The diameter is 19 cm.
The 6th round 5 stitches normally and the 6th stitch increases and then you put your hand on a circle and that is approximately the size of your head.
The diameter is 22 cm. On the 7th round you will simply needlebind all stitches (no more increasing/decreasing), and I will change the color to blue.
After this you will decrease the next round, and the color will become camel again.
The 8th round 5 stitches normally and the 6th stitch decrease.
On the 9th round, 4 stitches normally and on the 5th decrease stitch and try on your hat.
When the hat fits well, you can make the brim of the hat.
On the 10th round you will increase again, 3 stitches normally and increase the 4th stitch.
The 11th round 4 stitches normally and the 5th stitch increases.
The 12th round 5 stitches normal and the 6th increase.
The last round I will change the color back to blue, 6 stitches normally and increase the 7th stitch.
This 2nd hat now has a nice flat brim. I really enjoy making hats and I will make many more.
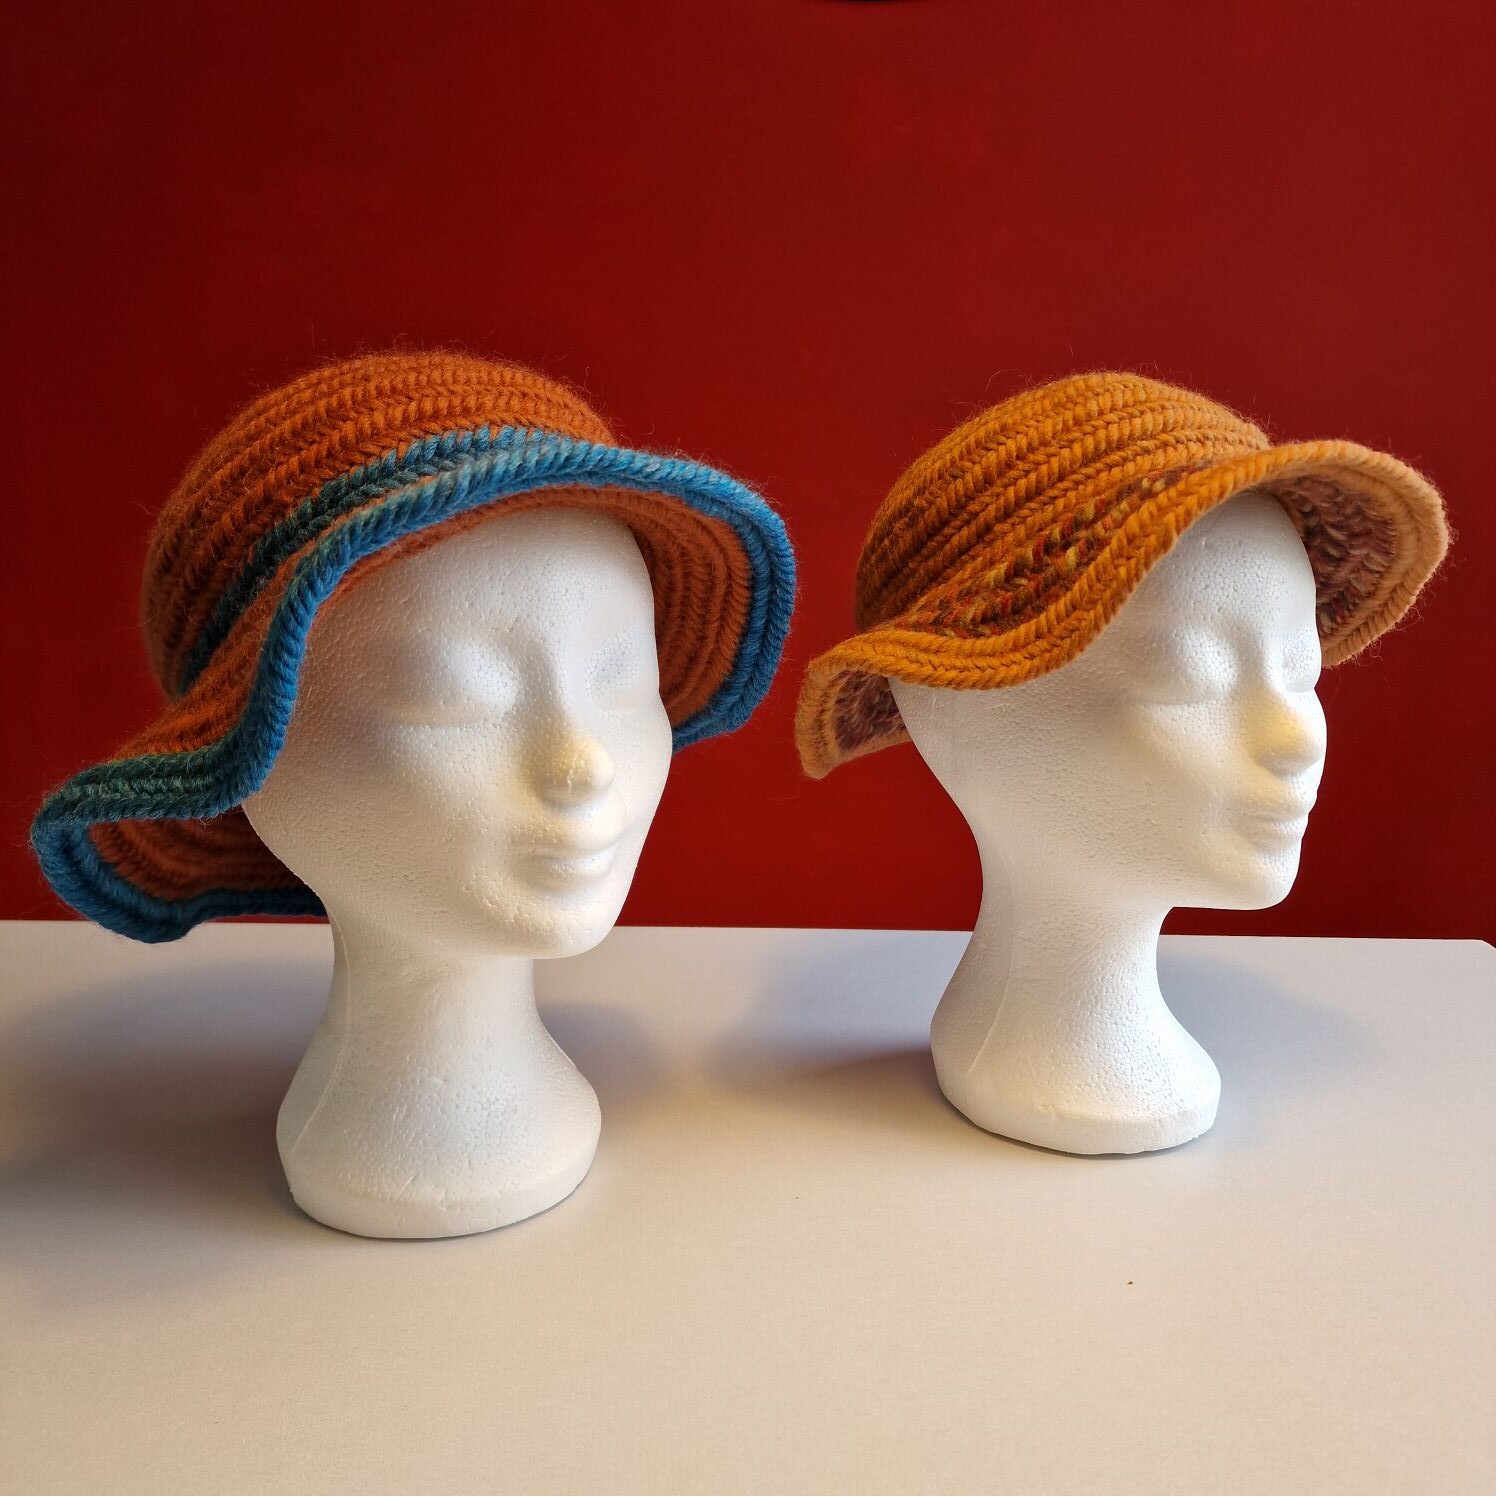
My third hat with a brim.
My third hat has the same pattern as the second hat.
My 4th hat with a brim.
My 4th hat has the same pattern as the second hat.
After i made the hat i made a video about how to make one.
Number 40. YouTube video called: nalbinding a easy hat with a brim.
I made a summer hat with the Oslo stitch and connection stitch F2. The edge of the hat i made with the faberg stitch.
A hat with earflaps 80% wool en 20% acryl.
The hat is needle-bound with a Mammen Stitch with stitch F2 as the connection.

You start with 16 stitches and make the tail longer because you start round, see video. Increase all stitches in the first round.                                                                                                            Second round, 1 stitch as plain and increase the 2nd stitch.                                                                         Third round 2 stitches plain and the third stitch increases.                                                                Fourth round, 3 stitches as plain and increase the fourth stitch.                                                                    Fifth round, 4 stitches plain and the fifth stitch increasing.                                                                      Sixth round 5 stitches plain and the sixth stitch increase.                                                                            Seventh round, all stitches plain.                                                                                                           Eighth round (all stitches plain) and now you are going to make the ear flaps.                                                                                                                                               You do this by making a loose row of 7 stitches (they often call this a finger) and make a bend (next row) and attach this again to the edge of the hat.                                                     Make a mark in the center of the finger which is also the location of the center of your first ear flap.
Use a mirror to determine the location of the next ear flap and place a marker.                                            Ninth round on the tip of the fingers you will increase 3 stitches and between the markers at the back of the hat you will plain needle bind, and at the front of the hat you will nalbind 5 stitches plain and decrease the sixth stitch.                                                                                                Tenth round nalbind at the back plain stitches and fingers and nalbind 4 stitches at the front and decrease the fifth.                                                                                                                      Eleventh round same as the tenth round but 3 stitches normal and the 4th decrease. Twelfth round just needle binding plain stitches and your hat is ready  :)
This pattern is a guideline, you can also make the earflaps larger and a little rounder so that your ears fit nicely. I did this on the next hat, by making the finger 9 stitches long and increasing 5 stitches in the next 2 rounds and then 3 stitches on the tip of the fingers. And a few extra rounds of plain needle binding to make this hat a bit bigger.
This hat is needlebind with 100% wool and with the Finnish stitch and a connection stitch stitch F2 and starts with 16 stitches. The pattern is the same as the hat above, but with slightly larger ear flaps.

If you wear glasses like me and you have a hat on your head and you want your entire ears to be covered, the edge of your hat presses on your glasses and then on your nose annoyingly. The solution :) A nice warm hat with ear flaps.
A hat, a hat and a beret needle binding with 80% wool and 20% acrylic. I made this in December 2024.
Thank you for the wonderful directions!