I made socks and slippers but never Baby socks.
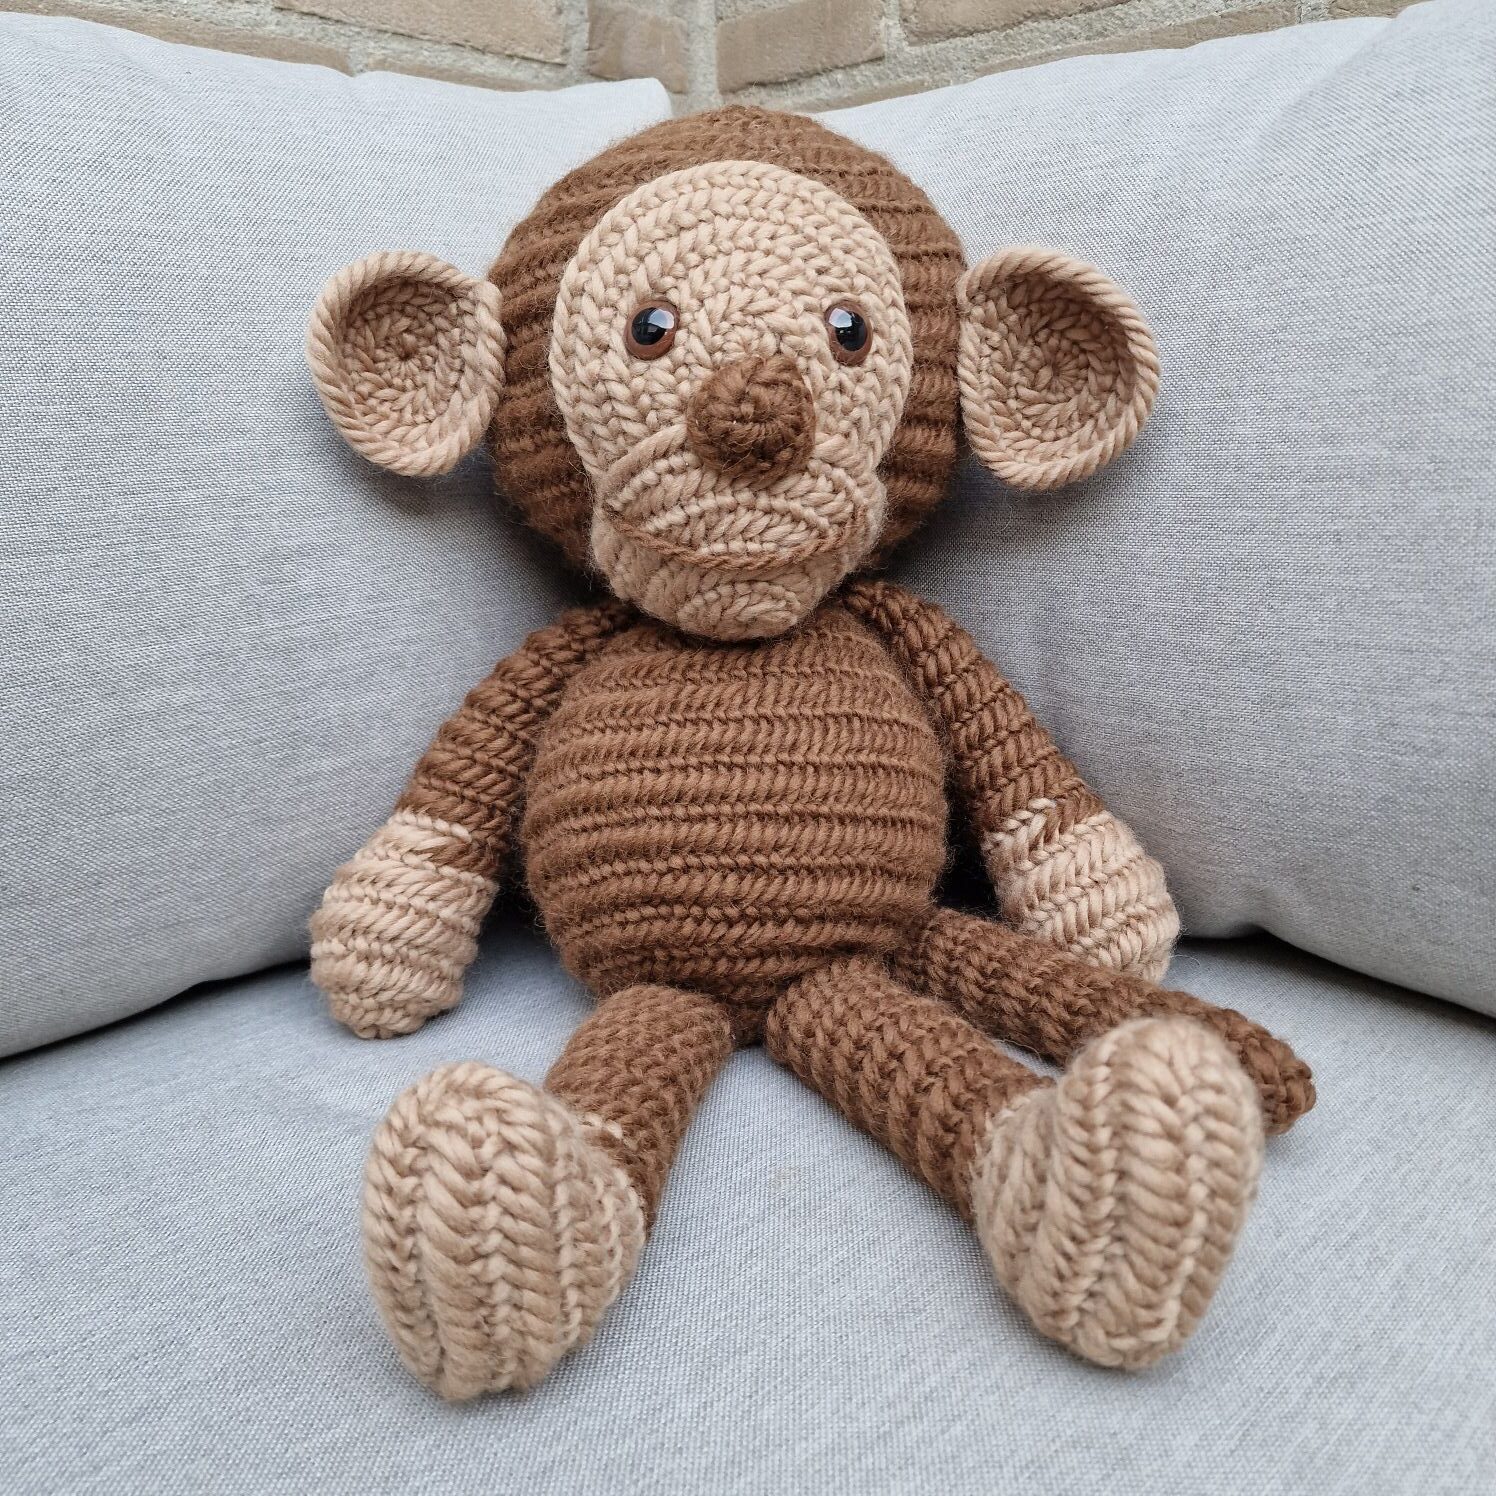
Today it is 3 okt. 2023 and i made my first nalbound Monkey.
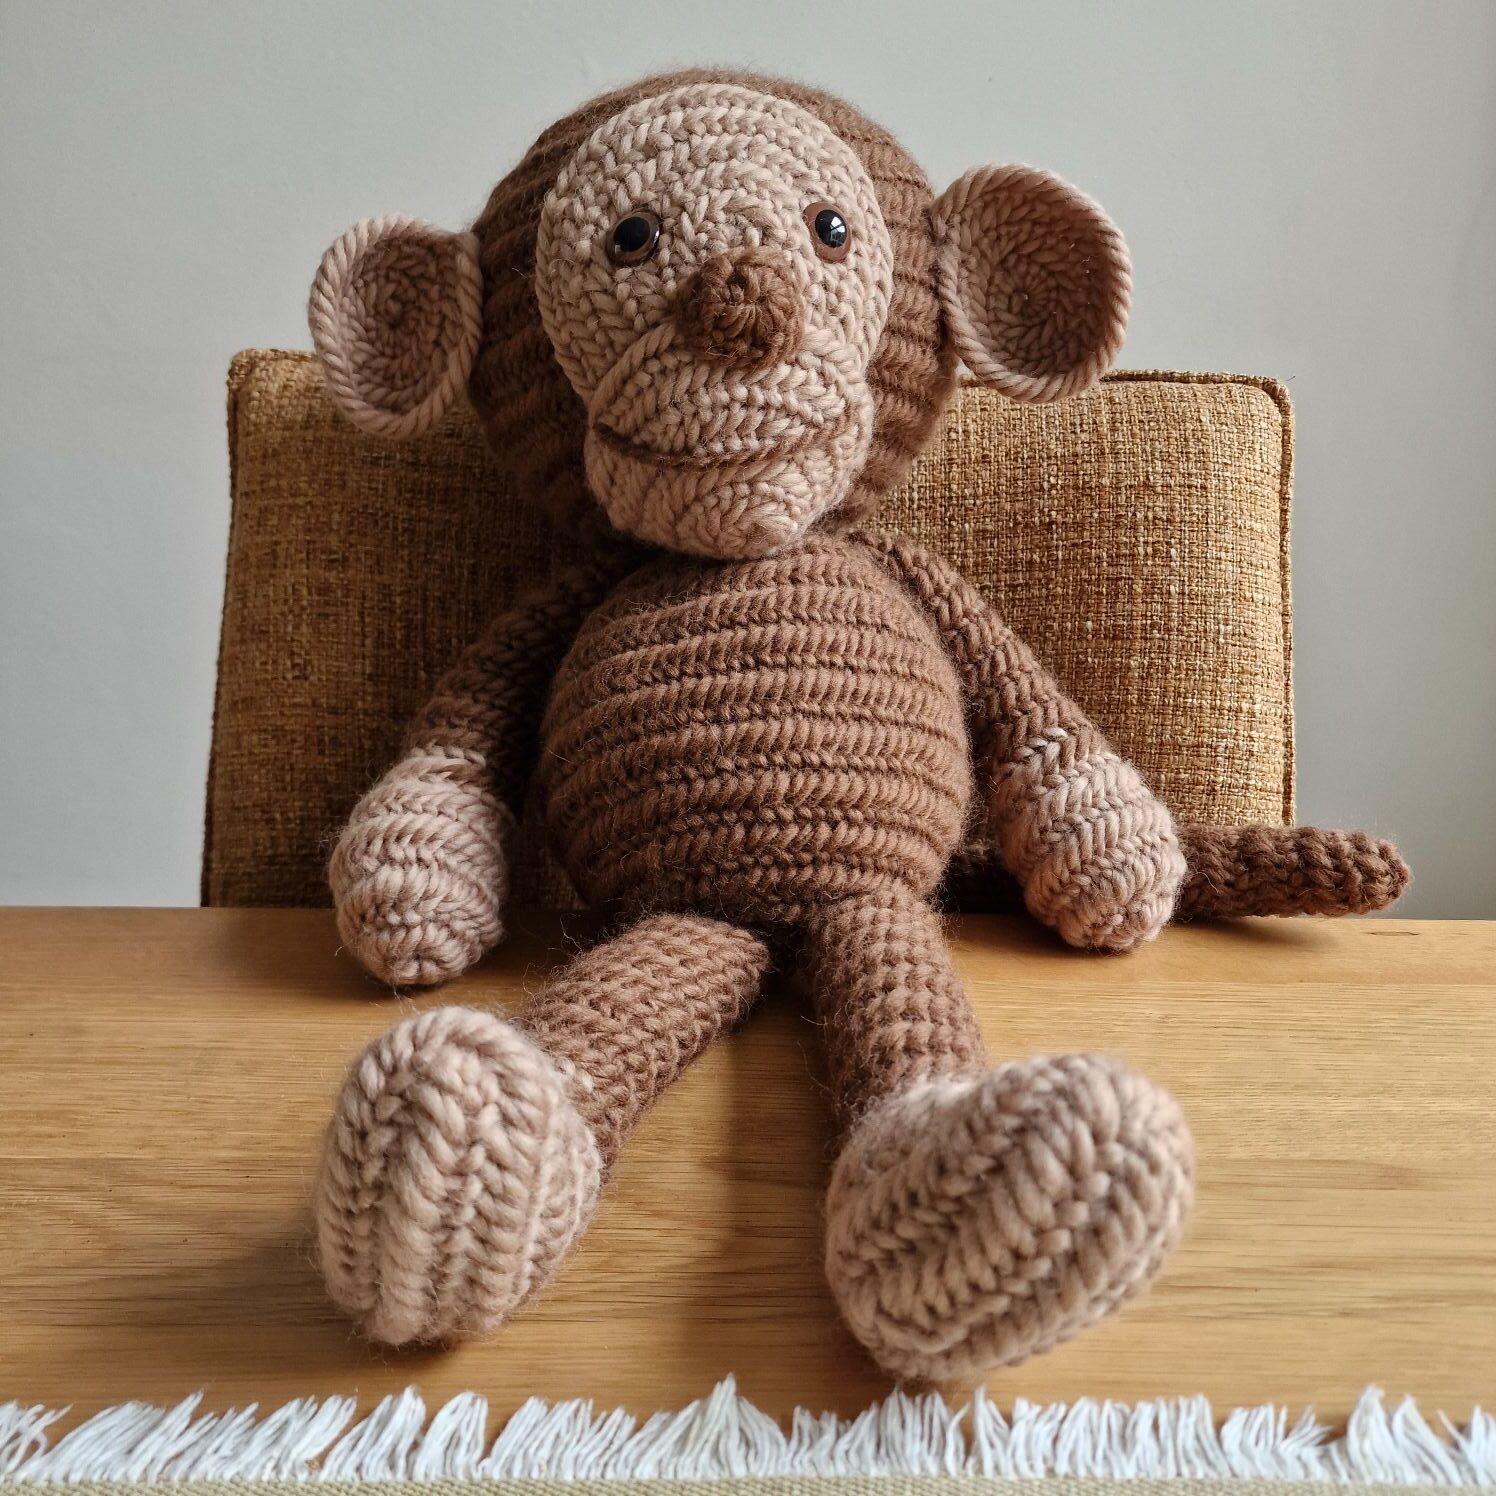
The pattern of my first stuffed monkey can be found at the end of this page.
All my patterns are free 🙂
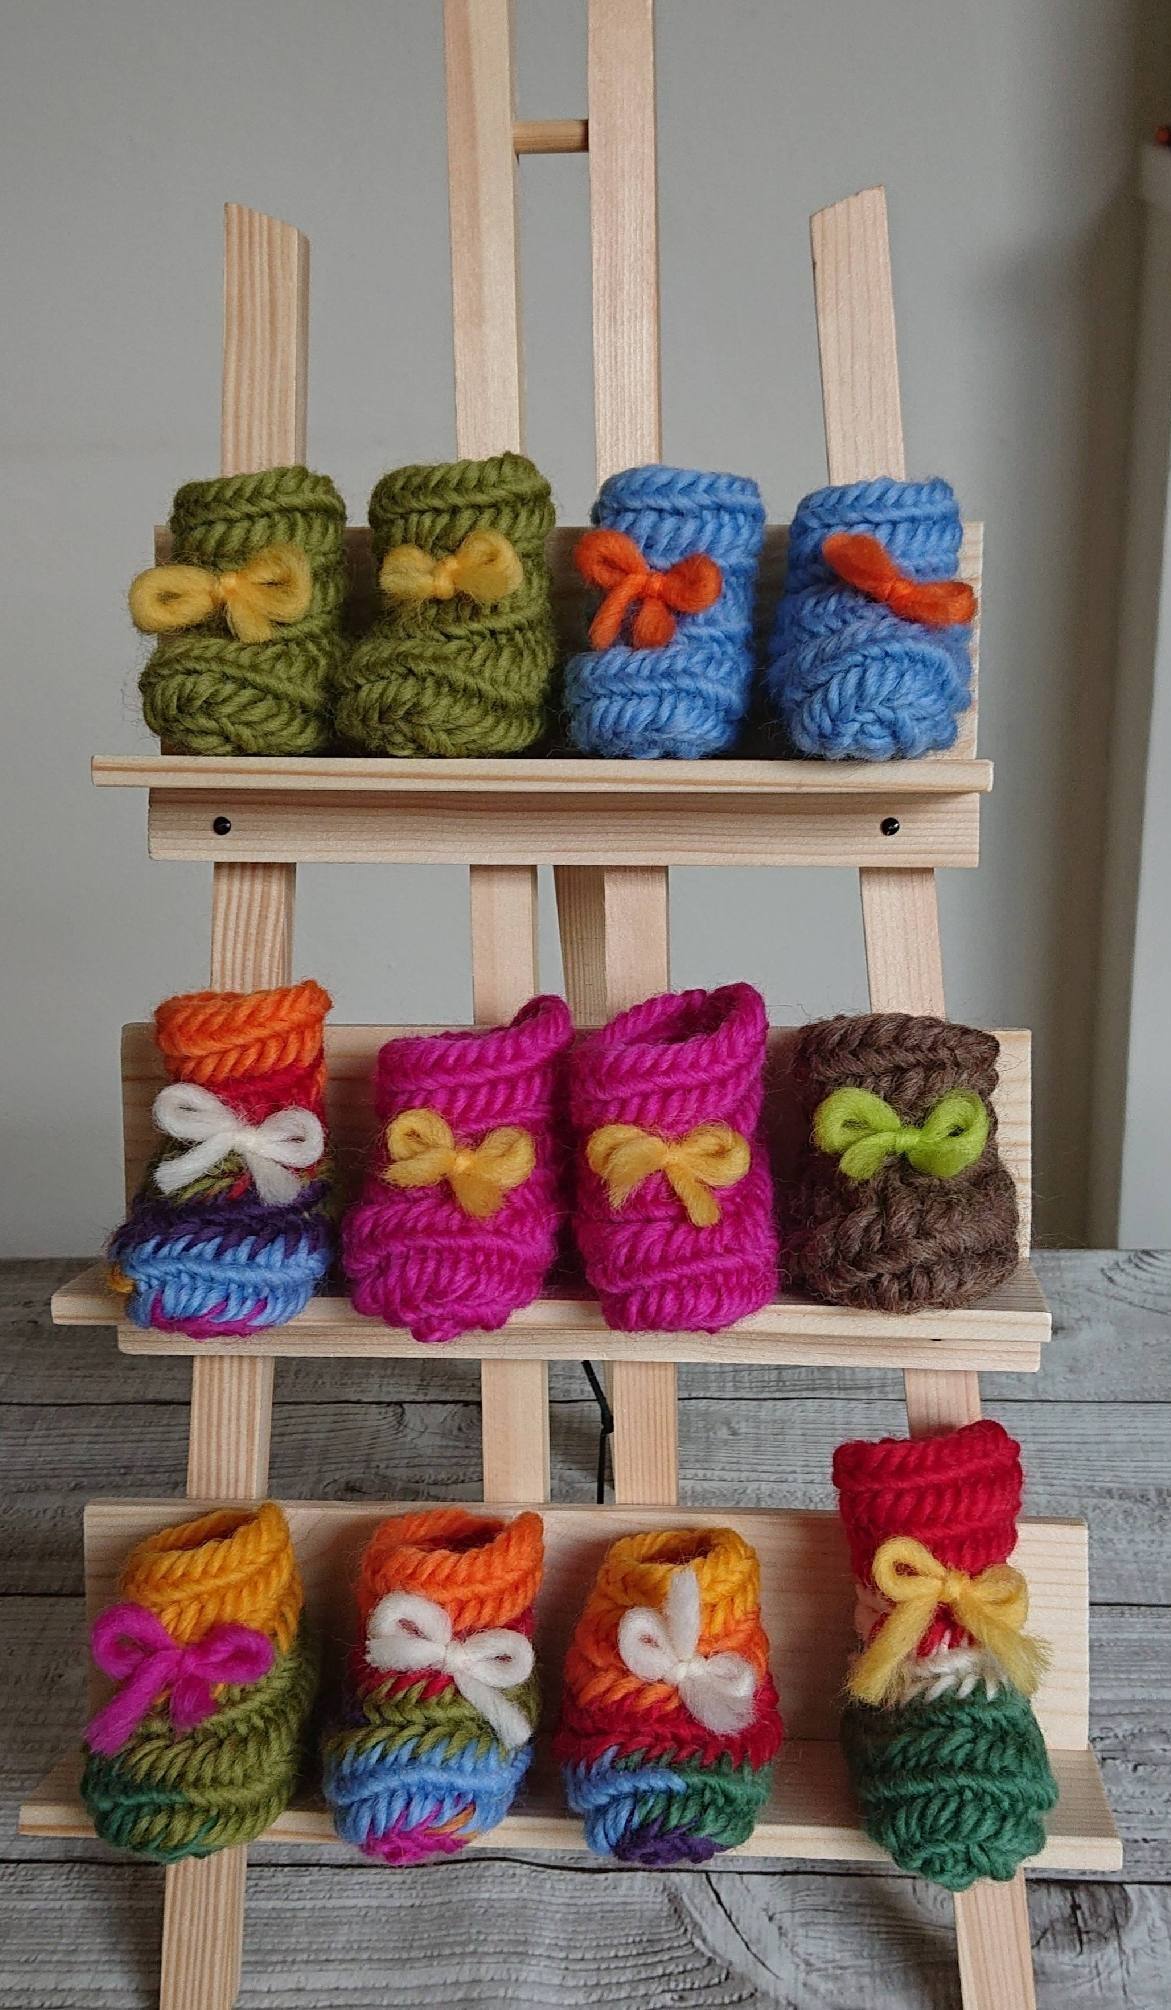
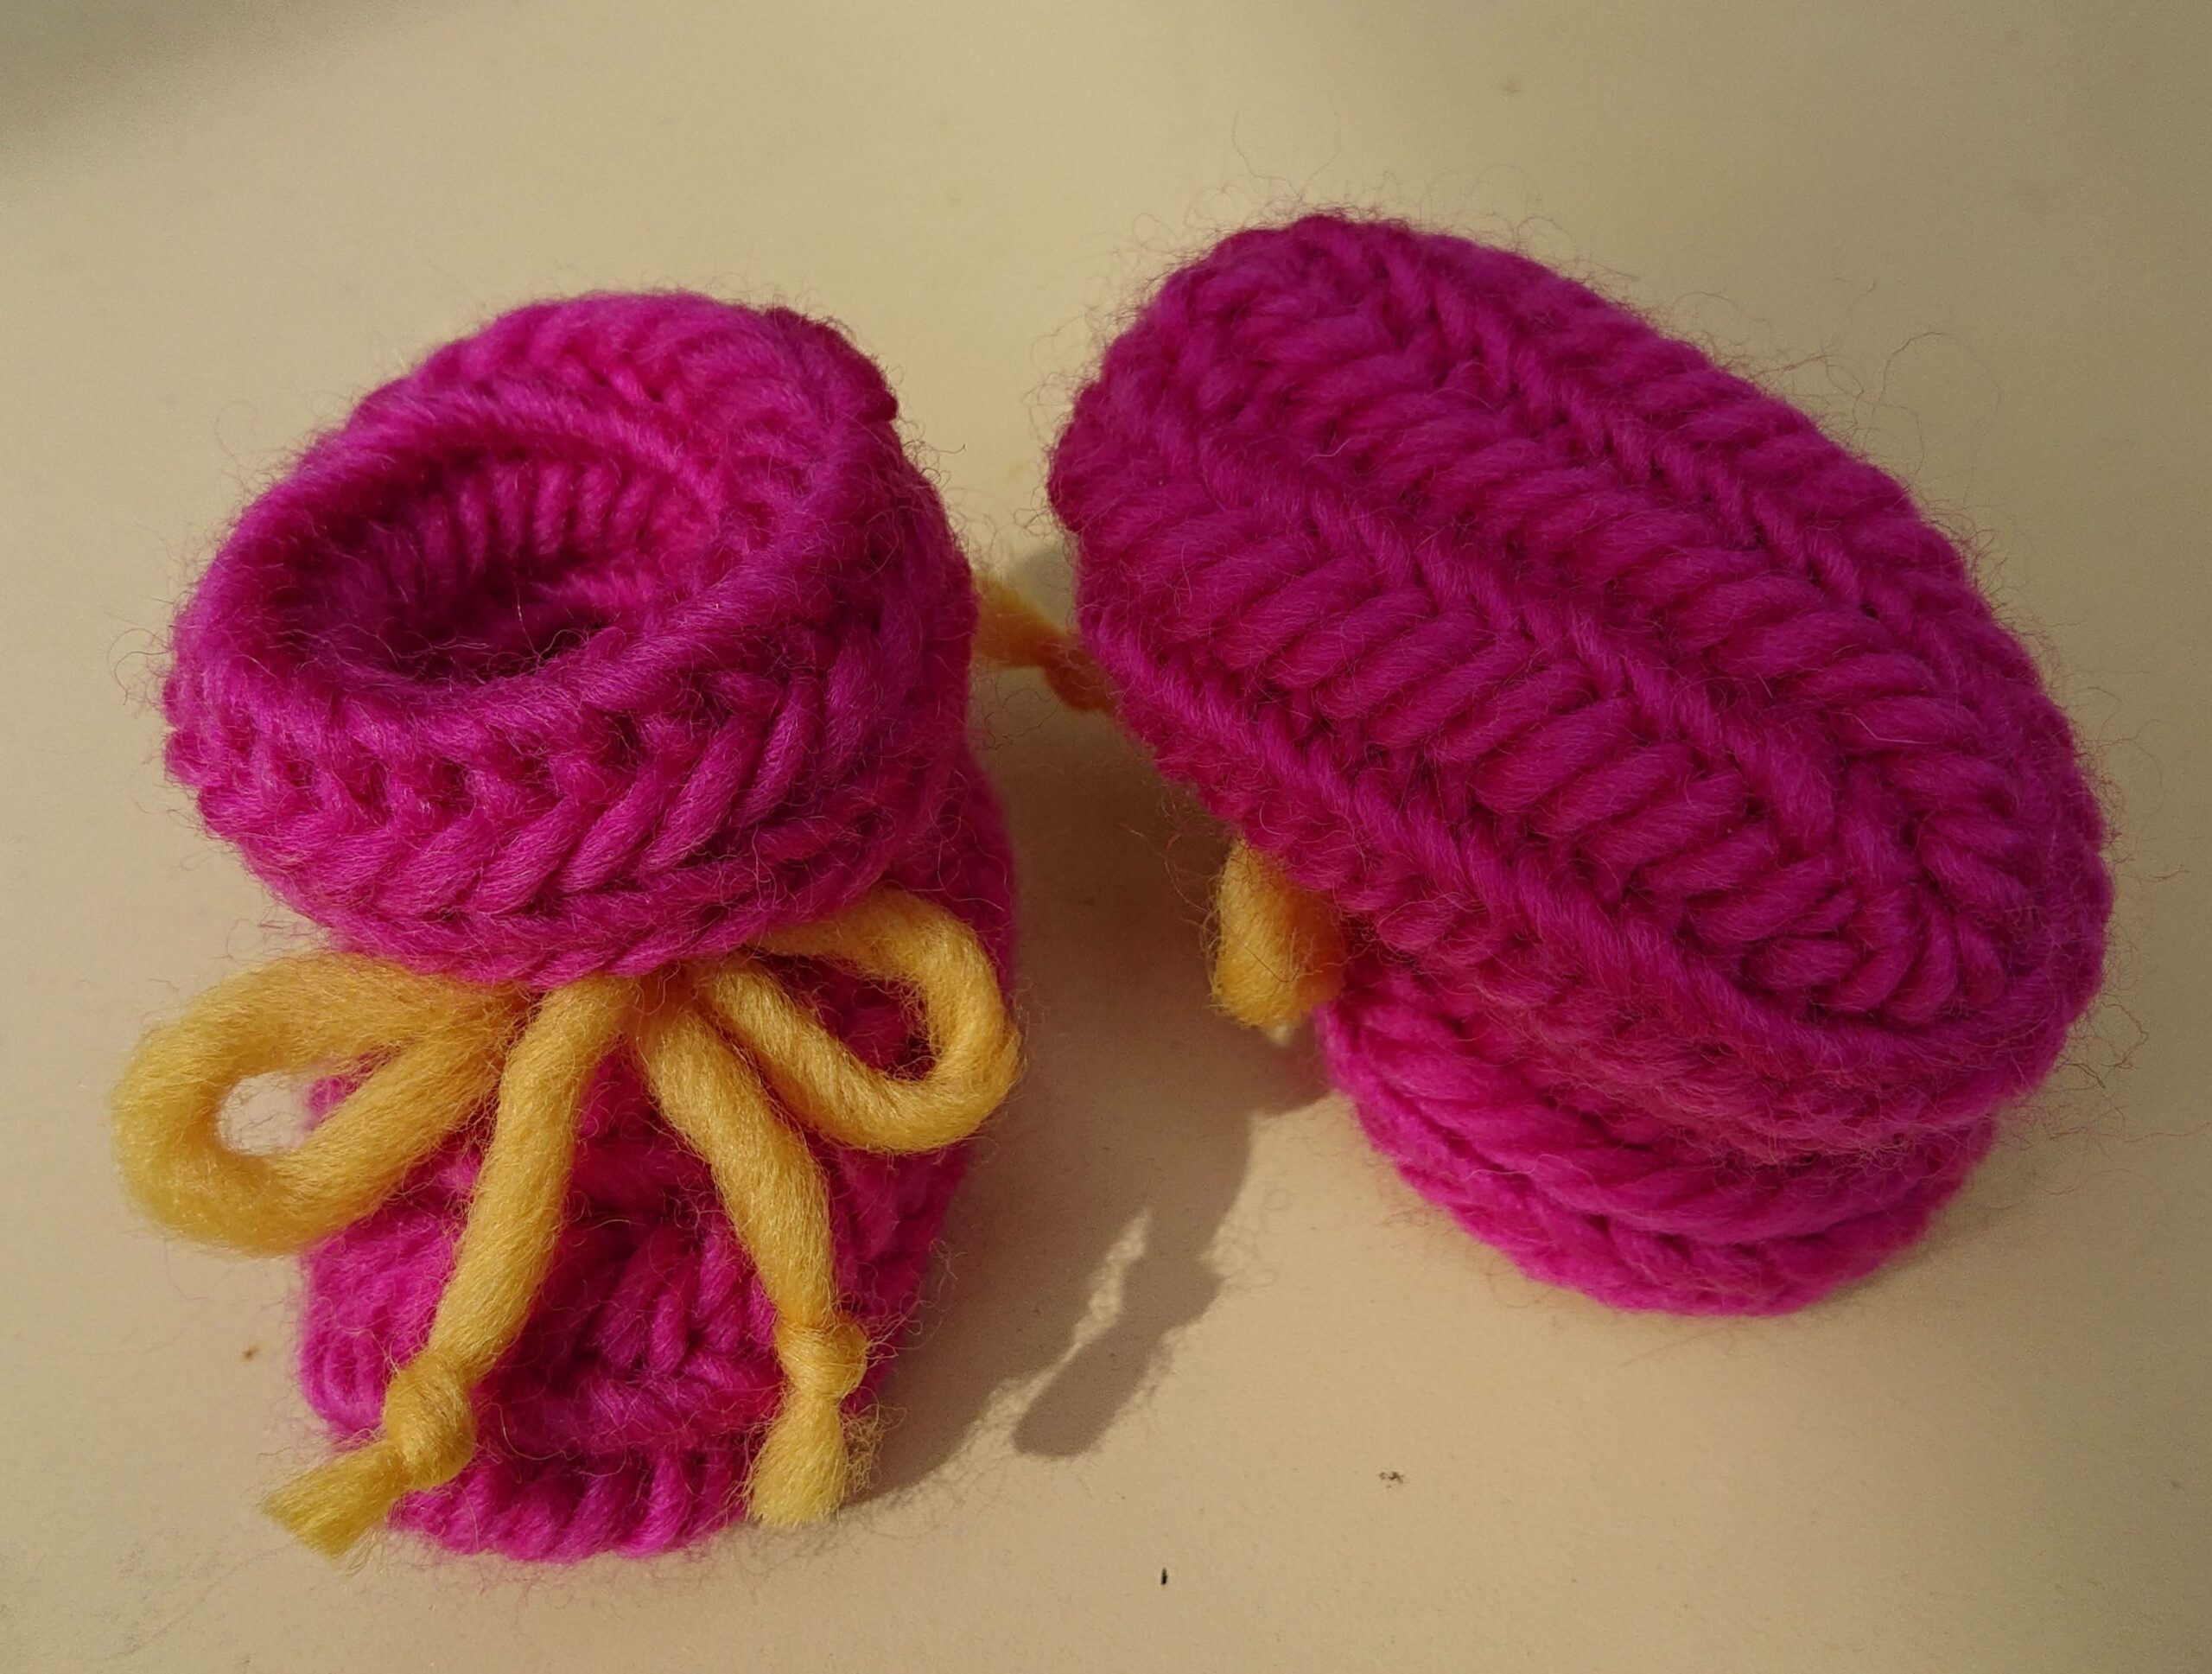
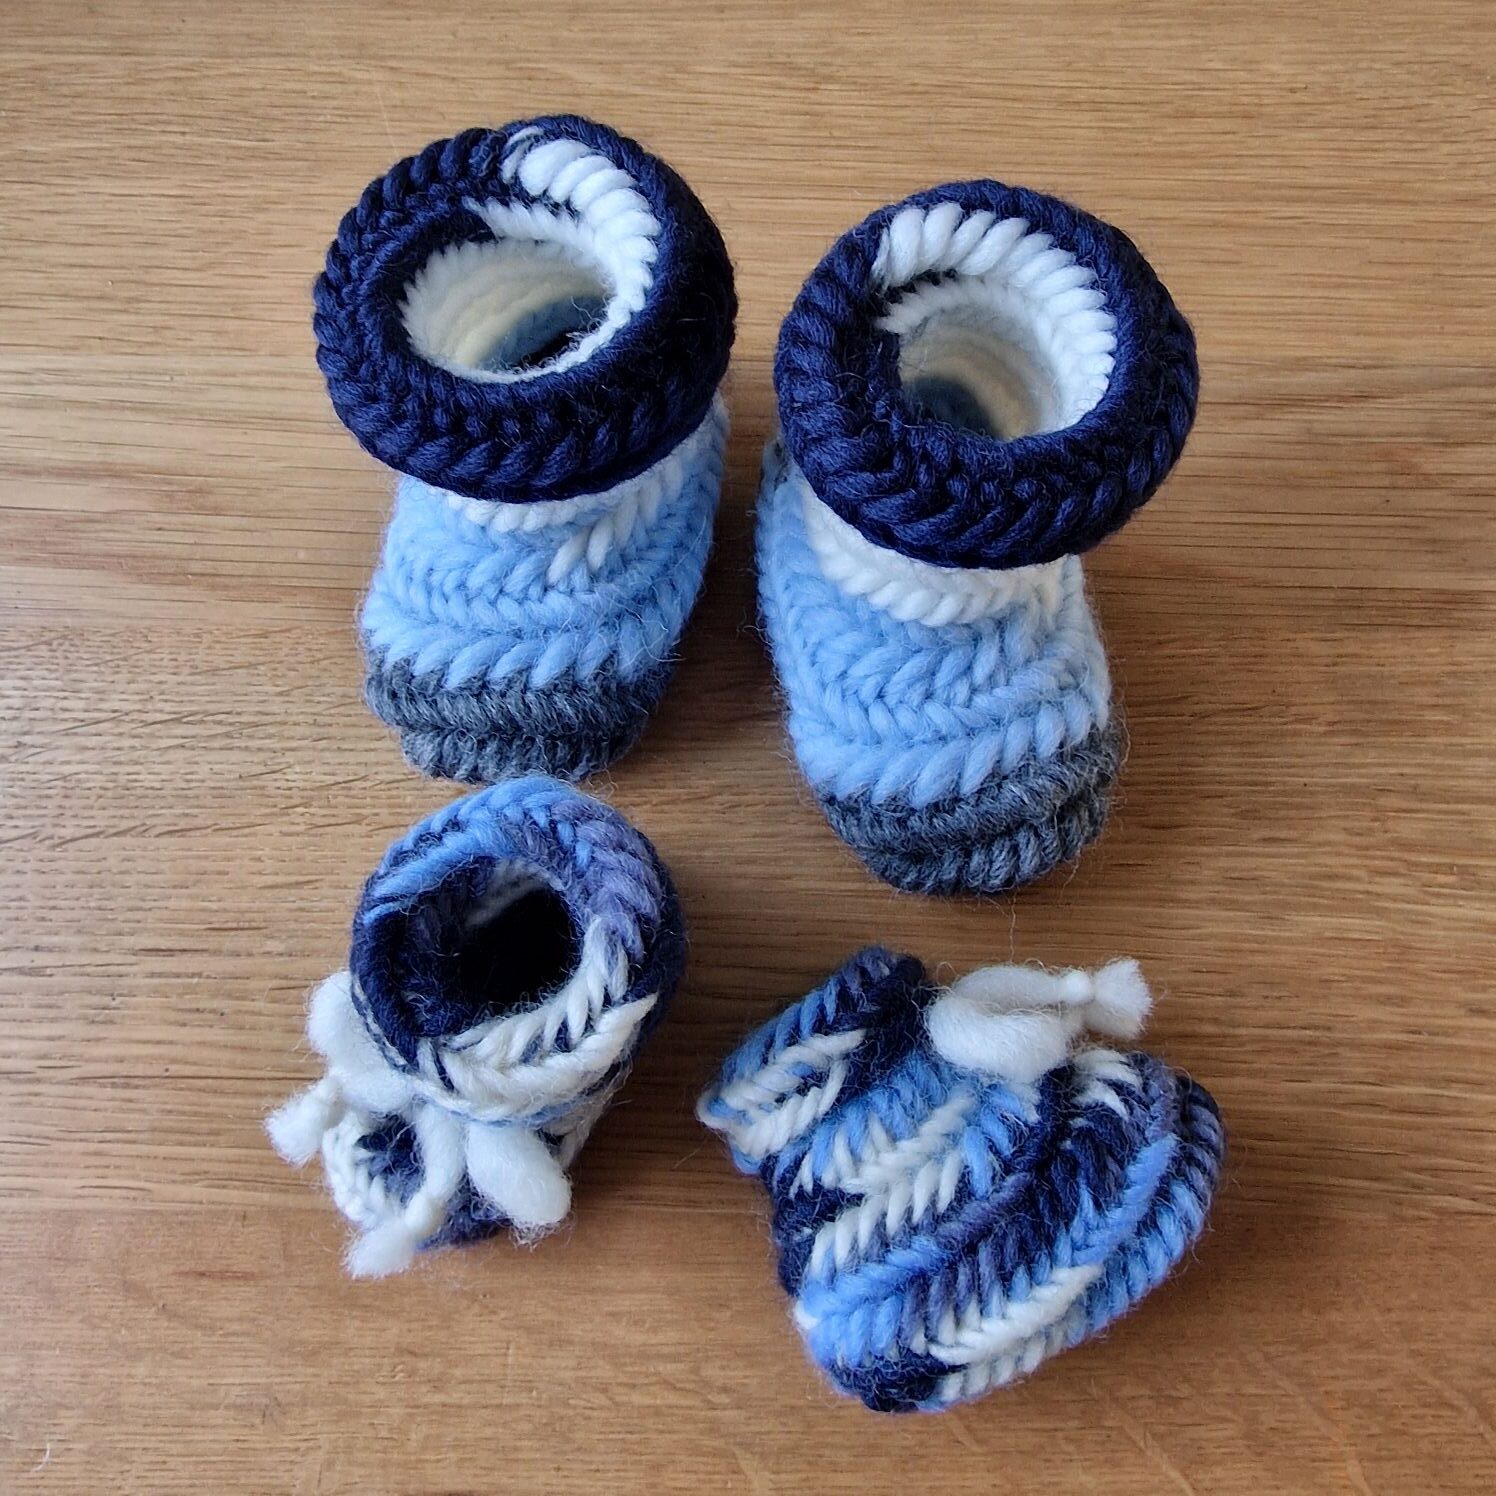
These were my first tries, and now i have to invent a good pattern.
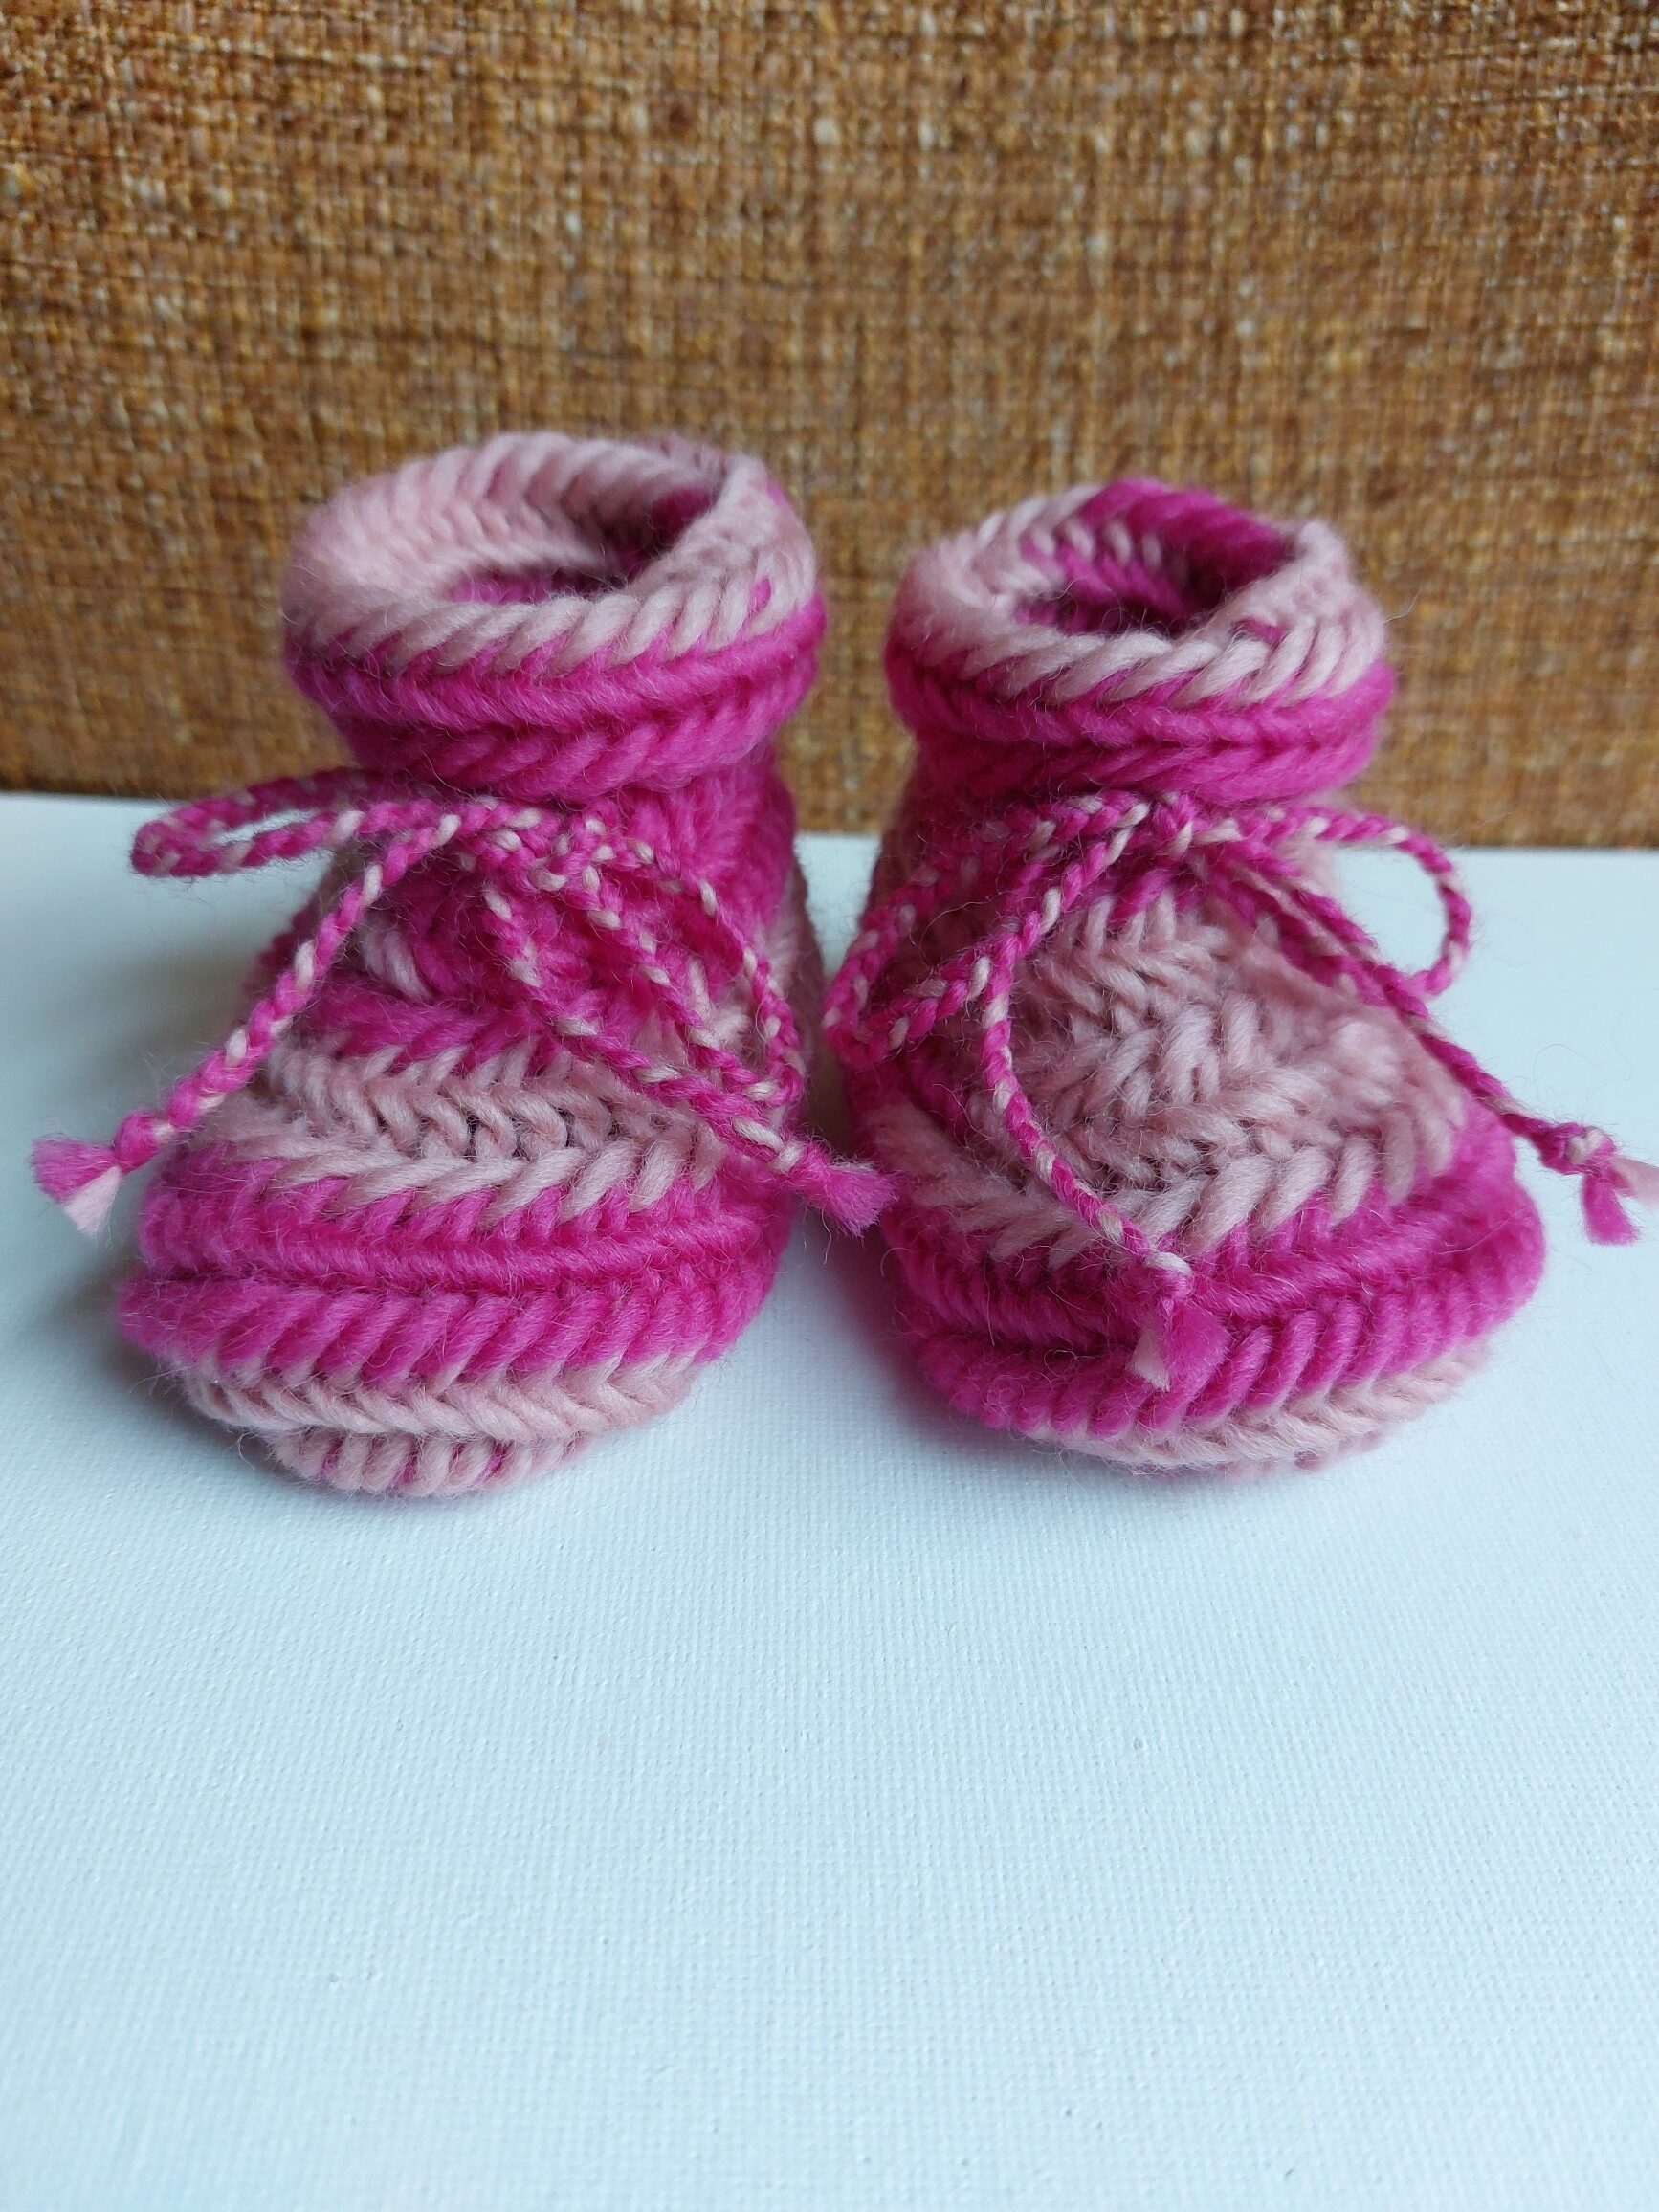
The bow ties were nice but not functional and needed replacing.
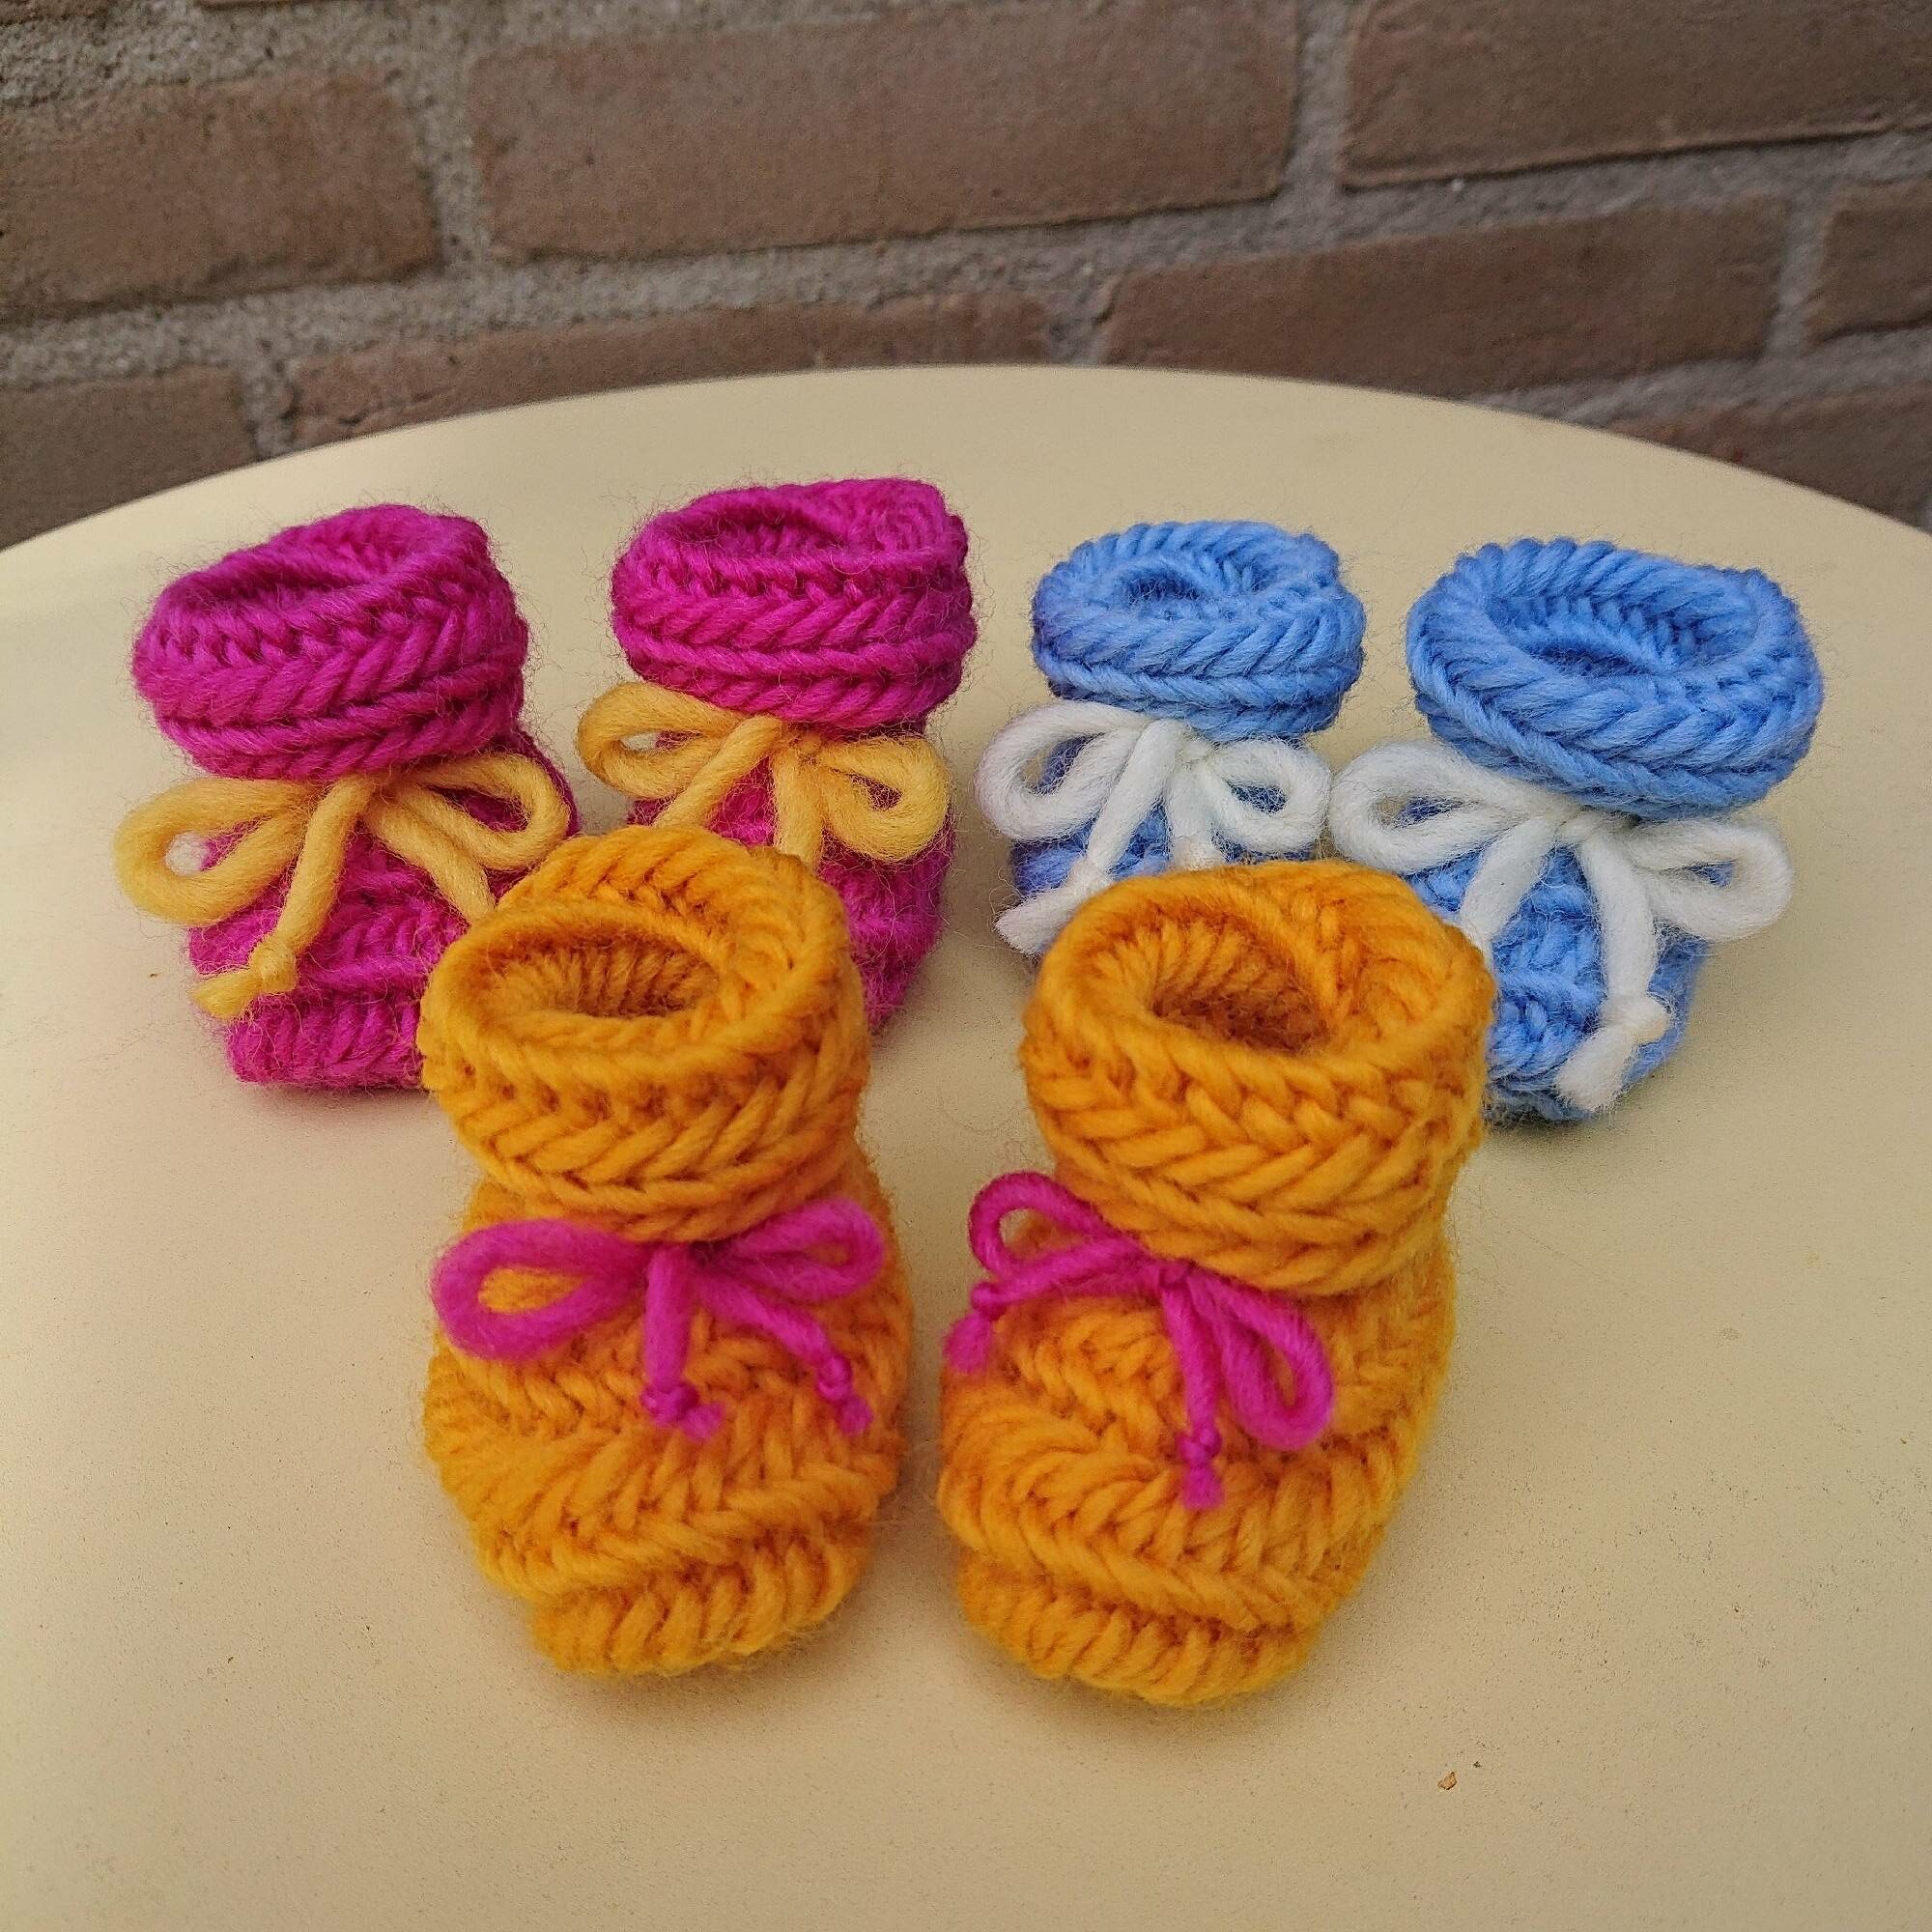
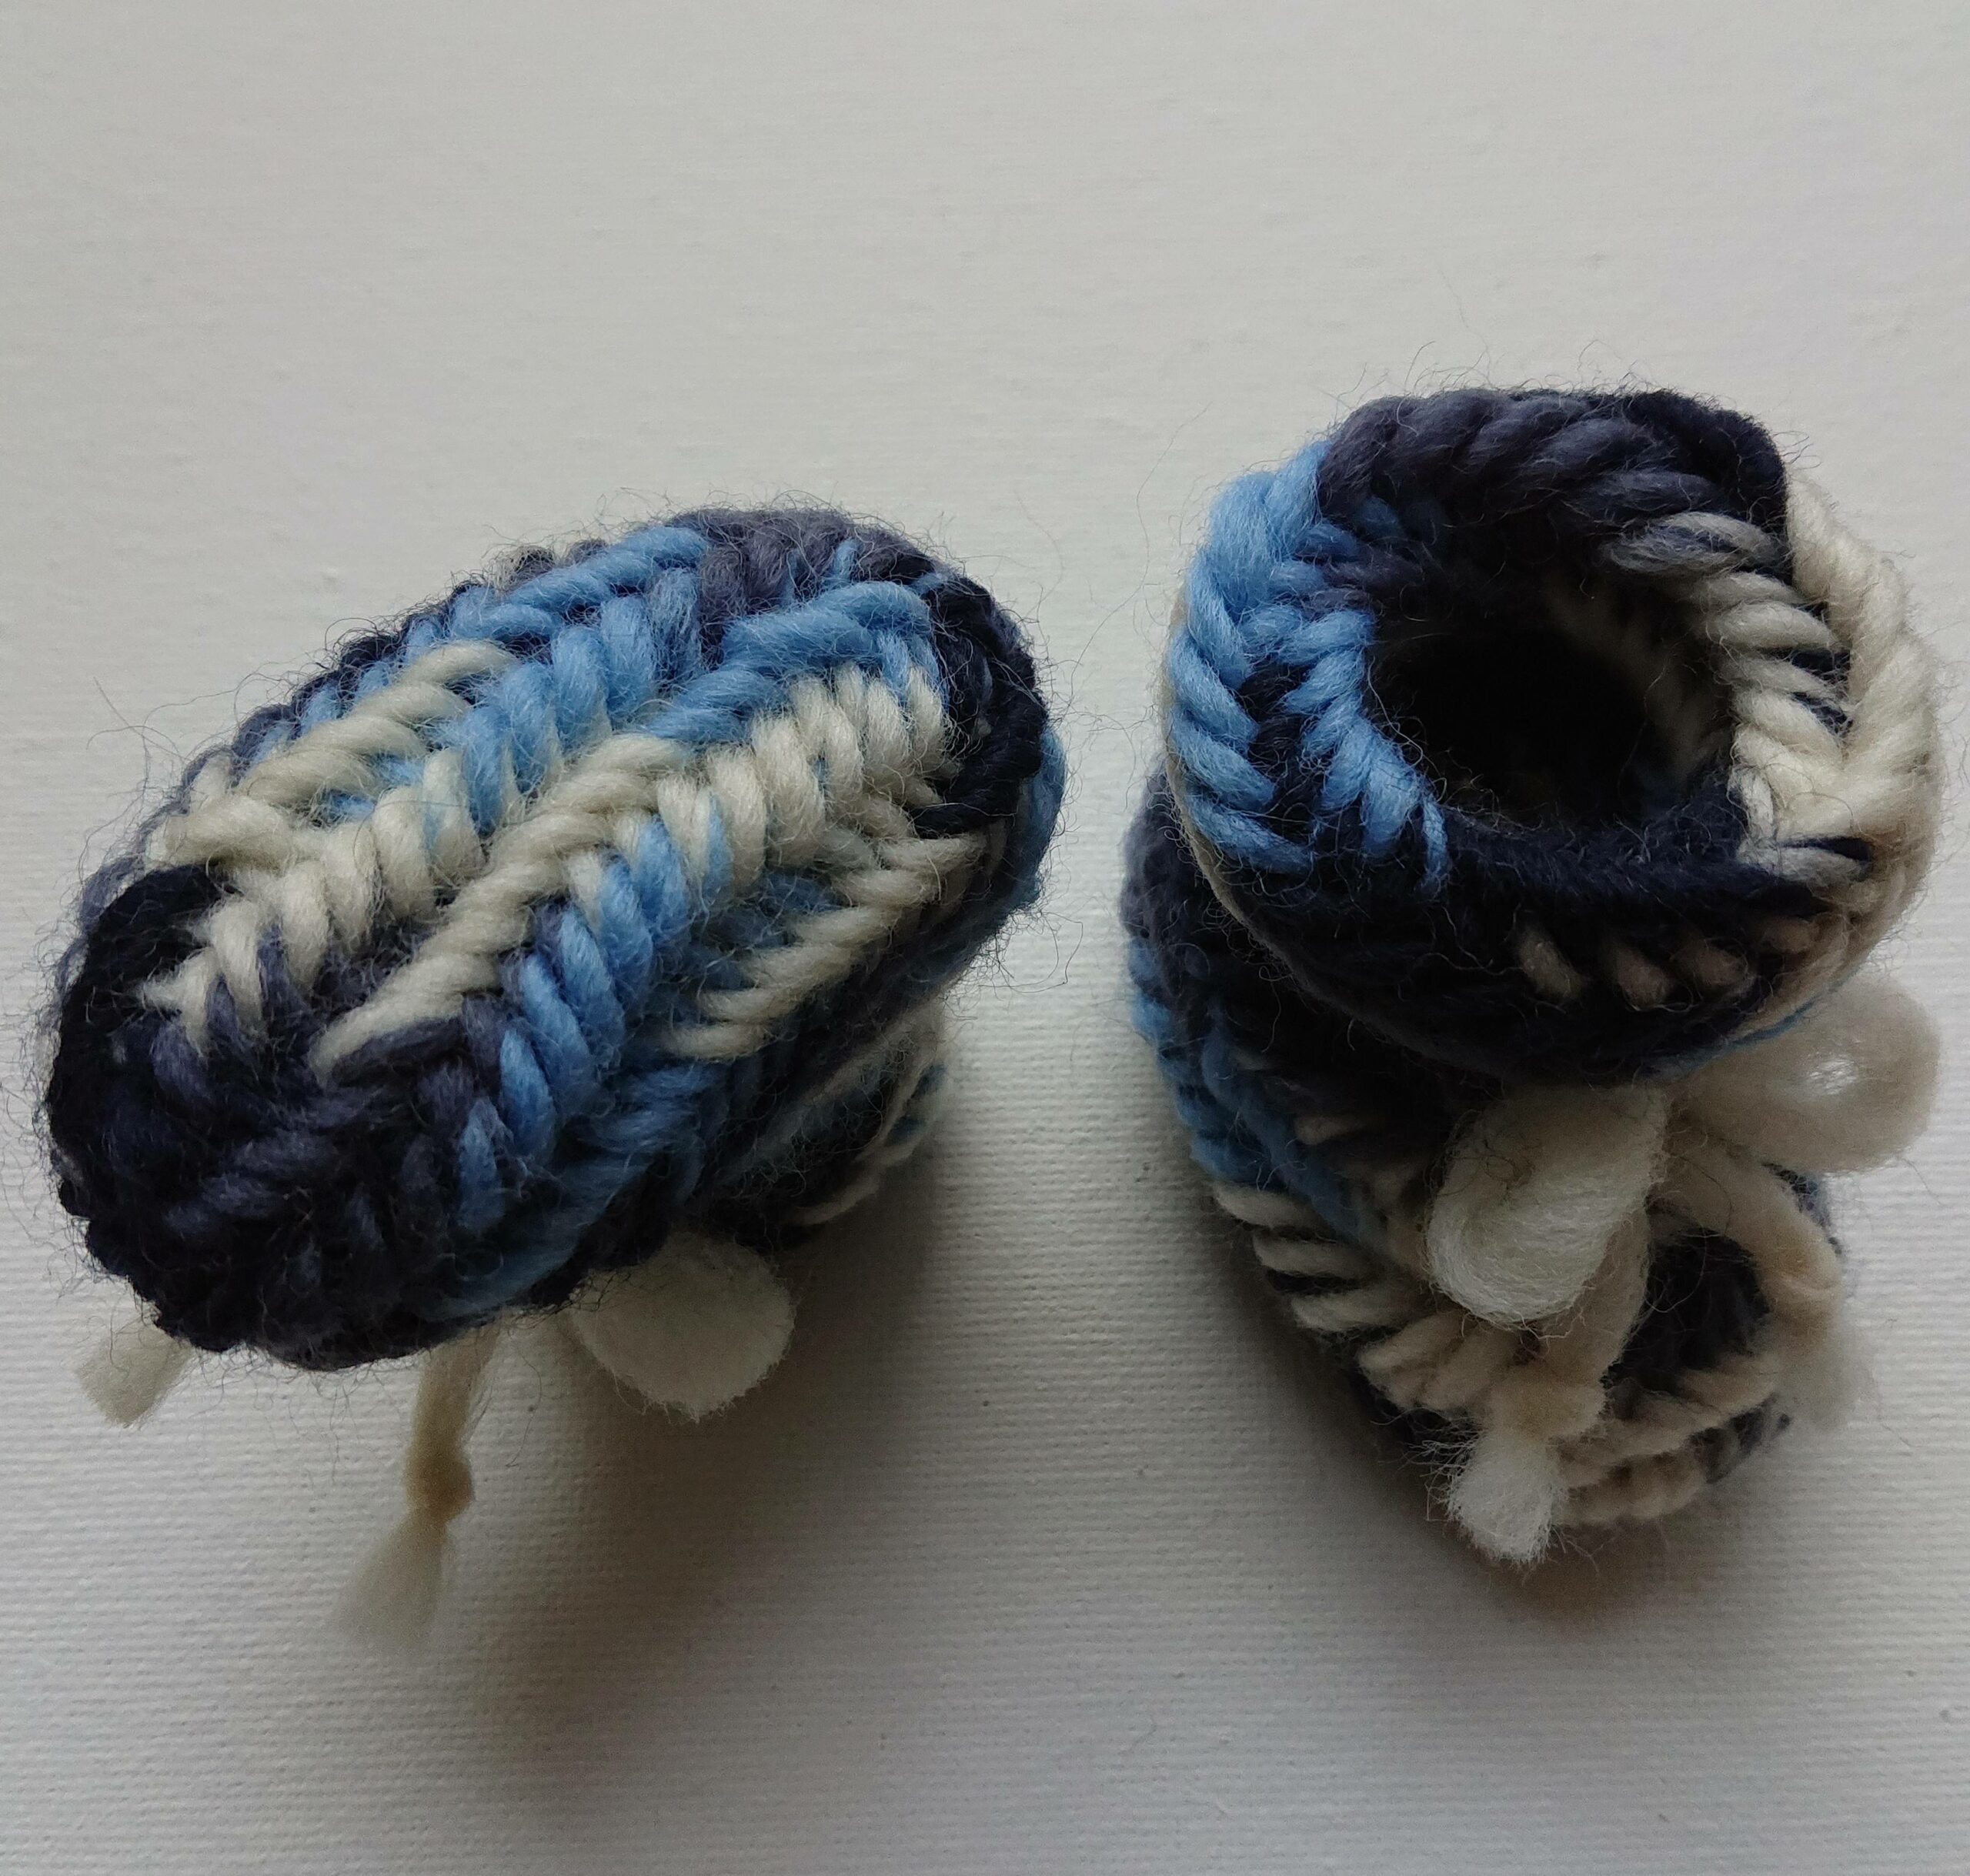
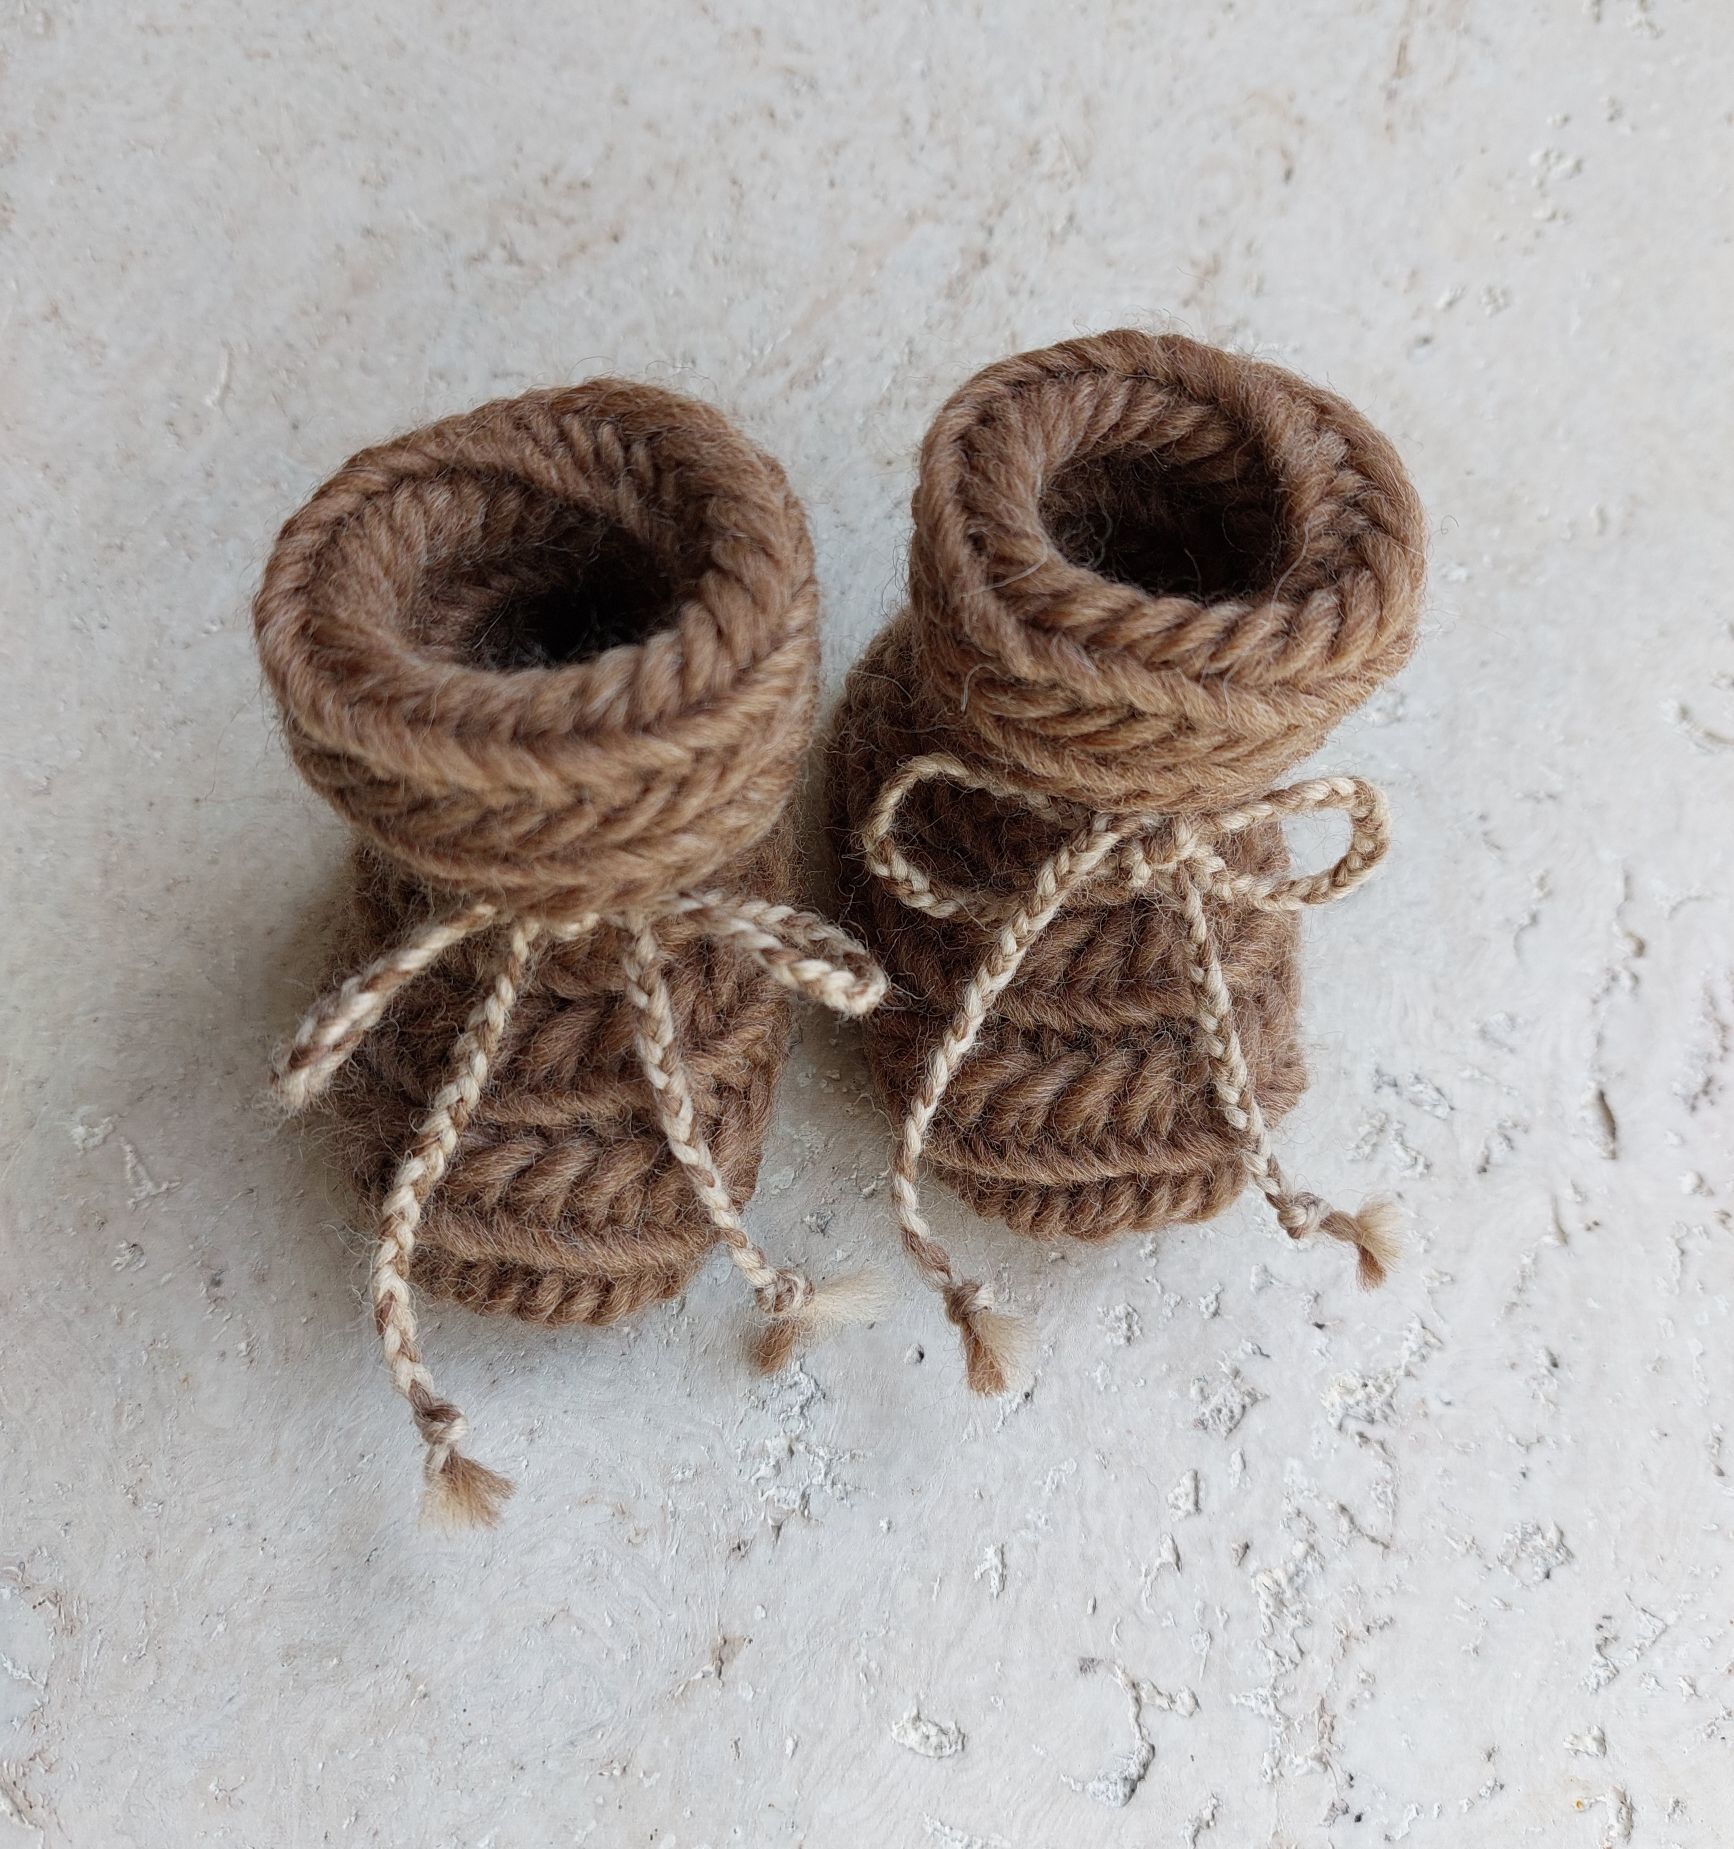
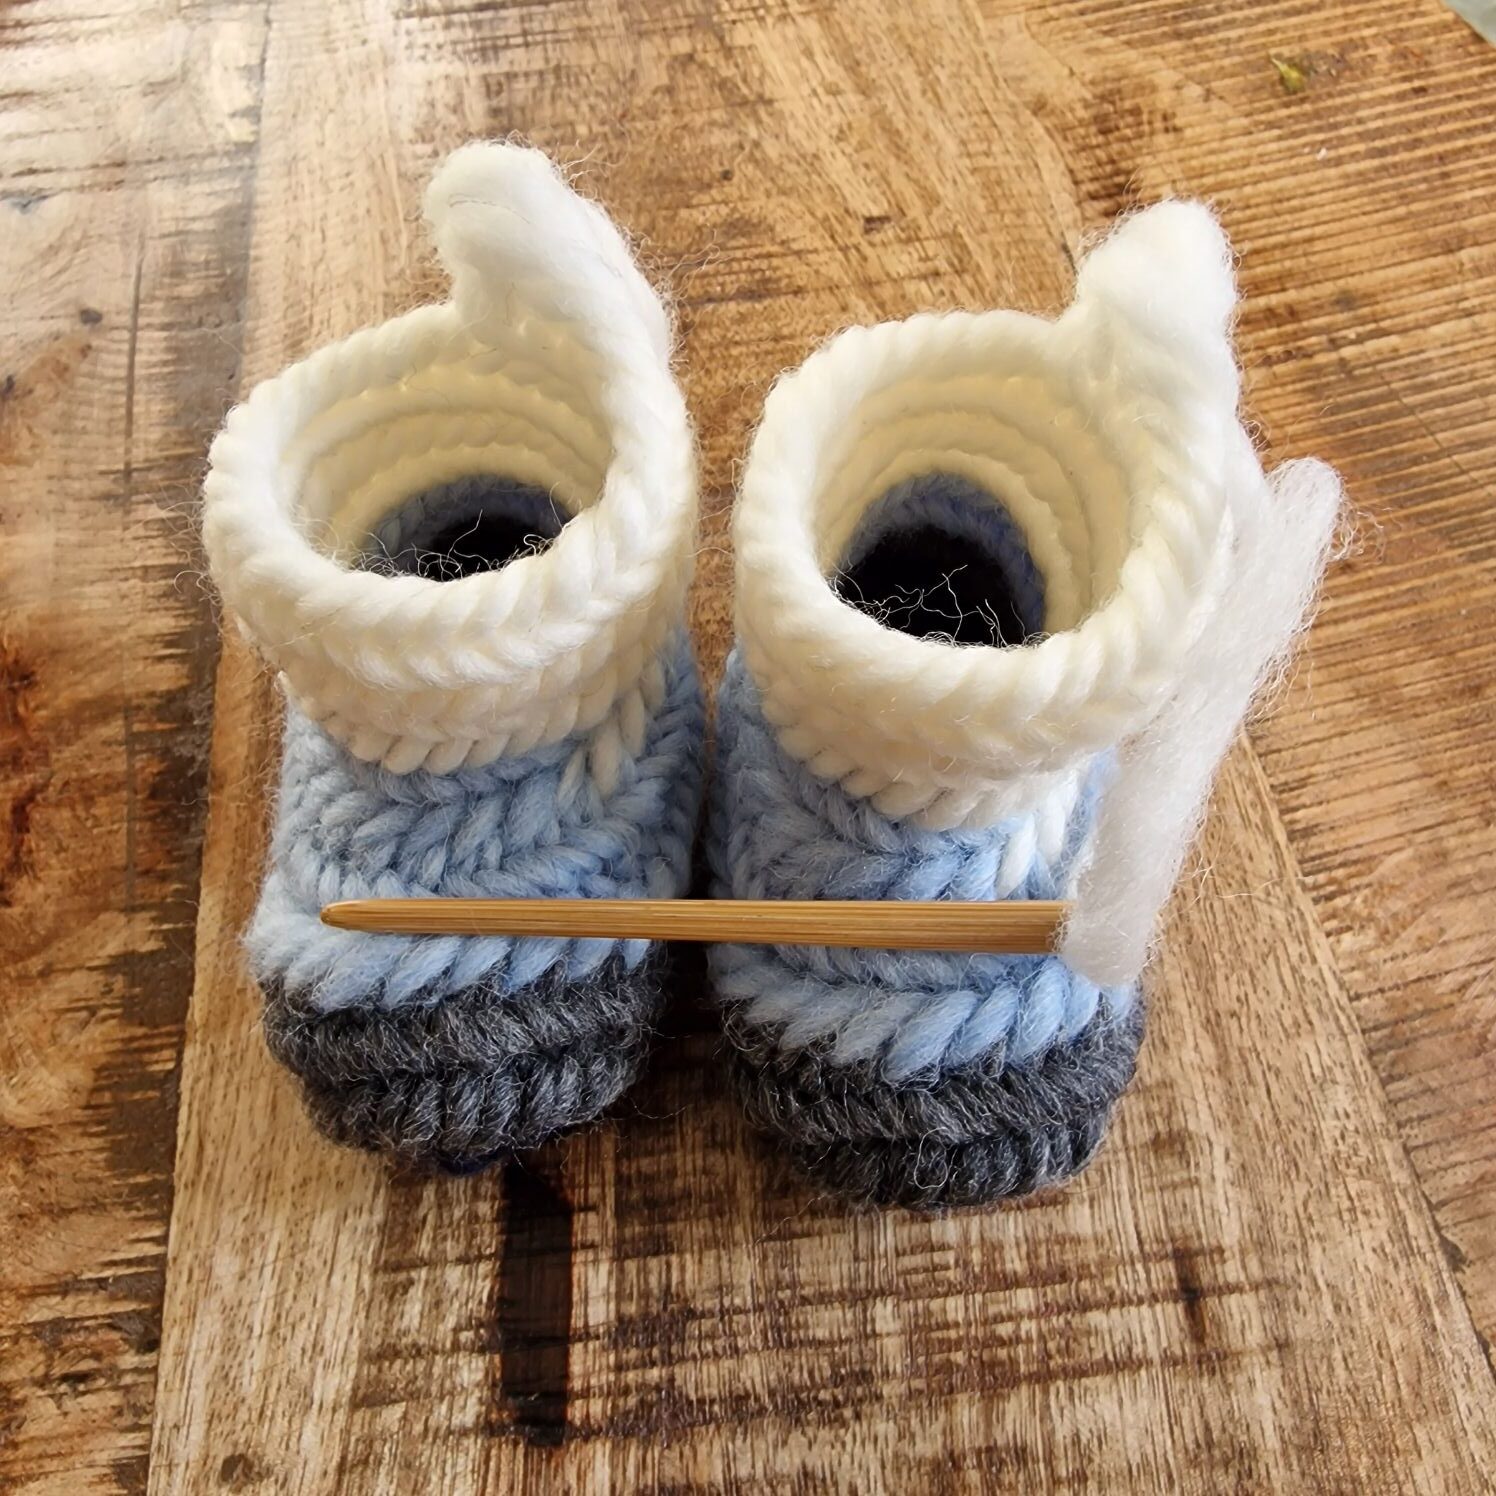
In the next foto you can see my baby socks, which i am quite proud of.
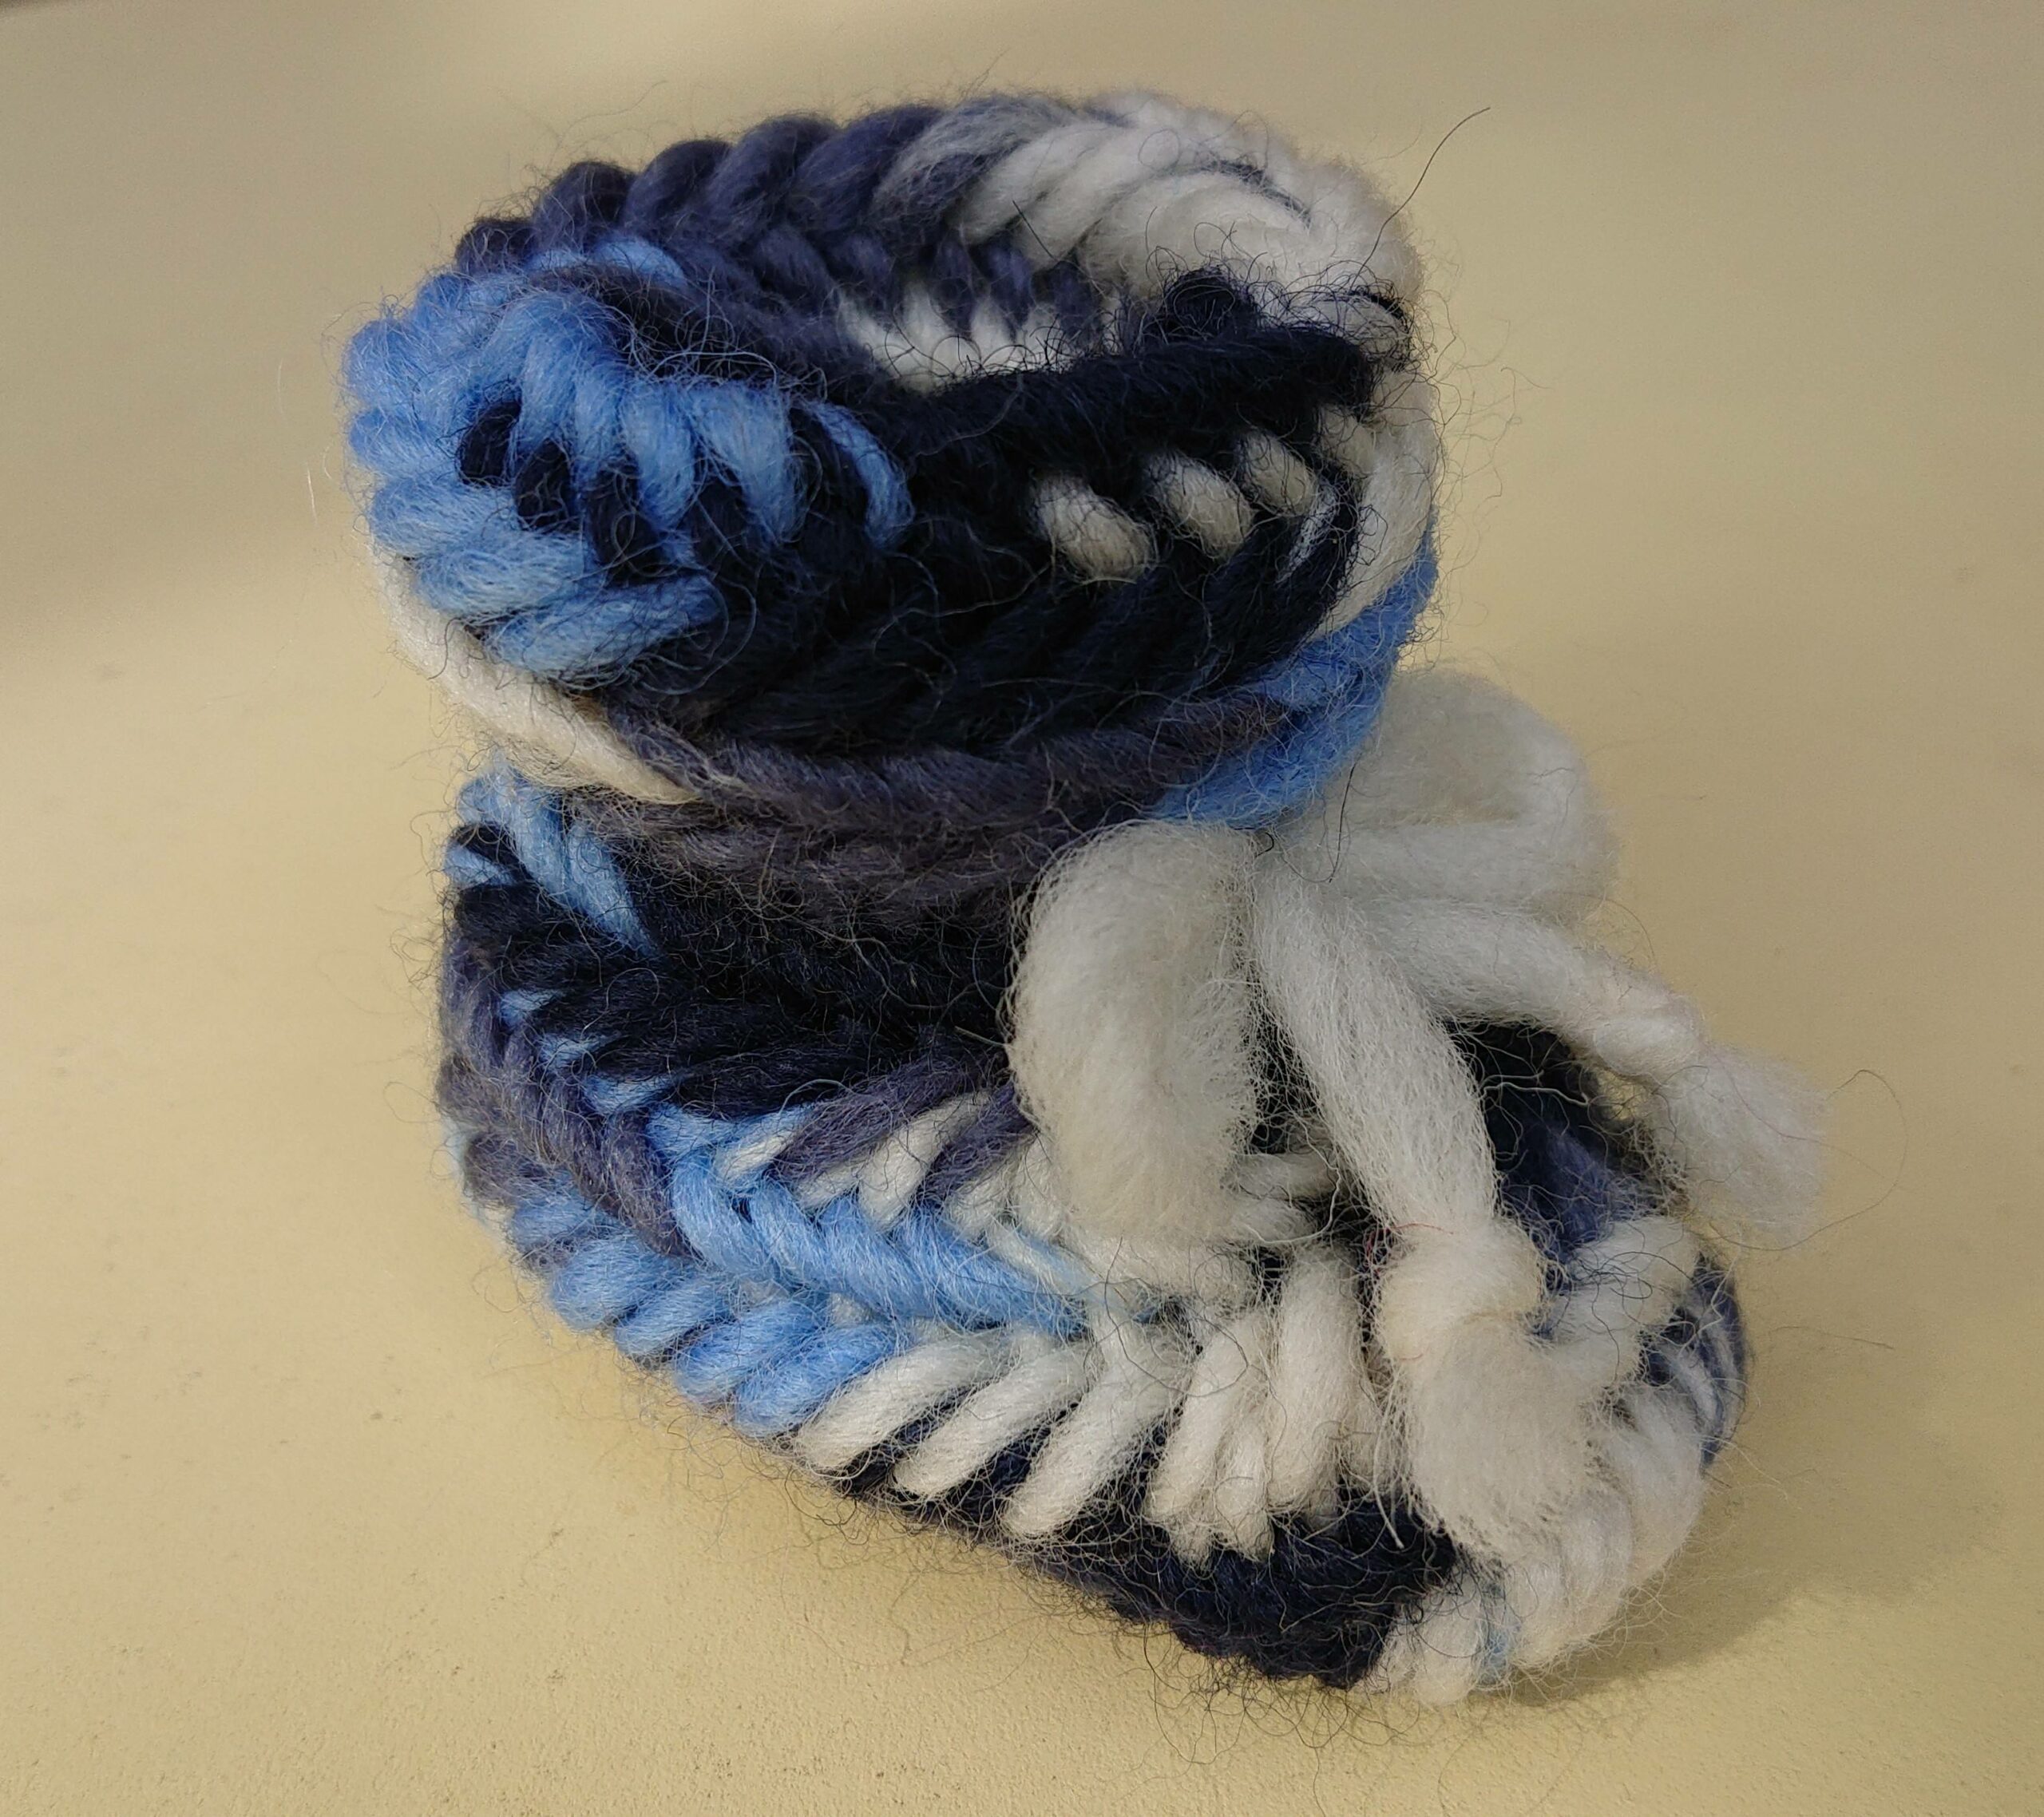
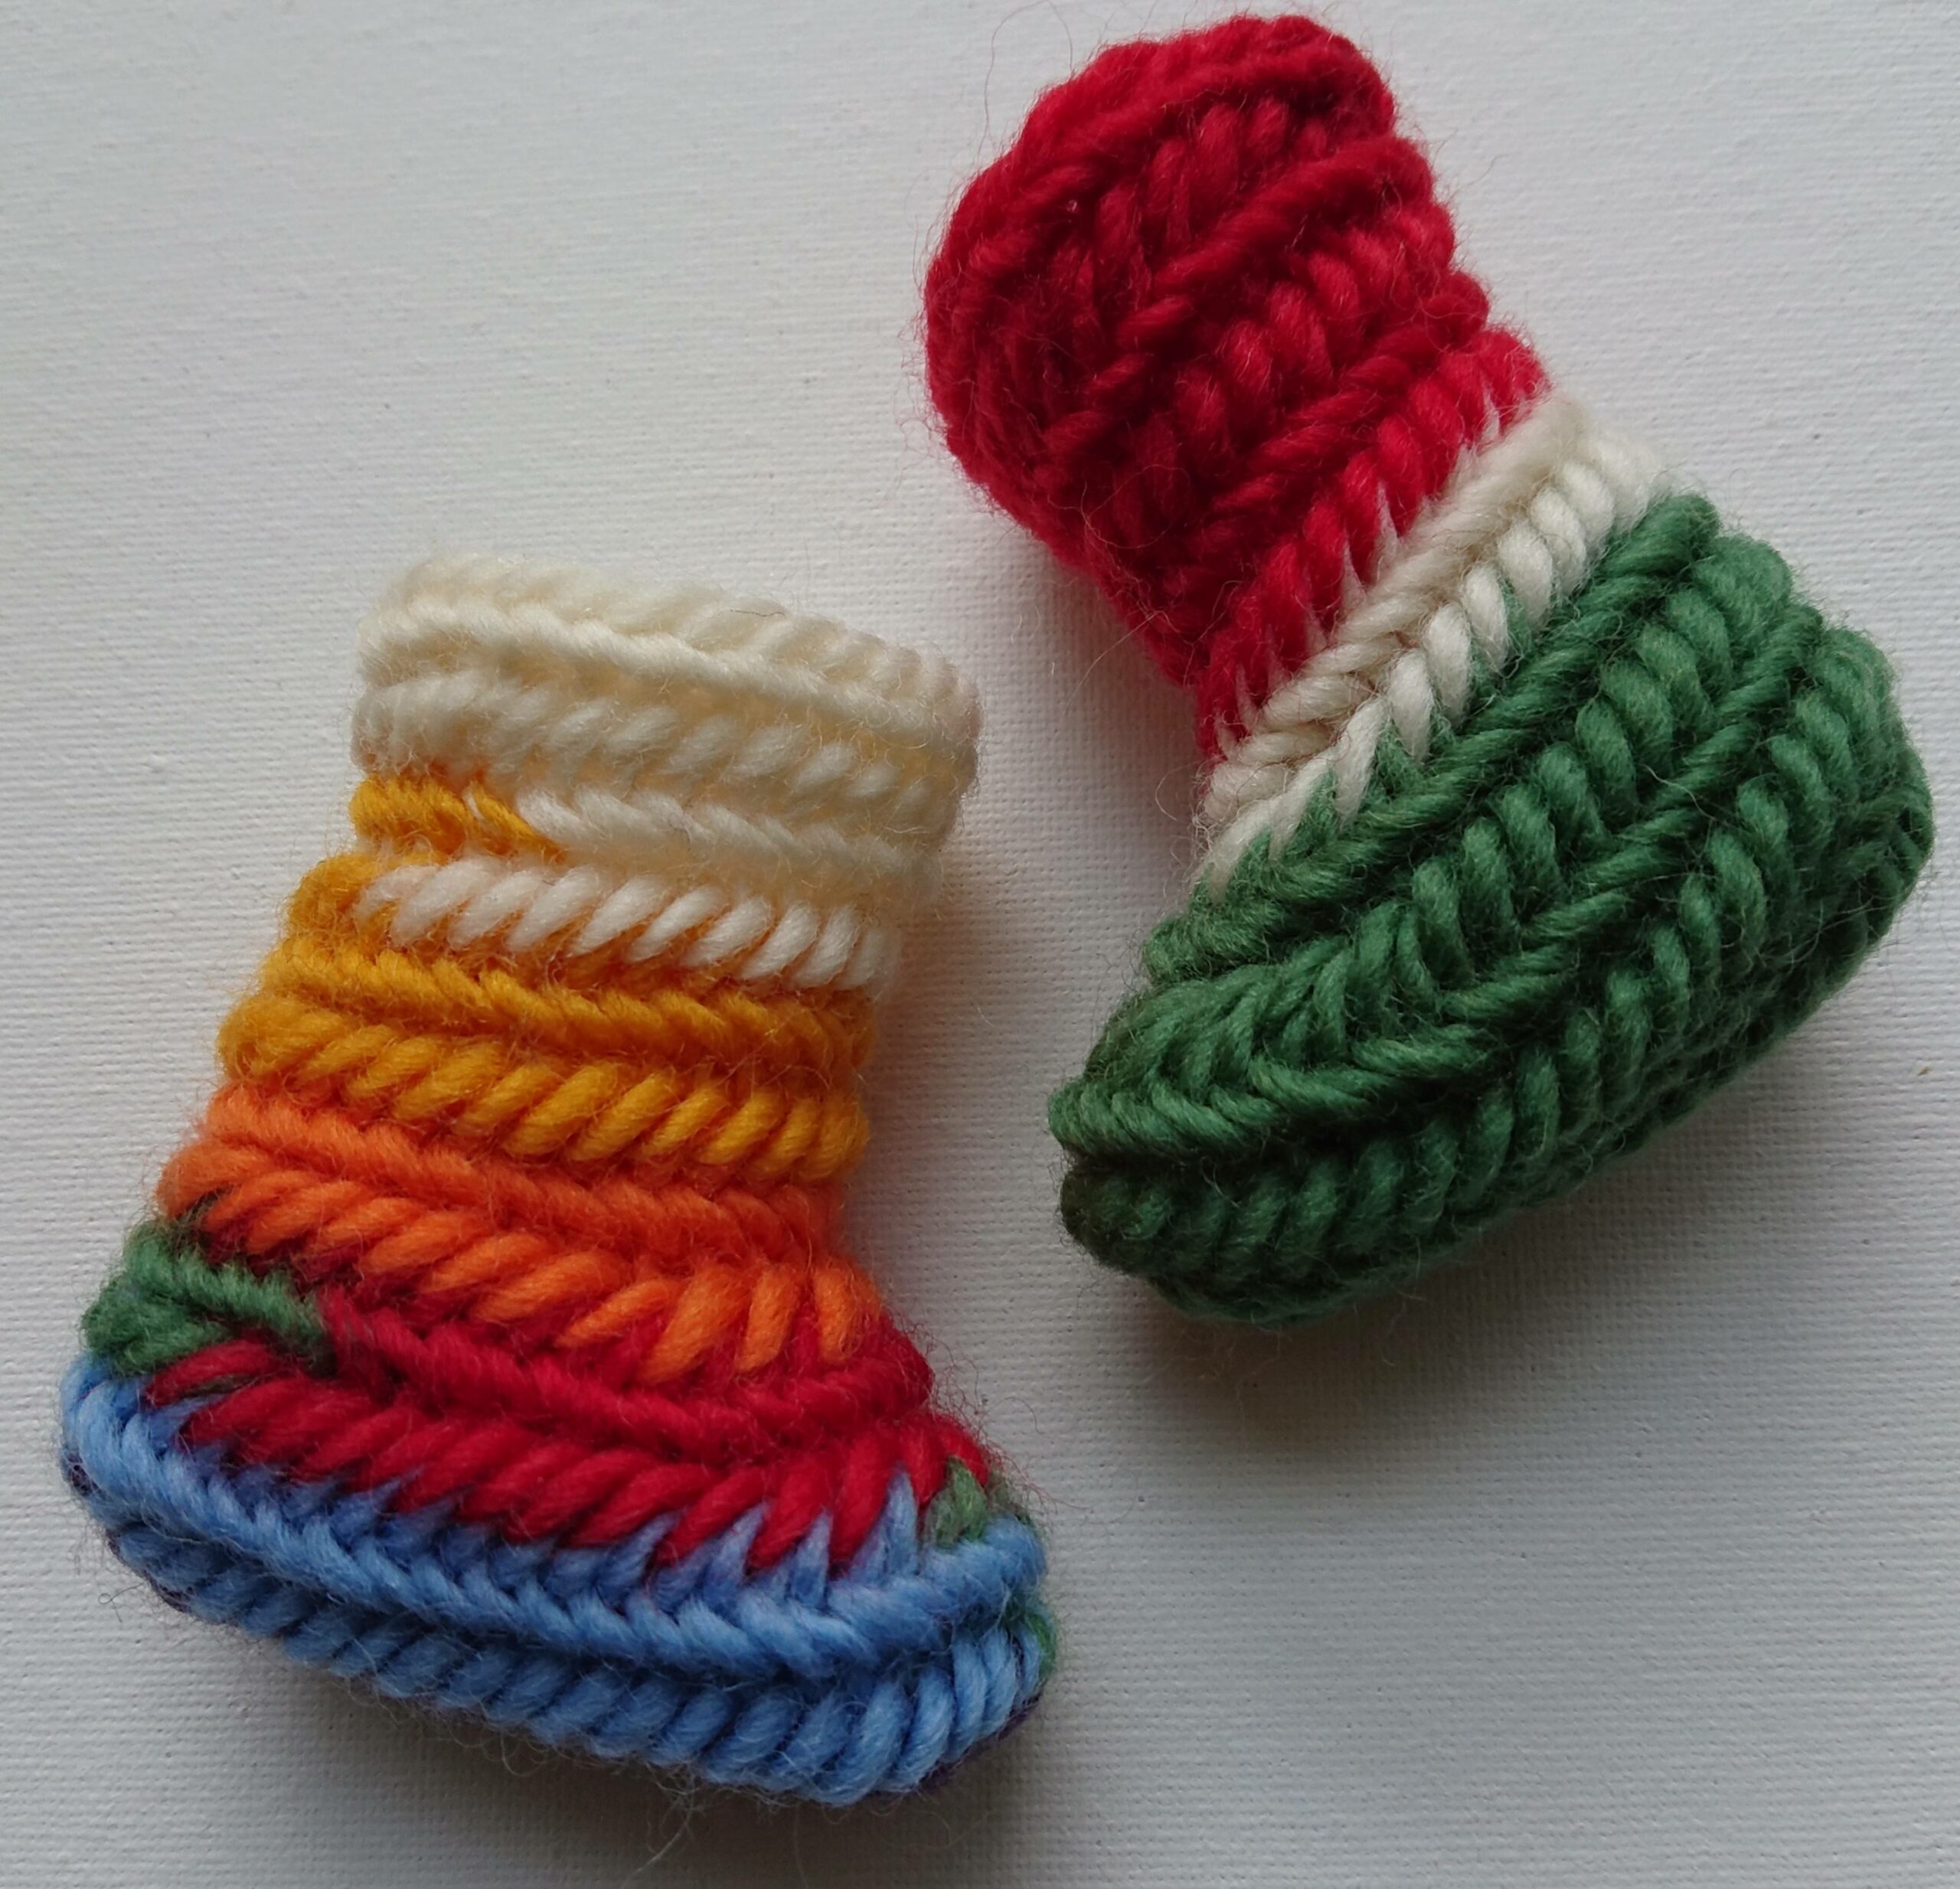
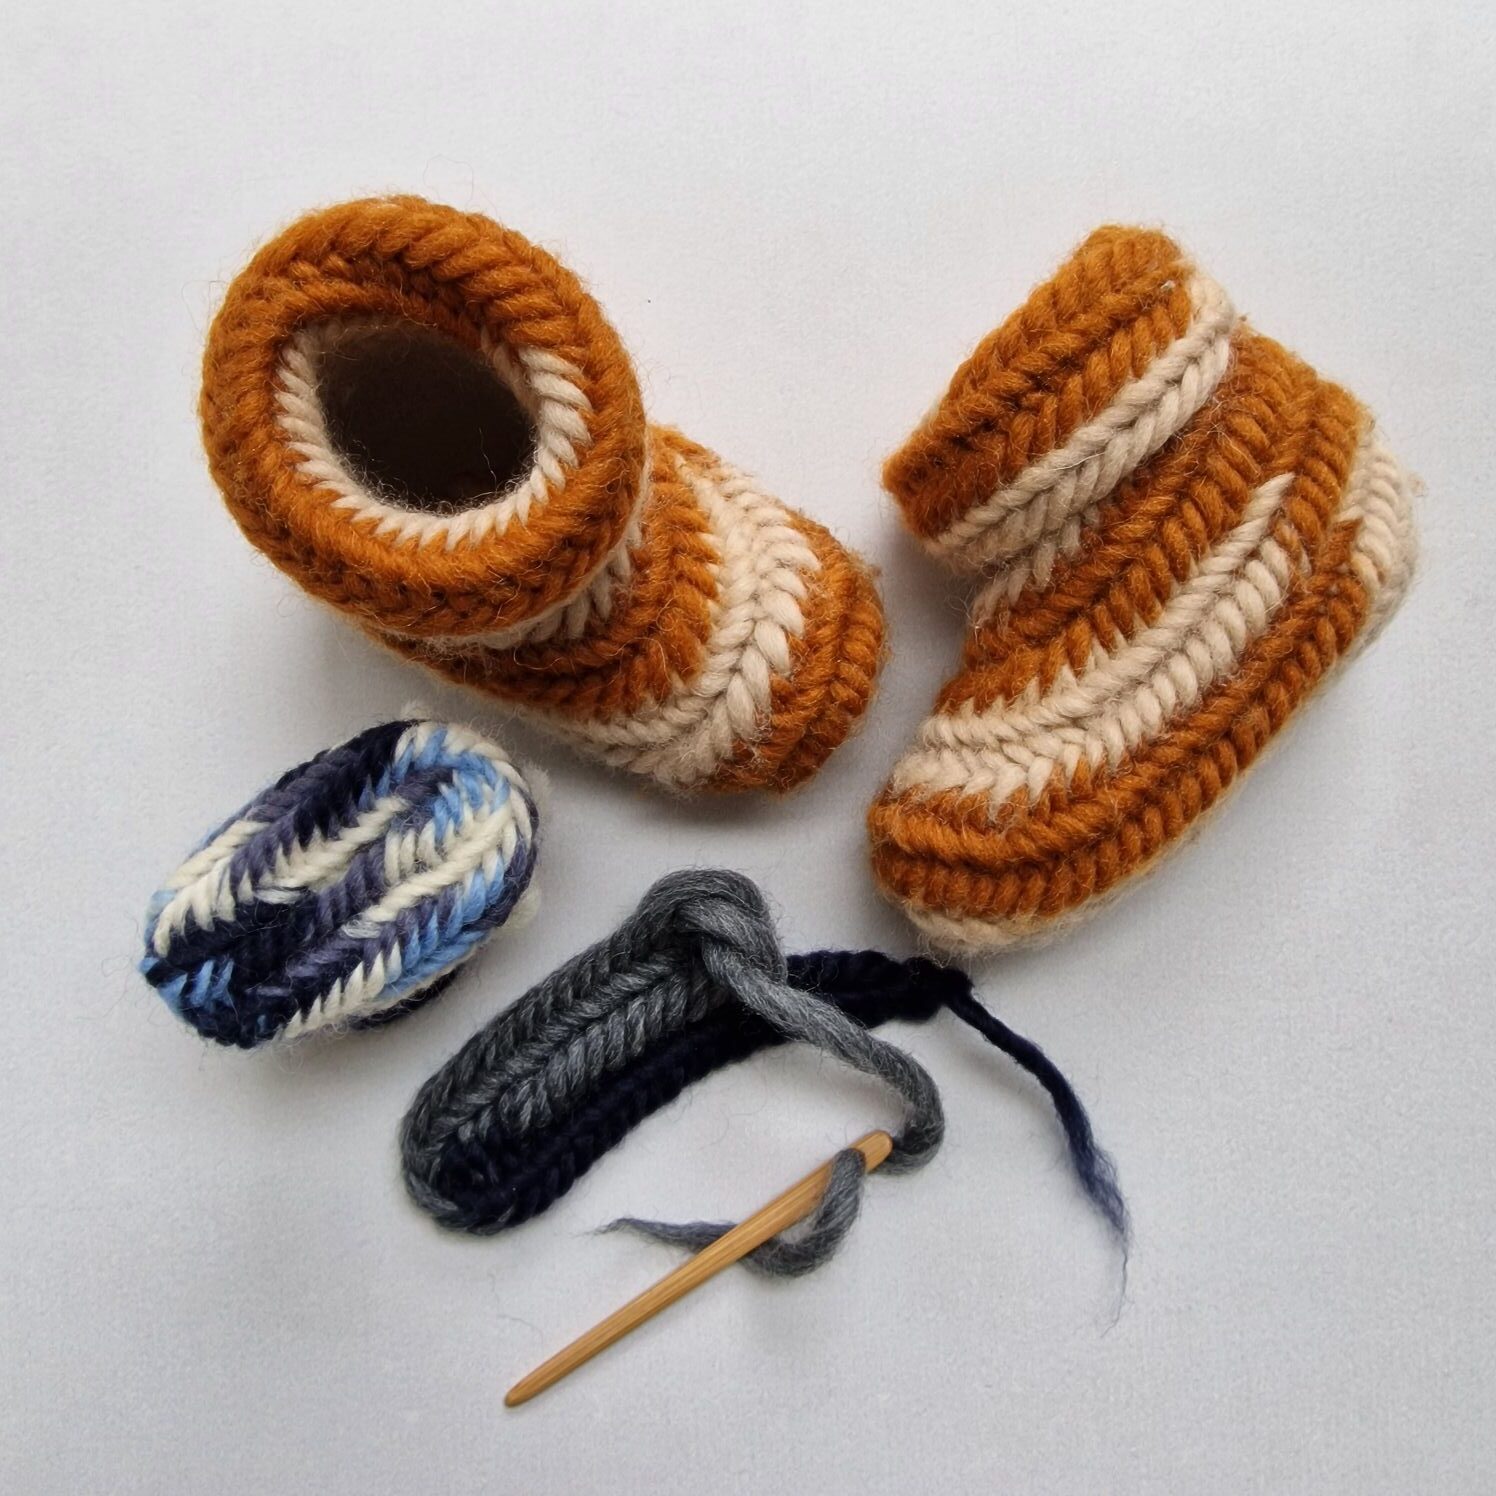
Delft blue tiles color palette was the inspiration of the next sock.
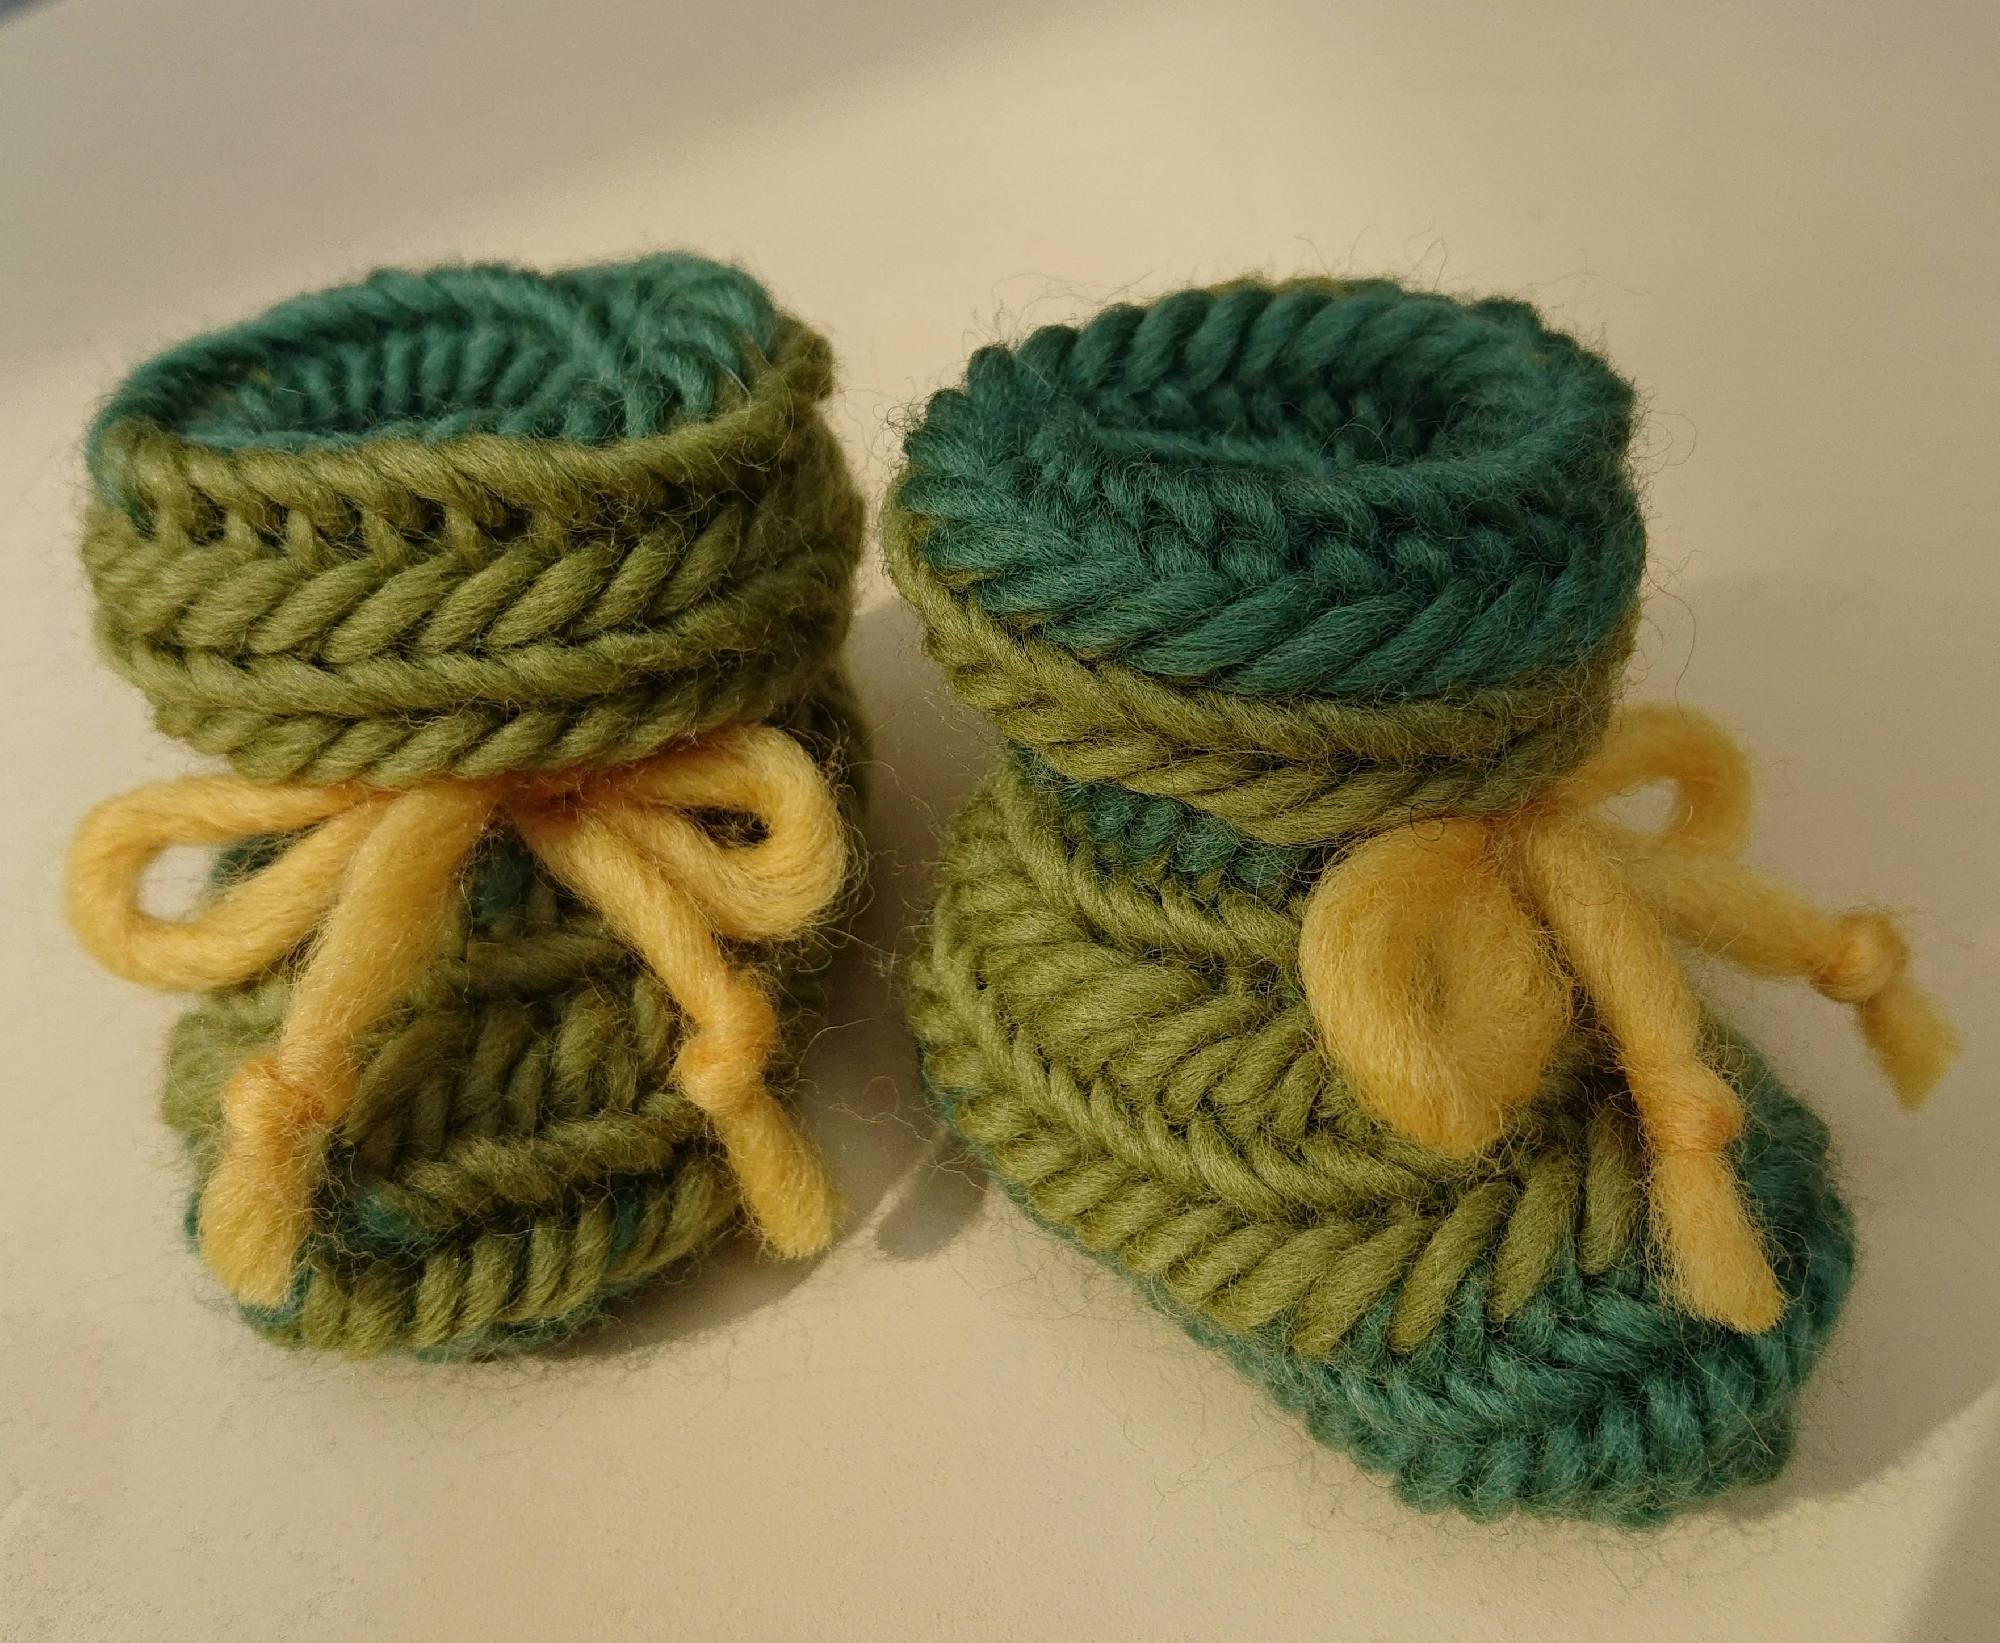
Green colors was next example .
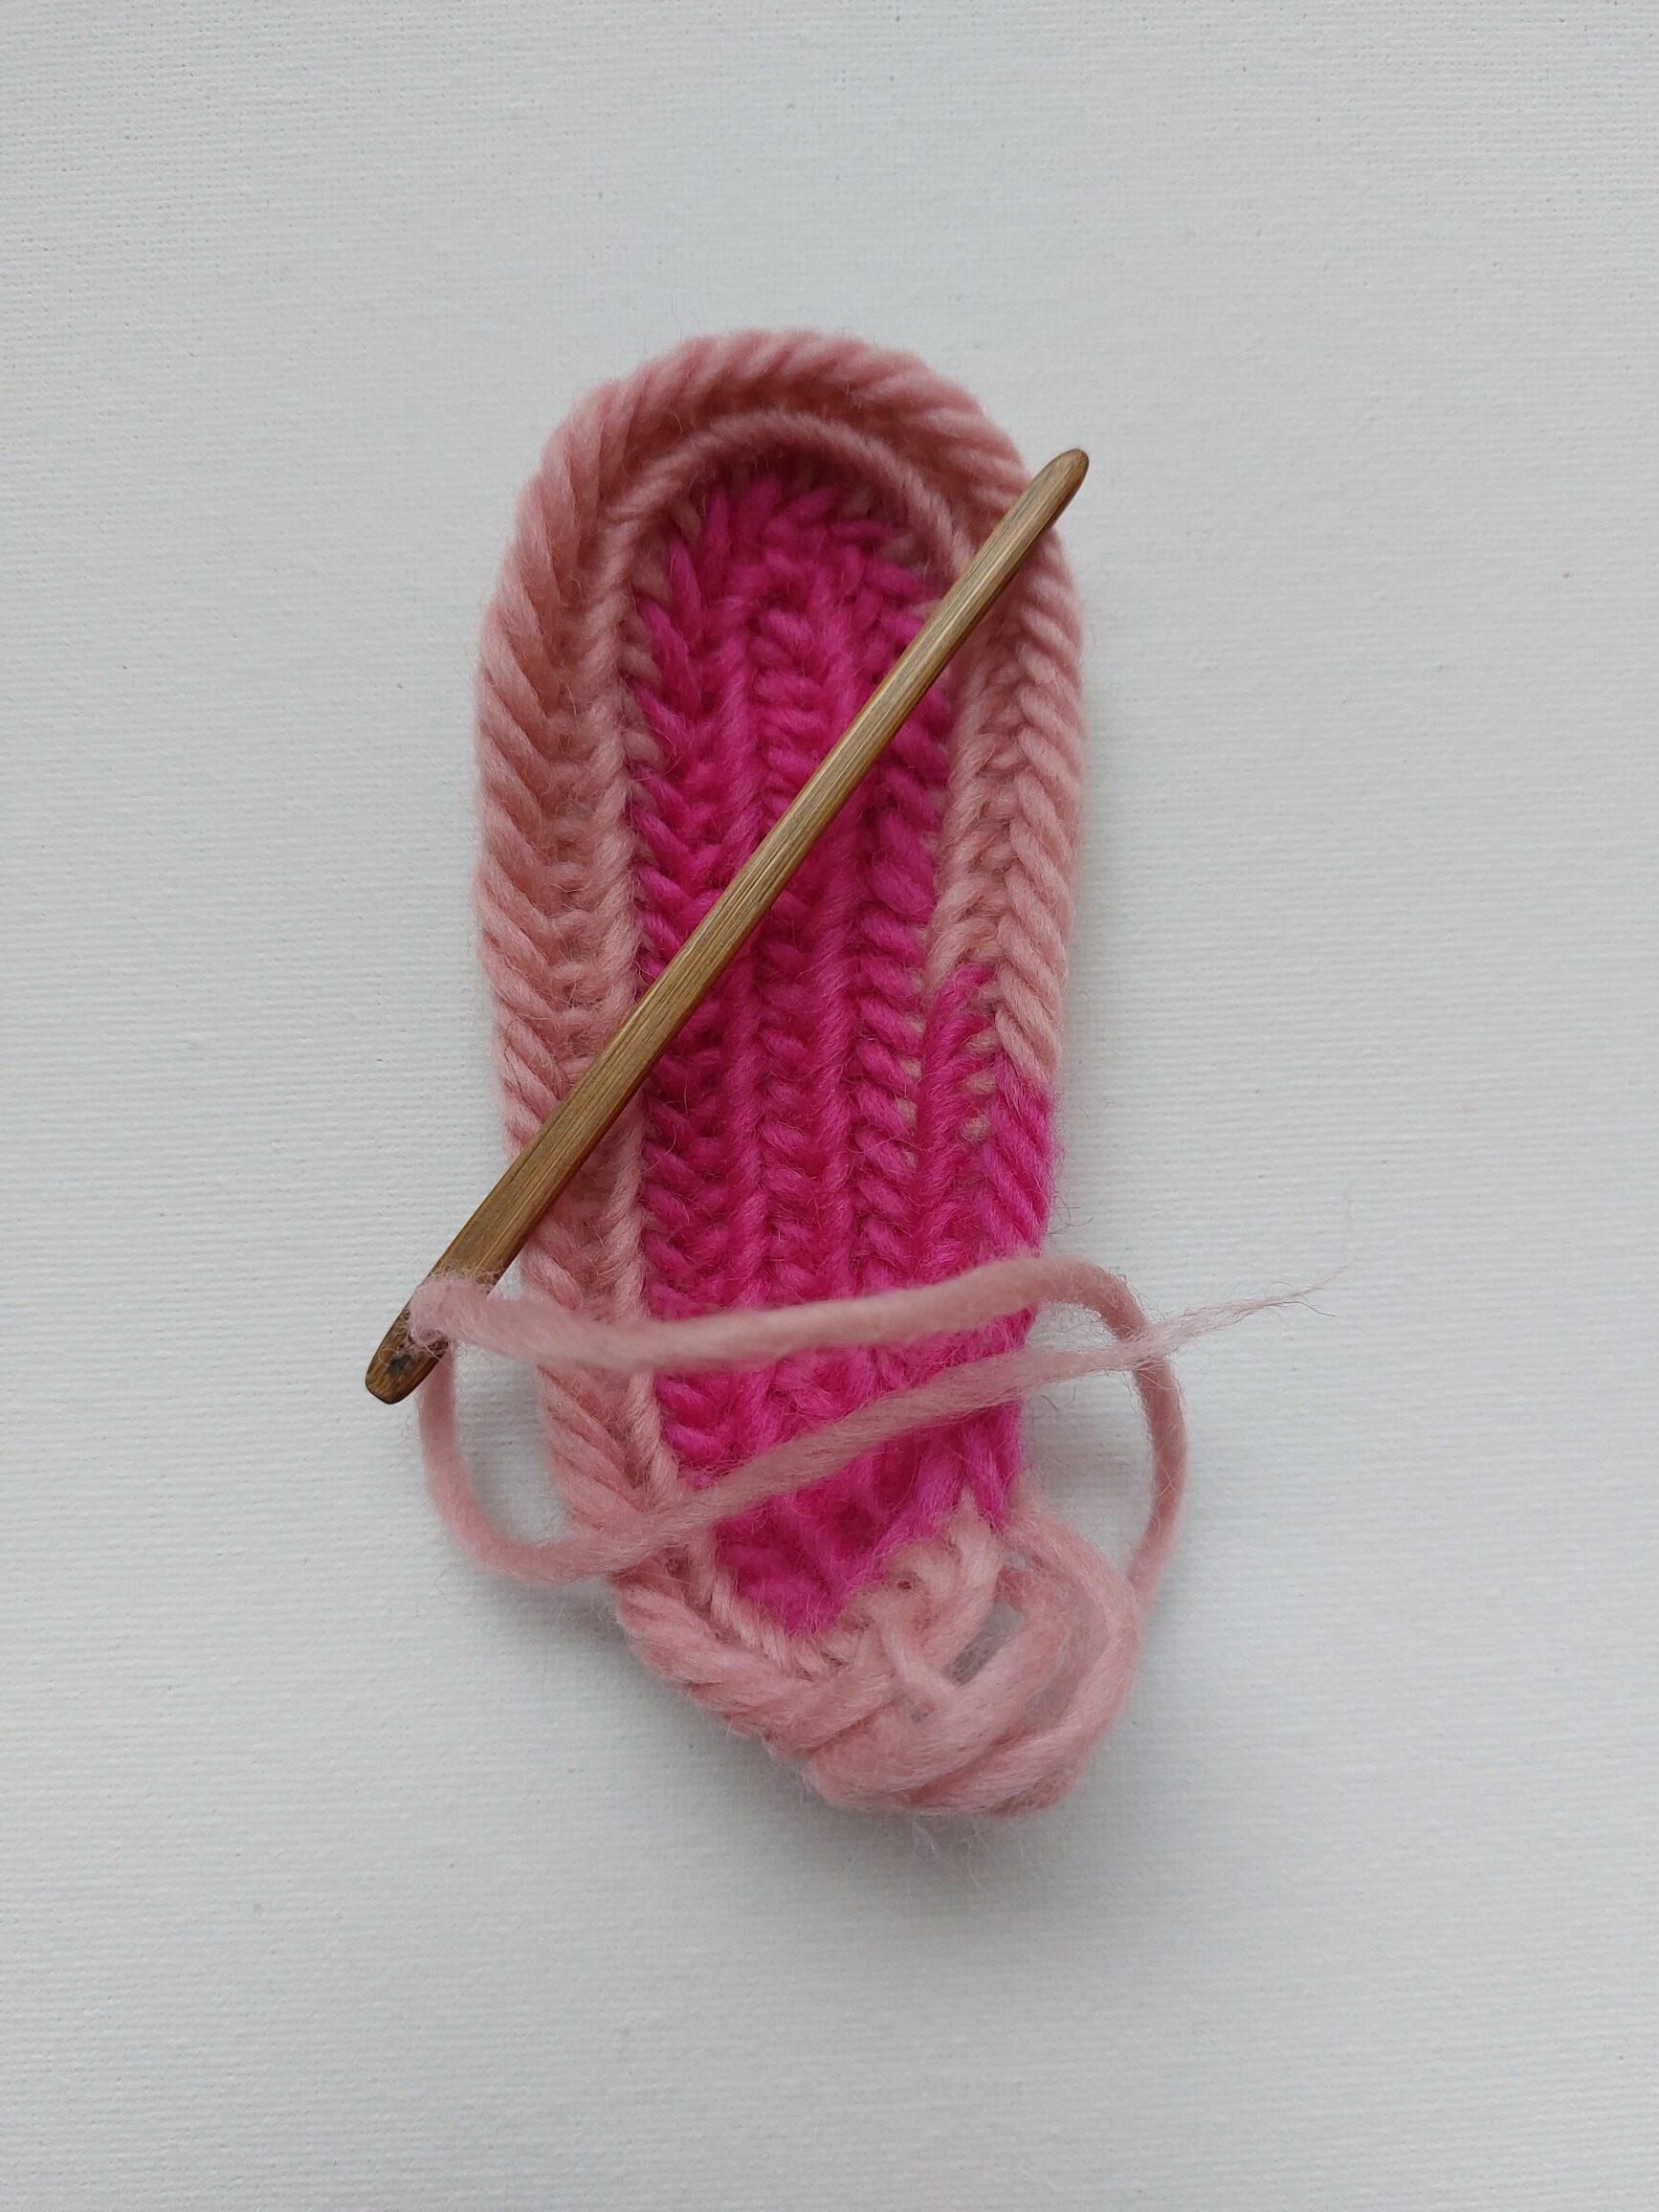
To make the baby socks you start with a row of 20 stitches with the Fin. stitch 2+2 F2 and wool of 3 mm.

Meerderen = increase, minderen = decrease, steken/lussen = stitches/loops, einde = end, eerste = first.
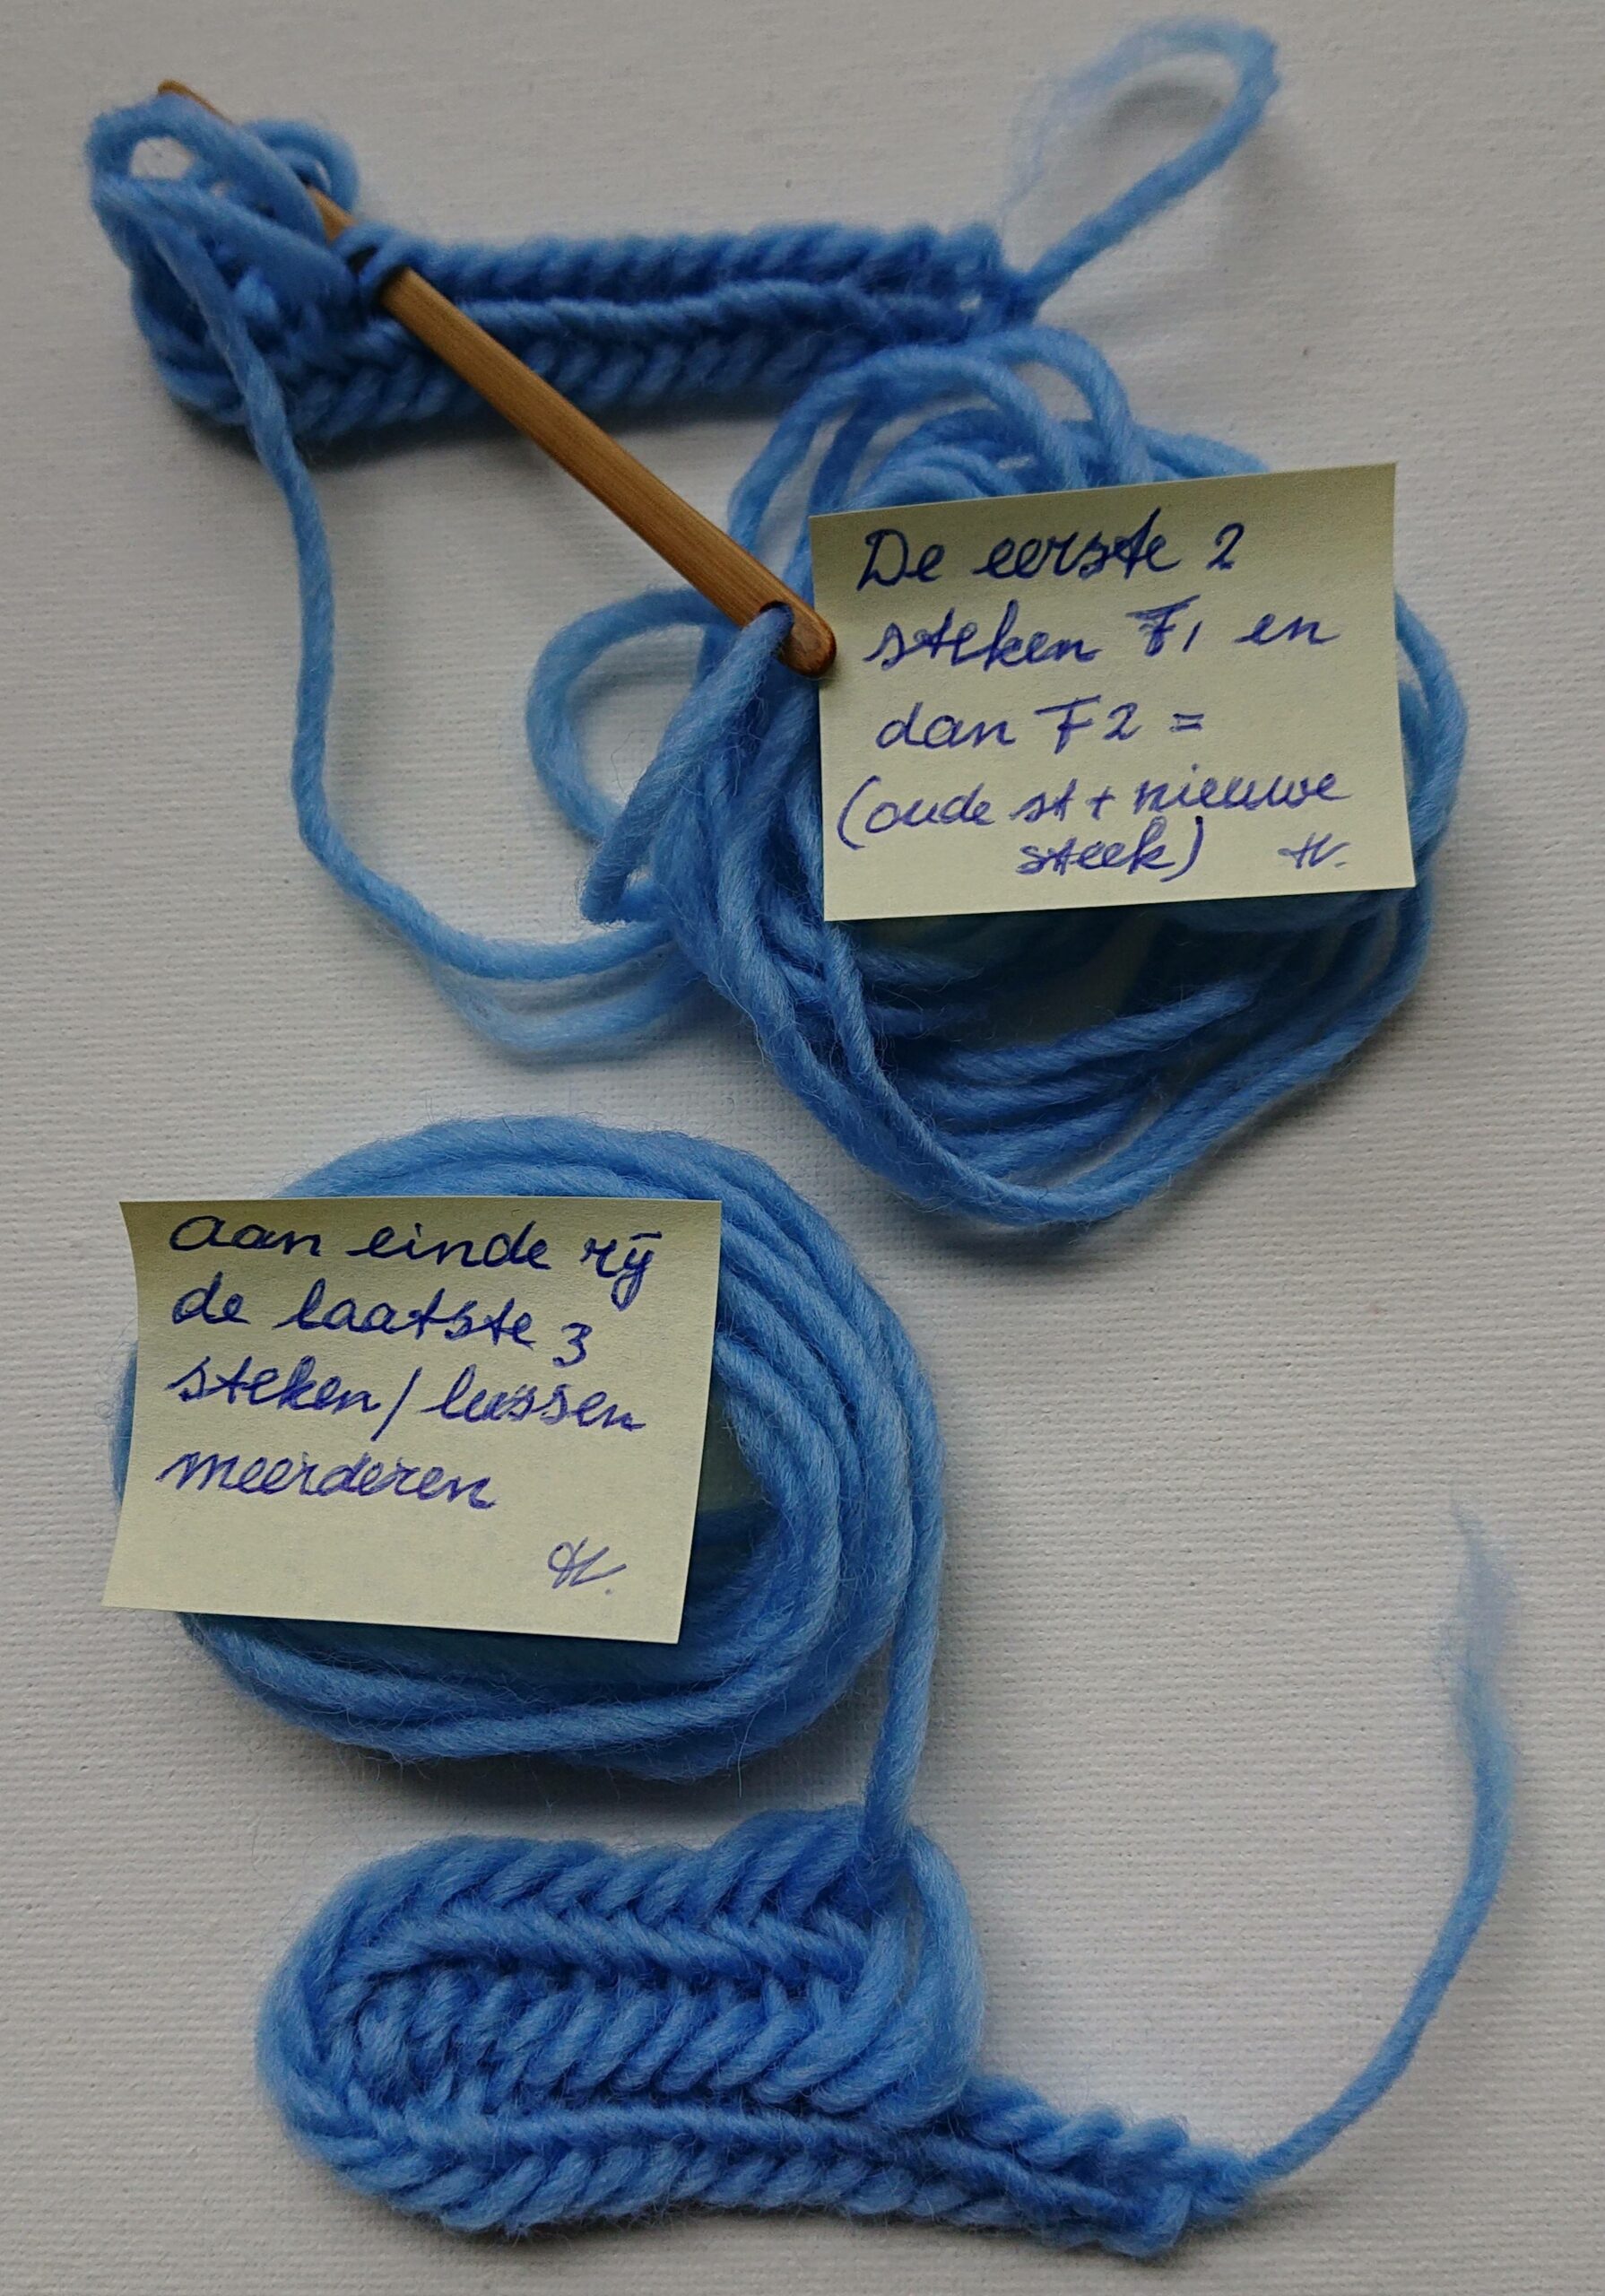
You make the turn by starting in the for last 4th stitch.
The first 2 stitches needlebind with F1 connection and the next stitches are needlebind with F2. The fabric wil be more dence with the F2 connection stitch.
When you get to the end of the row you have to increase 3 stitches.
This wil be the heel of the sock.
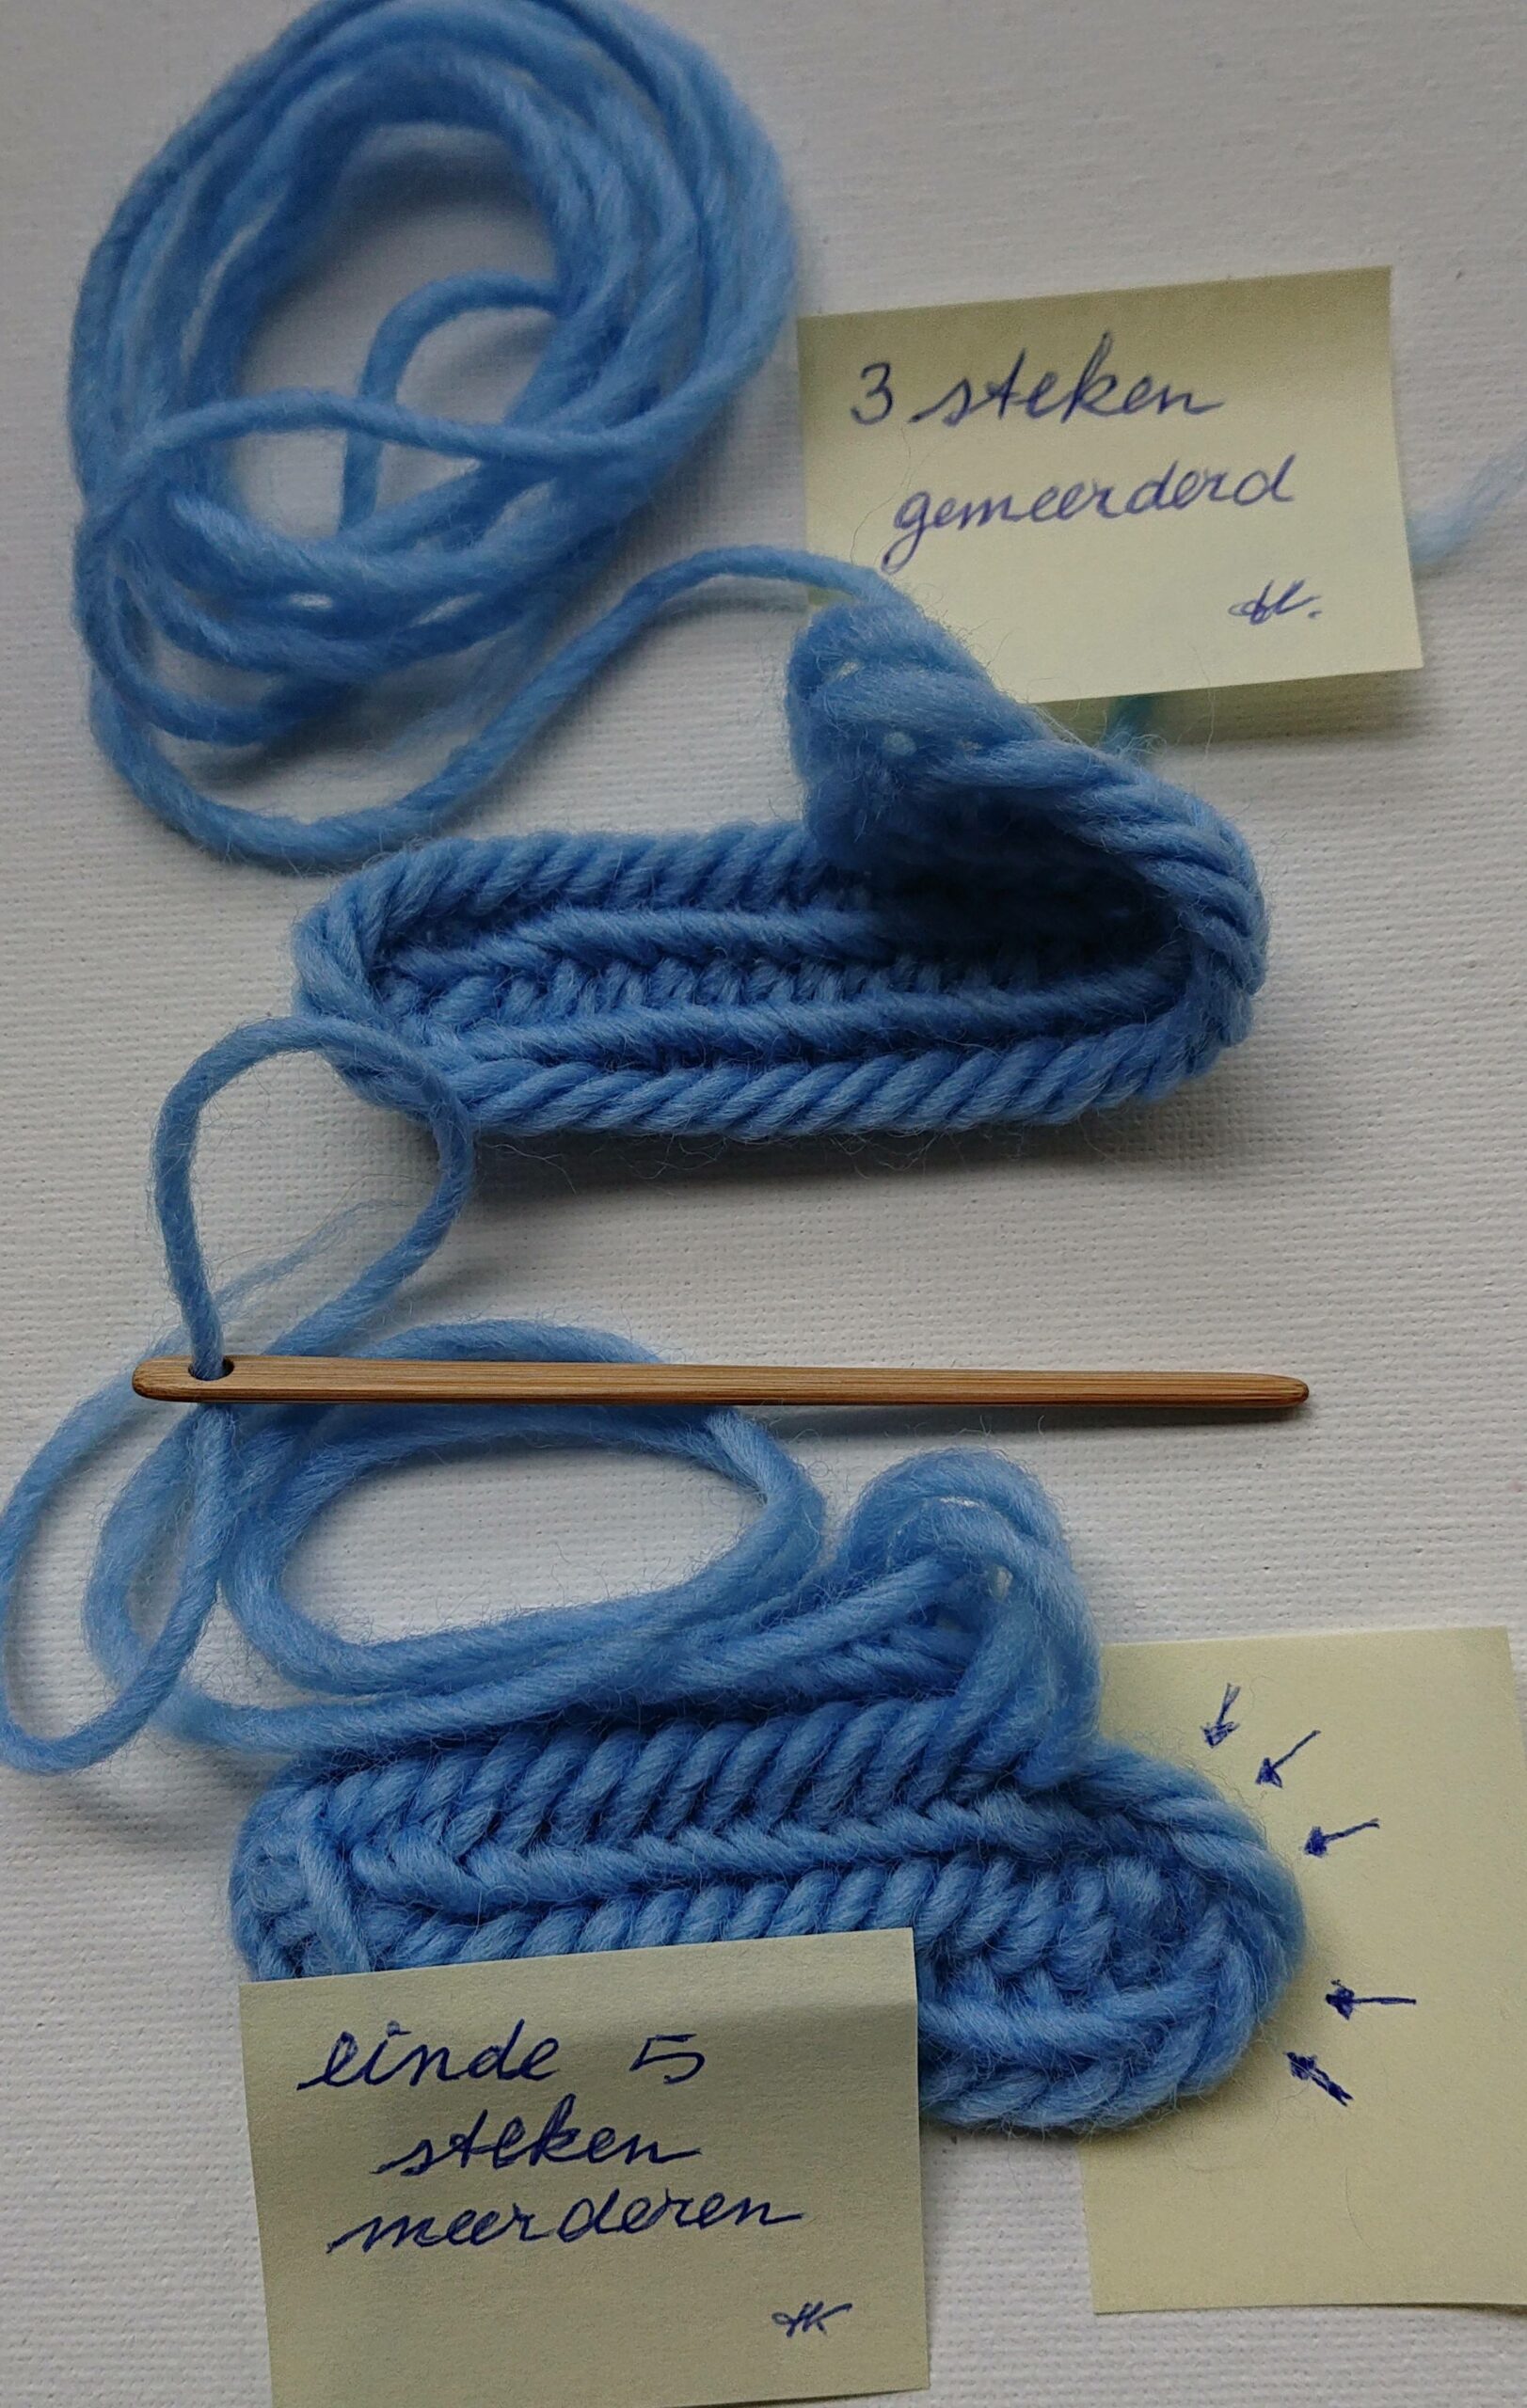
3 stitches have been increased, and you increase 5 stitches at the end of the next row.
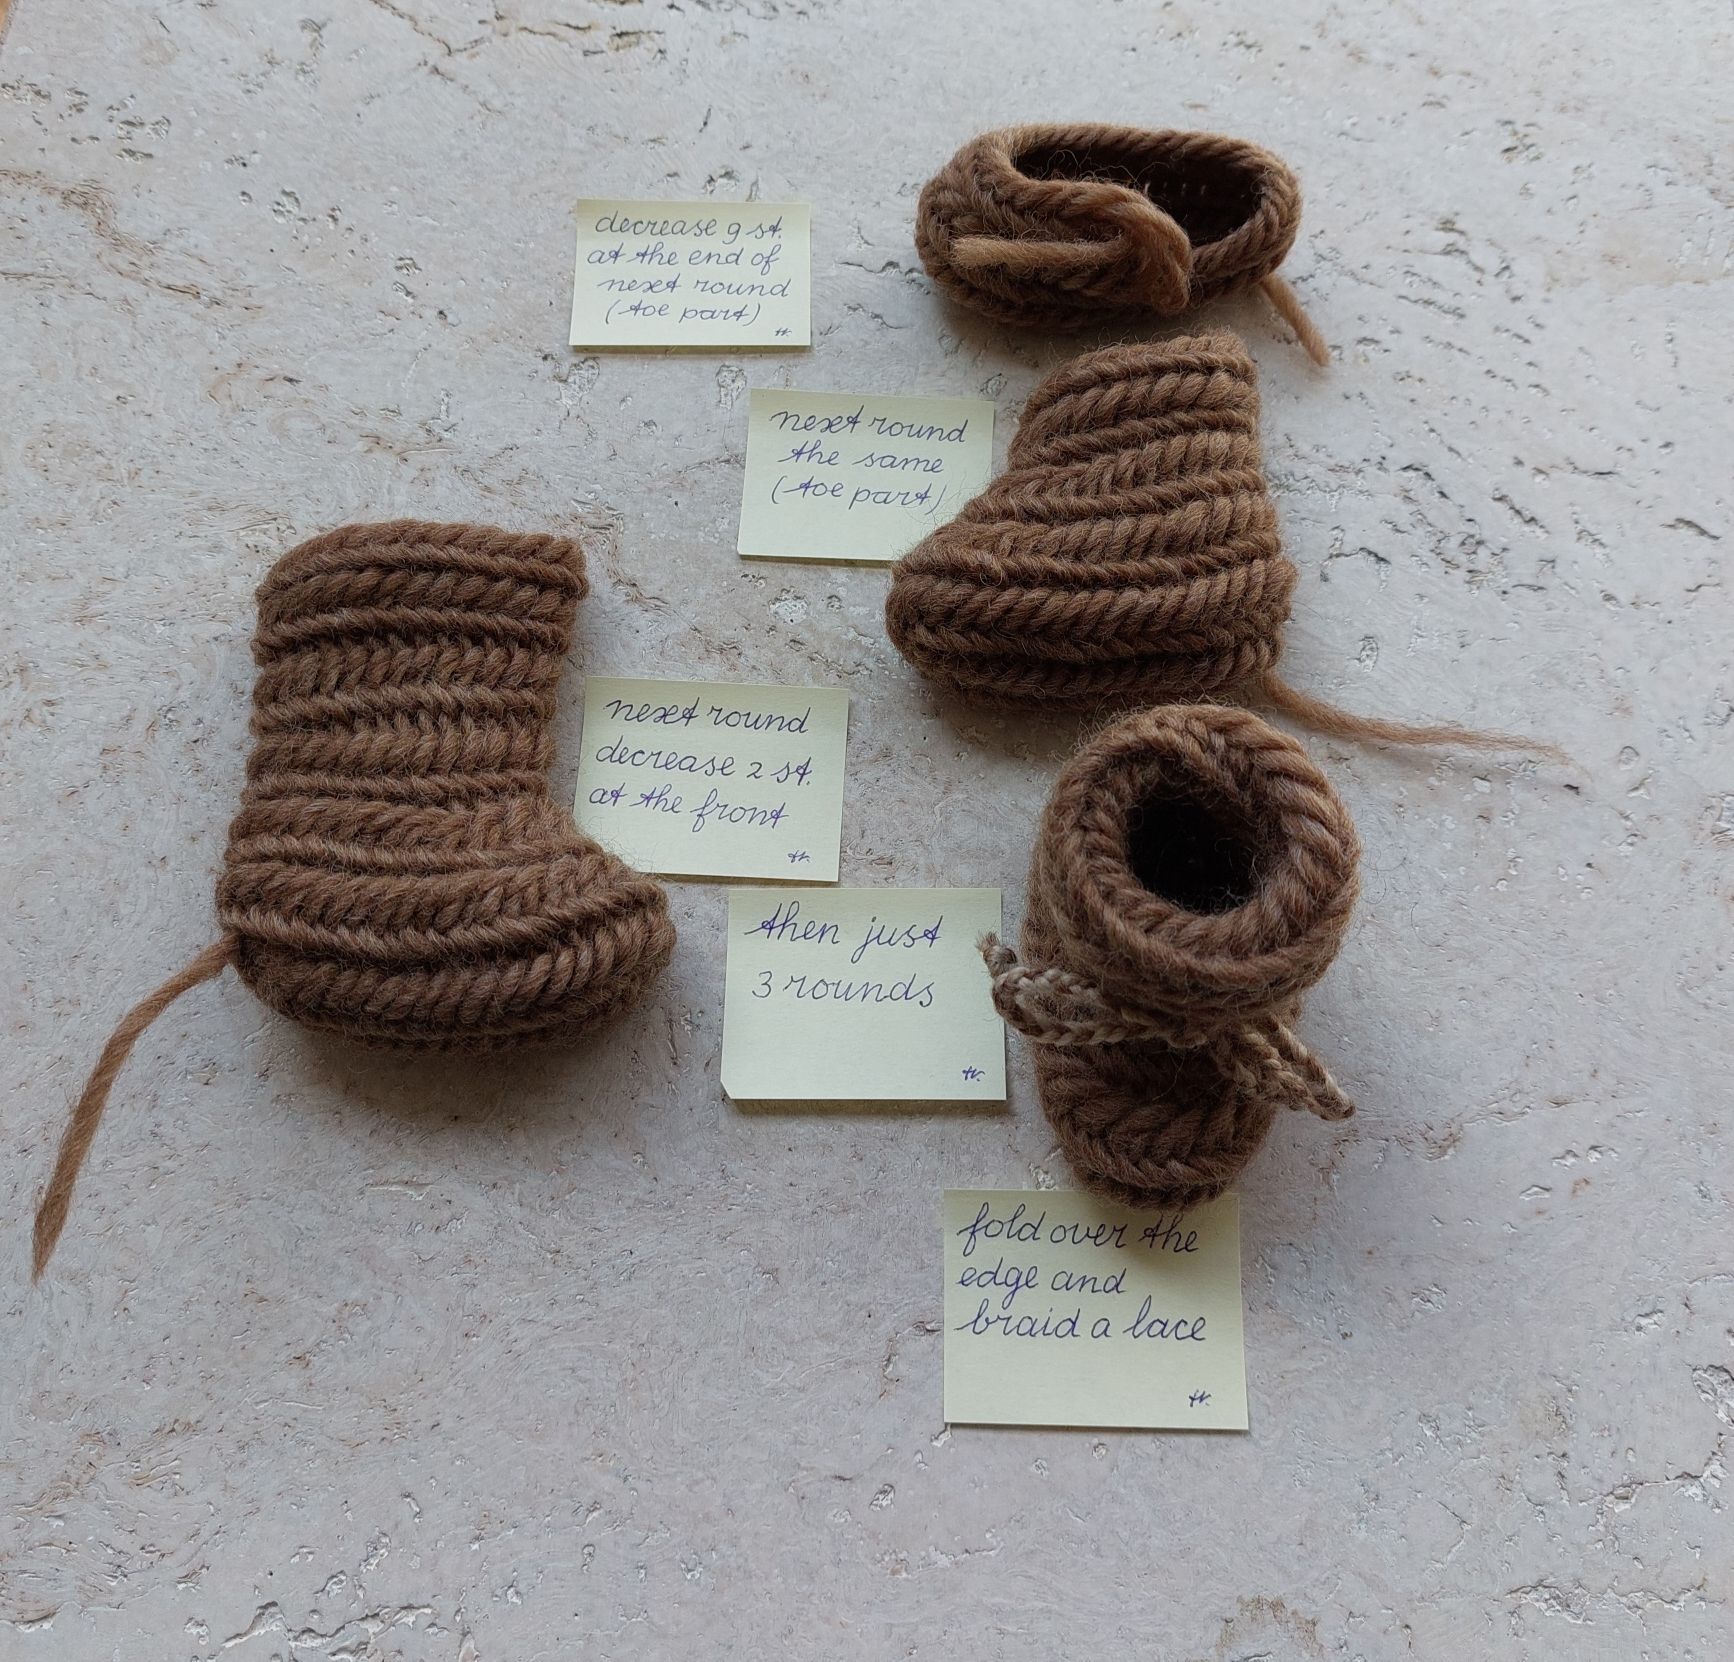
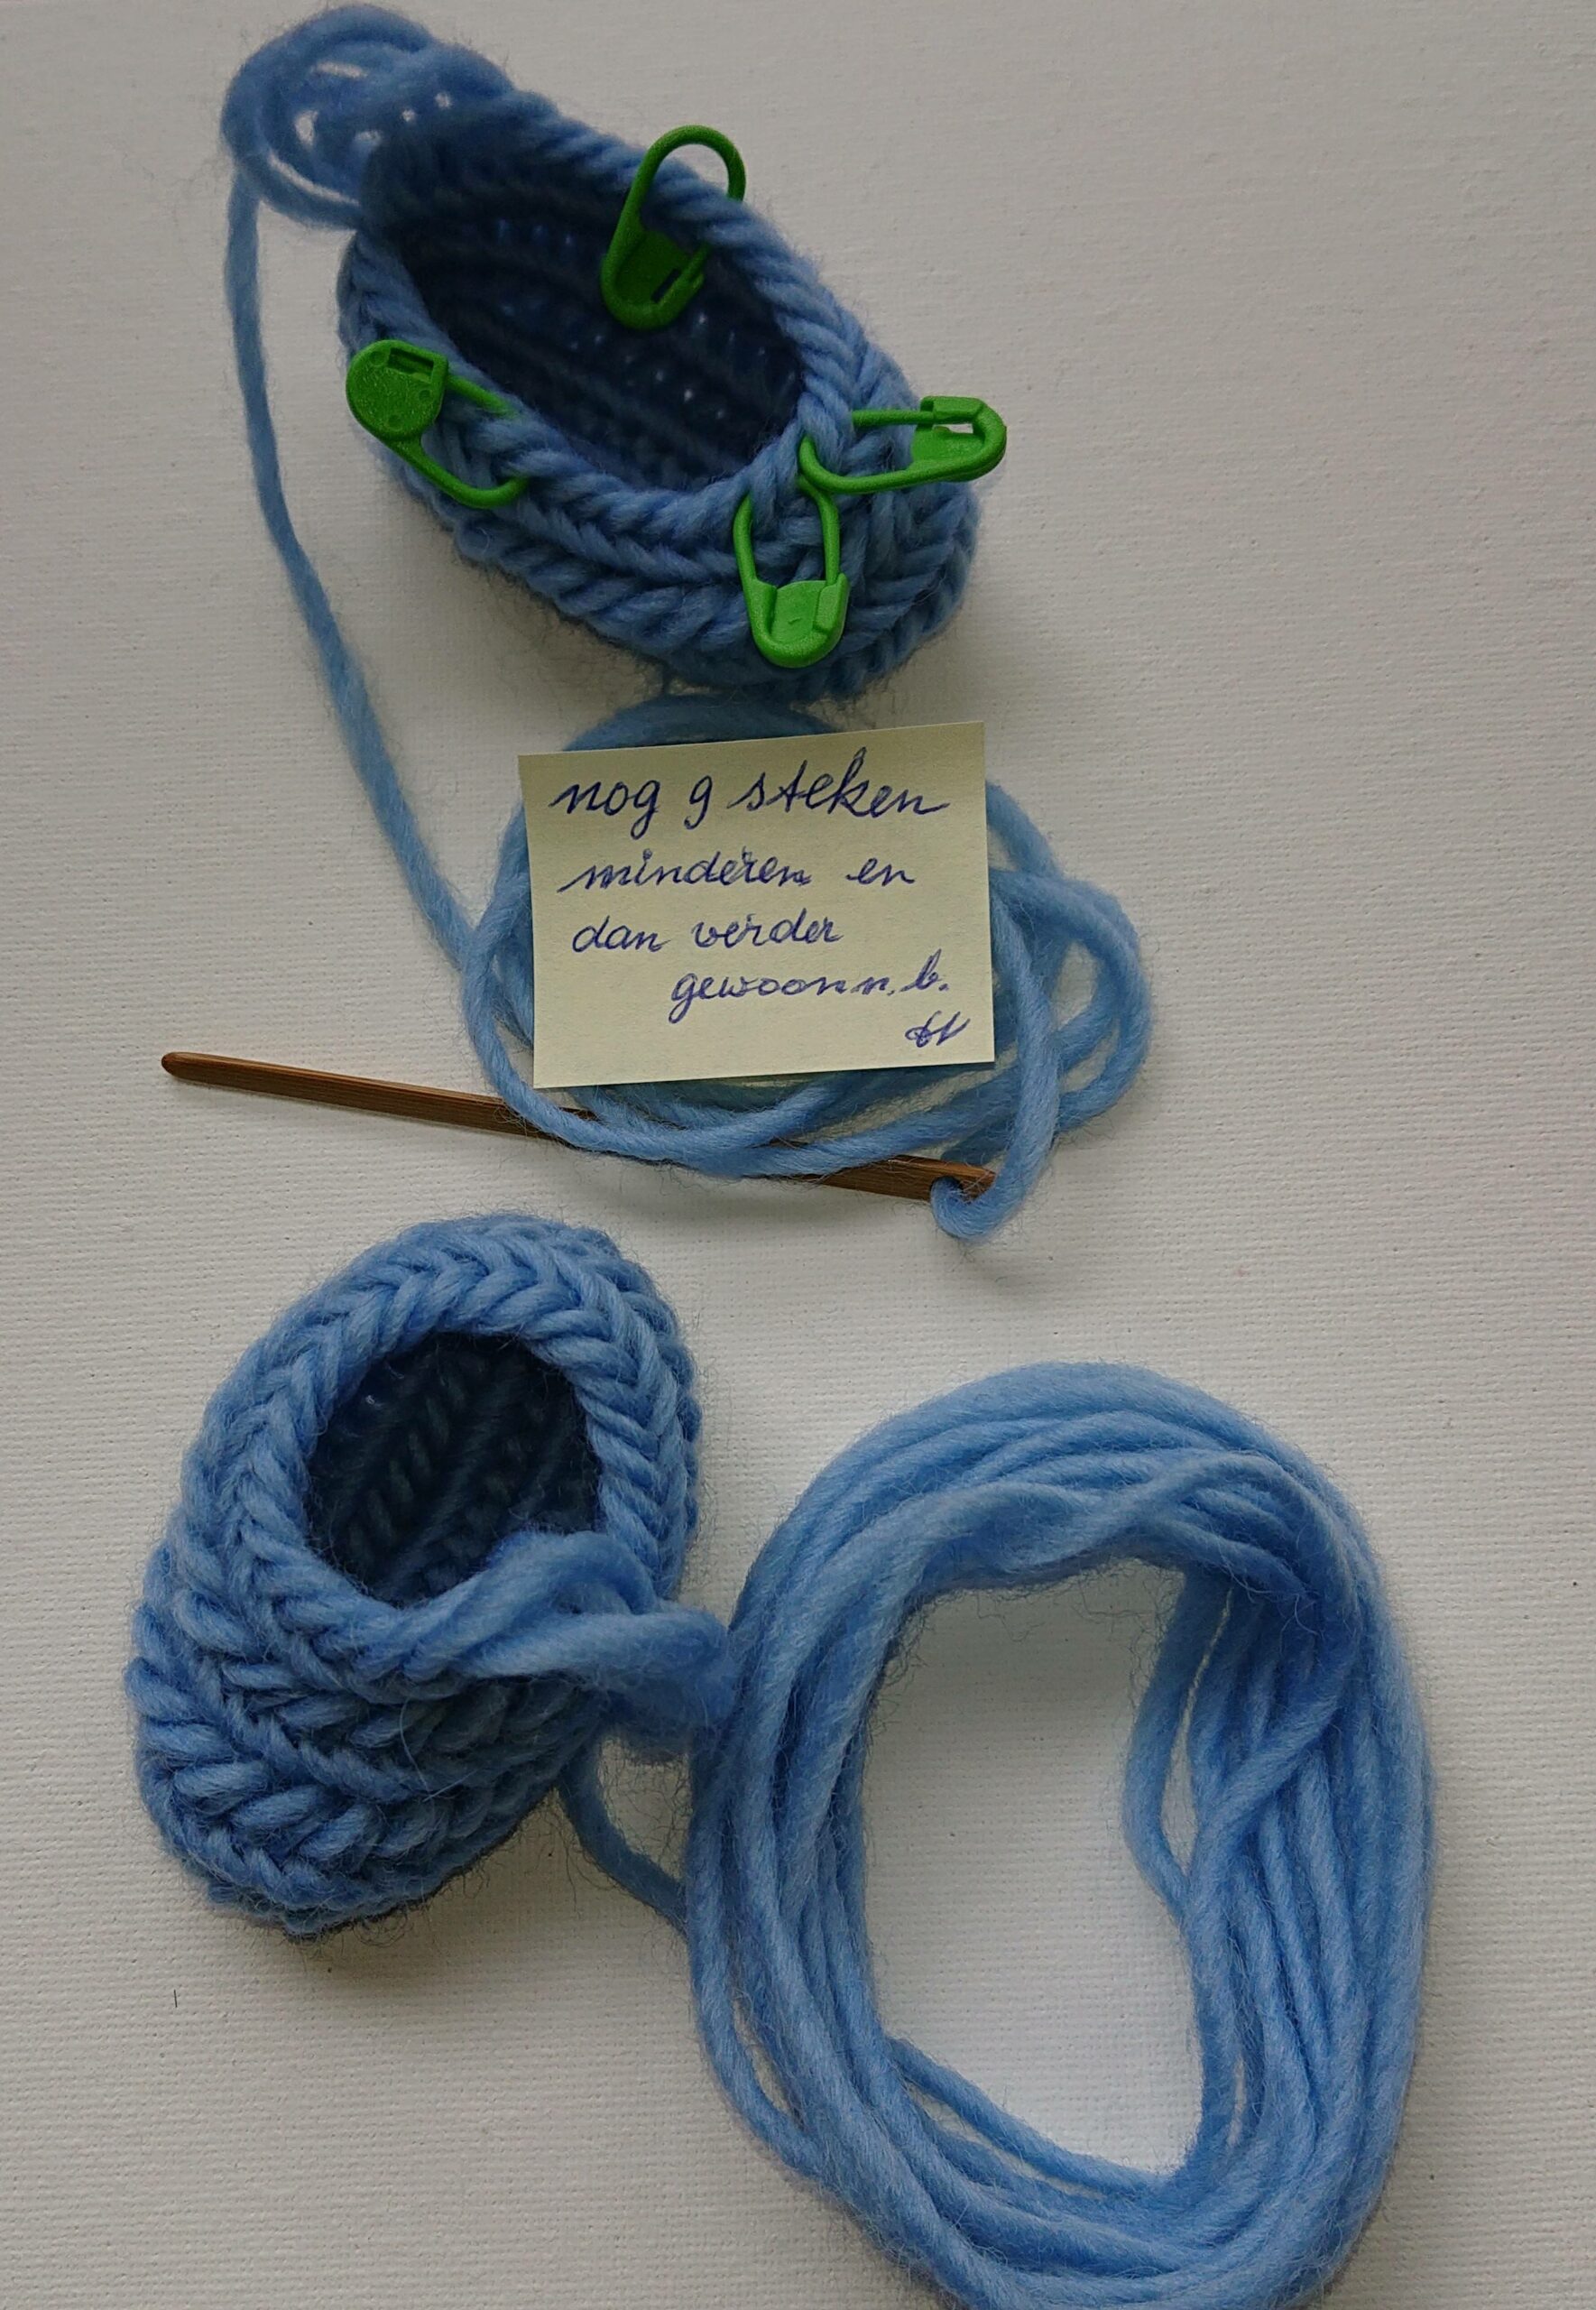
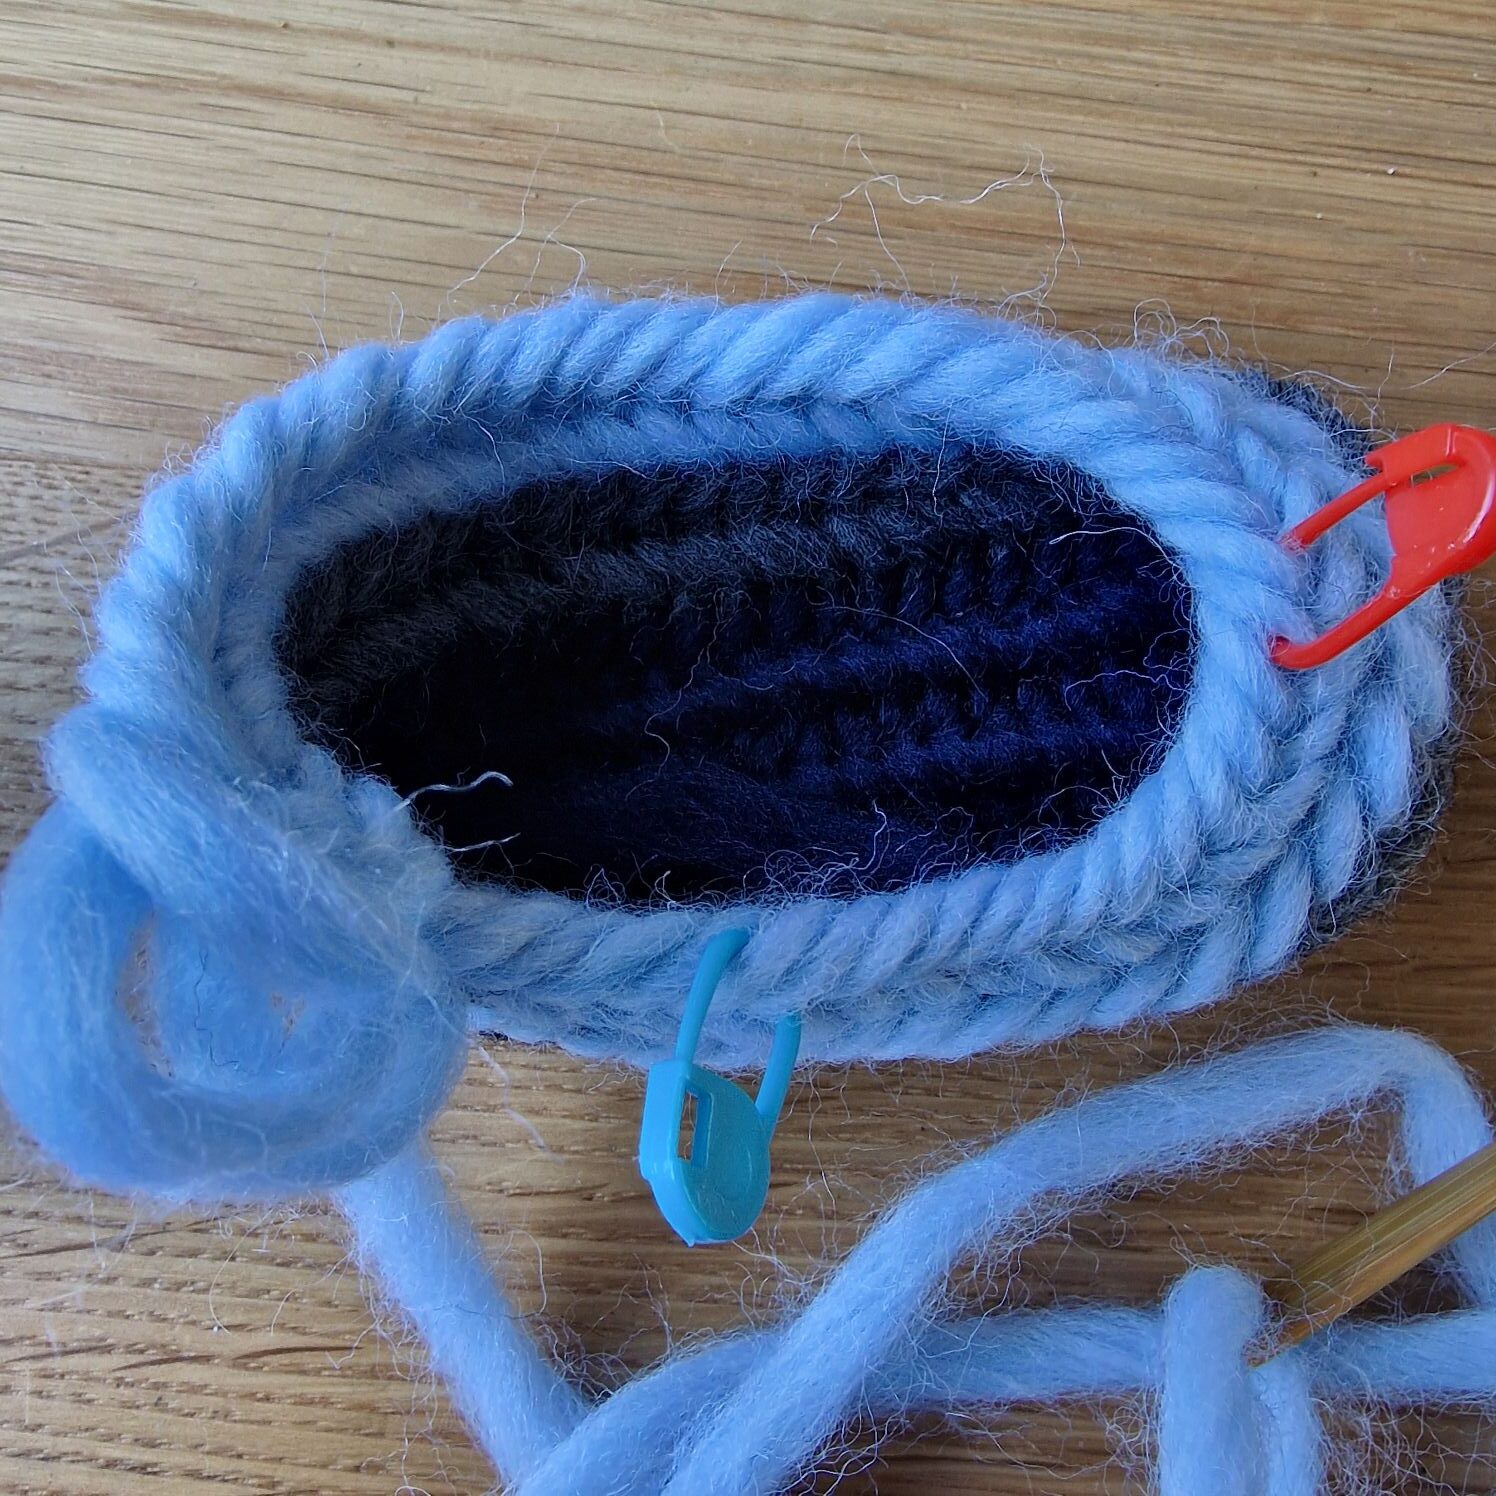
This will be the toe part of the sock.Next foto you decrease 9 stitches at the end of the row, the toe part, see markers.
After decreasing continue needlebinding.
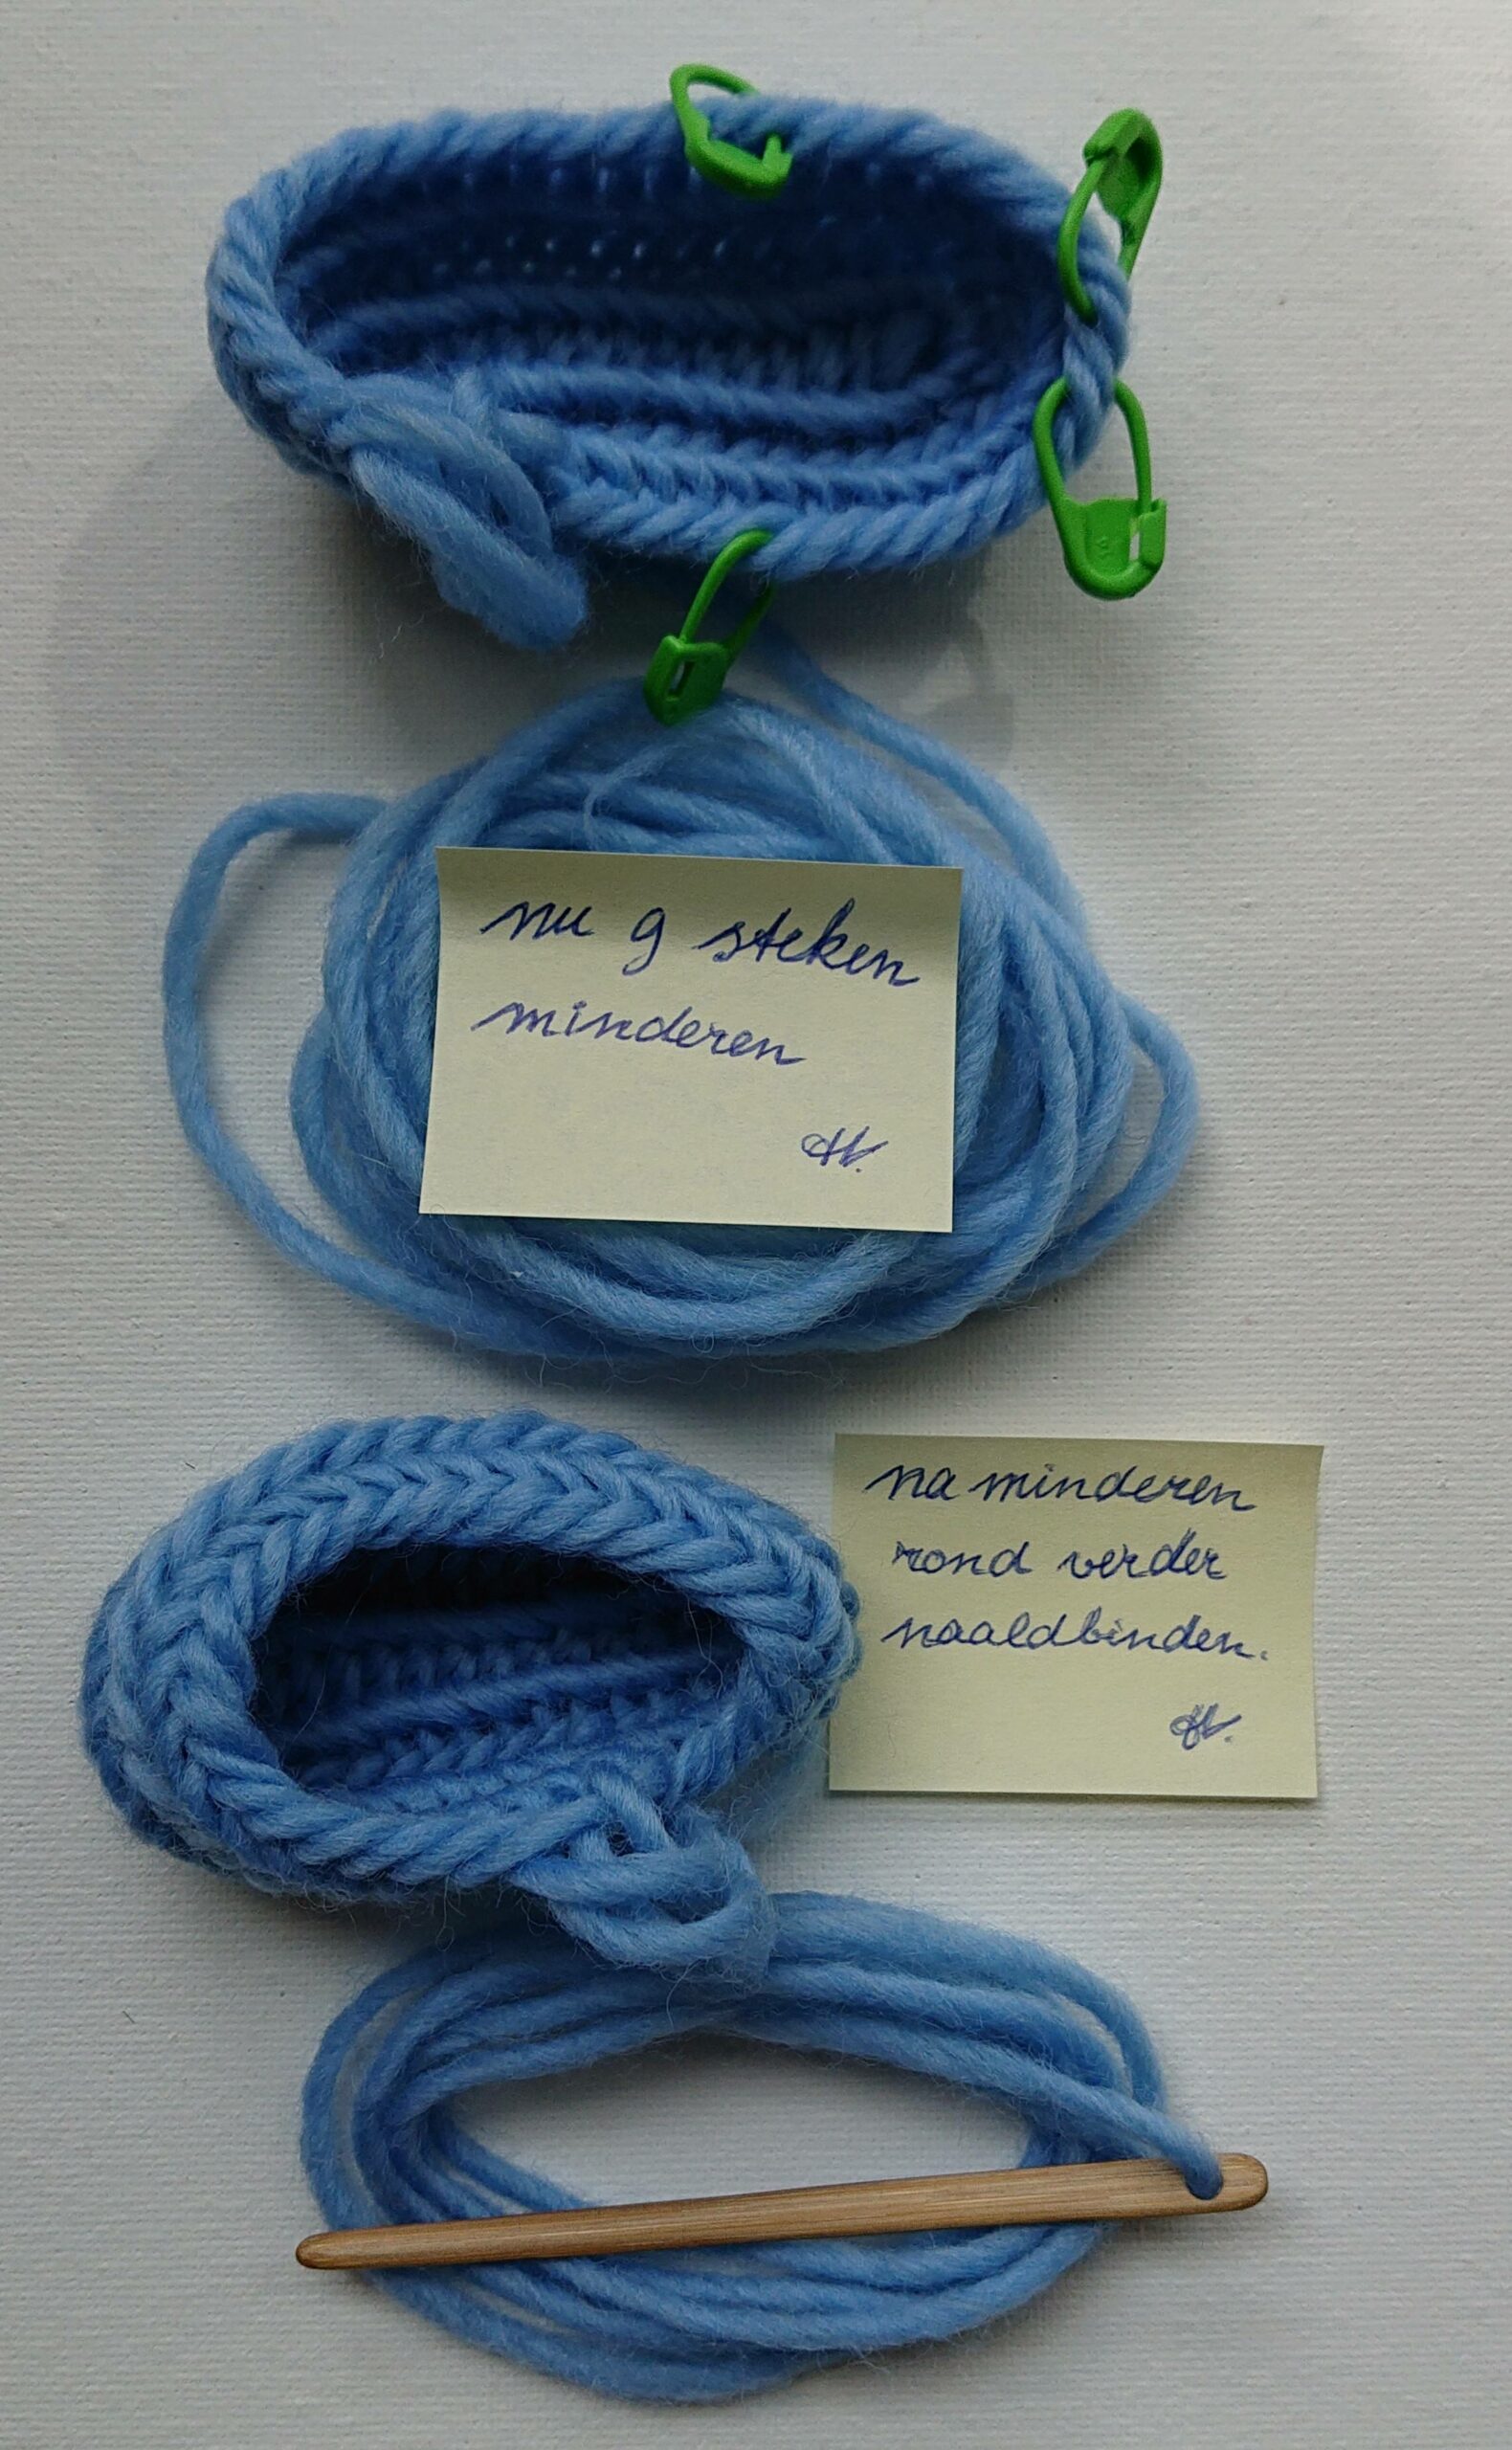
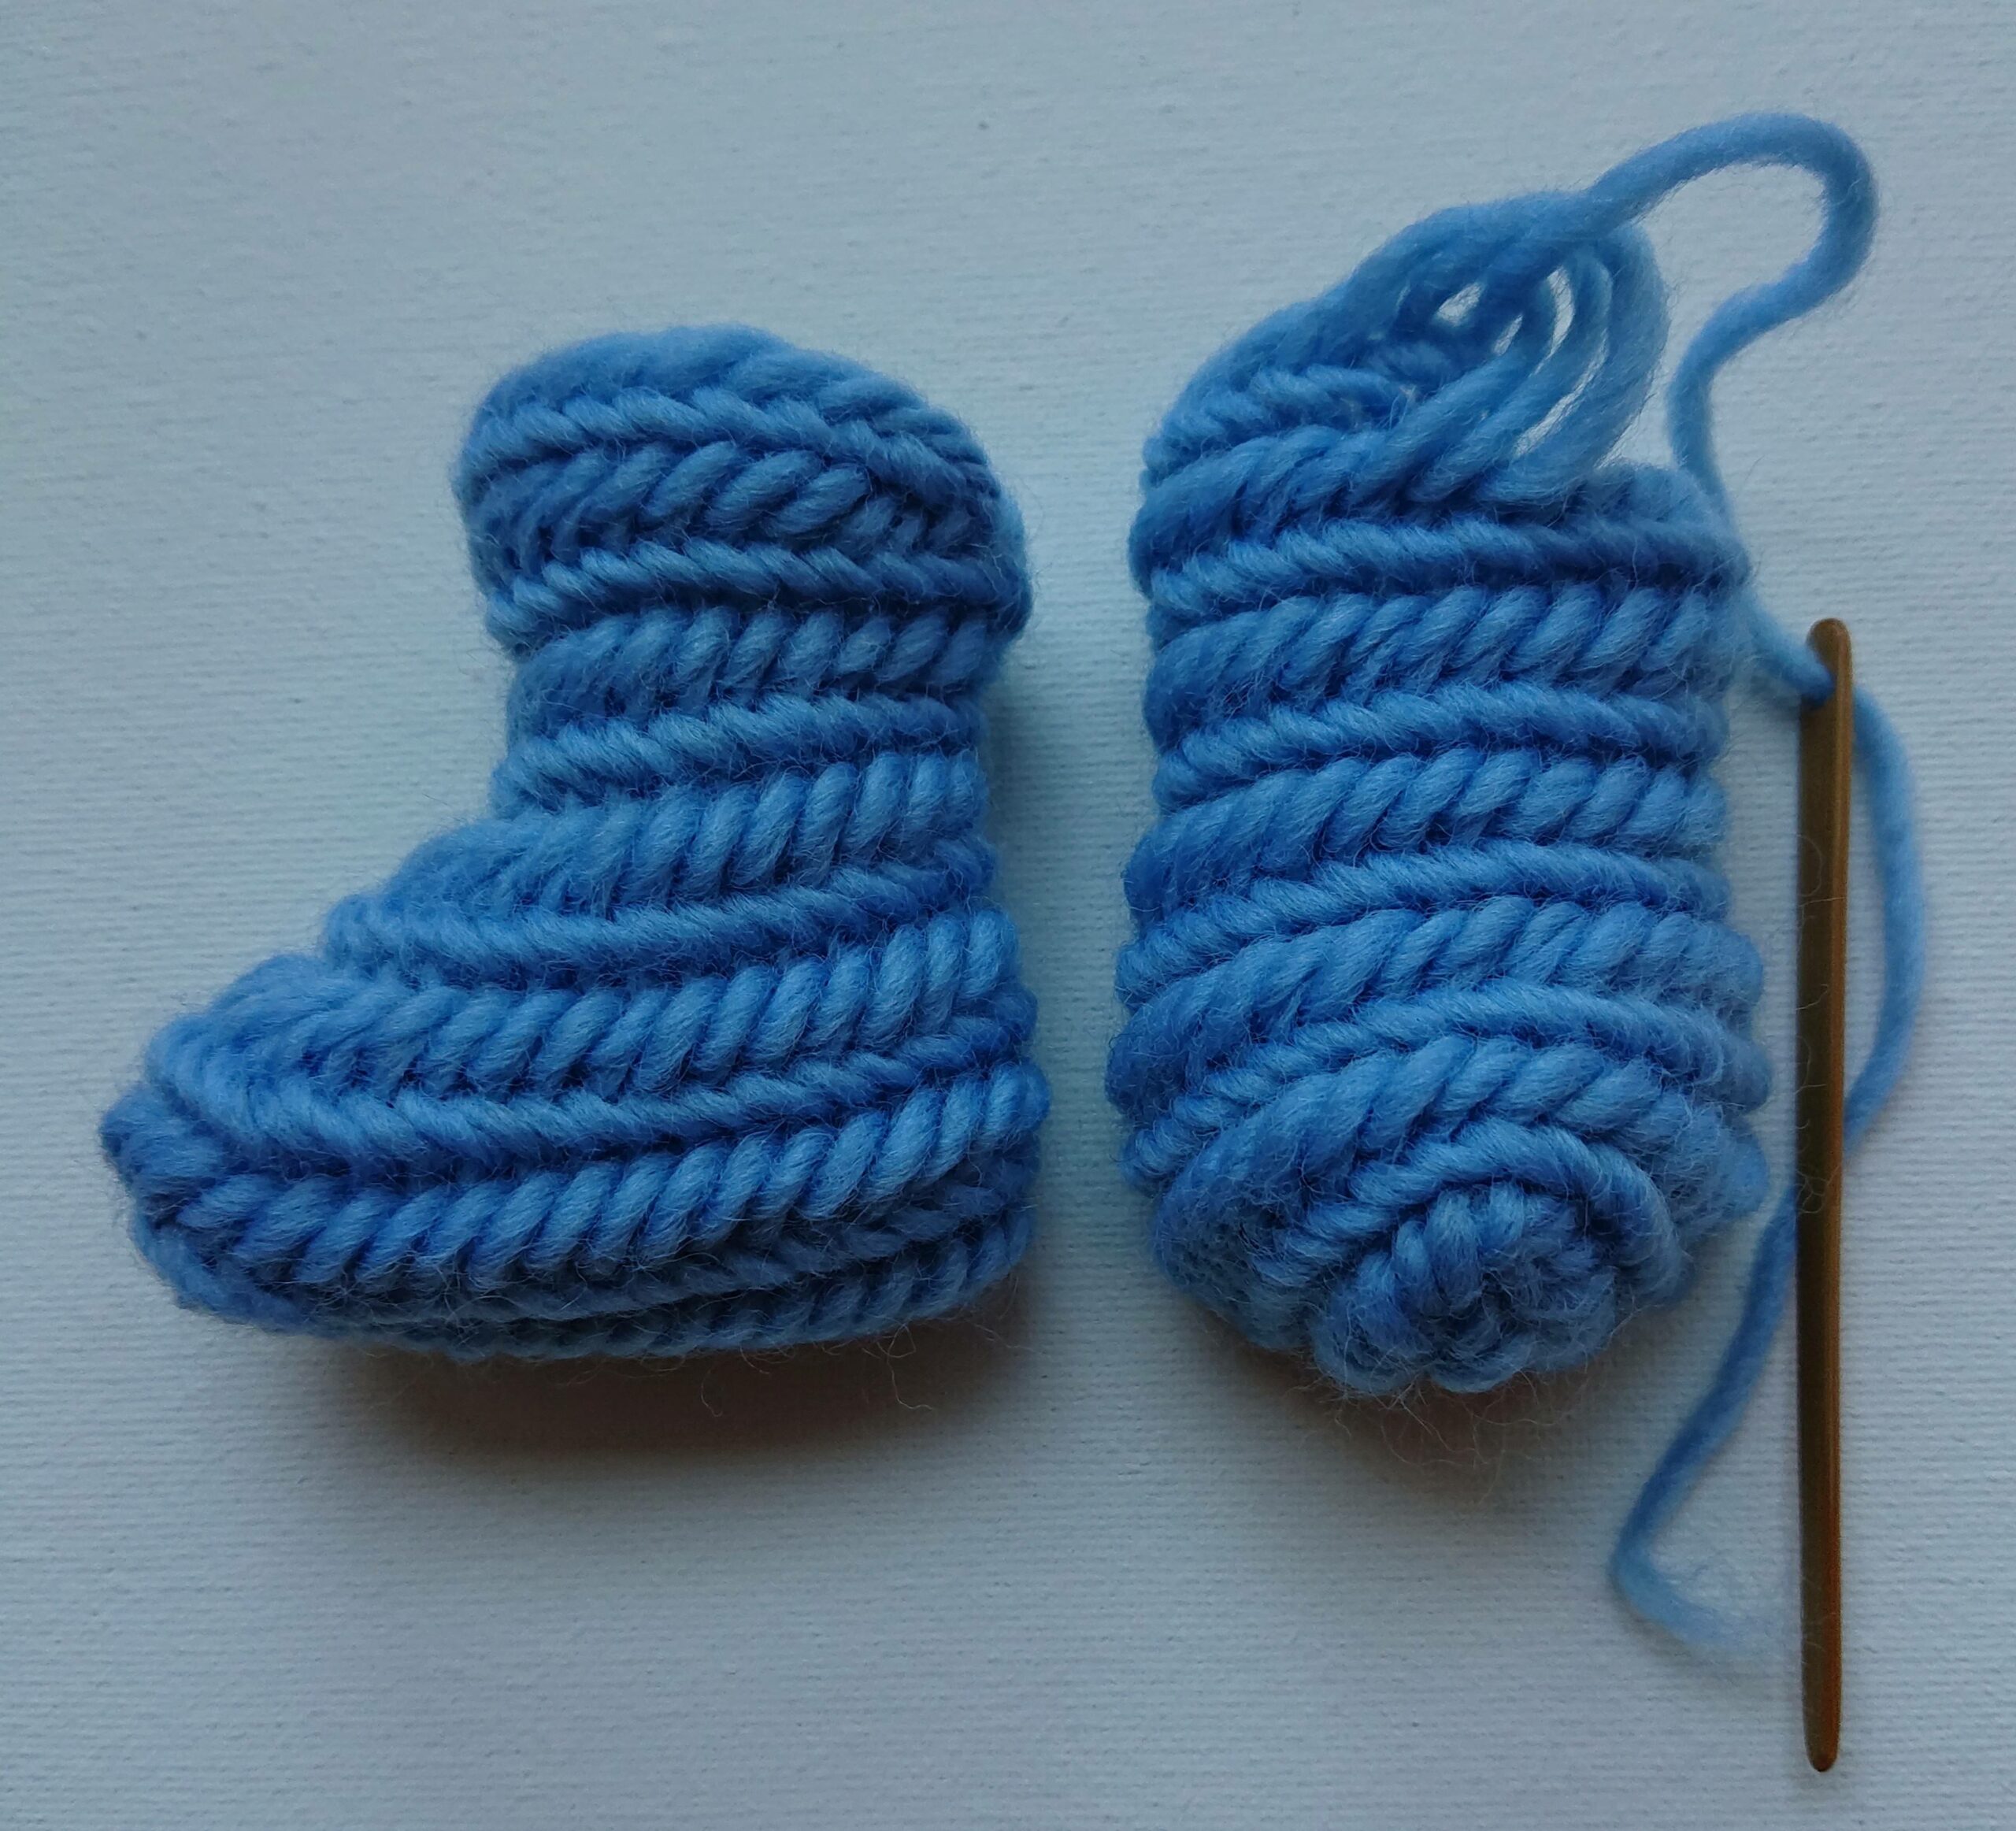
When you get at the second time to the toe part you have to decrease 9 stitches again.
You can make the sock as high as you want, i made 3 rows. Finishing is done by gently tightening the last 4th stitch, then the last 3 and so on.
Short video how i finish nalbinding project in English.
I always forget to ask if you’d like to subscribe to my YouTube channel: happy needlebinding If I have a lot of subscribers, I can email magazines to write an article about this wonderful old craft so I can pass it on to the next generation.
Thank you kindly in advance. bert veugelers.
Now just fold the edge and thread white lace through it and the baby socks are ready.
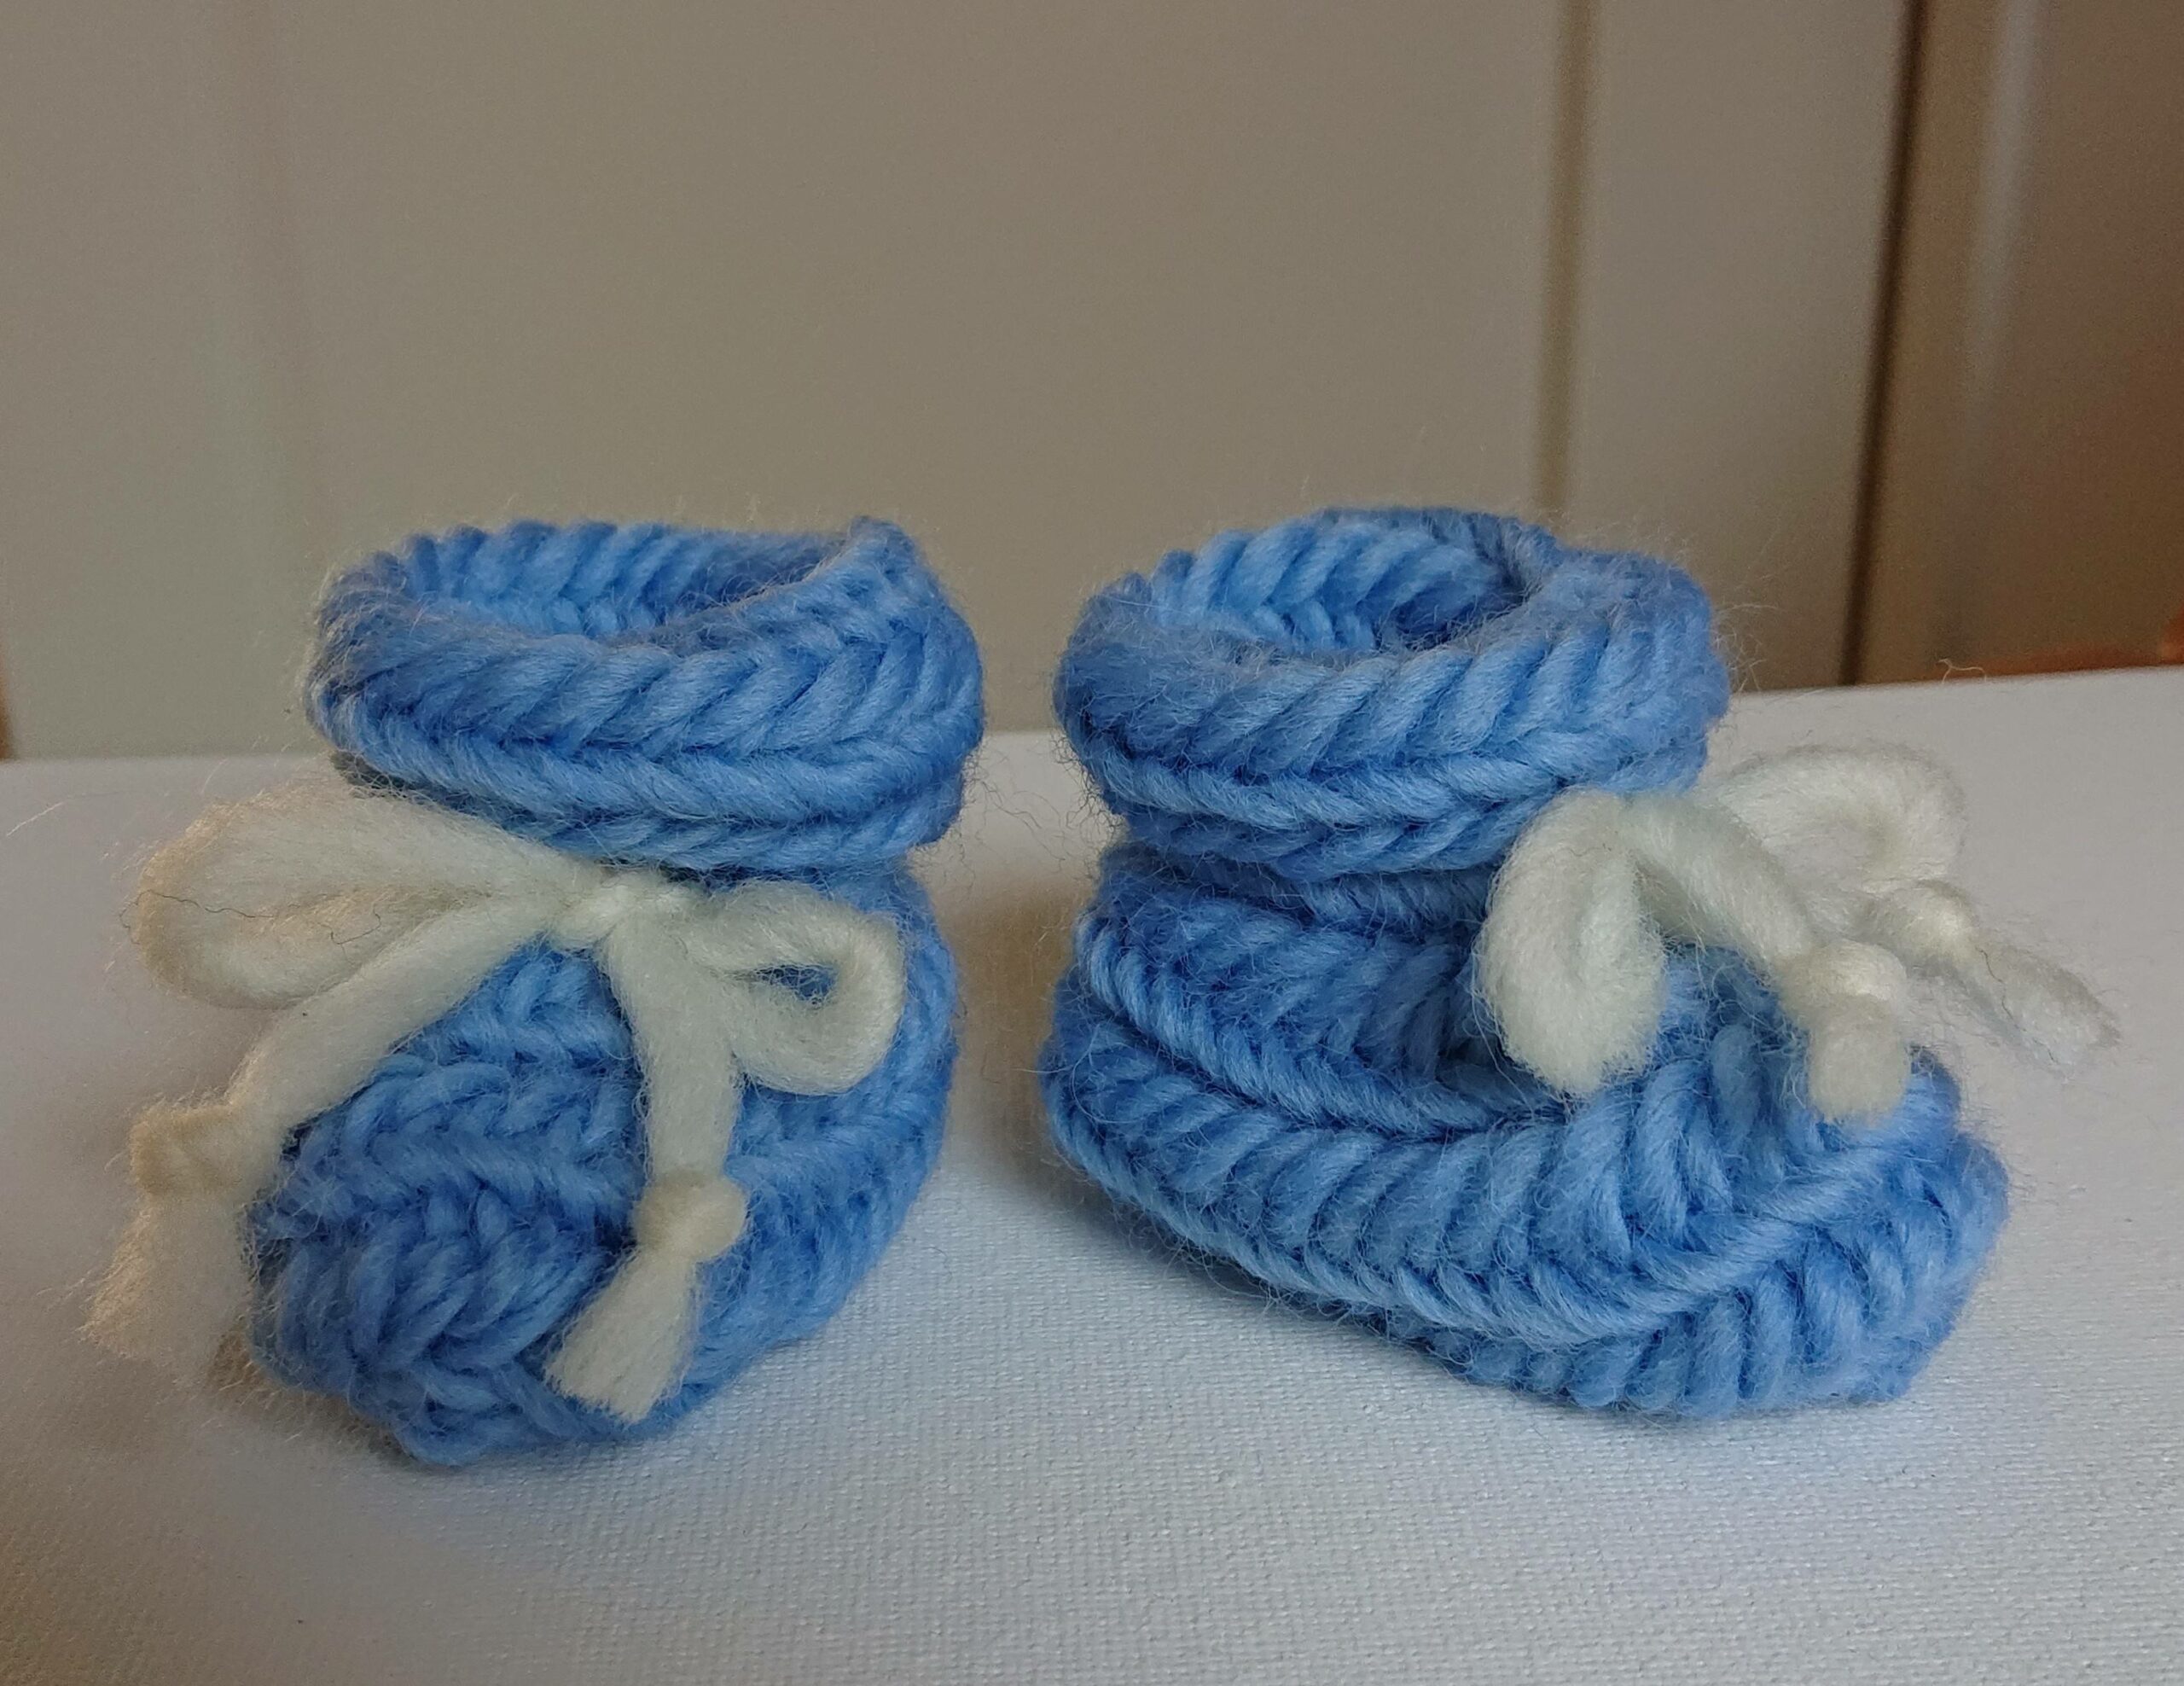
Have fun with needlebinding baby socks.
Next video is in Dutch, there will be an English version soon.
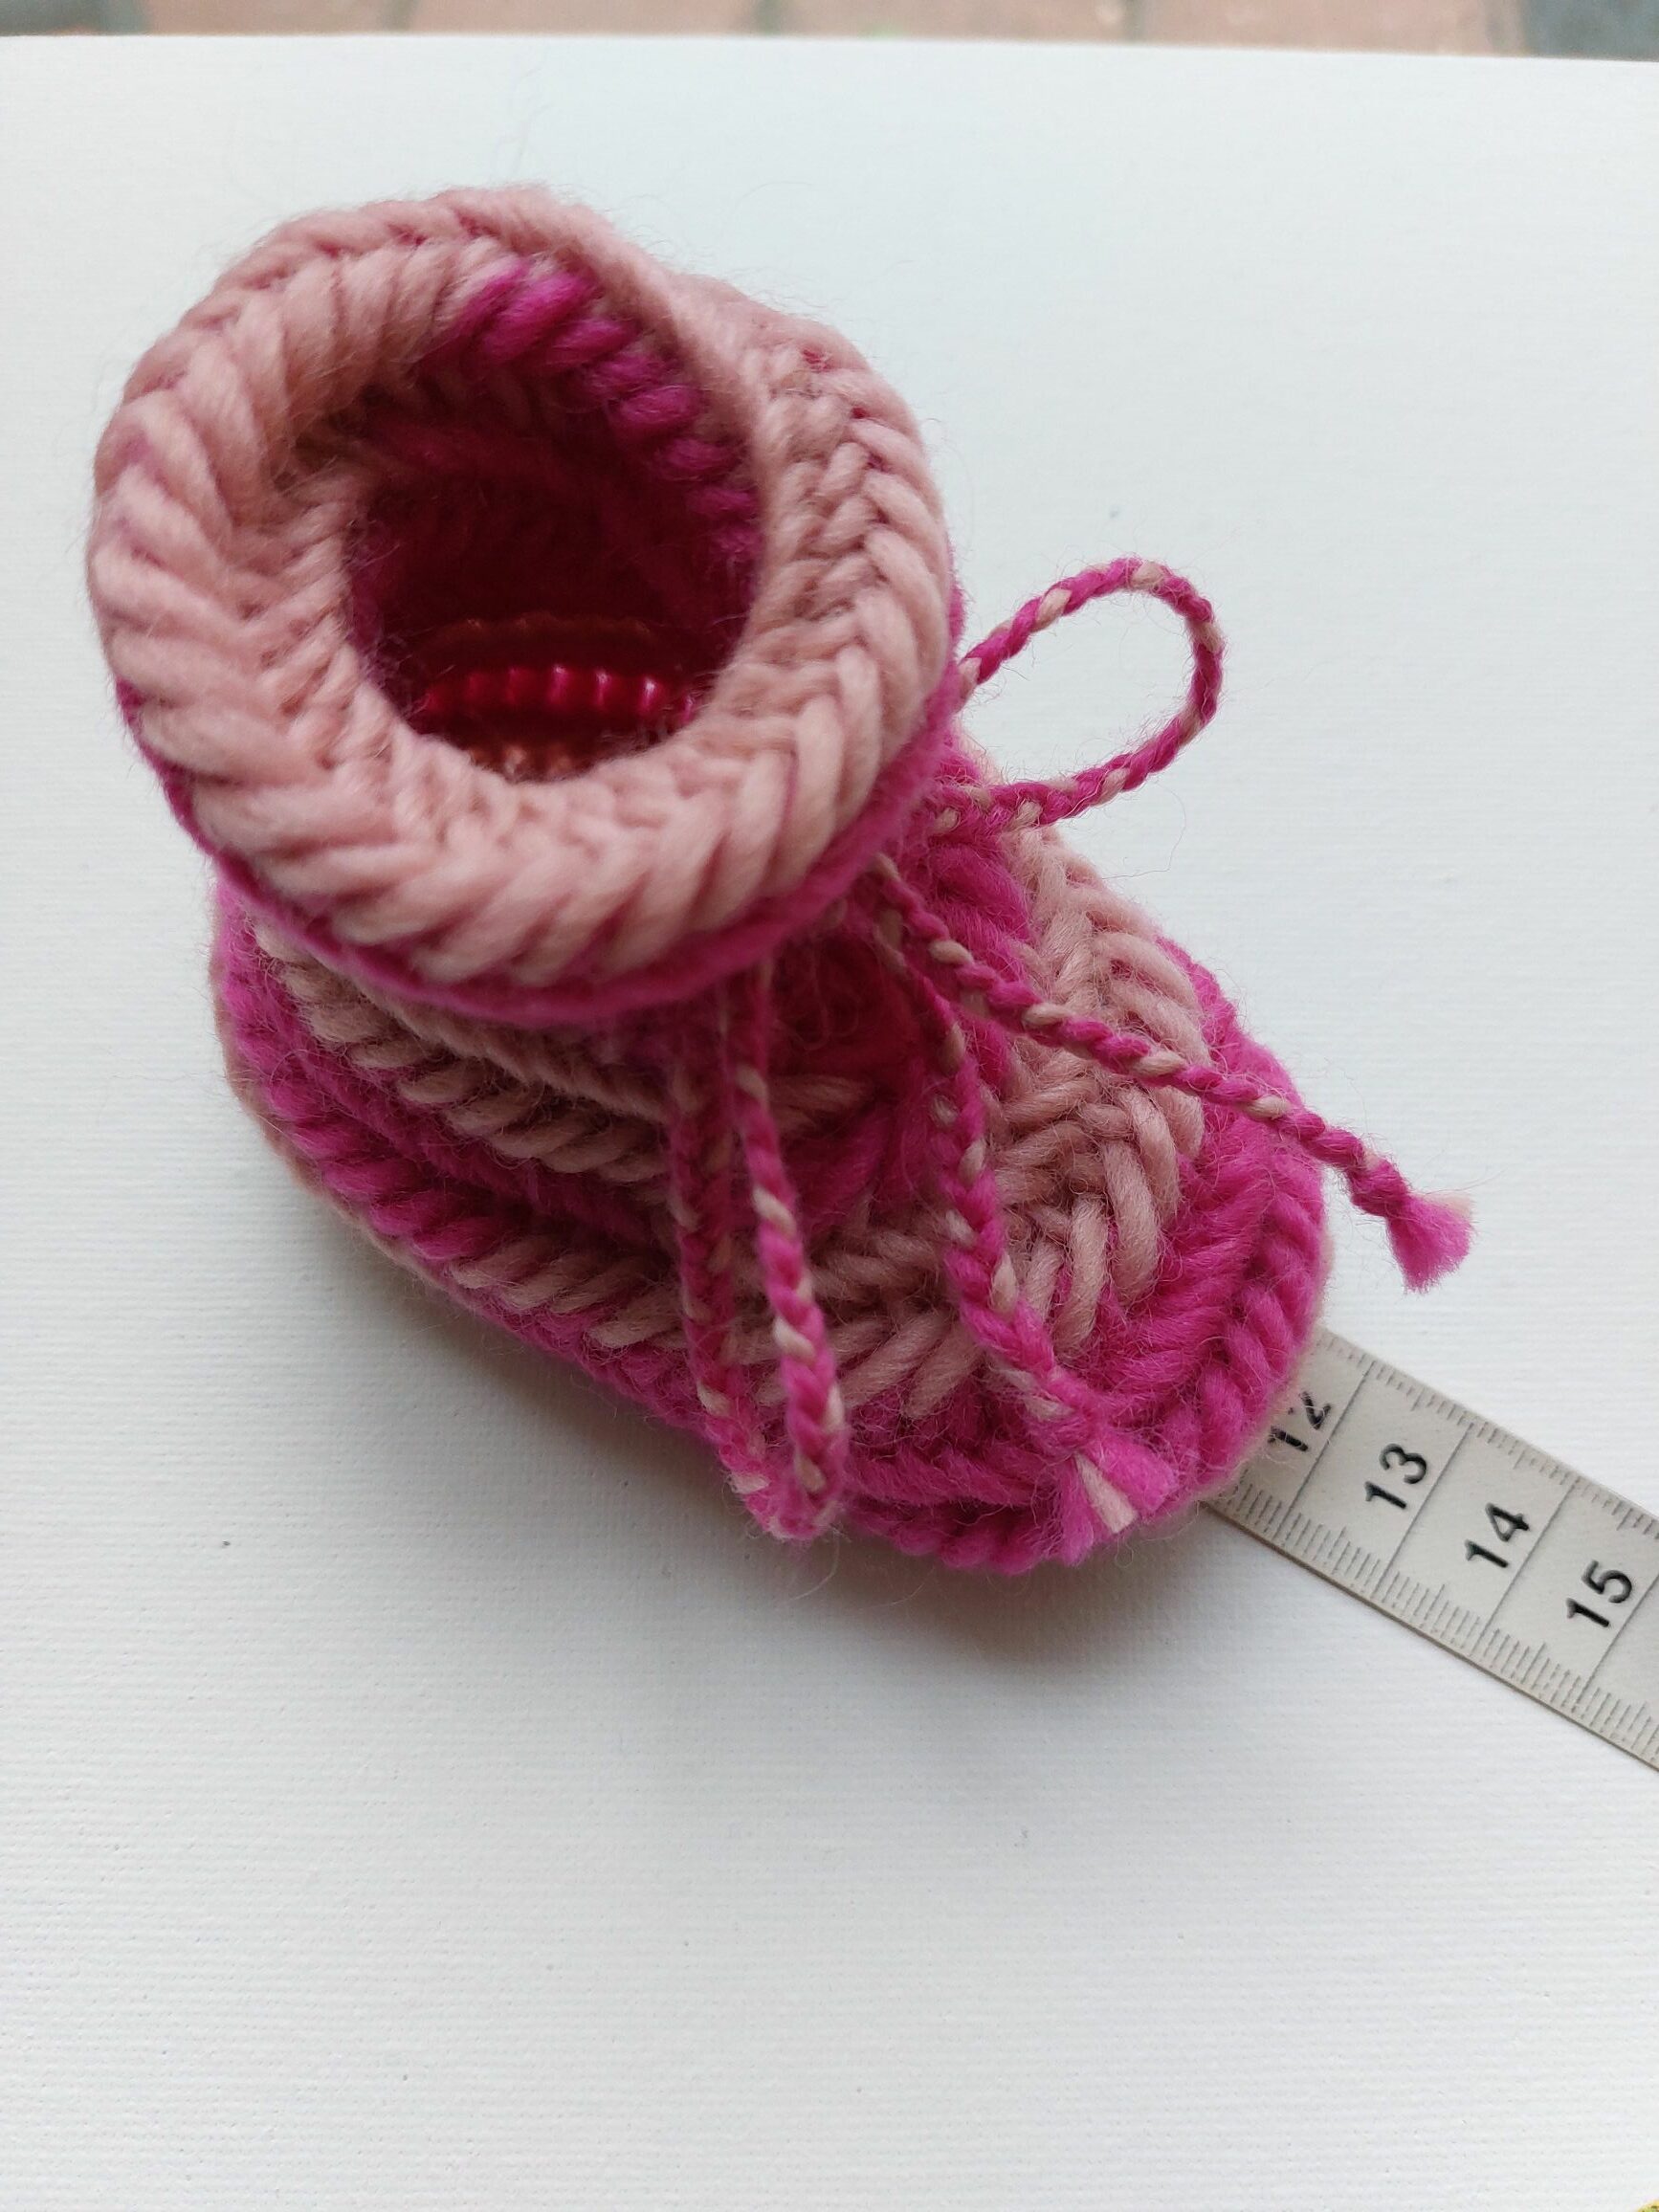
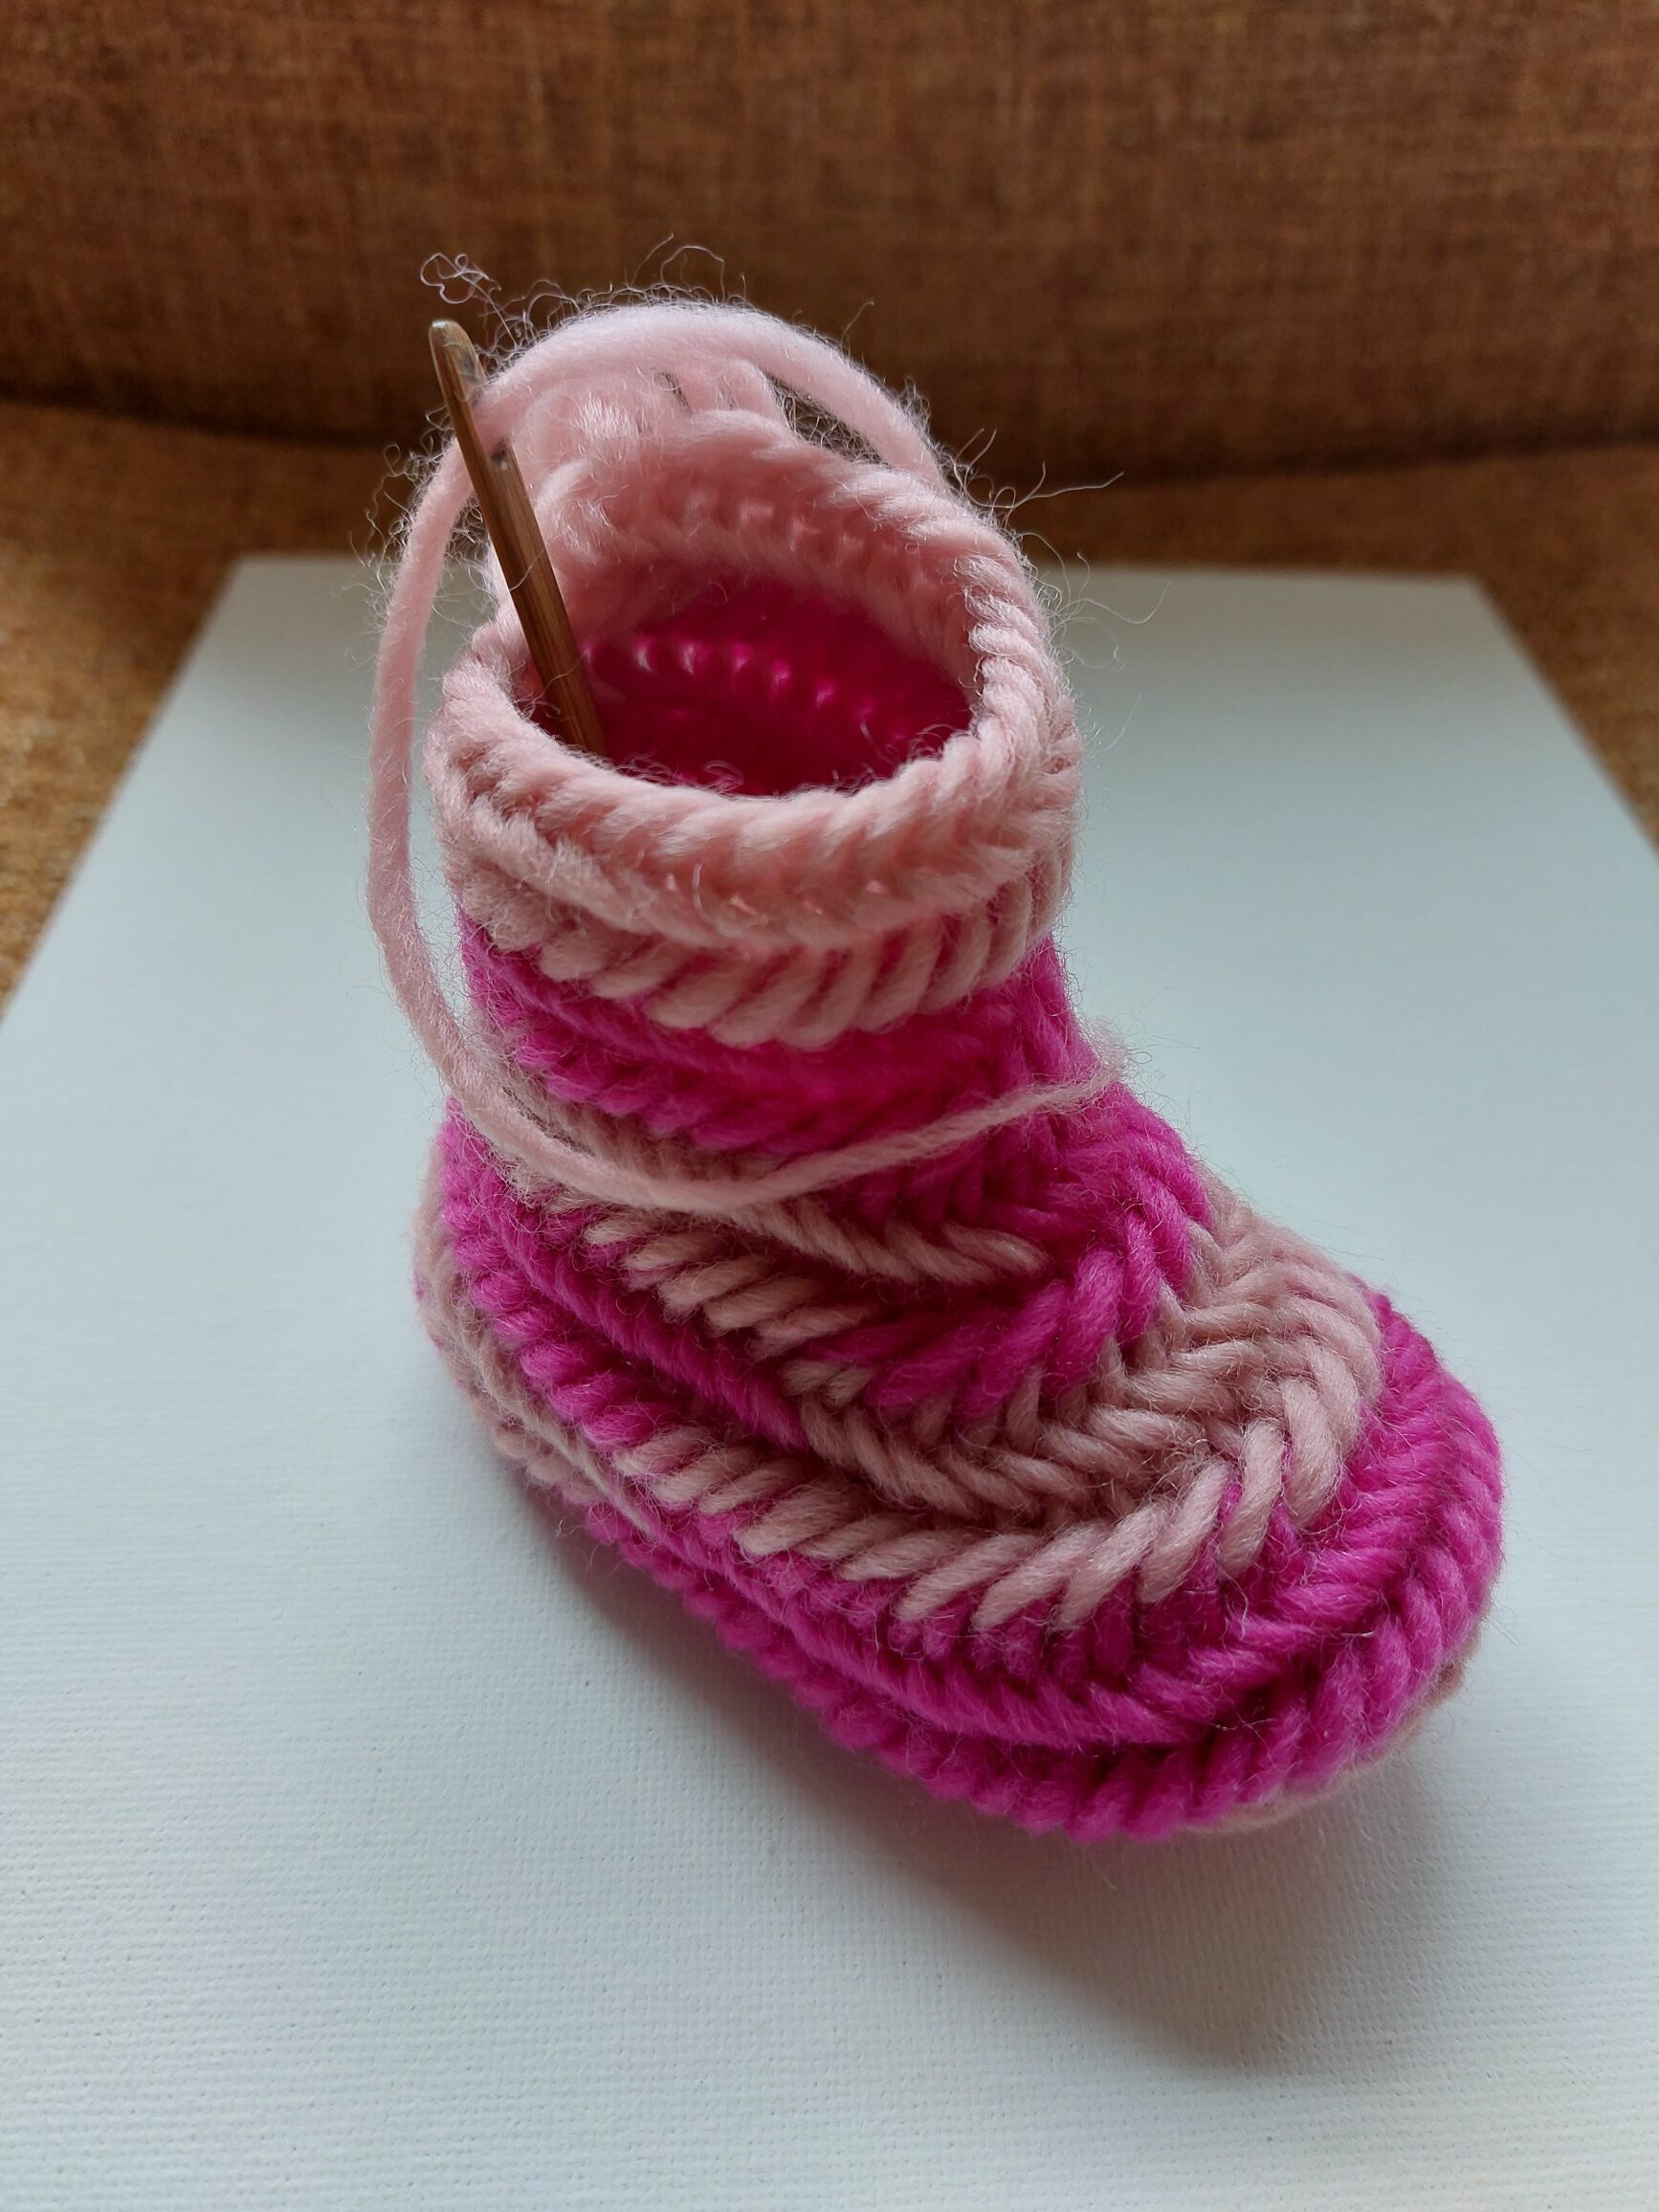
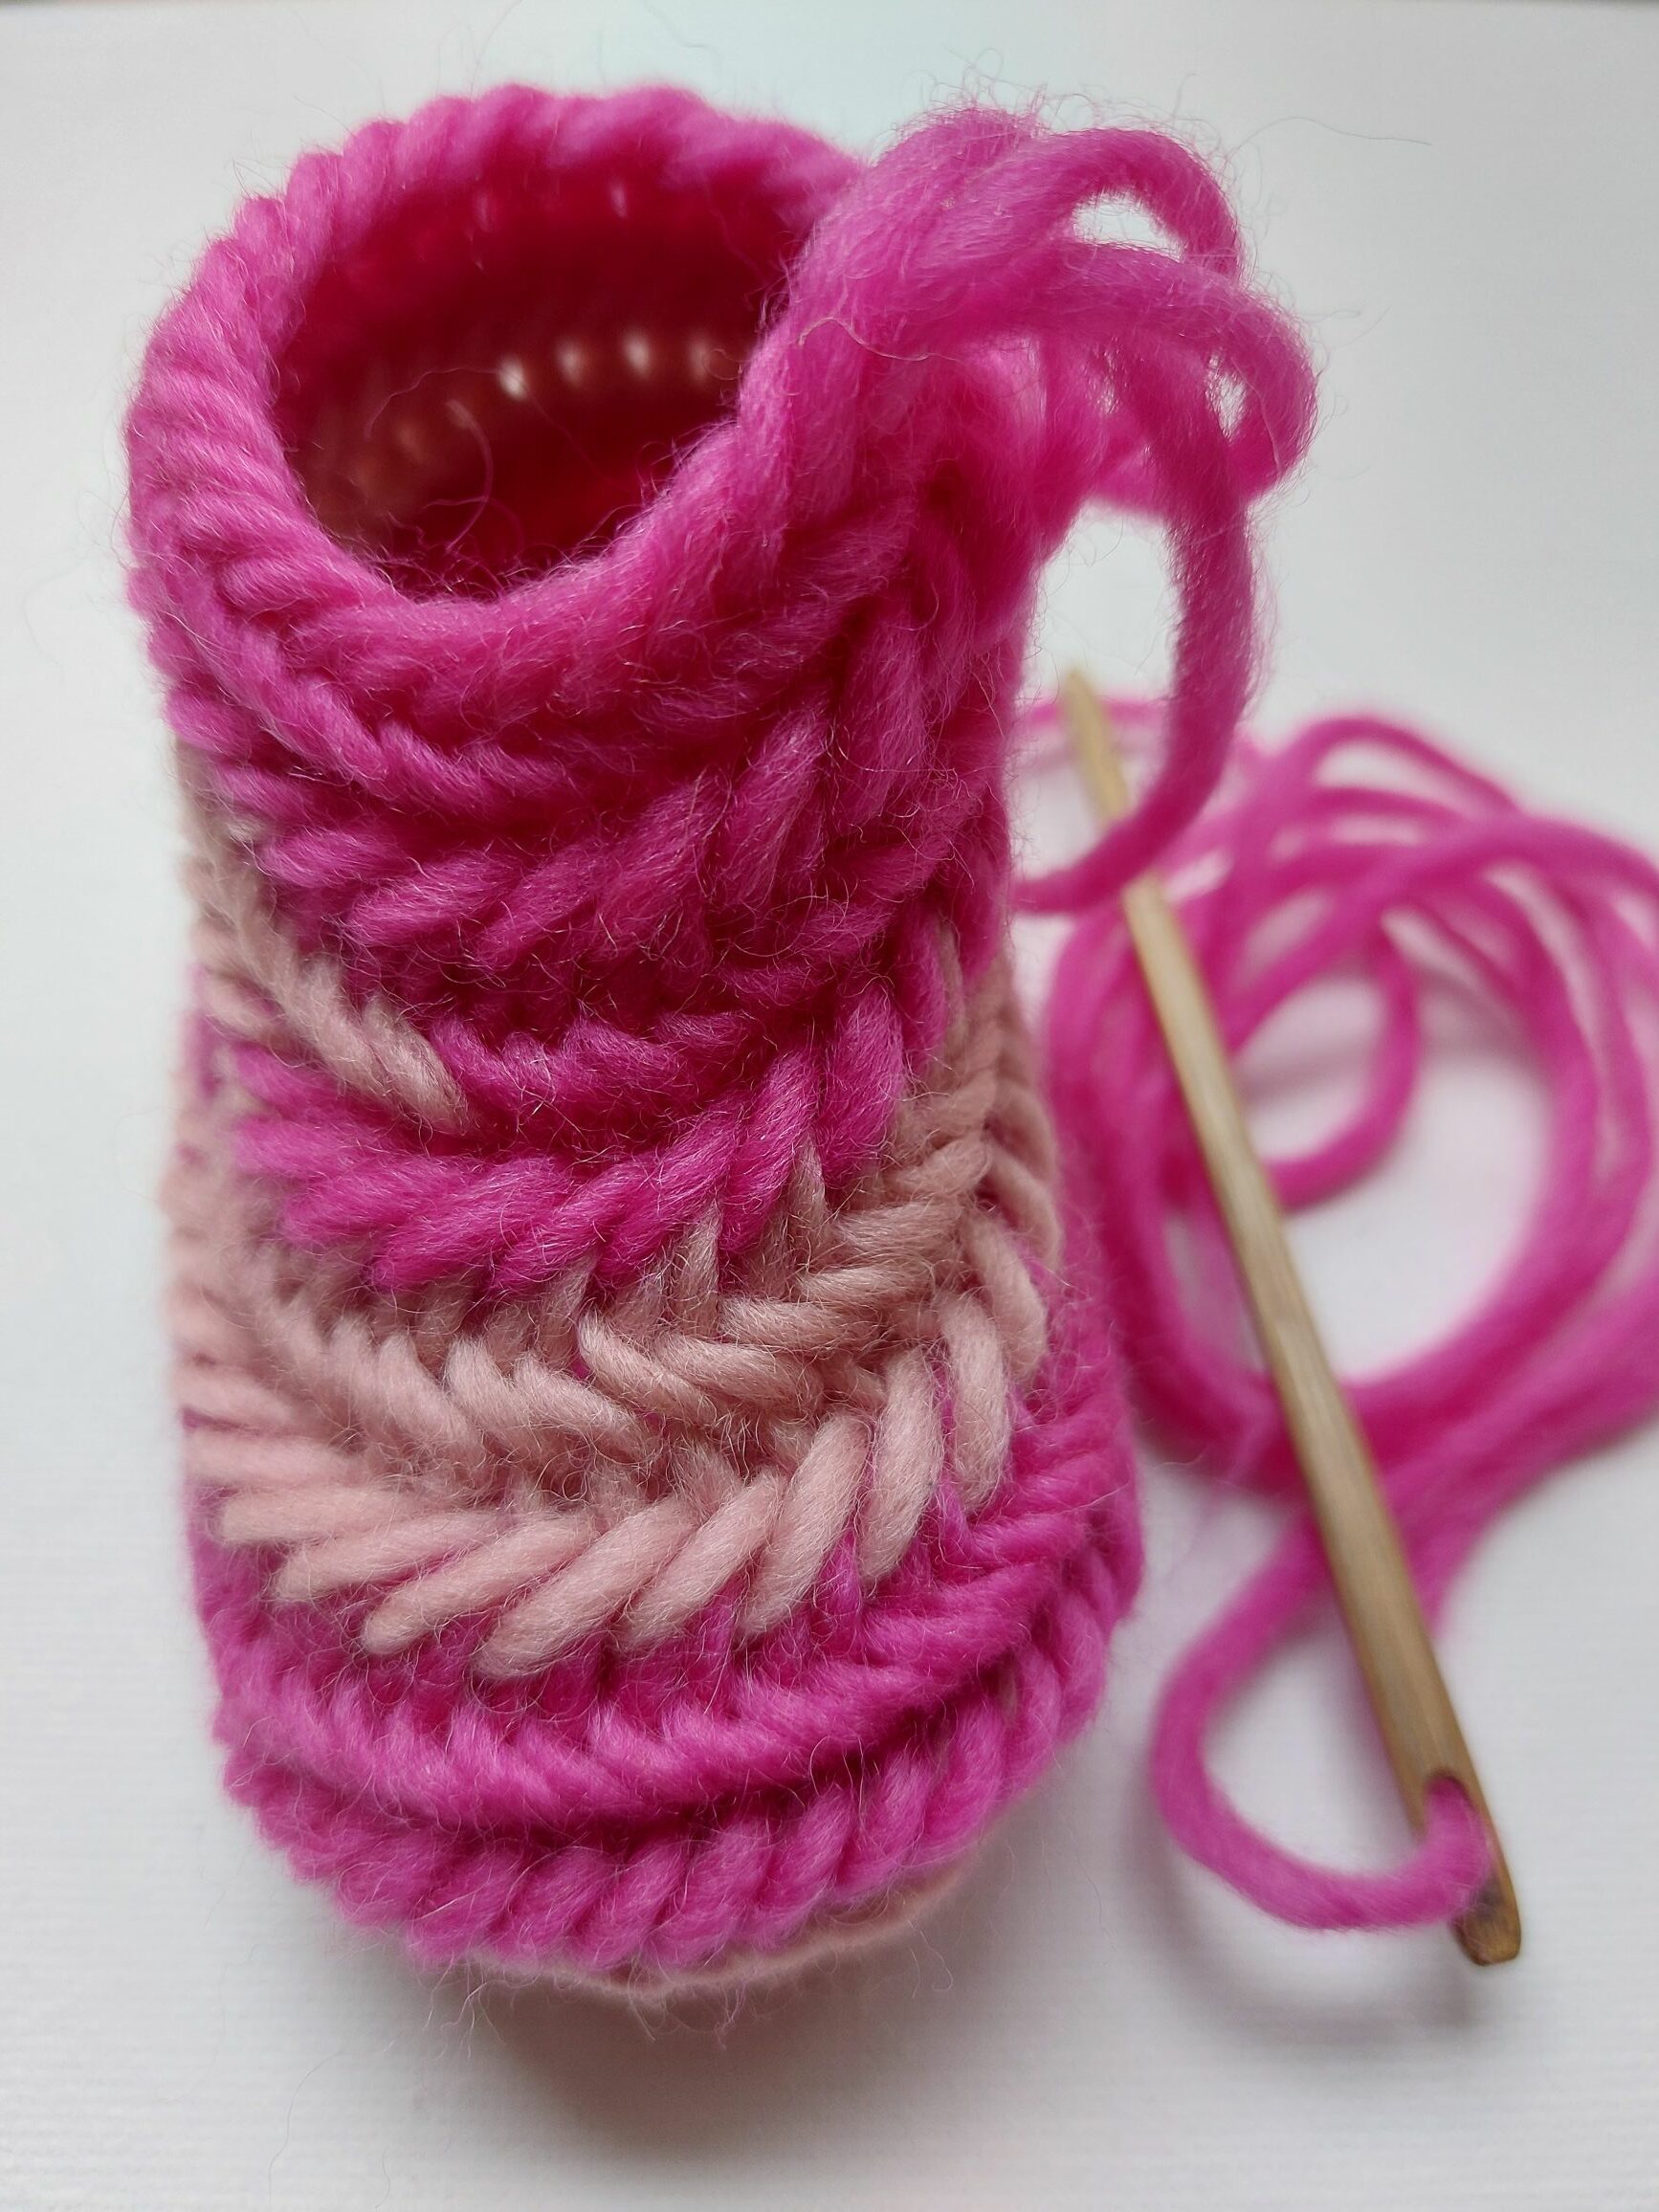
I made a couple of baby booties.
The pattern is the same as the baby socks, the edge is not folded.
Bigger baby socks.
To make the bigger baby socks i start with a row of 25 stitches with the Fin. stitch 2+2 F2 and wool of 3 mm. thick.
I make the turn by starting in the last 4th stitch. The first 2 stitches needlebind with F1 connection and the next stitches are needlebind with F2.
The fabric wil be more dence with the F2 connection stitch.
When you get to the end of the row you have to increase 5 stitches. This wil be the heel part of the sock.
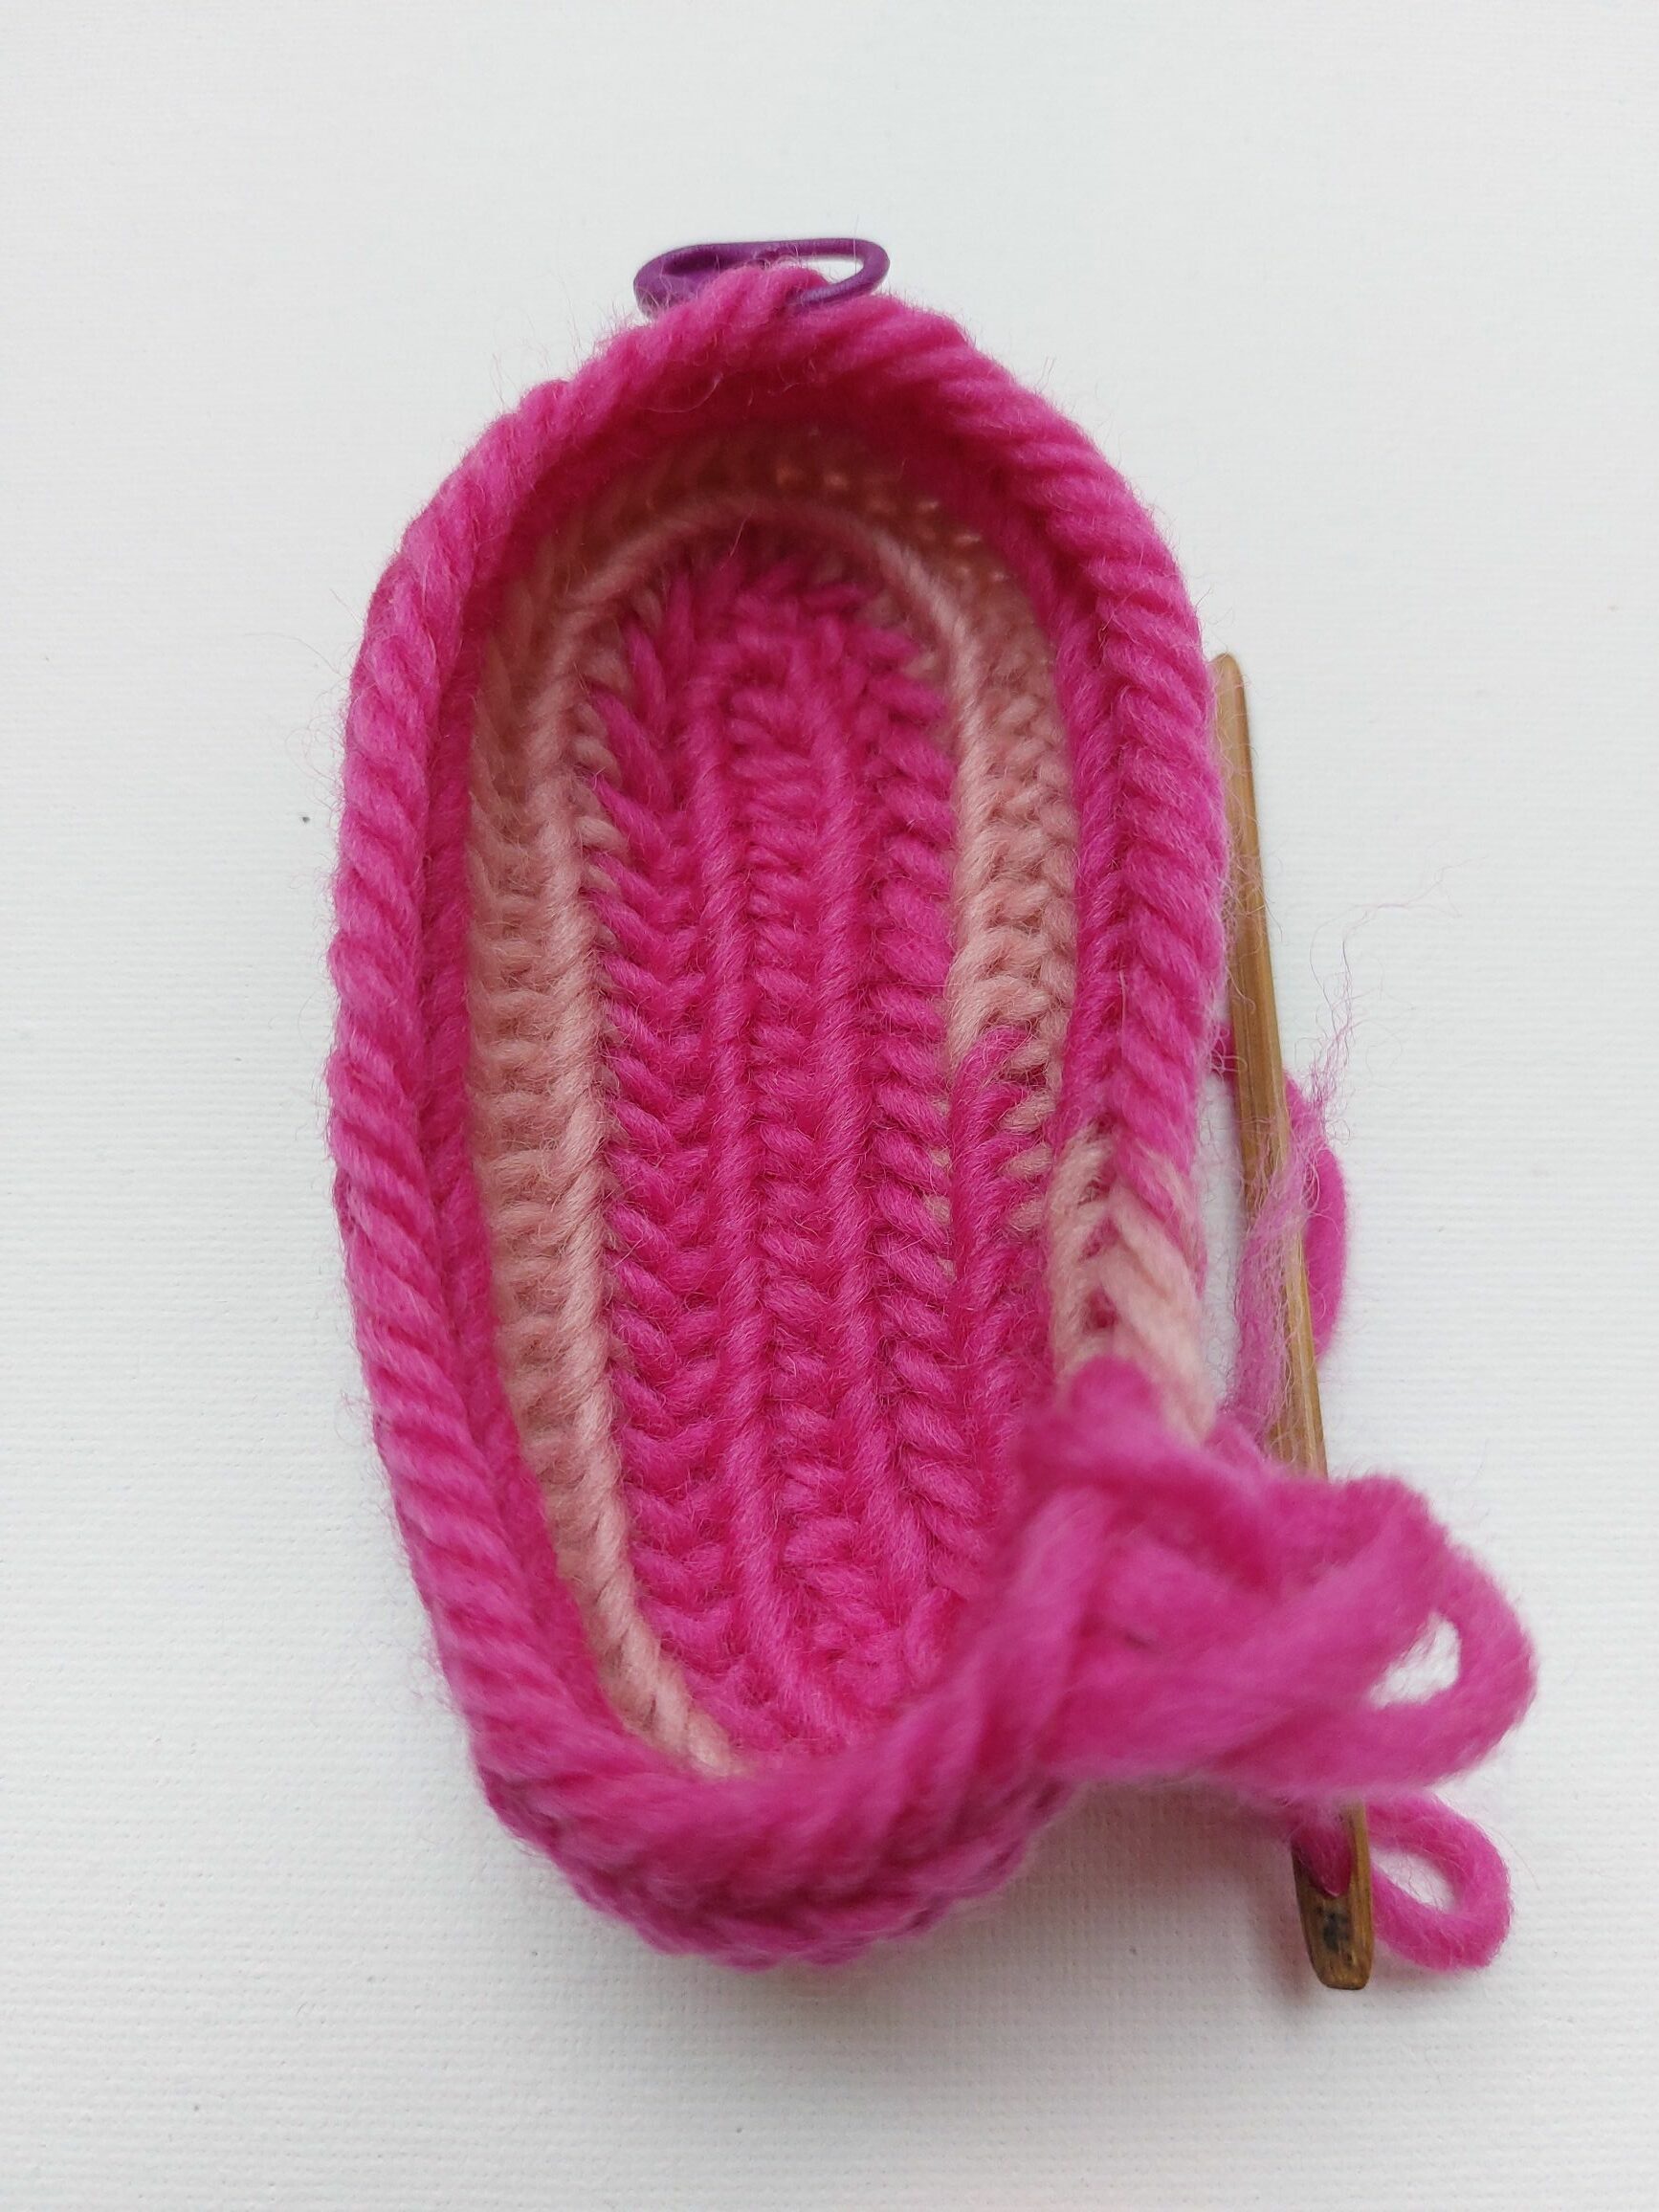
Next foto you decrease 10 stitches, the toe part, see markers. After decreasing continue needlebinding a whole round, when you are almost (middle part sock) at the toe part you decrease 13 stitches, and continue normal stitches.

When you get at the second round to the toe part you have to decrease 11 stitches again, and the third round you decrease 9 stitches and continue normal stitches.
After last decreasing you needlebind normal (no increasing or decreasing) a few rounds more.
Here you can see the Up-side down V the decrease stitches.
Finishing is done by gently tightening the last 4th stitch, then the last 3 and so on. You can see how i finish my nalbinding projects.
Now just fold the edge and thread lace through it and the baby socks are ready.

With the next round i forgot after decreasing 10 stitches to needlebind a whole round (: the almost ready sock seems smaller, so i had to use the sissor and start again.

A very famous painter Bob Ross told : ” we don’t make mistakes, just happy little accidents.
Designing baby socks was a great challenge and also extra special because for the first time i became a grandfather of a beautiful grandschild, his name is ODIN
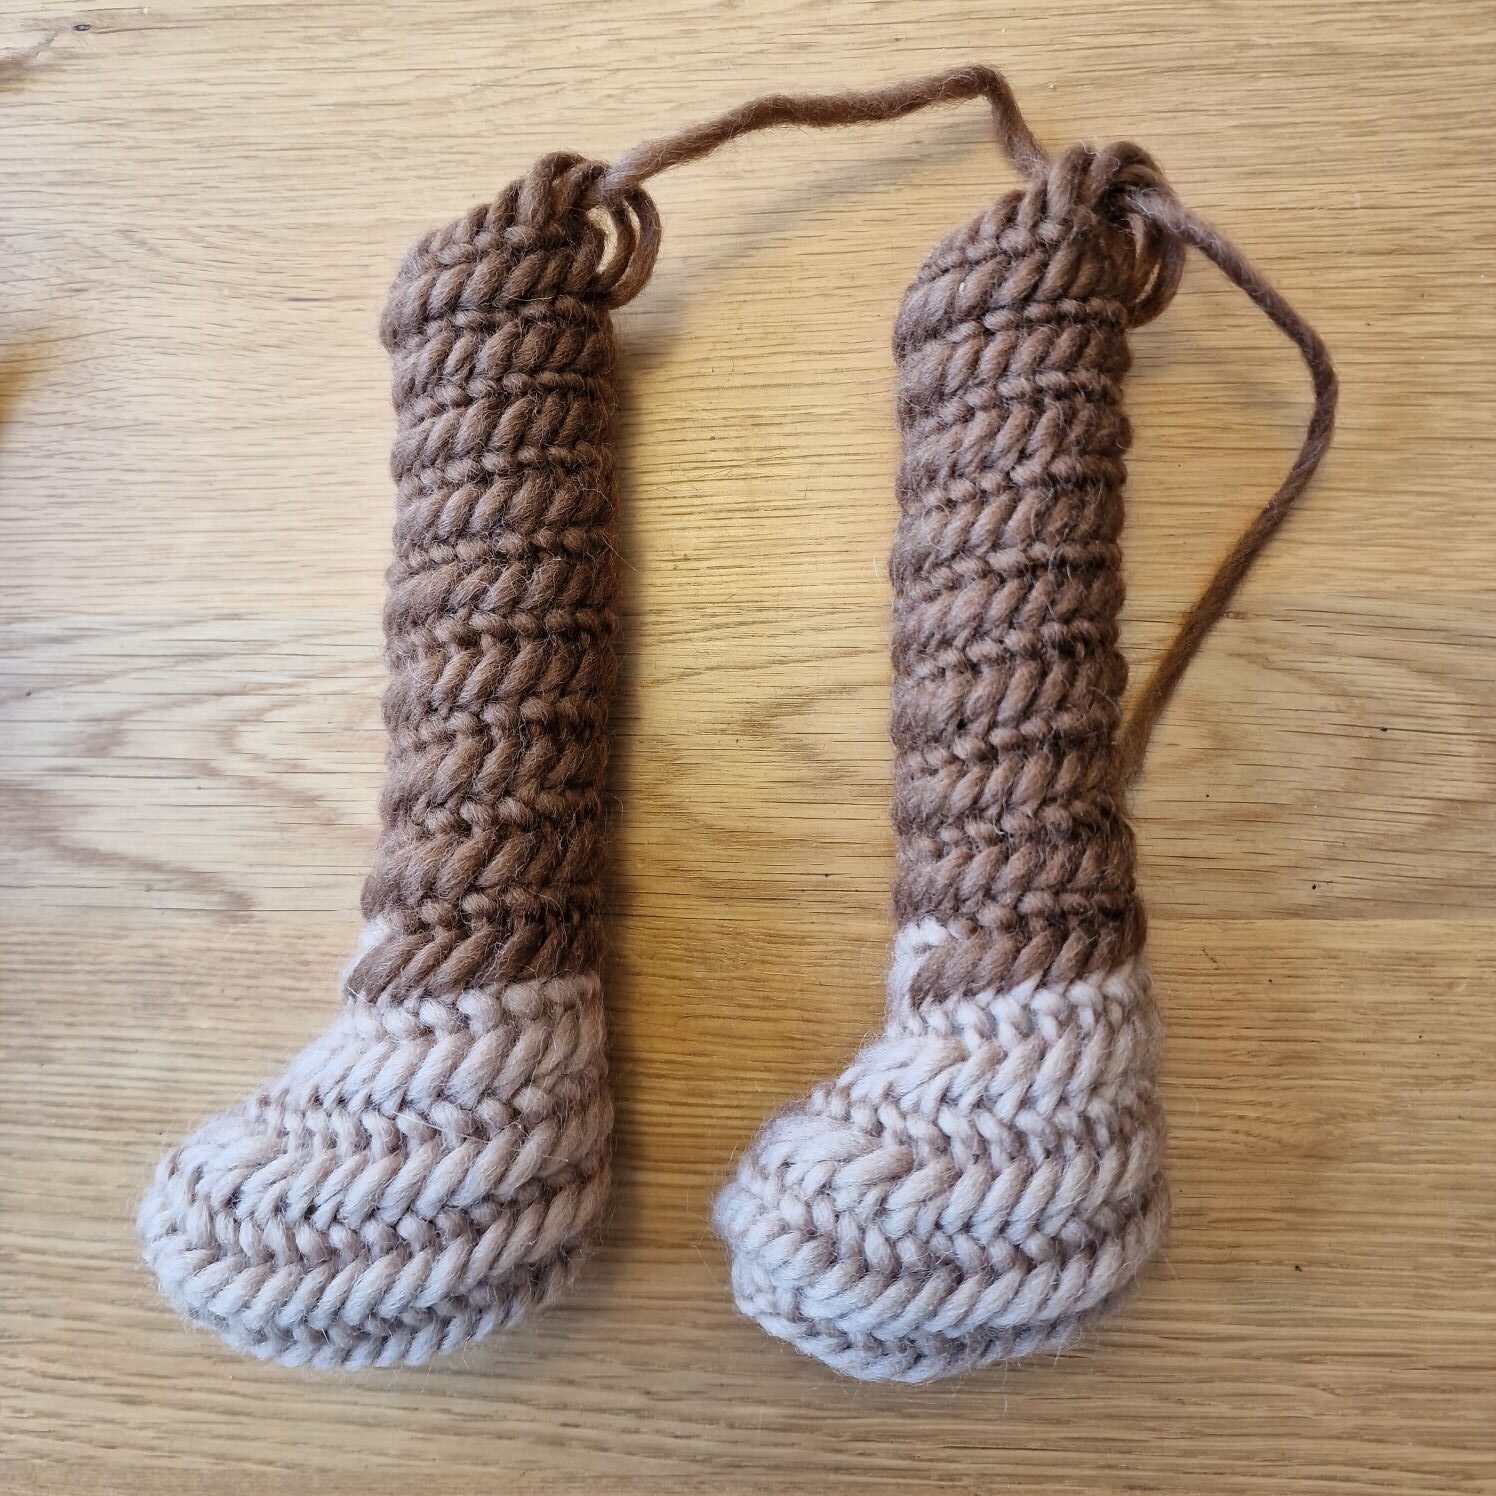
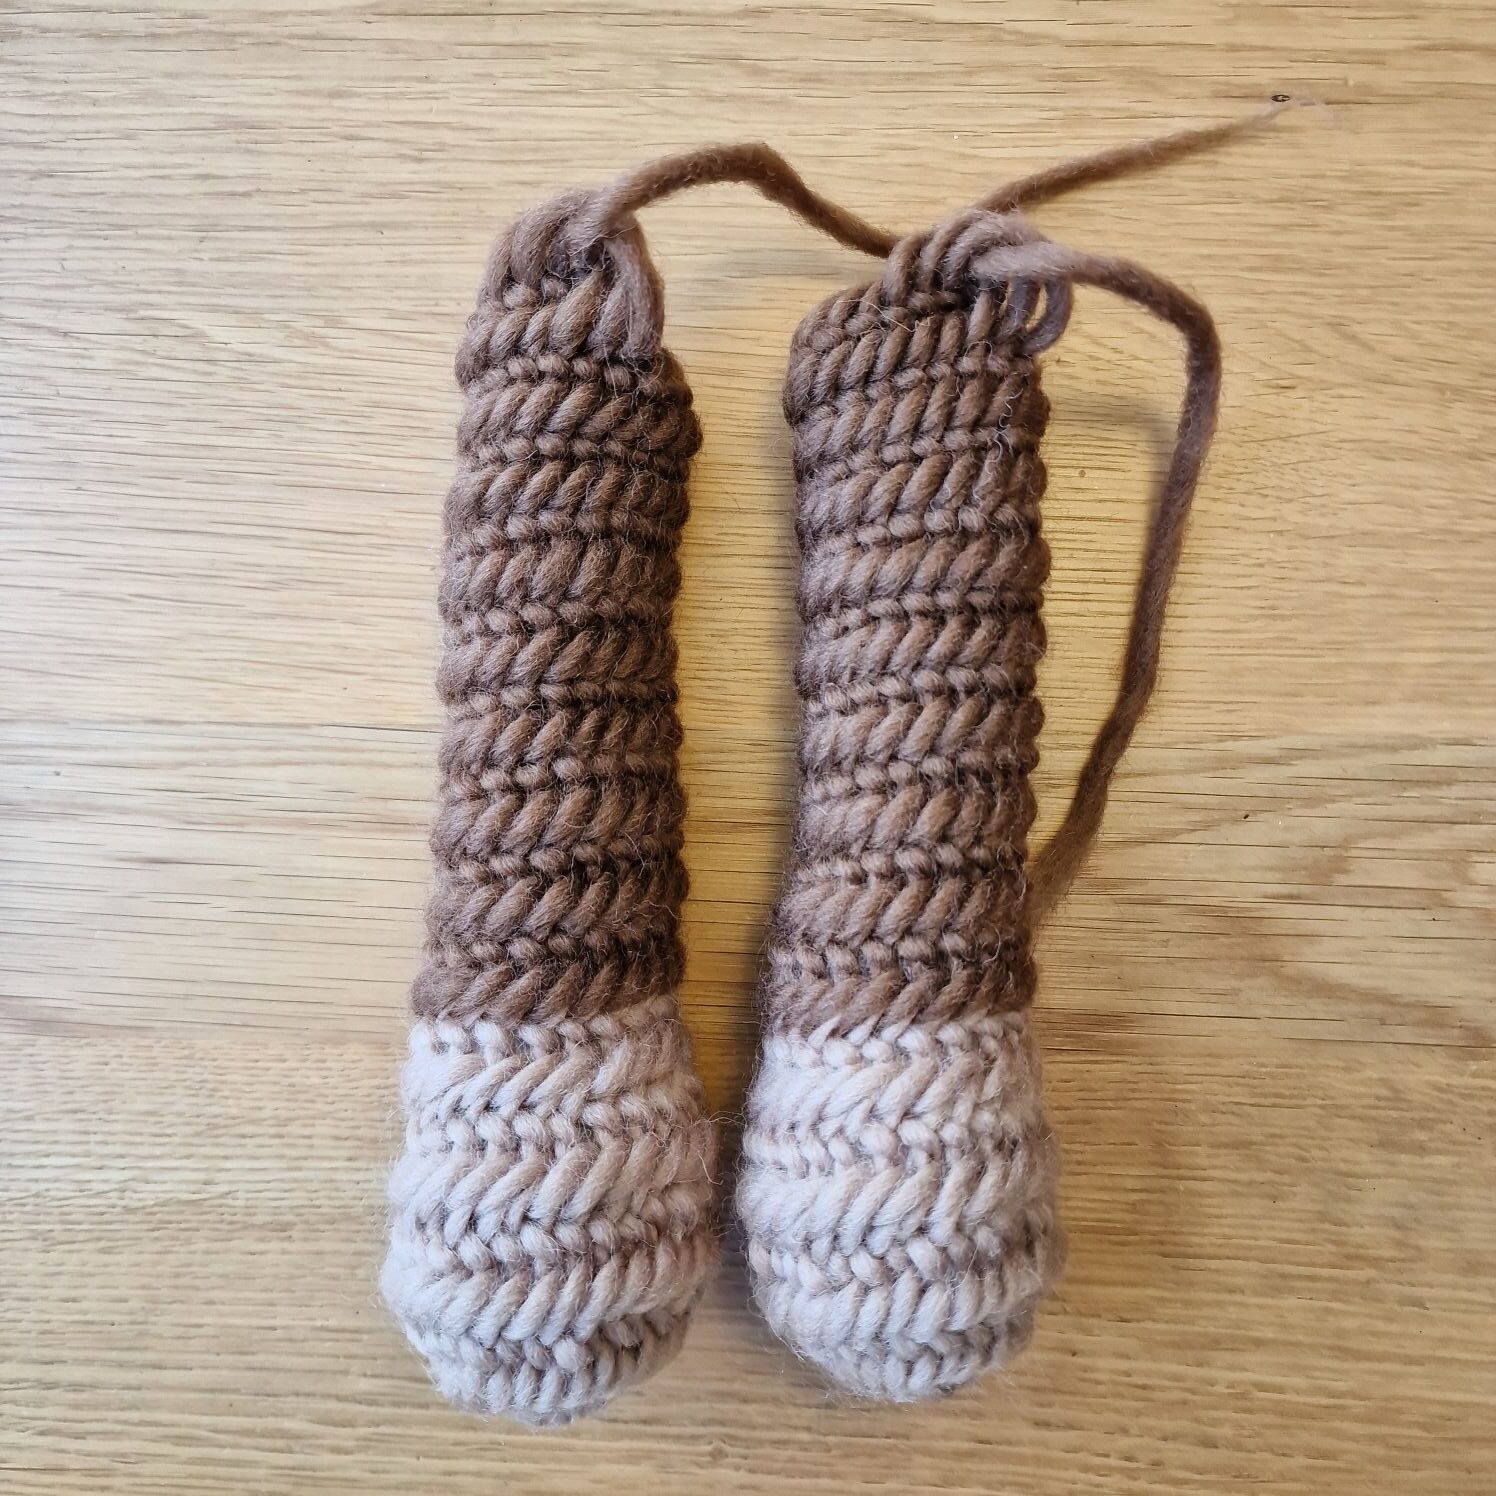
After the small baby socks I made a slightly larger sock.
The wool I use is 5 mm thick and 1ply.
The stitch is the Finnish stitch 2+2 F2. I start with a row of 25 stitches. In the 4th penultimate stitch I start the next row using the F1 connection stitch for the first 3 stitches so that it goes around easier.
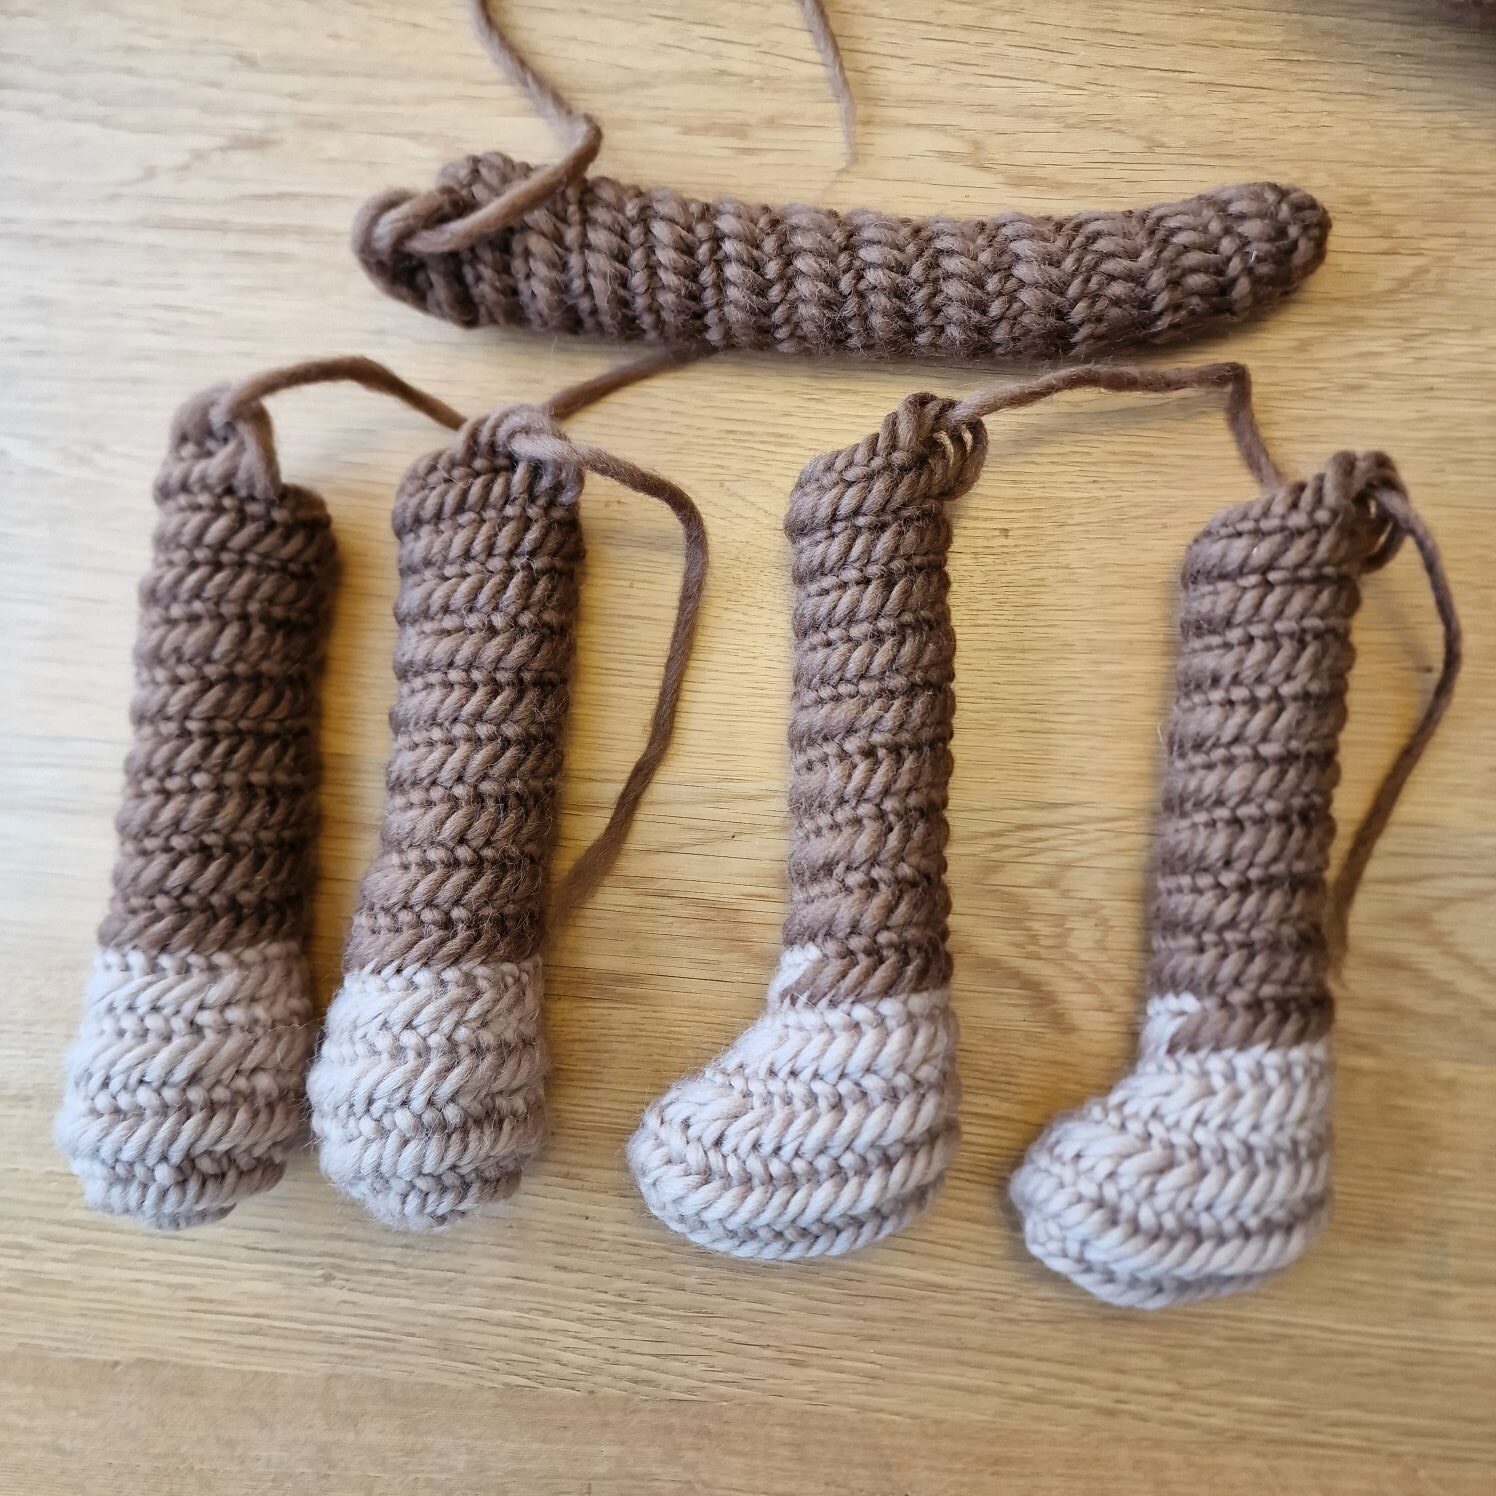
You can clearly see the difference in size below.
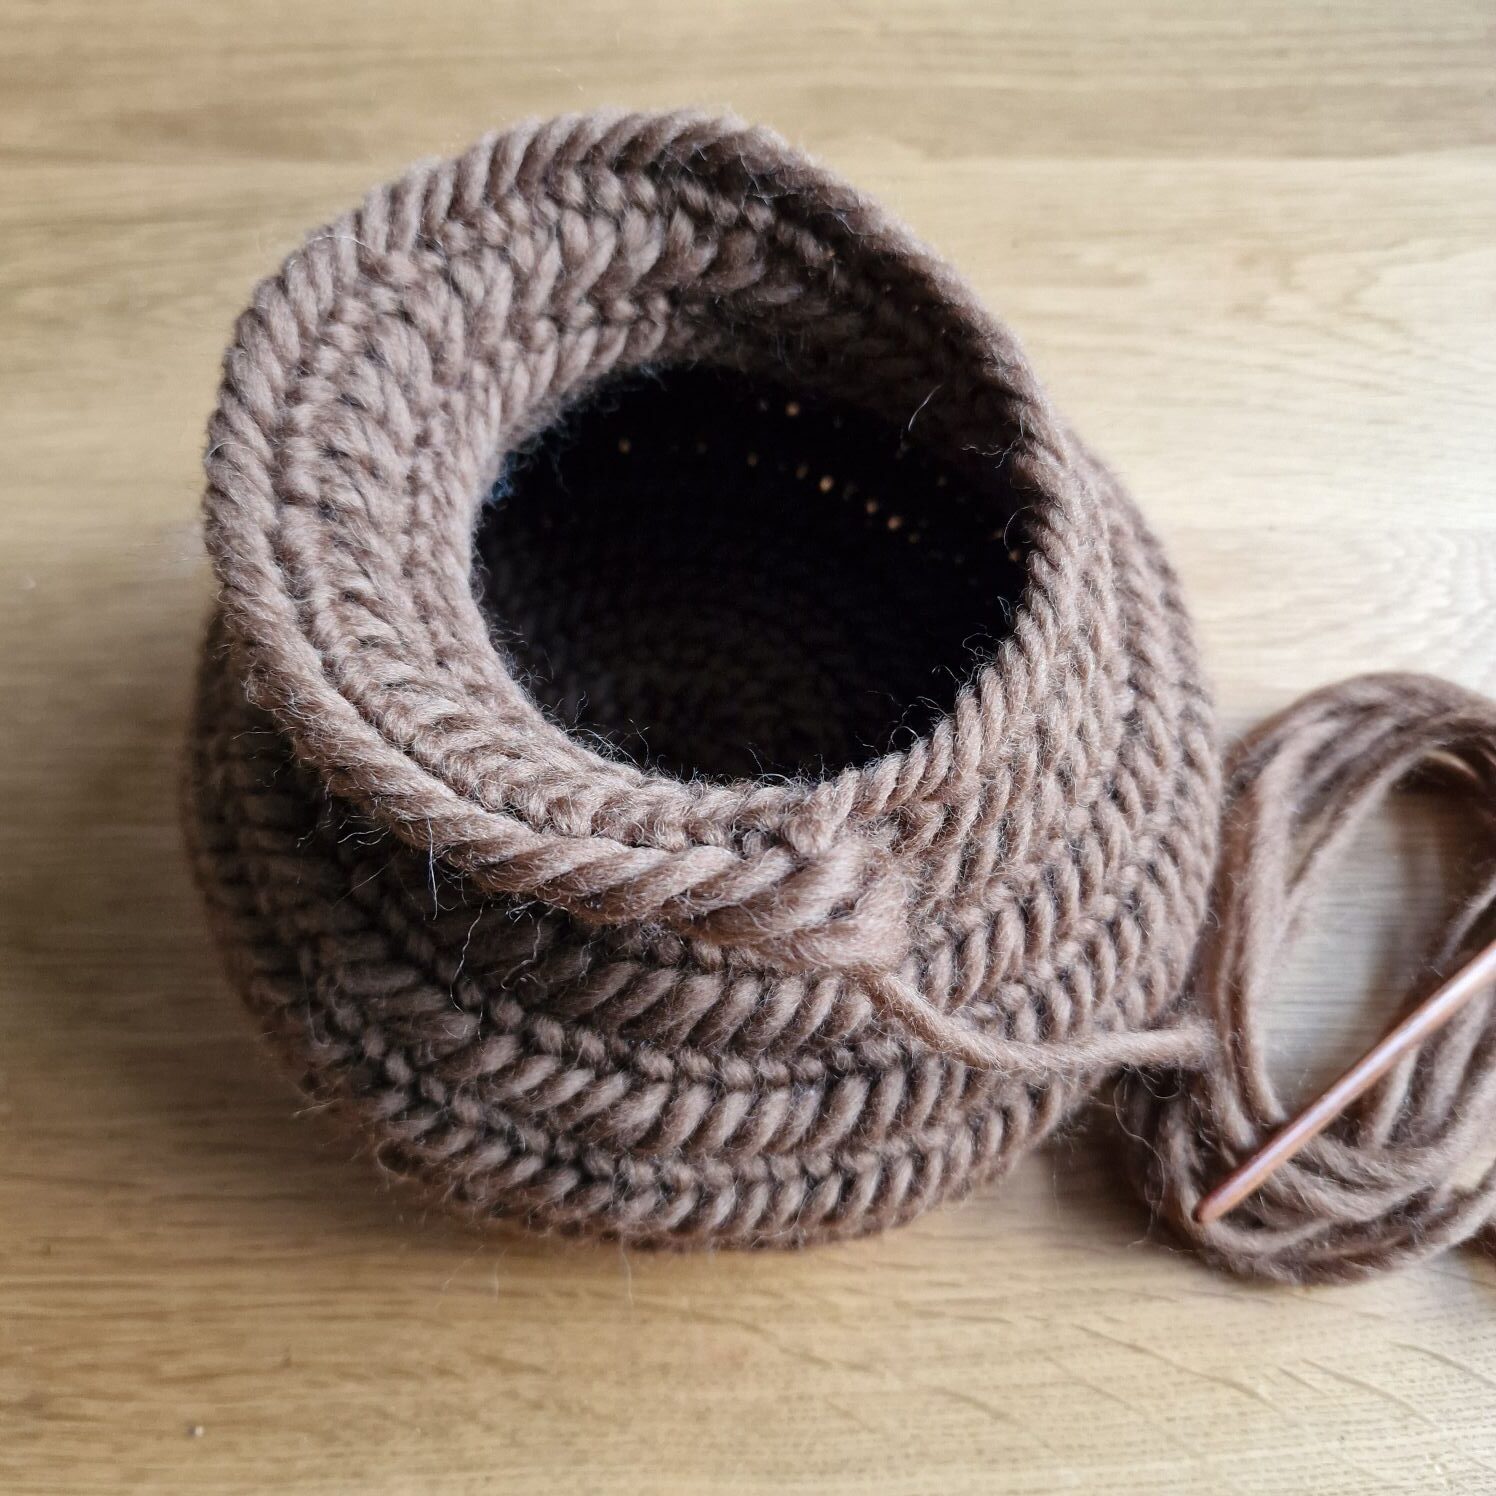
At the end of the row you will increase 5 stitches (heel part).
And you continue around and when you reach the end of the row you increase 7 stitches (Toe part).
After this you continue in the round and when you are almost halfway through the sock, you measure where you will then decrease 15 stitches.
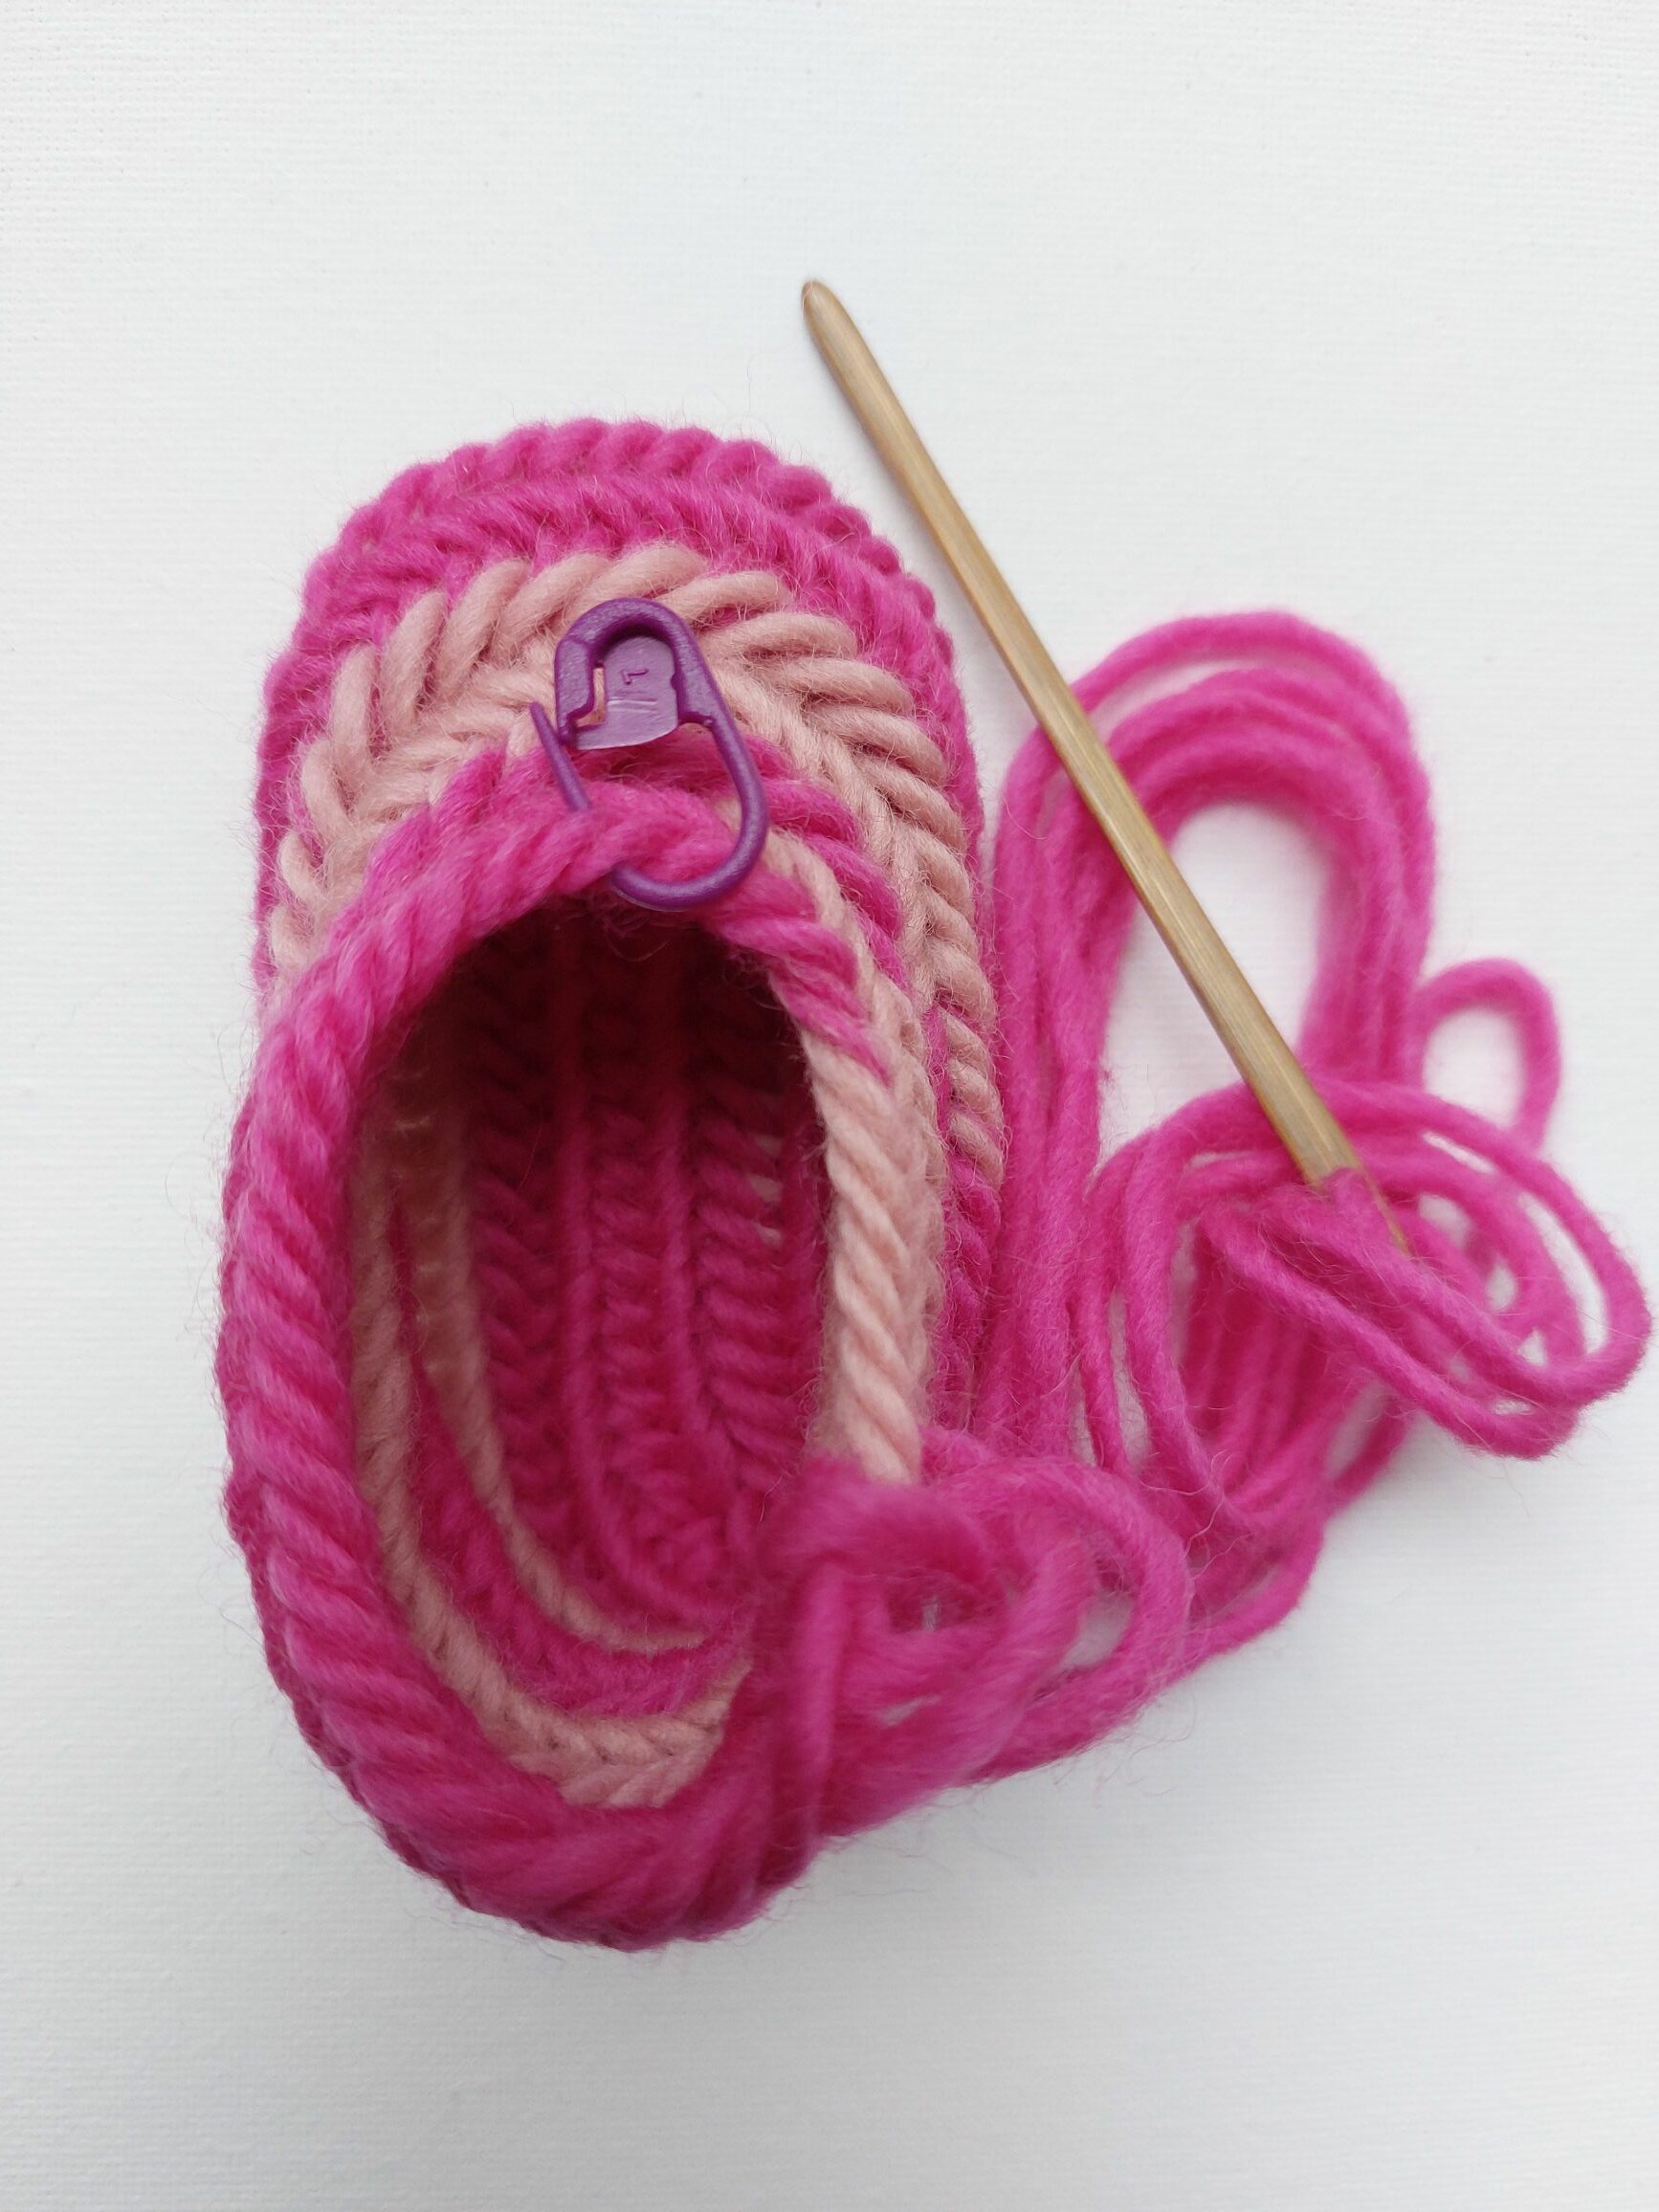
The red marker is the middle of the bend stitch 8 and the blue marker is the 1st decrease.
So after the red marker you still have to decrease 7 stitches and you have decreased a total of 15 stitches and see the toe part being created.

Continue tying your needle around and when you are almost halfway through the sock, you measure again where you will then decrease 13 stitches.
The red marker is the middle of the bend stitch 7 and the blue marker is the 1st decrease.
So after the red marker you have to decrease 6 more stitches and you have decreased a total of 13 stitches.
and see the toe part emerge.
After these decreases you continue in the round (no more decreases and increases).
You can now decide how high you want to make the sock.
The length of the foot is 10 cm, width of heel part 3.5 cm, width of toe part 5 cm. the height of the sock is 9 cm.
The dimensions are approximately not exactly to the mm.
The size of the sock is determined by many factors: How big is your thumb, how tight or loose you needle tie, which stitch, and which connecting stitch do you use.
All patterns are a guideline of how to make something.
With needle binding you can give your project your own twist, which makes it very unique and special.
English video: nalbinding easy baby socks.
Free pattern of my first nalbound monkey
When needlebinding a pattern, it is best to compare it to a food recipe, follow the recipe exactly (knitting and crocheting) or approximately a little more of this and a little less of that and make your own creation.
Your thumb is approximately the size of the stitch.
The wool can be slightly thicker or tinner.
One needlebind tight and another needlebind loose.
Than there is the connection stitch that also determines the appearance of the fabric and its density.
The following pattern is a guidline, just see what you like.
I made the monkey with the Faberg stitch and F2 as a connection stitch. (Faberg stitch is 2 loops around your thumb and one loop behind yout thumb).
F2 means the old and the new stitch on your needle.
The feet are actually baby socks that you then lengthen to create the legs, you start with 16 stitches.
Then you stitch into the 4th penultimate stitch to complete the next row, the first are F1 and the next stitches are F2. (this way you can easily make the bend).
At the end of the round you will increase the last 3 stitches (your starting knot also counts as a stitch), this is how the heel is created.
Then at the end of the next row you increase 10 stitches, this is how the toes are formed.
Then continue around and decrease 6 stitches at the end of the row (toe area).
Then continue around and decrease again 6 stitches (toe area).
Then continue around and decrease 2 stitches at the back of the heel, you have now 18 stitches.If you want the foot and leg to be slightly thicker don’t decrease, just see what you like. Now round straight up fot the leg.
The arms are a little easier, start with 13 stitches and keep the tail of wool about 10 cm. so that you can make the circle.
You will do this more often when making the monkey.
Take a look at the chapter Round start, how it went again. (there is now also a video).
After you close the circle, attach a stitch marker so you know when a round starts. (and ends) The first round you increase all stitches.
The secound round increase 6 stitches evenly over this round, you now end up with 32 stitches if not add or substract what is needed.
The next round you needlebind all stitches normal (no increase/decrease).
Then next round 2 stitches normal and the third decrease the entire round.
You end up with 18 stitches, and if not then increase or decrease some stitches.
And now you go straight up to make arms in the lenght what you like.
With the tail you start with 8 stitches.
The next round you increase all stitches.
For the next rounds you needlebind normal and when you reach round 4 you increase 1 stitch. Then just needlebind around again and when you get to round 8 you will increase 1 stitch. After this, continue without increasing/decreasing and make the tail as long as you want.
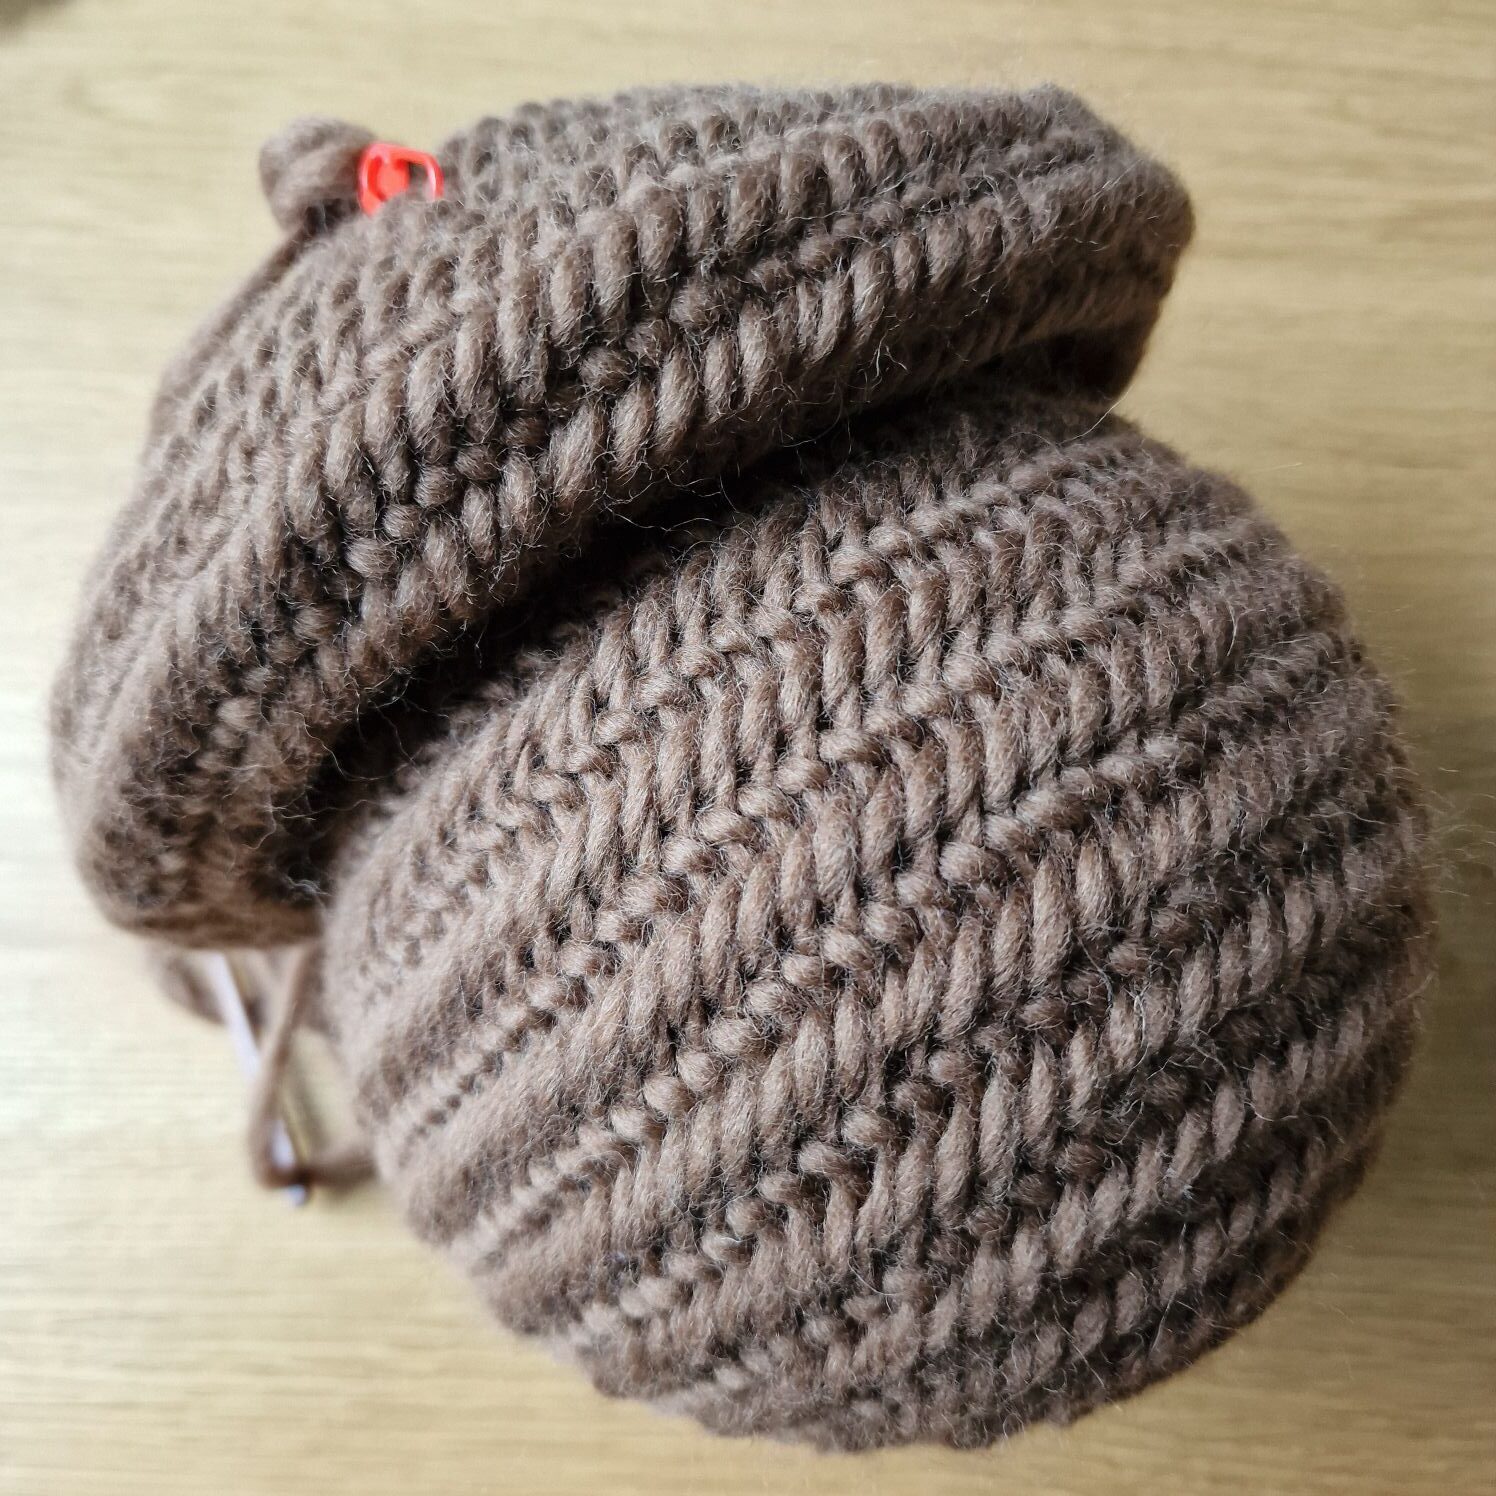
The monkey’s head with the body attached.
You start with 13 stitches with a long tail because you going start round.
Attach a stitch marker after you closed the circle.
The first round all stitches are increased.
Next round 1 stitch normal and the 2 stitch increase.
Next round 2 stitches normal and the 3th increase.
Next round 3 stitches normal and the 4th increase.
Next round 4 stitches and the 5th increase.
Next round 5 stitches normal and the 6th increase.
The next round will be needlebind normal.
After this you will start decreasing next rounds.
Next round 5 stitches normal and the 6th decrease.
Next round 4 stitches normal and the 5th decrease.
Next round 3 stitches normal and the 4th decrease.
Next round 2 stitches normal and the 3th decrease.
You have a small circle that you hand can just pass through, the next round you will simply needlebind round without increase/ decrease.
This round is the transition from head to torso.
You have made a slightly longer ball by simply needlebind a round between increase and decrease rounds.
You wil repeat this a little larger.
Next round 2 stitches normal and the 2th increase.
Next round 3 stitches normal and the 3th increase.
Next round 4 stitches normal and the 5th increase.
Next round 7 stitches normal and the 8th increase.
The next round you will needlebind all stitches normal, no increase/decrease.
Then decrease the rounds with the same numbers.
So 7 stitches normal and the 8th decrease. next round 6 stitches normal and the 7th decrease. Next round 5 stitches normal and the 6th decrease
Next round 4 stitches normal and the 5th decrease.
Next round 3 stitches normal and the 4th decrease.
Next round 2 stitches normal and the 3th decrease.
You have made now made the head and the body and i thought the proprtion was not right, and what if i turned it over ???
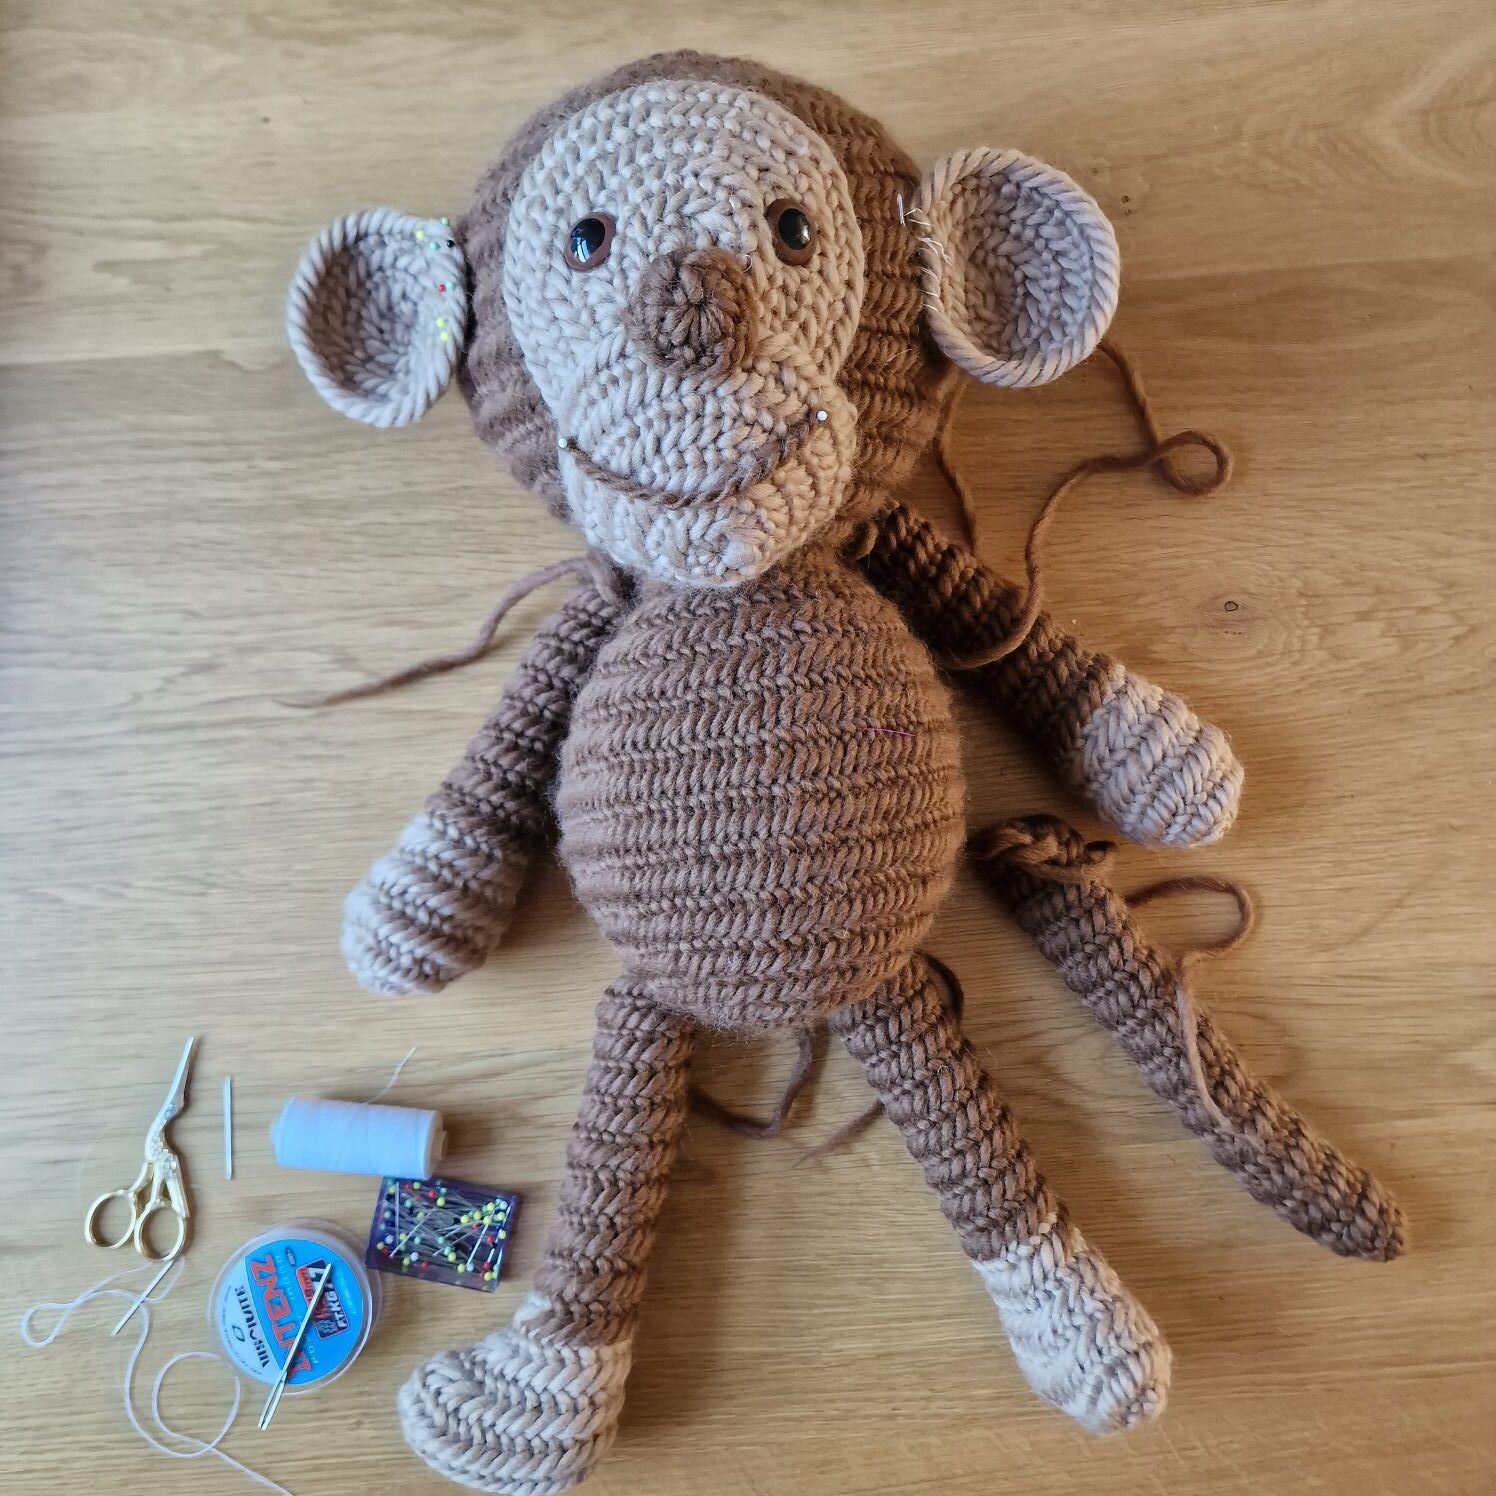
I fitted the arms and legs and it was now beautiful ( in cartoons you often have characters with a large head and a smaller body. (the body is closed after filled up)
To get a good idea of how big the convex shape is, I placed a balloon in the shape and blew it up.
And now i got a better idea of the relationship between the head and the torso.
The mouth part again consists of a cicle and i start with 13 stitches.
The round is made according to the above pattern.
And after round 5 stitches normal and the 6th increase the mouth part is ready and you finish it.
The chin part also consists of a cicle, but now i start with 10 stitches, which makes the cicle more conex shape, and that is what i wanted for the chin.
Start as normal circle an when you reach round 4 stitches normal and the 5th increase, the convex circle is ready and is slightly smaller in diameter.
If you want to make the chin area larger, just go through another round of what you like.
A monkey’s earse are very important, they make a monkey cute and adorable.
The design of the earse is 13 stitches and i forgot to write down how big they should be in my notebook.
After inspecting the earse they are: first round all stitches are increased.
Next round 1 stitch normal and the 2nd increase.
Next round 2 stitches normal and the 3th increase. and then finish of, but if you want to make them bigger, continue a few more rounds.
The nose starts with 13 stitches and after all stitches are increased, finish and the nose is ready. Fil ( 100% polyester) the body, arms and legs and sew them together with nylon fishing line.
I found it a great challenge to needlebind a monkey.
I chose the Faberg stitch because it is wider then the Oslo/Lund stitch and that makes good progress.
For the connection stitch f2 so that the fabric also became denser in structure.
You can of course use other stitches.
With the monkey i had filled and finished the head and body and then i attached the parts (mouth, chin, nose) which was not very easy.
With a new monkey after the head and body almost finished i use balloon, secure the parts with basting thread. then i removed the balloon and secure the parts with strong fishing nylon. Some parts i made 2 or 3 times before i was satisfied with the result and you can also take it out if it is not right and cut of a piece with scissors and start over.
This pattern is a general guideline for me.
I hope to learn and discover much more when making cuddly toys and what is still possible with this beautiful centuries old craft of needlebinding . 🙂
He is so cute!! Love him!! Great pattern and instructions. I just might have to give it a try!!