I always forget to ask if you’d like to subscribe to my YouTube channel: happy needlebinding If I have a lot of subscribers, I can email magazines to write an article about this wonderful old craft so I can pass it on to the next generation.
Thank you kindly in advance. bert veugelers. (today 12 nov 2026 i have 72 videos on my YouTube channel happy needlebinding
The Oslo stitch
You can see the oslo stich on the photo it is 1 loop around your thumb and 1 loop behind your thumb.
The oslo stitch is often the first stitch that is learned with needlebinding.

The oslo stitch is a very beautiful stitch, has a nice pattern and the inside and the outside are very similar the woolen fabric feels soft and supple.
The Fåberg stitch

The fäberg stitch was created because i put one extra loop around my thumb during the oslo stitch to see if it will work.
It became a beautiful stitch and easy to make.
This fabric was again a lot denser and thicker and the stitch was also a bit wider than the oslo stitch.
The Finnish stitch

The finnish stitch comes from Finland.
The addition 2+2 means: two stitches around your thumb and two stitches behind your thumb. The stitch is narrower than the Fäberg stitch and the stitch is very compact and dense in structure.
With this stitch you can still fast needlebinding despite having to pick up 2 stitches behind your thumb.
The fabric is strong, slitghtly flexible and almost windproof.
The Korgen stitch

The korgen stitch is 1 loop around your thumb and two loops behind your thumb and F1 as connection stitch.
The stitch is denser and thicker than the oslo stitch.
The Mammen stitch

The Mammen stitch is 1 loop around your thumb and 2 loops behind your thumb.
With the mammen stich you use the F2 connection.
The connection stitch F2 ensure that the fabric becomes denser, thicker and stronger.
The broden stitch

With the Broden stitch you have 1 loop around your thumb and 3 behind your thumb.
Multiple loops behind your thumb makes the needlework a lot thicker and also denser in structure.
The fabric is almost 1 cm thick and if you make a hat of it it’s very warm. 🙂
The next video is about the York stitch, a very big loose and stretchy stitch.
Swatches.

When knitting or crocheting, test pieces are made to determine the stitch ratio. ”Swatches” are also used in needle binding.
The test pieces I make are 30 stitches long and 5 rows wide and are not squares but flat wristbands and nicely show the different proportions.
Double Oslo stitch.
With the double Oslo you insert 2 times into the upper thumb loop instead of 1 time.
The double Oslo stitch is wider than the regular Oslo stitch and is stronger and denser in structure.
The thickness is almost the same as the regular Oslo stitch.

The stitch is slightly wider.

In the photo above I used very thin (1 mm) alpaca to needle bind the regular Oslo stitch and the double Oslo stitch.
Today I uploaded my 37th YouTube video about needlebinding.
Today Saturday 7 November 2026 i have uploaded 72 nalbindings videos on my YouTube channel happy needlebinding. 🙂
Currently I am making a Beret with the Double Oslo stitch with connecting stitch F1 and with 18 stitches for the round beginning. (it will be ready soon).

This Baret is lots of cheerful colors

Finished and you may discover small errors here and there, but this is my 1st beret with the double Oslo stitch

This beret has a round start of 18 stitches with connecting stitch F2.
After you have made the circle and closed it, place a stitch marker.
The double Oslo stitches are slightly wider than the regular Oslo stitch, so you can finish it faster
The 1st round increase all stitches.
The 2nd round, 1 stitch plain and increase the 2nd stitch.
The 3rd round, 2 stitches plain and increase the 3rd stitch.
The 4th round just 3 stitches plain and increase the 4th stitch.
The 5th round just 4 stitches plain and increase the 5th stitch.
The 6th round just 5 stitches plain and increase the 6th stitch, the diameter is approximately 26 cm.
On the 7th round you nalbind all the stitches normally.
The 8th round 5 stitches plain and the 6th stitch Decrease.
The 8th round 4 stitches plain and the 5th stitch Decrease and if the beret fits.
The next round just needle bind all stitches plain.
You can choose whether you want to make the border larger or keep it that way.
This Beret took a lot more time than the Berets I have already made and that is because I had to felt many short pieces of wool together, but I think the result is very nice 🙂
Connection stitches.
The Oslo stitch with F1.
When you needlebinding, the size of the stitch is determined by the size of your thumb and not by the needle you use.
If you want a very dense fabric you can use for example the Asle stitch, or the Finisch stitch 3+2 with F2.
With needlebinding you have a choice of about 3 to 4 thousand stitches and with the different connecting stitch combinations many more.
The great thing about needlebinding is that you only need one needle for either thick or thin yarn.
That is the big difference with knitting and crocheting where you need a lot of needles
Connection stitches makes stitches together to form a woolen fabric.
The different stitches and connection stitches determine the flexibility, strength, density and structure of the woolen fabric.
It is not necessary to tighten the thread strongly on the needle, needle binding is relaxed and above all there is no tension with your thread or needle.
Different connecting stitches and combinations are possible, the examples that i show are made with the Oslo stitch and a the Faberg stitch. Clear picture off the difference between F1 and F2 connection stitch, you can see that the F2 patch is smaller then the F1.
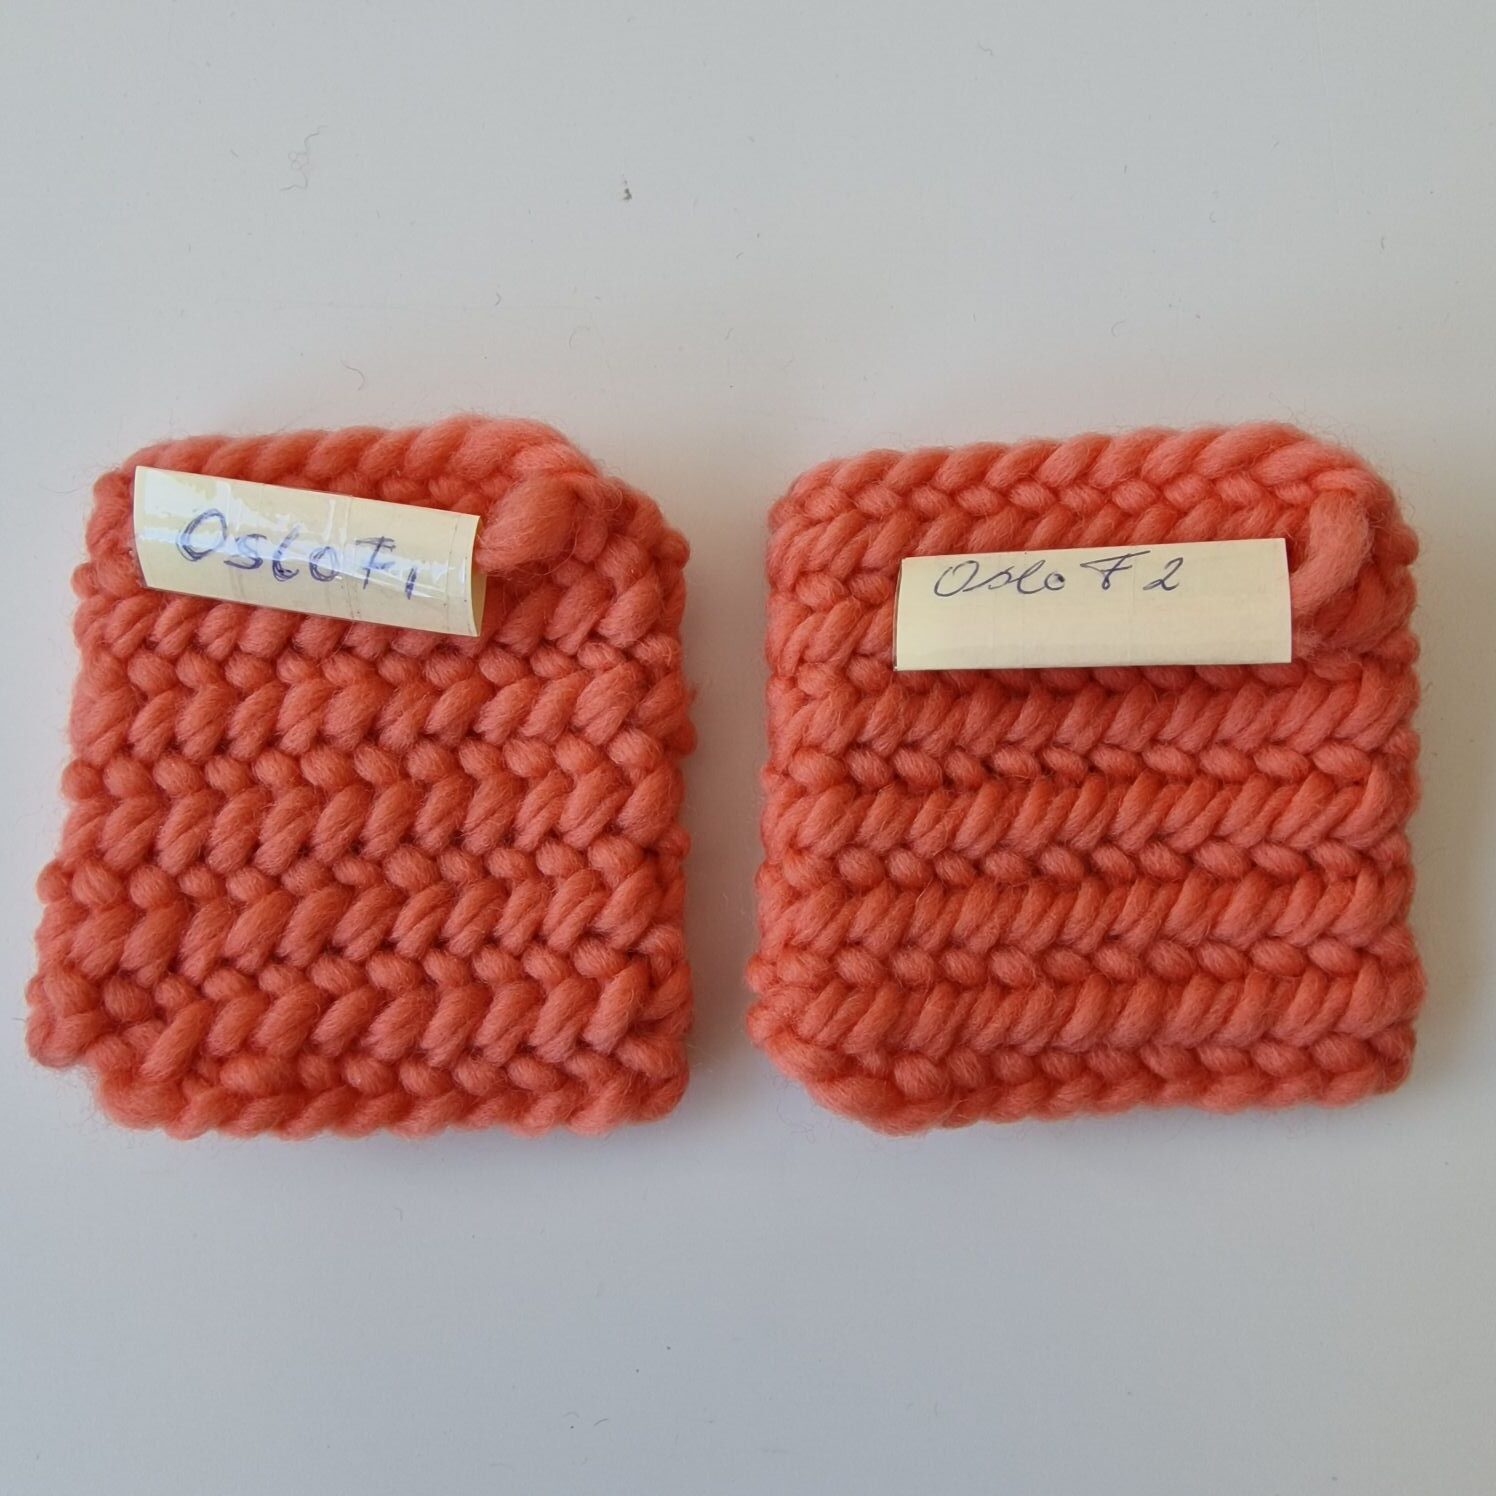
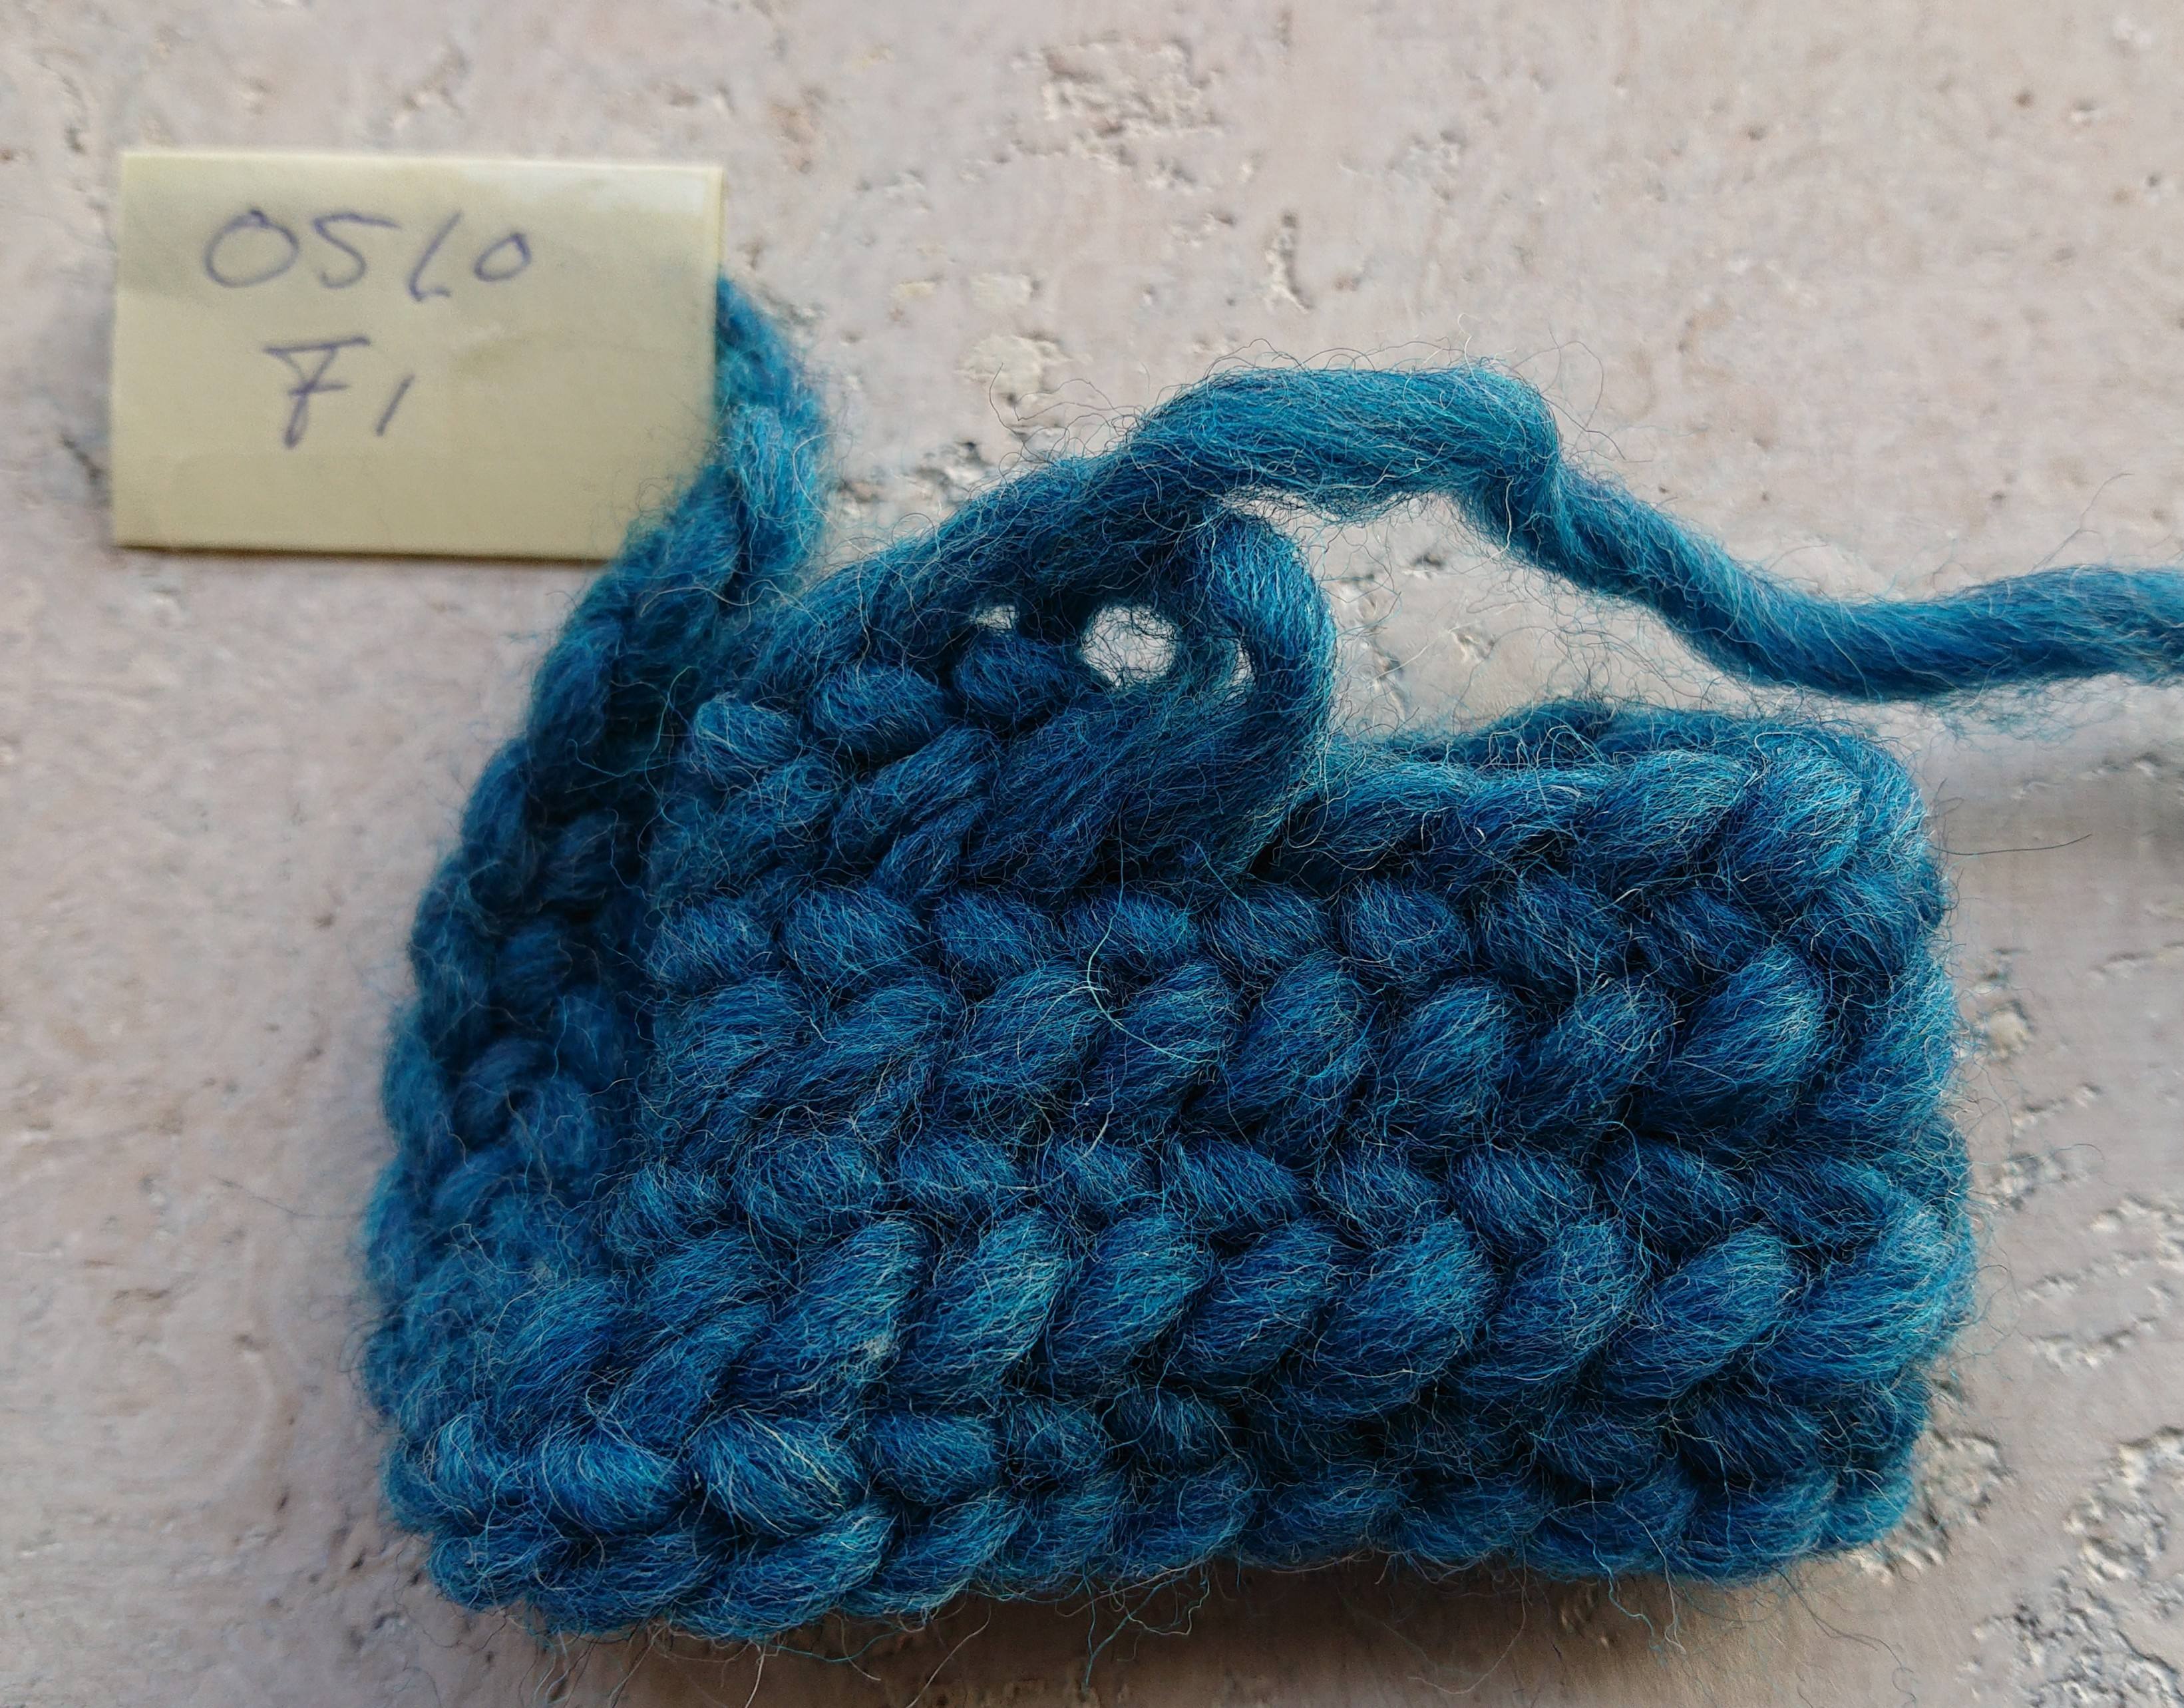
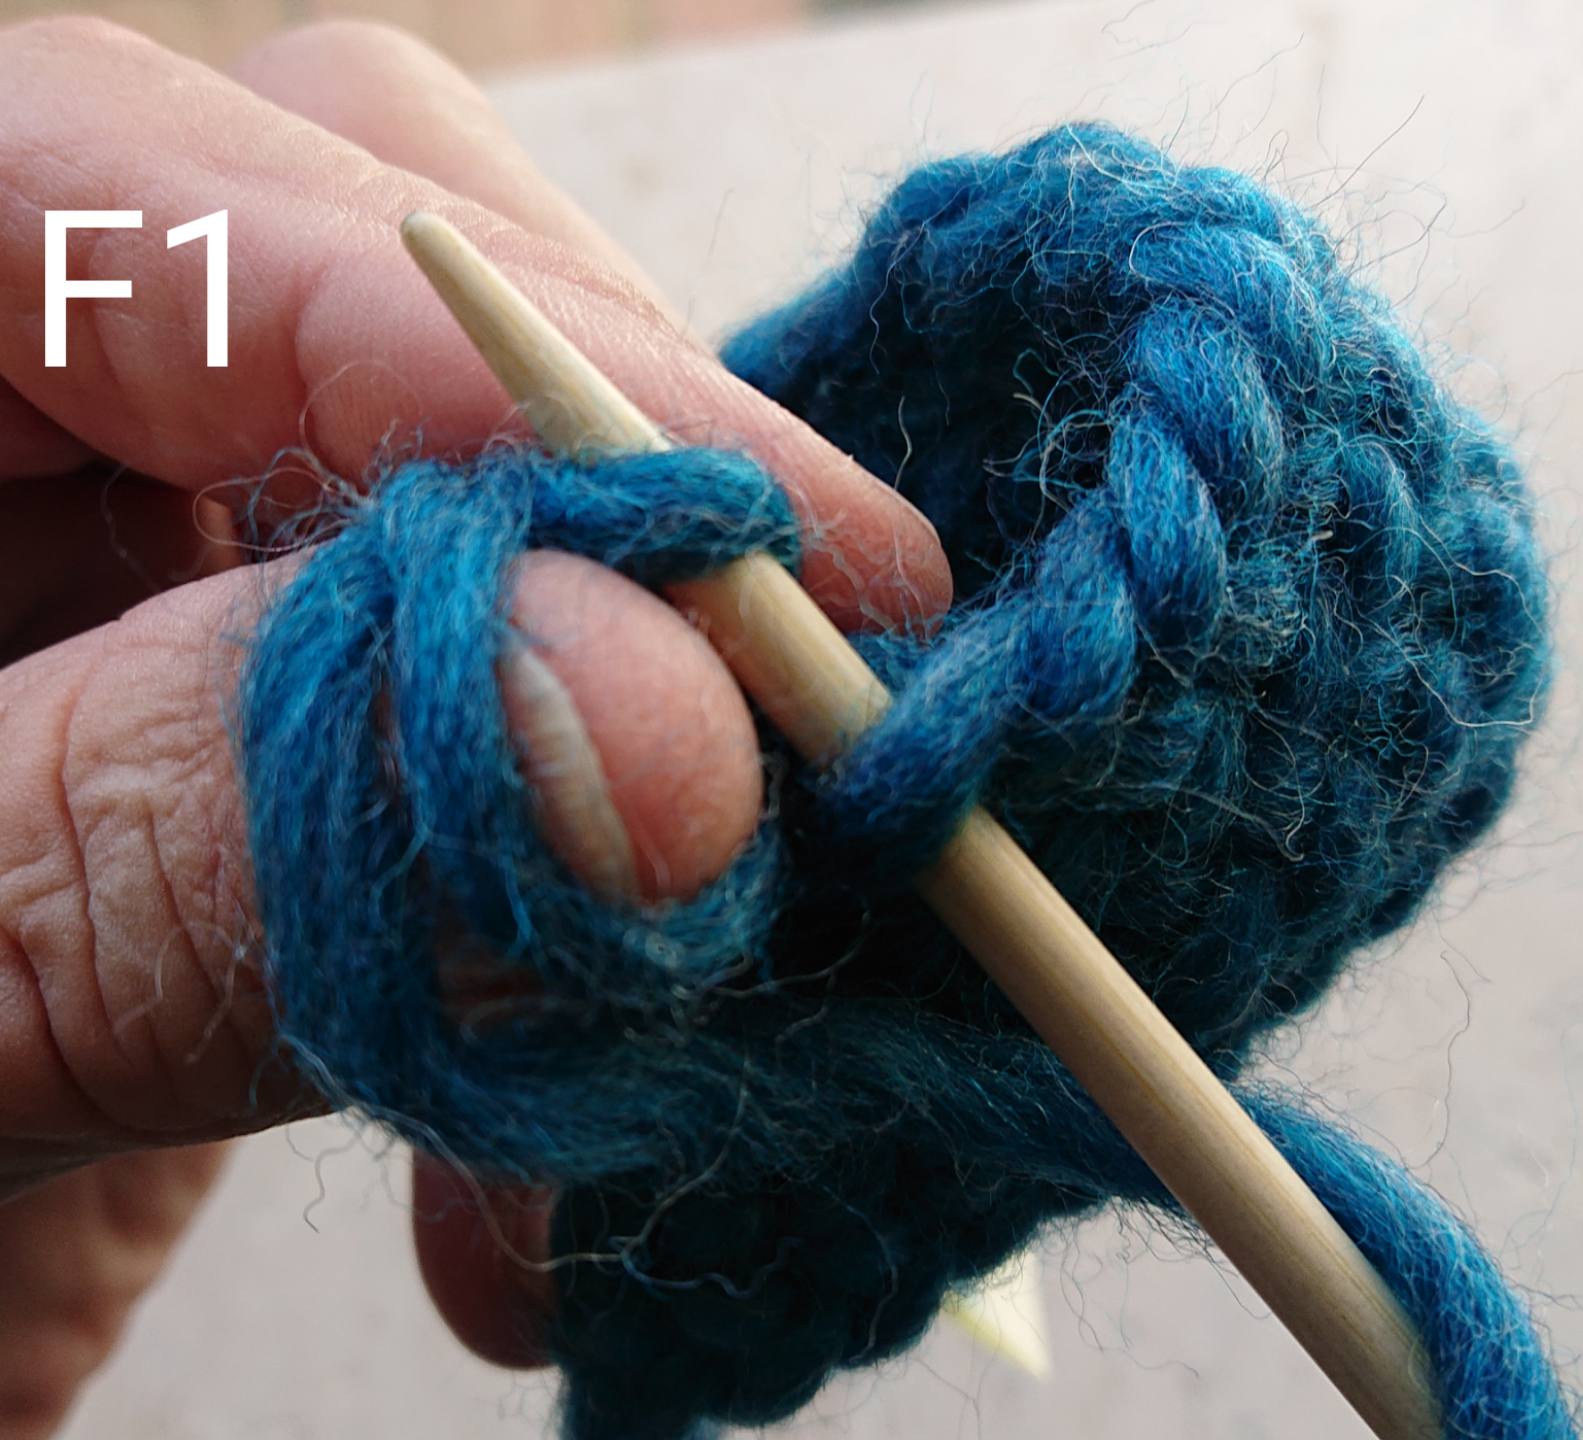
If you have set up a row of needlebinding stitches to make a wristband out of it, for example, you need to needlebind two ends together with a connecting stitch.
The most used connection stitch is the F1 which means front and one next stitch.
You put the needle through 1 loop.
The Oslo stitch with F2.
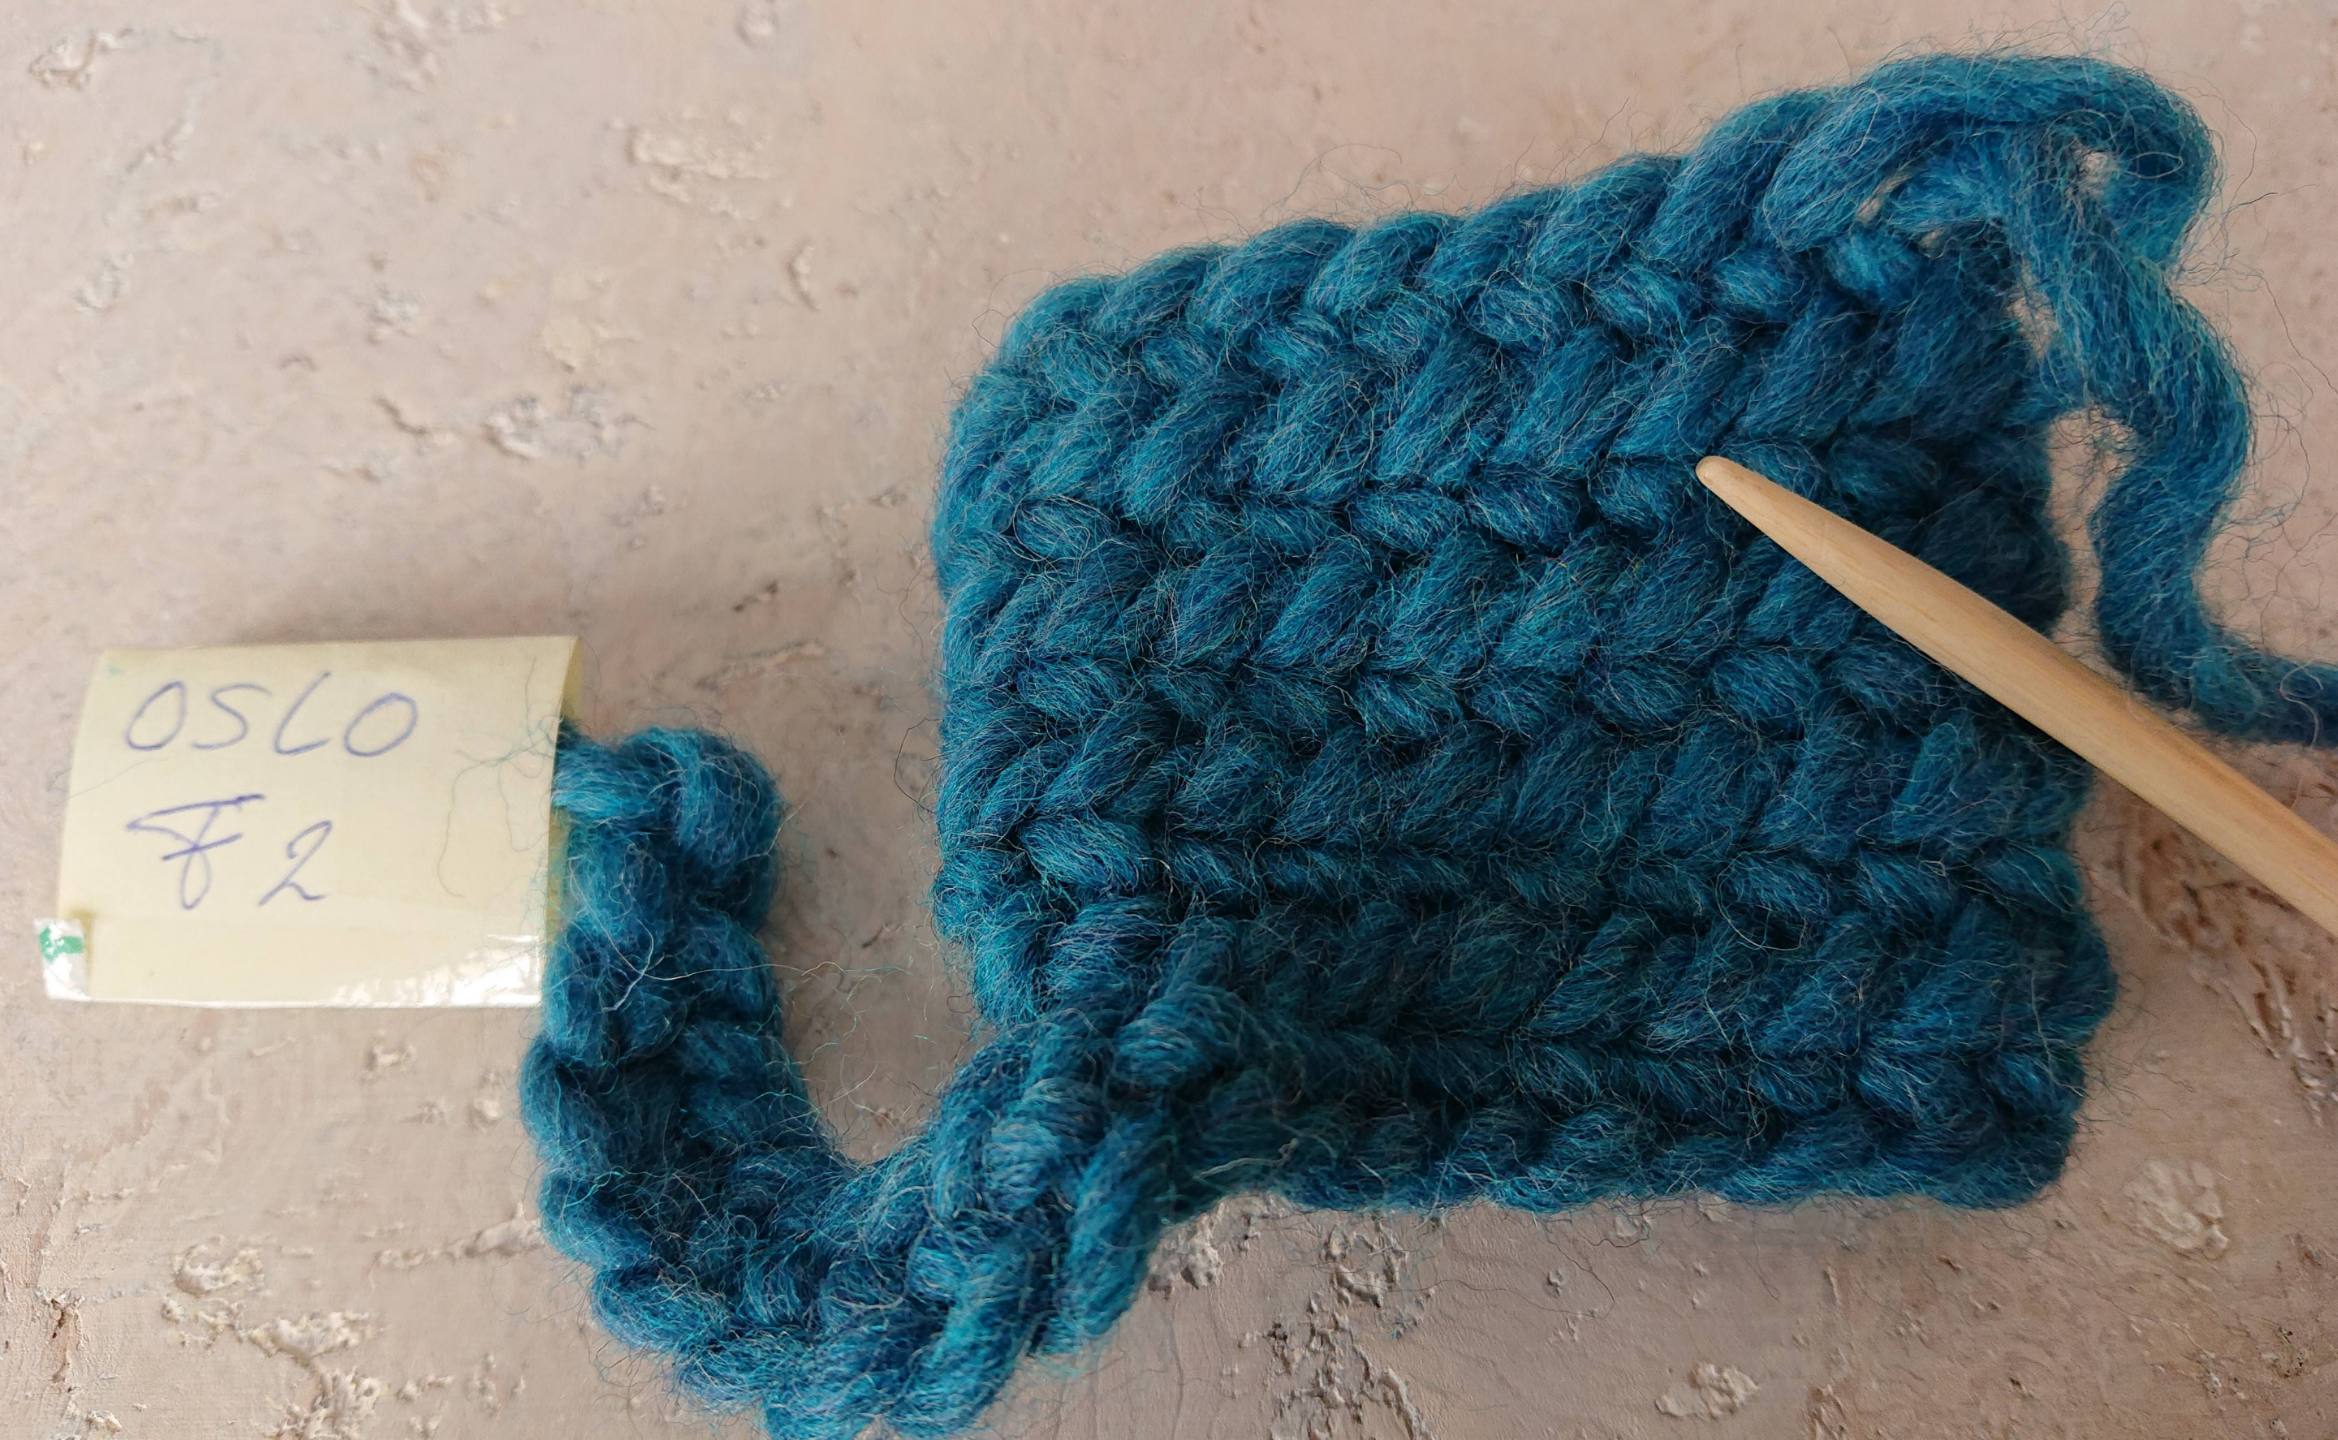
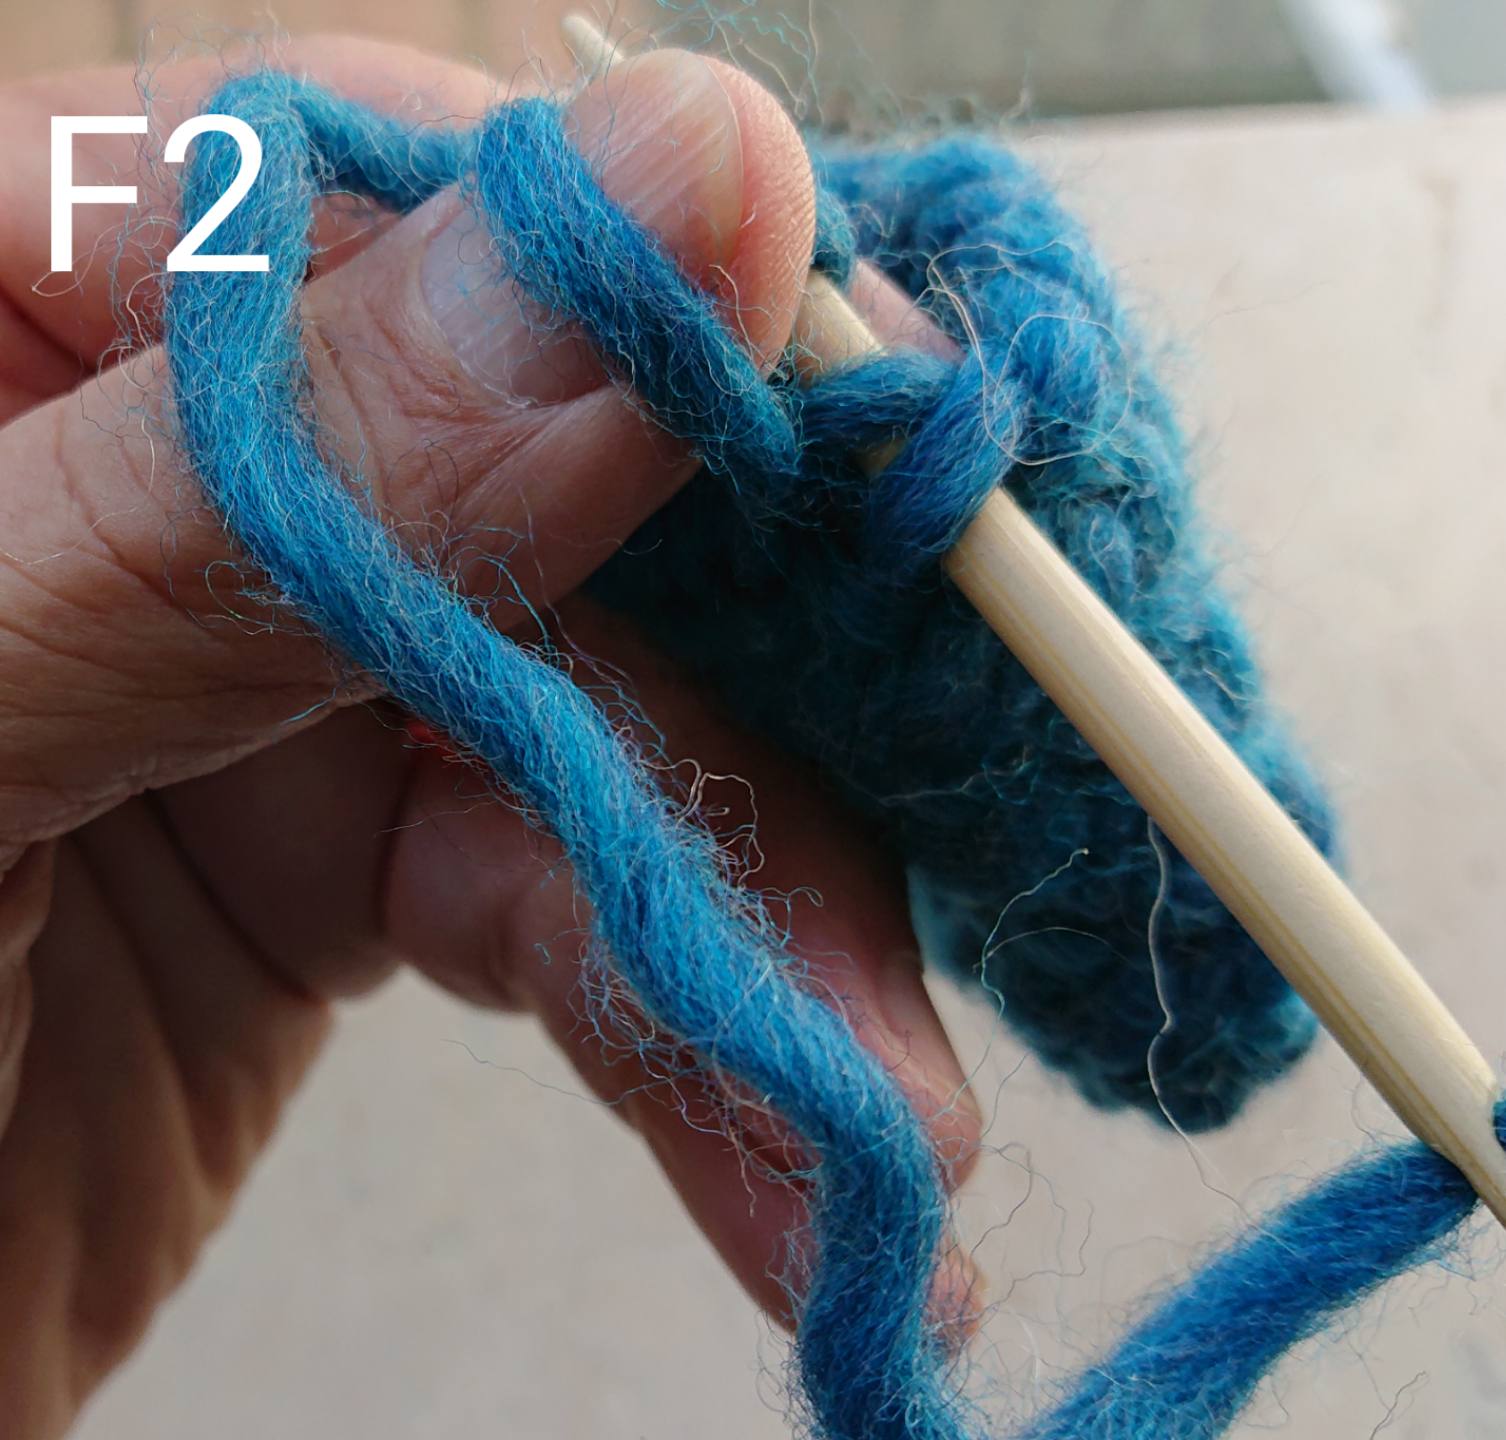
F2 means front two stitches, you have two stitches on your needle the old and the new stitch and then you make your stitch as usual.
This F2 stitch gives you a dense fabric.
The Oslo stitch with M1.
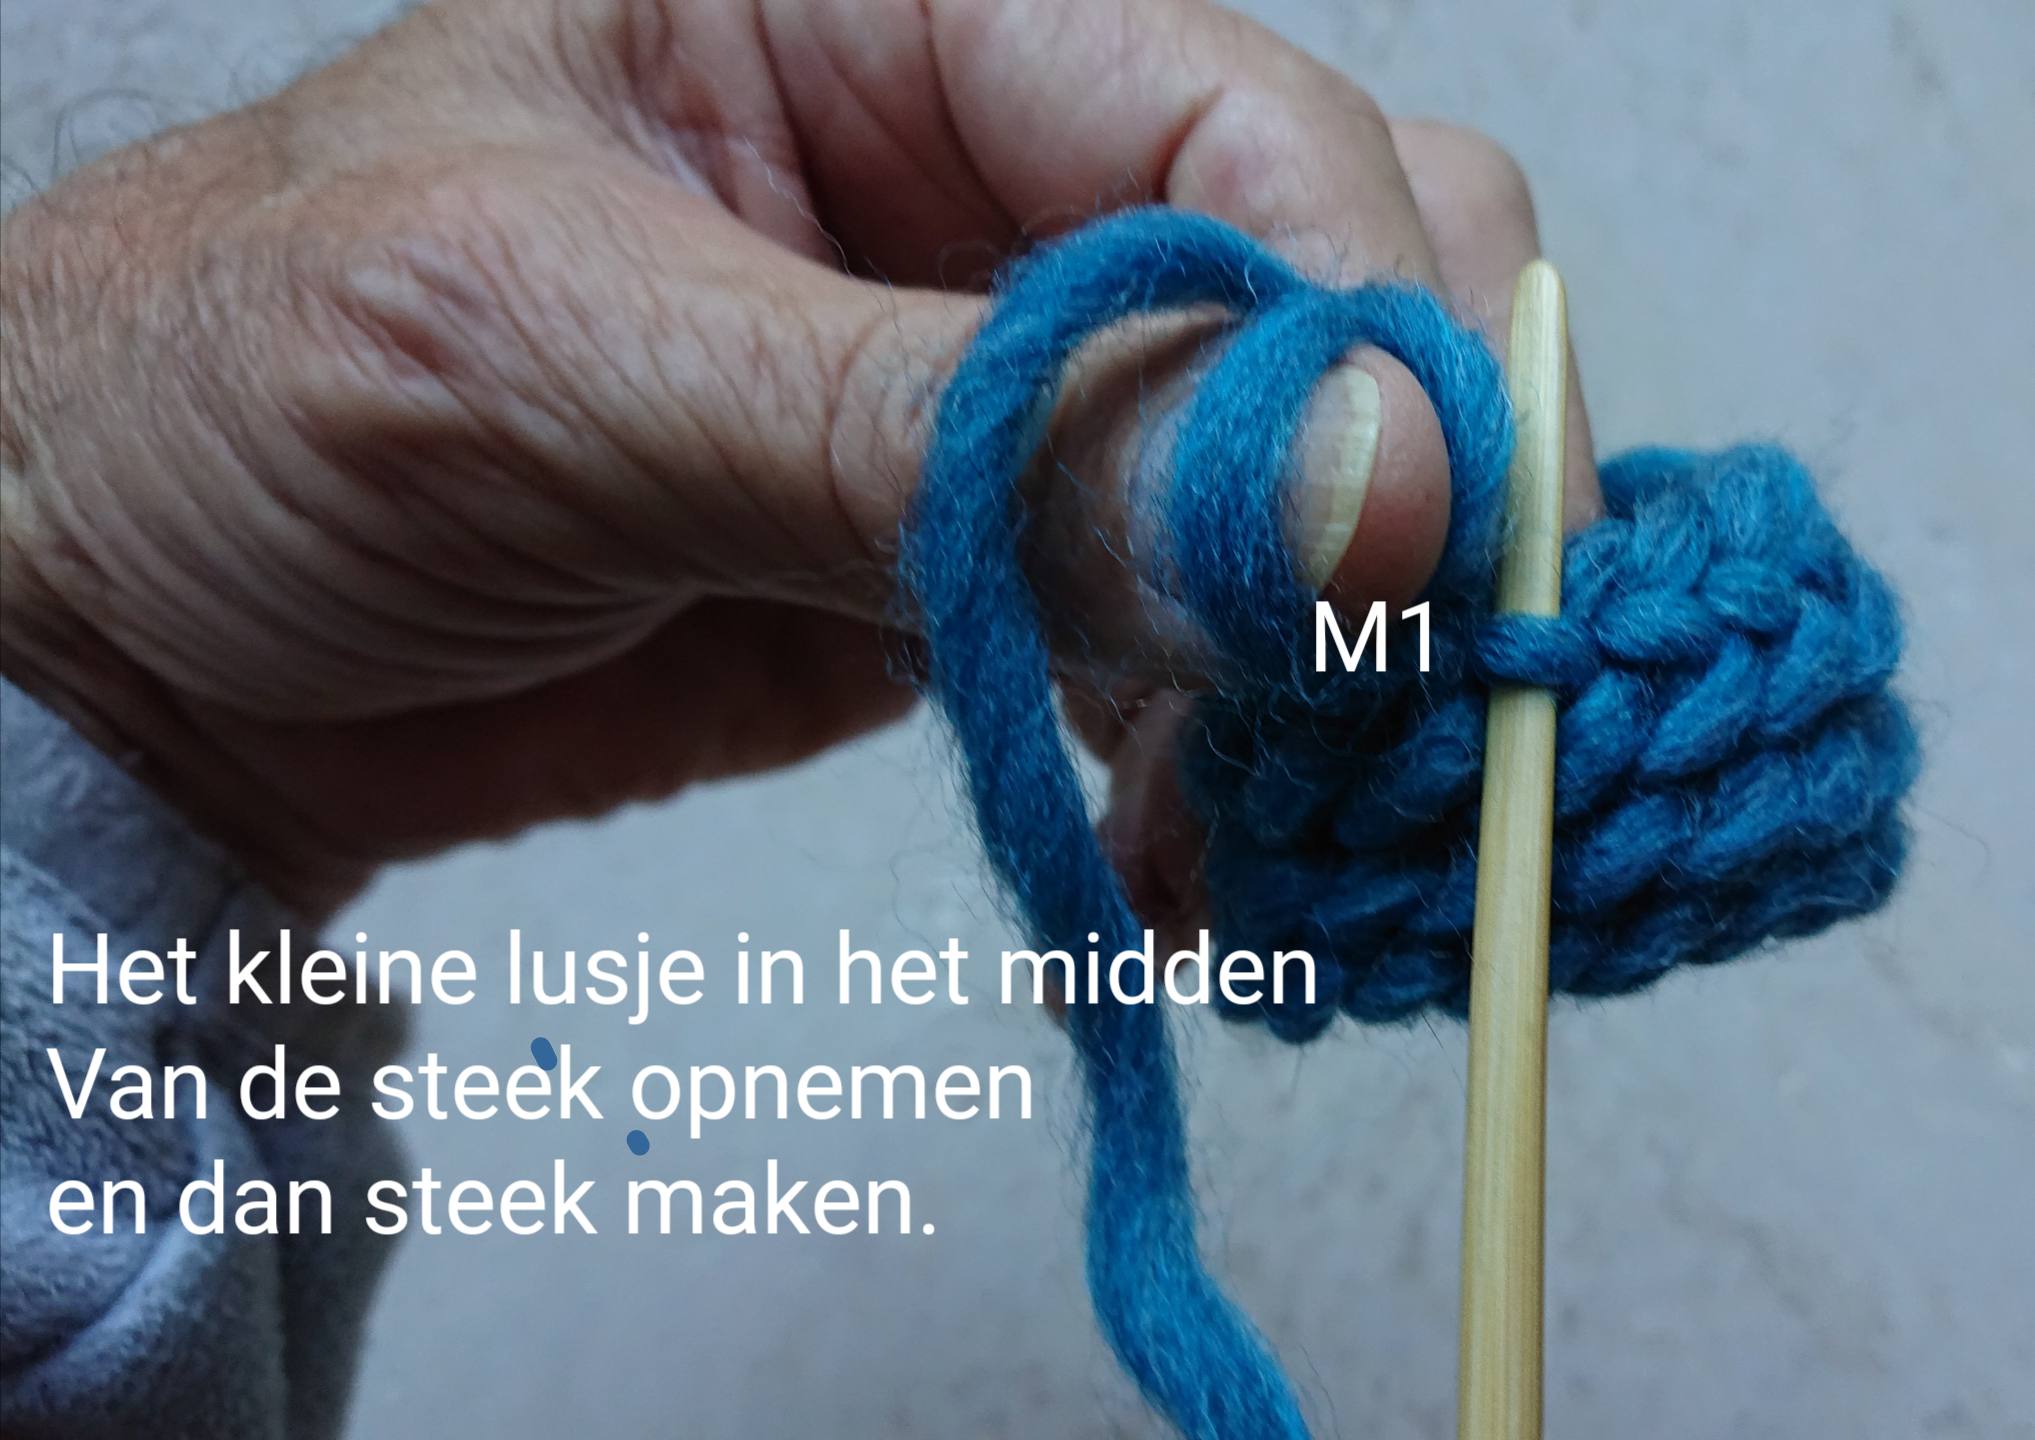
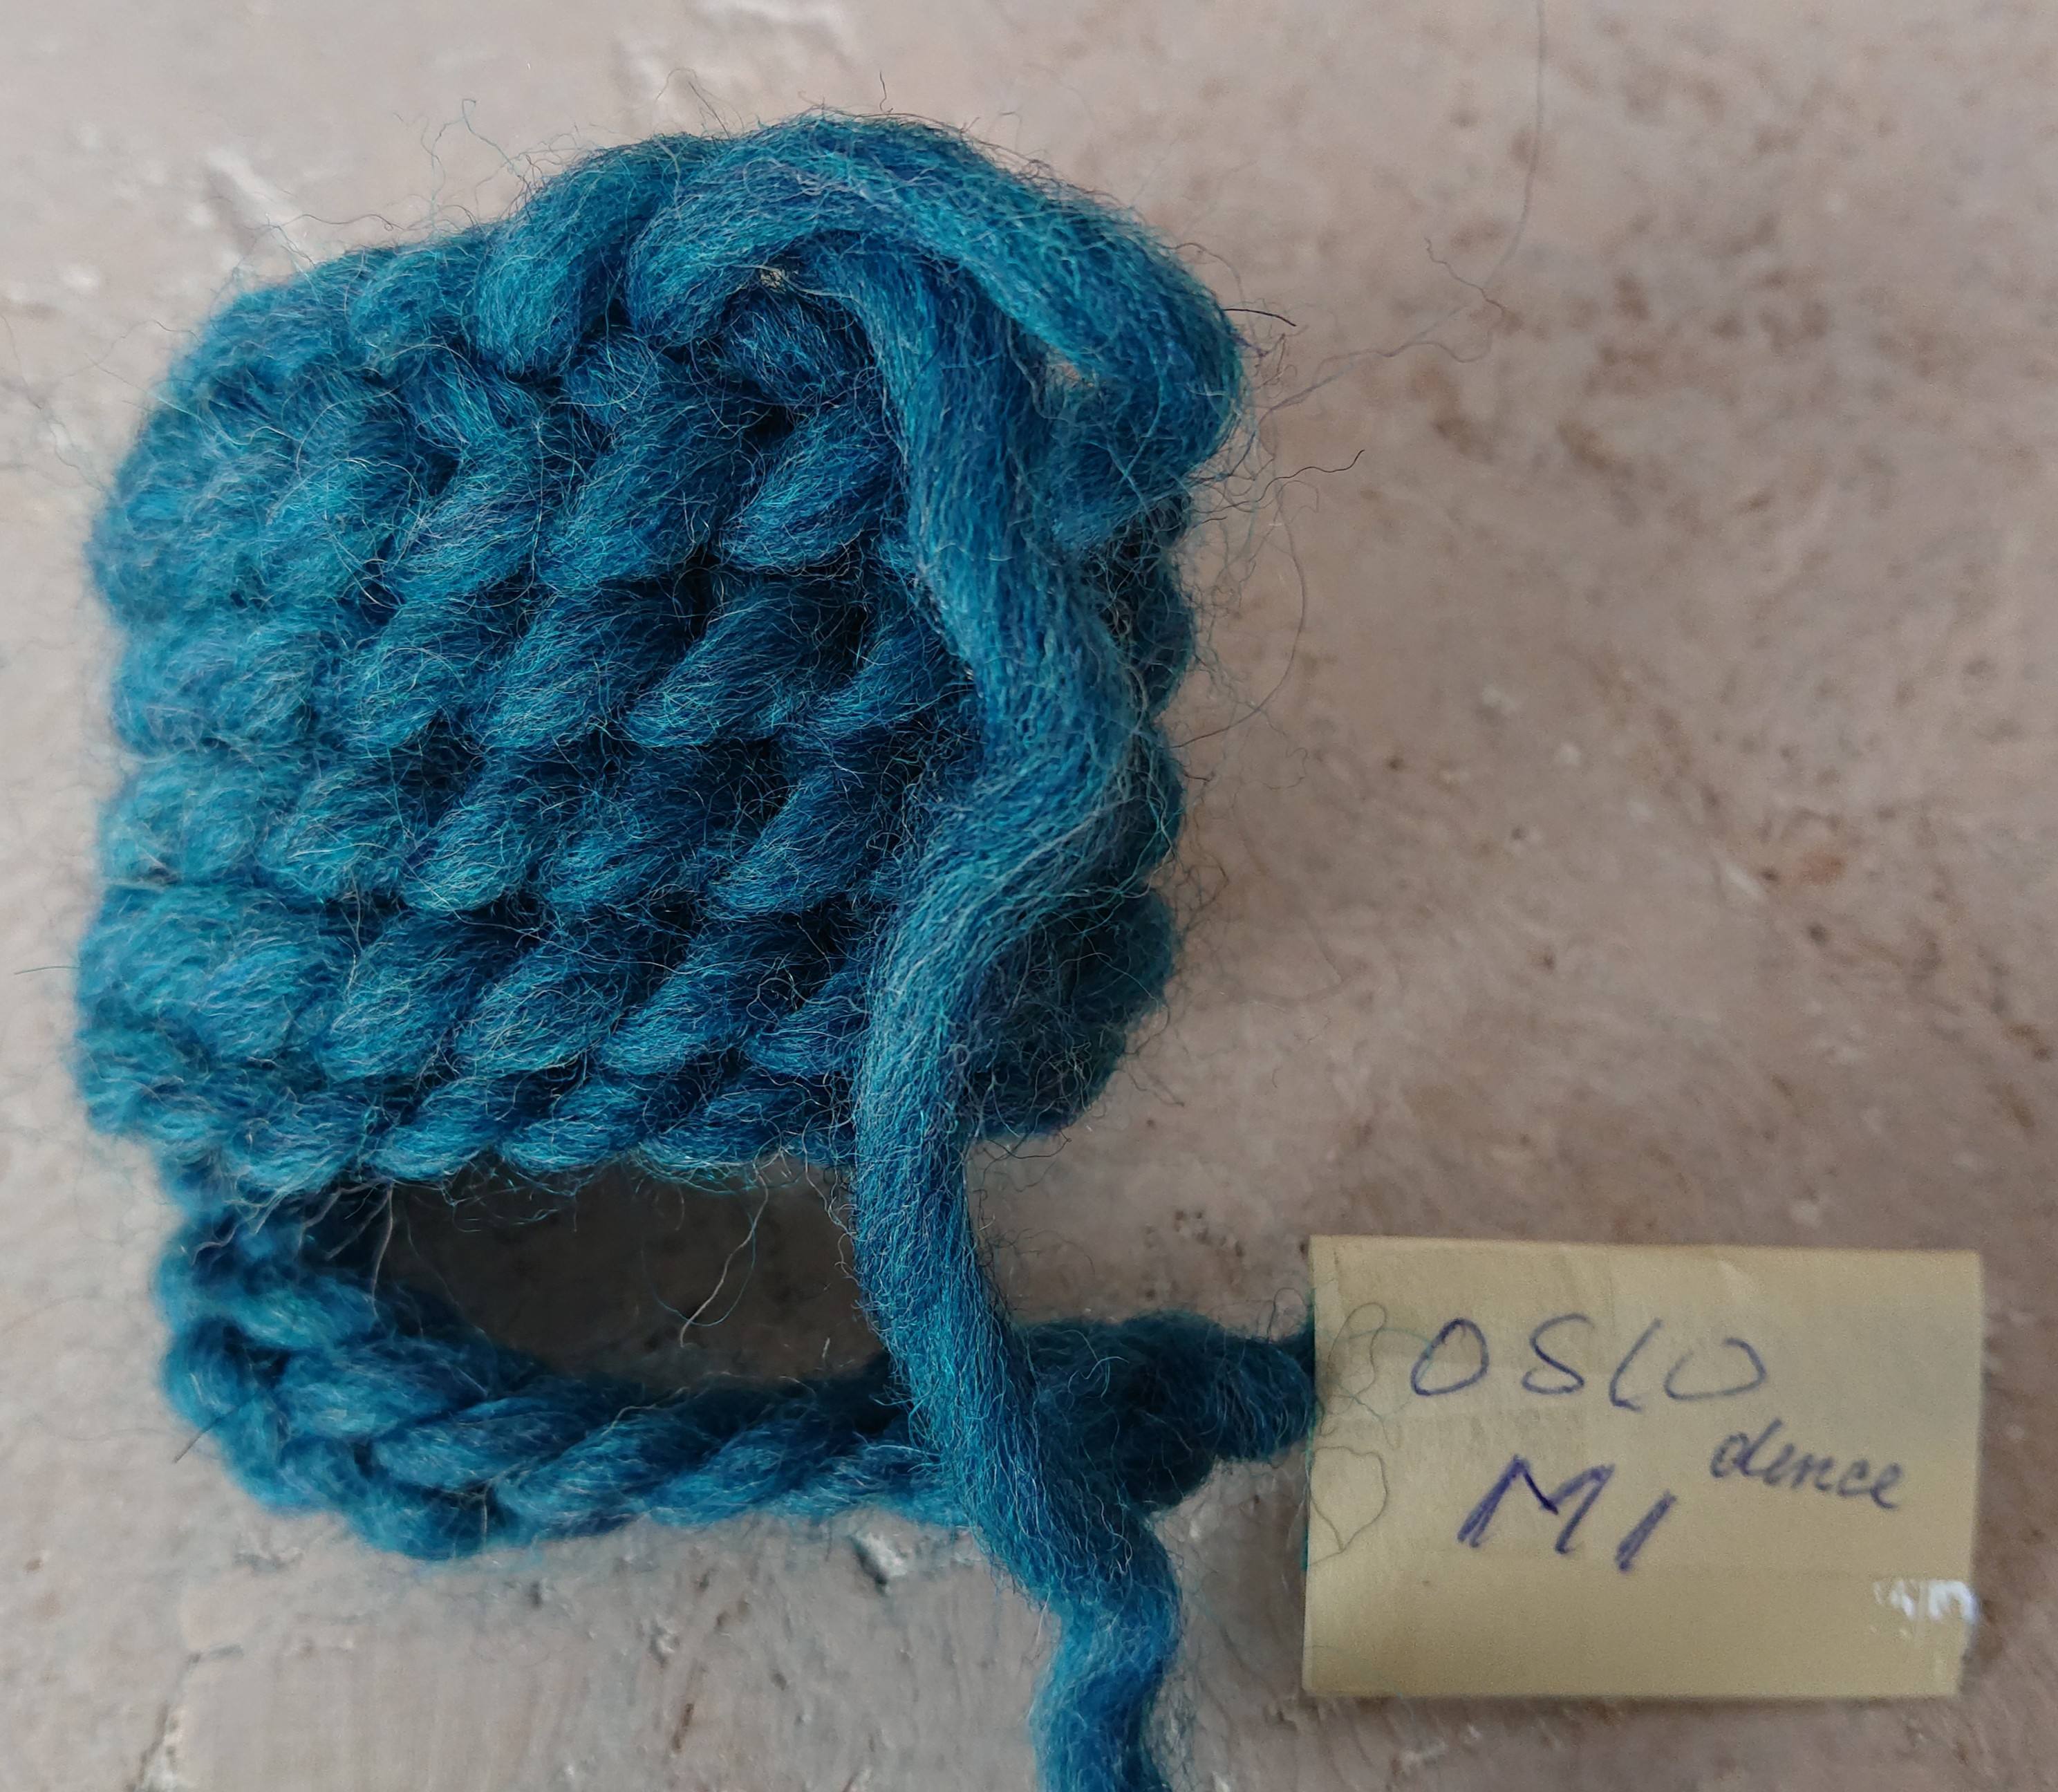
The fabris is about 1 cm thick.
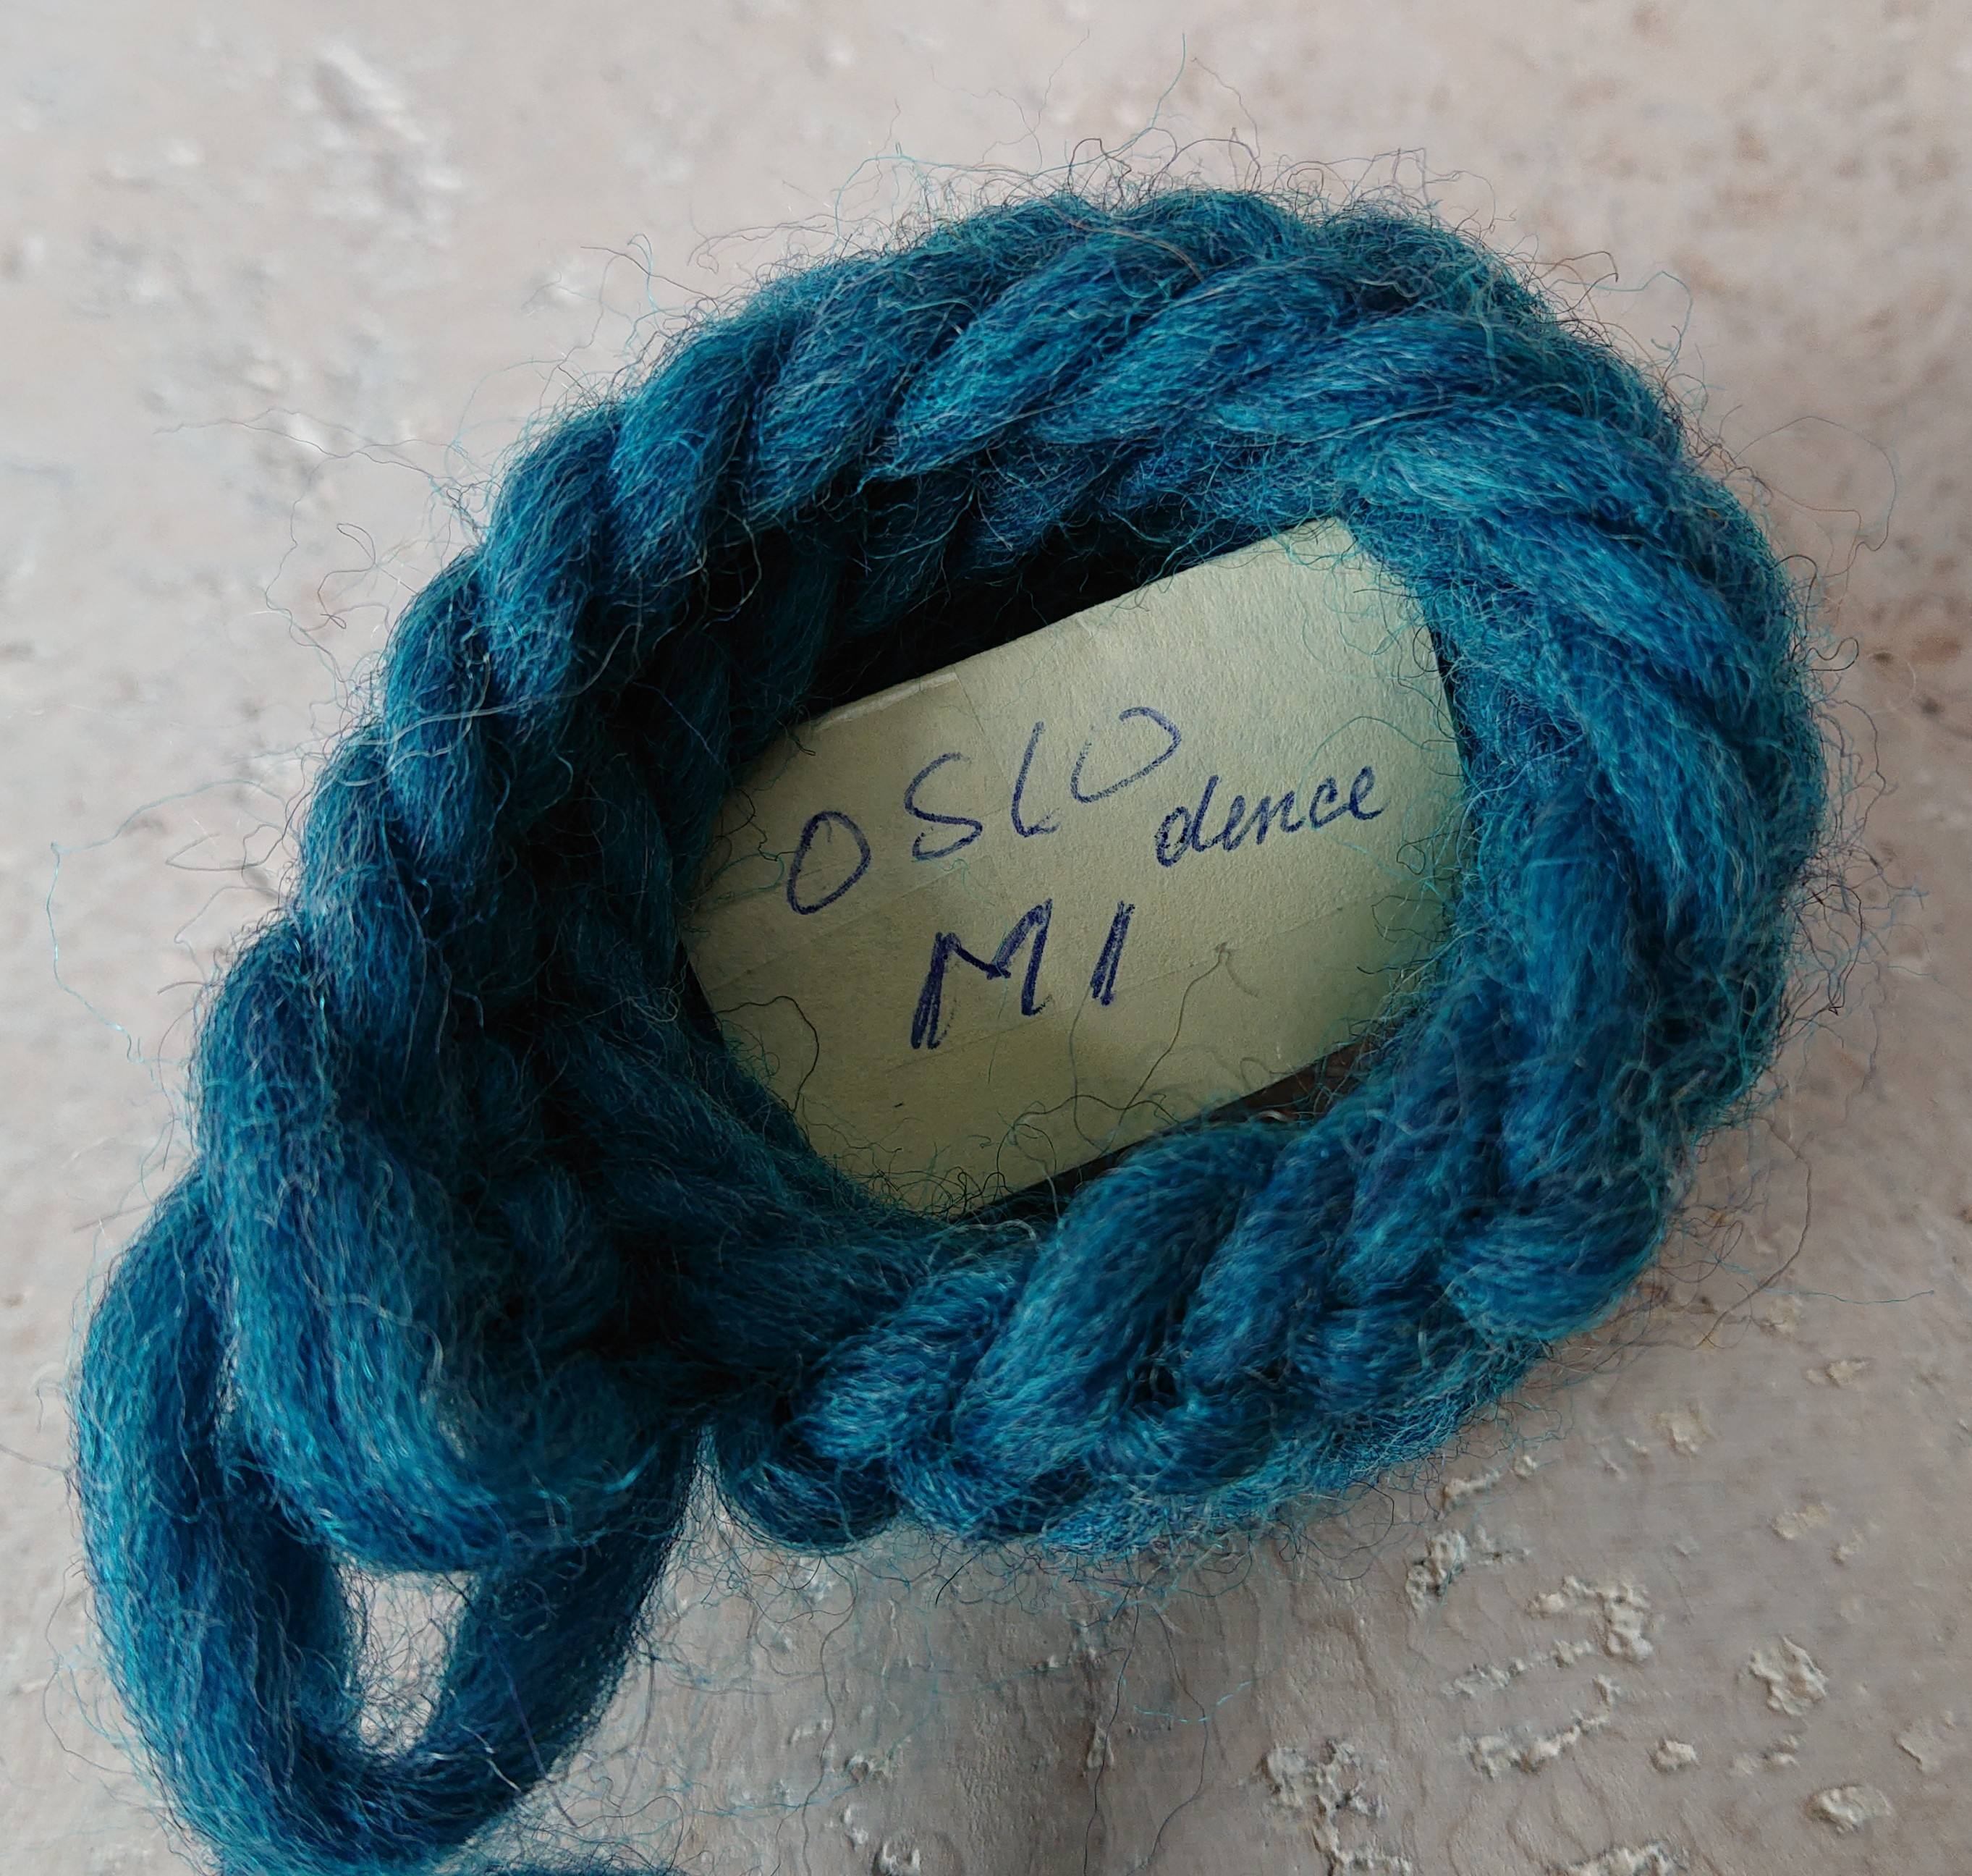
With M1 connection stitch the needle goes through the small loop in the middle of the stitch. Then through your stitch and under the your thumb loop and under the working thread. You get twice as thick fabric and at the back side there are ridges.
With this fabric you can needlebind a very warm slippers or hat.
The Faberg stitch with M1.
With M1 connection stitch the needle goes through the small loop in the middle of the stitch and then through your stitch and under the 2 thumb loops en under the working thread.
You get twice as thick fabric and at the back side there are ridges.
This stitch is a very, very thick fabric.
I always forget to ask if you’d like to subscribe to my YouTube channel: happy needlebinding If I have a lot of subscribers, I can email magazines to write an article about this wonderful old craft so I can pass it on to the next generation.
Thank you kindly in advance. bert veugelers.
The Oslo stitch with F1 and M1.
Combination stitch with F1 and M1.
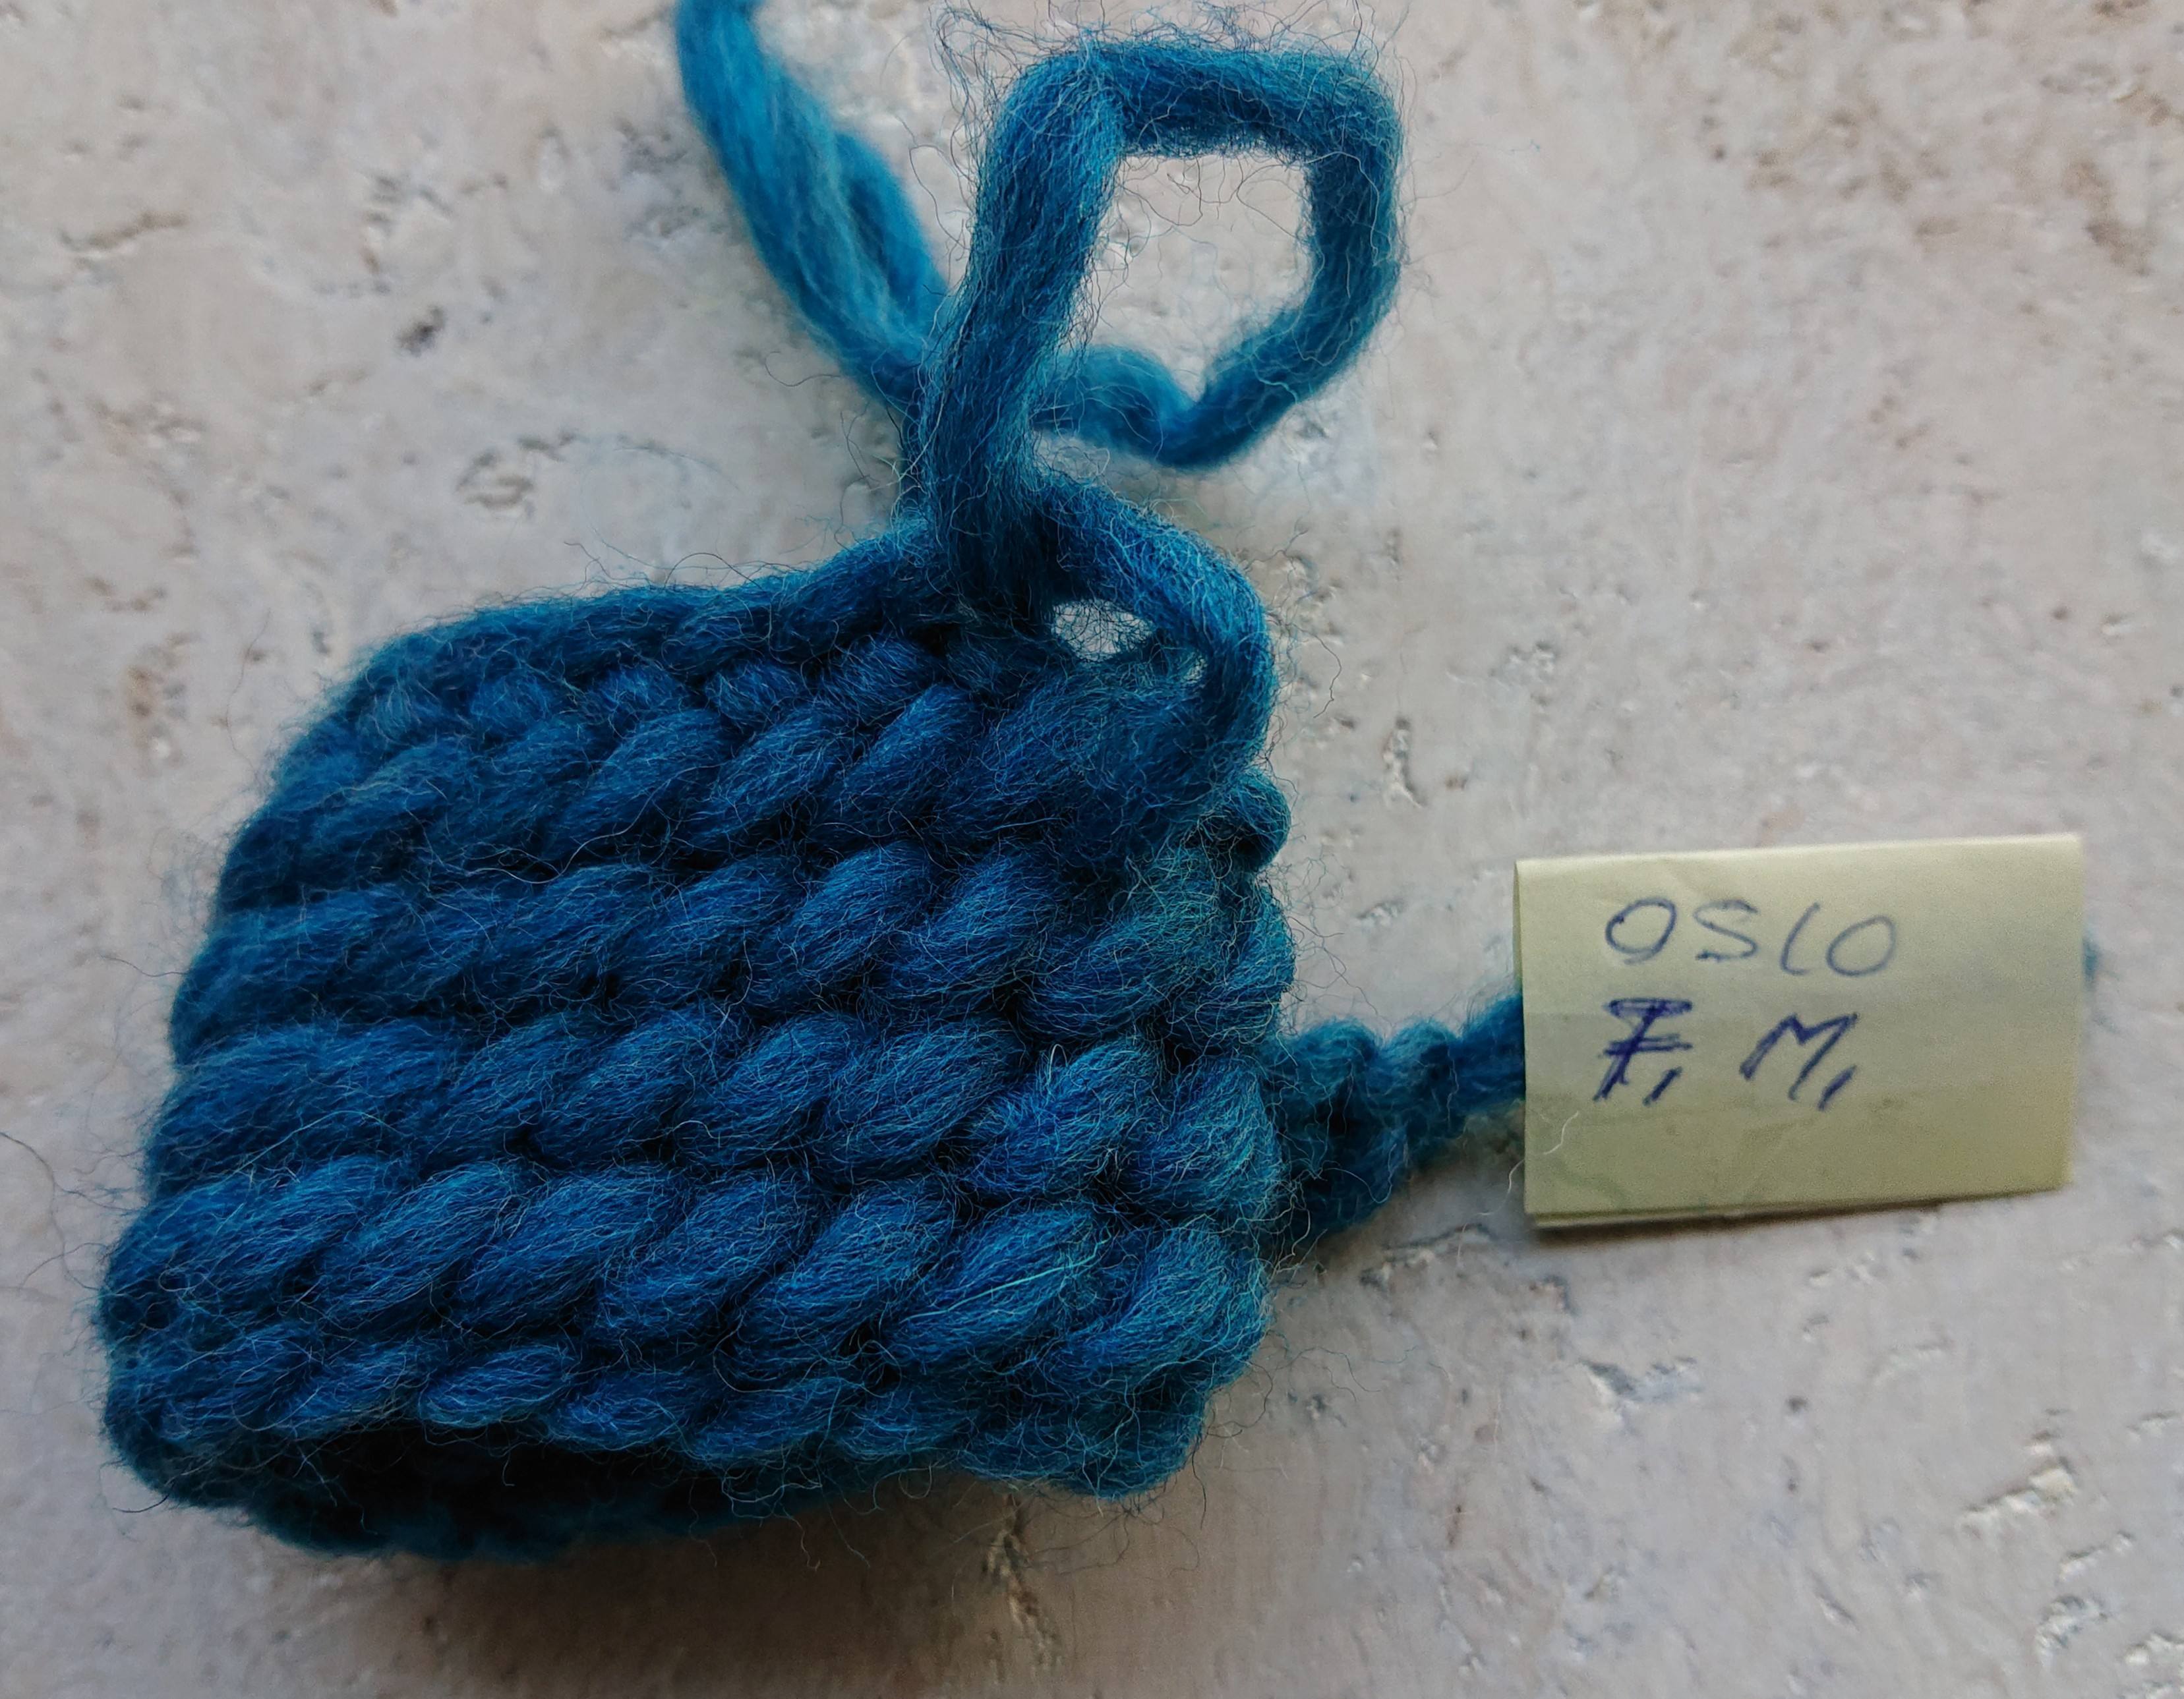
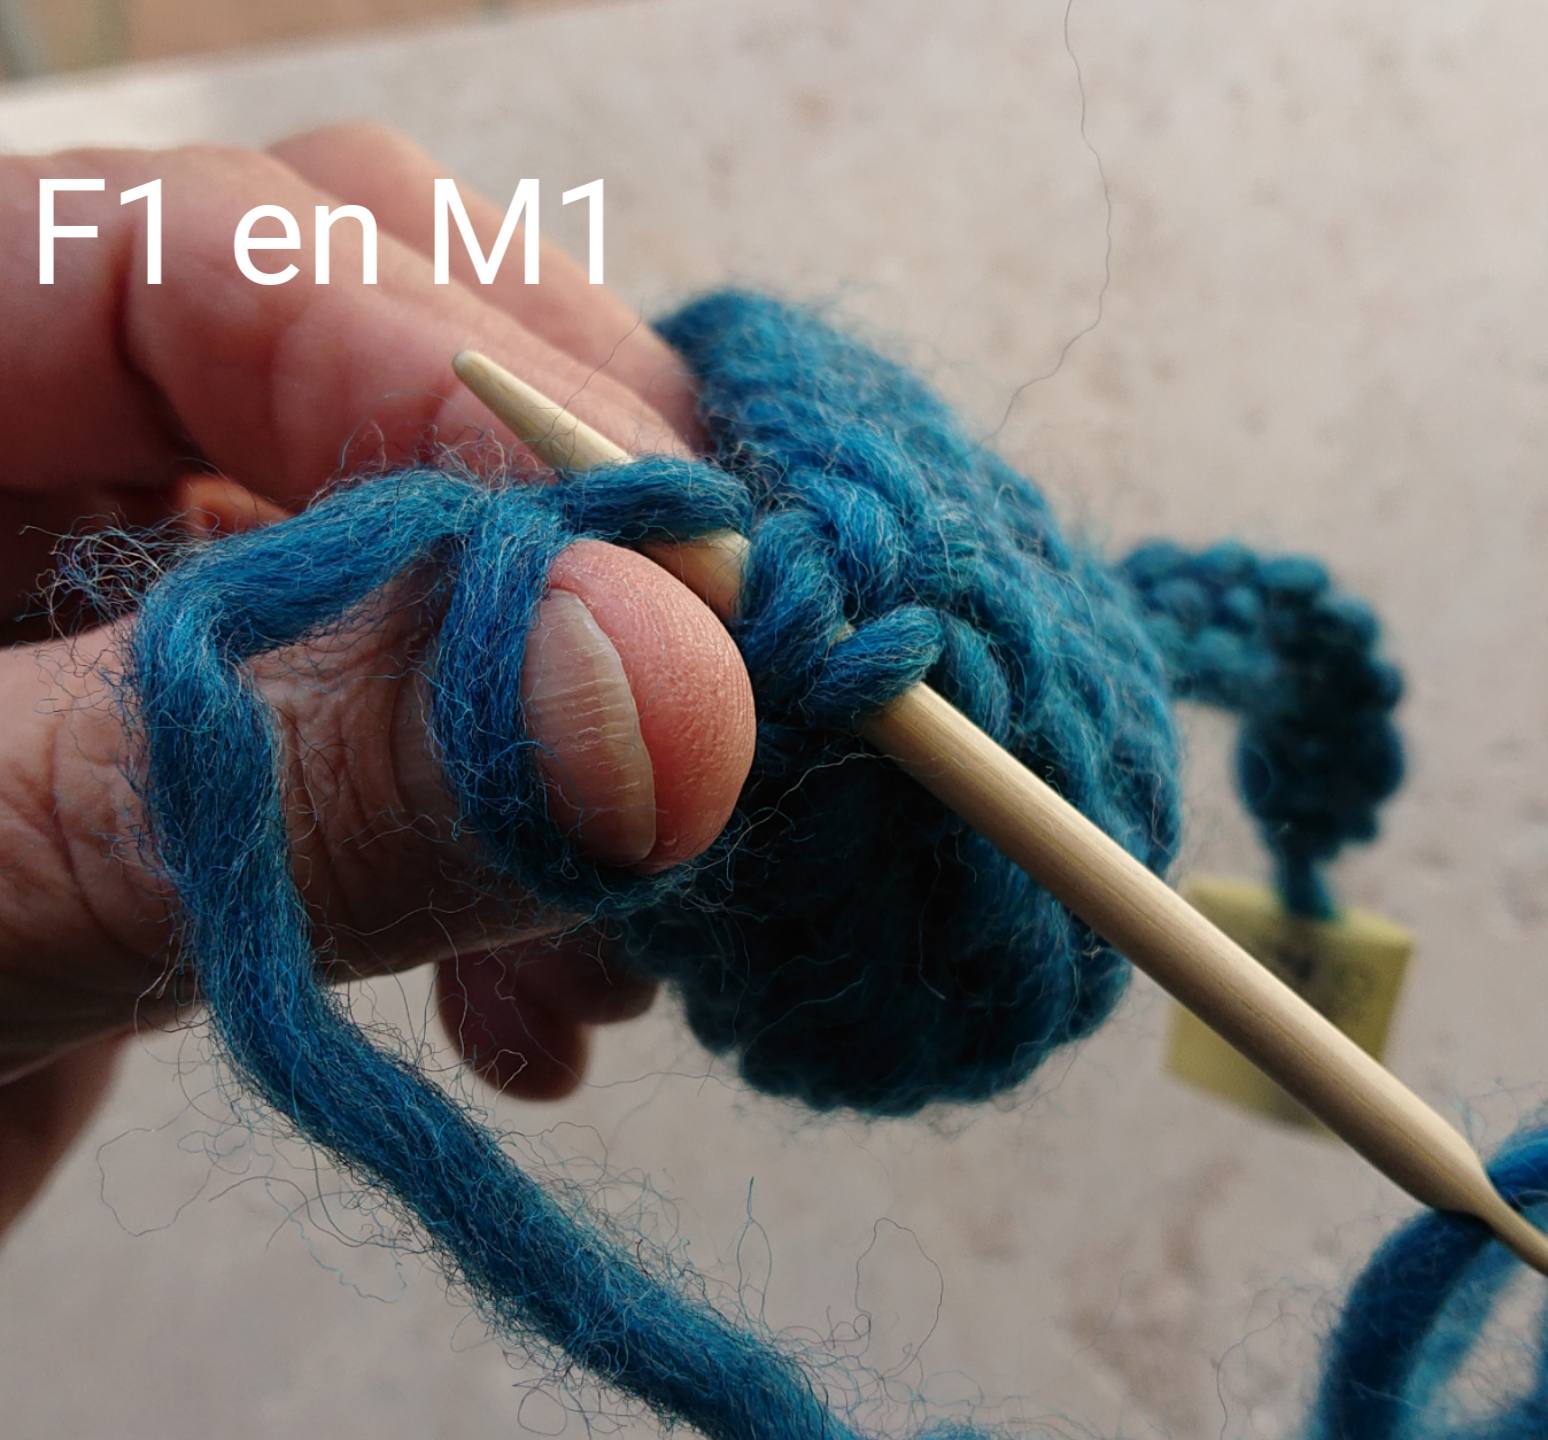
The needle goes first through the small loop in the middle of the stitch and then through the stitch.
The fabric that is created has a dense structure (there are no rows at the back).
Furthermore the fabric is very dence, smoother and naturally wonderfully warm.
Your imagination, creativity, patience and perseverance means that you can create incredibly beautiful and surprising objects with needlebinding. 🙂
Next video is about how to finish your nalbinding project.
Next video is called: nalbinding easy project.