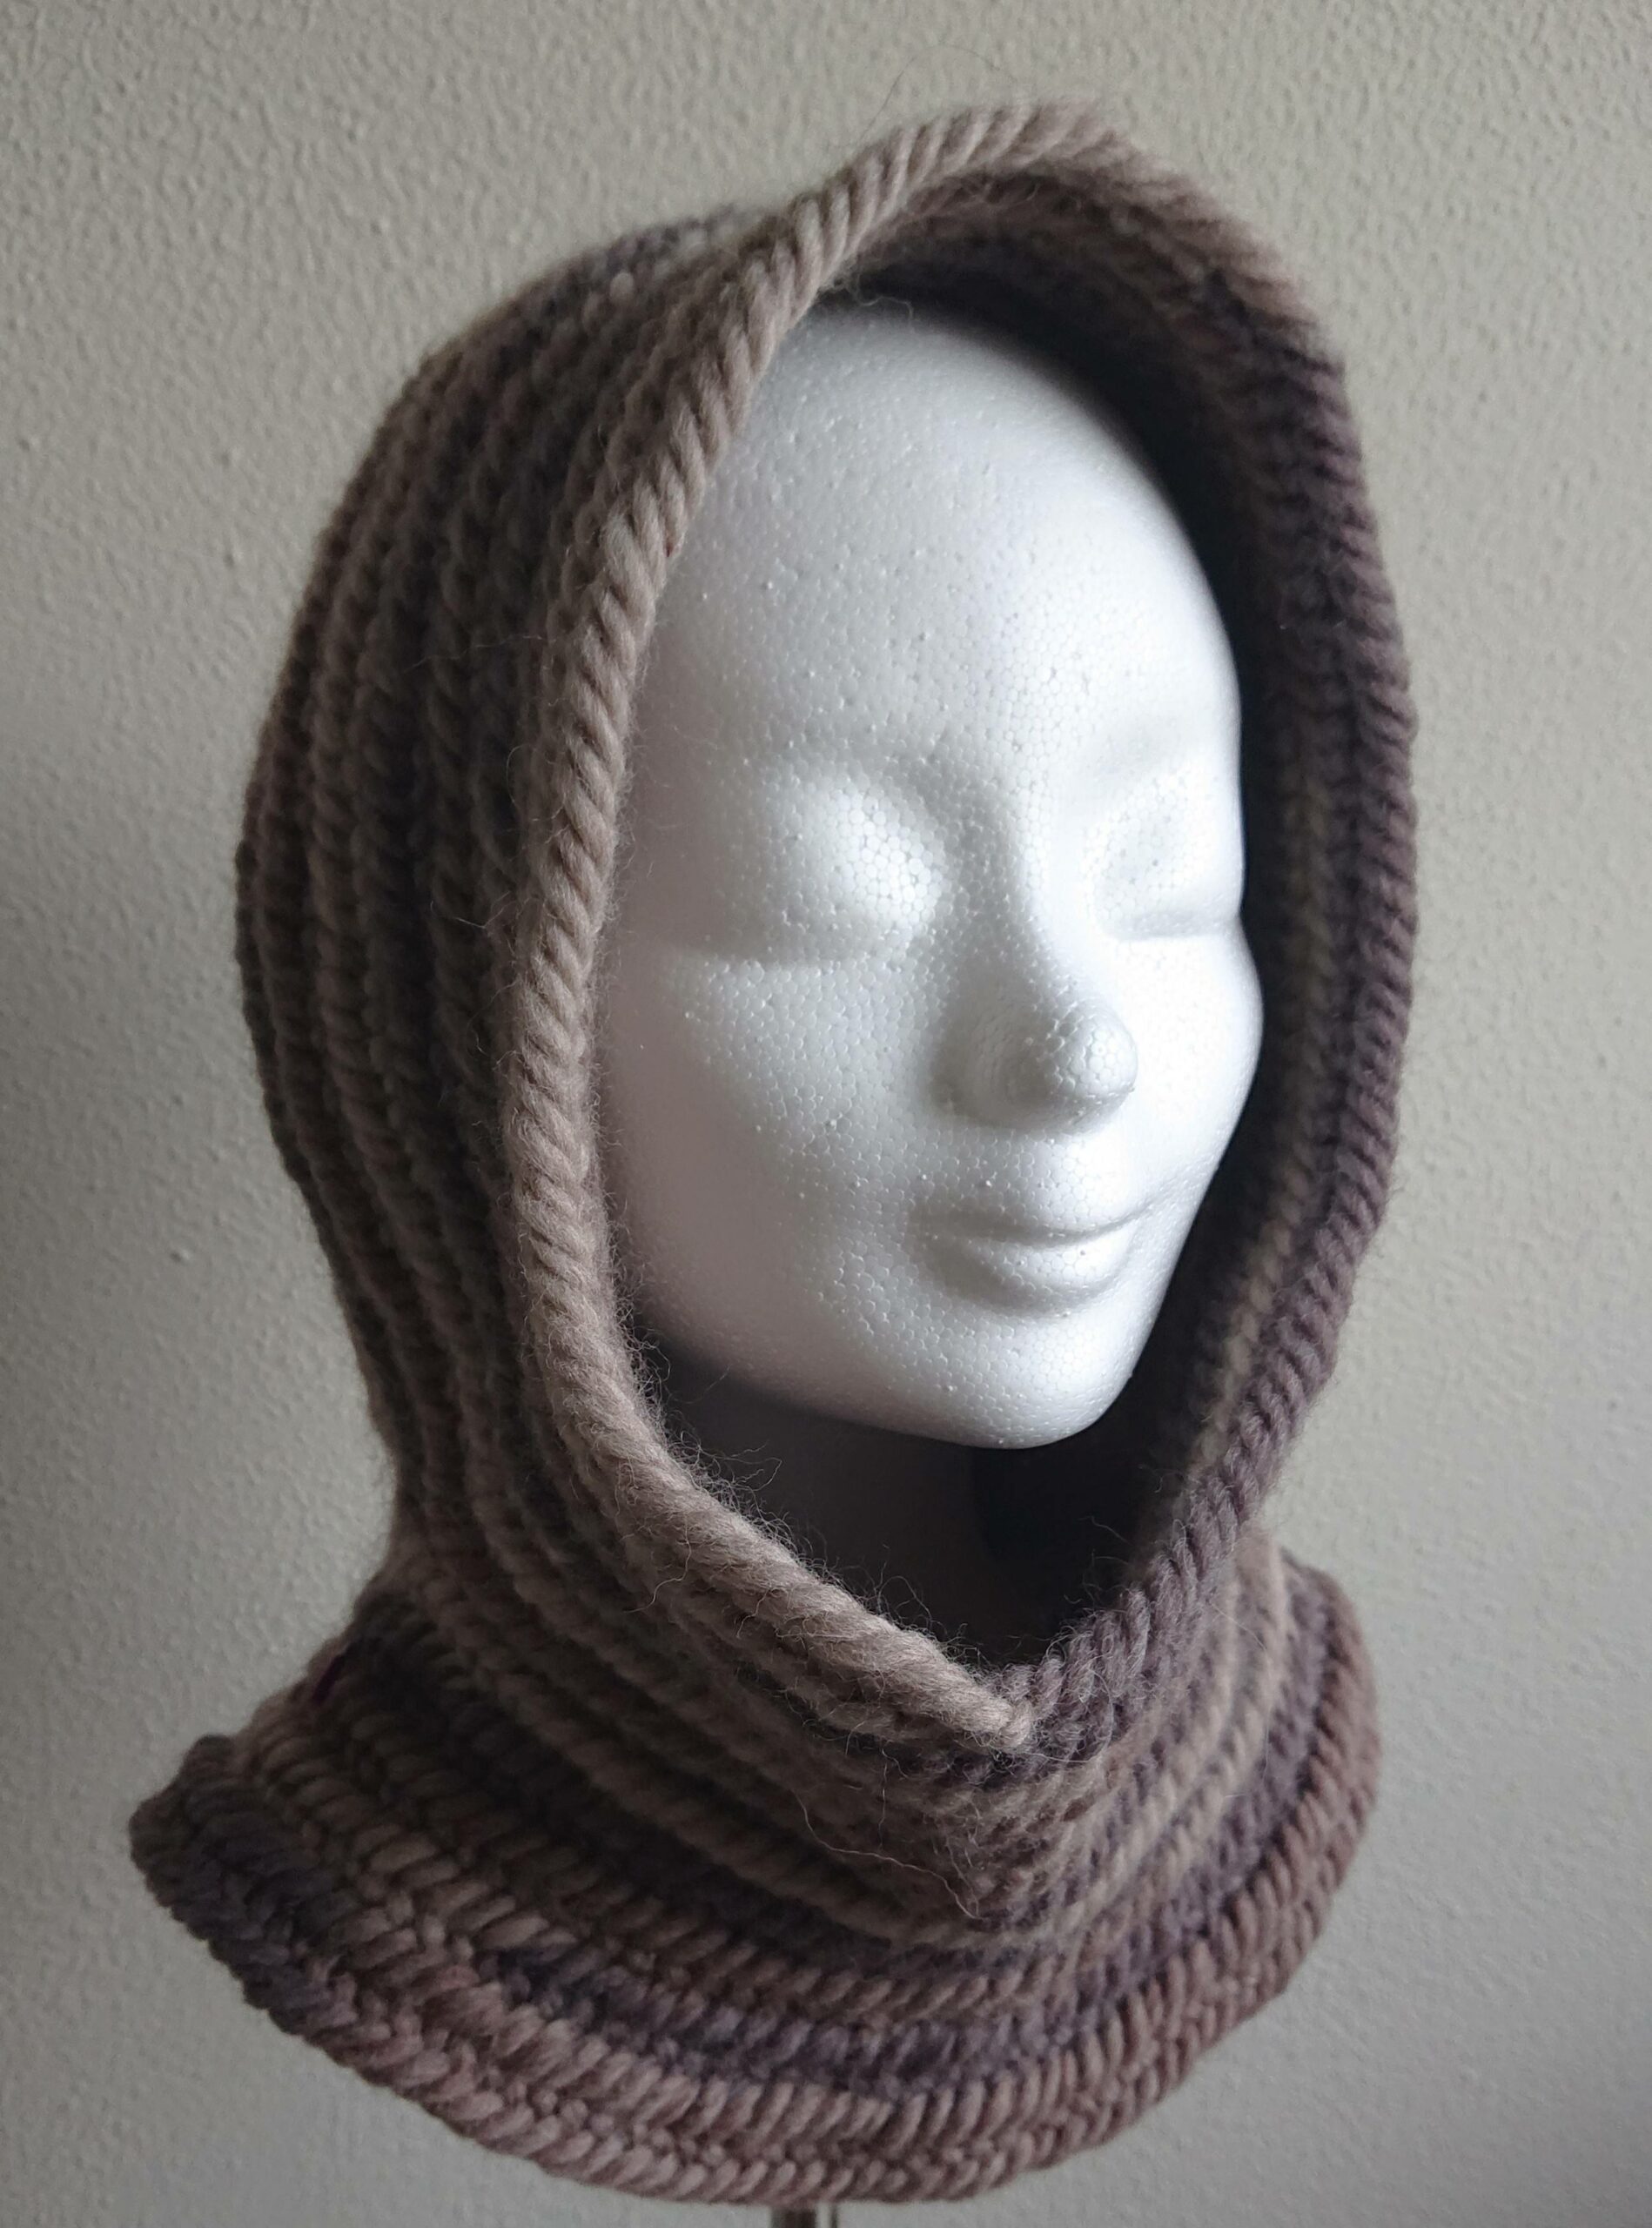
I designed my hood without using scissors and sewing parts together. The hood consists of one piece and I am glad that it worked.
This pattern you can adjust to your own size and shape.
I made this hood on18 februari 2020.
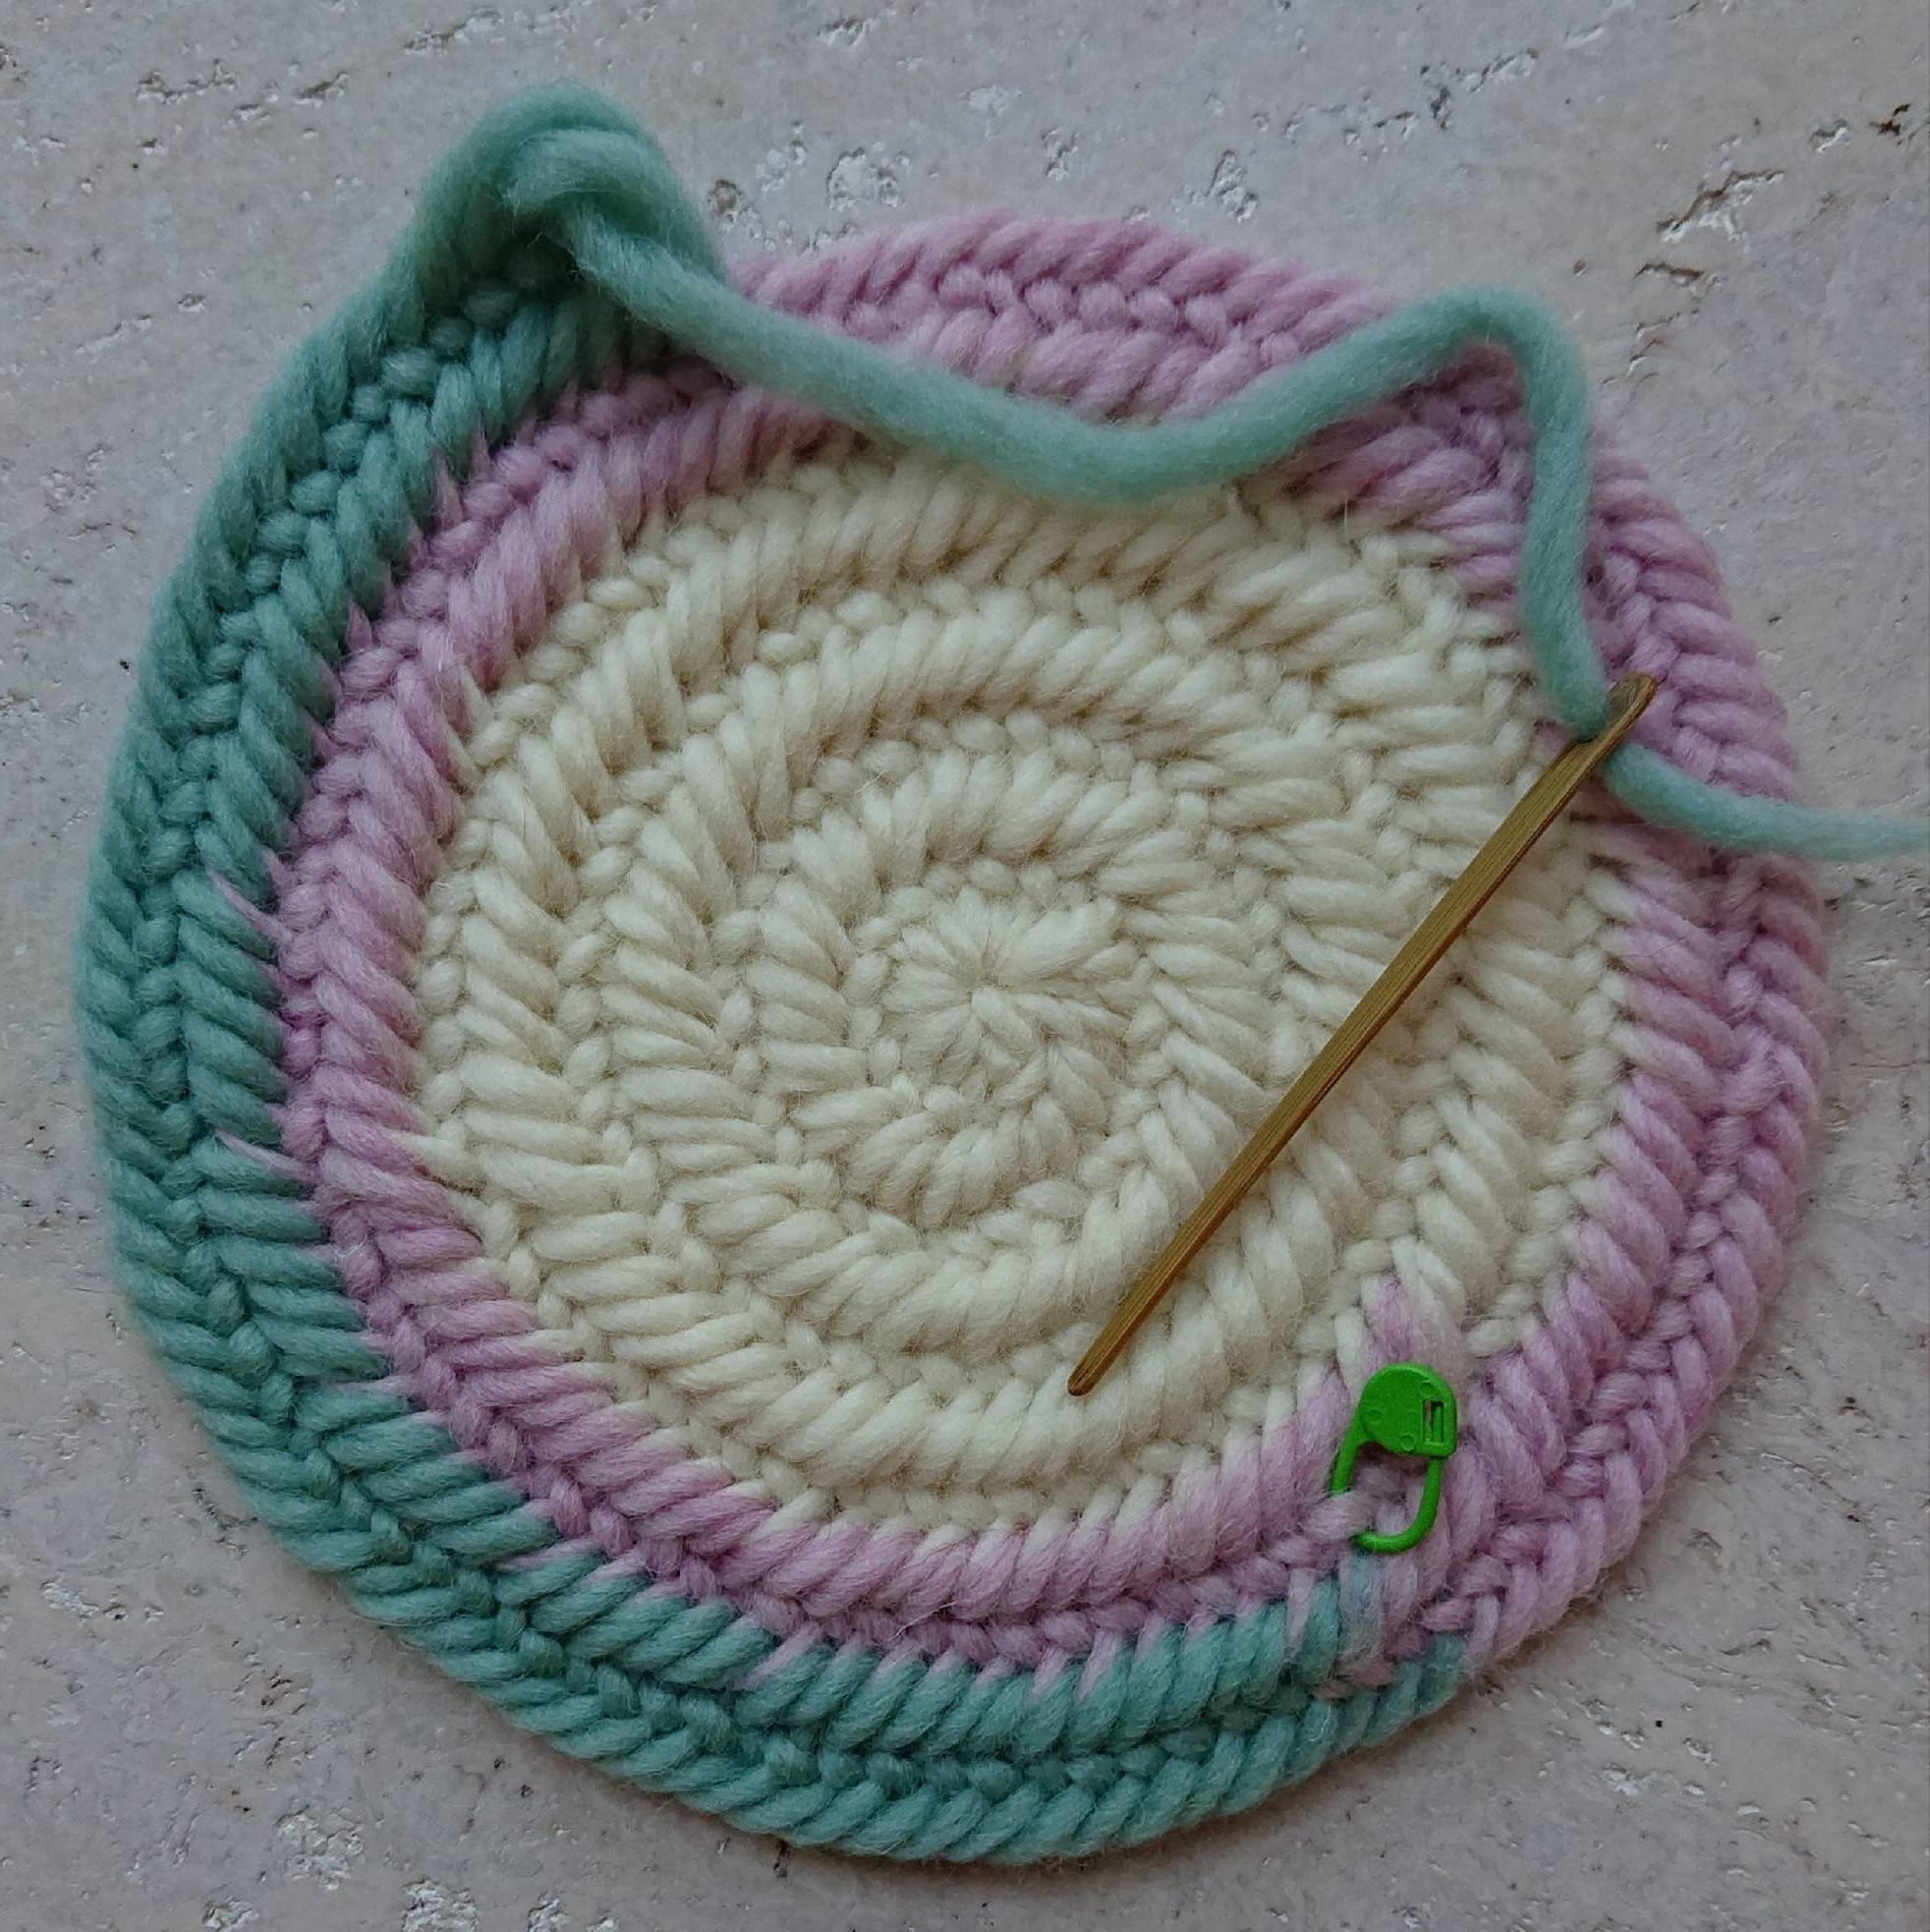
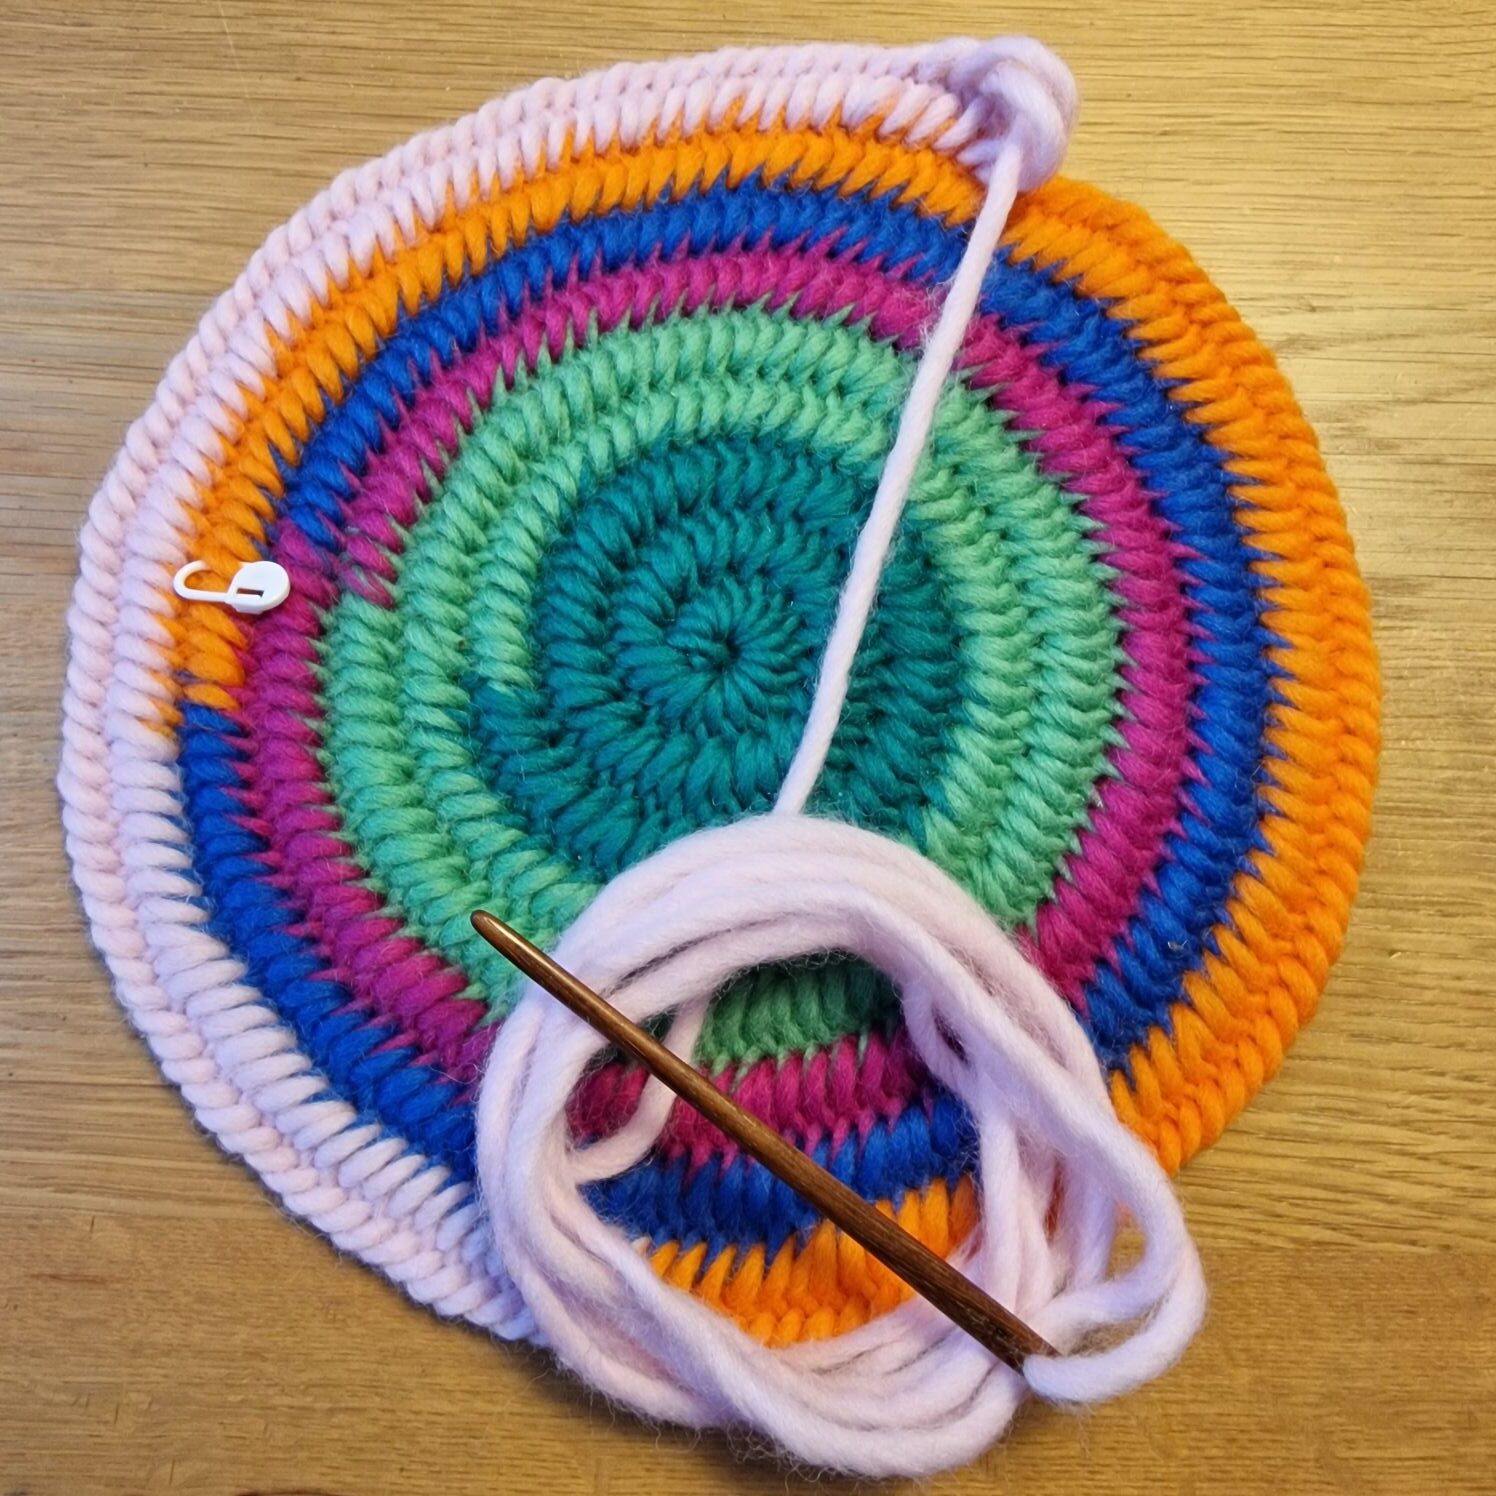
Starting with 17 stitches and needlebind so called magic circle.
I always forget to ask if you’d like to subscribe to my YouTube channel: happy needlebinding. If I have a lot of subscribers, I can email magazines to write an article about this wonderful old craft so I can pass it on to the next generation.
Thank you kindly in advance. bert veugelers.
The stitch that i use is the Fåberg stitch with F2 therefore the fabric becomes more dence.
The first row increase every stitch.
The 2 nd row increase every 2nd stitch.
The 3 nd row increase every 3th stitch and so on.
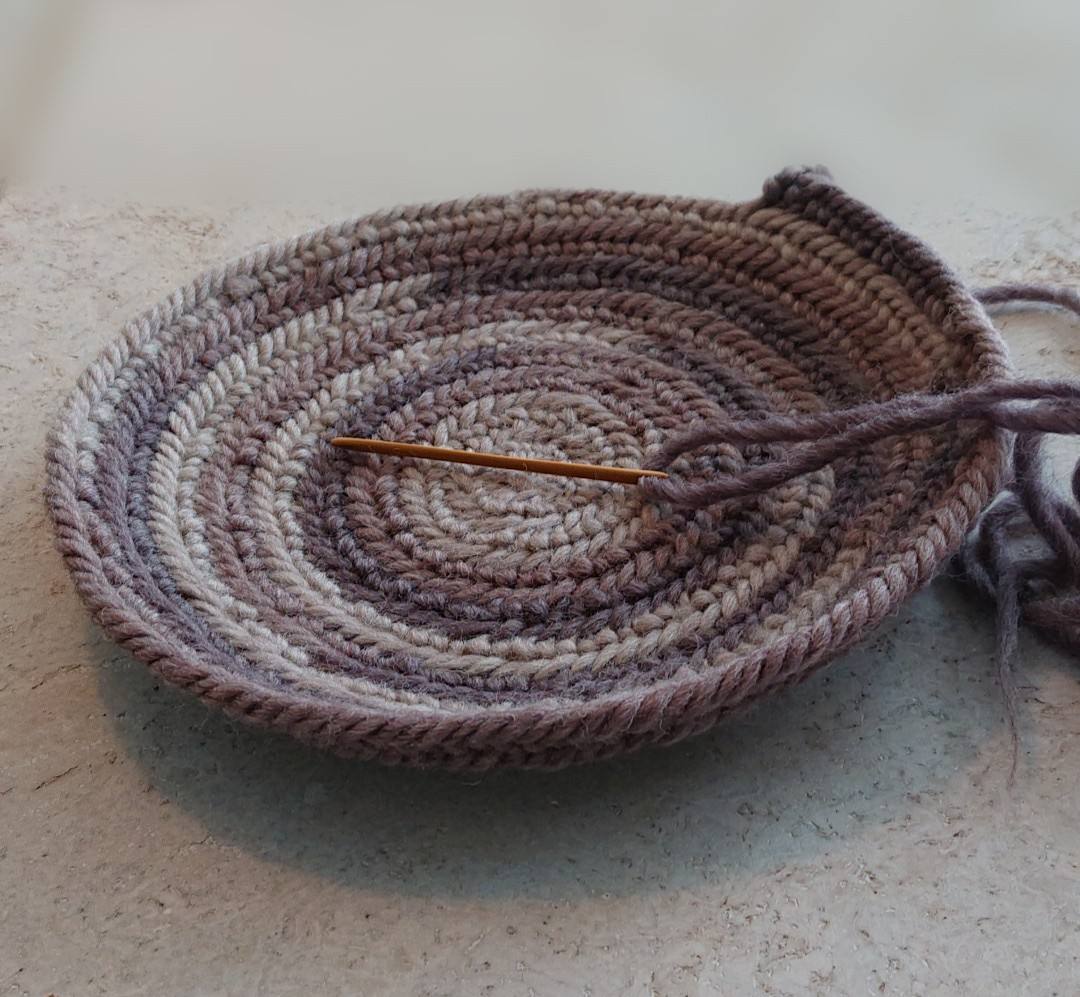
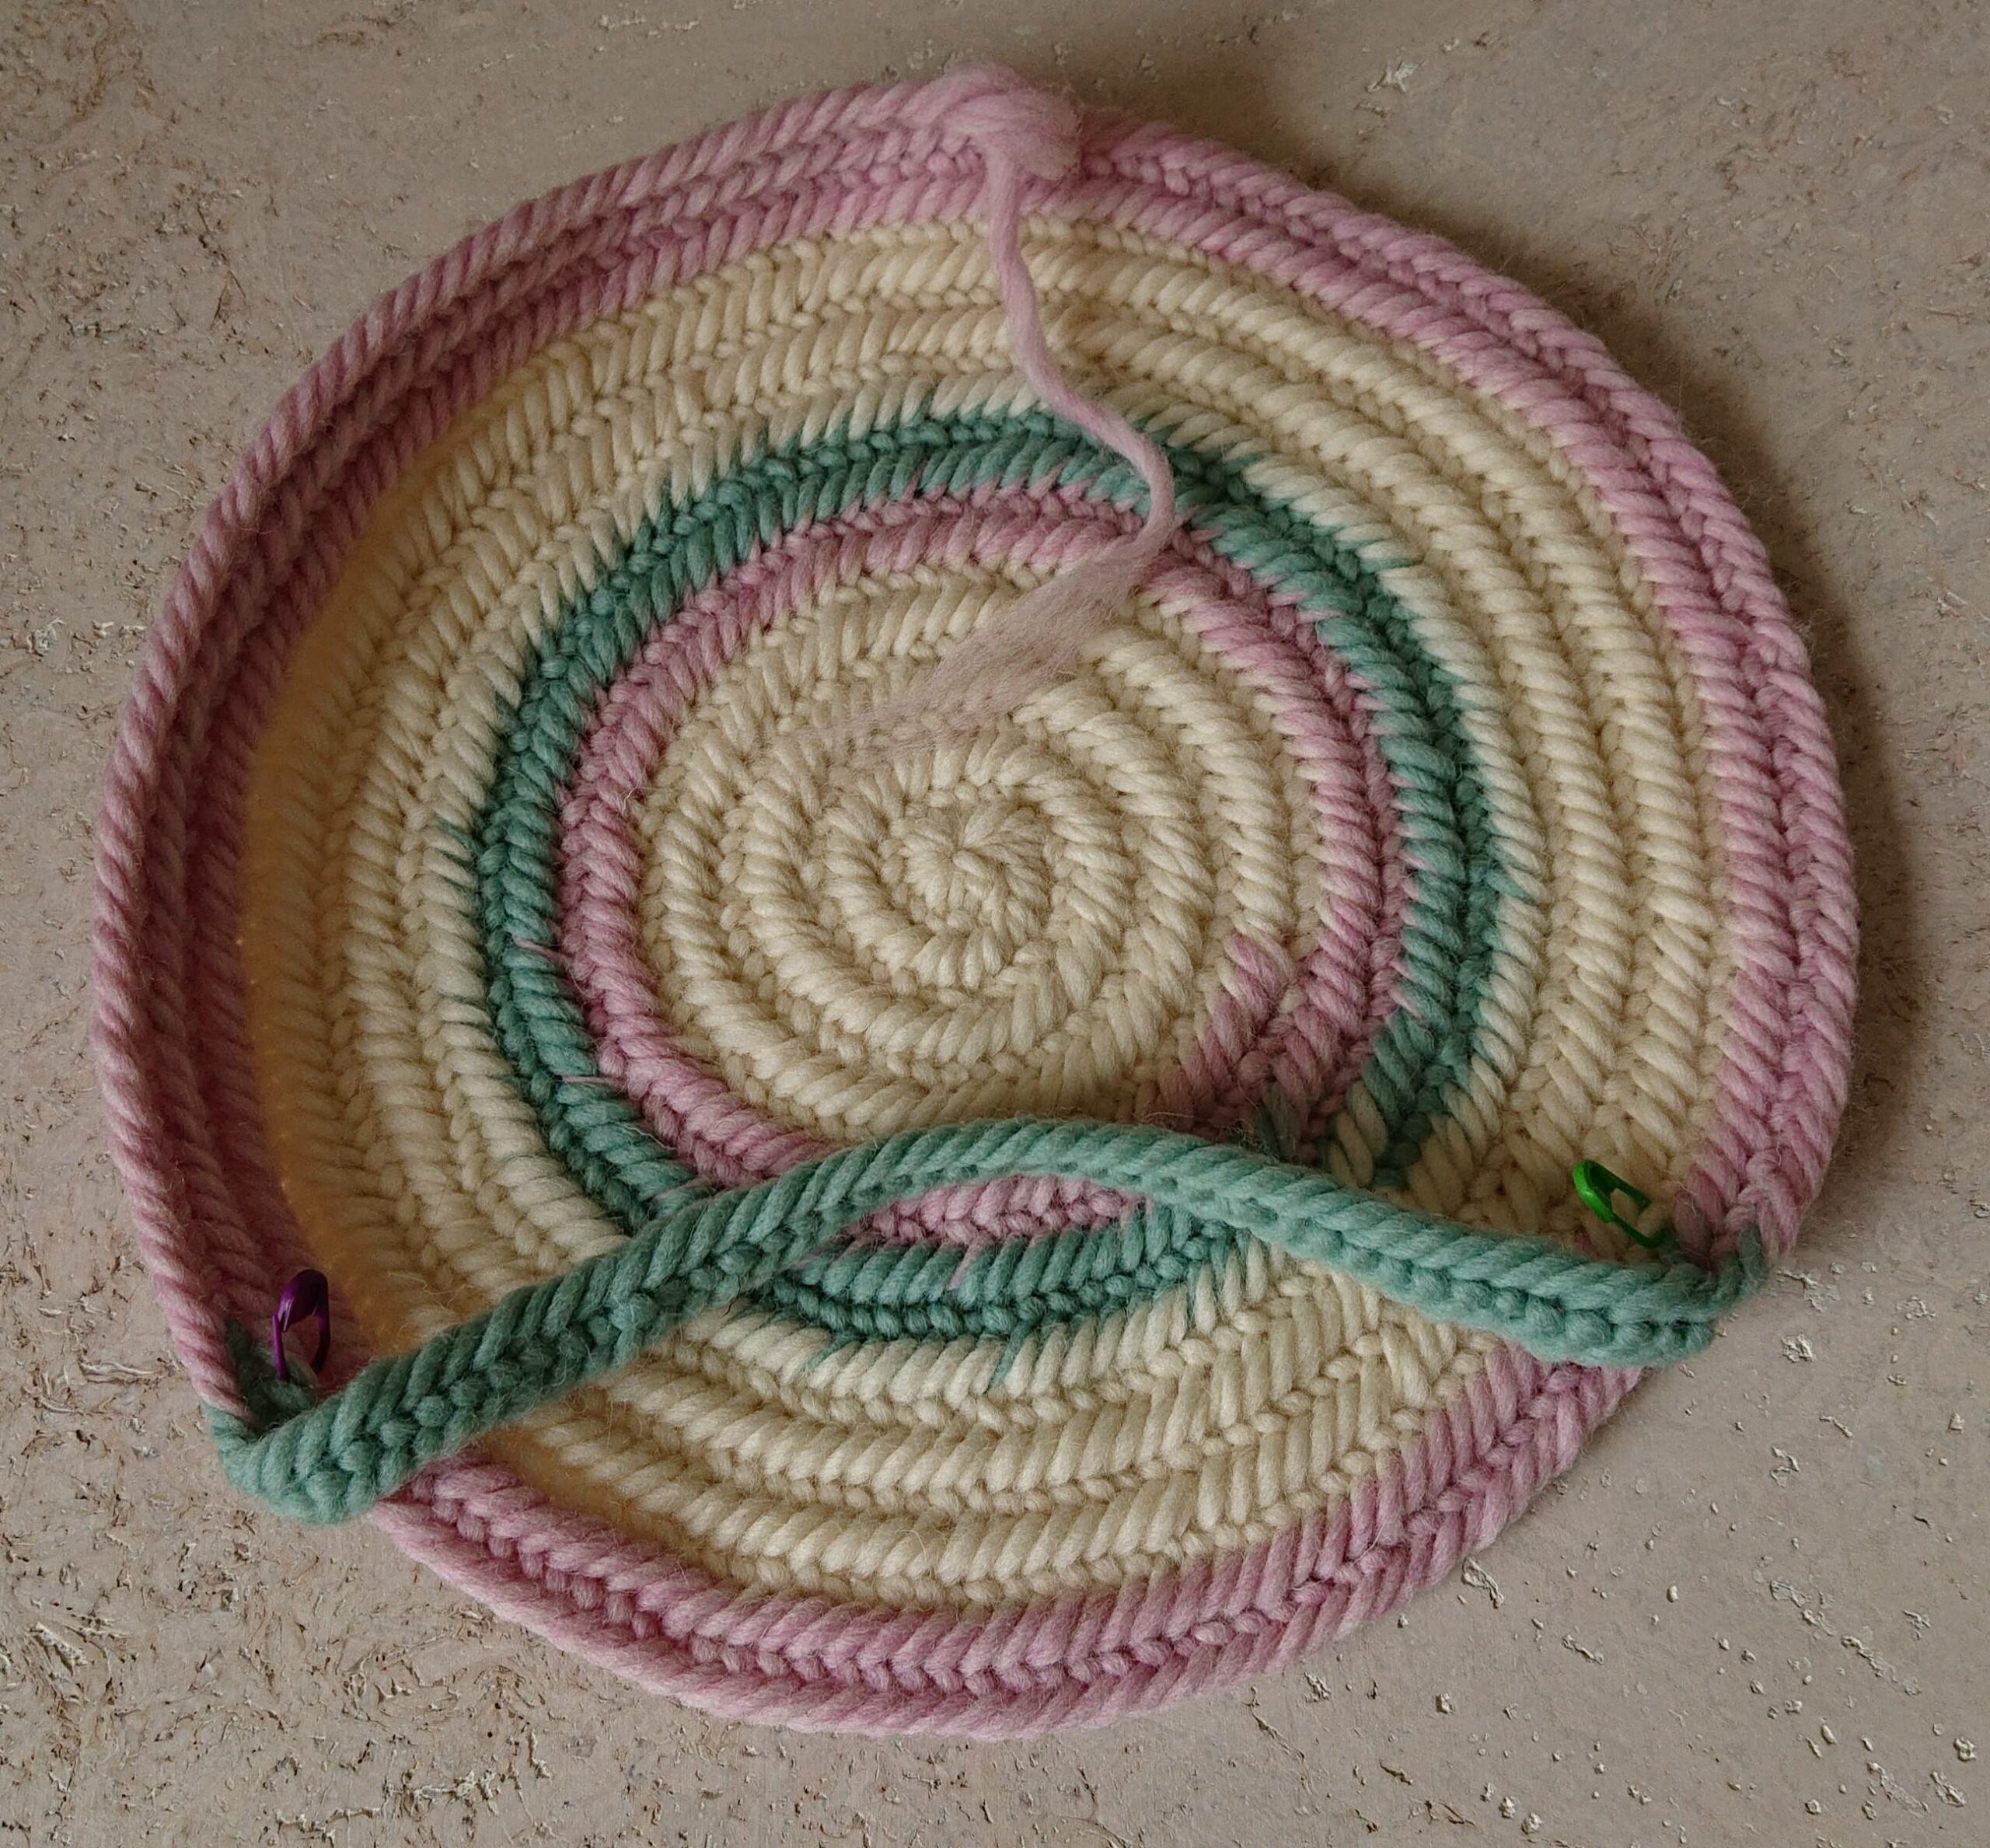
When you reached round 10 you needlebind normal (no increasing).
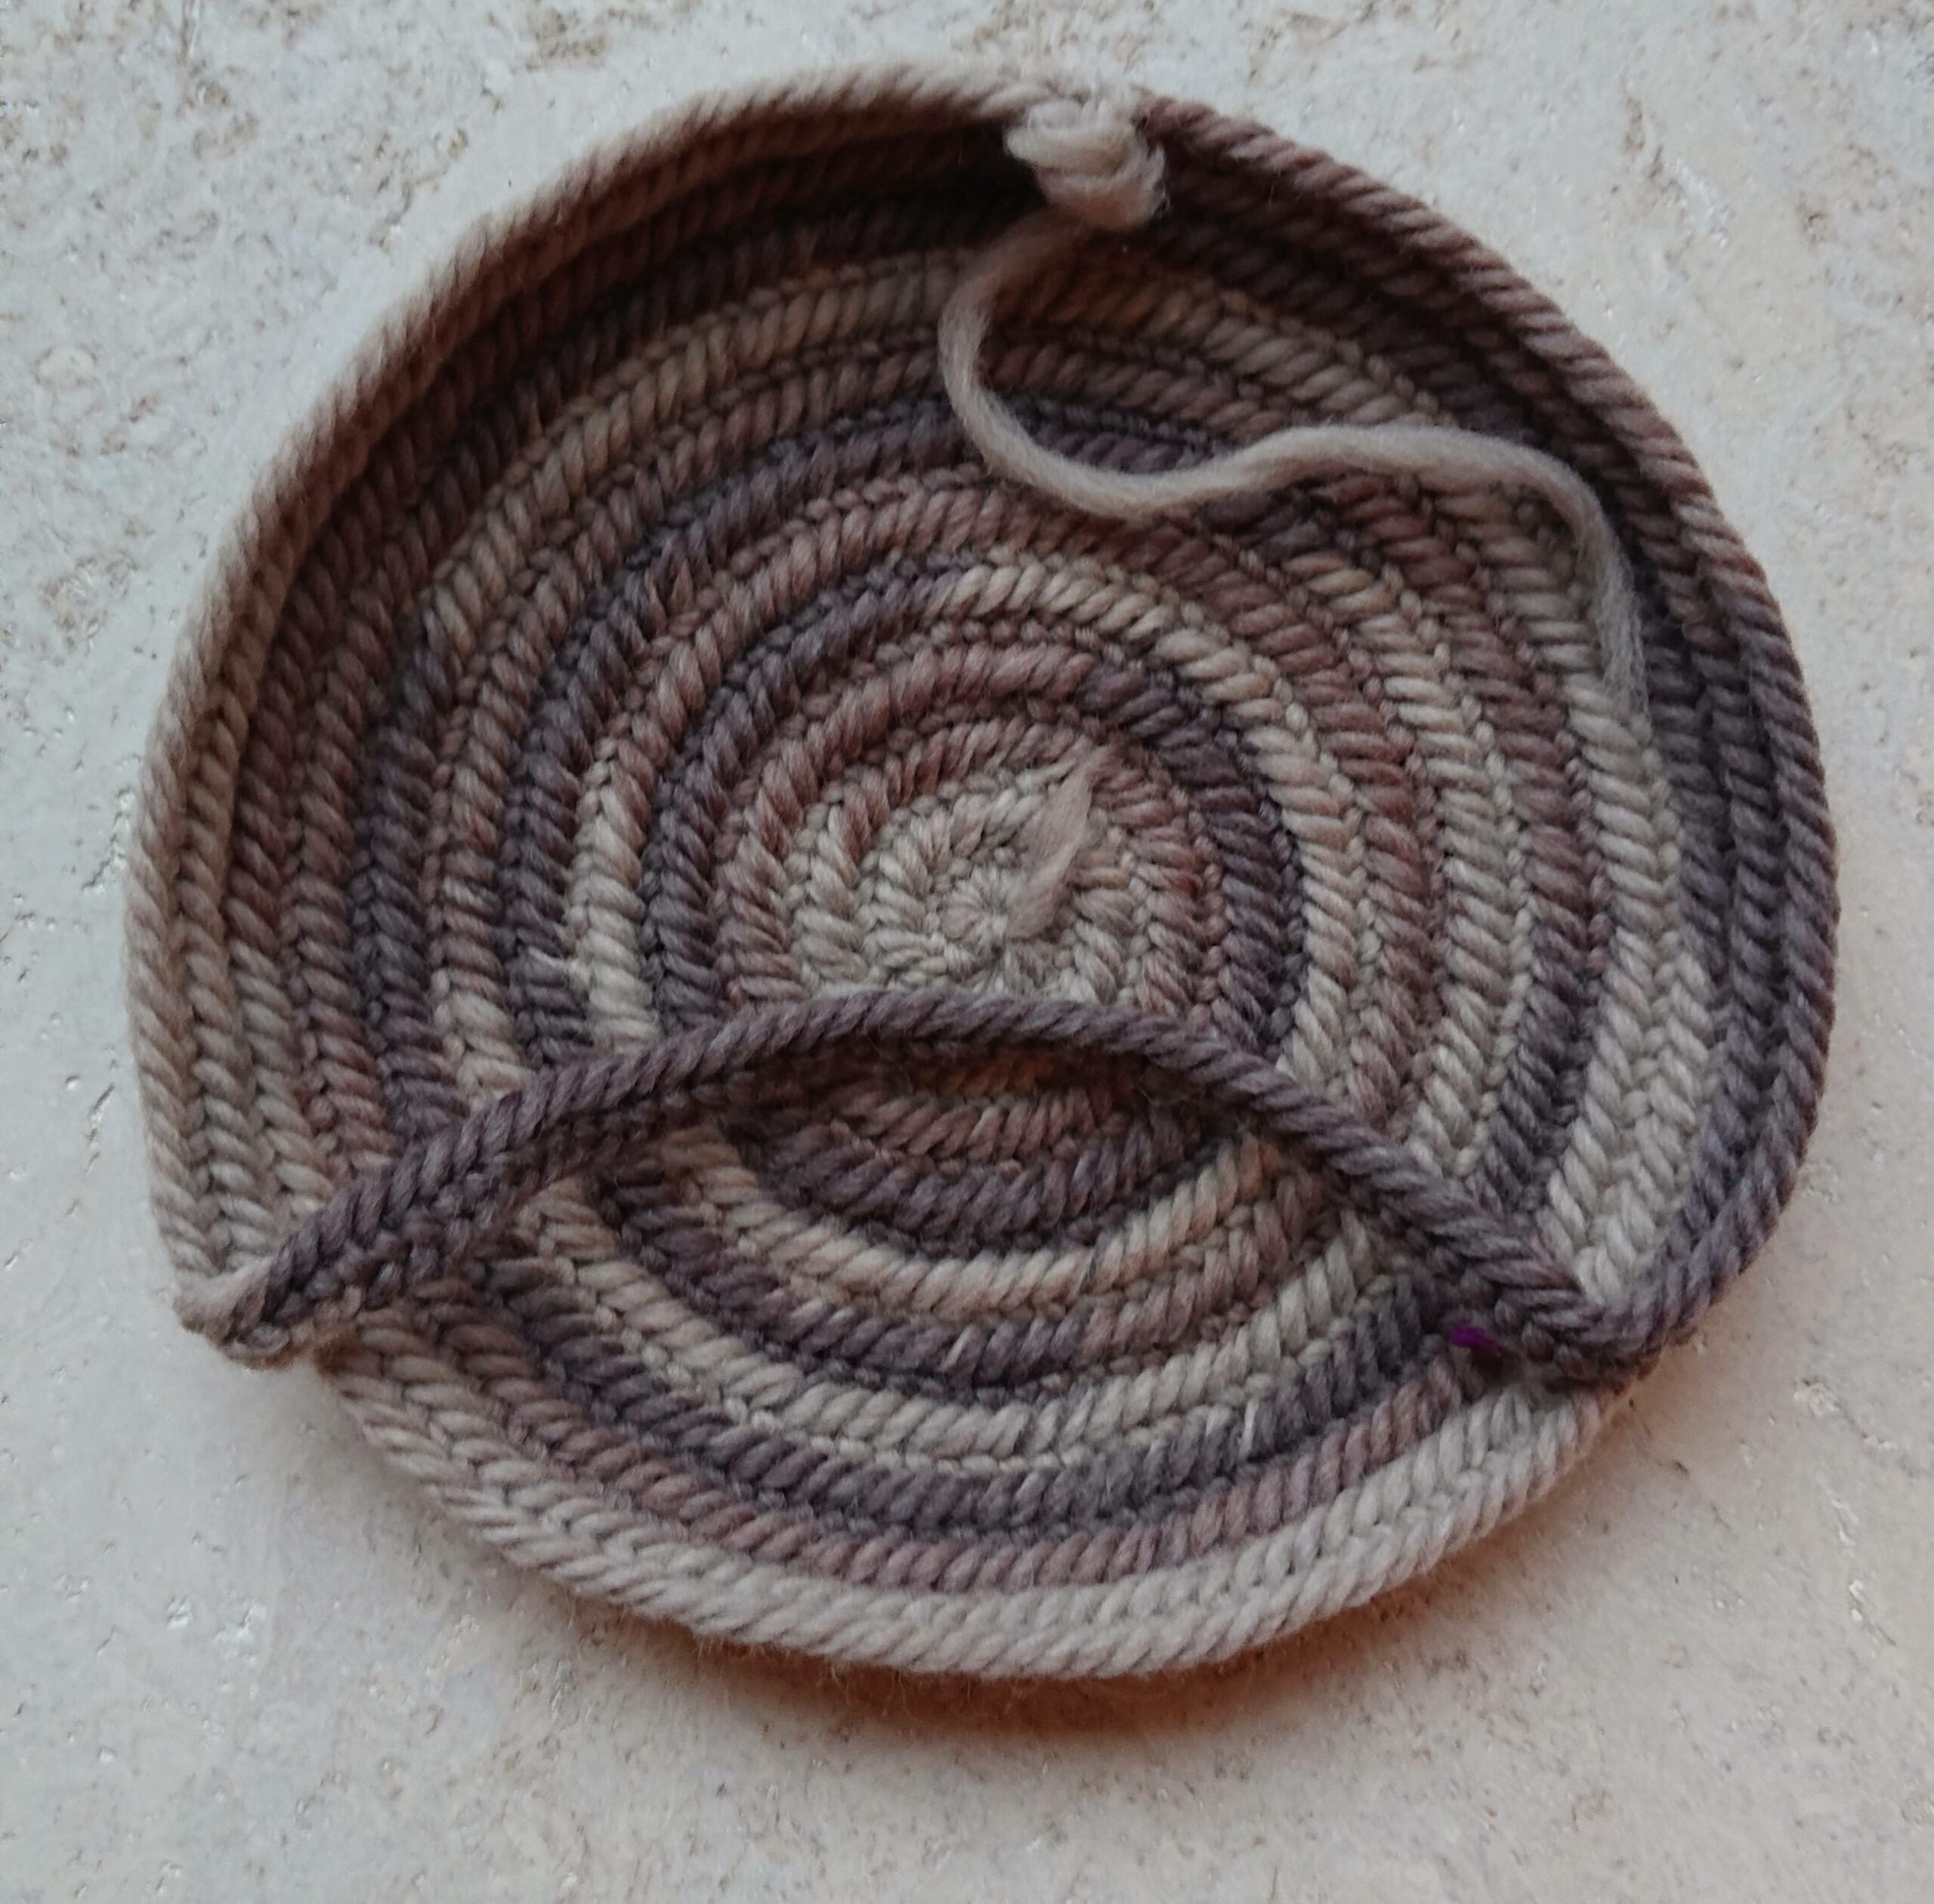
Round 11 needlebind another round normal and then needlebind a loose row and reattached the row stiches.
You have now 144 stitches and the loose row is 42 stitches.
The length of the loose row is half the circumference of your head.
You have to put your head through it.
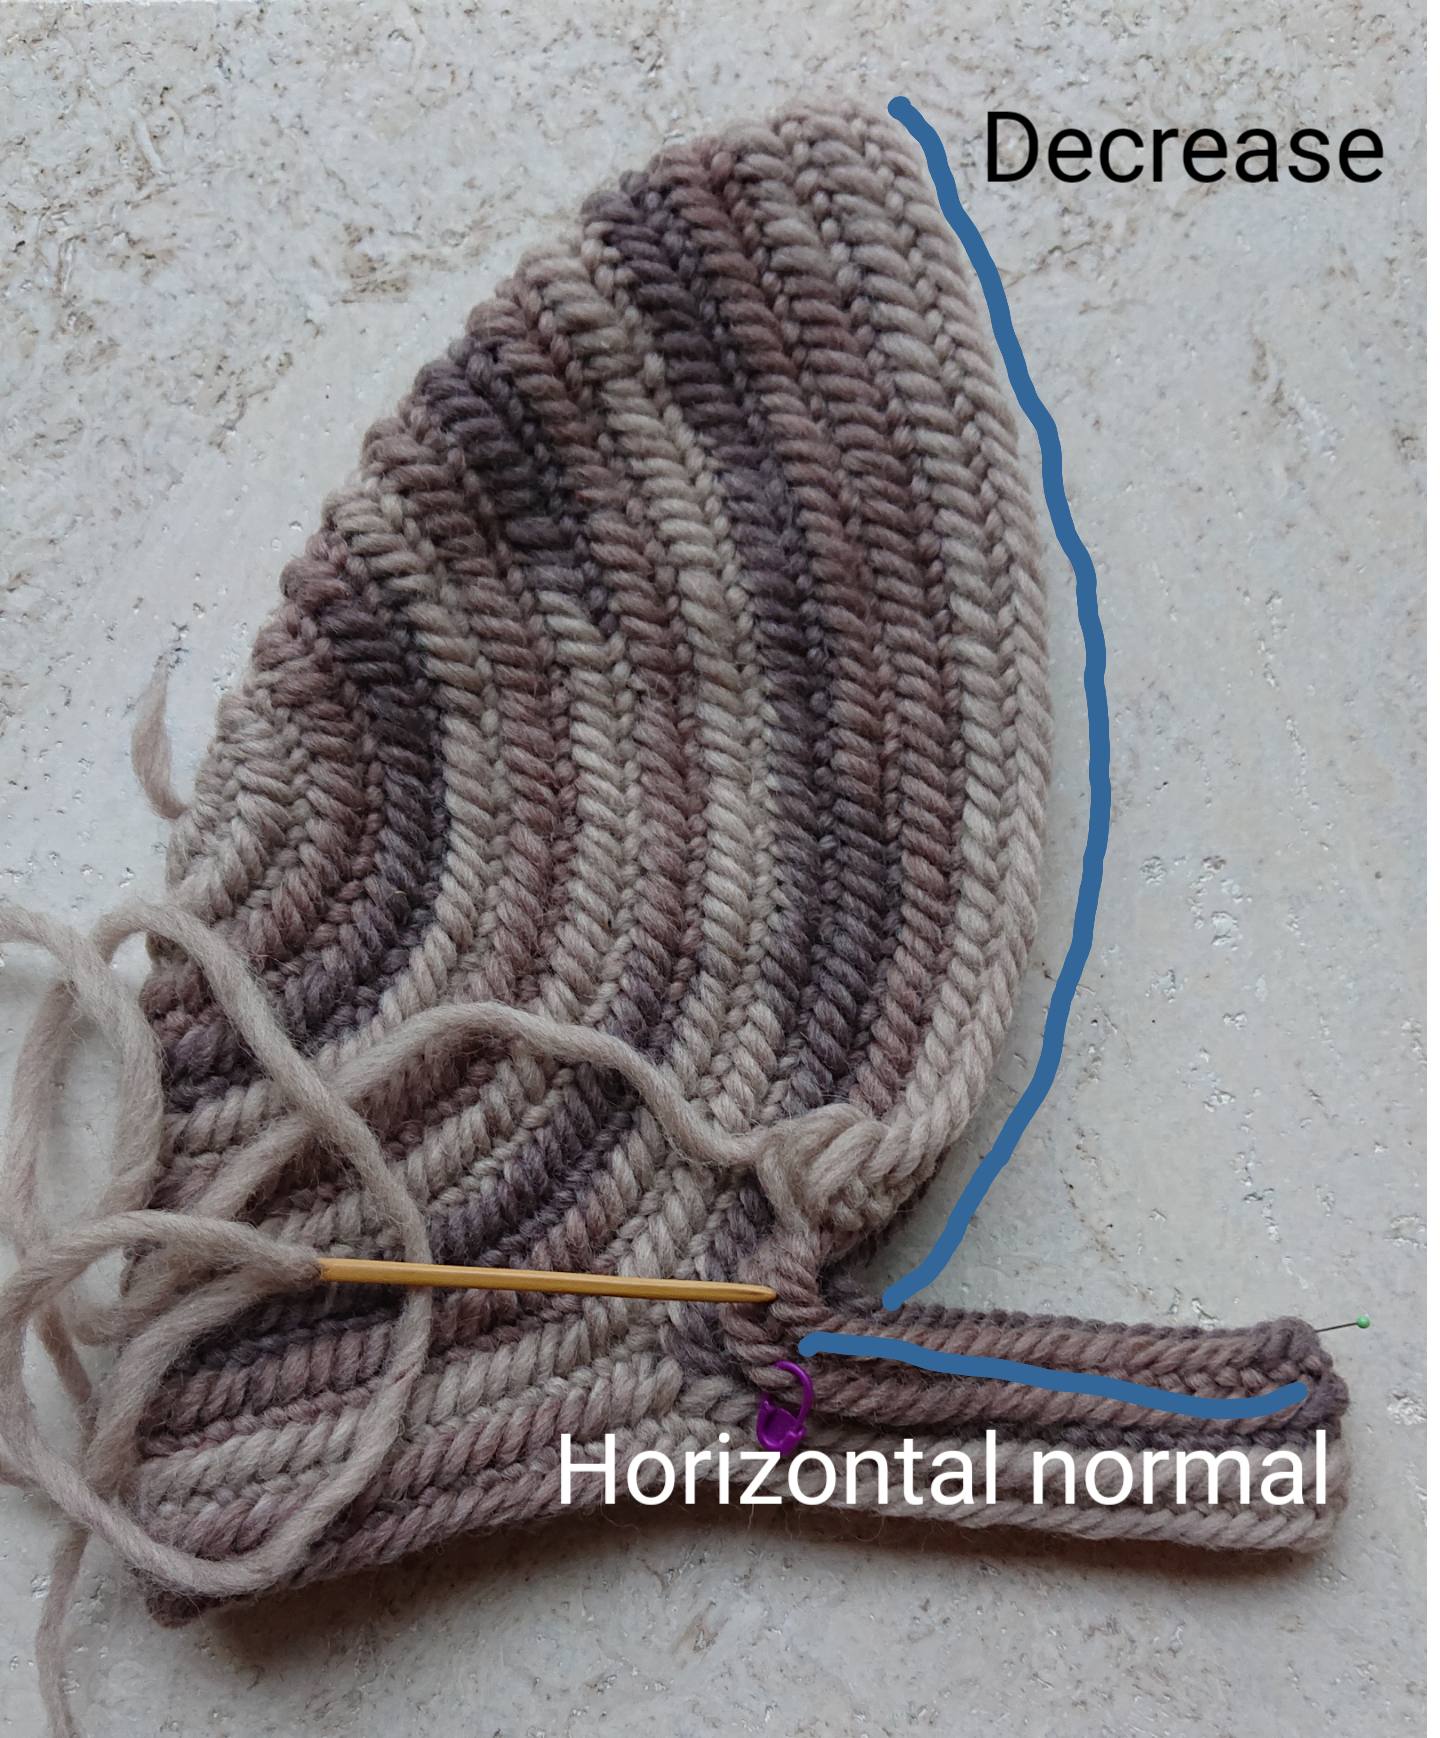
To make the front of the your hood you have to decrease.
To start in the corners (needlepoint) i decrease 2 stitches two rows, to make the corners less sharp.
The horizontal part i needlbind straight for 3 rows, and then i decreased with the same number as the vertical part.
In the vertical curve (the blue strip) 8 stitches normal and 9nd decrease.
The vertical curve 7 stitches normal and 8nd decrease.
Messure if the hood is small enough, if not continue.
The vertical curve 6 stitches normal and 7nd decrease.
Now mesure if it is big enough, you can of course make the size of the hood, what you like, needlebind some more or less rows.
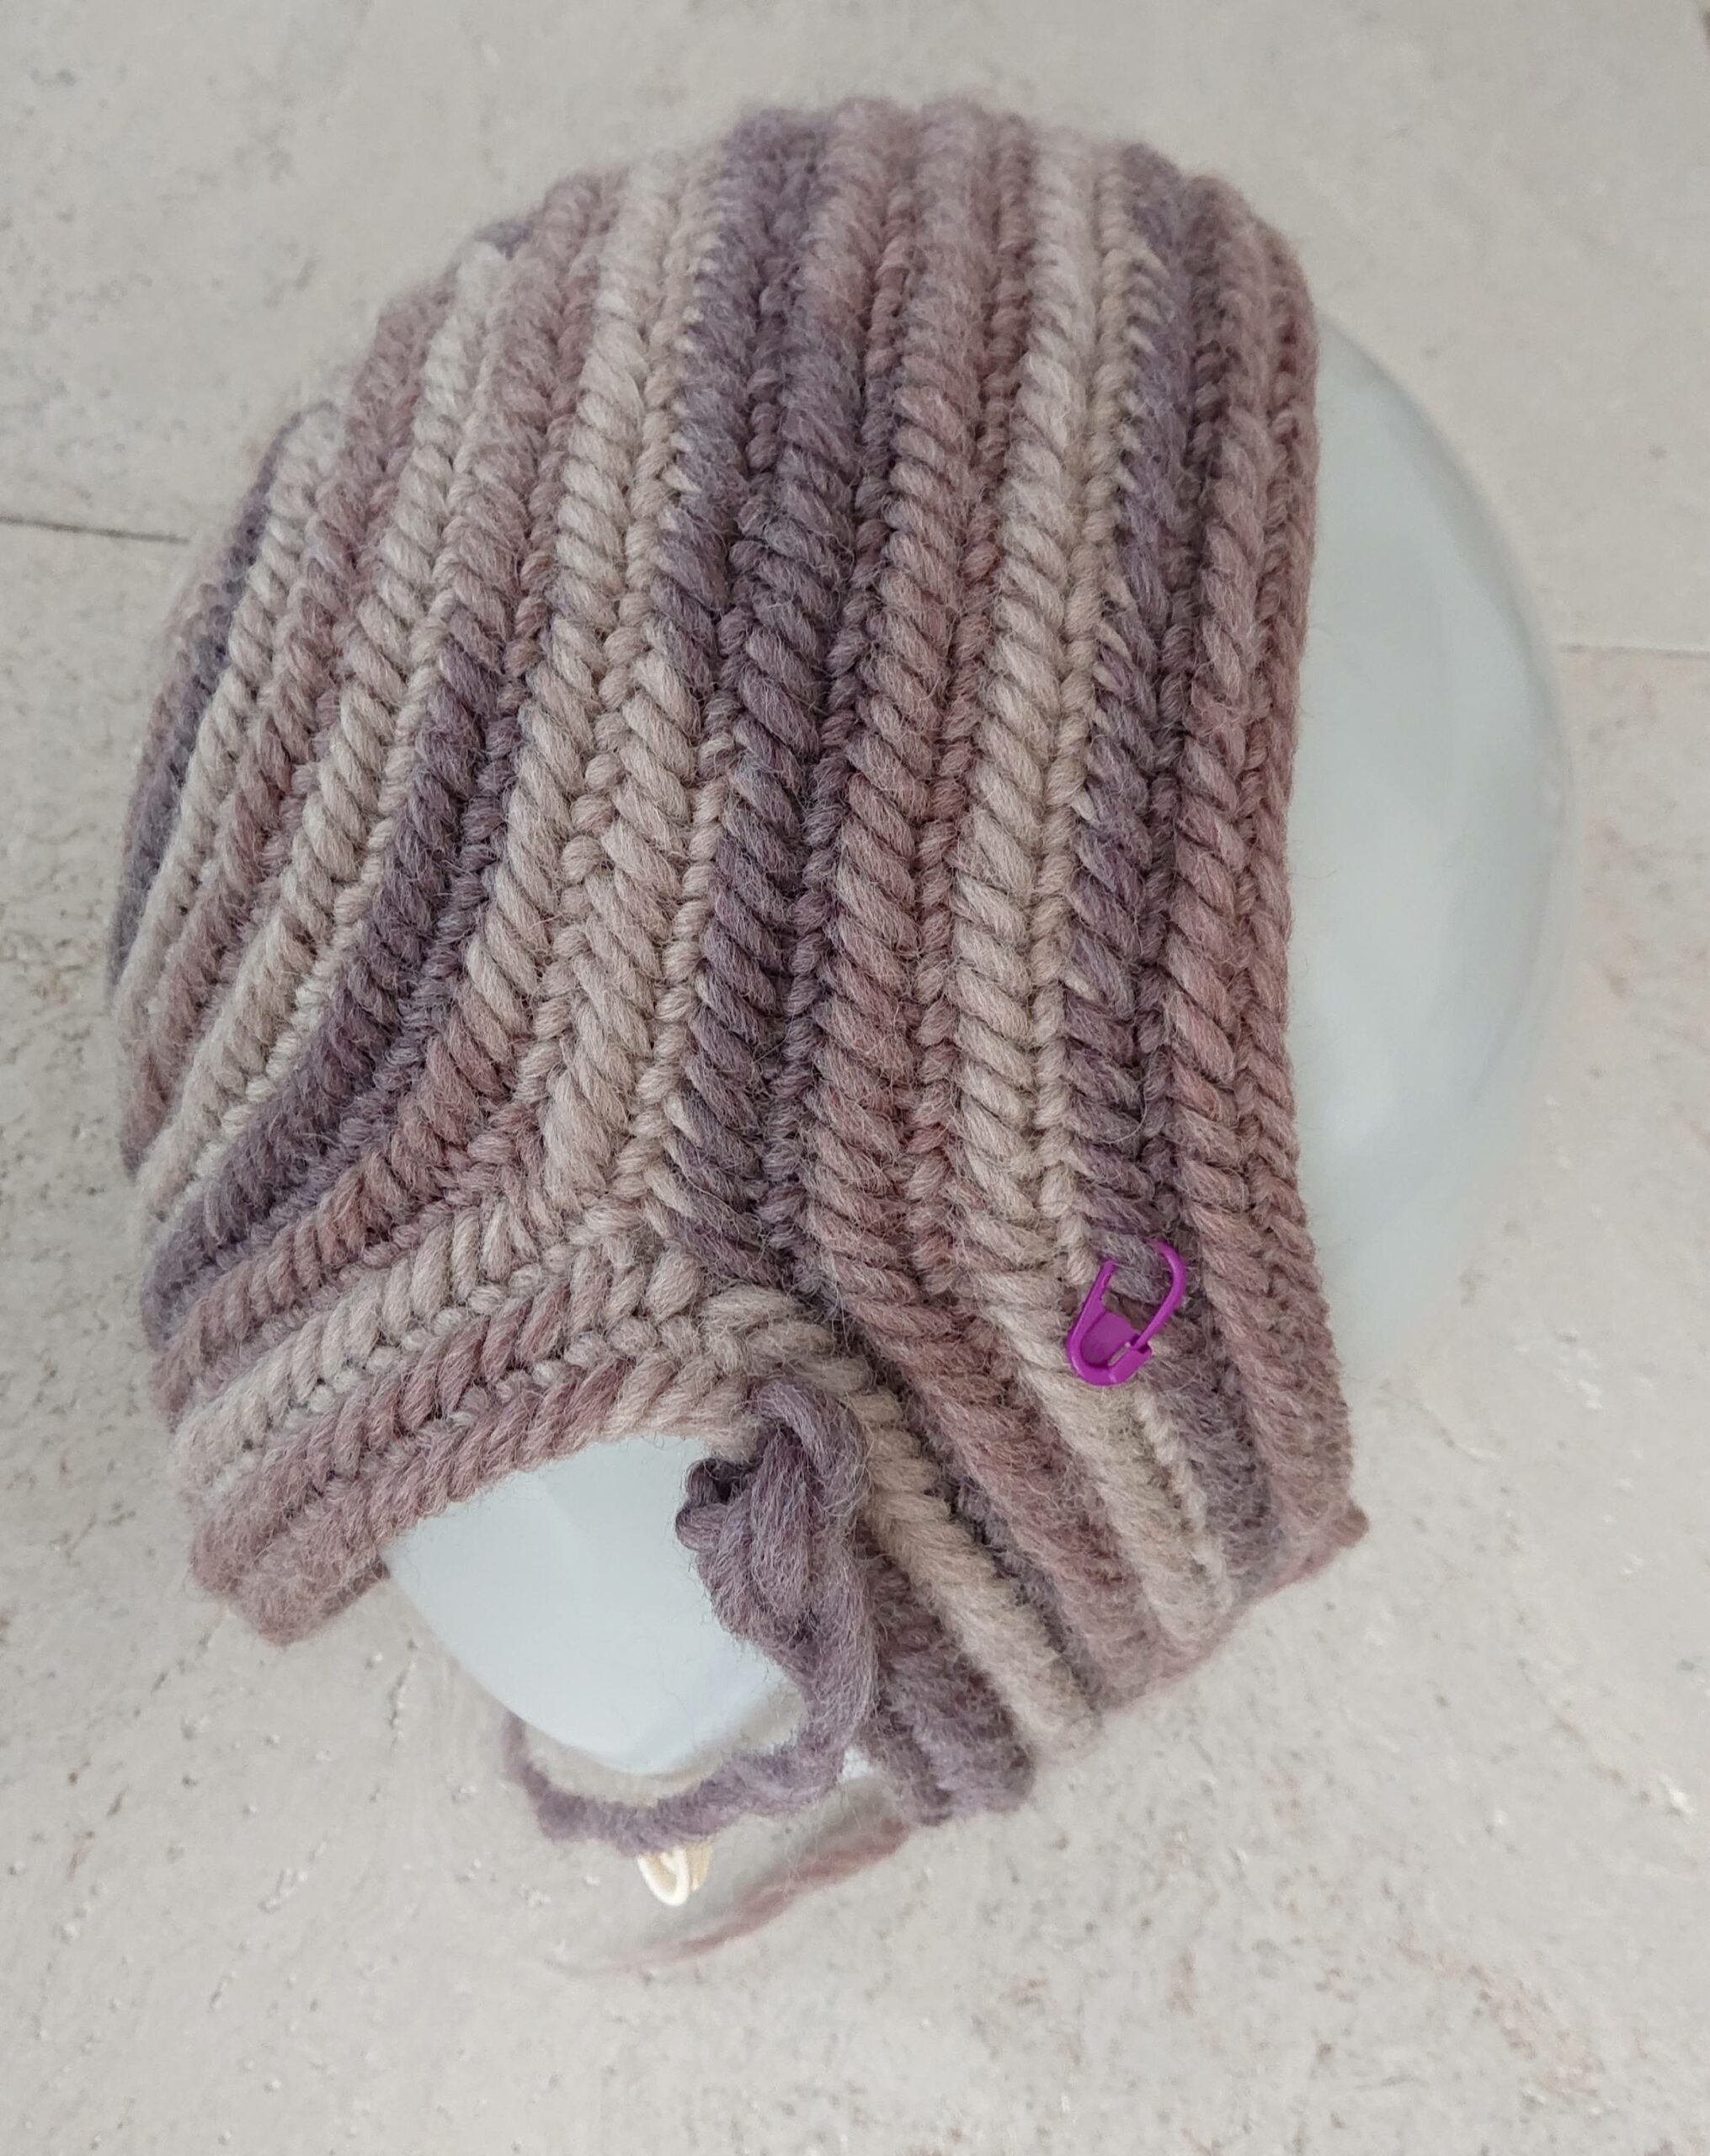
Nalbinding the neck.
Make a new thread on the edge of the new created small circel and needlebind this first row of the neck of the hood normal.
When this row is ready measure if your head gets through.
The first rows of the neck needlebind normal, measure it, is it to short then needlebind another row.
Nalbinding the shoulder.
Now you are going to increase the neck towards the shoulder.
Next row needlebind 5 stitches normal and the 6 stitch increase.
Next row 6 stitches normal and the 7 stitch increase and so on, until it is big enough for you.
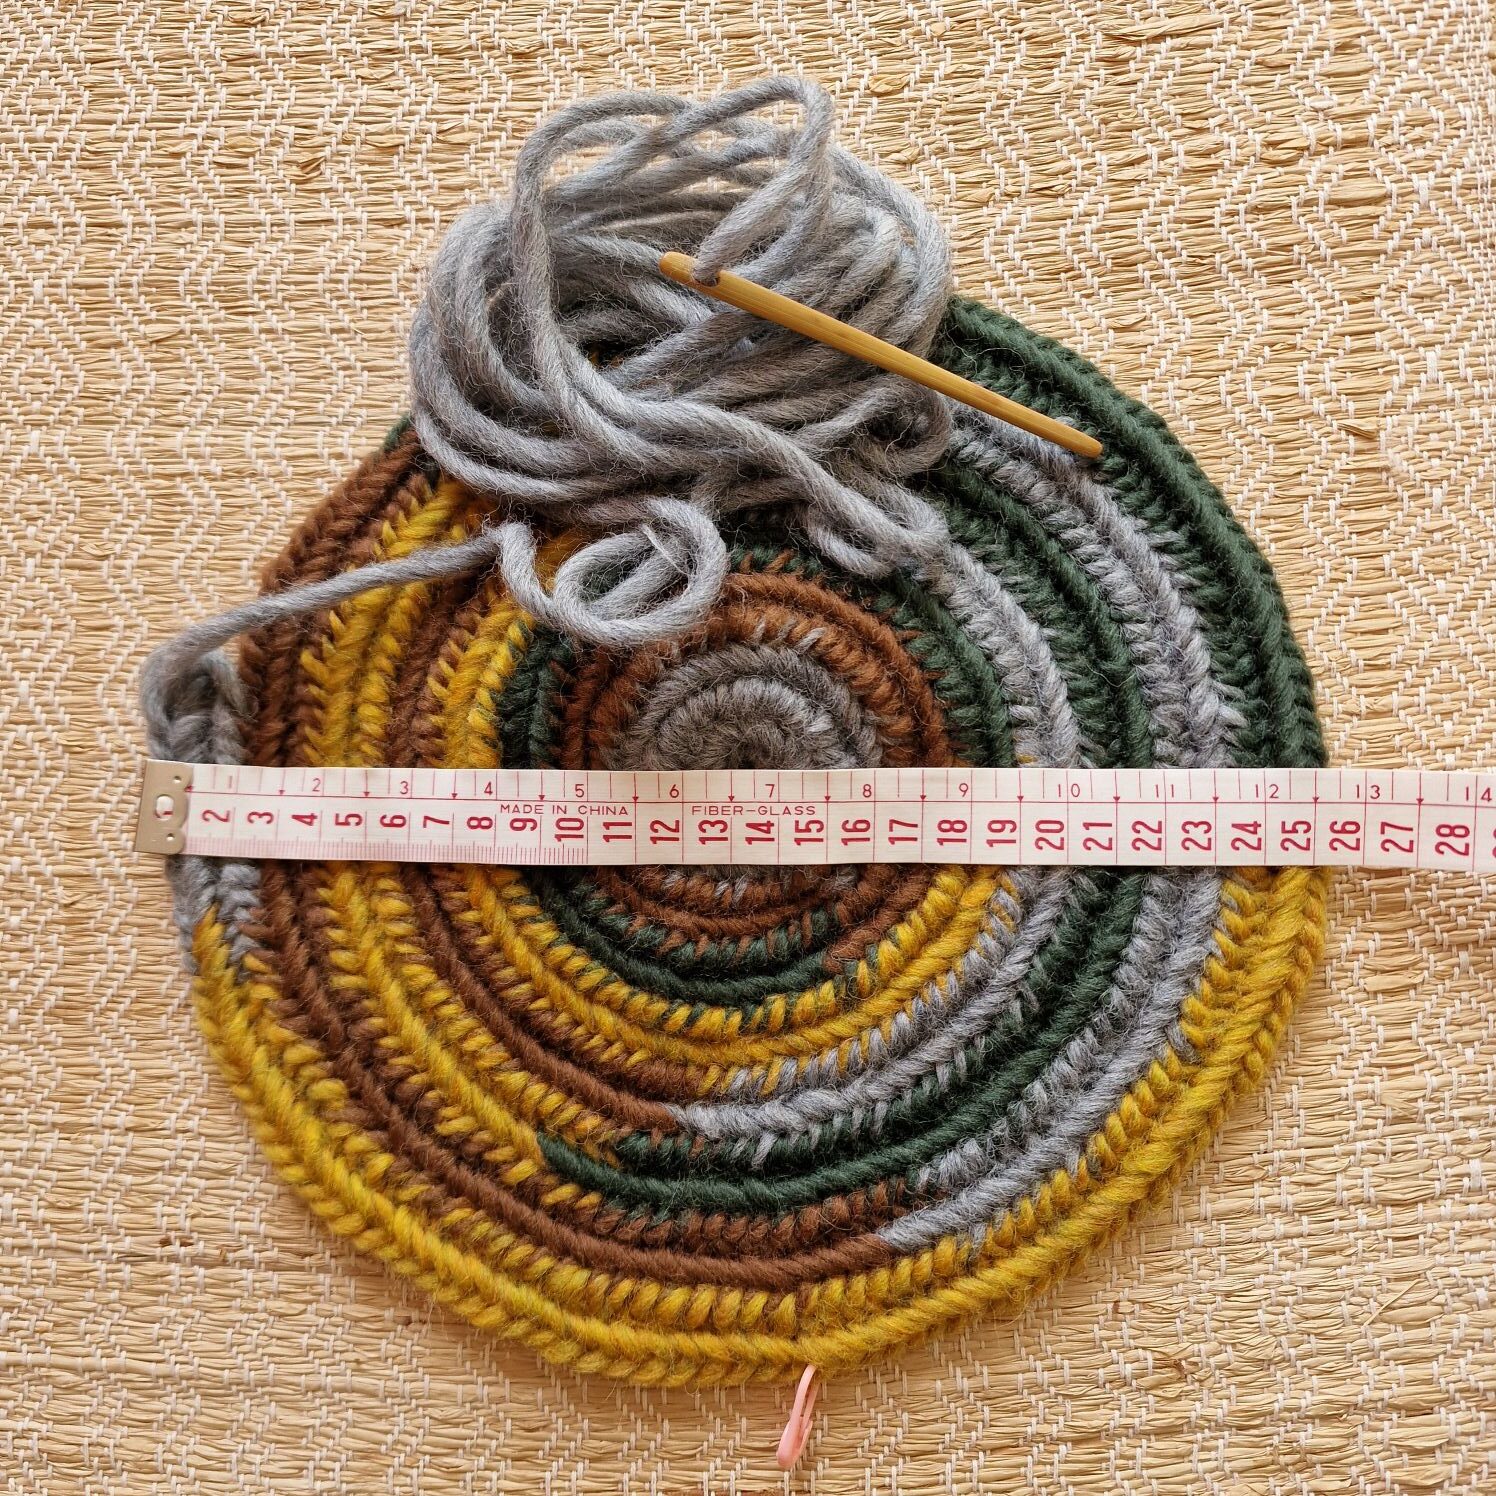
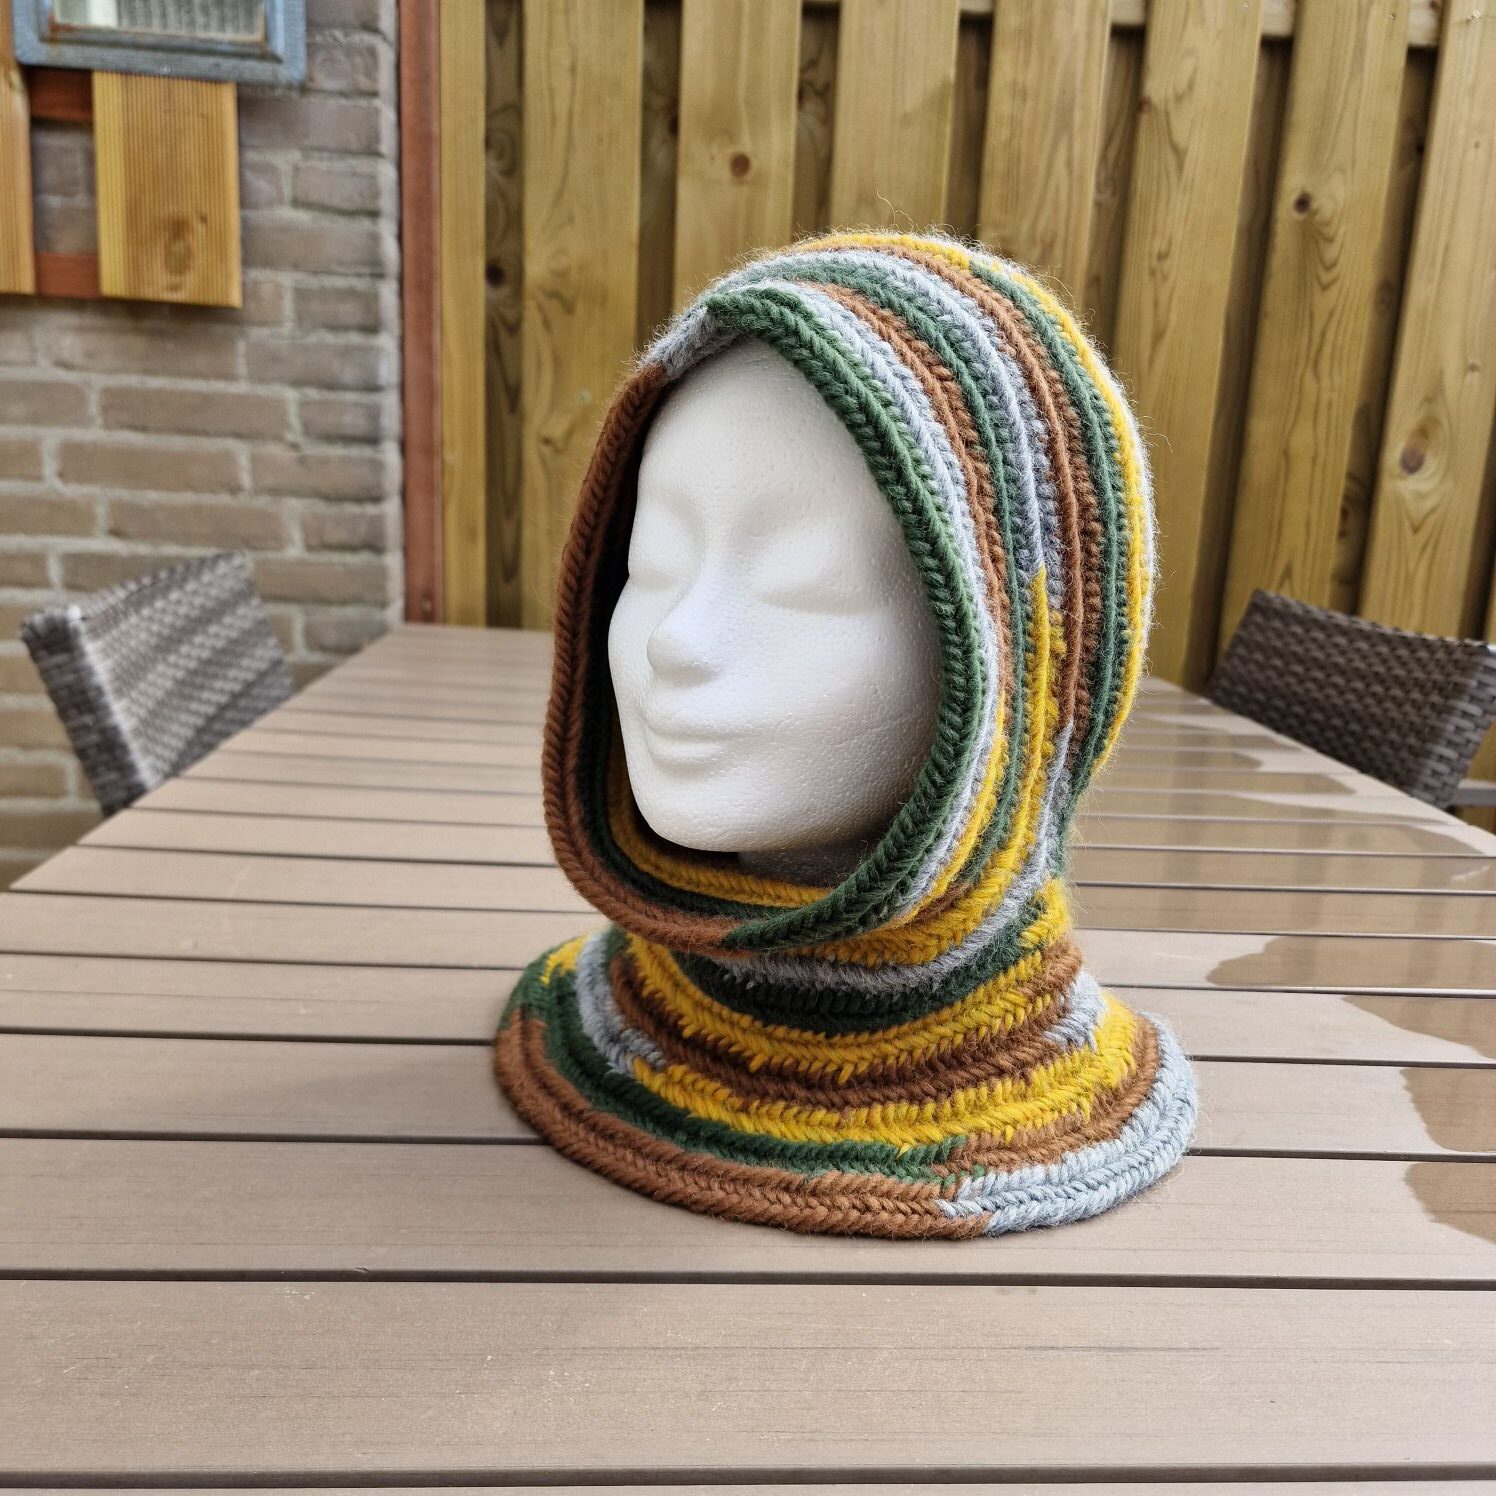
Here you see another project of making a hood, with the same patern as above.

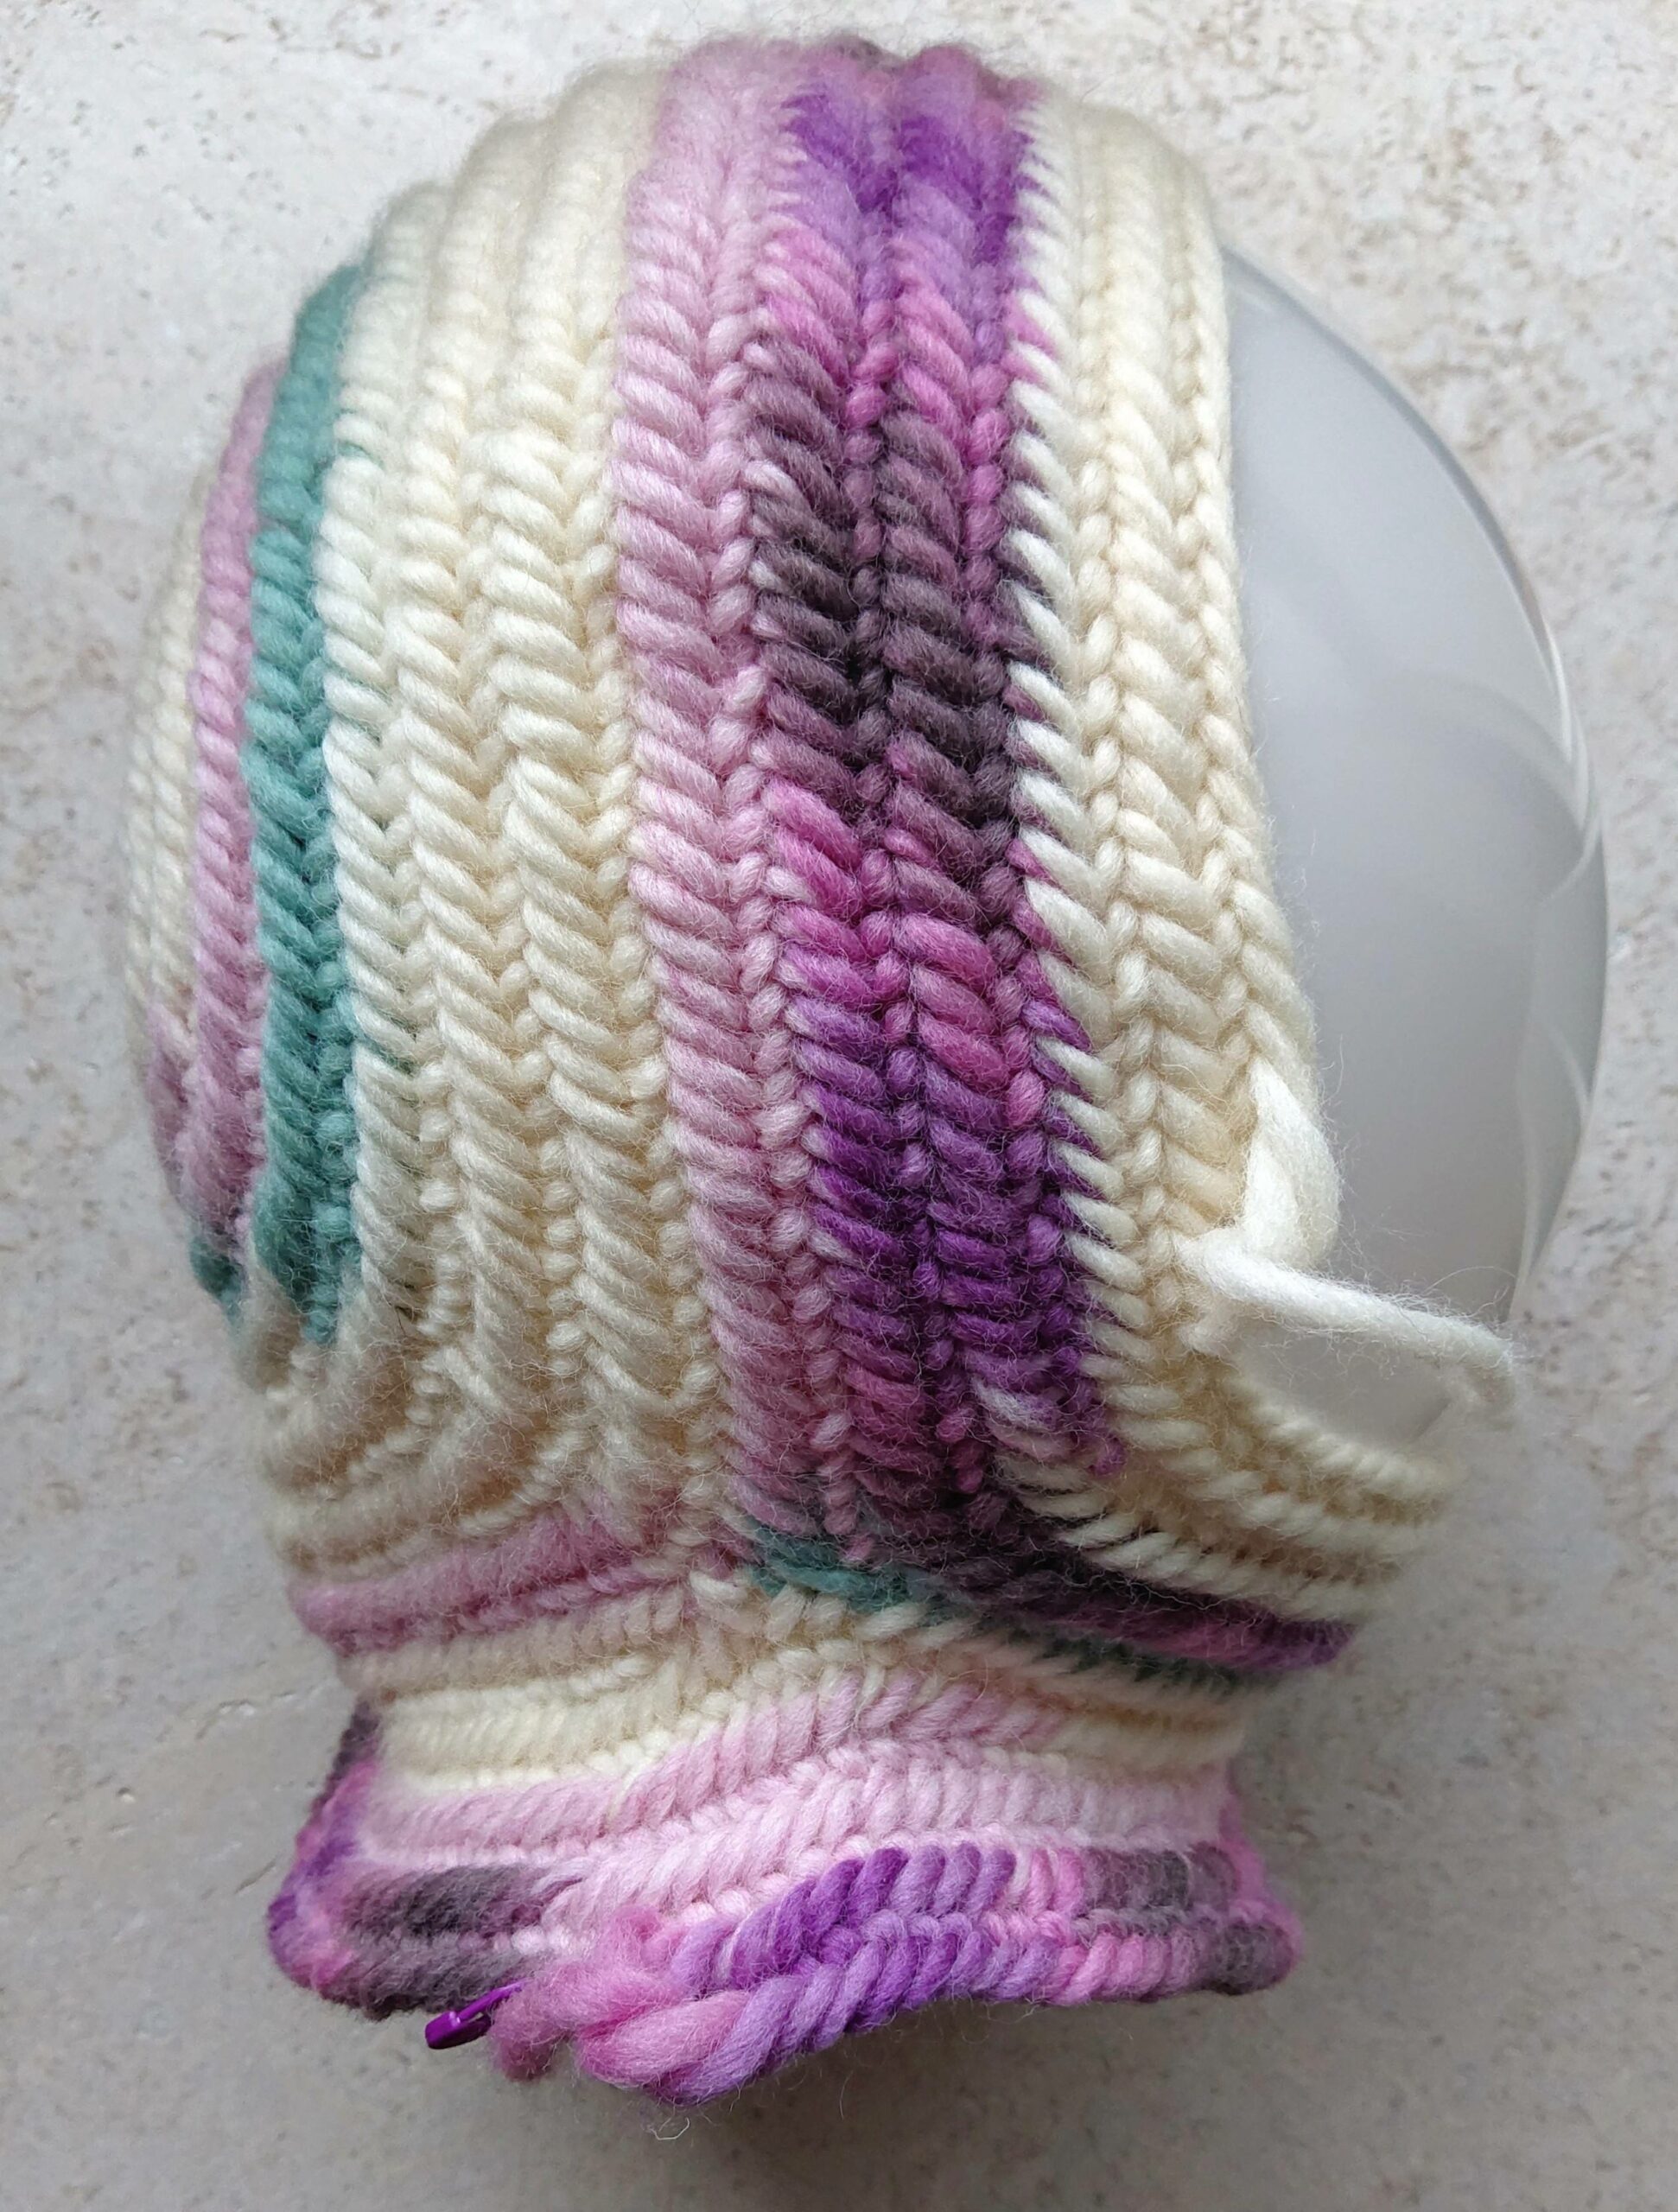
The 2nd hood is another project where the photos are a help for the next Hood (the colors of the wool are no longer for sale).
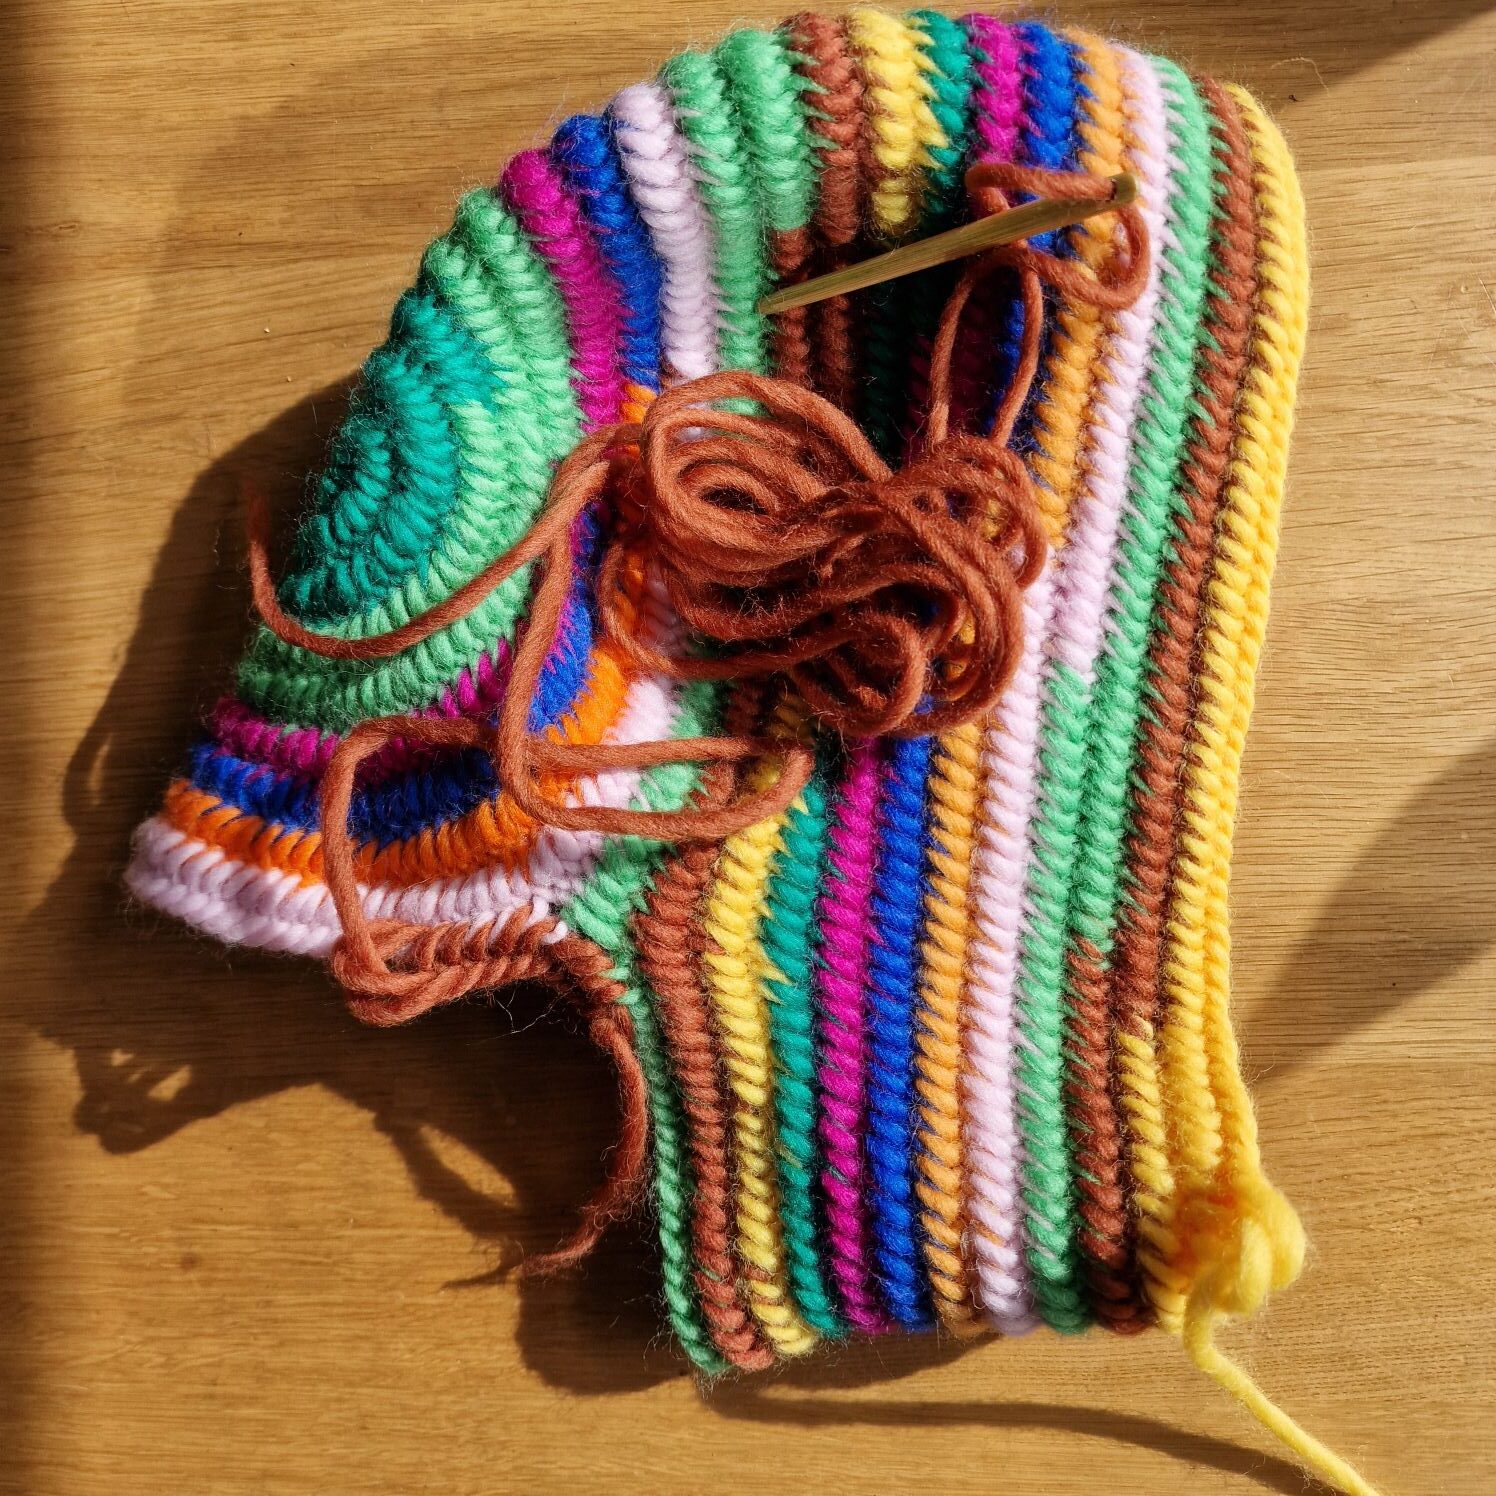
Today is March 29, 2024 and my new Hood is ready.
I needle-bound this Hood with a variation of the Asle stitch and with connecting stitch F2.
The wool thickness is approximately 4mm. and I made a cast on of 18 stitches and then started in the round.
Starting 16 stitches is actually better because the fabric had a little wave
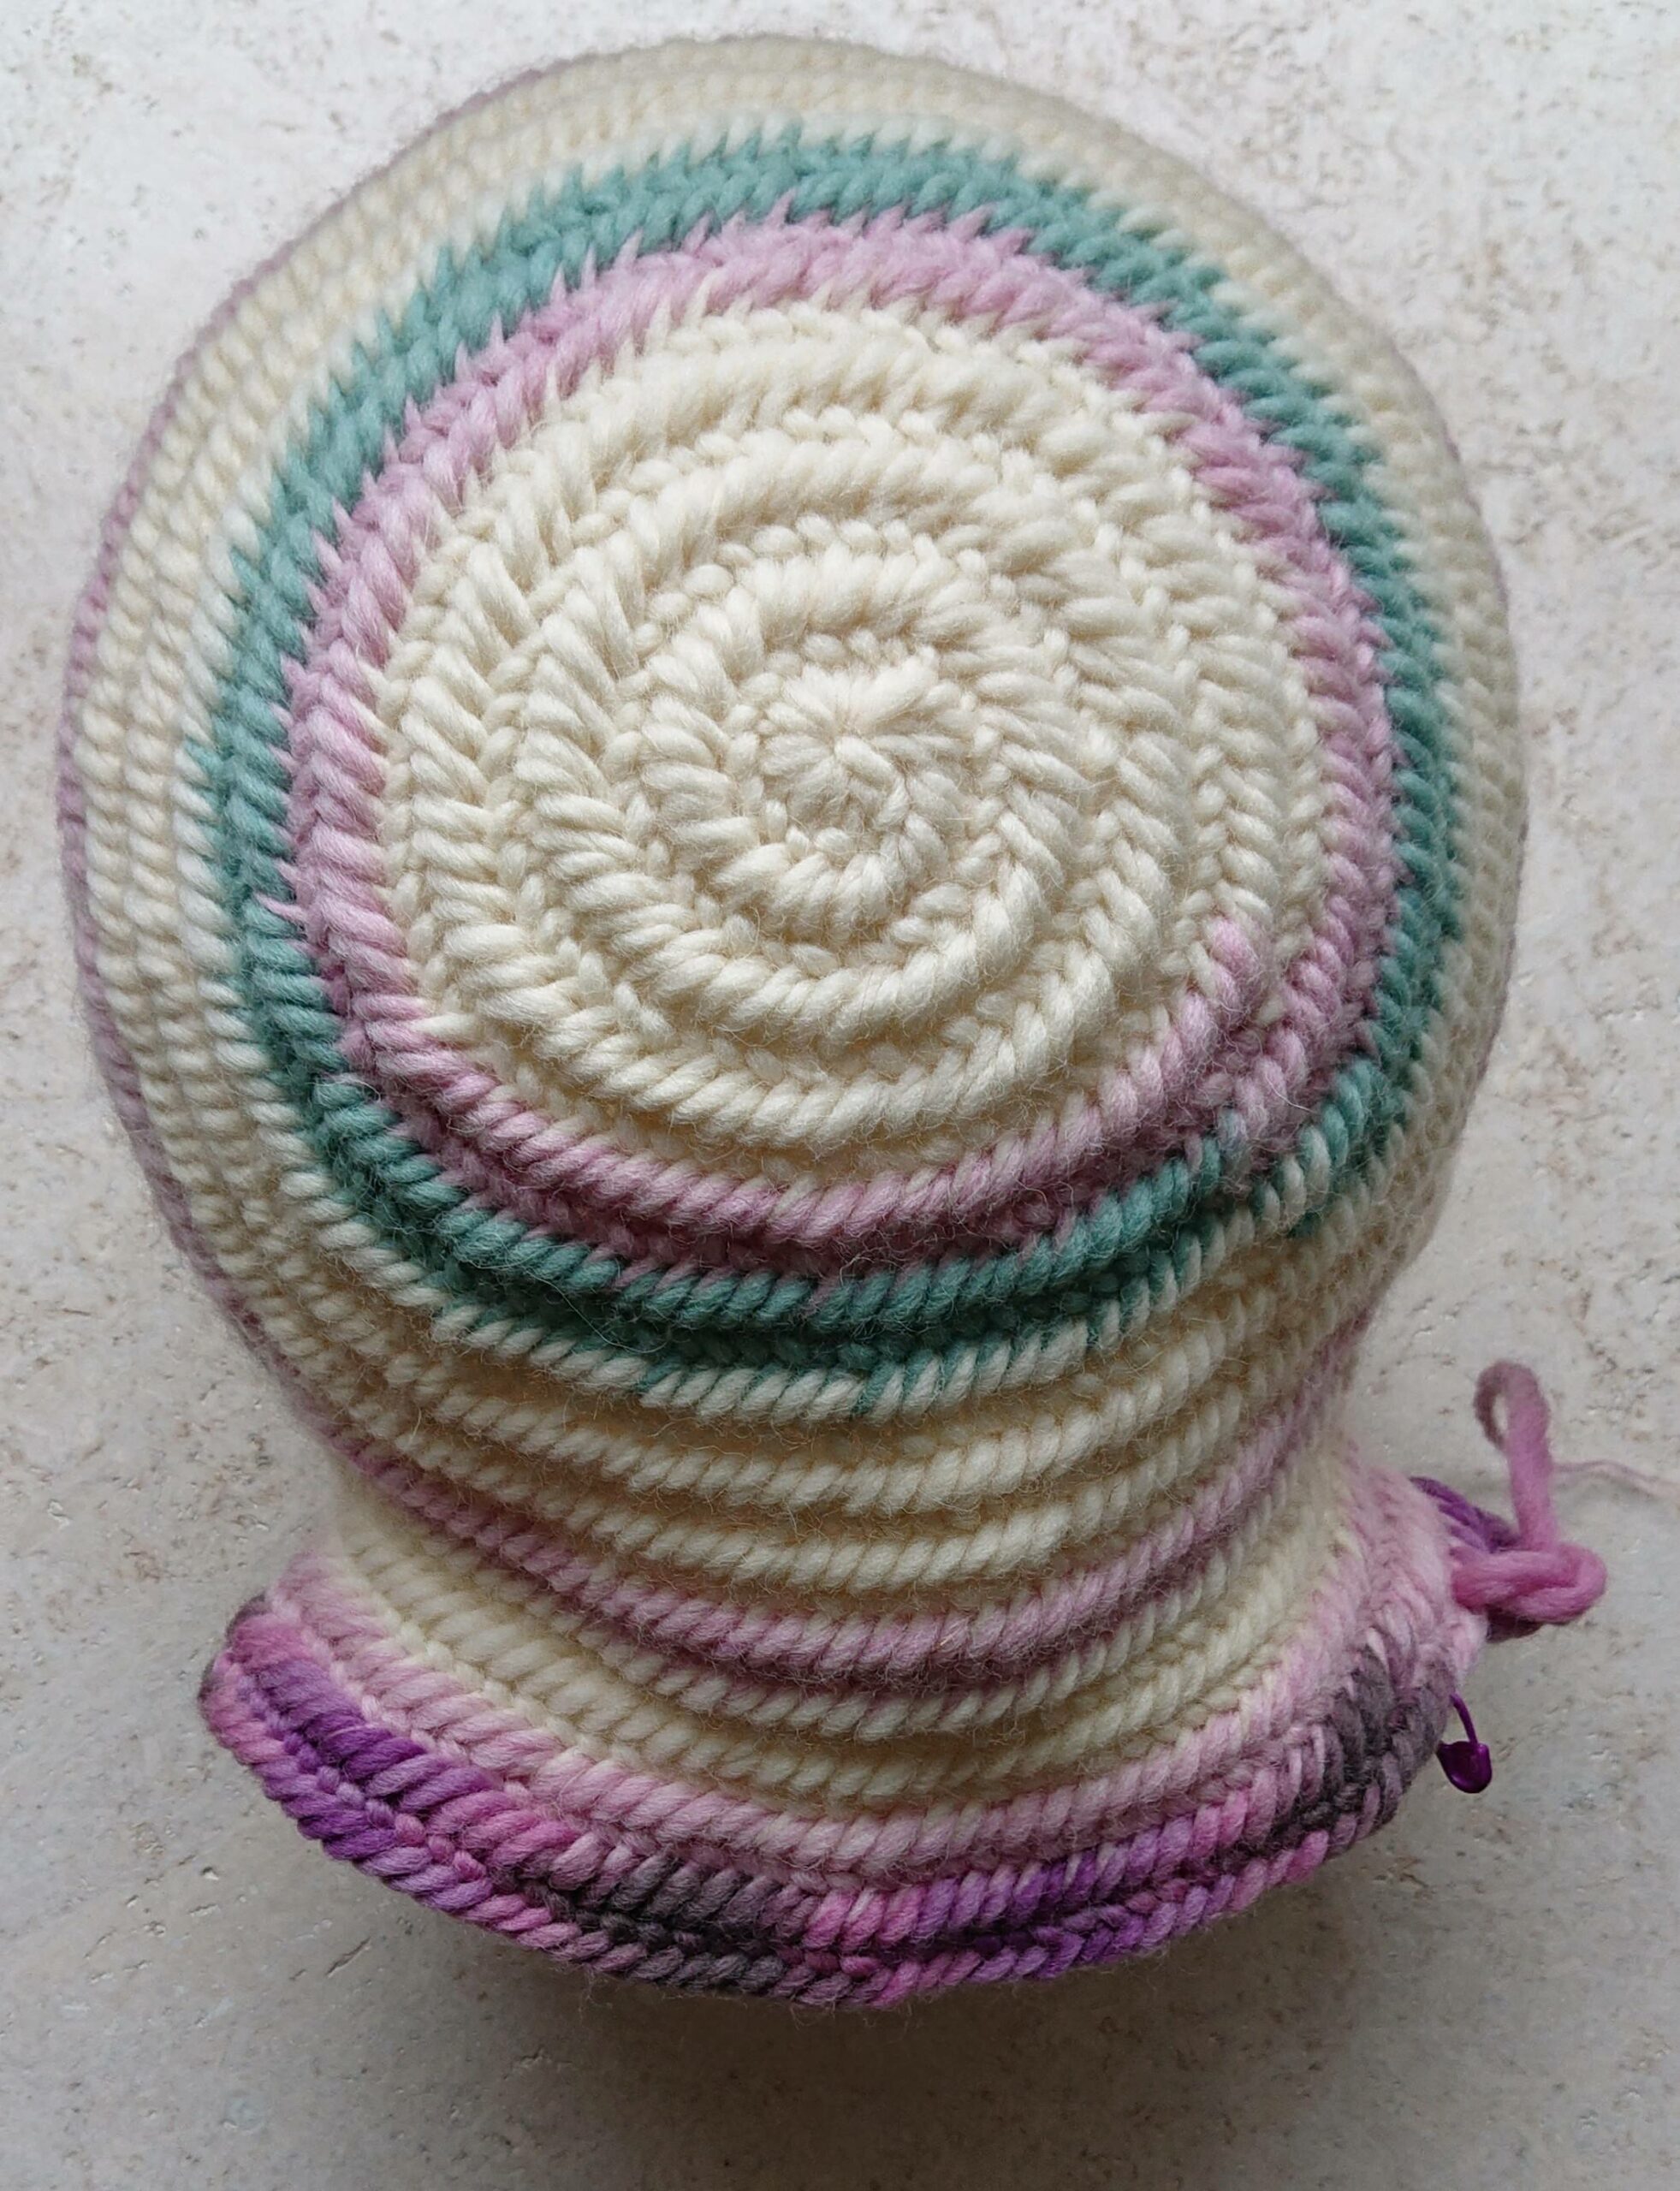
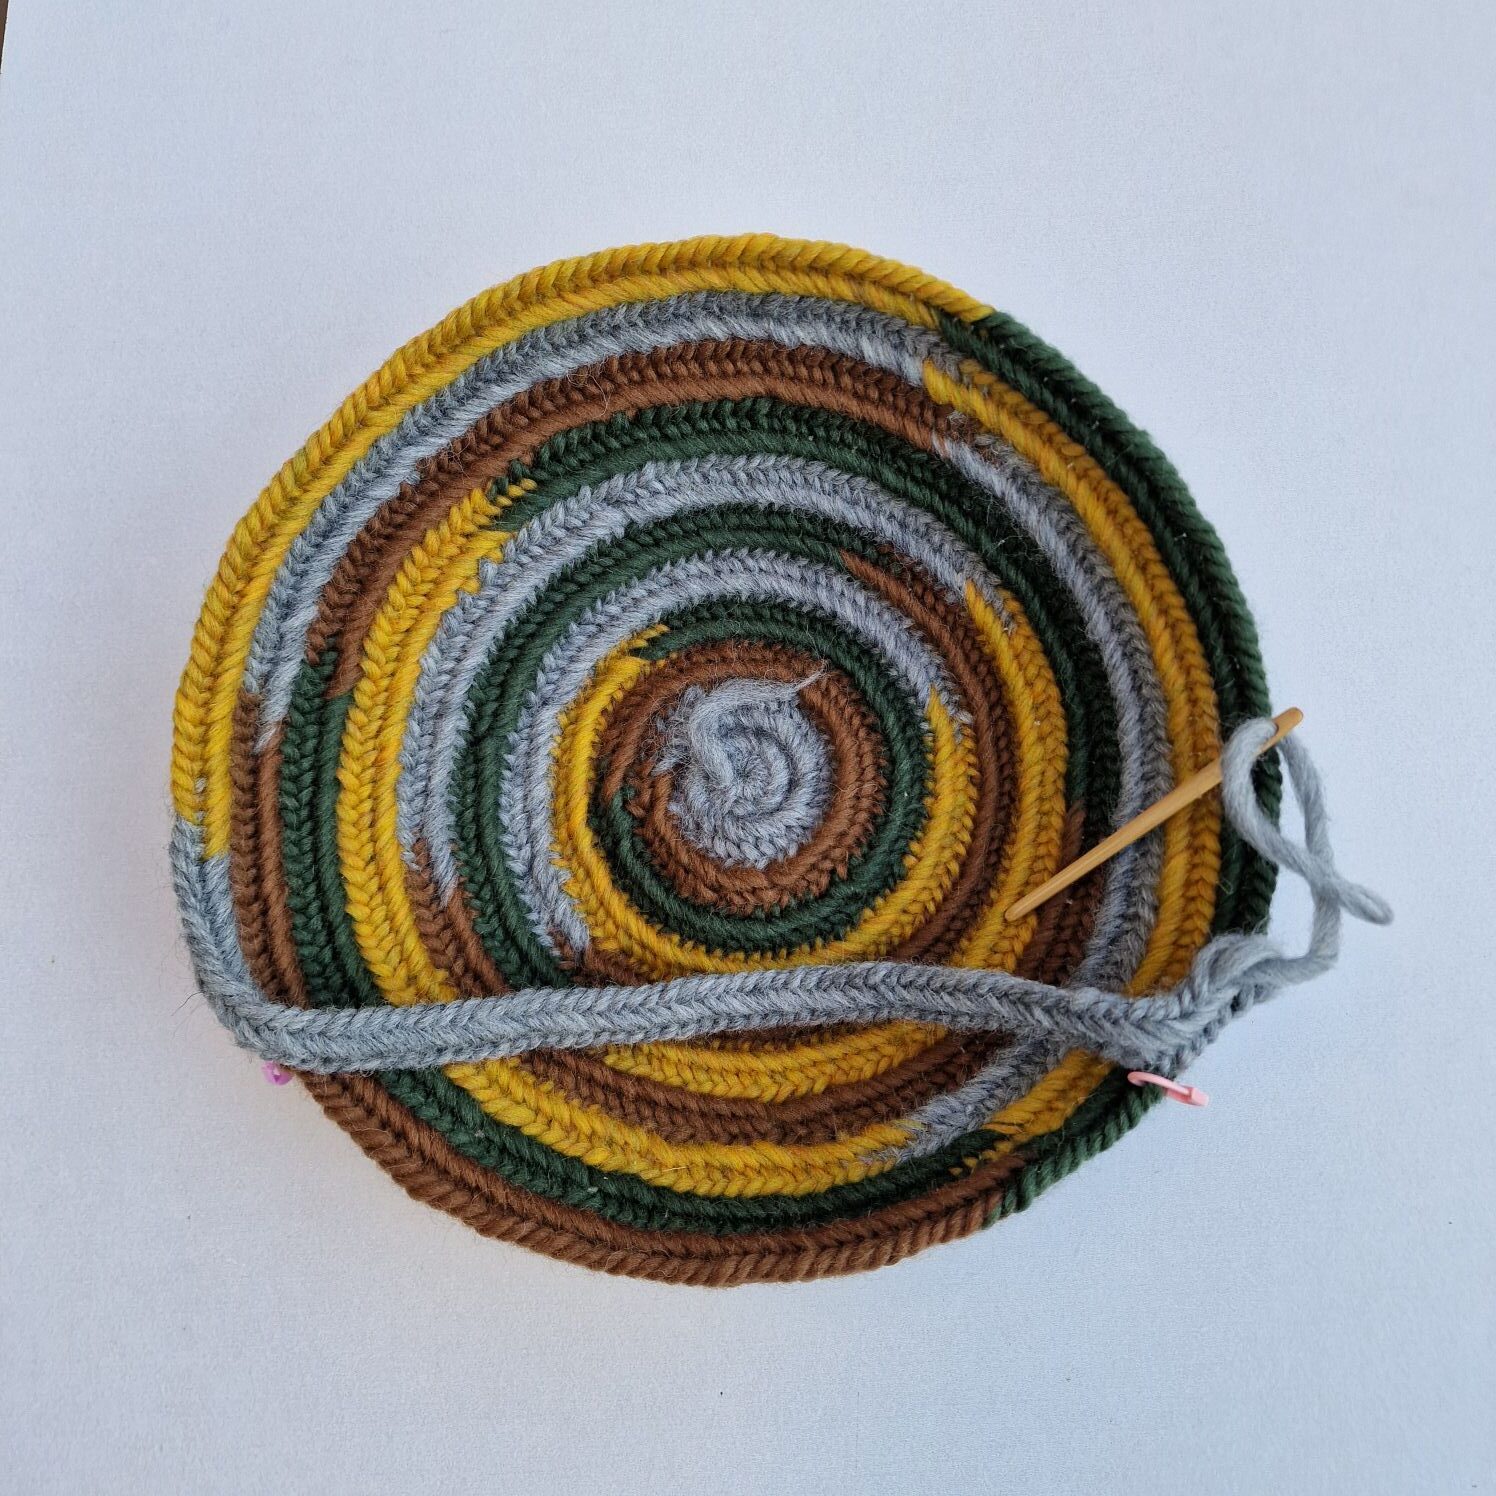
After you have closed the circle, place a stitch marker so you know when the circle starts and ends.
The pattern is as follows:
First round increase all stitches.
2nd round, make 1 stitch and increase the 2nd stitch.
3th rounds of 2 stitches and increase the 3rd stitch.
4th round just 3 stitches and the 4th stitch increase.
5th round, make 4 stitches plain and increase the 5th stitch.
6th round 5 stitches plain and the 6th stitch increases.
7th round, 6 stitches plain and the 7th stitch increase.
8th round, nalbind 7 stitches and increase the 8th stitch.
9 th round nalbinding round all stitches plain.
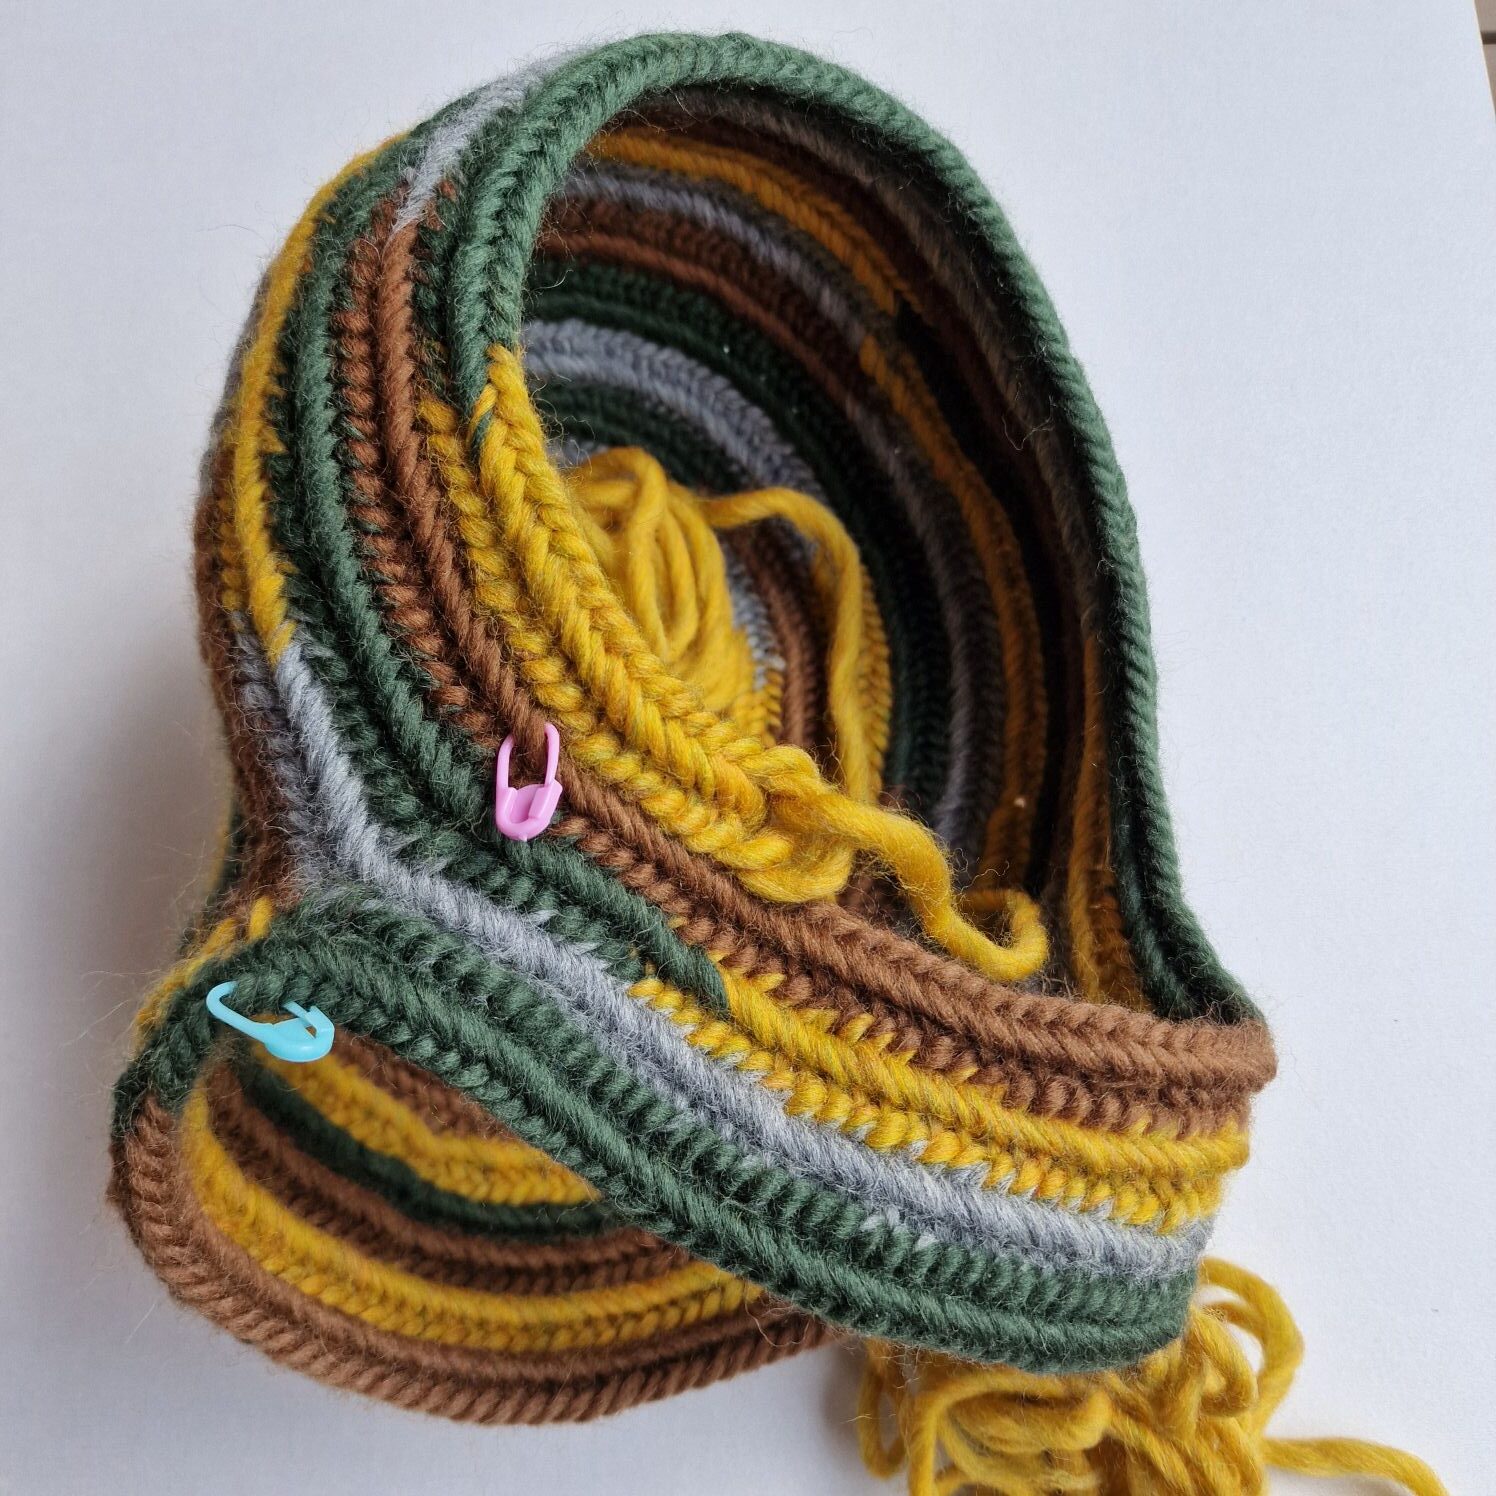
In the next round, simply knit all stitches and make a loose row of stitches that you then fasten again.
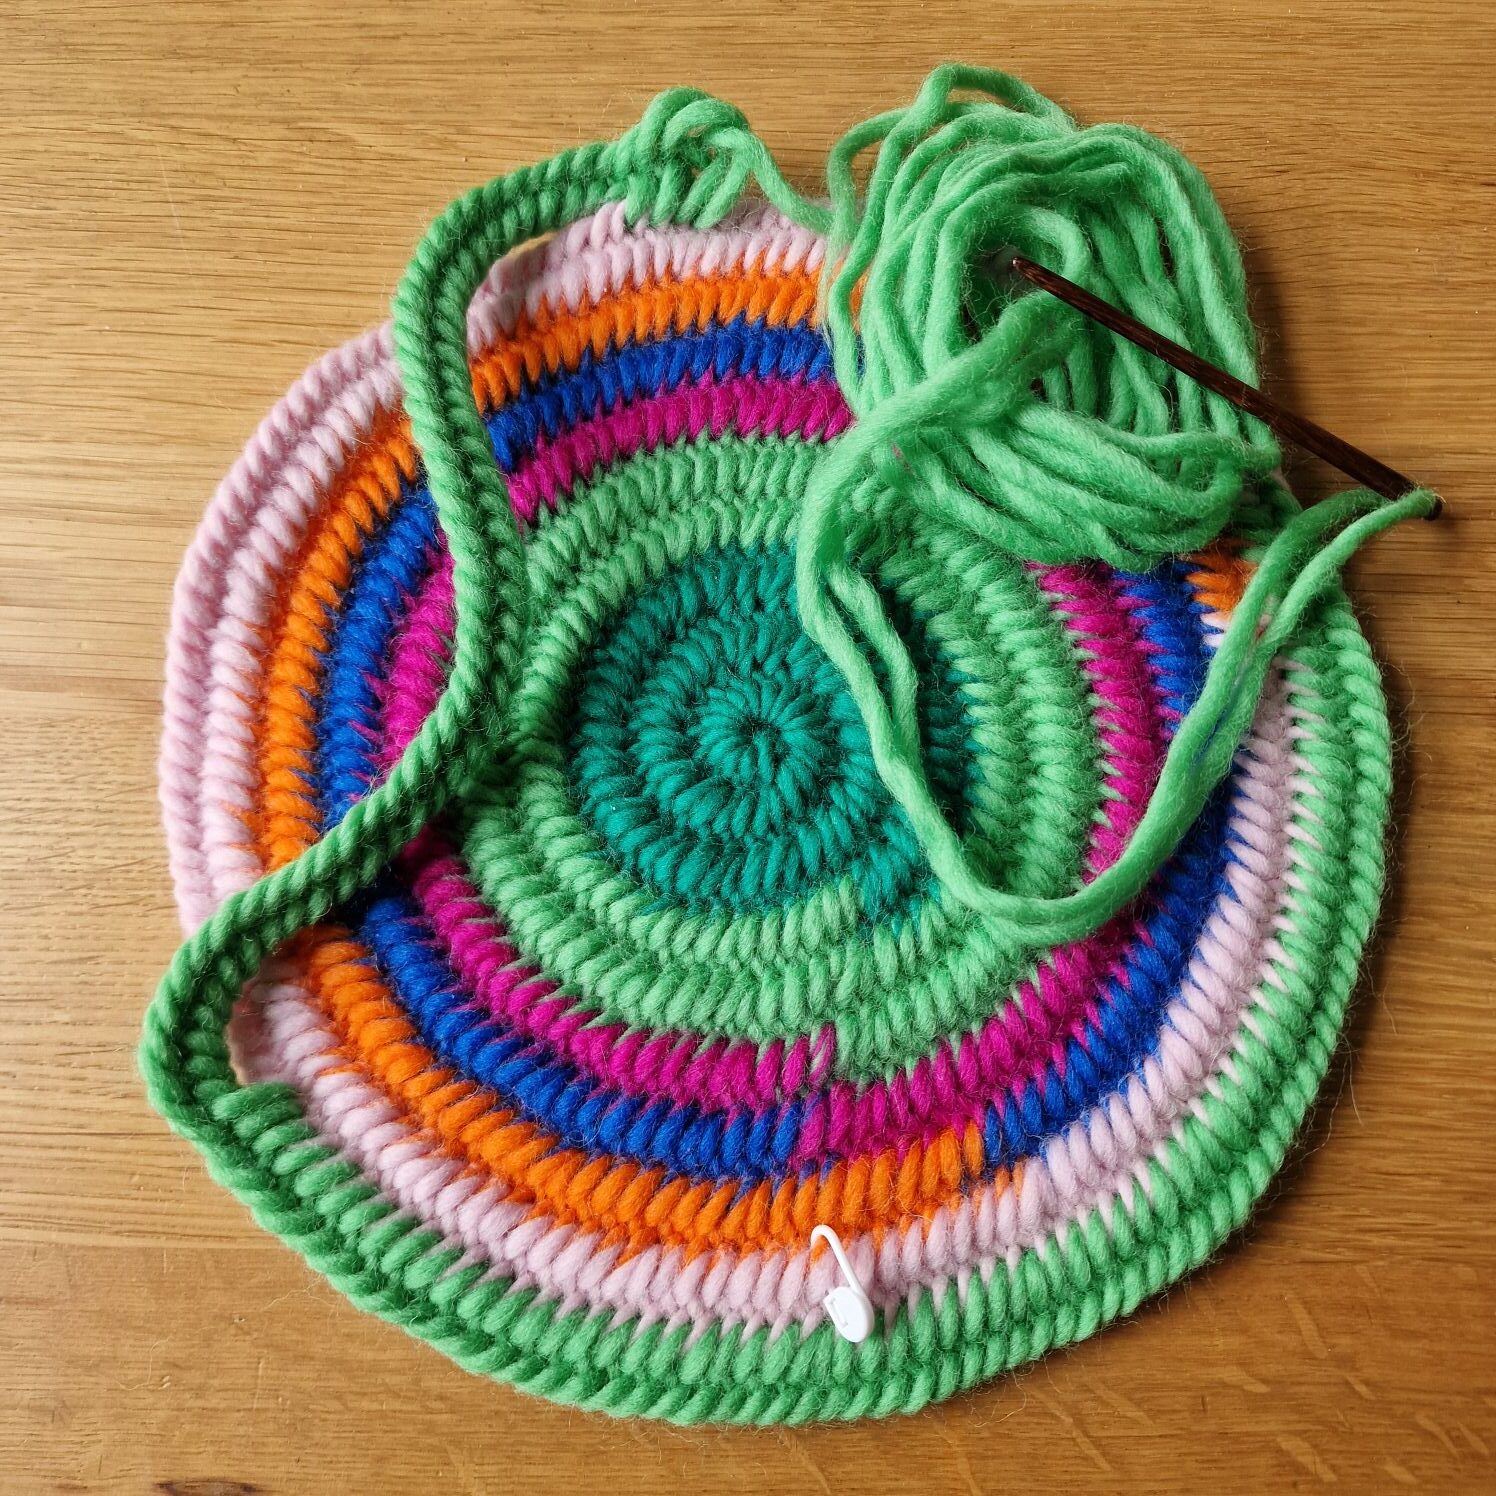
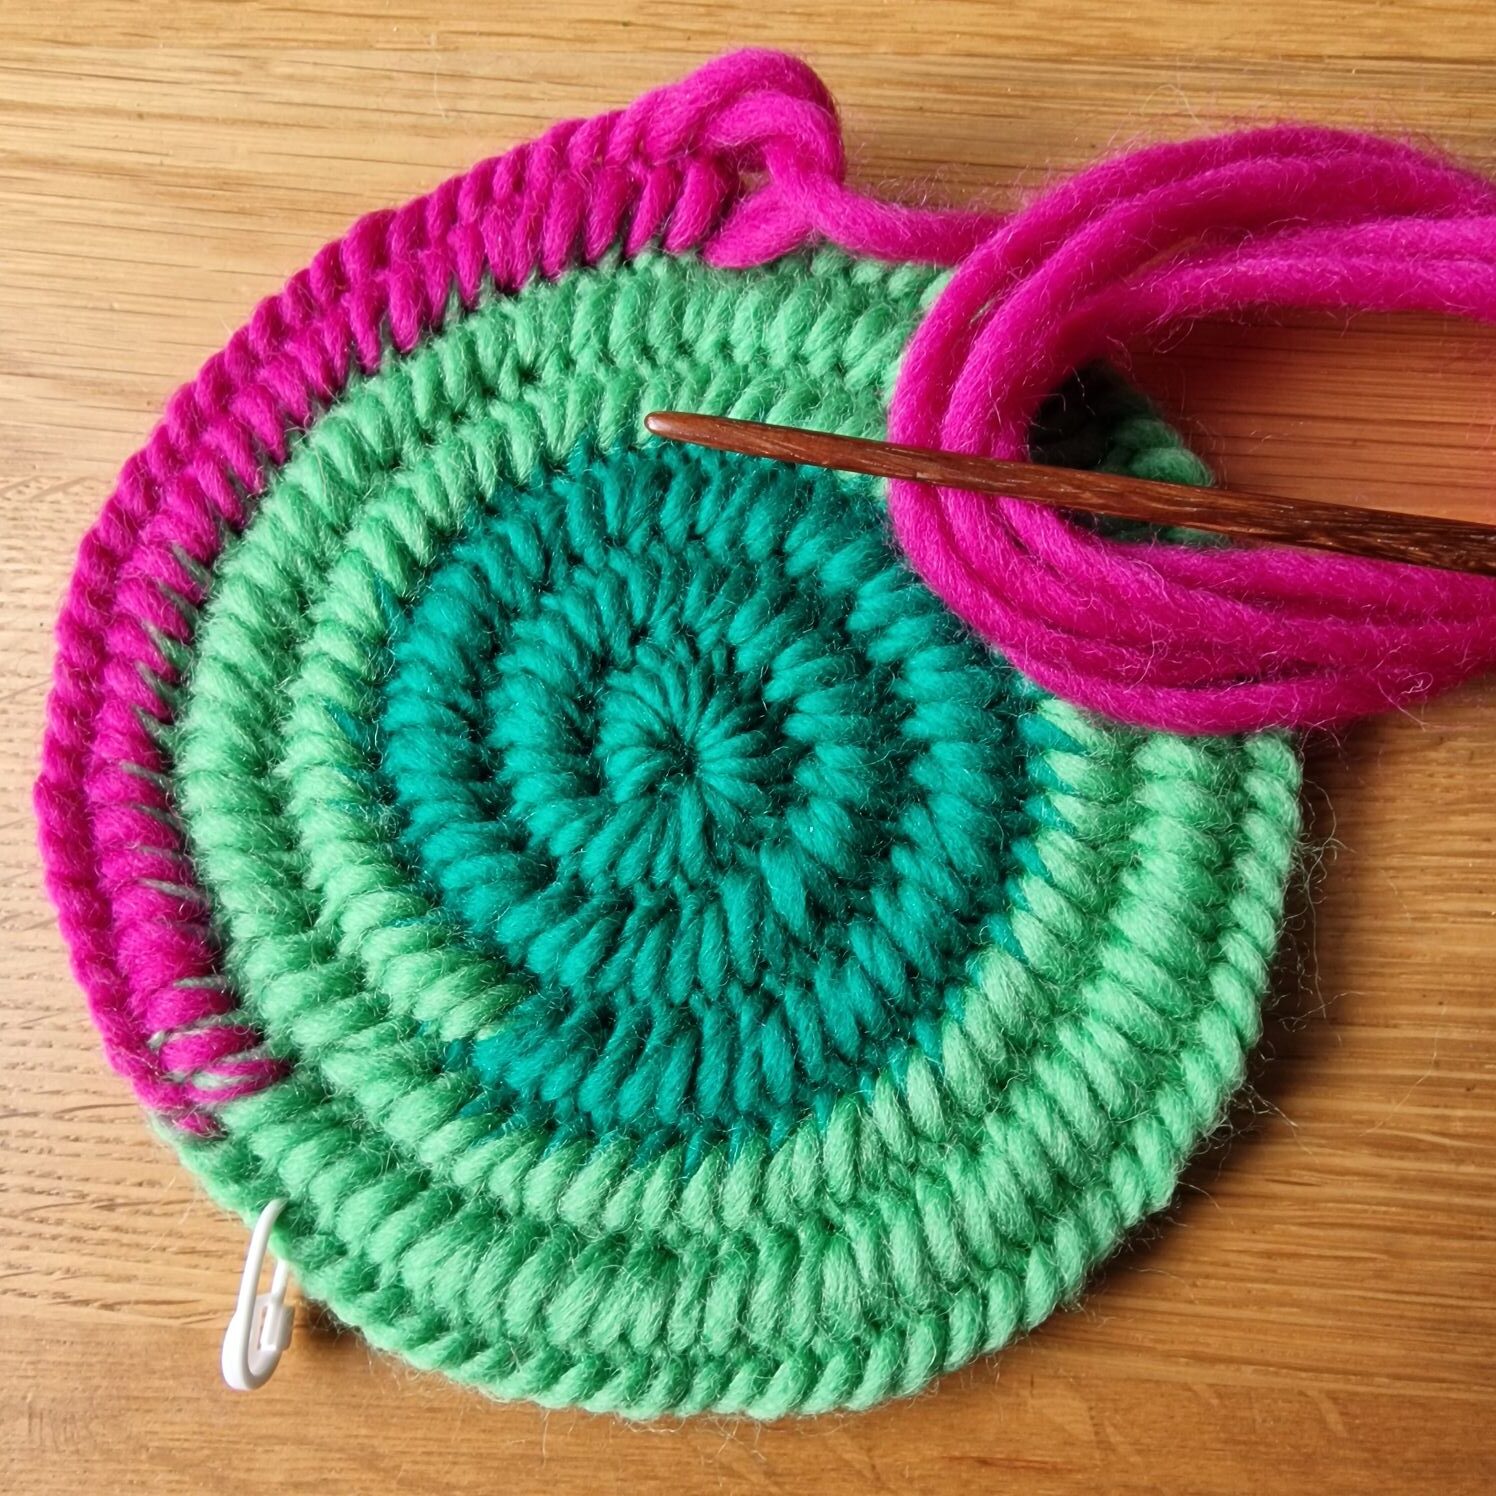
Make the main part with the green thread.
You attach the stitch marker where you attached the green loose thread again.
The length of the loose row is half the circumference of your head.
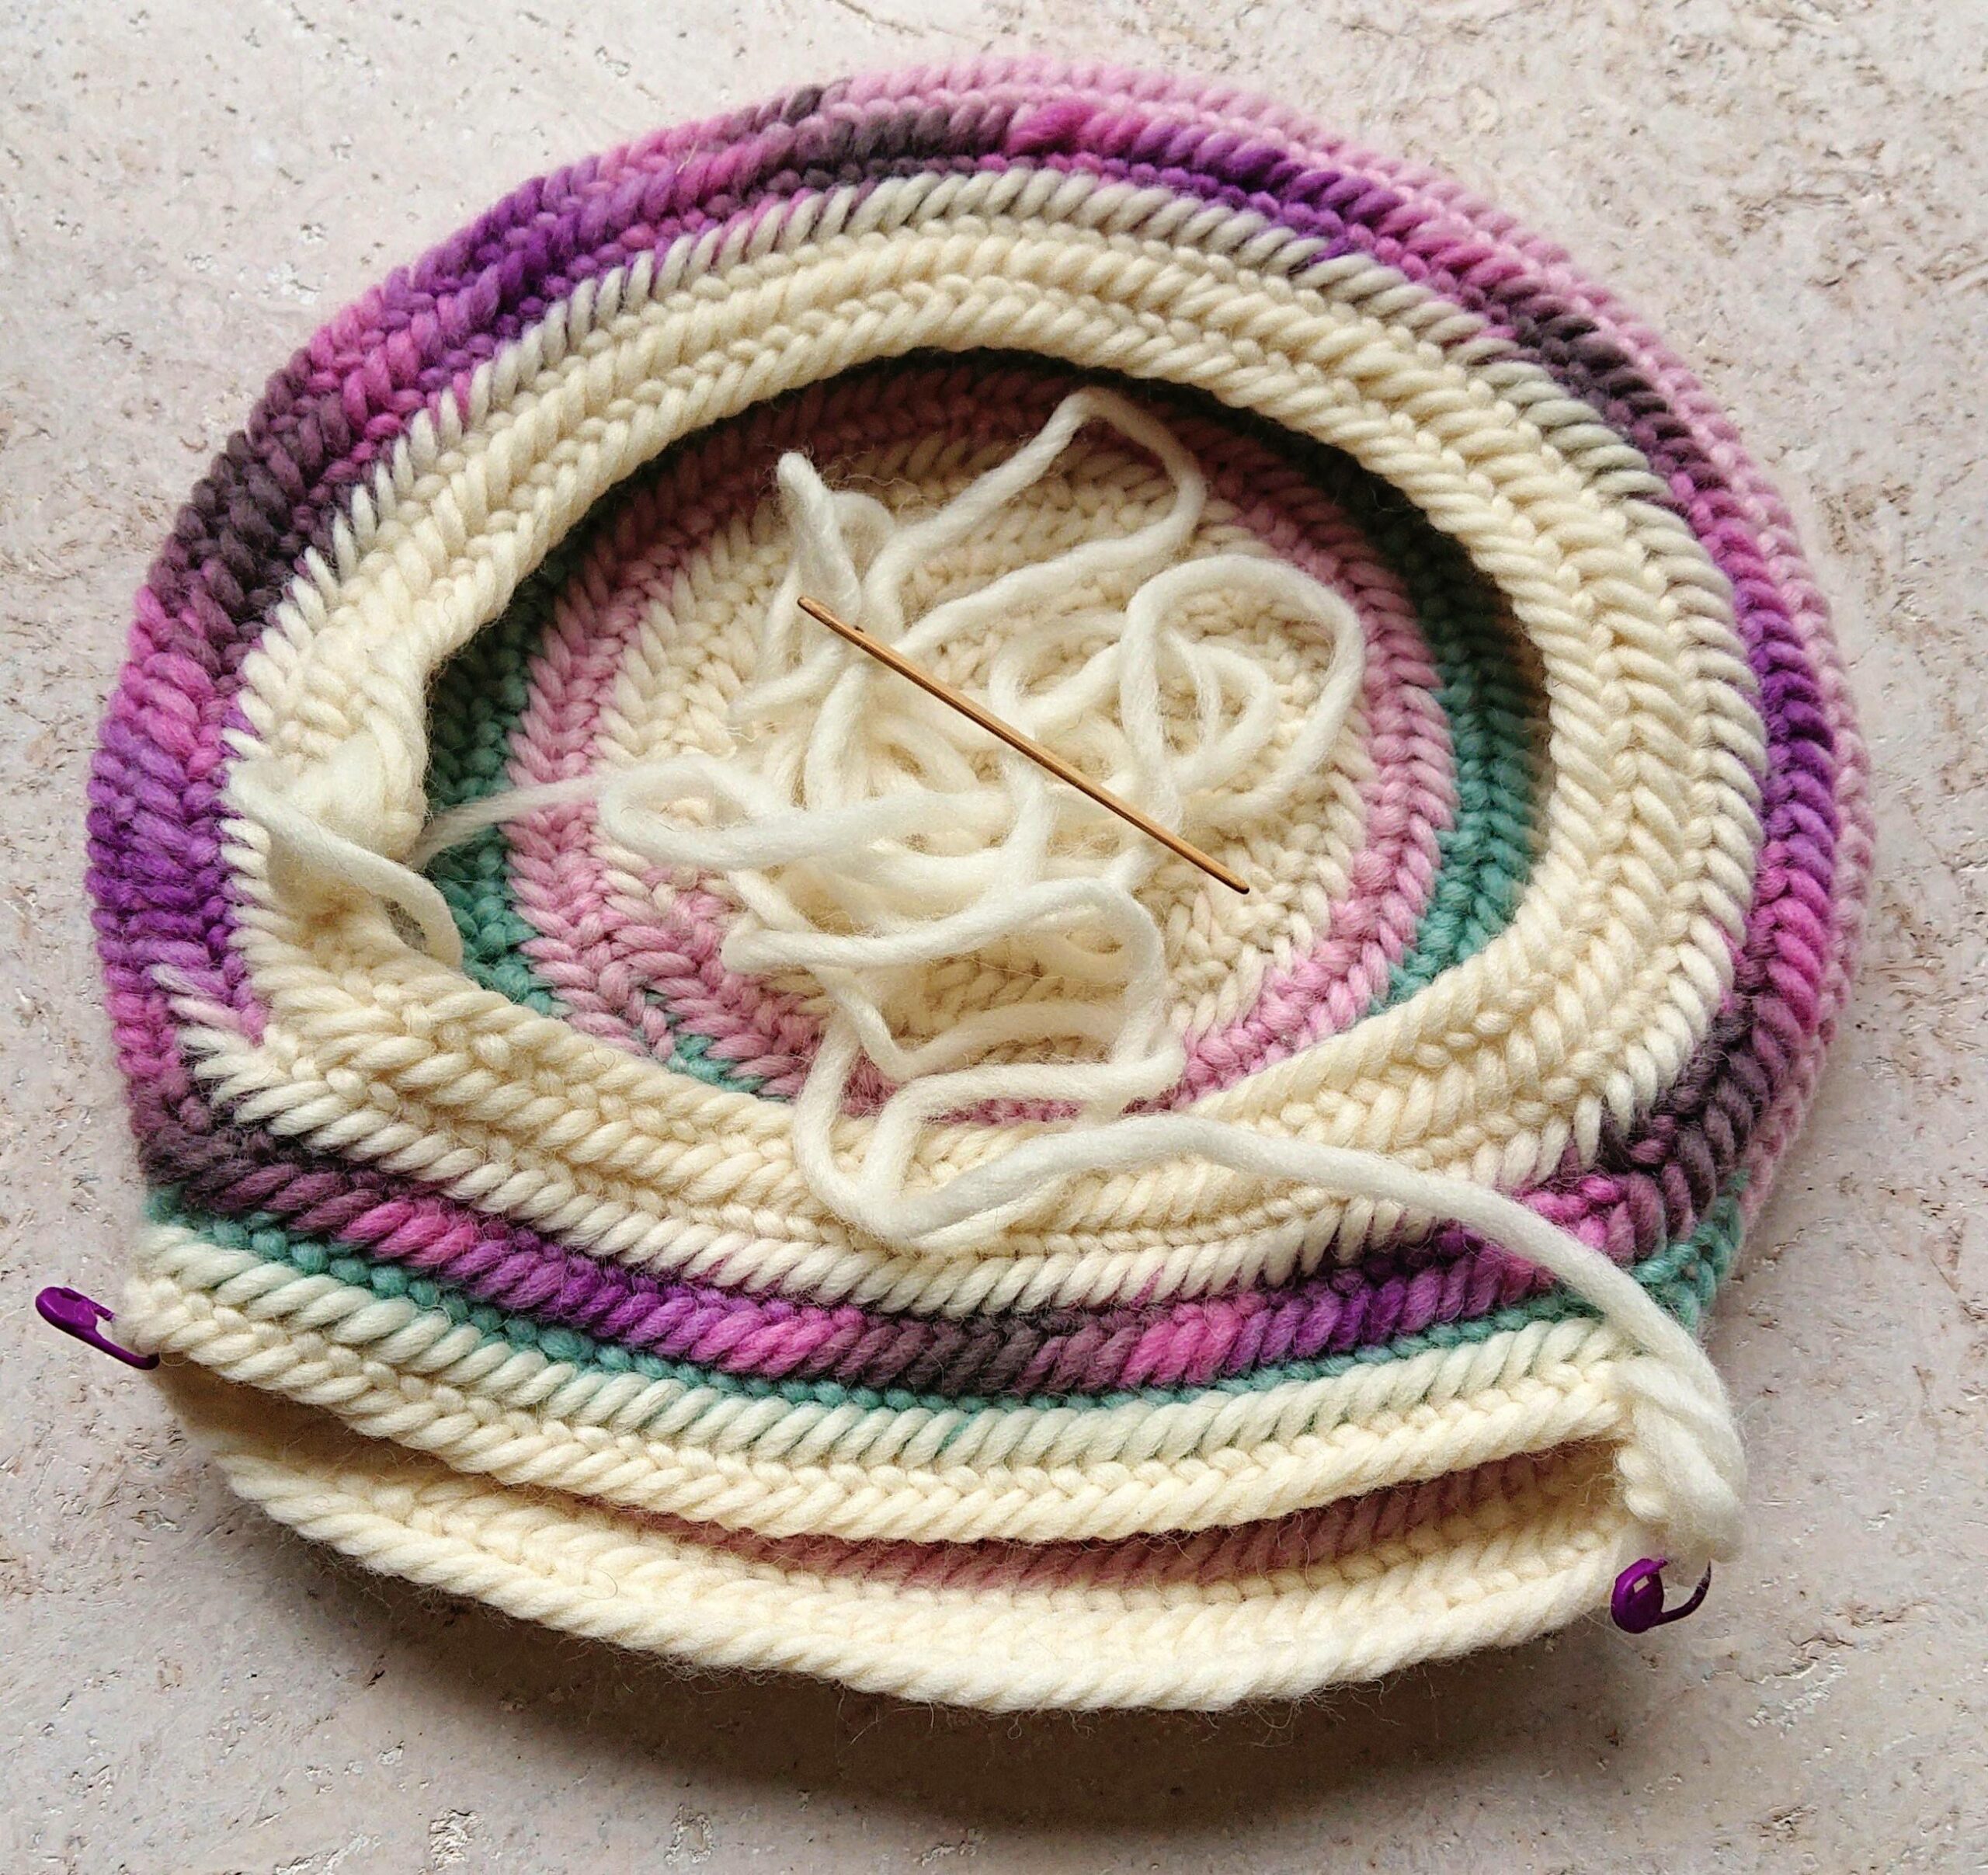
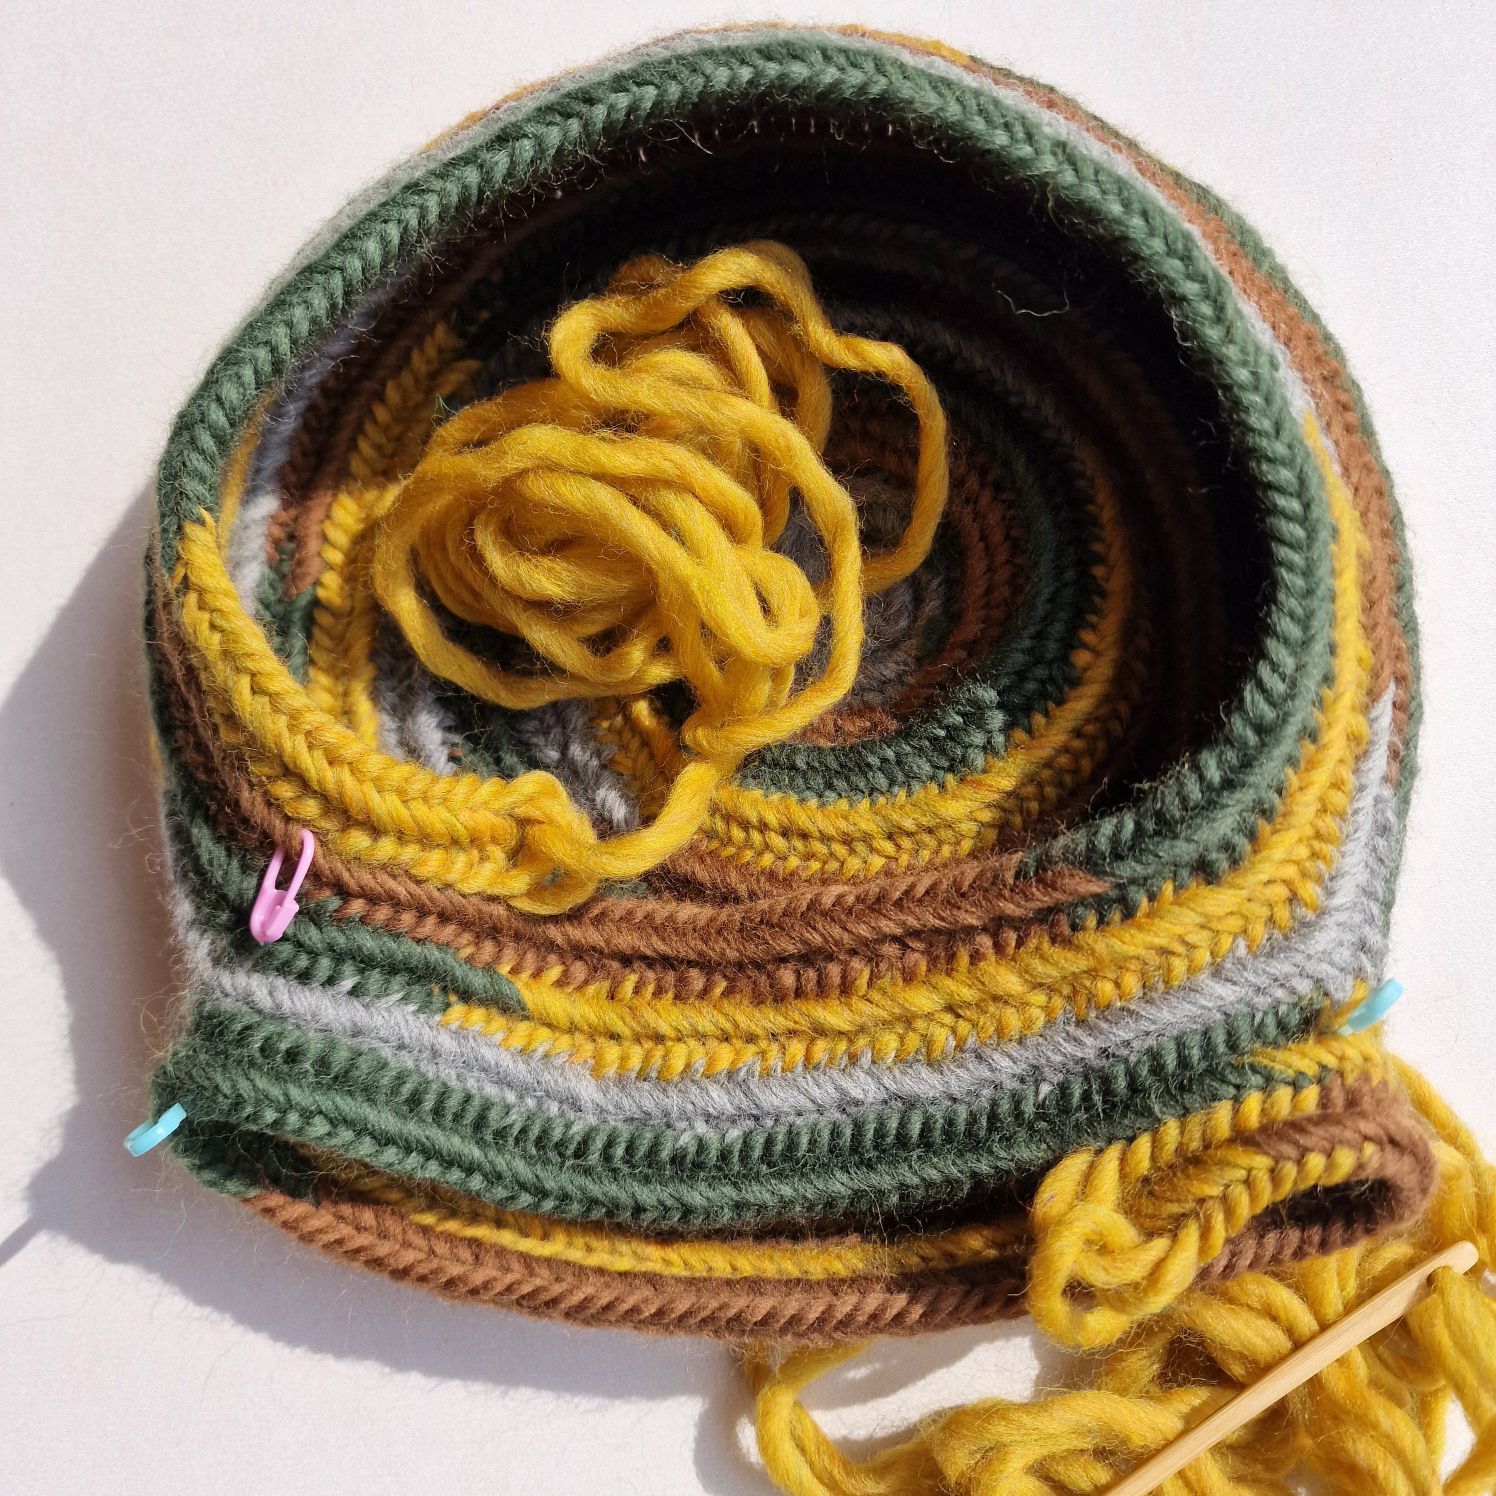
You now continue with the green wire.
On the 11th round you will decrease 7 stitches and the 8th stitch.
On the 12th round you will decrease 6 stitches and the 7th stitch.
Then do 7 rounds of plain needle binding, and then possibly 1 round of 5 stitches plain and decrease the 6th stitch.
Now we are going to make the neck part.
Simply needlebind the first 2 rows normal, no increace or decrease.
And then you’re going to make the shoulder part.
You start with: 5 plain stitches and increase the 6th stitch.
Then 6 stitches as plain and increase the 7th stitch.
Then 7 stitches plain and increase the 8th stitch.
Just nalbind 8 stitches and increase the 9th stitch and then finish or continue.
You can of course change the pattern to your own insight and size.
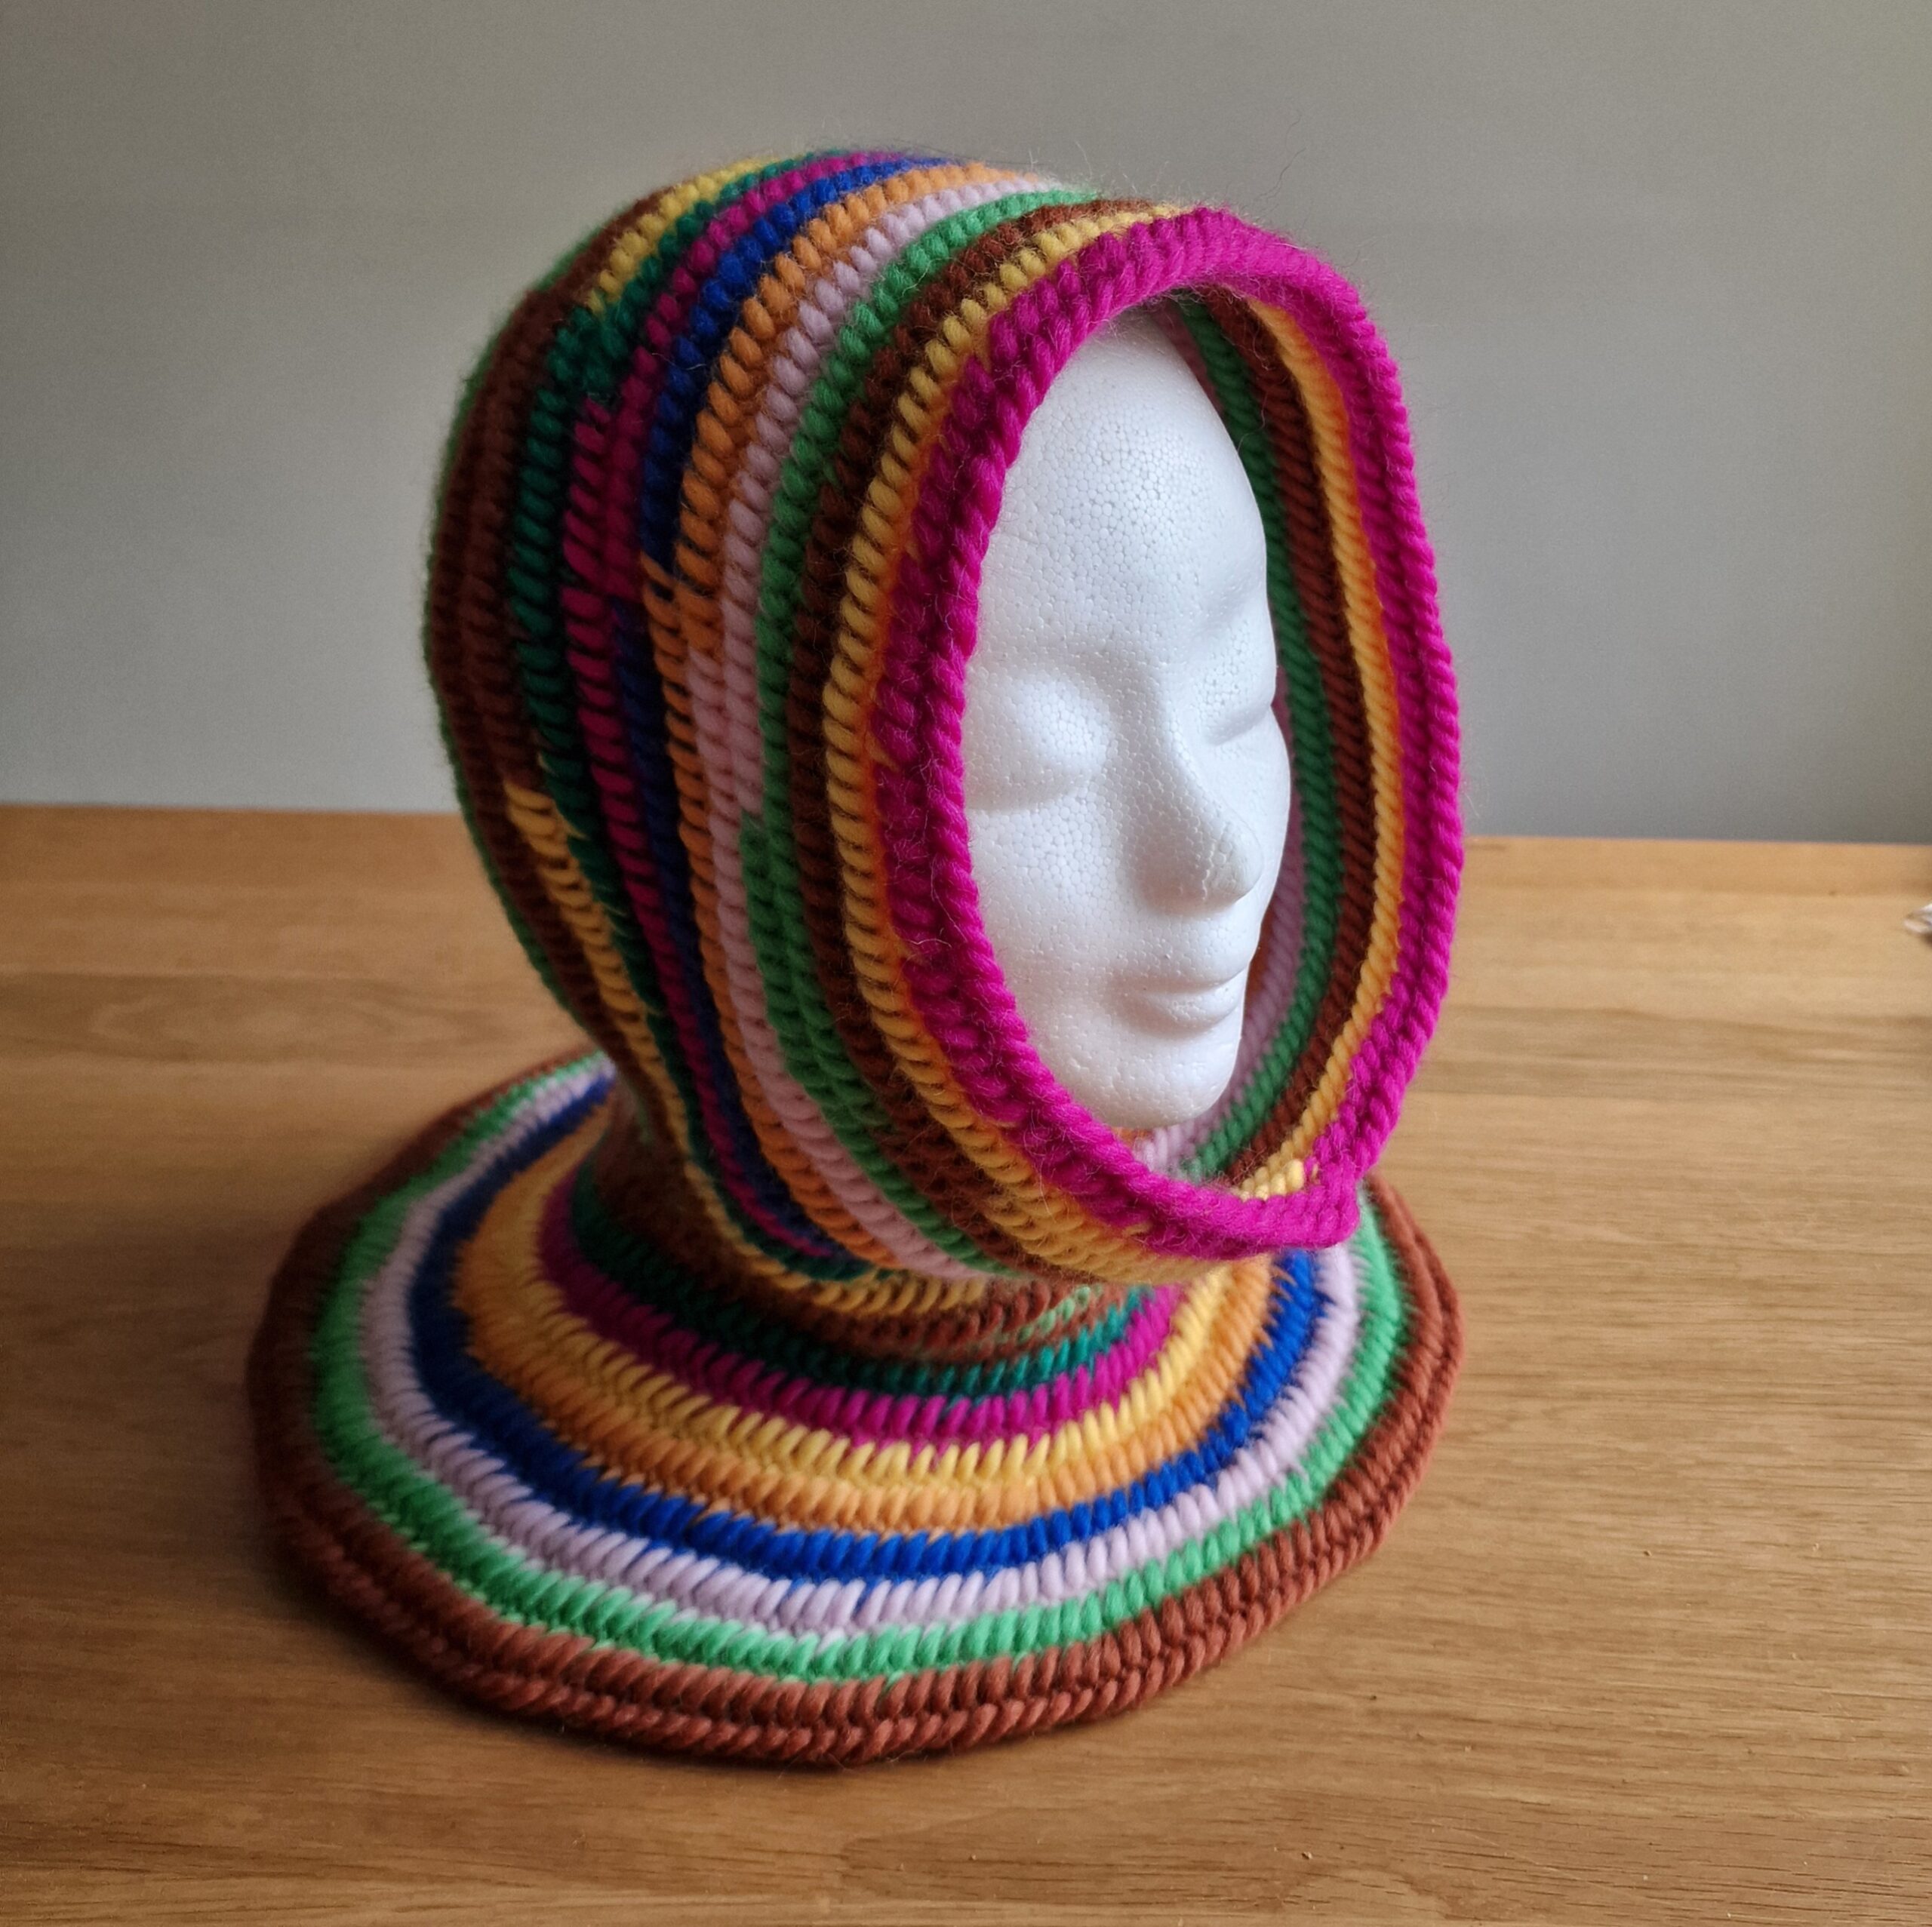
The Asle stitch is a very close stitch so that this Hood is nice and warm and also very colorful.
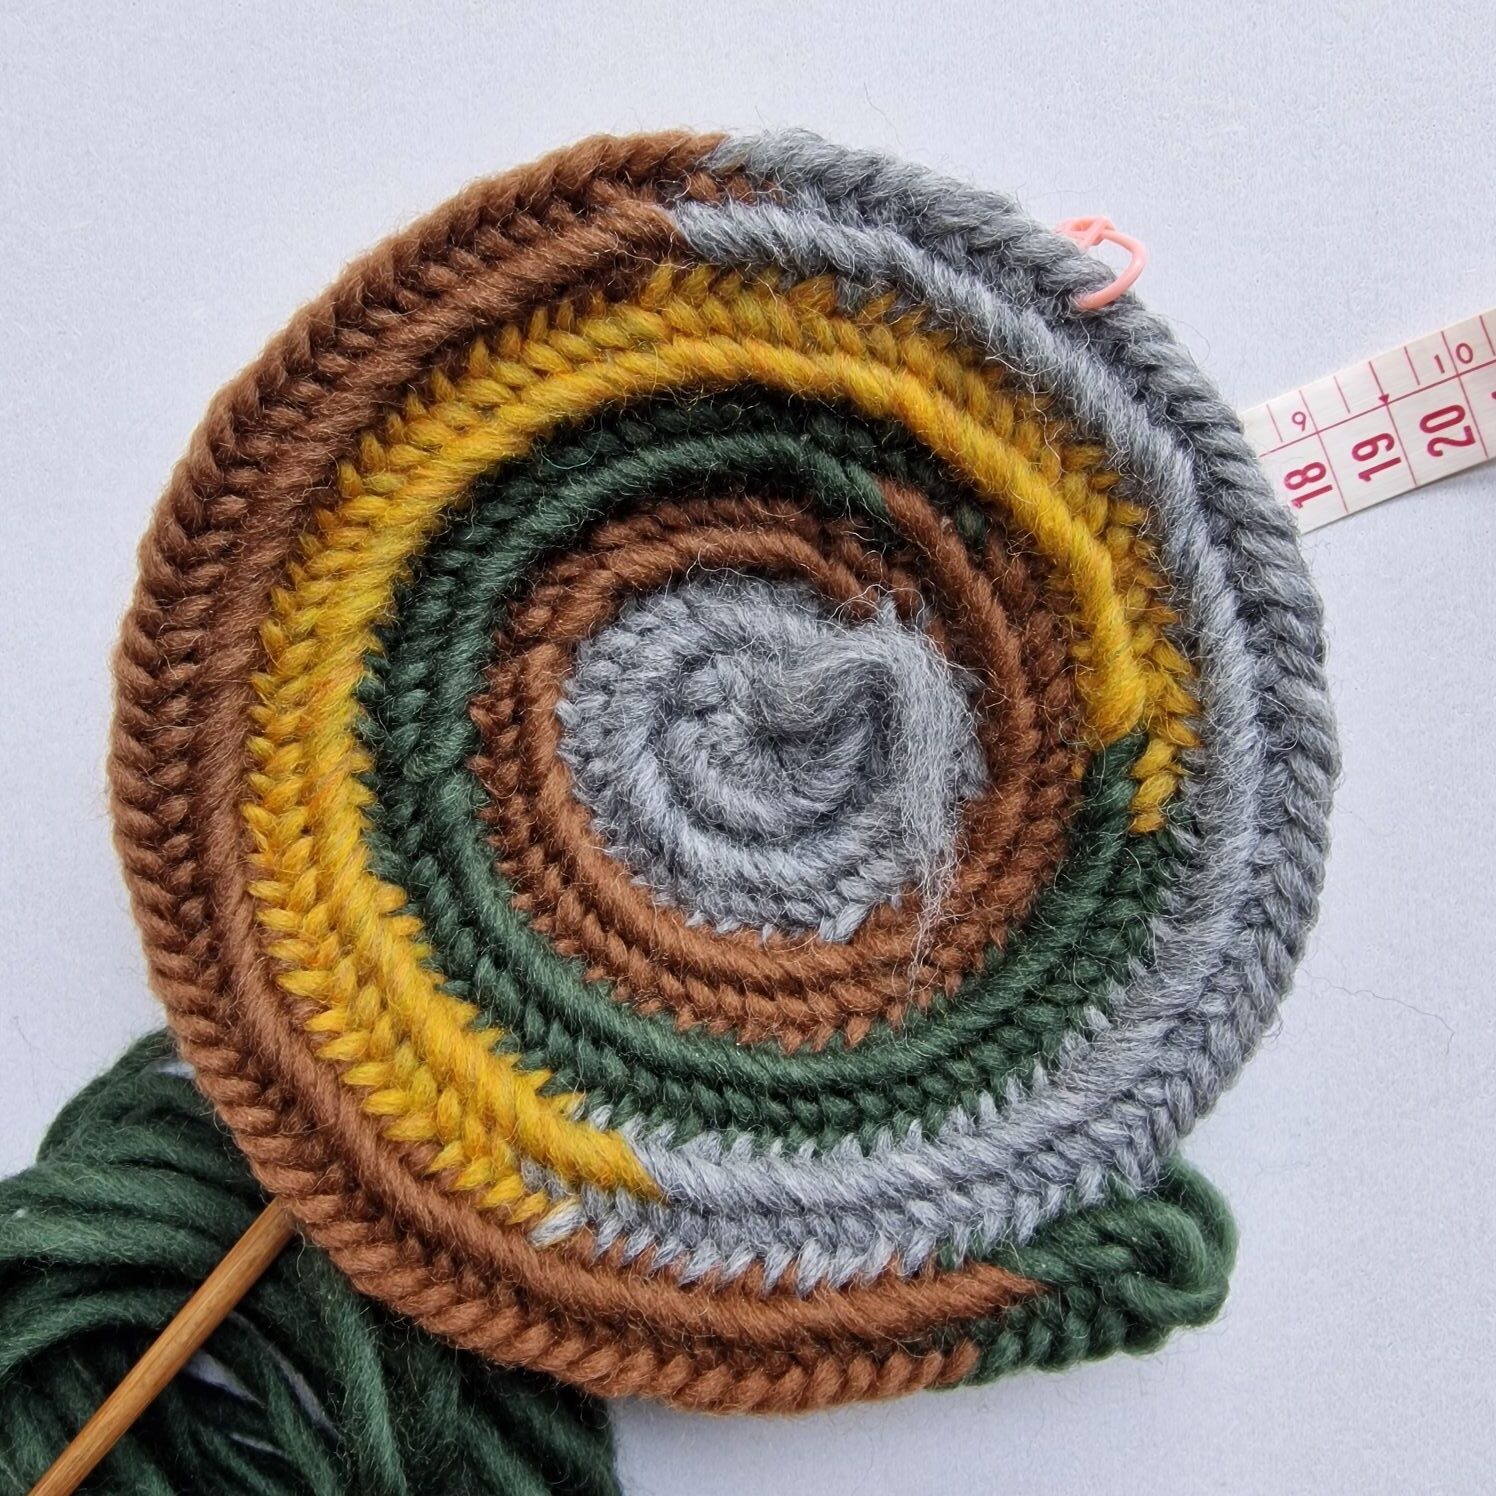
My 4th Hood with the Korgen stitch end F2 connection stitch.
My 4th hood is made following the above pattern. (the third Hood).
im new to this craft, i recently joined a viking living history group in mackay nth queensland, australia. i also discovered my ancestors came from visby gotland. i came across your site, just wanted to say hi, and i am looking forward to learning this beautiful craft.
This is really beautiful. Well done!
This hood is beautiful… off to grab my needle and yarn ❤️❤️❤️
Thanks for posting the link to your website on the Nalbinding FB group. I have really enjoyed seeing your work and reading your insights. Nalbinding is one of about 19 hobbies I have, so I don’t do a lot of it but I just bought a fabulous wool on sale and I think I need to try mittens. I have focused on neckwarmers, hats and cowels and only did mitts once. Anyway, thanks Bert.
On another note- the Dutchness here makes me feel cozy. My step-father was a Dutchman and I learned how to say Hagelslag, Scheveningen and Uitsmijter and to eat herring, but not eel.
I put my partner’s website as I have a small, still invisible page there until I want to show my work.
I have made many hats (we call them toques in Canada) with the Oslo stitch. i feel confident enough now to try something different. This hood is perfect. Thank you so much for sharing.